Live Chat Management
You can establish a connection with website visitors with the
live chat plugin in order to communicate directly, which
improves the relationship between clients and staff personnel.
You are given fresh leads through the use of the live chat
module, which you can then turn into opportunities. A dialogue
box, sometimes known as a chat box, appears at the bottom of
the website when a consumer arrives, helping the sales team
start a conversation. You may answer all of the client's
questions through the live chat feature, giving them immediate
assistance with rhythm. We shall go over the live chat's
functionalities under this model.
The screenshot below illustrates what the live chat module's
home screen will look like.
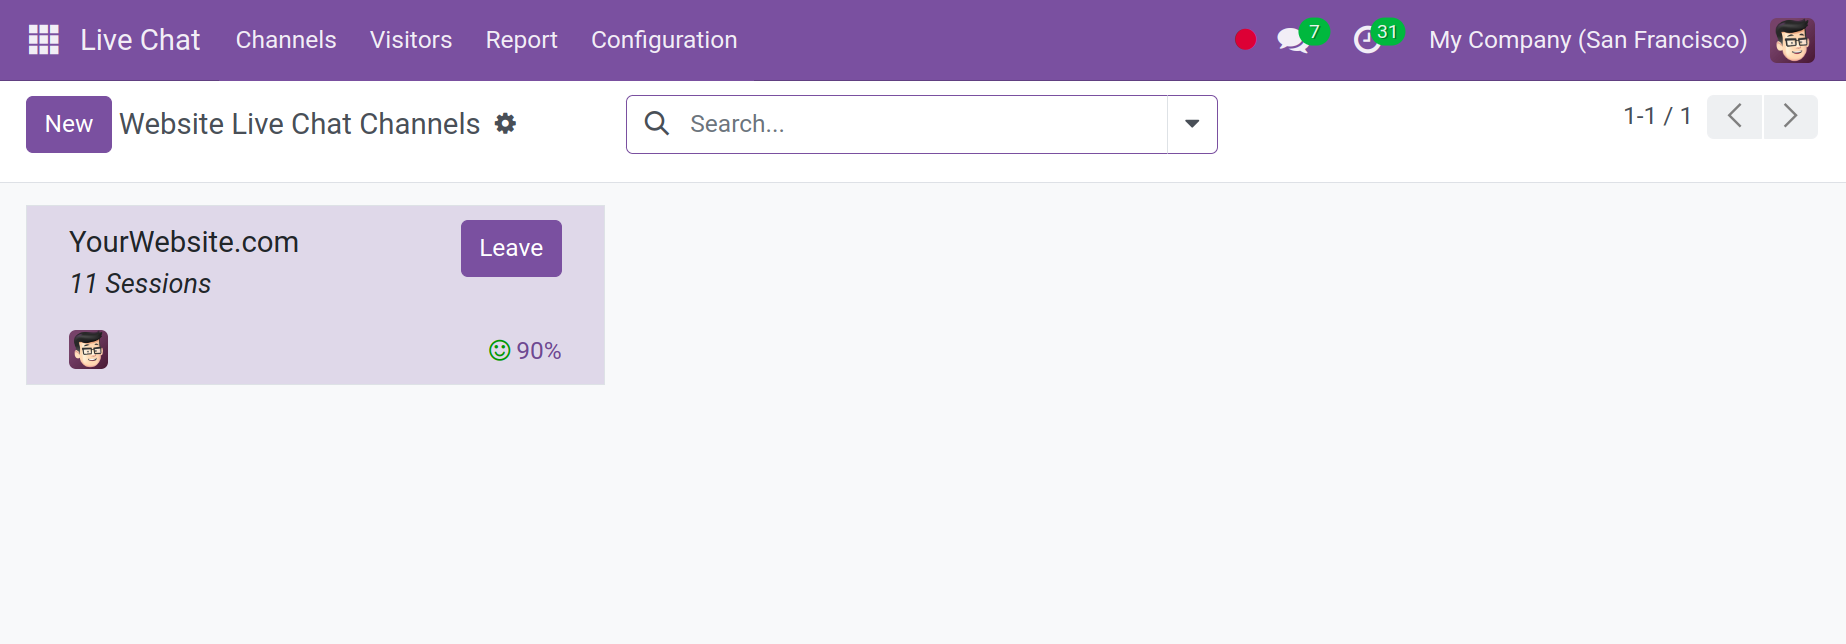
As seen in the screenshot, you will see the pre-existing
conversation on the live chat page. If necessary, you can
utilize the group by, favorites, and filters. Additionally,
you can use the search tab appropriately. A live chat channel
of a similar nature can also be created using the new option.
The creation page, as seen in the image below, will appear
when you select the New option.
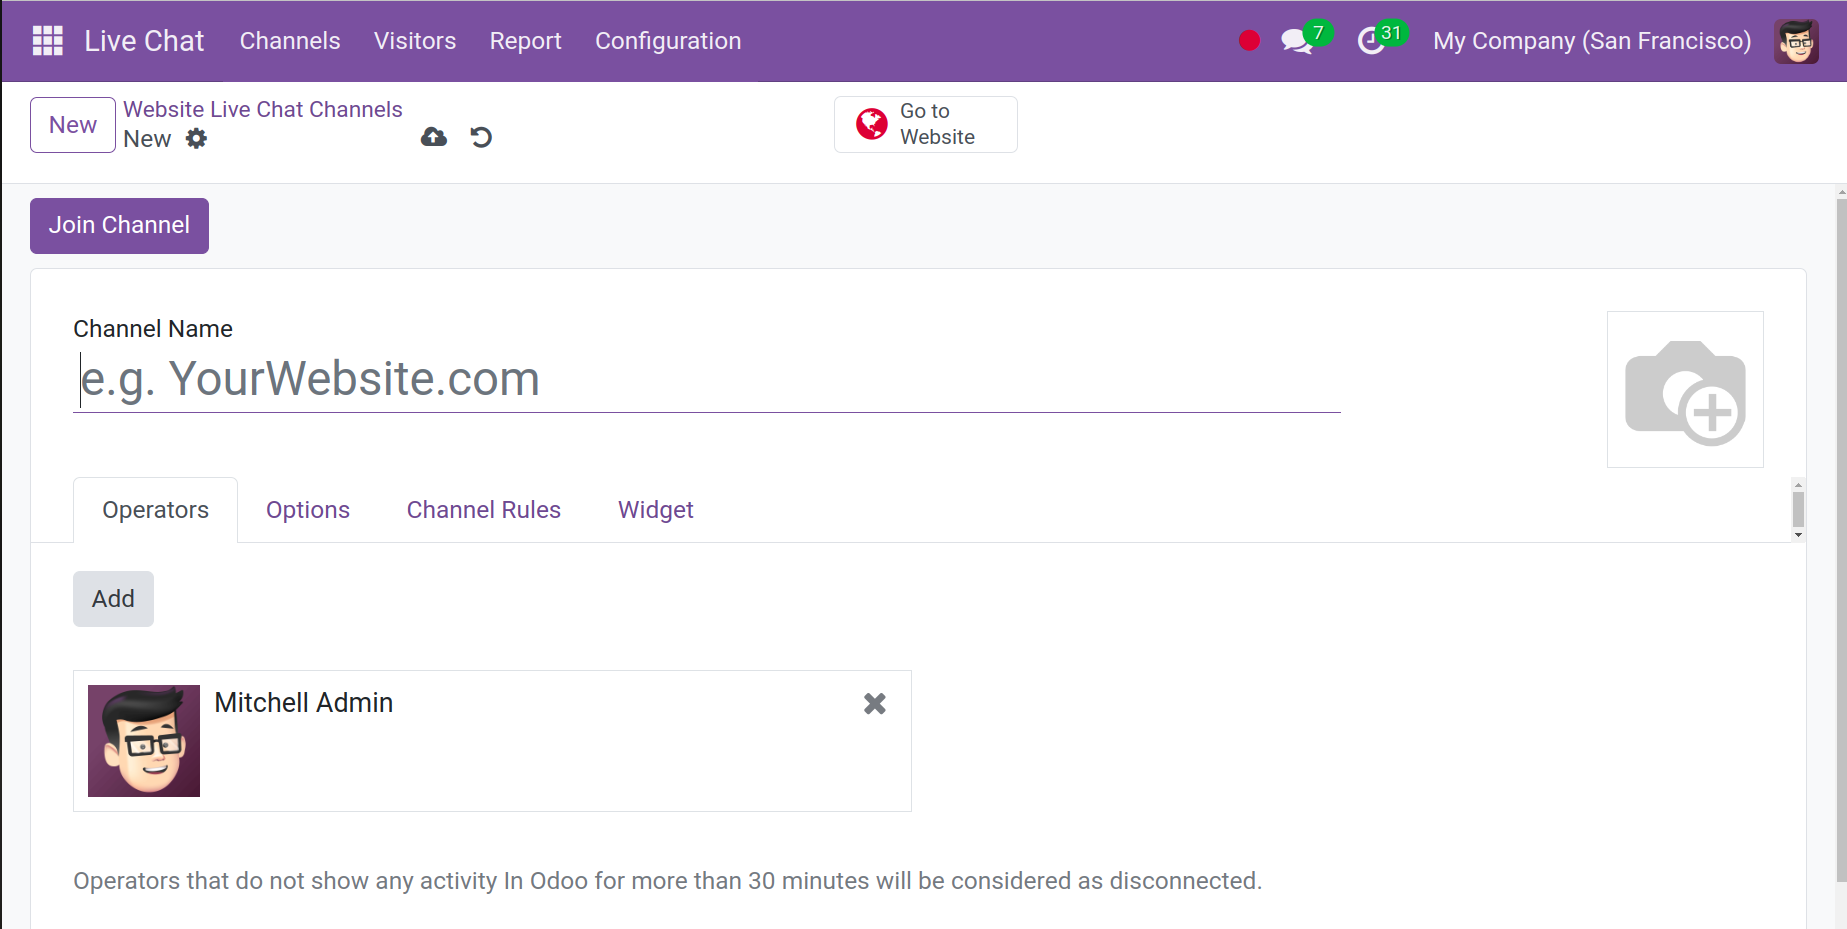
You can enter the channel name in the designated field on the
creation page. You have a few tabs behind it, including
channel rules, widgets, operators, and preferences. Using the
ADD icon, you may add the operators under the operator's
choice. As seen in the screenshot below, you will see a page
after choosing the ADD option.
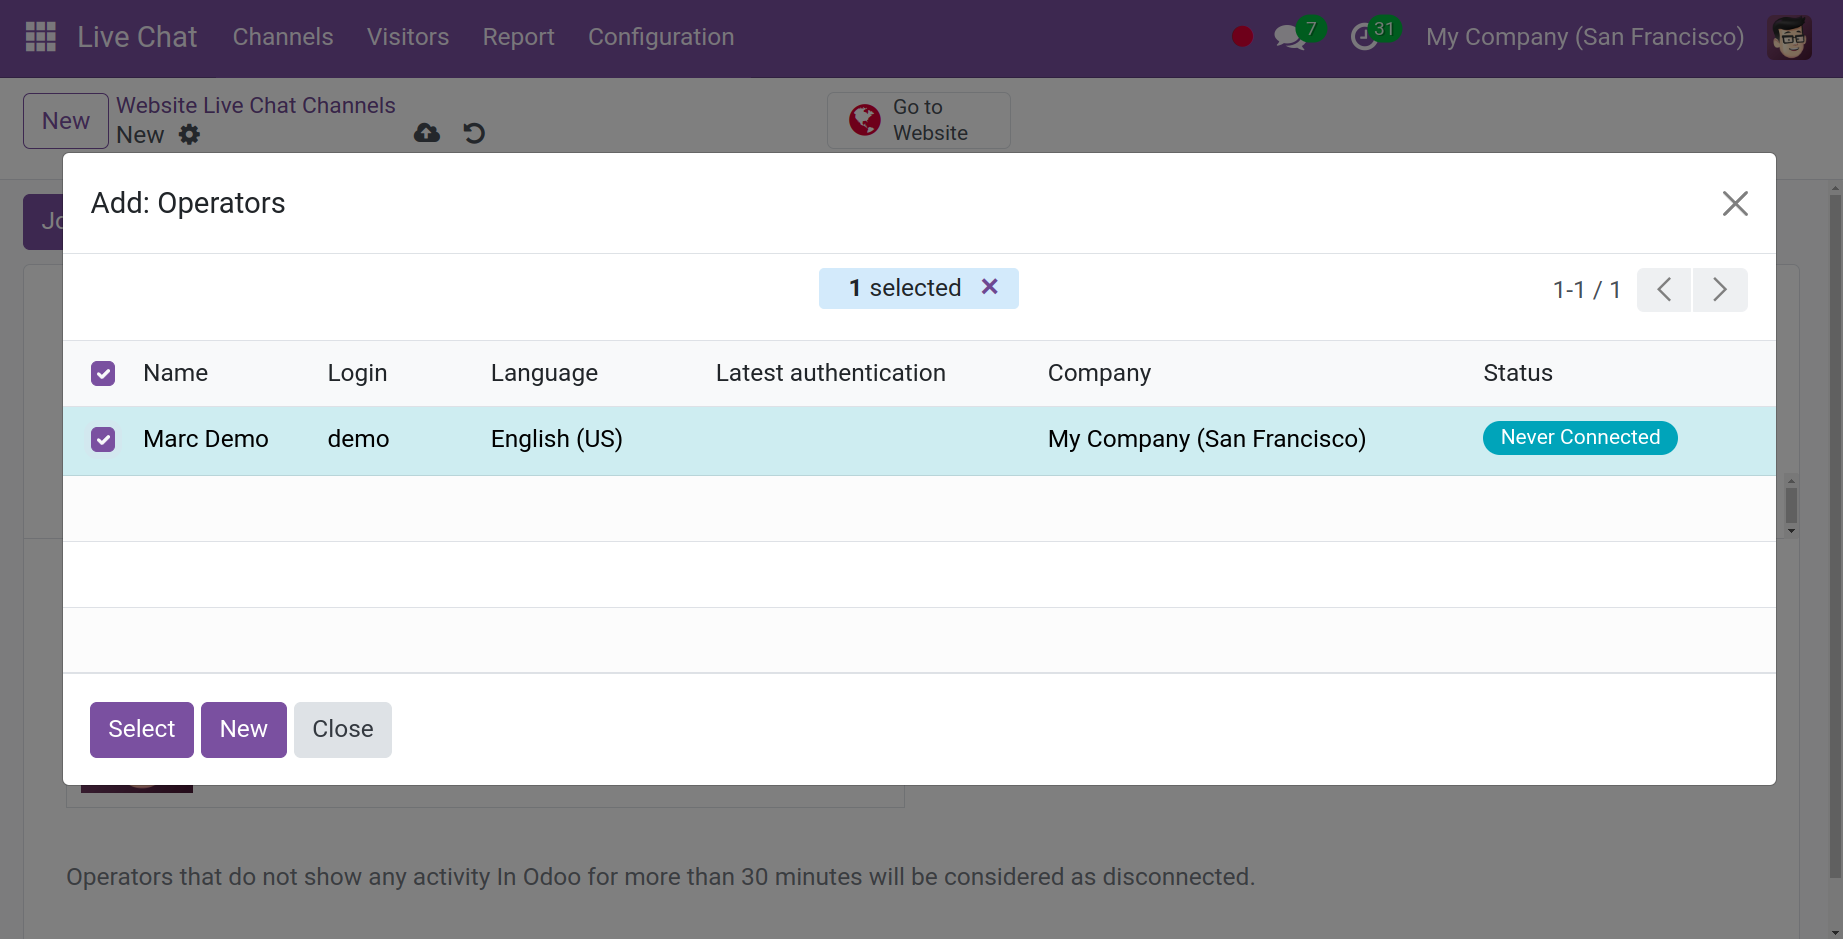
Here, you can use the provided list to choose the necessary
operator, and you can add additional operators by using the
New icon. The screenshot below illustrates the page
where new operators can be created.
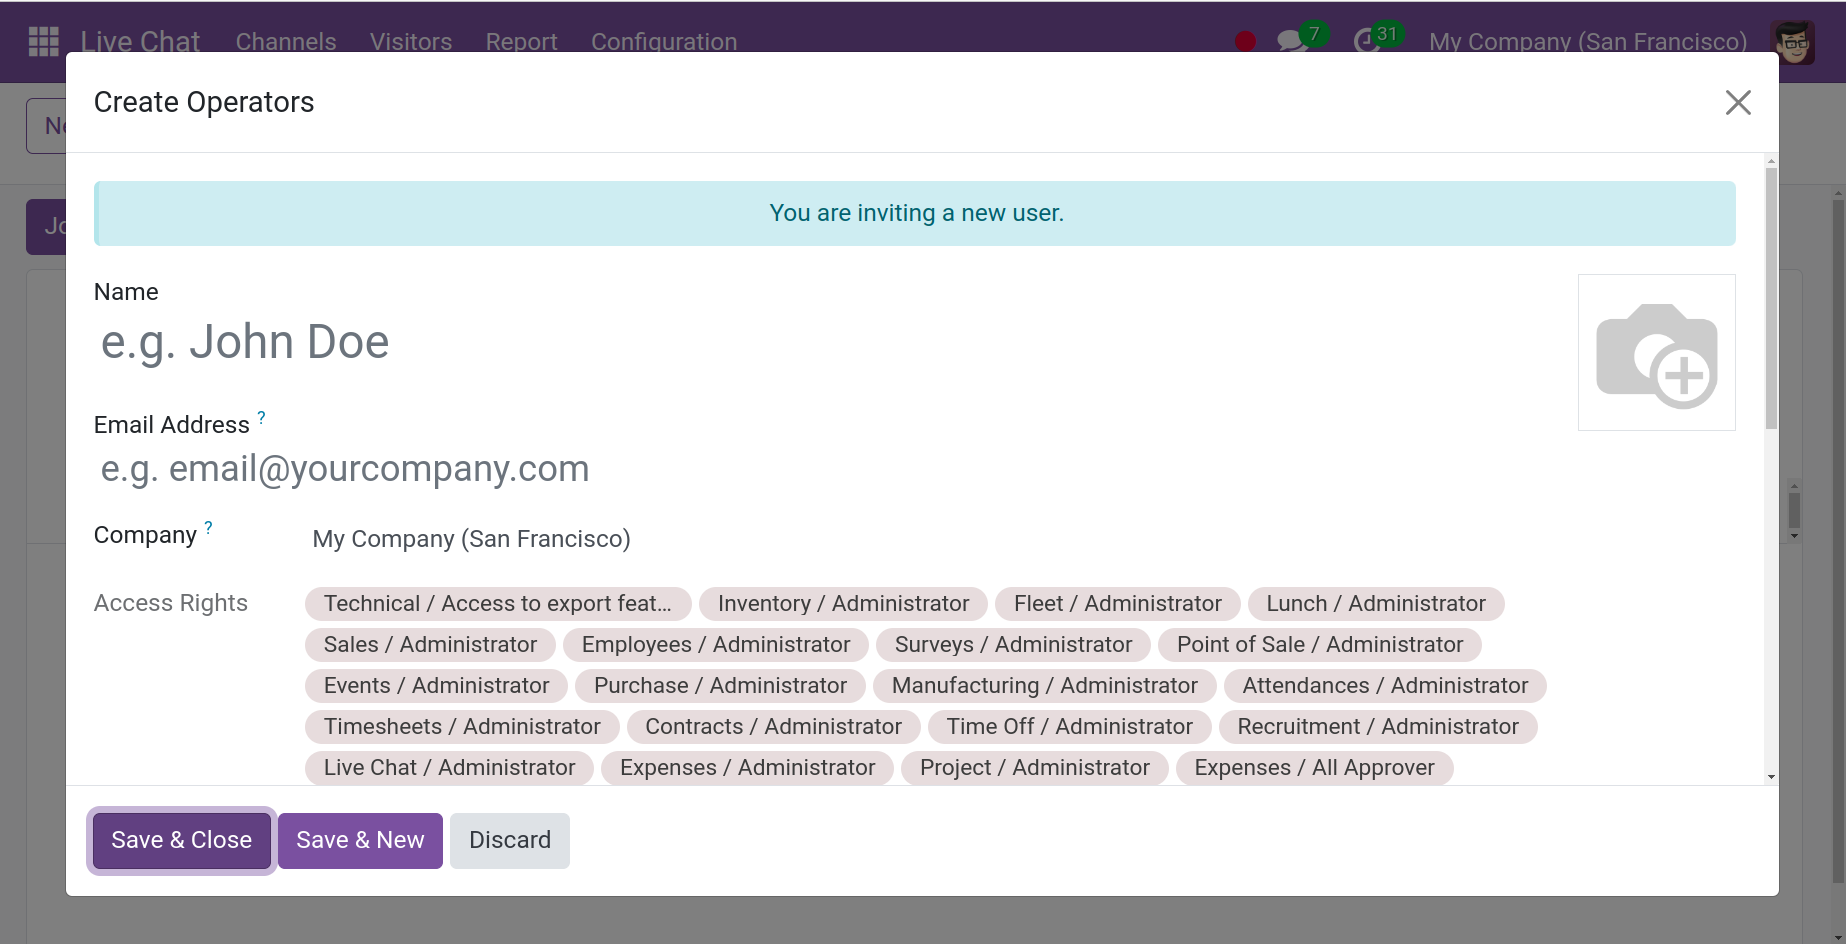
The creation page requires you to enter the operator's name at
the top, followed by the company name, phone number, email
address, and cellphone number, in that order. The generate
employ option is now also activated. Once you have finished
entering all the information, save the newly generated
operator by selecting the save and close icon.
The Options tab is the next tab, and it will look like
the screenshot below.
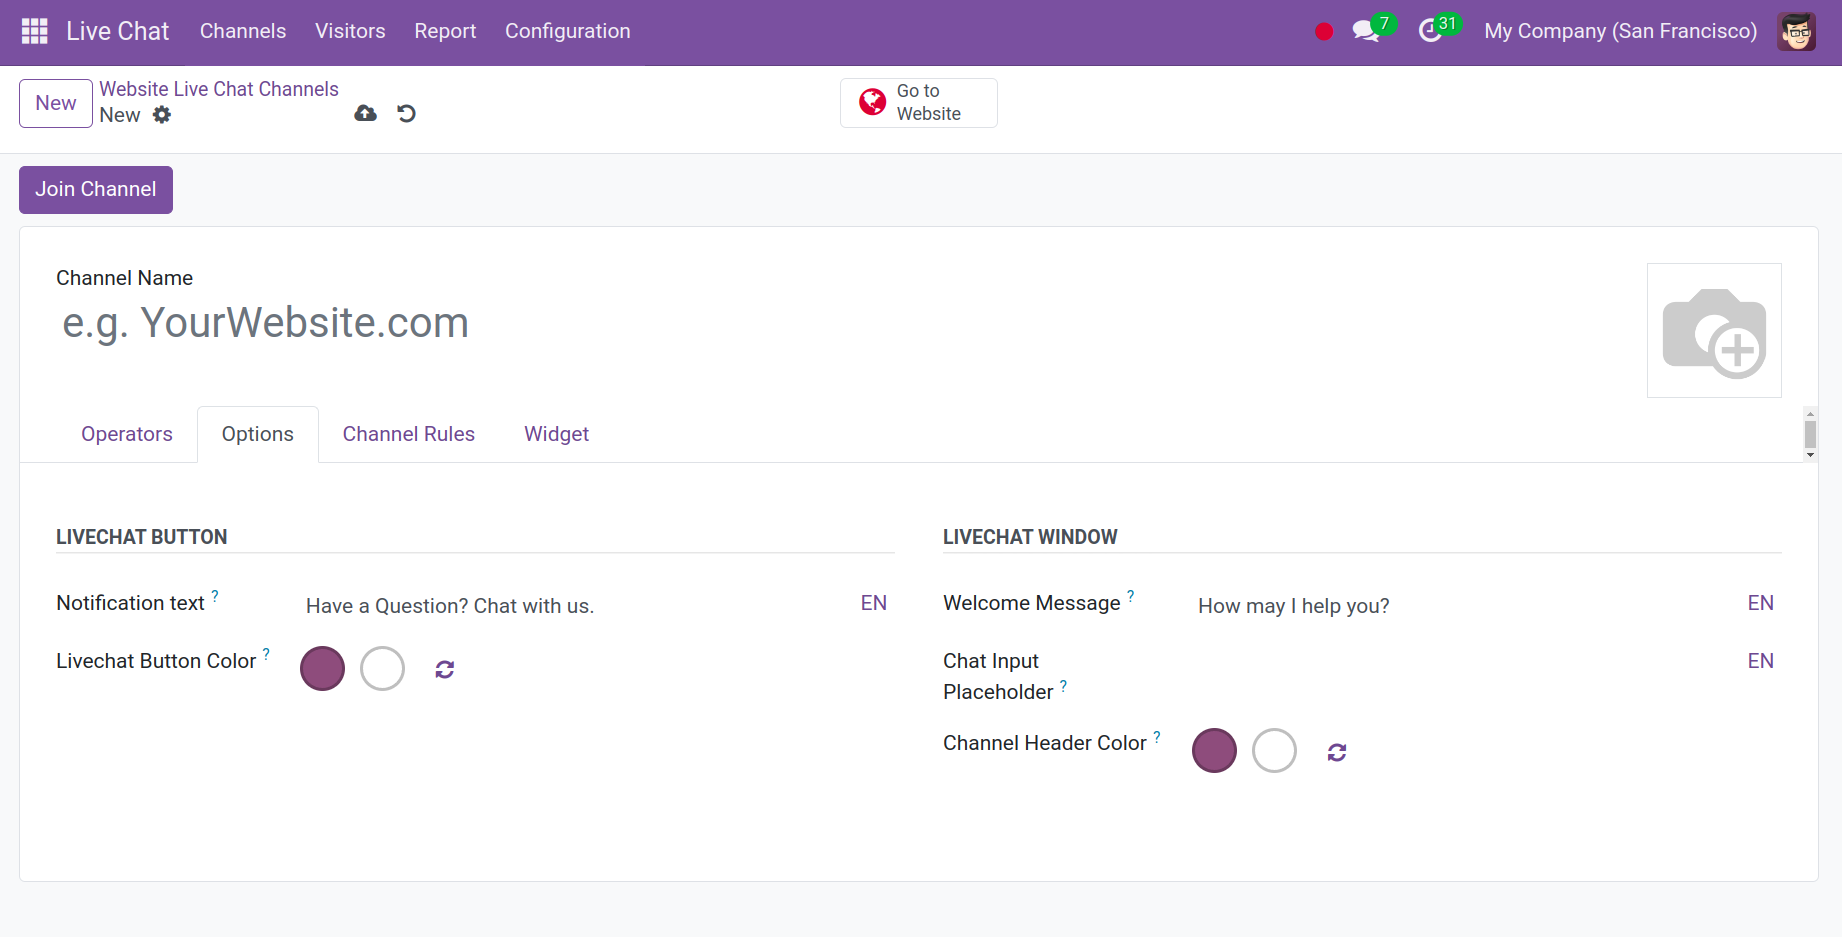
This page contains the button text option, which allows you to
customize the default text displayed in the live chat support
symbol. The default backdrop color of live chat can be found
by selecting the "Live Chat Button Color" option under that.
You can set a welcome message for visitors to the live chat
window that will appear when a conversation starts by
selecting the welcome message option. You may now set the text
that prompts users to start a chat by using the placeholder
option for the chat field. The channel header color option
will supply the default backdrop color of the channel header.
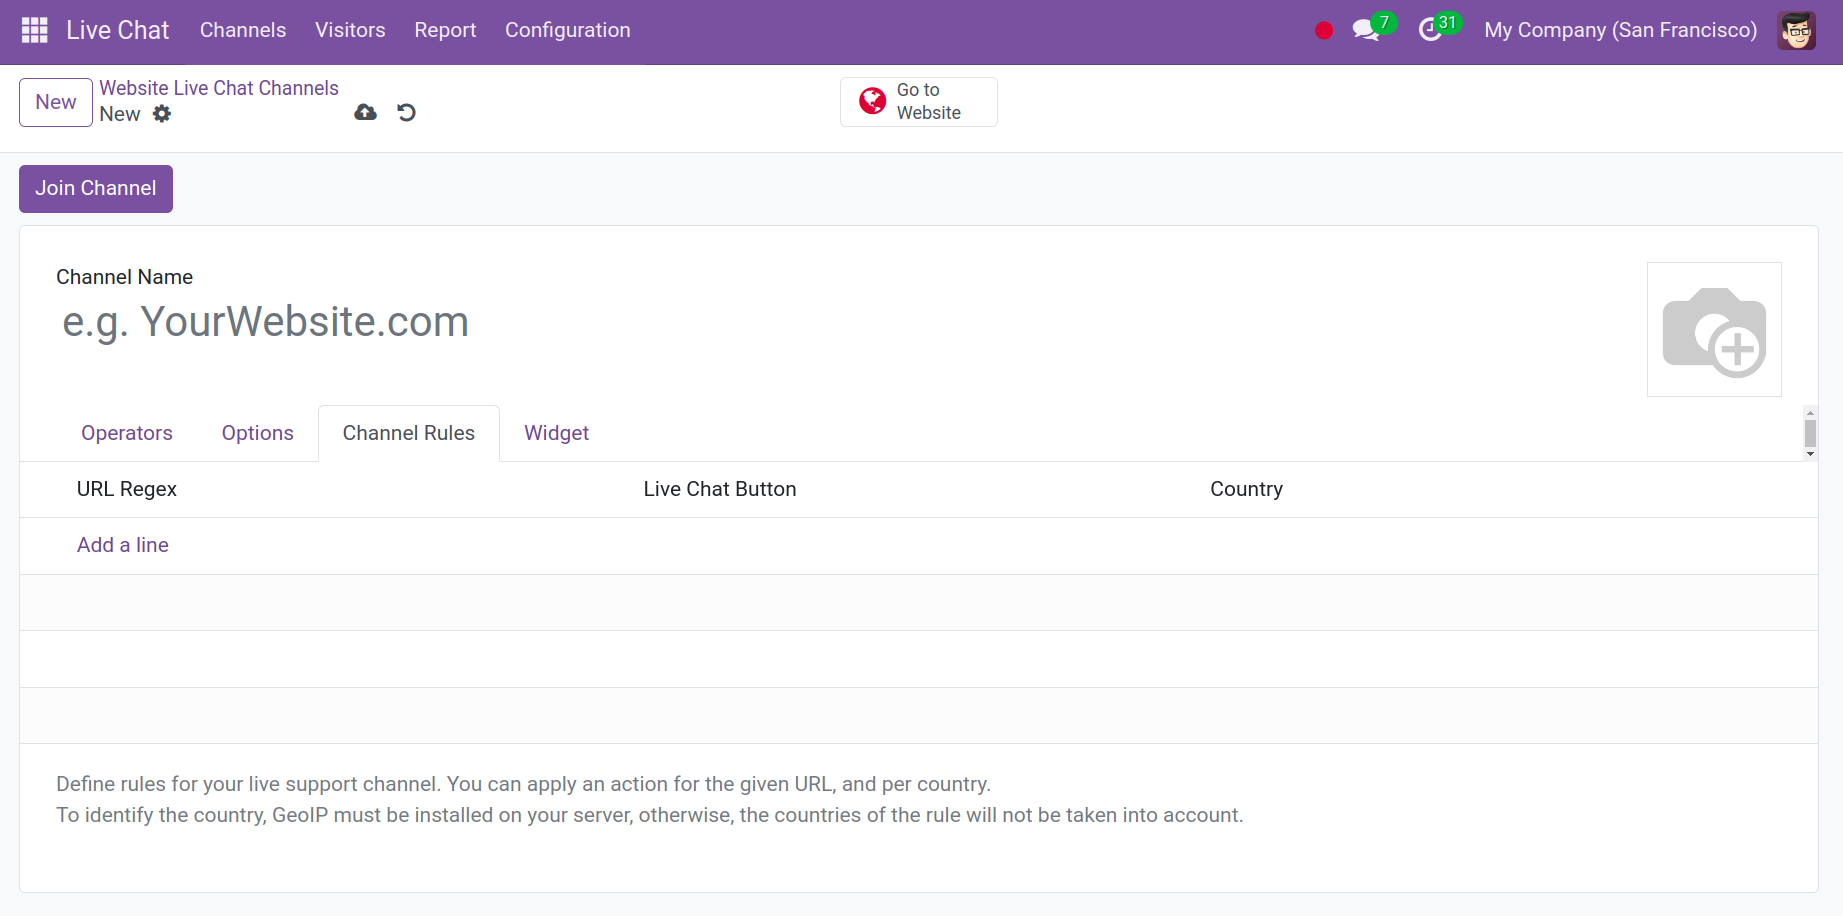
You may set up the various rules for the live chat under the
Channel Rules tab. You can keep up communication only
with the designated nations by doing this. The chat box might
be hidden for website users from specific countries if the
company's sales team is having trouble understanding them in
their native tongue. As seen in the screenshot below,
different actions can be implemented for a certain URL and per
nation with the aid of the ‘add a line’ option.
On selecting the add a line option, you will obtain a page, as
seen in the image below.
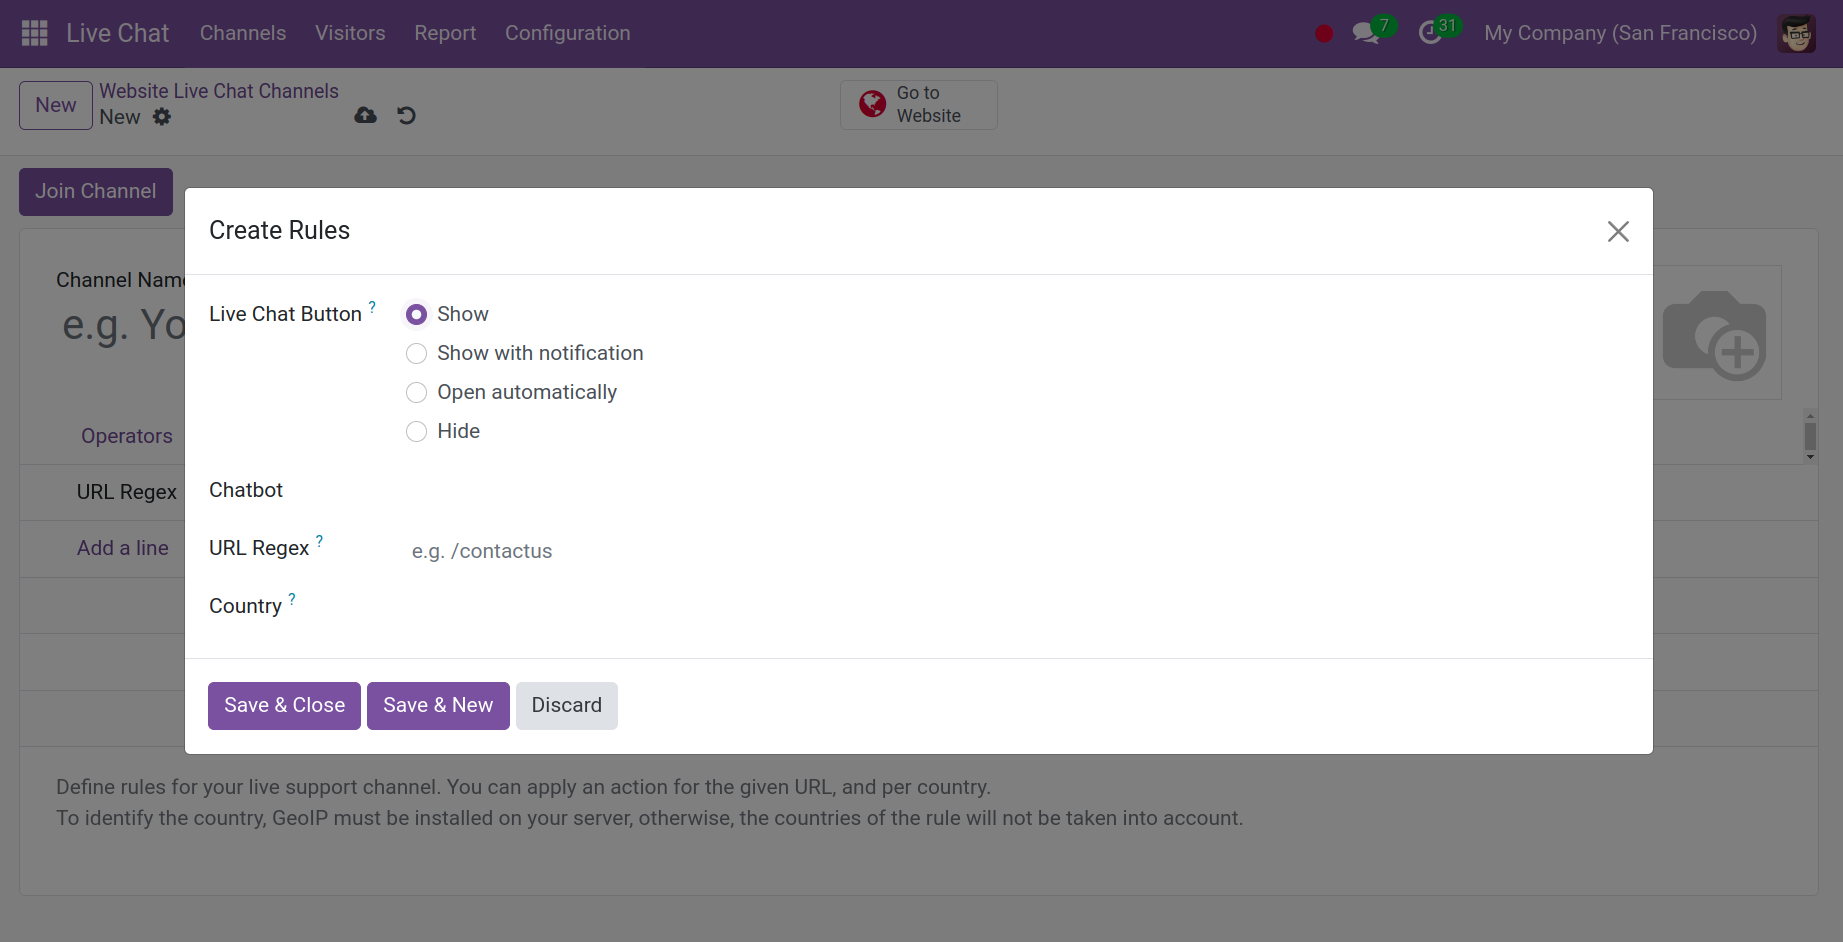
The live chat button on this rule creation page has four
options: Show, Show with notification, Open automatically, and
Hide. Regular expressions mentioning the web pages covered by
this rule can be provided using the URL rejects option. You
can specify which country the regulations should be
implemented in the country field. You can use the save icon
once you have completed all the fields.
You must post the channel on the website in order to use it as
a means of communication with those visitors. Visit the
website option to do that.
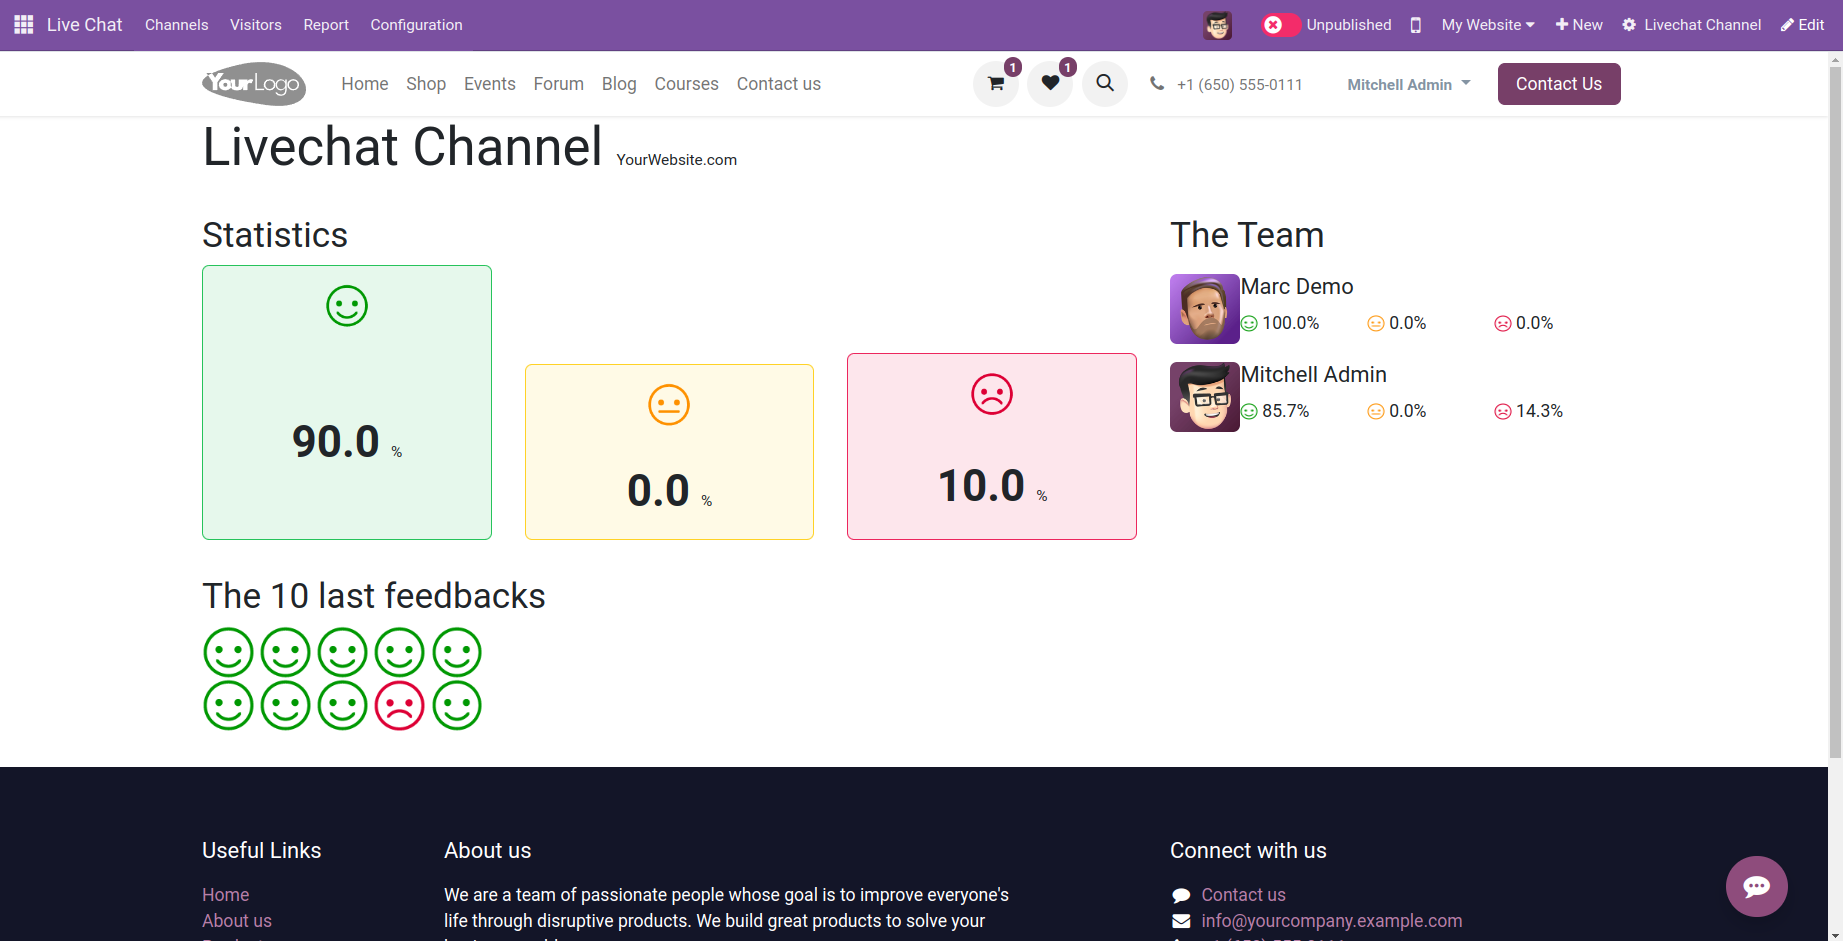
To publish the channel to the website, go to this page on the
website and change its unpublished status to publish. All of
those discussions can be viewed as direct messages in the
discuss module since the live chat and discuss modules are
connected.
Visitors
As seen in the screenshot below, the visitor's menu, located
beneath the live chat module, offers a list of website
visitors.
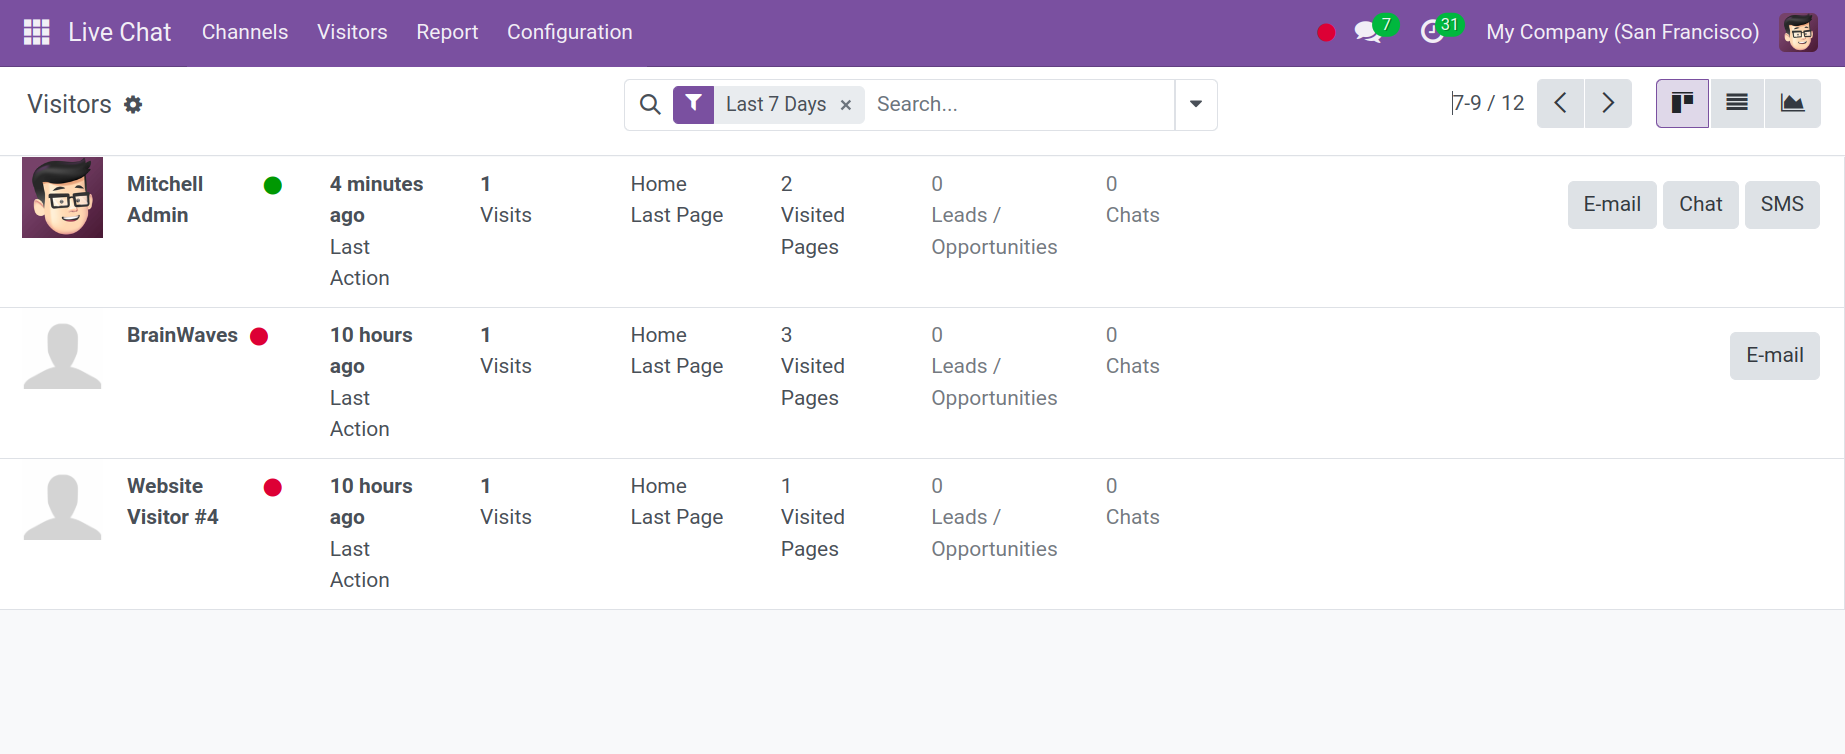
The page is displayed graphically and in a Kanban list
accordingly. If the visitor's name is stored in the database,
you will see their name on the page. You will also receive the
email details in addition to that. Additionally, you can
display the number of visits, last action, number of pages
visited, number of leads or chances, and number of chats in
that order.
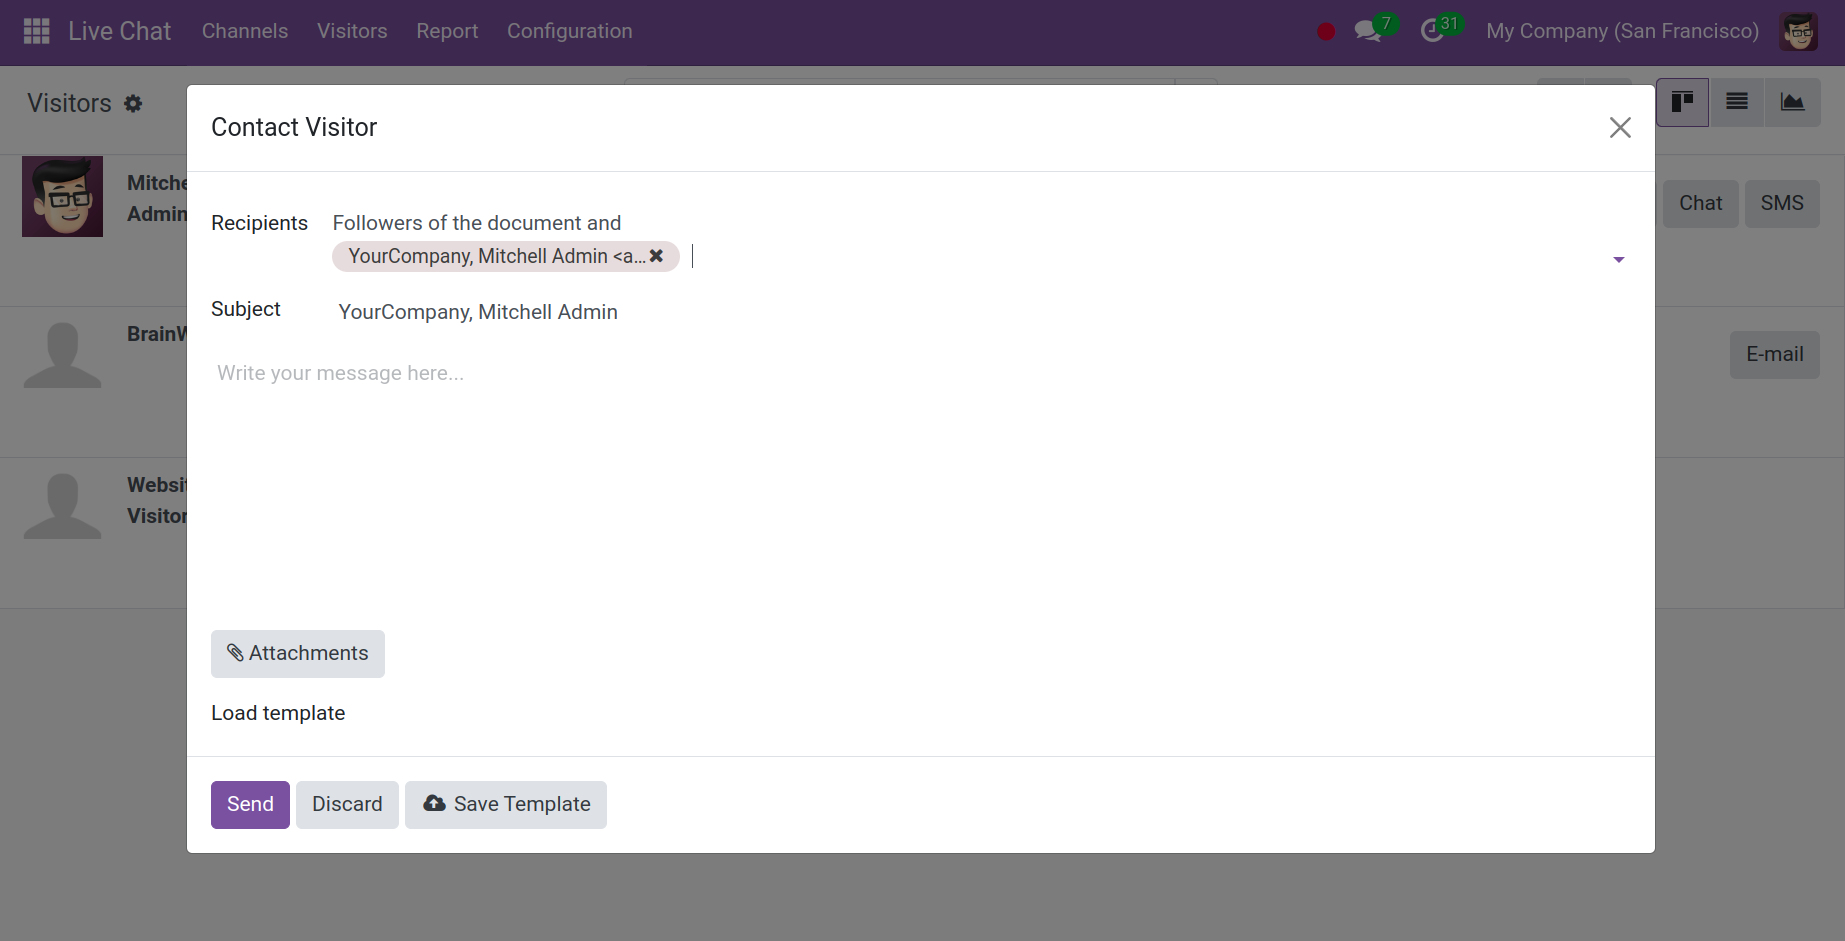
Users can send the visitor an email by using the
Email button.
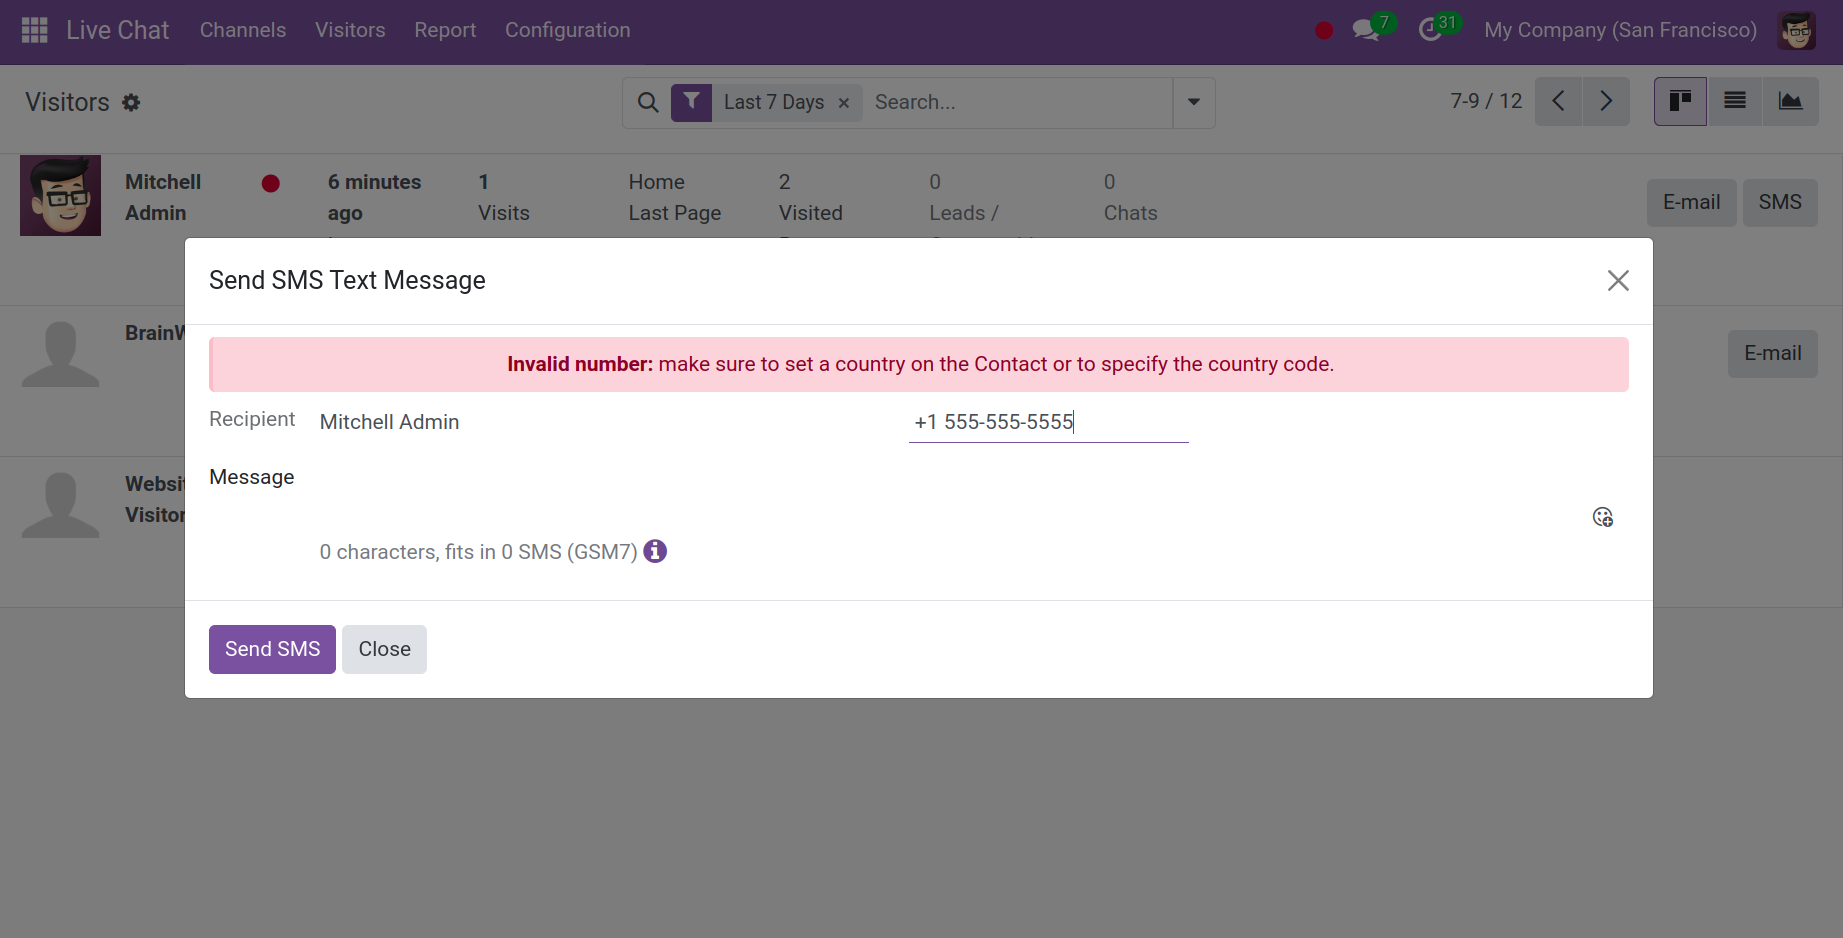
Users can text visitors with an SMS message by using the
SMS button.
Canned Responses
The operation of "Canned Responses" retrieves the
pre-written questions or answers to frequently requested
questions. Time and effort are saved with these kinds of
answers. Additionally, you have the ability to compose these
kinds of responses via the Odoo live chat menu. As seen in the
screenshot below, the setup menu will provide options for
canned answers.

You may find the information, including shortcuts and
substitutions, on the canned responses page. The filters,
group by, and favorites features are available for use and can
be applied appropriately. To generate a canned response of a
similar nature, utilize the New option. You can see the
answers in the chat box after inserting the“:” expression. The
new line, where you may quickly add a new response, will be
shown when you want to write a new one.
Chat Bot
Odoo's chatbot feature may be tailored to perform a variety of
activities, deliver information, and raise user satisfaction
levels. The created chatbot can be shown under the
Configuration menu.

Add the chatbot's name inside of it. Inside the script, the
users can specify the message, step type, and corresponding
responses for the questions.
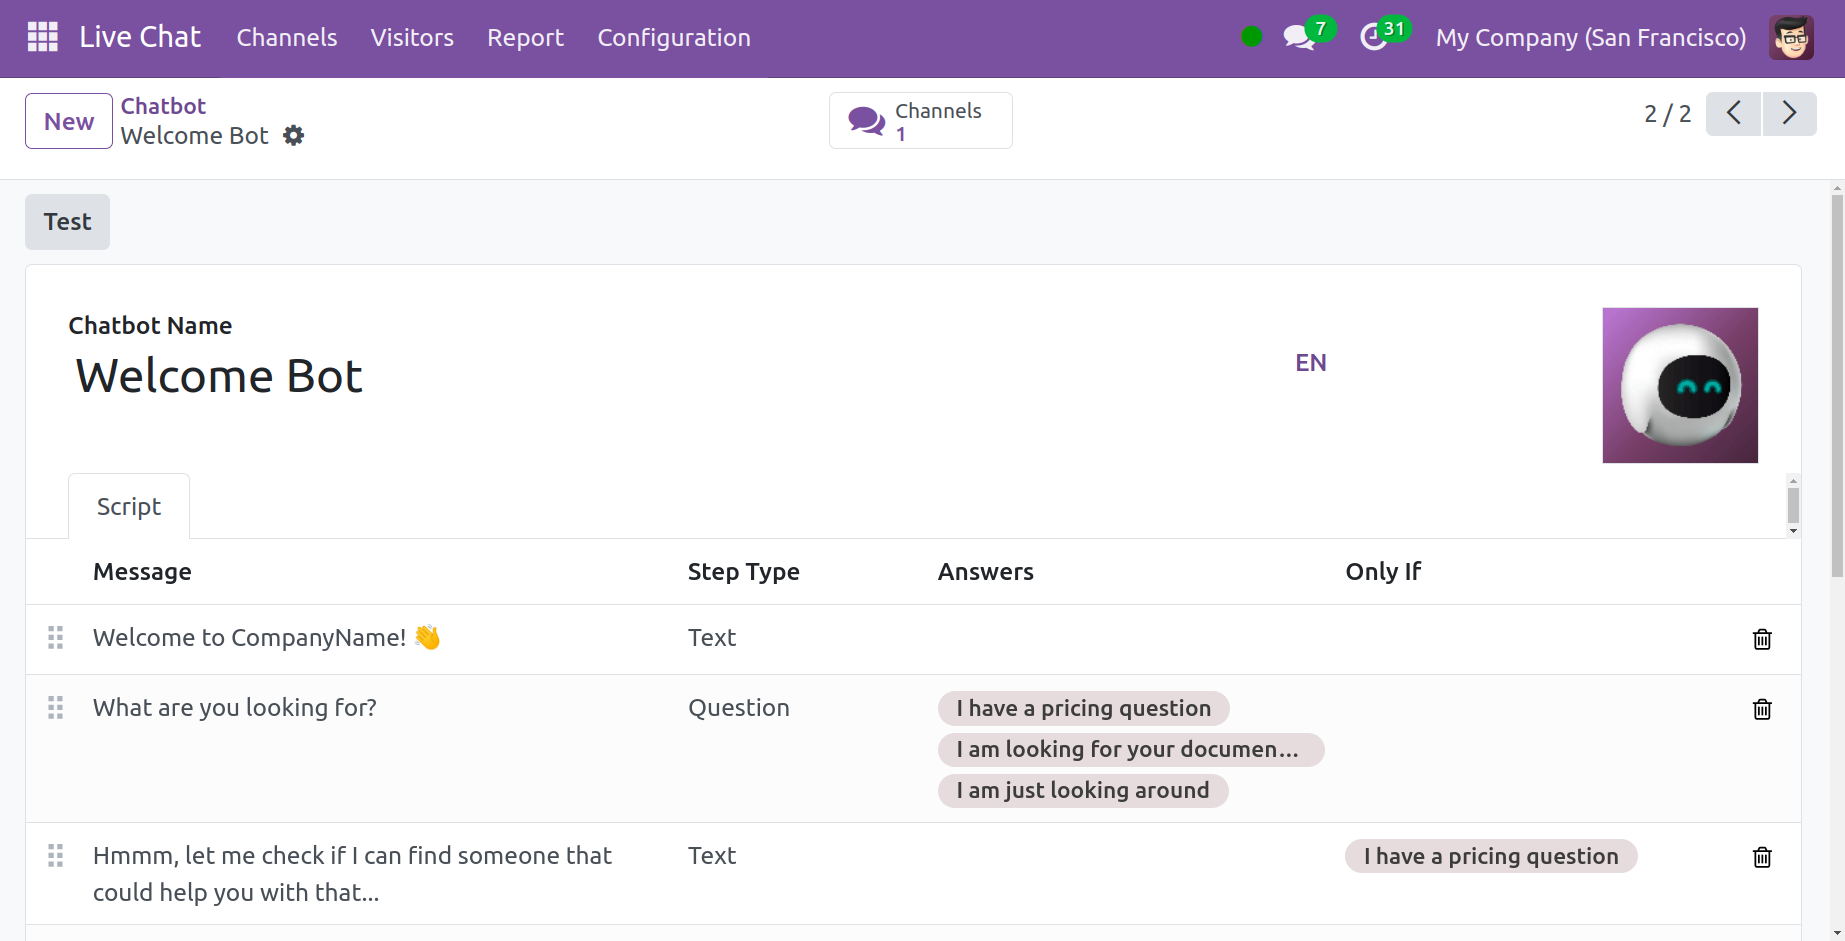
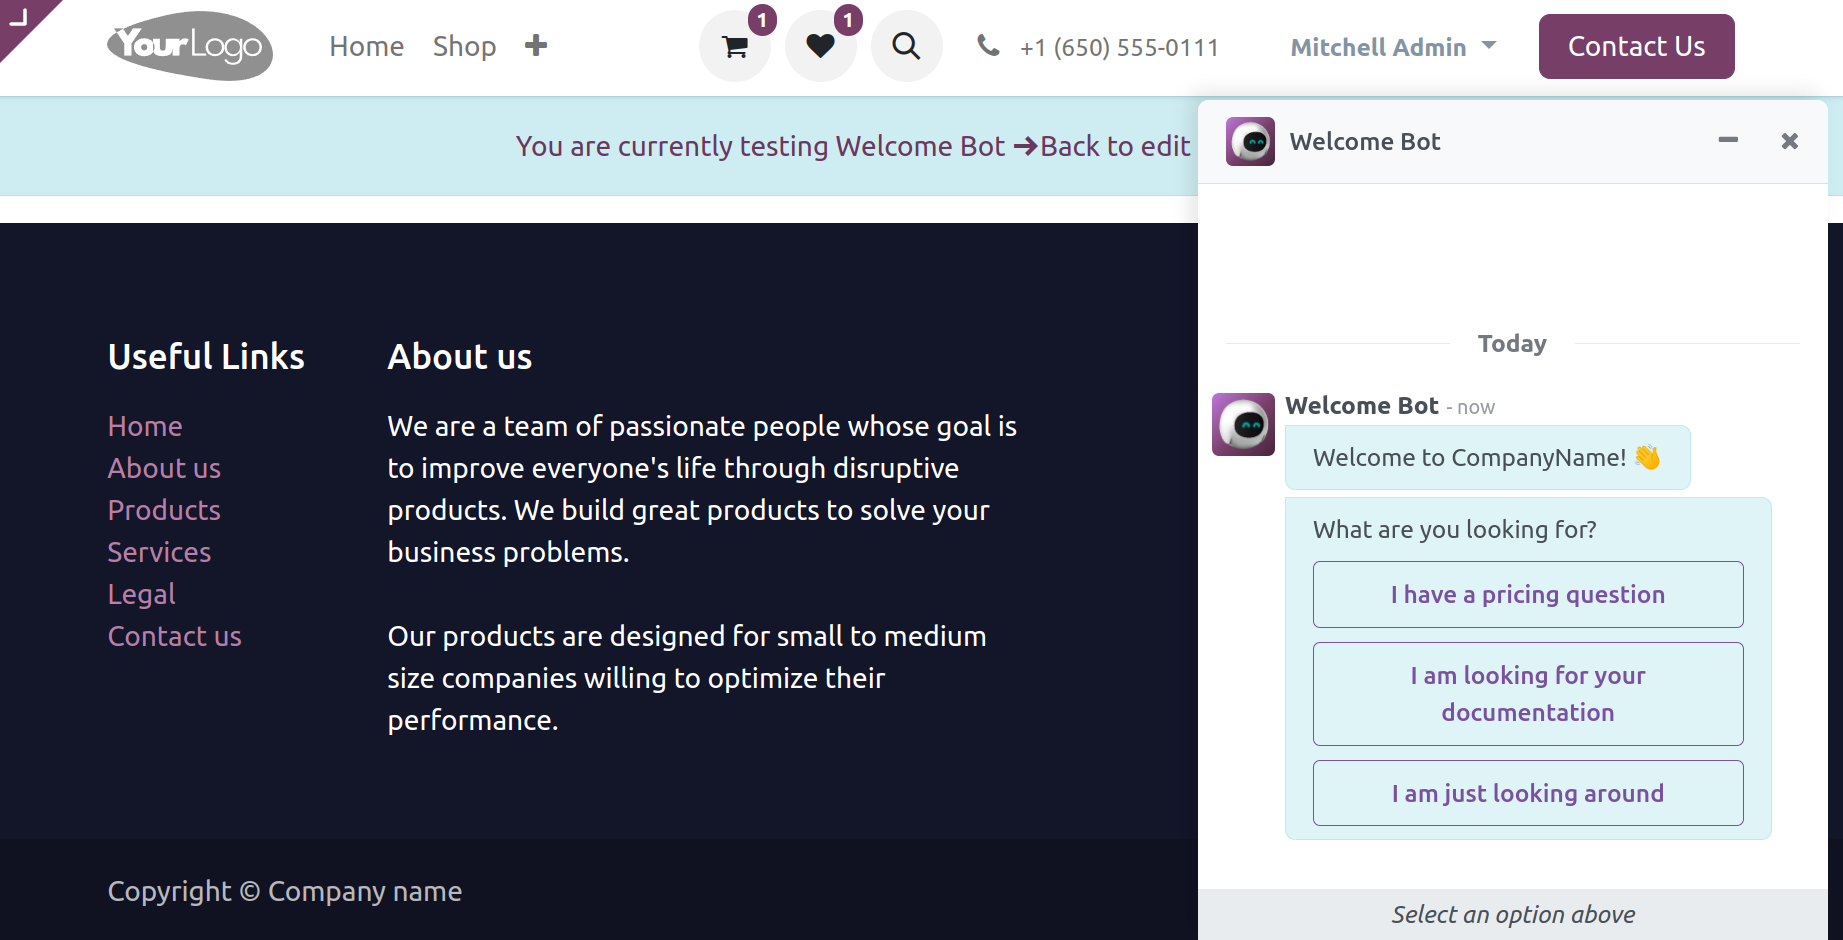
The chatbot collects information from the website visitors as
per the scripts we configured and redirects to the operator if
required. The chat is redirected to the operator who is
online, and whoever has the least communication in the last 30
minutes will be considered and assigned. This will create a
feeling of hassle-free communication between the operators and
visitors. All such collected details will be recorded so that
the operator can see all the collected details.
The chat displays the chatbot within the chat window when you
click the Test button.
Reporting
You can access many sub-options, including operator analysis,
customer rating, session statistics, and session history,
under the Live Chat module's reporting menu. The snapshot
below will display this session history.
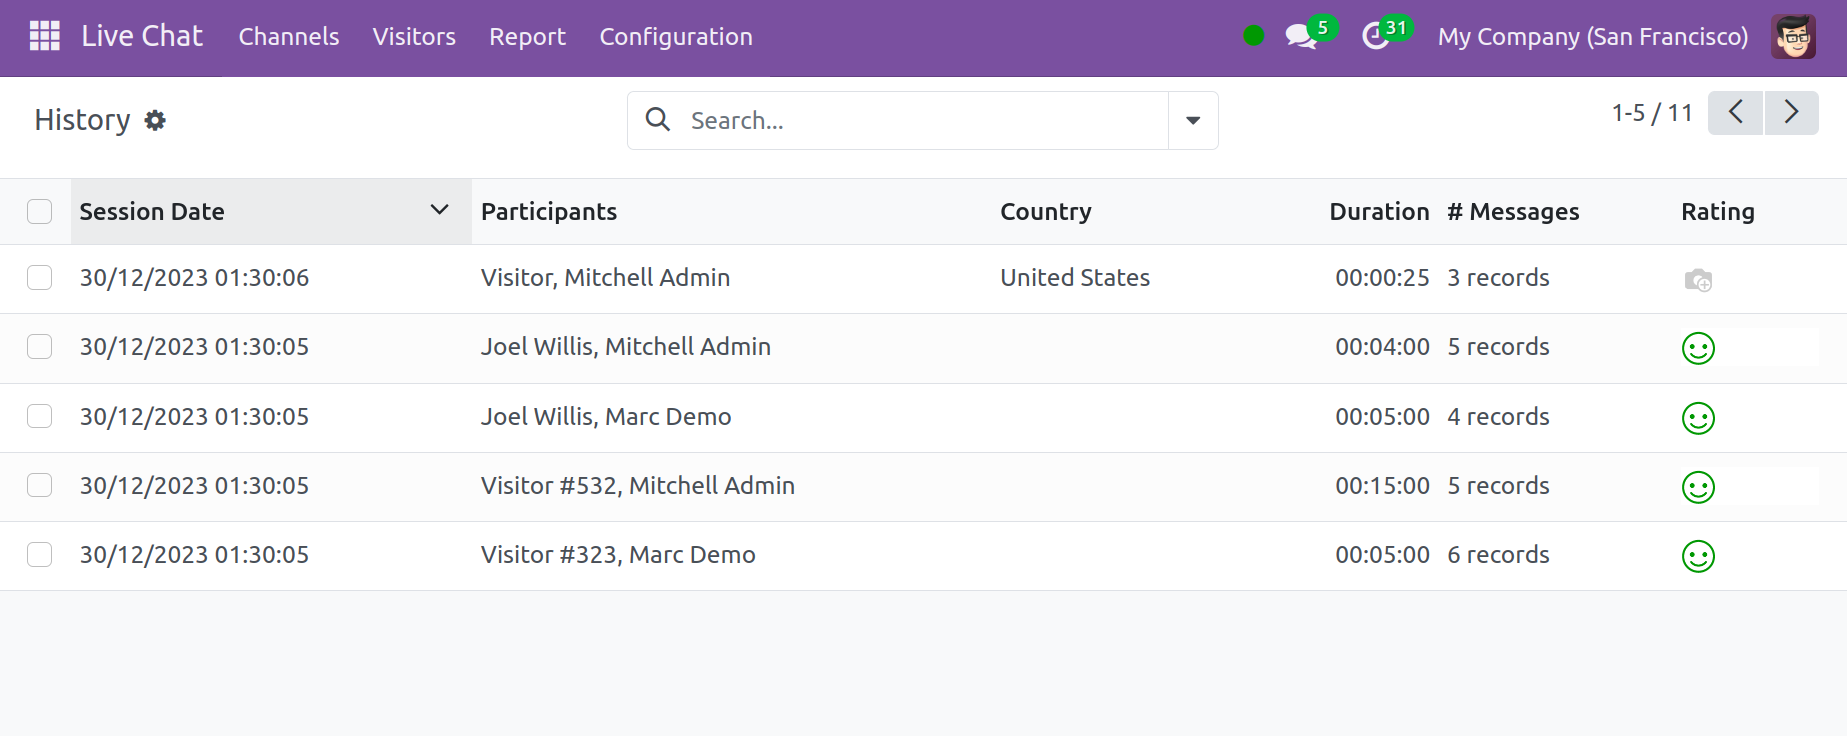
This is where you will find all the information, including the
session date, participants, messages, and ratings. The
statistics for the session will display the various activities
that were captured in the live chat module.
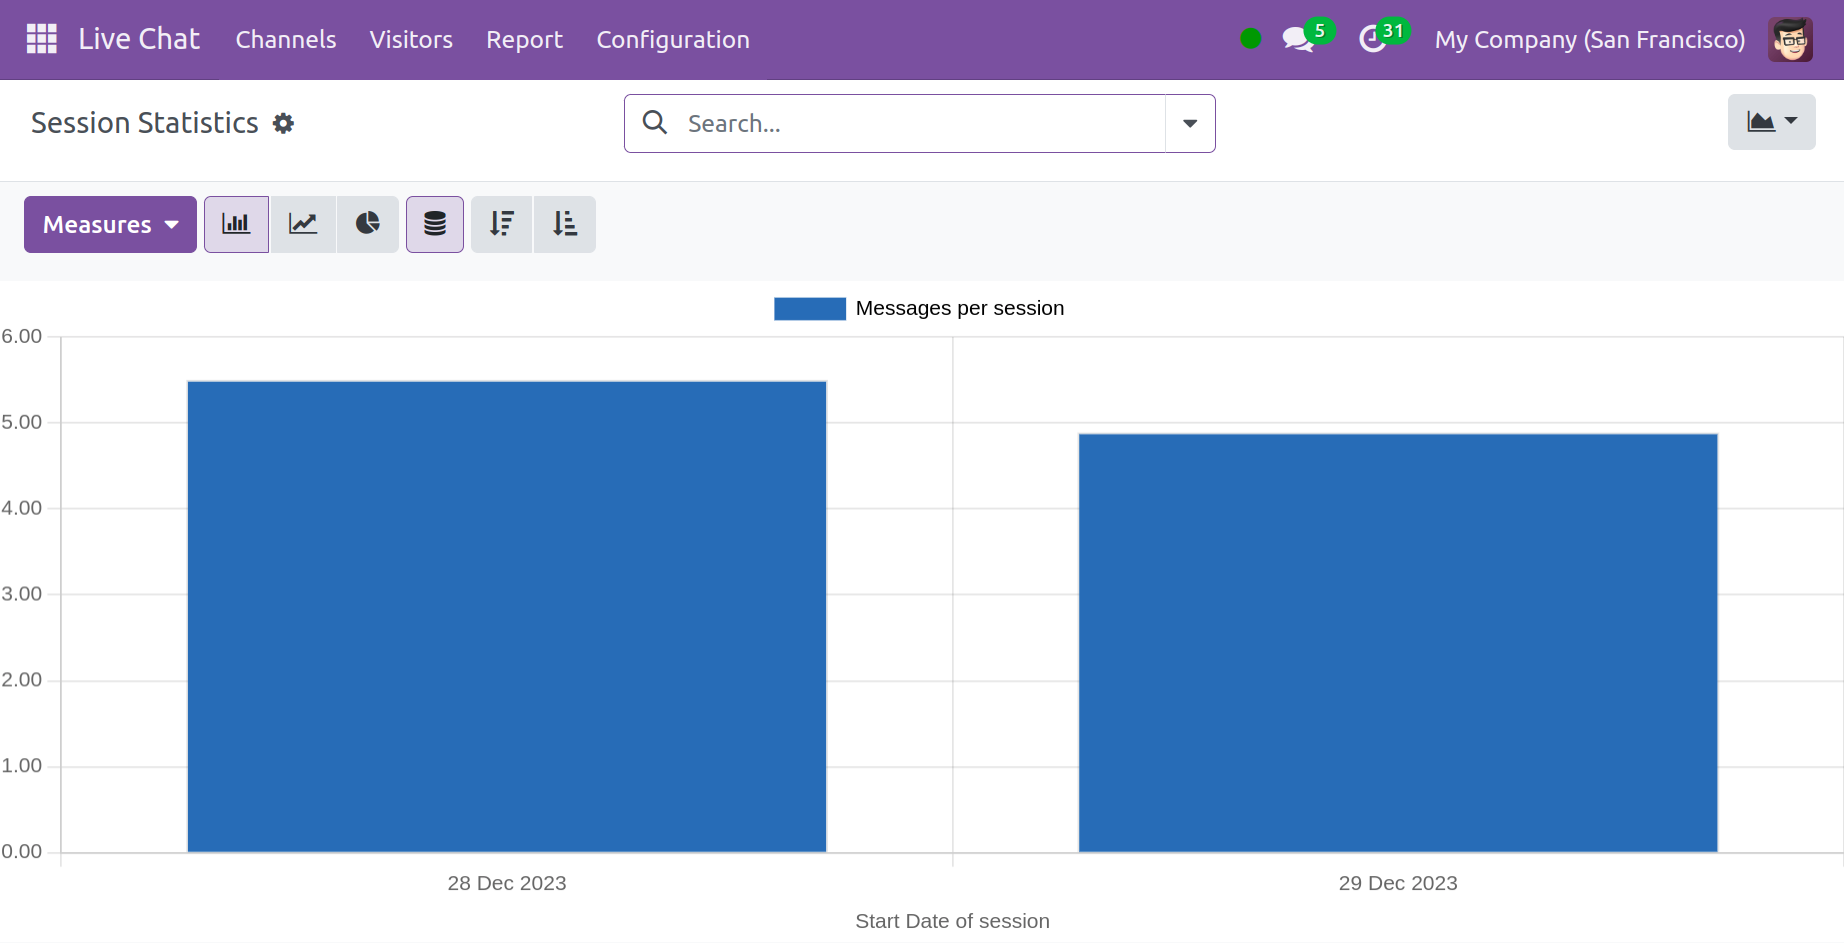
You can apply the required modifications to the reports with
the aid of measures. The pivot view also displays the page.
The analytical form will be provided by the pivot view. As you
can see in the screenshot below, you now have Operator
Analysis.
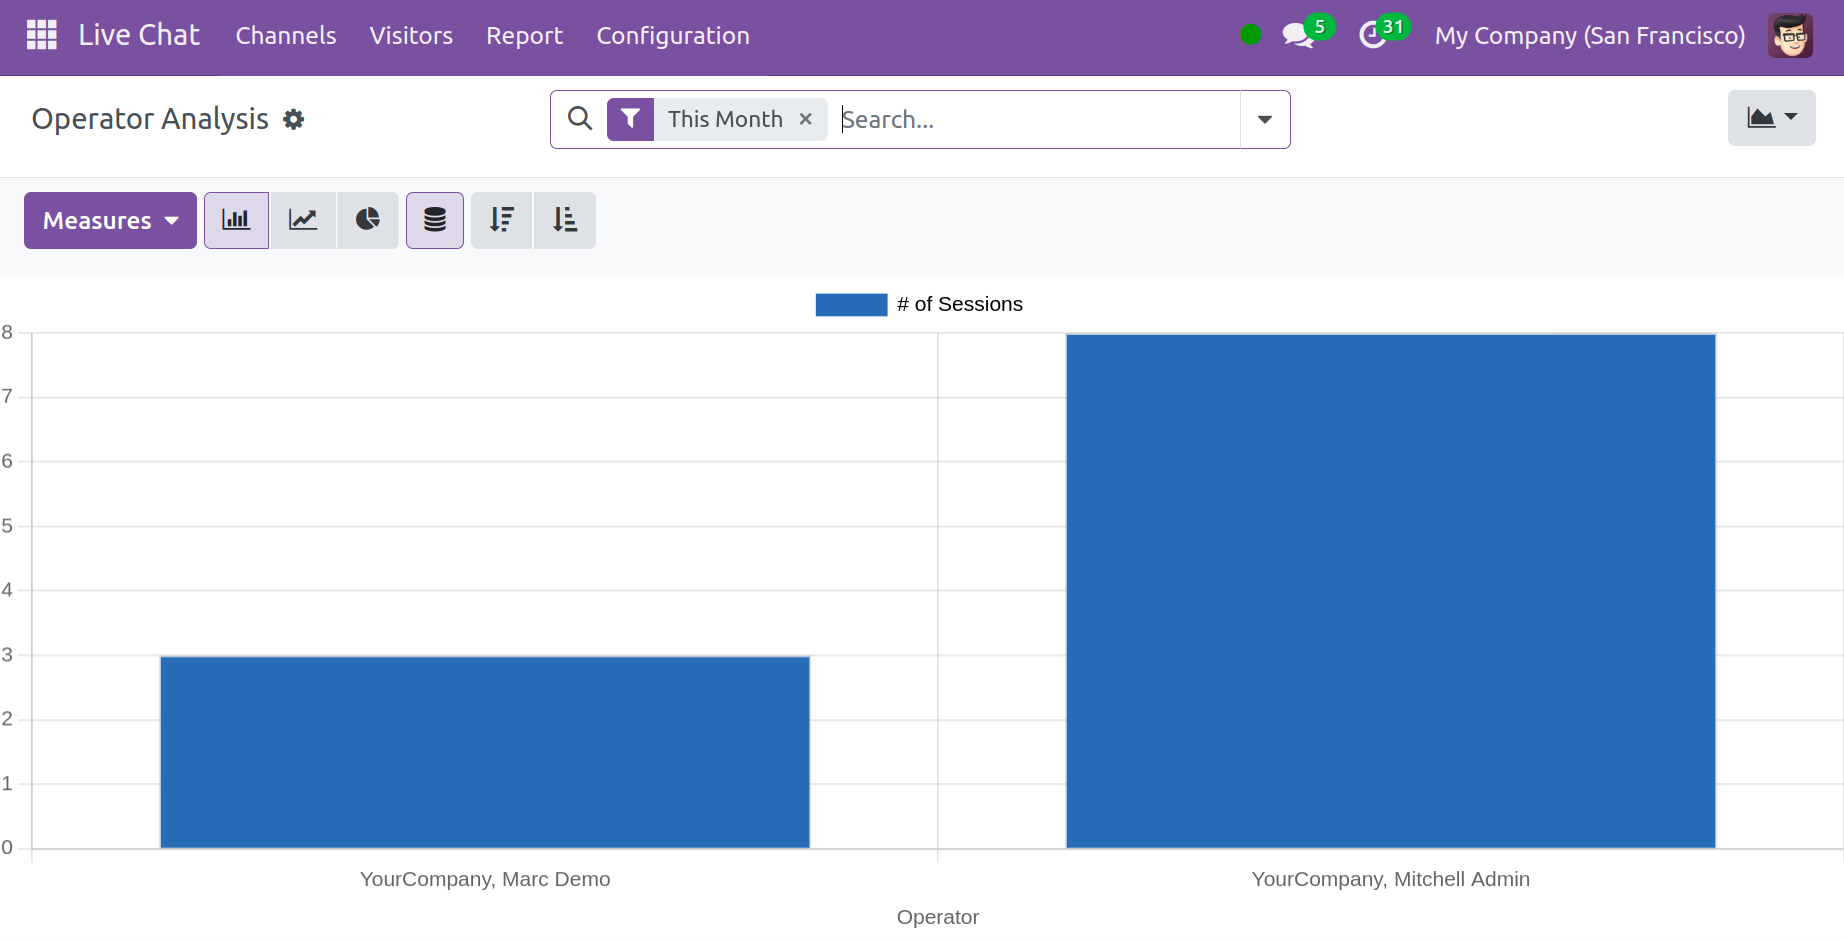
As seen in the above figure, the report will be updated in
light of the operations. The graph can be displayed as a bar,
line, or pie, as appropriate. The customer rating is the last
item, as seen in the screenshot below.
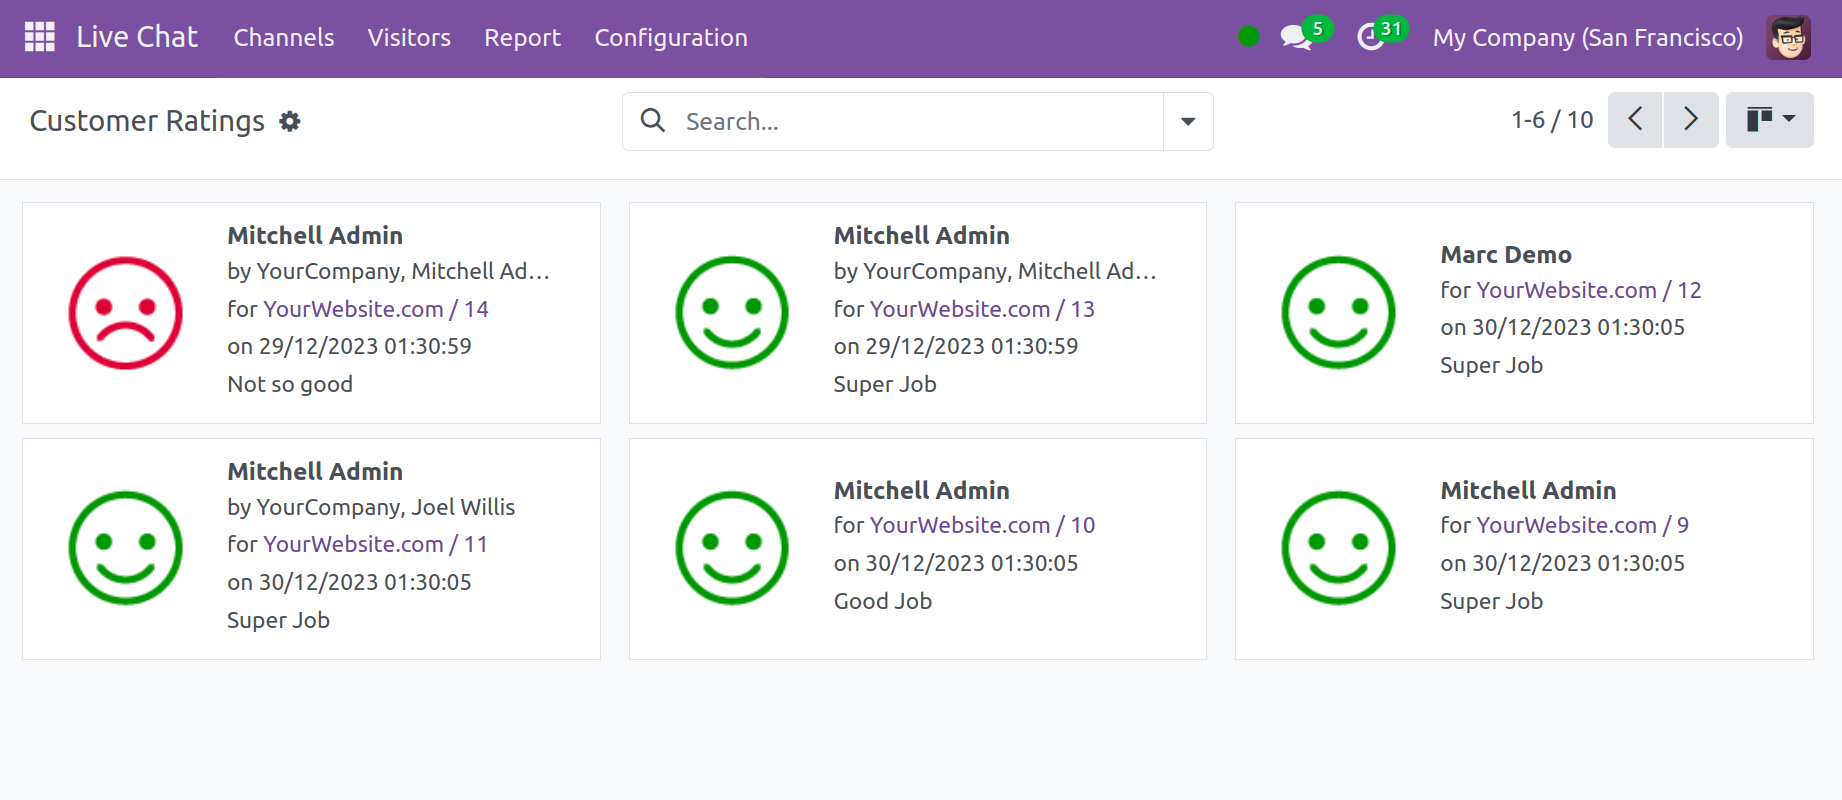
The ratings aid in bringing about the desired progress in the
relevant field.
All in all, the module assists you in controlling and
directing client communication, allowing you to make the
necessary enhancements to their offerings.