Product Traceability
An essential component of inventory management is recording and tracing the location of each product component at various points during the inventory process. To guarantee simple movement throughout the inventory, this operation must be handled with the utmost care. The tracking processes will be made simpler by Odoo 17's product traceability features. With the help of sophisticated tracking, these features will put all inventory operations under control.
Lots and serial numbers are used to effectively track the movement of items in inventory. They can be used to monitor a product's progress from production to delivery. Additionally, this will increase your company's stock management efficiency. It is simple to find the missing parts using the lots and serial numbers, which is useful for lowering the stock movement risk factors. Odoo 17 will maintain a traceability report detailing the stock movement of every component that makes up a product.
Lots and serial numbers can be used in Odoo 17 to track your products. The purposes of these two traceability aspects are noticeably different. Lots typically serve as a special identification number to distinguish a collection of goods that belong to the same sort. The products can be combined into a single pack and assigned a lot number to the pack. The products are rather small and challenging to count as individual products. In the inventory, the products will be chosen in batches. For each item in stock, the serial numbers can be used. Each of these numbers will serve as a unique product identification number.
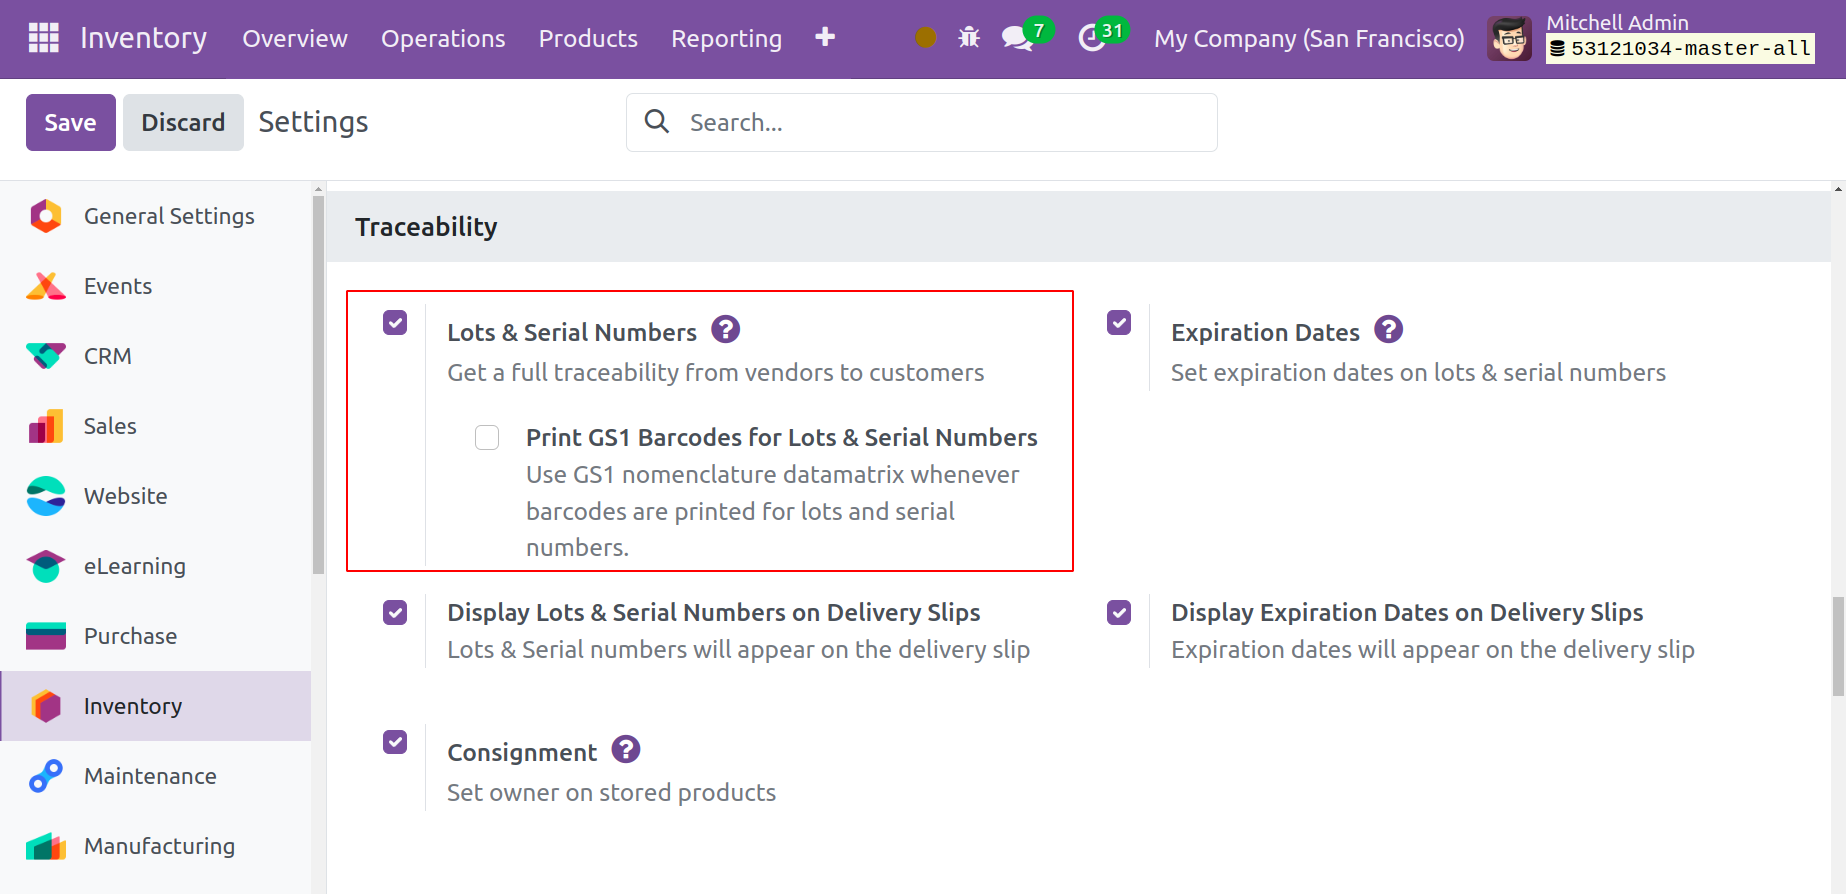
You can assign lots and serial numbers to products when managing their inventory. These traceability features, which will increase tracking efficiency, are supported by the sophisticated inventory management tools found in the Odoo 17 Inventory module. To enable all of the traceability capabilities in the Inventory module, let's navigate to the Settings menu. Under the Traceability tab, you can activate the Lots & Serial Numbers option here.
From the Inventory module's product configuration panel, you may determine a product's traceability. You can choose the Inventory tab in the product form view for this.
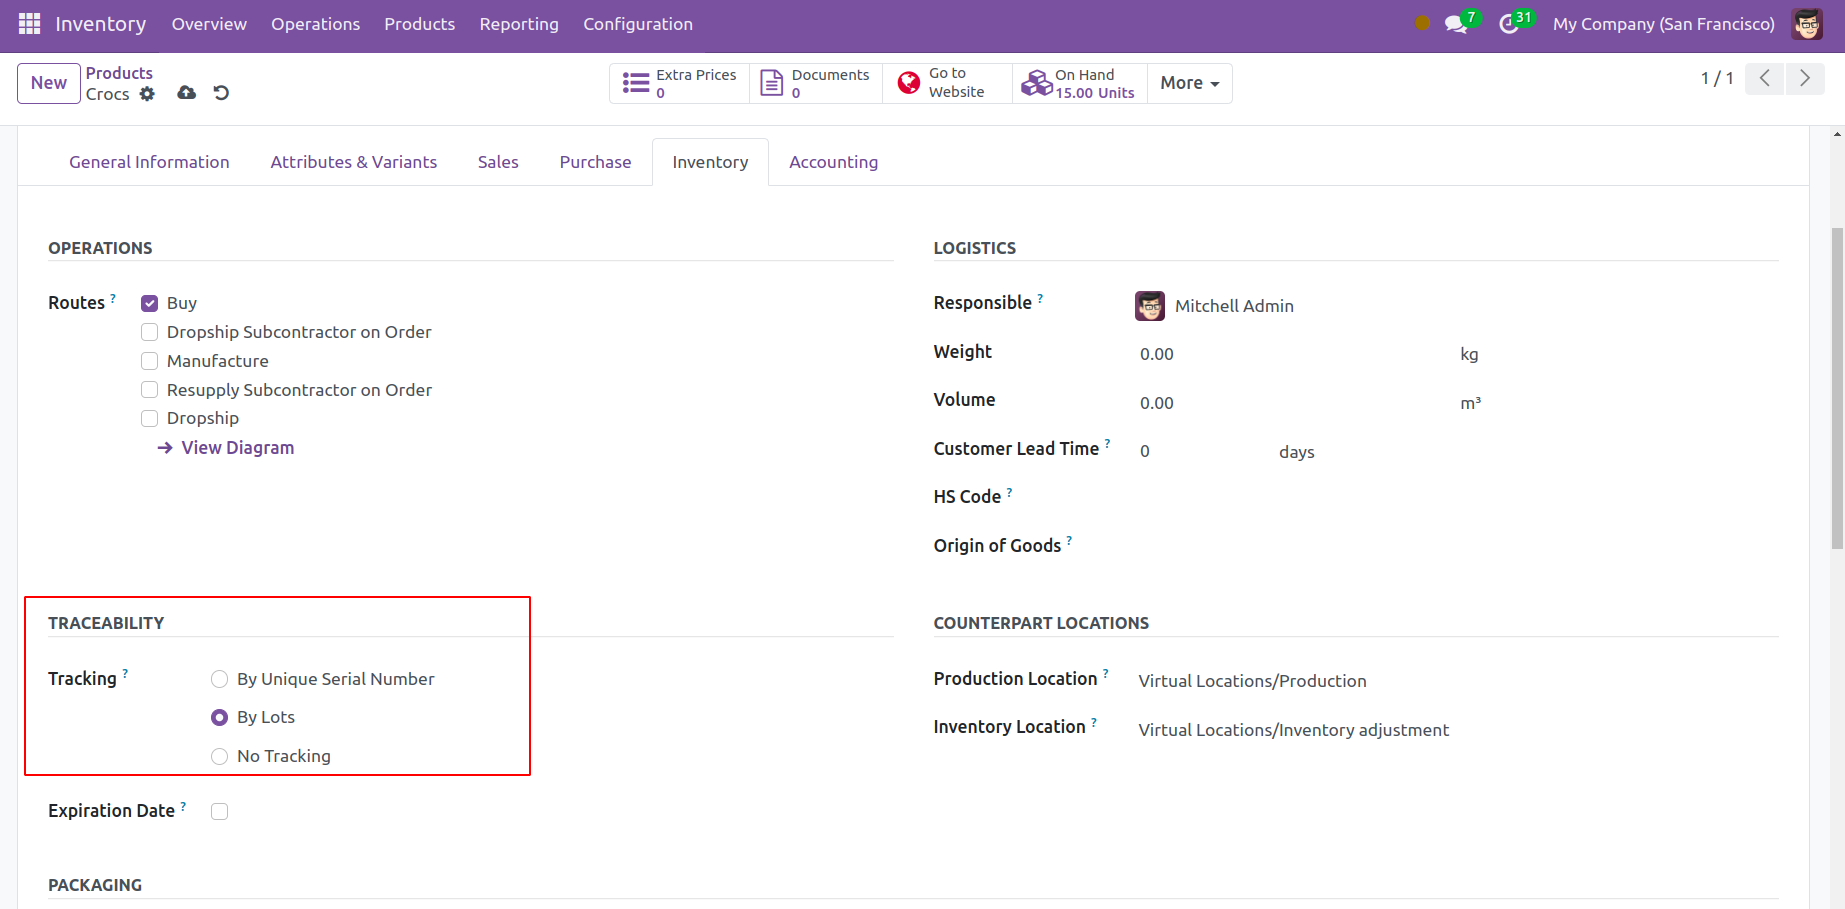
This is where the Traceability section is located, as seen in the screenshot, and it will assist you in determining how to trace that specific product. You have the option to base the tracking on lots or a unique serial number. You can use the No Tracking option if you don't want to enable any tracking on the product.
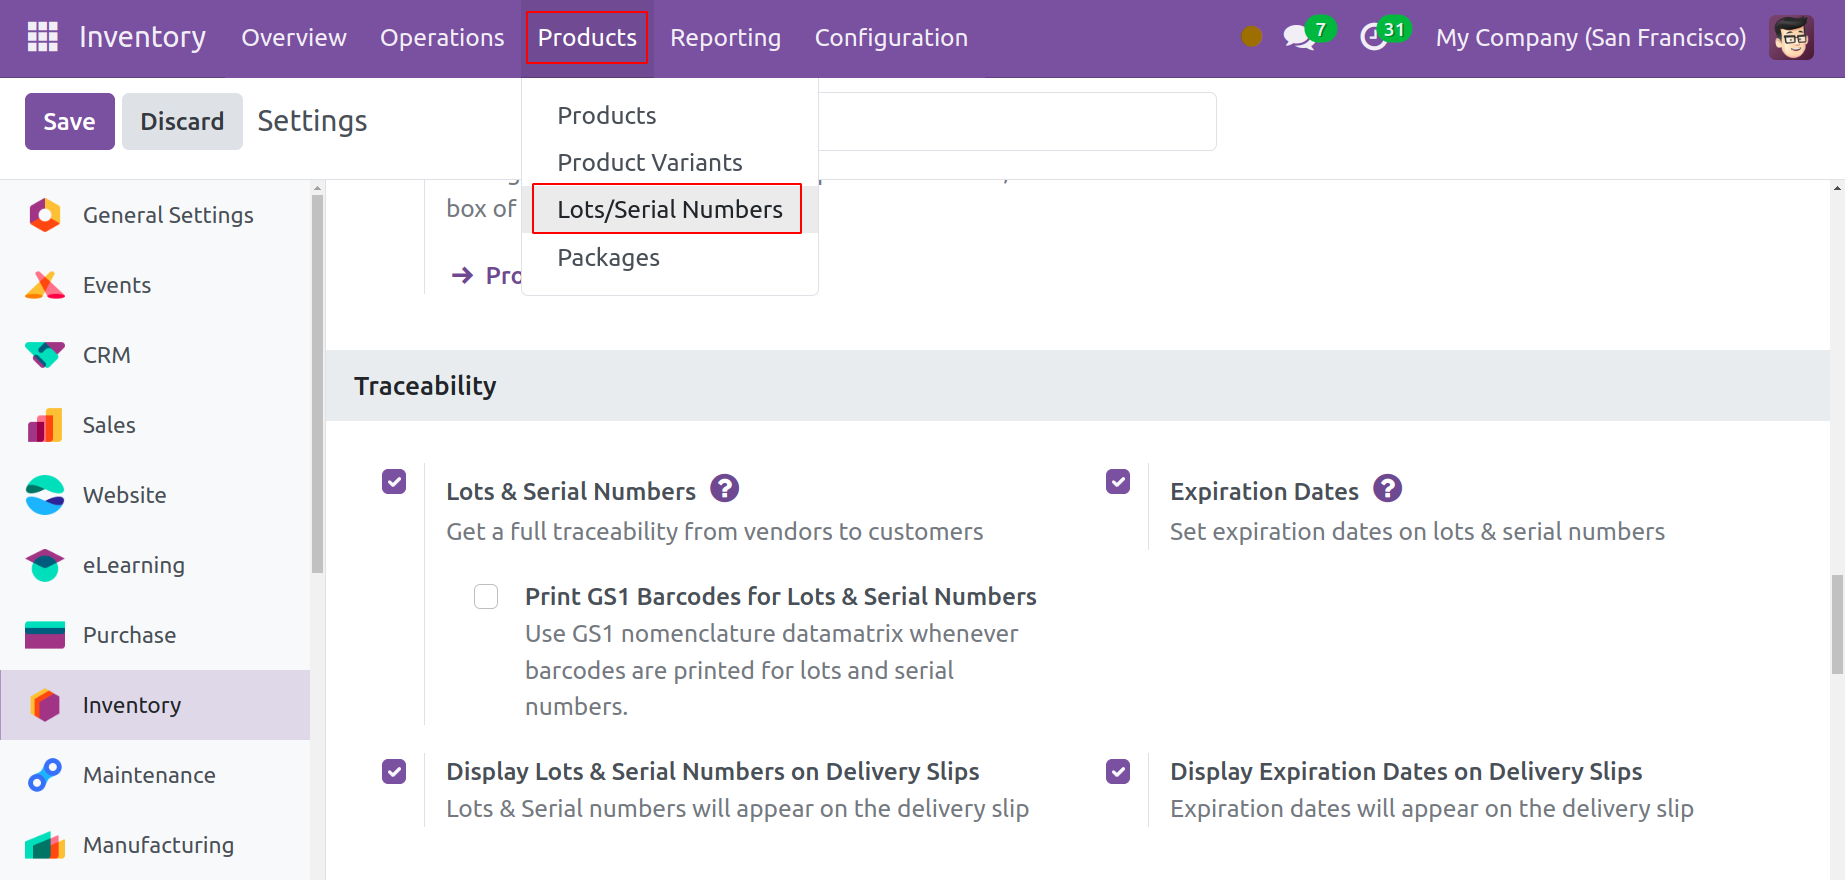
As seen in the figure below, the Inventory module's Products menu has the relevant sub-menu that you can access once you activate this functionality.
This is the pre-configured list of lots and serial numbers. Details about the product, creation date, company, internal reference number, lots/serial number, and product will be available in the list view.
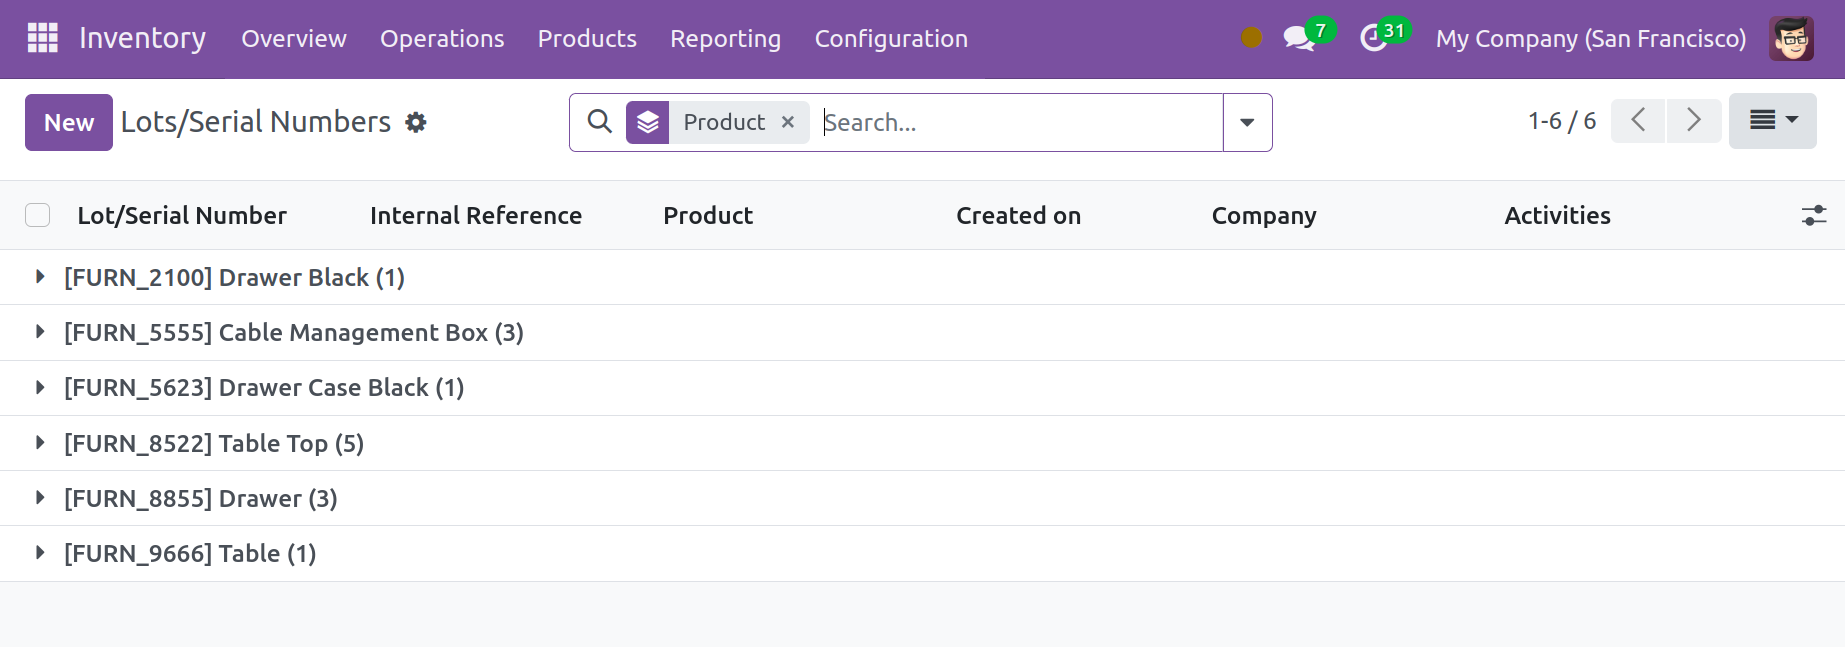
You can use the New button to create new Lots/Serial Numbers. This will take you to a form window where you can configure a new lot/serial number, as illustrated below.
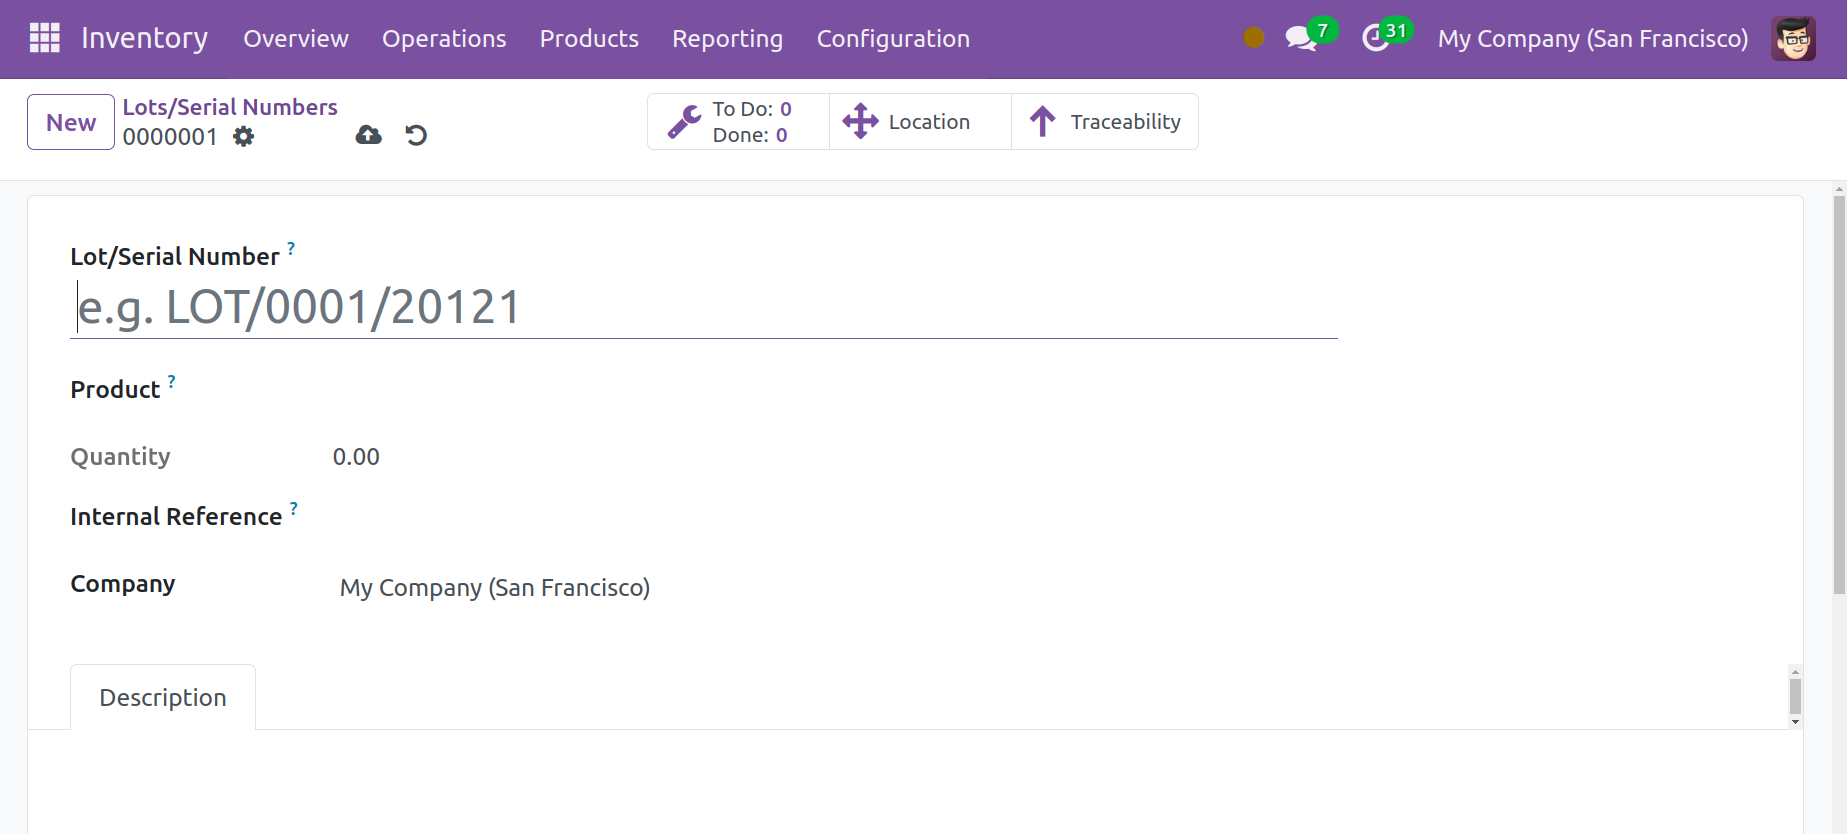
You can include a product's unique lot or serial number in the designated space. The Product field allows you to specify the matching product. Once you mention the product, the quantity that is currently in stock for that product will show up automatically in the relevant field. If the internal reference differs from the lot/serial number provided by the manufacturer, you can include it in the form. You can enter a description pertaining to this lot/serial number in the Description area after stating the Company.
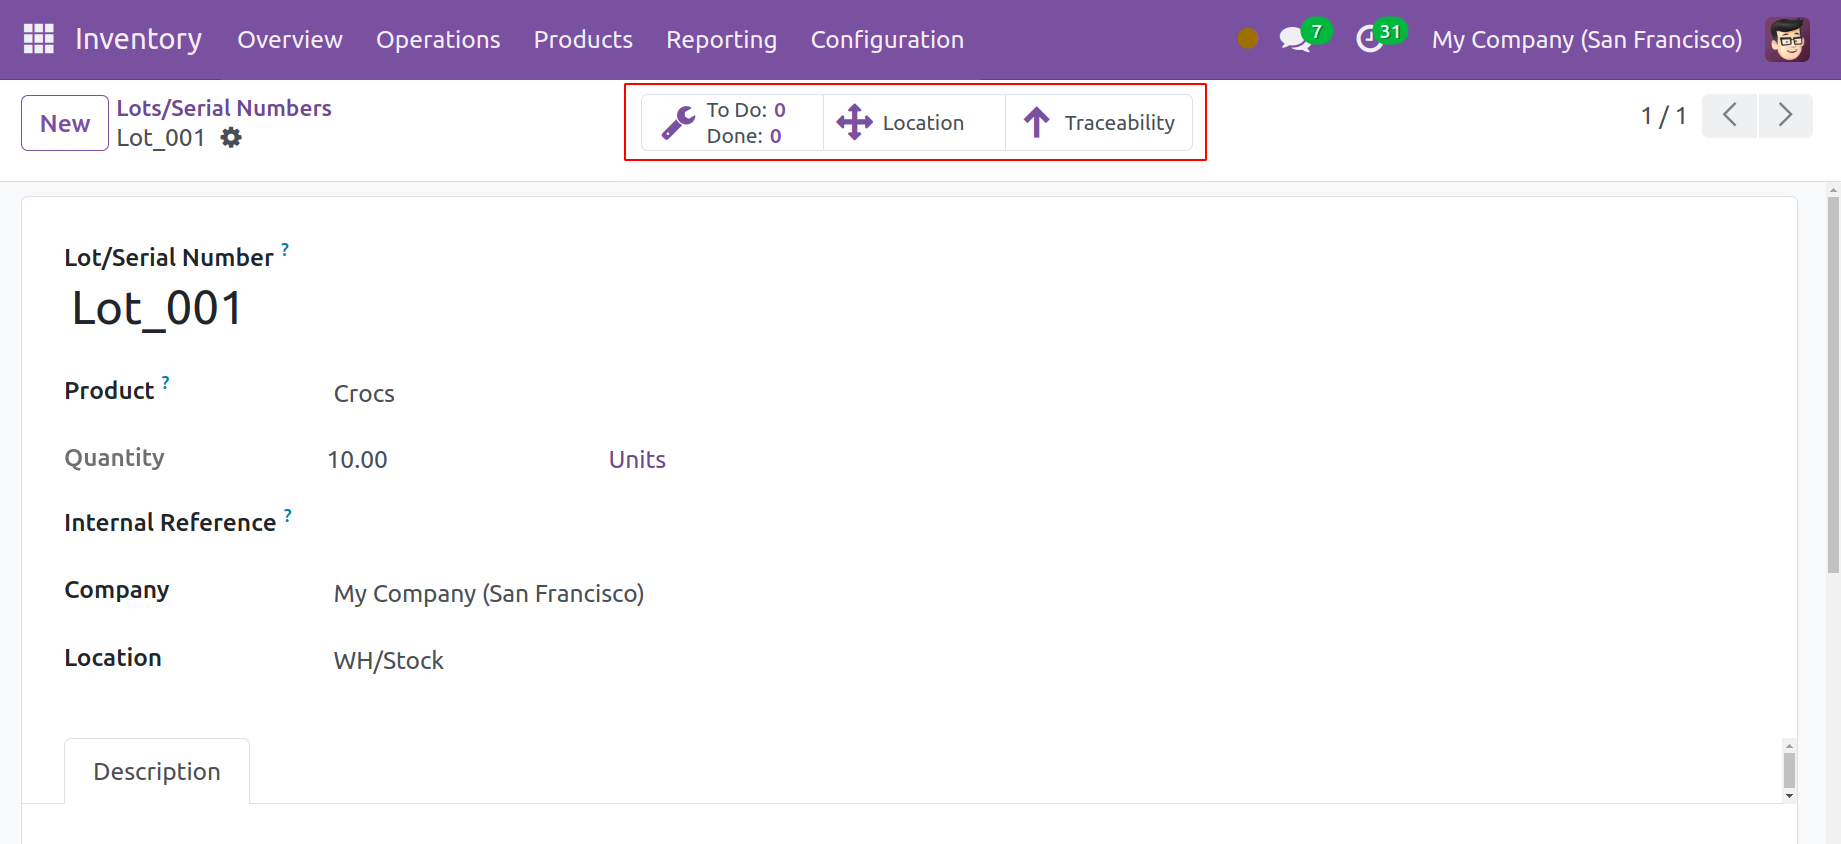
You will see the Location smart button on the screen after setting the new lot/serial number, which you may use to see where the product is located in your inventory.
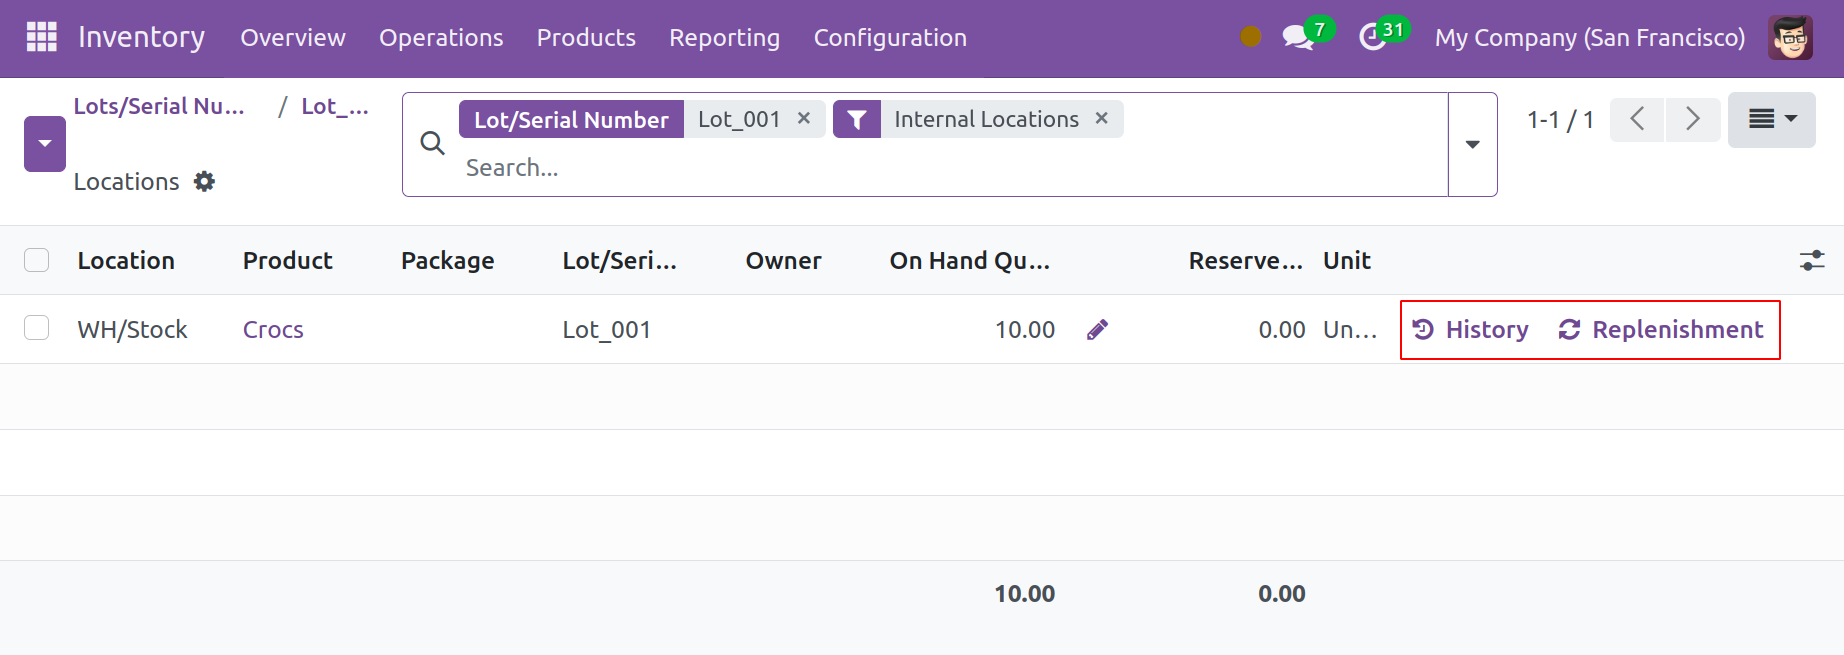
Location, Product, Package, Lot/Serial Number, Owner, Received Quantity, On Hand Quantity, and Unit data are displayed. Here, you can utilize the History button to get the movement history of this particular product. Using the Replenishment button, you can refill the product from this window. Use the Inventory at Date button to see the product's most recent inventory details.
Another useful button on the lot/serial number window is Traceability. Clicking this button will display the product's tracking report, as seen in the screenshot below.
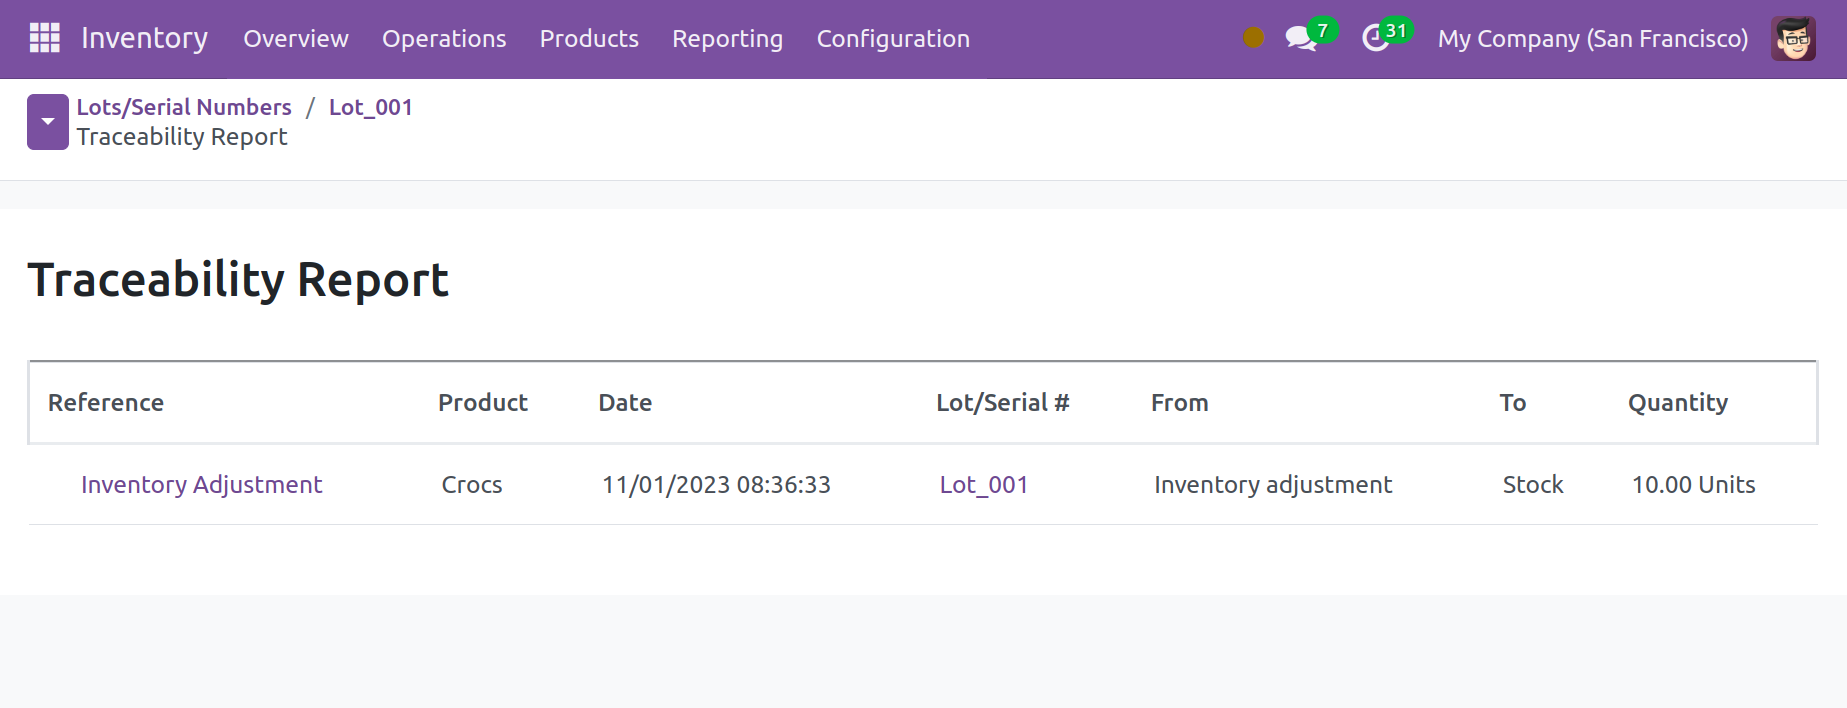
The Reference, Product, Date, Lot/Serial Number, From, To, and Quantity are displayed in this report.
Odoo 17 will let you assign a new lot or serial number to a product as soon as it is added to your inventory. On an order with a confirmed receipt, this is possible. The merchandise will arrive at your business by the specified anticipated arrival date. The purchased item is visible in the Receipt window under the Operation tab. An advanced icon to access the detailed operation window will be shown to you here.
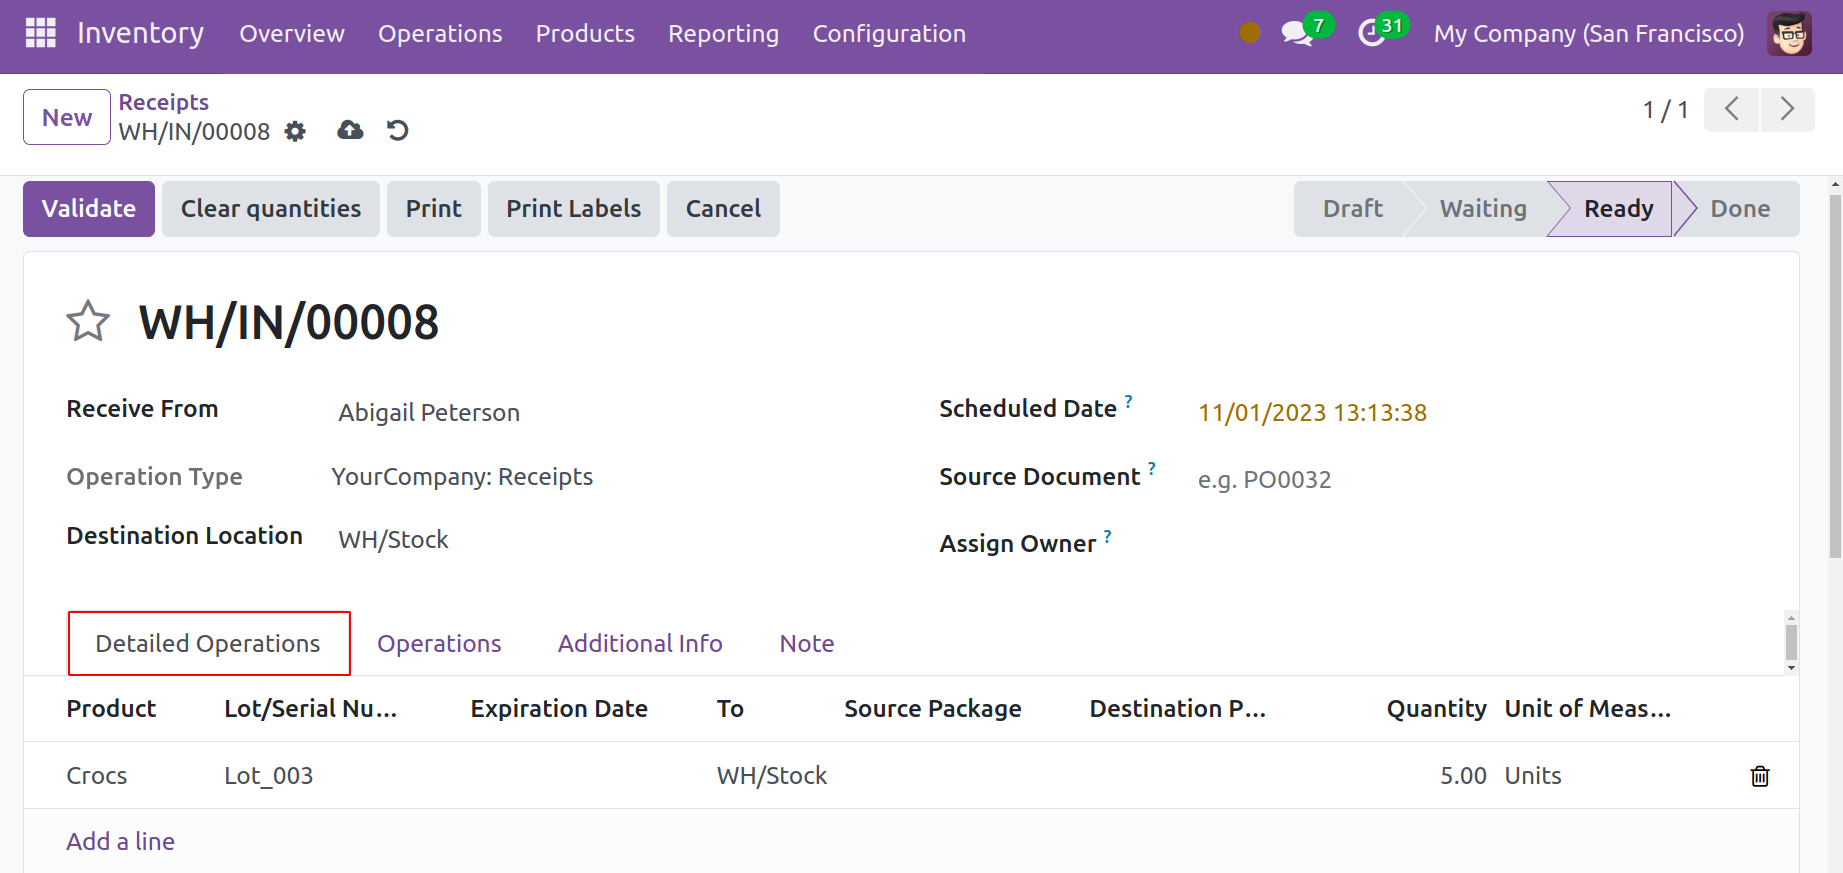
You can utilize this pop-up window to note the new product's lot or serial number. In addition, you may specify the Destination Location, which will instruct the goods to be shipped to this address as soon as it arrives at your inventory. Click the Validate button now. Upon examining the product form for that specific item, the updated lot/serial number is visible.
Choose the product from the Product menu to accomplish this.
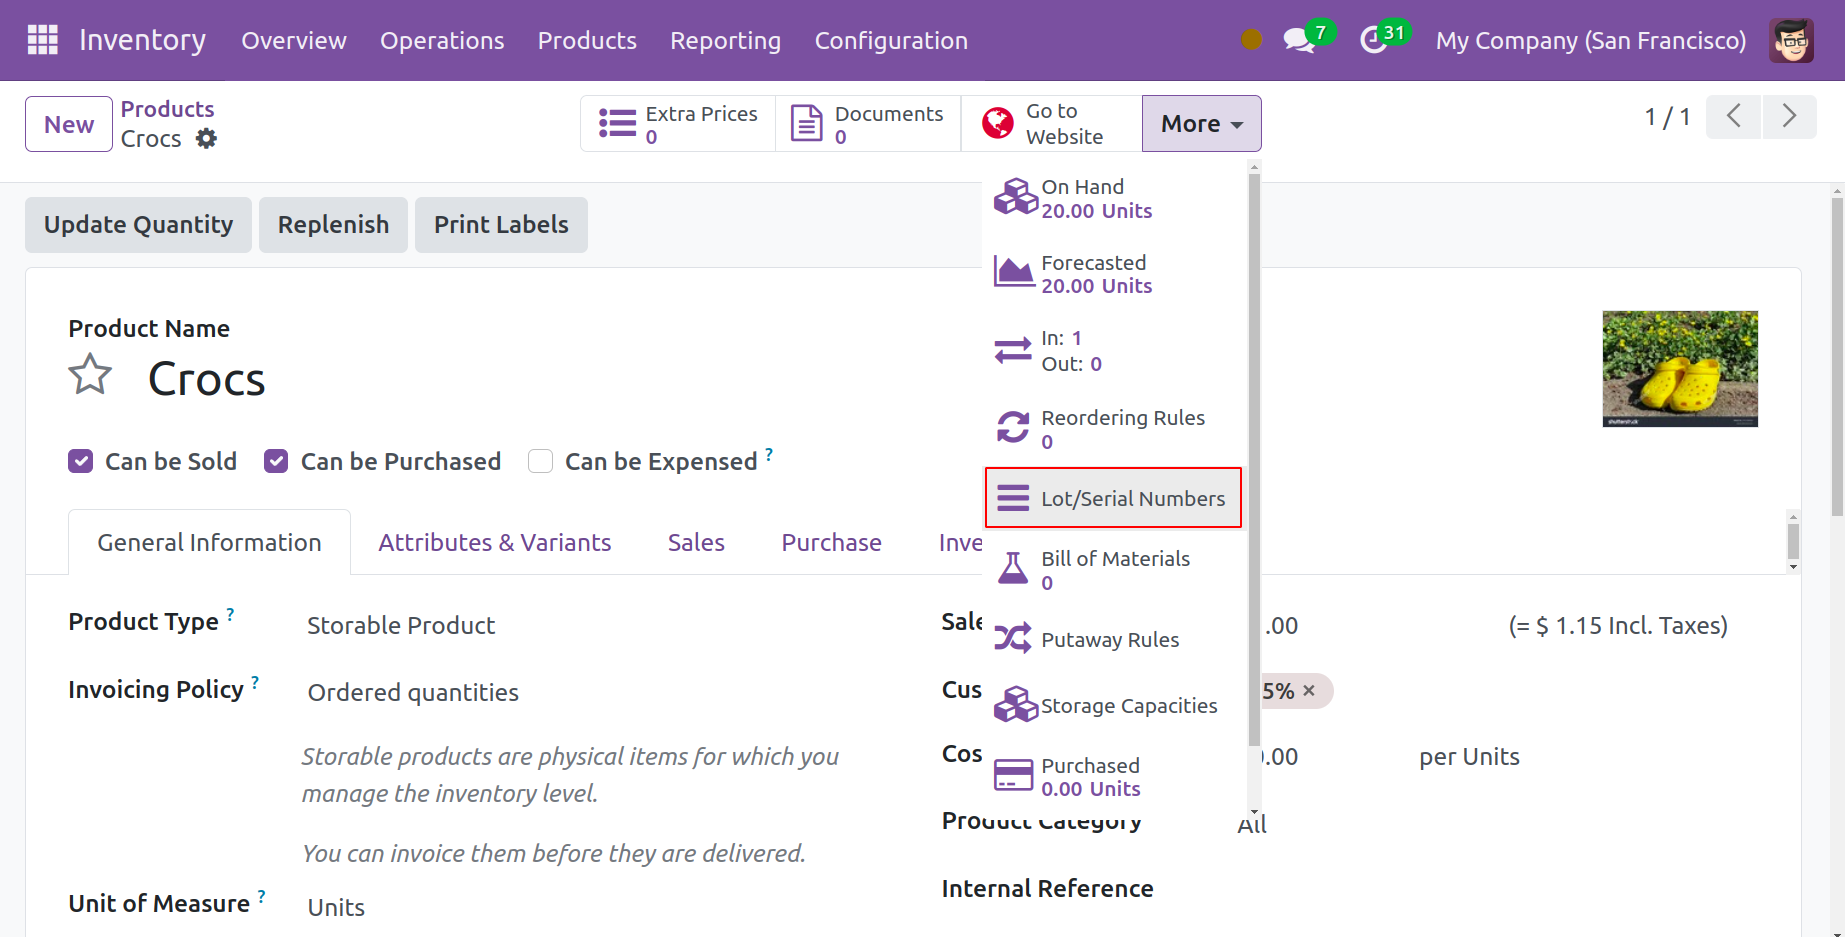
Select the Lot/Serial Number smart button. The product's new lot or serial number will be displayed in this window, just like it appears in the image.
You can enable the Display Lots & Serial Numbers on Delivery Slips option from the Traceability tab in the Settings menu to display lots and serial numbers on the delivery slips.
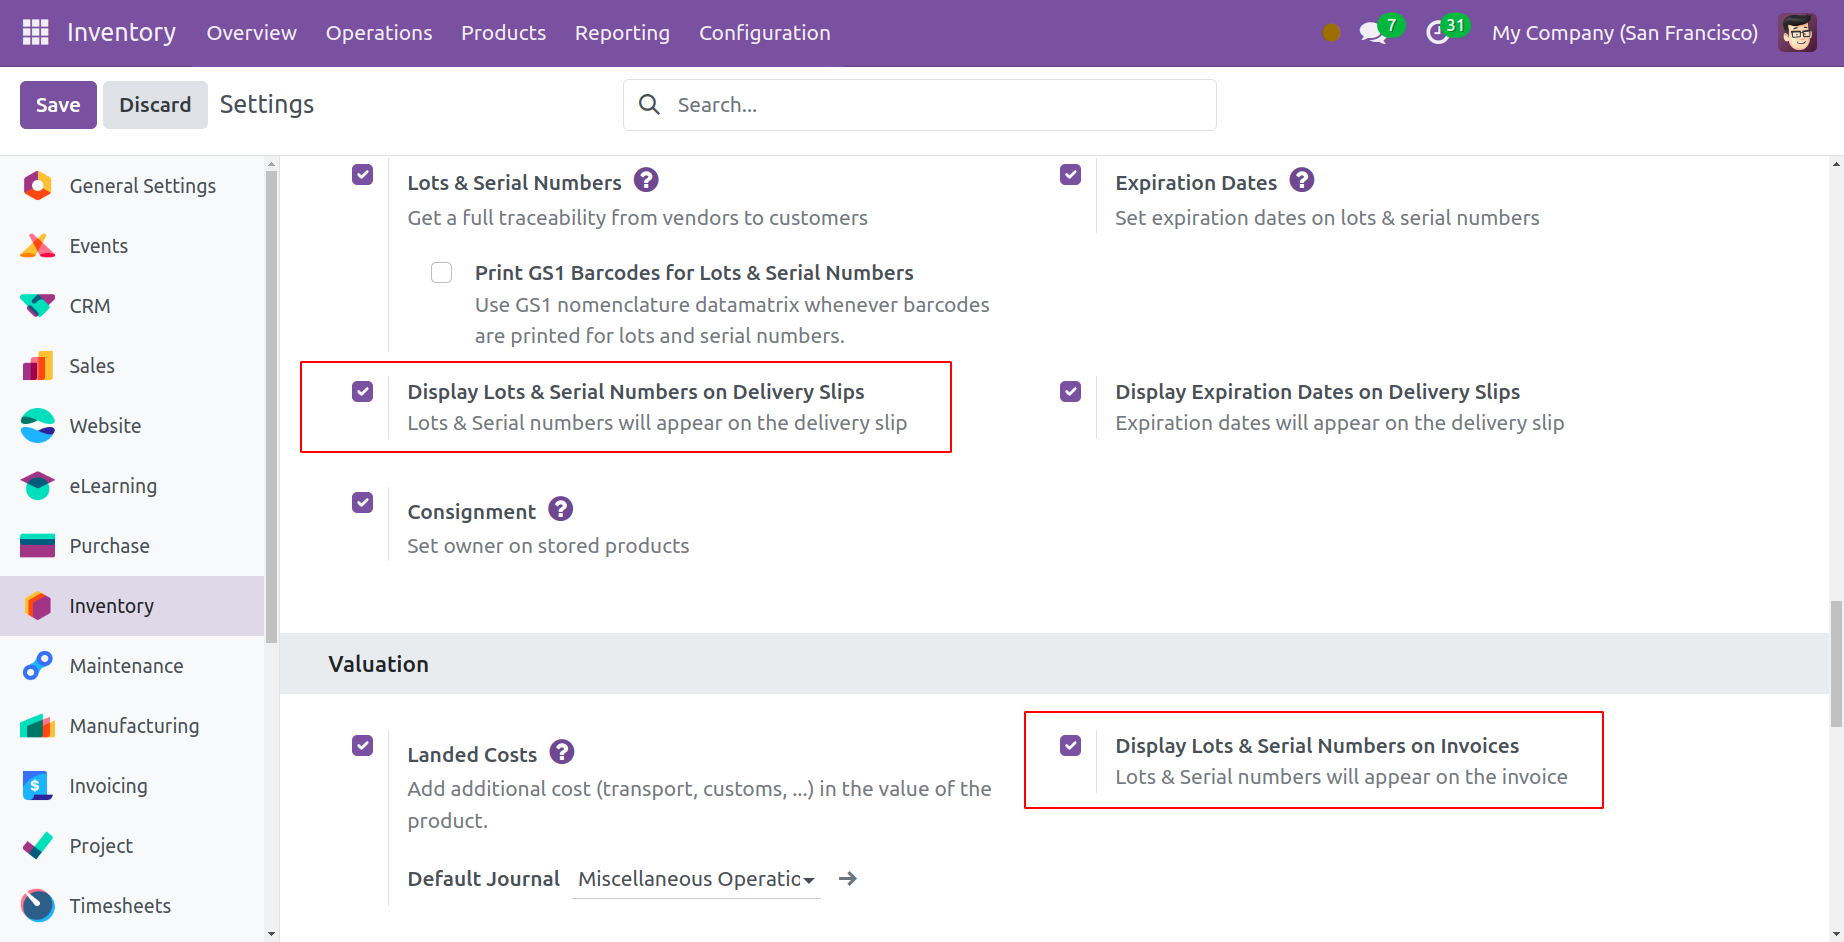
Lots and serial numbers can be seen on invoices by turning on the Display Lots & Serial Numbers on Invoices feature from the Valuation tab.
Expiration Date
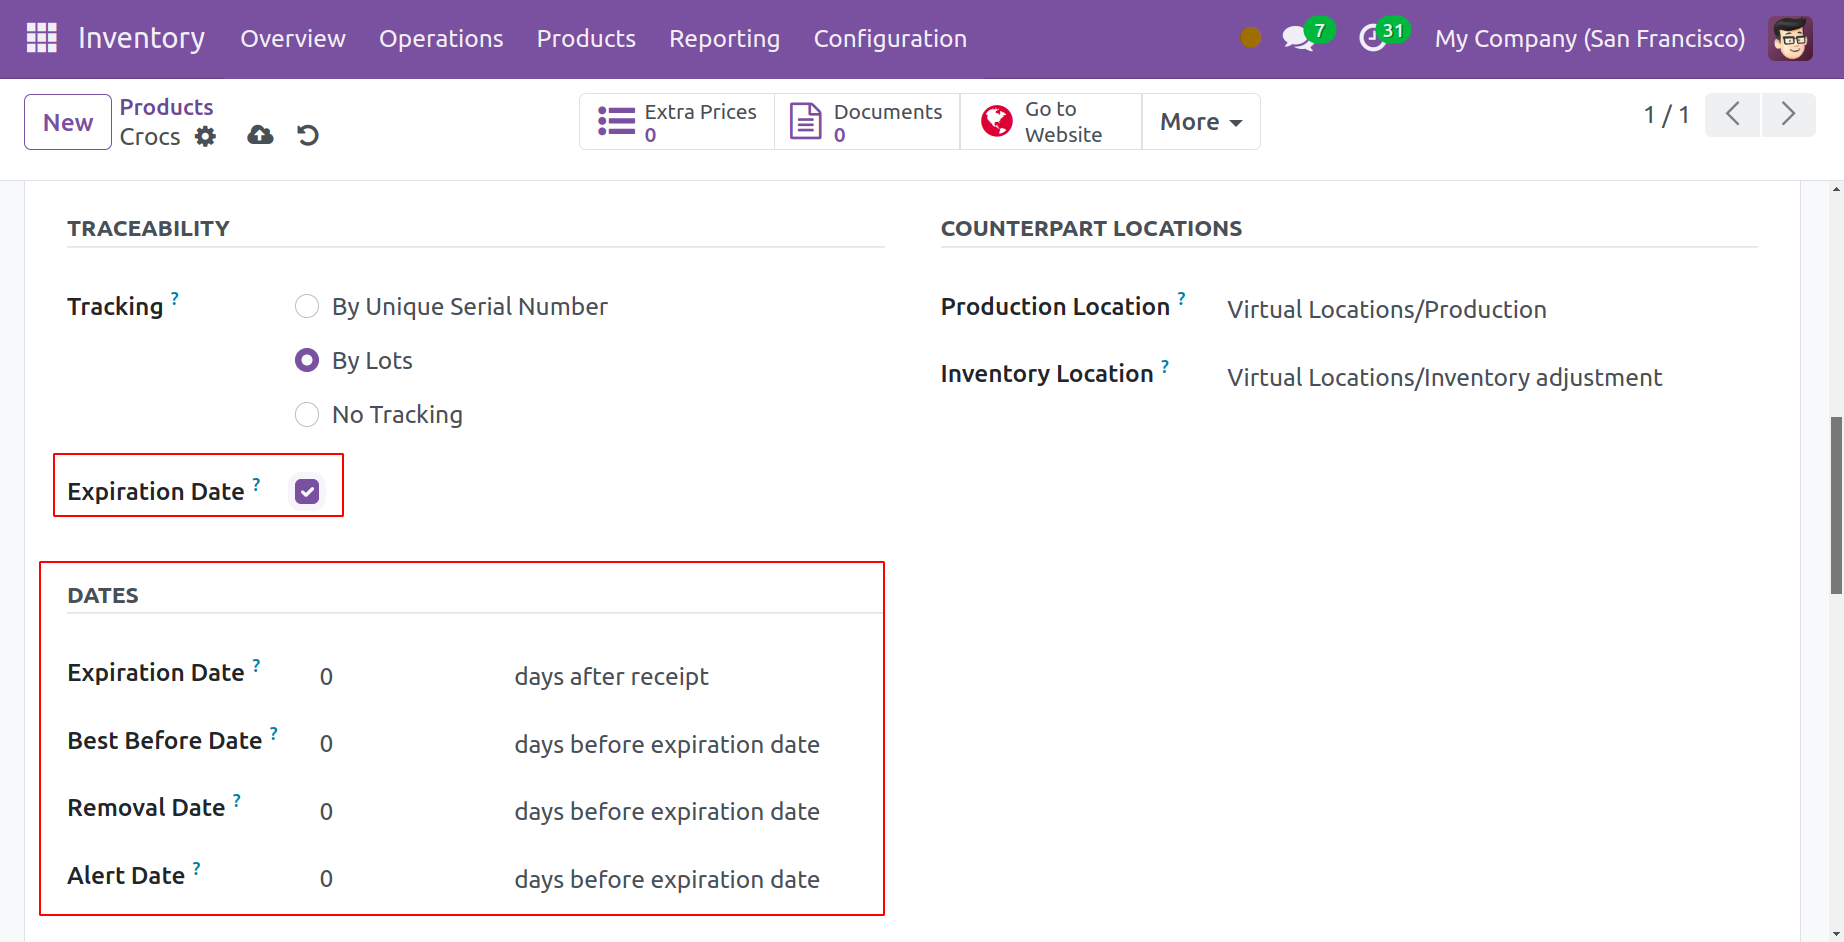
Make sure you don't send your consumers expired products if you want your business to grow and your relationships with them to remain positive. Because of this, you have to make sure your products are up to date before selling them. To display lots and serial numbers on delivery slips, turn on "Expiration Dates." The option to "Display Expiration Dates on Delivery Slips" appears after you enable the latter. To activate it, tick the box next to it.
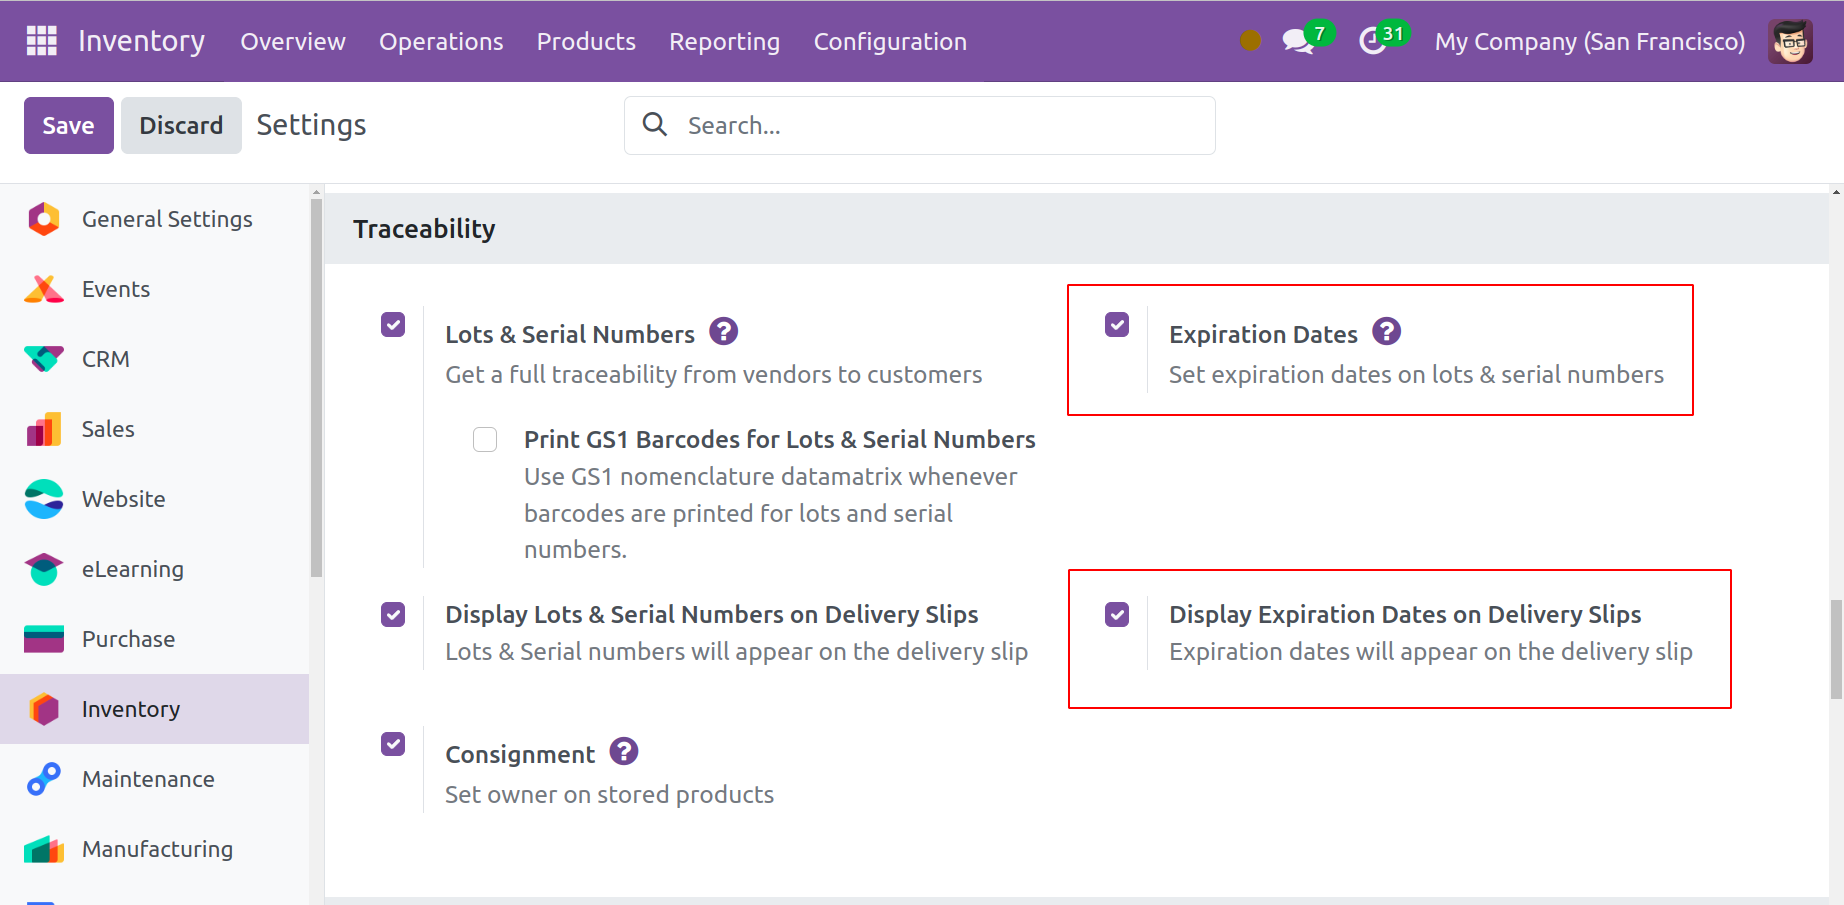
Go to the form view of any product and enable the Expiration Date option under the Inventory tab to set a product's expiration date. It will be followed by new fields where you can input expiry details.
