Fleet Management
The system used by a firm to oversee and control its fleet of commercial vehicles is
known as fleet management. You may manage all processes related to repairs and other
maintenance tasks with the aid of this module. You can handle this process with ease if
you use Odoo ERP. This module allows you to save data on the number of cars, mileage,
driver information, expenses, and fuel used, and it also displays the current status of
each vehicle.
You can view every configured vehicle list, including New Request, To Order, Ordered,
Registered, Downgraded, Reserve, Waiting List, and so forth, by selecting the Fleet
Module. You will be able to create new stages for that specific vehicle by selecting the
Add a Column option, as shown in the screenshot below.
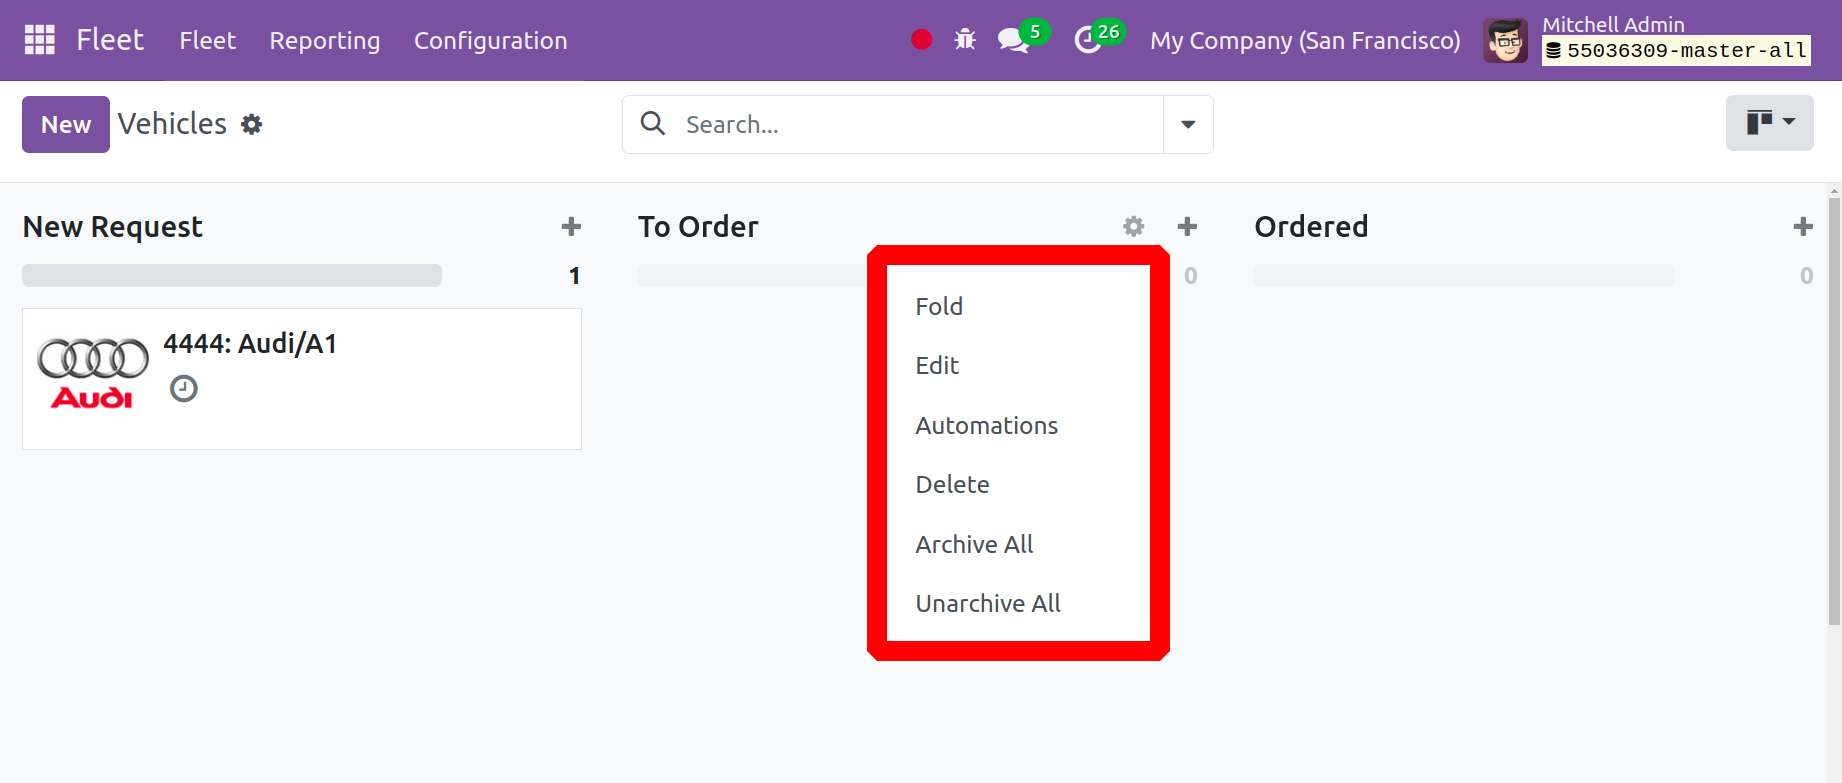
You can choose to Fold the stage to Kanban, Edit the stage, Delete,
Archive, and Unarchive by clicking on the settings button that appears in
each step. Set Automation rules using the settings.
In addition to the Kanban view, you can also see the page in List and Pivot. You may also
add a new car either by using the + icon or by using the New button. We can
quickly construct new vehicles by selecting the construct icon.
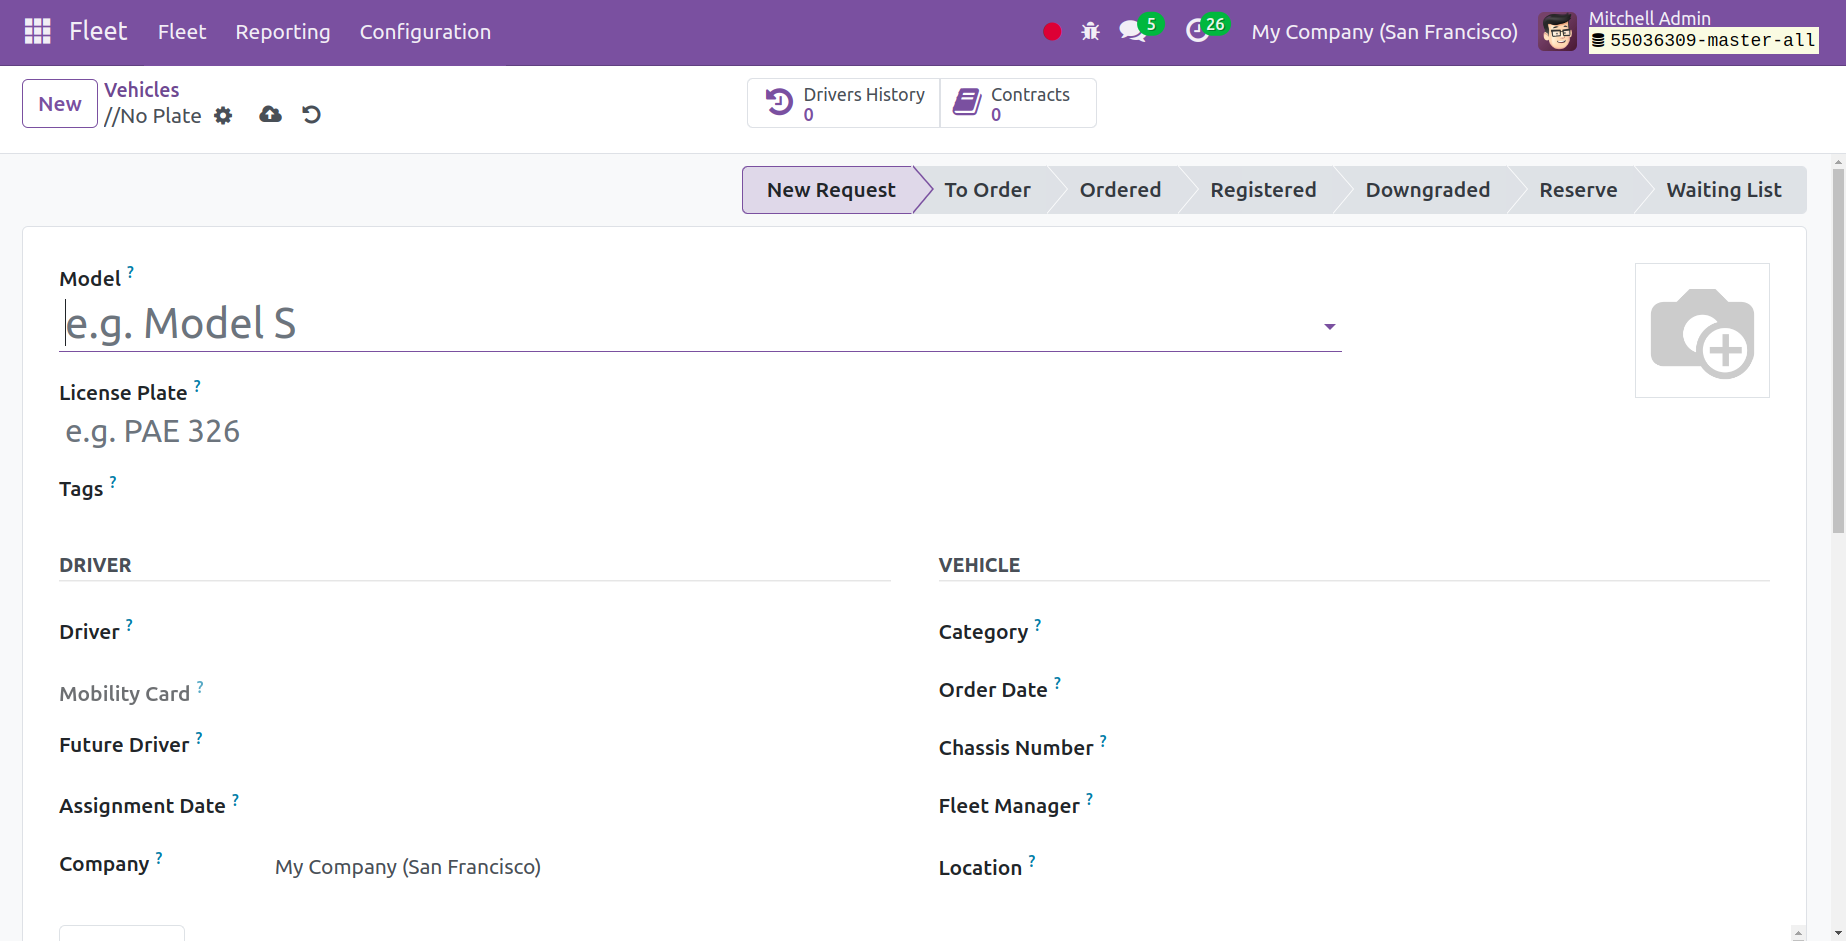
You can enter the number plate number and the model of the car in the designated spaces
on the creation page. You need to enter the future driver's address and name under the
DRIVERS Tab. You must enter the date of the vehicle's availability in the
Assignment Date field. The absence of a date denotes the vehicle's immediate
availability.
If the car can fit in the designated slot, the Chassis Number will be visible under the
VEHICLE Menu. Enter the name of the designated employee in the Fleet Manager
field. Enter the appropriate info in the fields for Location and Company.
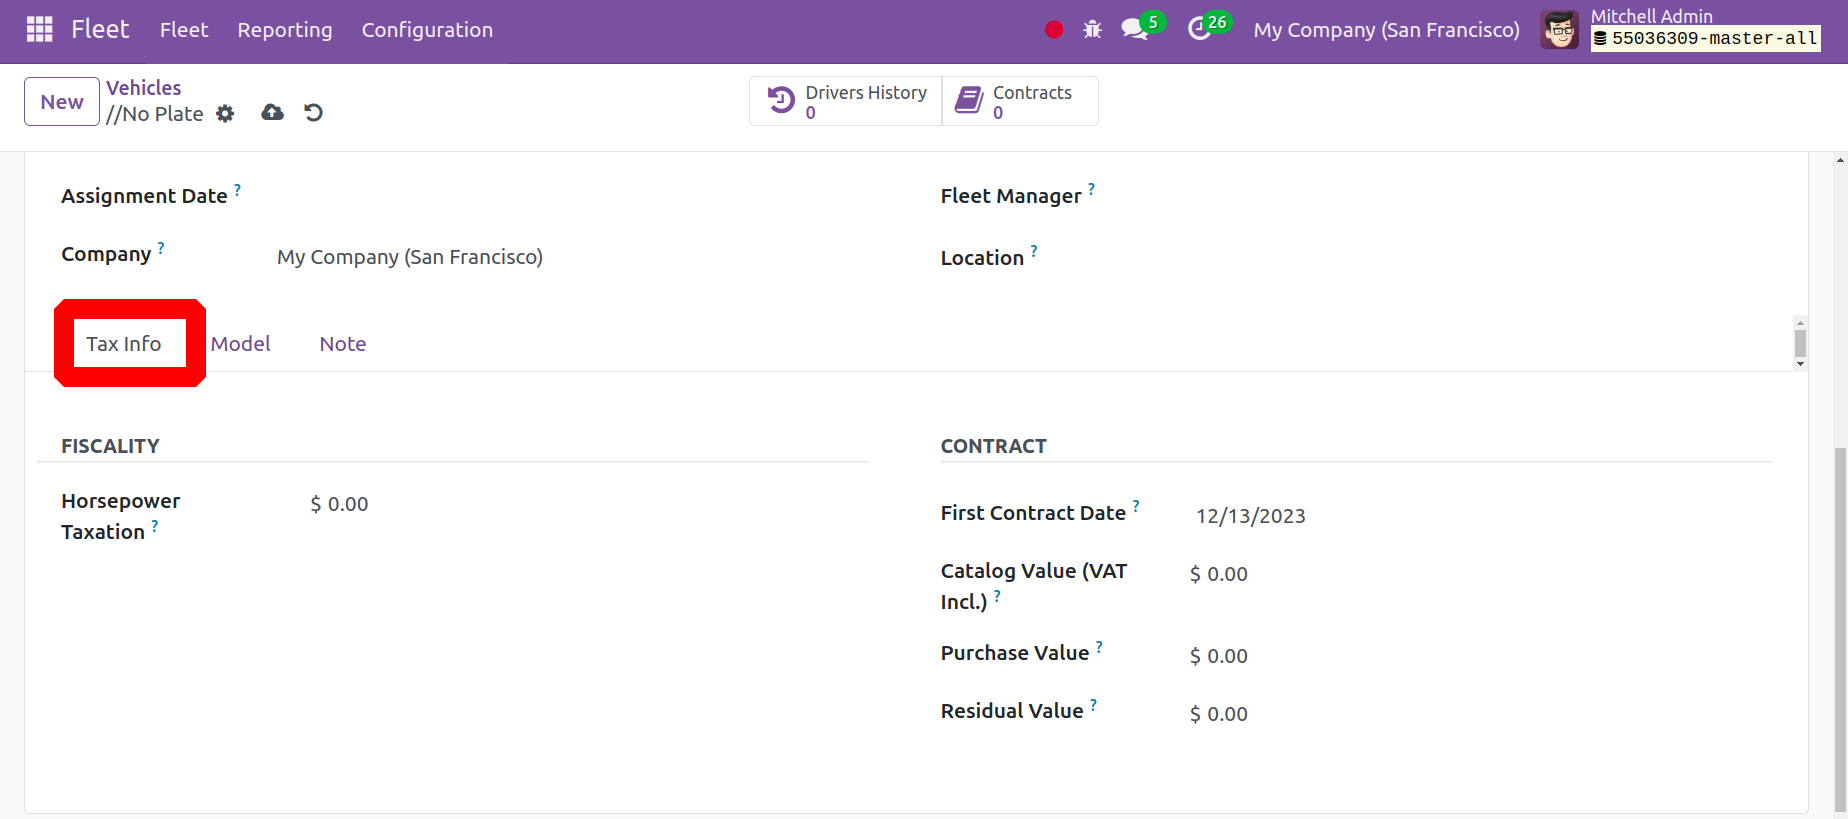
You can select the Horsepower Taxation option beneath the Fiscality option on the Tax
Info Tab. The first contract date, the vehicle's worth as listed in the catalog,
the purchase value, and the residual value are all required to be provided under the
Contract option.
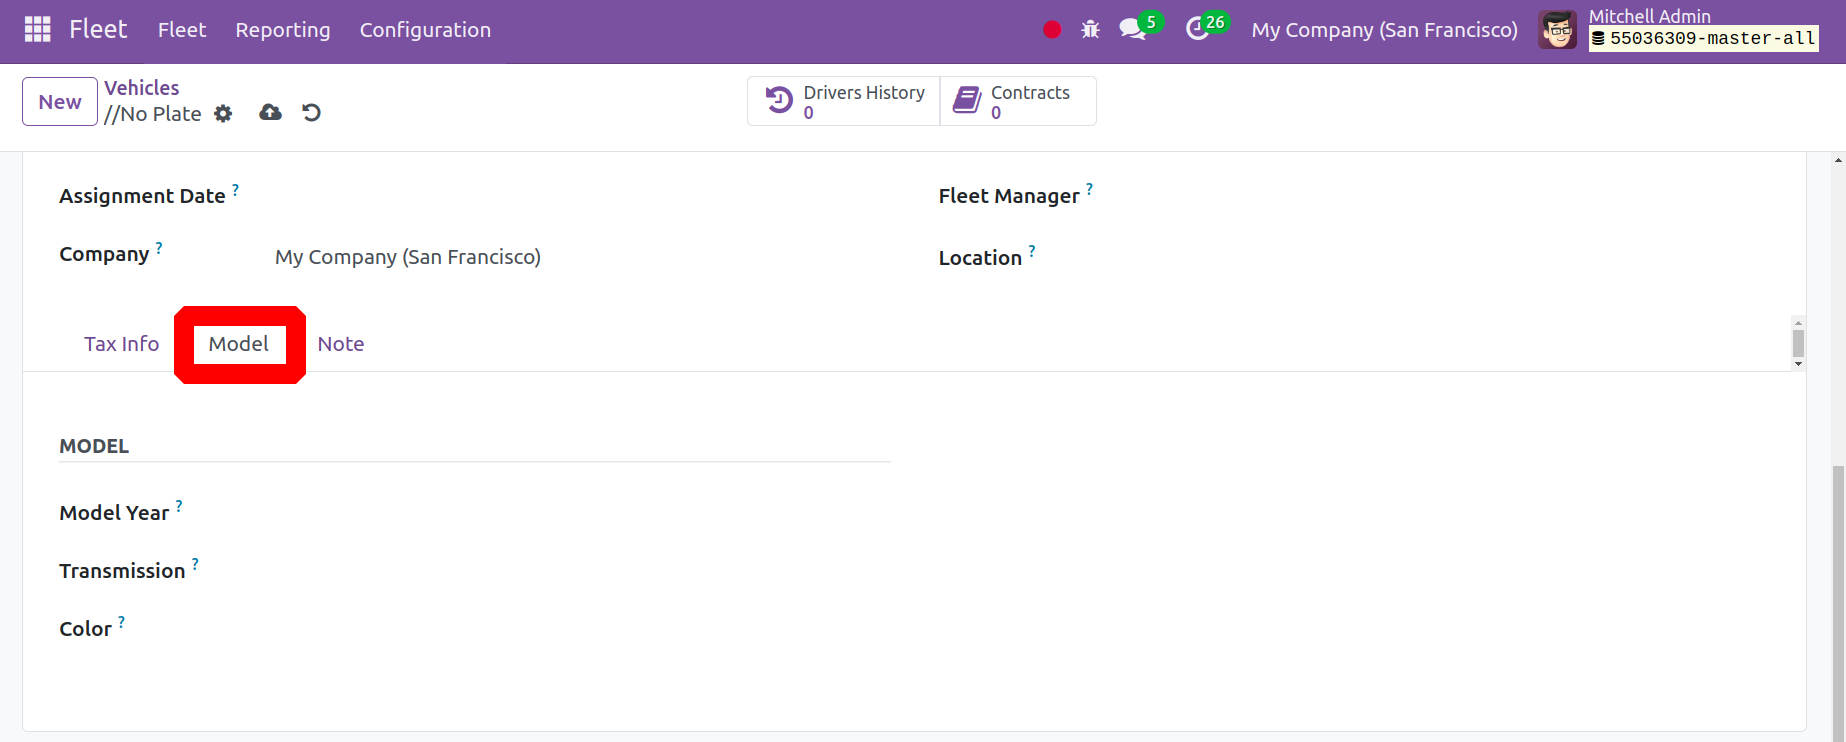
Within the Model Tab, you can specify the vehicle's color, model year, and gearbox
type under the Model option. You can list the vehicle's horsepower, power in kW, fuel
type, CO2 emissions, and CO2 standards beneath the Engine option.
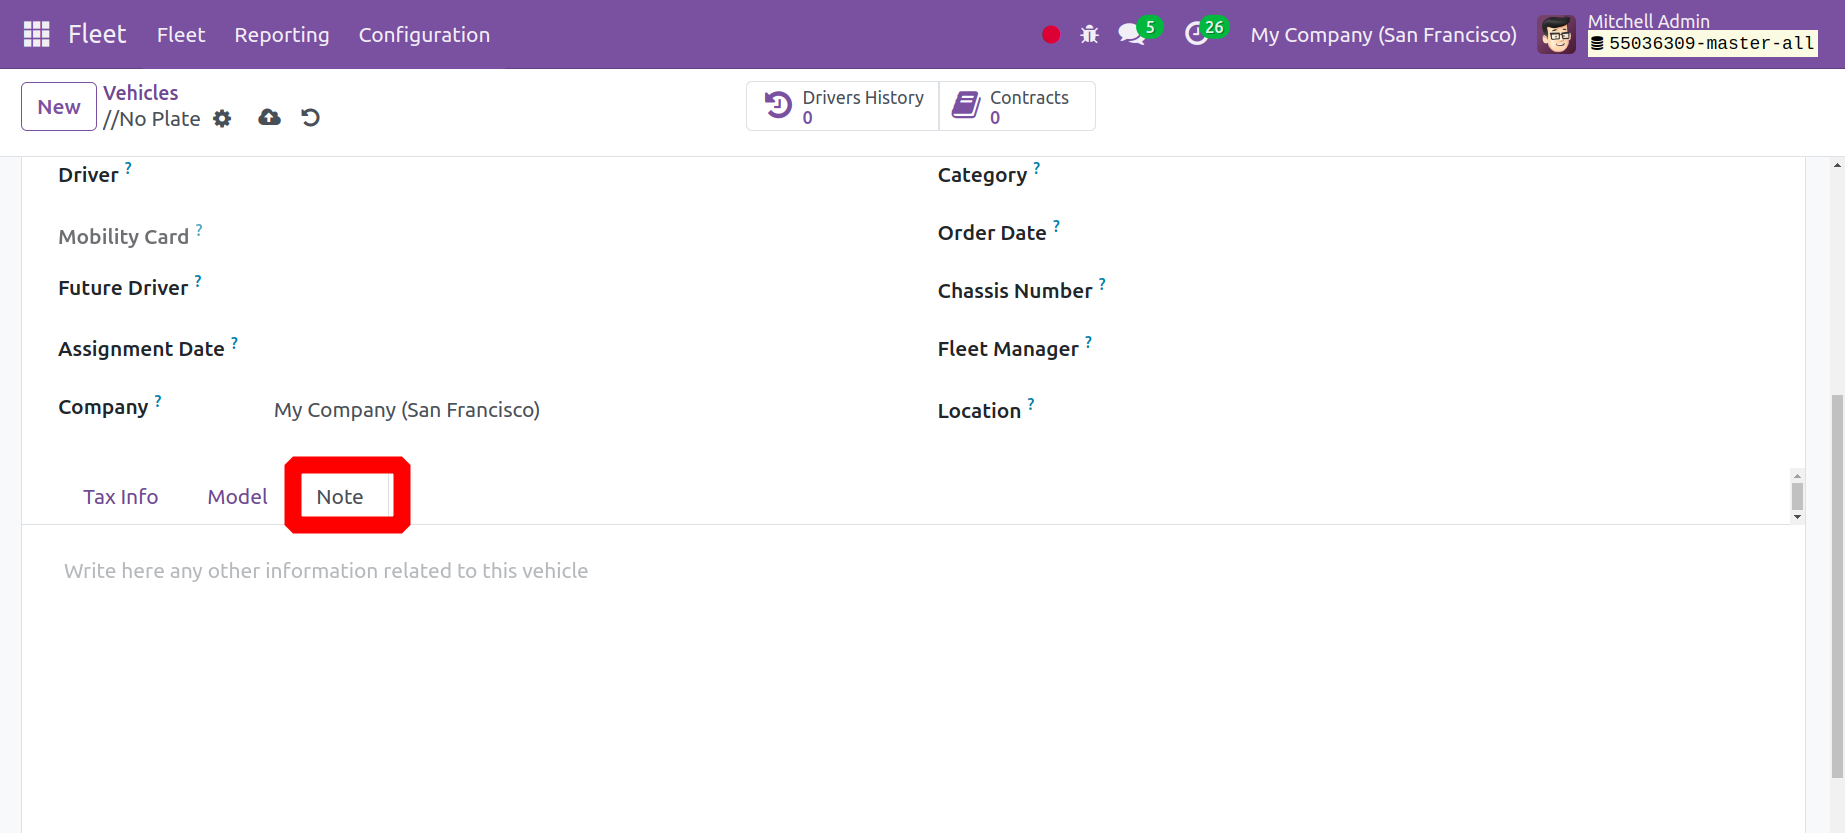
You may add a more detailed description of the car under the Notes Tab. Lastly, select
the Save icon.
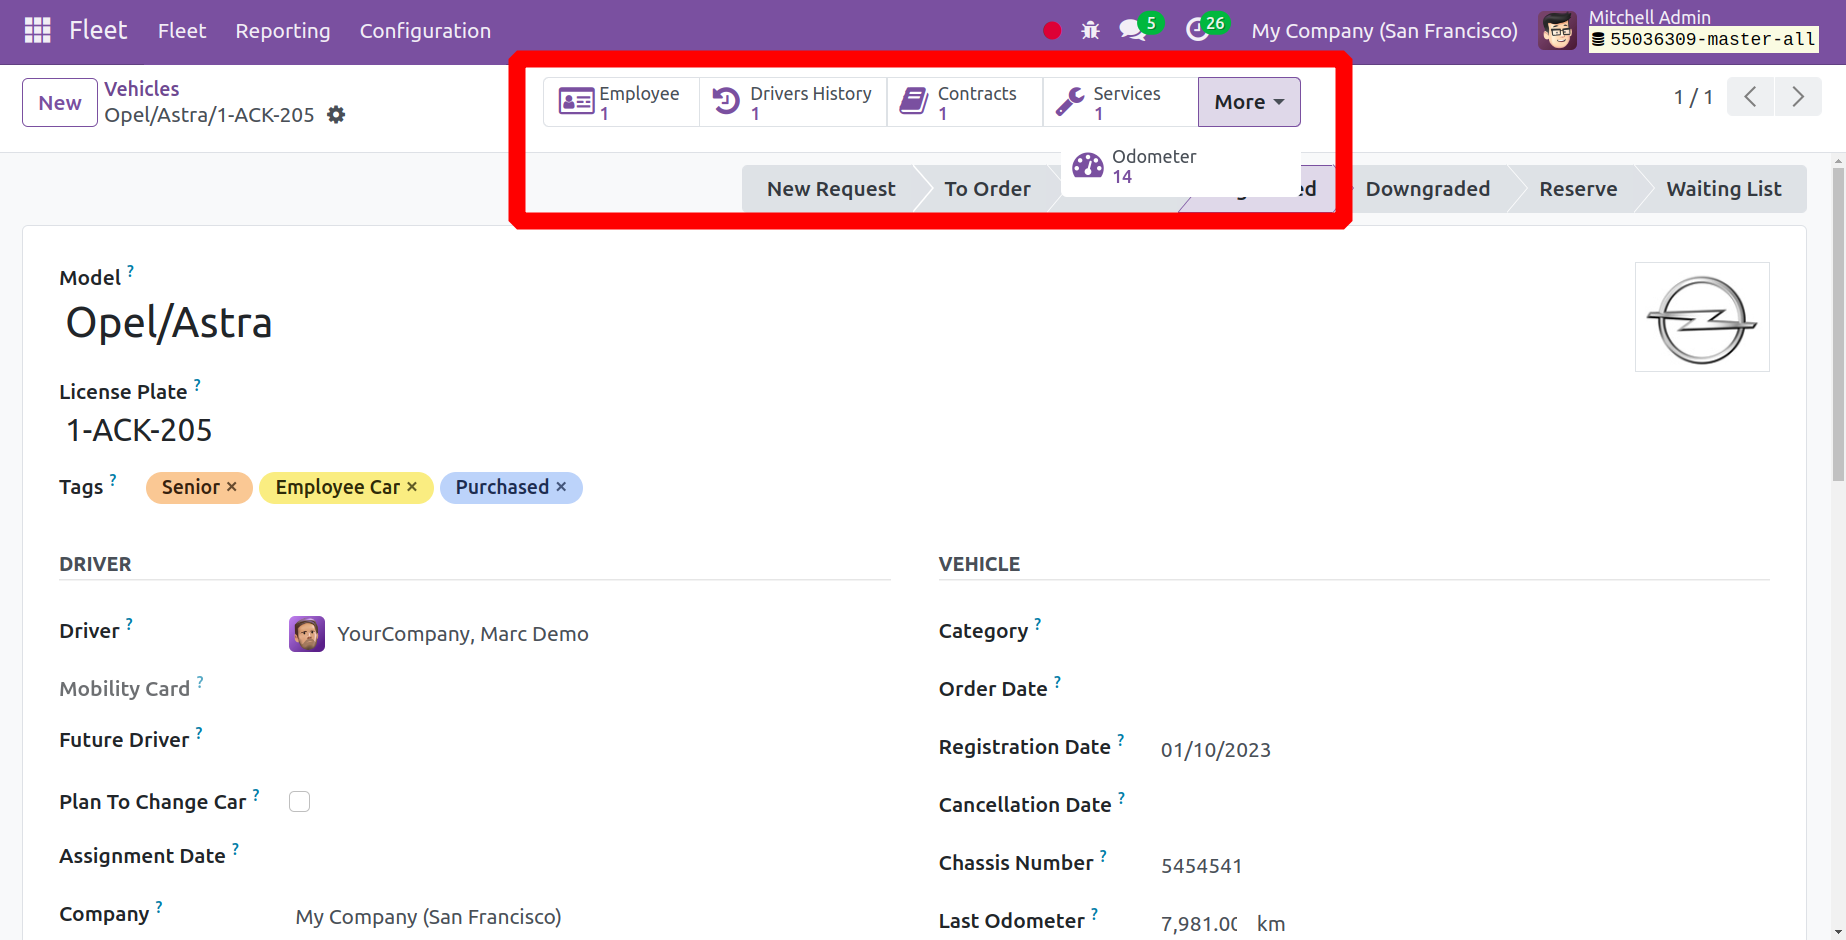
You will be able to access several advanced capabilities after saving the details, as
shown in the image below. You can find the driver's history under Driver's
history. You can access the contracts created for this car by selecting the
Contracts option. You can see the service logs assigned to that specific car
under the Service option and the vehicle's odometer logs under the
Odometer option.
These are the actions that need to be taken for the vehicle's contract management.
Contracts
You can maintain the data and make changes to the vehicles that are already configured by
using the Contracts option. As seen below, the option will be accessible through
the Fleet Menu.

The contract name, contract start date, contract expiration date, vehicle name, vendor
information, driver, cost for recurring, frequency of recurring costs, and contract
status are all listed on this page. The page is visible in Activity, Graphical, Pivot,
and Kanban views. Go to the New symbol to create a new contract.
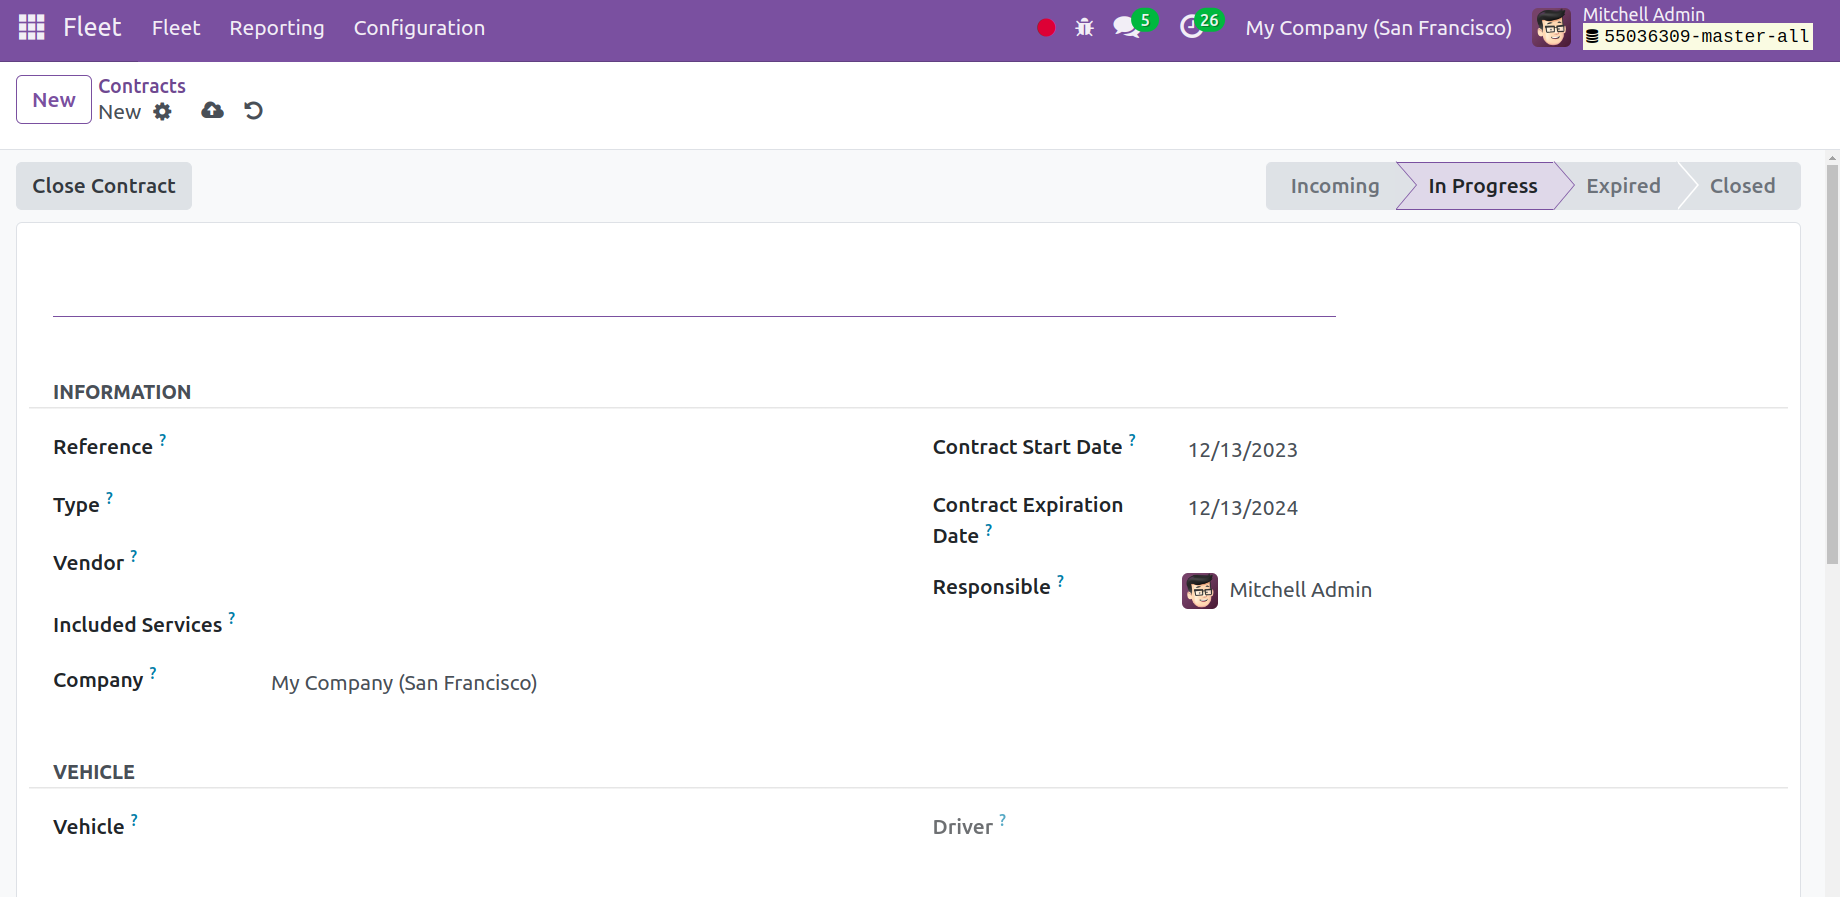
You must enter the contract details on the creation page, including the name of the
company, the vendor, the reference, the cost of recurring, the type of cost that is
purchased using this type, and the employee who is in charge. To ensure that the price
is paid just once during the establishment of the contract and that the recurring cost
is also included, the cost of activation can be entered in the Cost of Activation field.
You can describe the car and the driver under the Vehicle Information Tab.
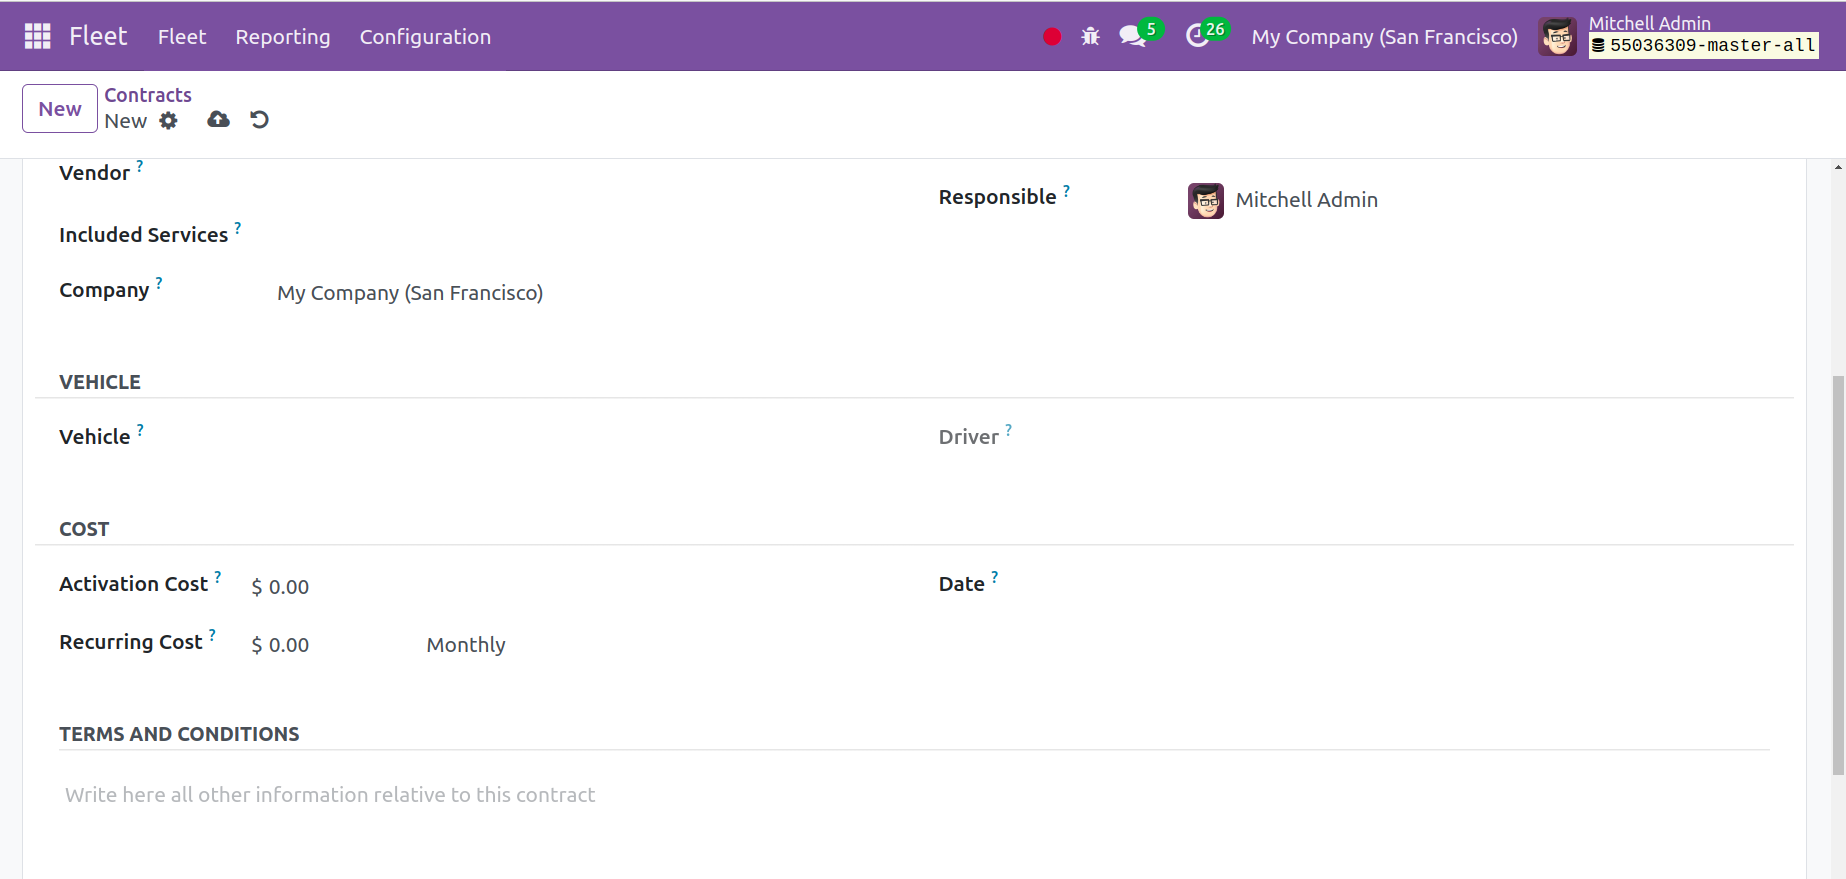
It is simple to add additional contract-based information underneath the Terms and
Conditions option. Lastly, select the Close Contract menu item.
Services
Using the Service option offered in the Fleet management module, the vehicle's
services can be viewed and adjusted. As seen in the illustration below, the Fleet Menu
will have the Service option available to you.
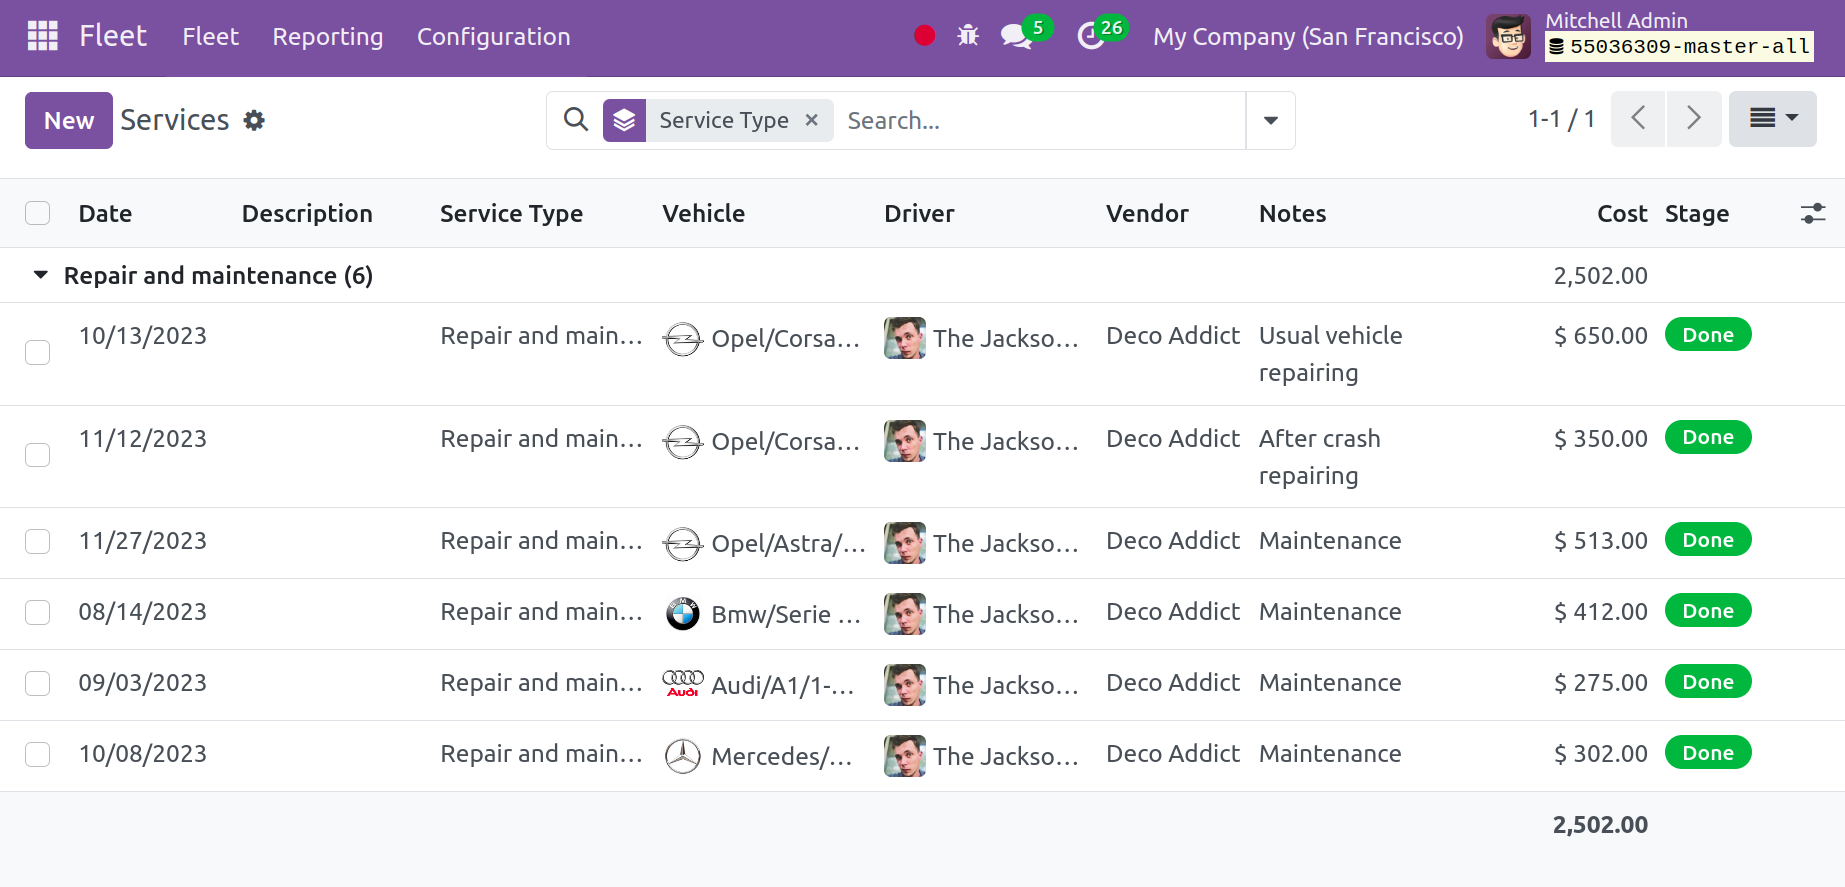
This is where you will see all of the previously created services, along with their
specifics, like the service date, description, type of service needed, vehicle name,
driver name, vendor, additional notes, and current service status. The page is displayed
in graphical, list, pivot, and kanban views. Go to the New button to perform a
new service on the car.
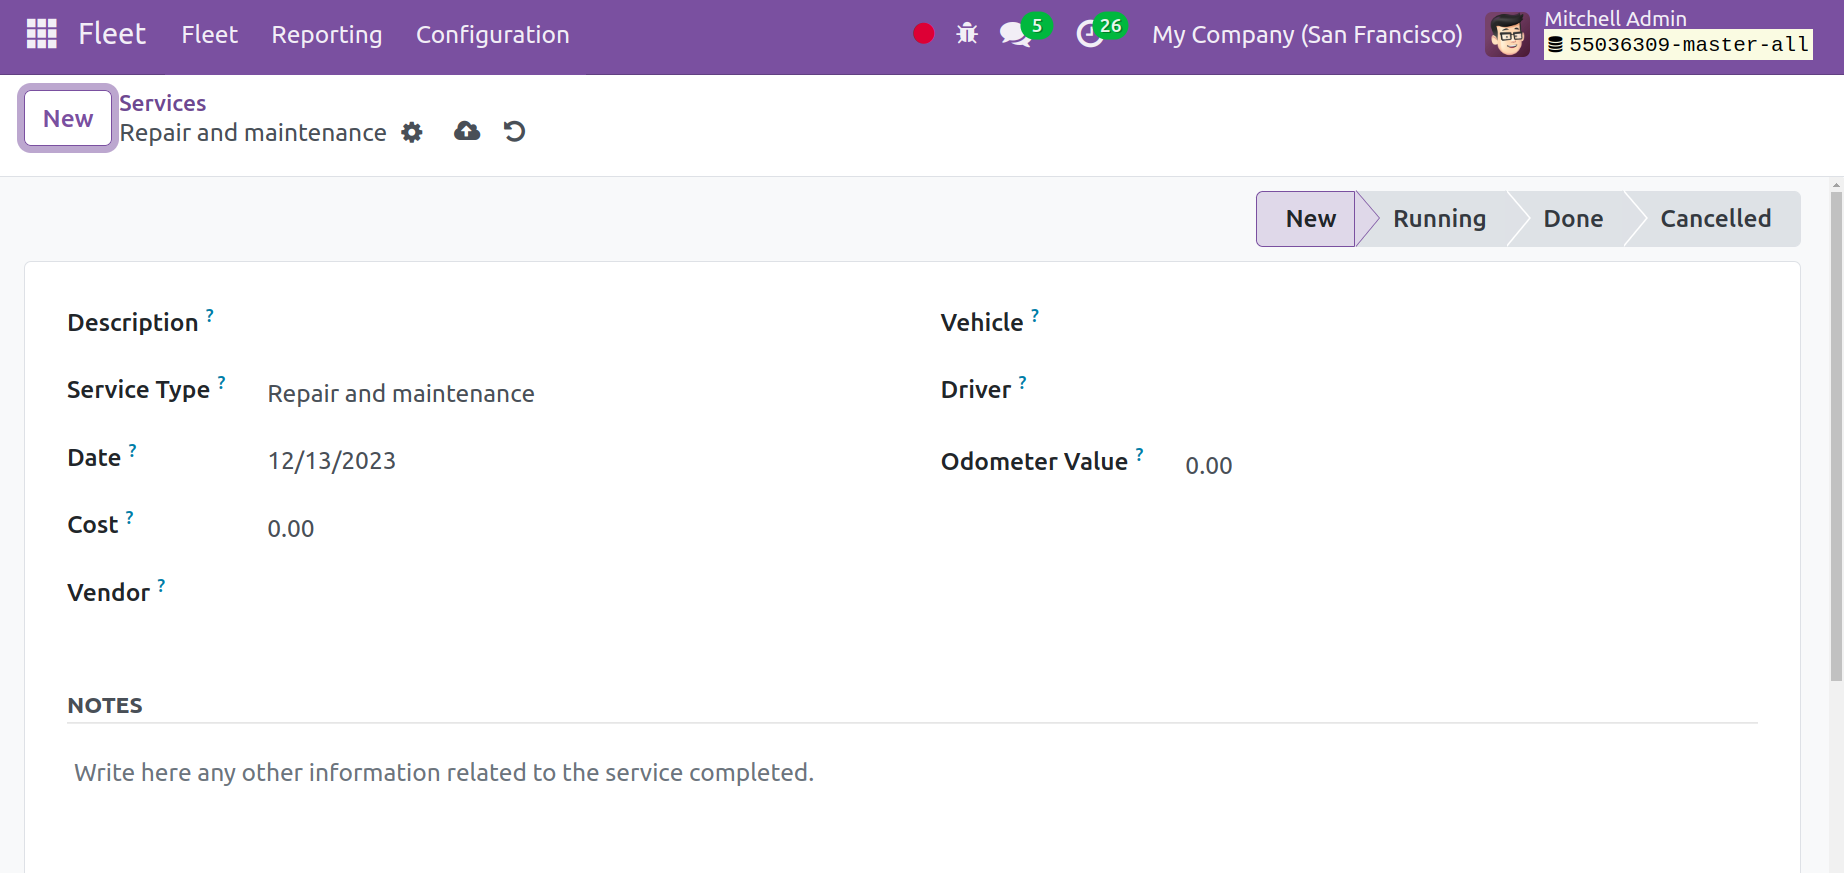
You can provide specifics on the service creation page, including the type of service,
the name of the vehicle, the driver, the date of execution of the cost, the vendor, and
the odometer value. You can provide information on the vehicle's service underneath the
Notes tab. Lastly, click the "Save" button.
Odometers
You can record the reading of the vehicle's meter by using the Odometer option found in
the Fleet Menu.
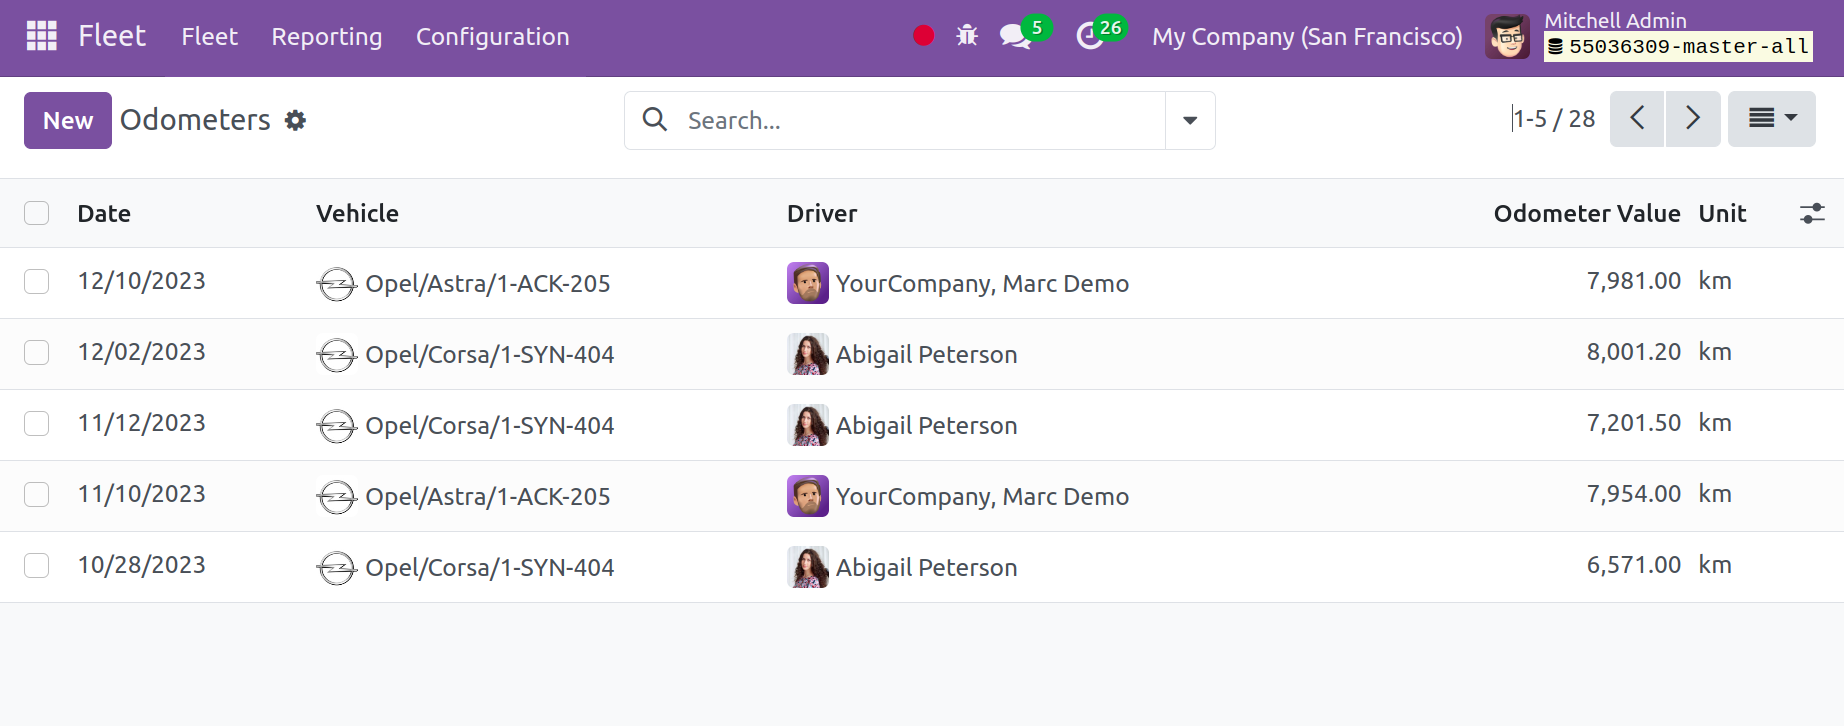
You may find details on the page, like the date, the name of the car, the driver's name,
the odometer value, and the unit. You only need to click the New icon and provide
the required data to create this kind of odometer record.
Manufacturers
The Manufacturers option, found in the Configuration menu, aids in creating
new manufacturers or brands for automobiles. The page will display the manufacturers who
have already been created, as indicated below.
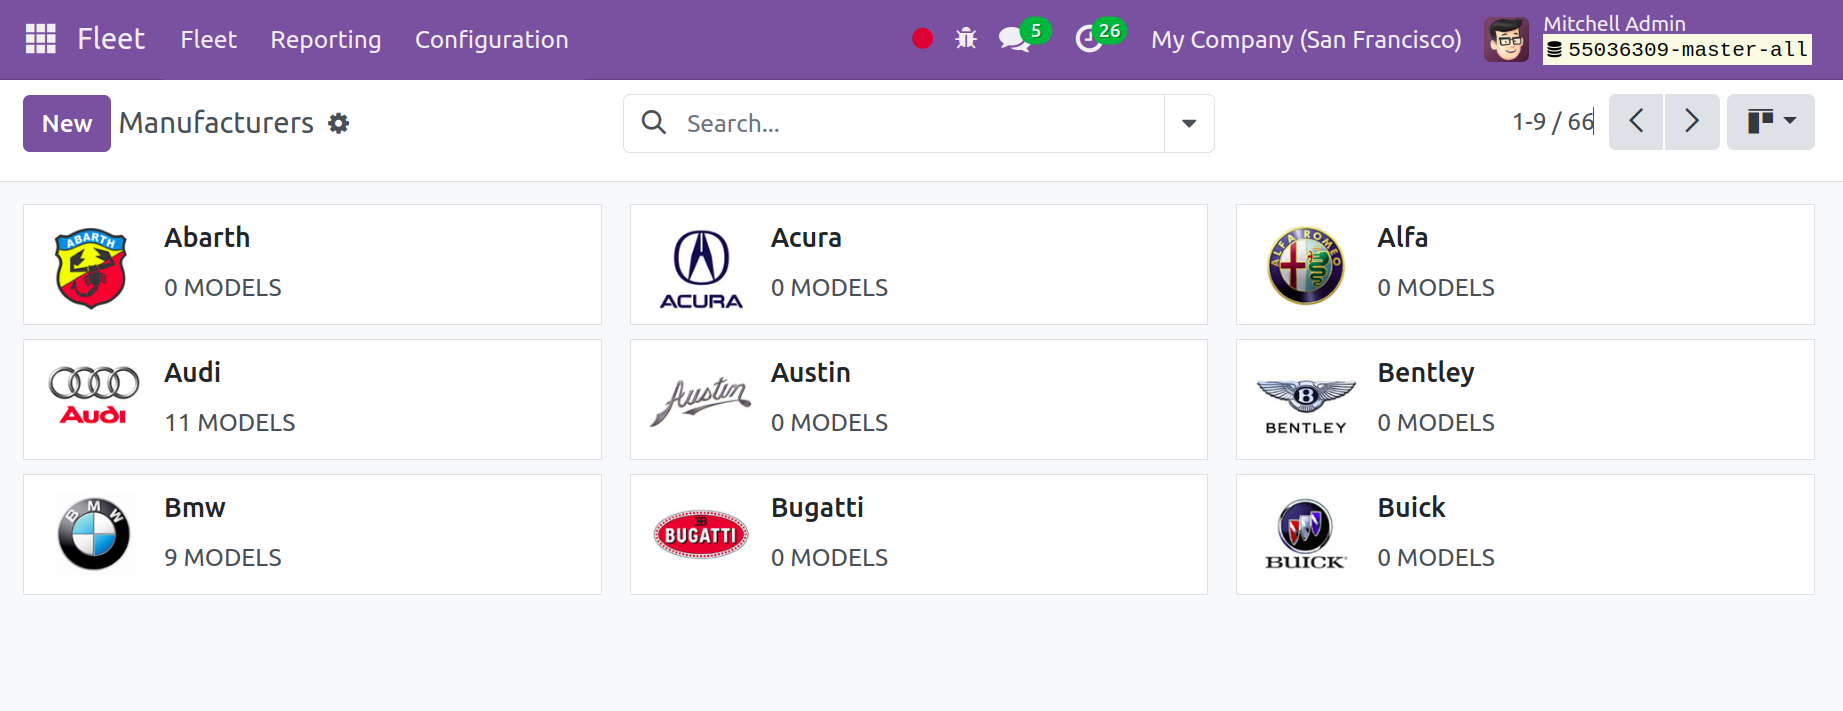
Using the New icon on the provided page to create a new brand is quite simple. You
can enter some info on the creation page.

You only need to provide the manufacturer's name and an image of the brand in this case.
Lastly, select the Save icon.
Models & Model Category
Models
The possibility of creating different models of the same brand can be found in the
Configuration menu. You will find a variety of models along with their brands on
this page.

Details like the manufacturer, model name, vehicle category, and type of vehicle will all
be provided on this page. Sorting options according to criteria can be accomplished by
using the Filters and Group By options. Go to the New icon to build
a new car model.
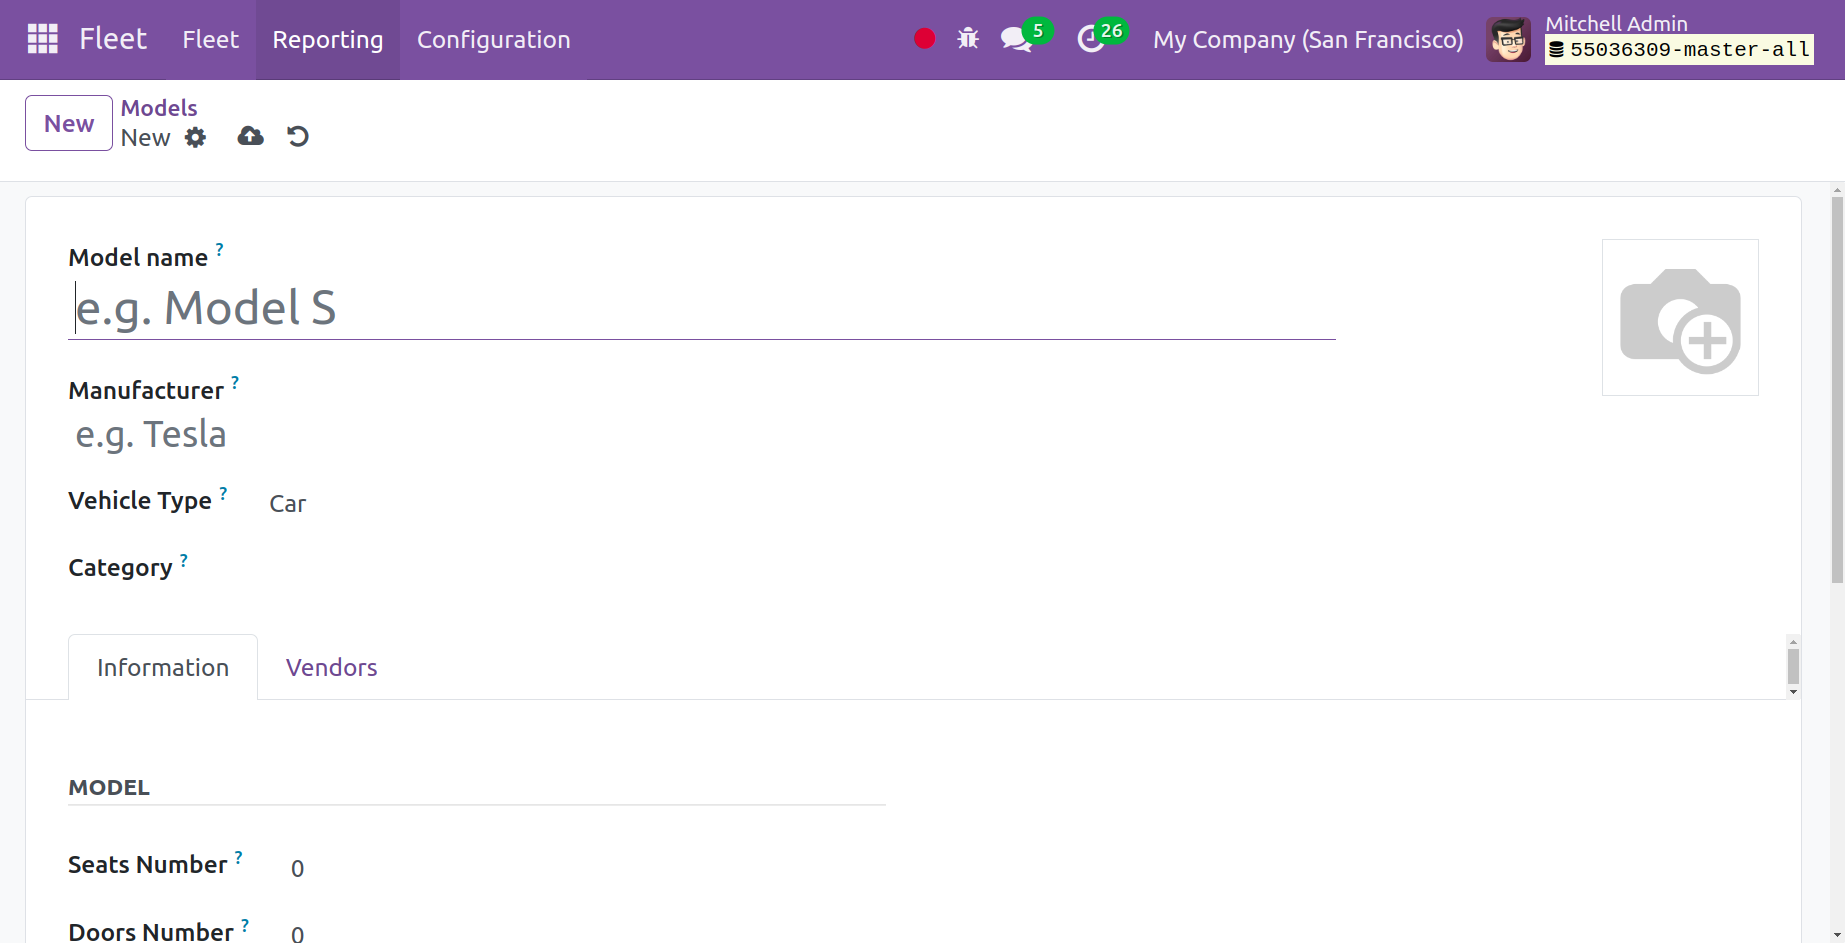
Please include the name of the vehicle model, the name of the manufacturer, the vehicle
type, and the category on this page.
The model and engine specifications can be added under the Information Tab. That
is, you can specify the vehicle's color, year of manufacture, number of doors, and seats
under the model option. Next, activate the Trailer Hitch feature as well.
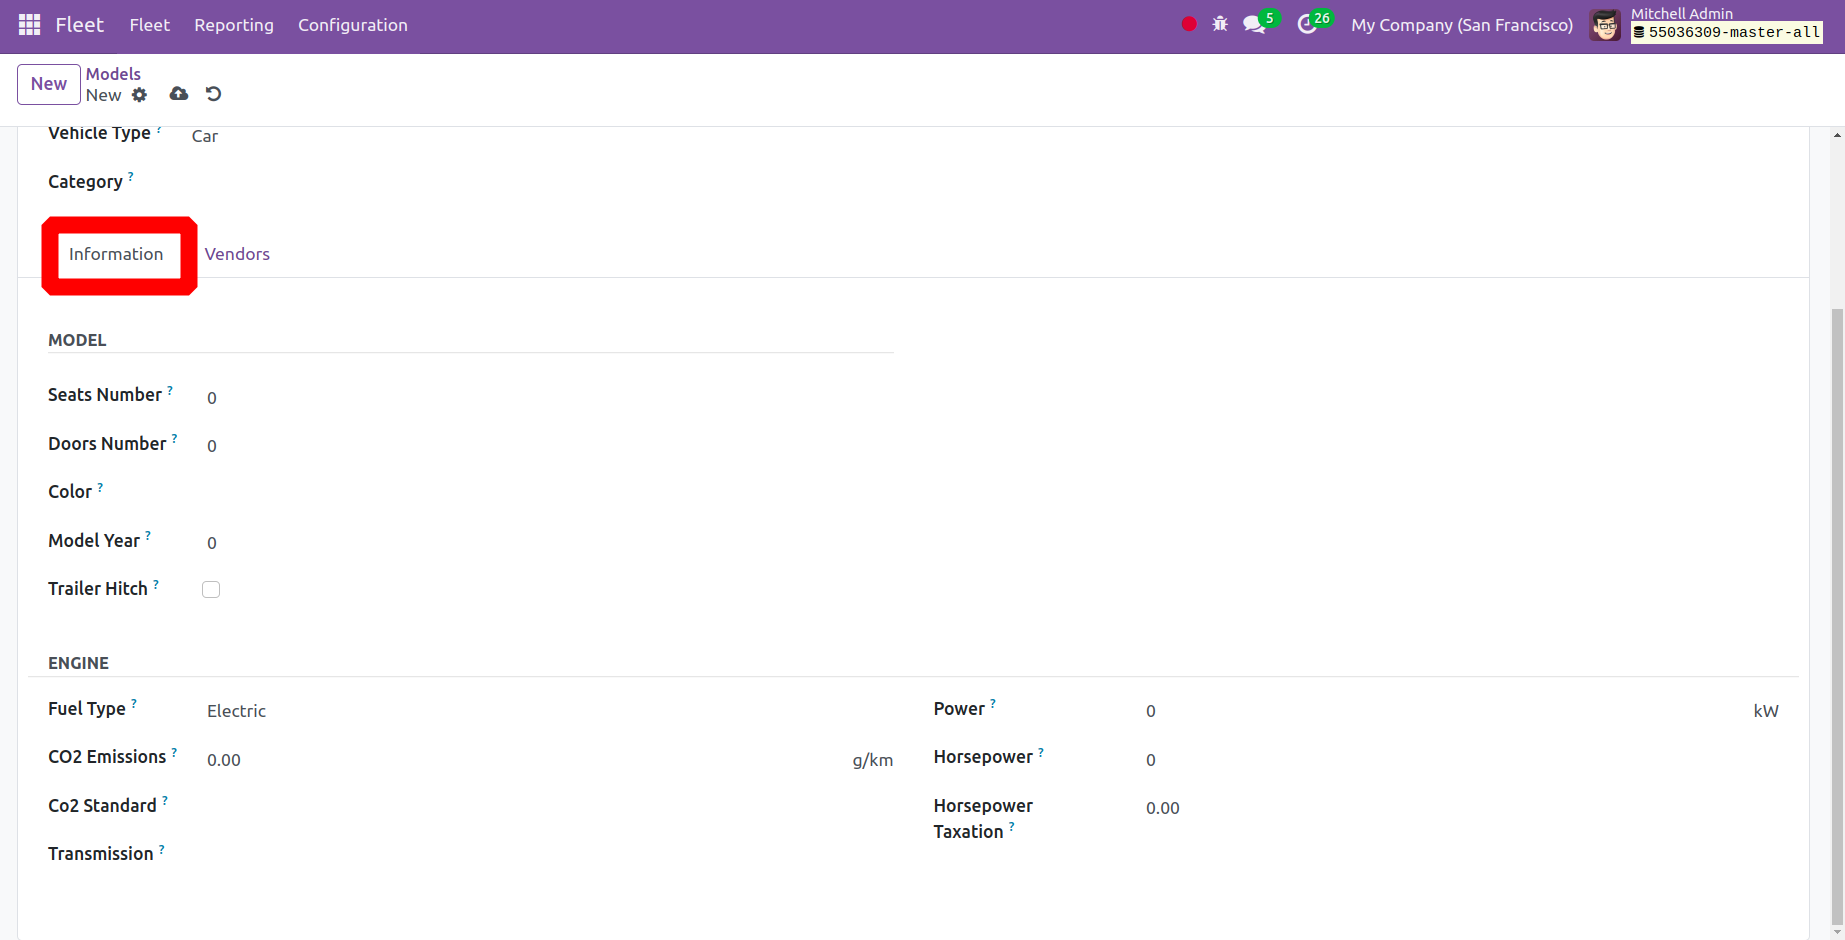
Enter the fuel type, vehicle gearbox, standard CO2 emissions, horsepower, power, and,
lastly, taxation of horsepower under the Engine menu.
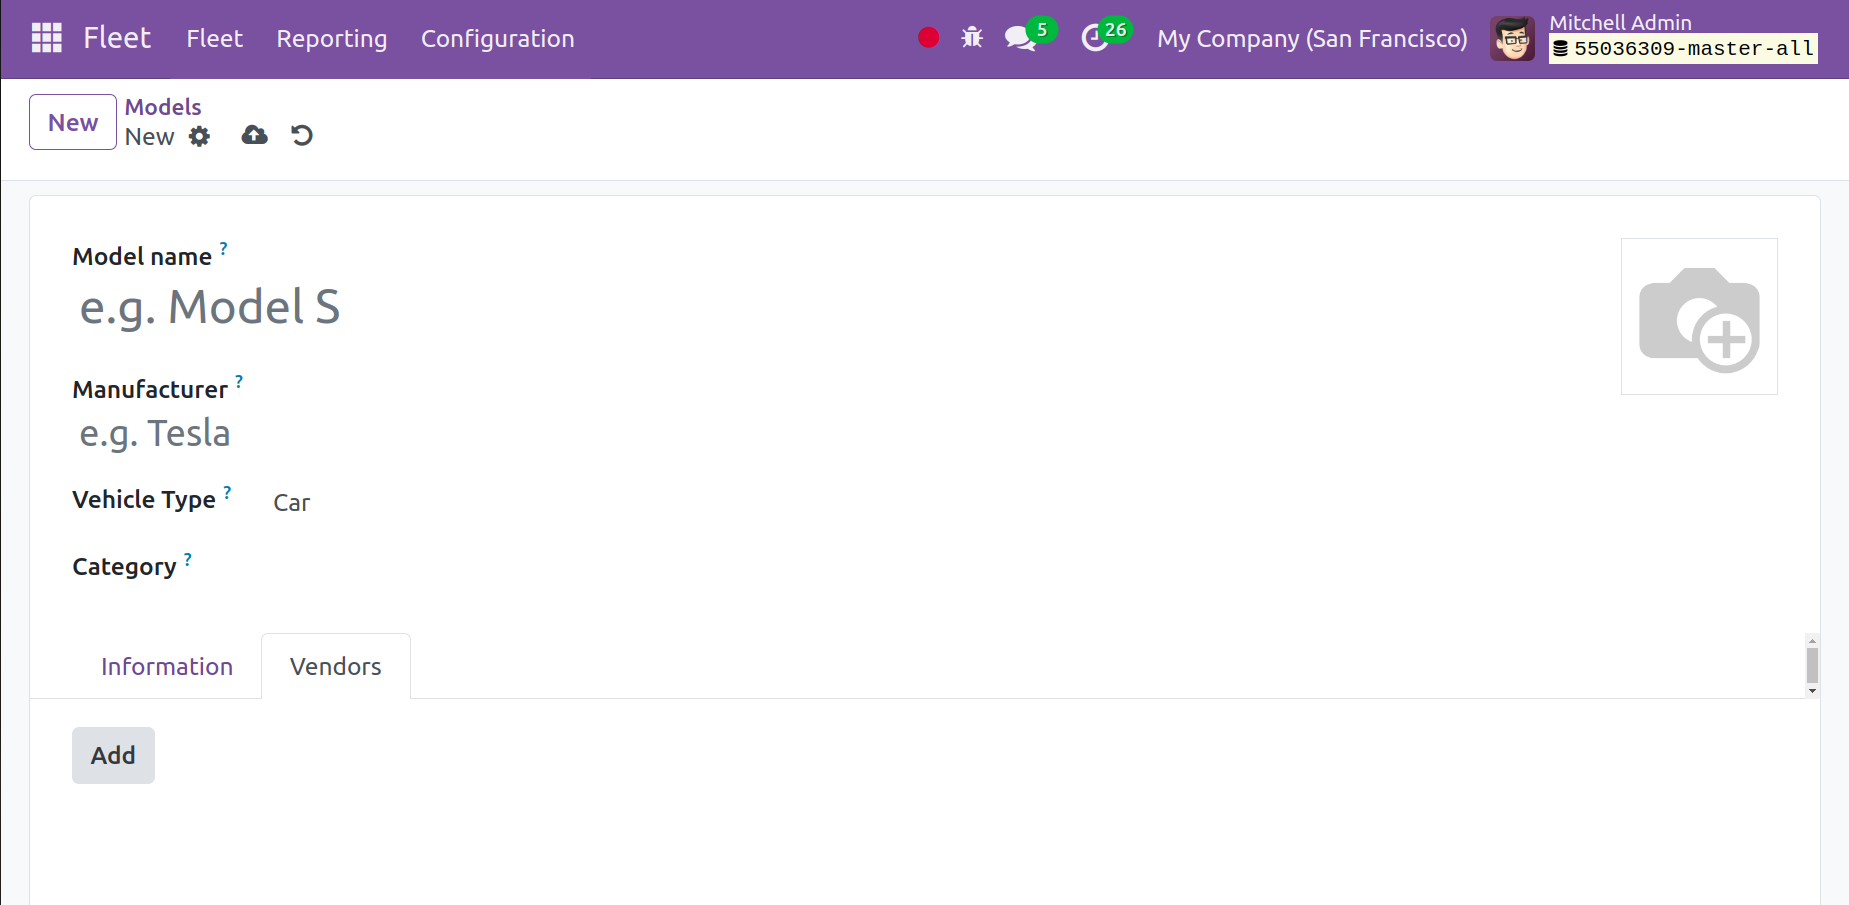
The add icon under the Vendors page allows you to add the vendor for that specific car.
Next, select the Save icon.
Model Category
The Configuration menu's model category option can be used to add the category of
the chosen module of the car. You will find pre-made model categories for the car on
this page.
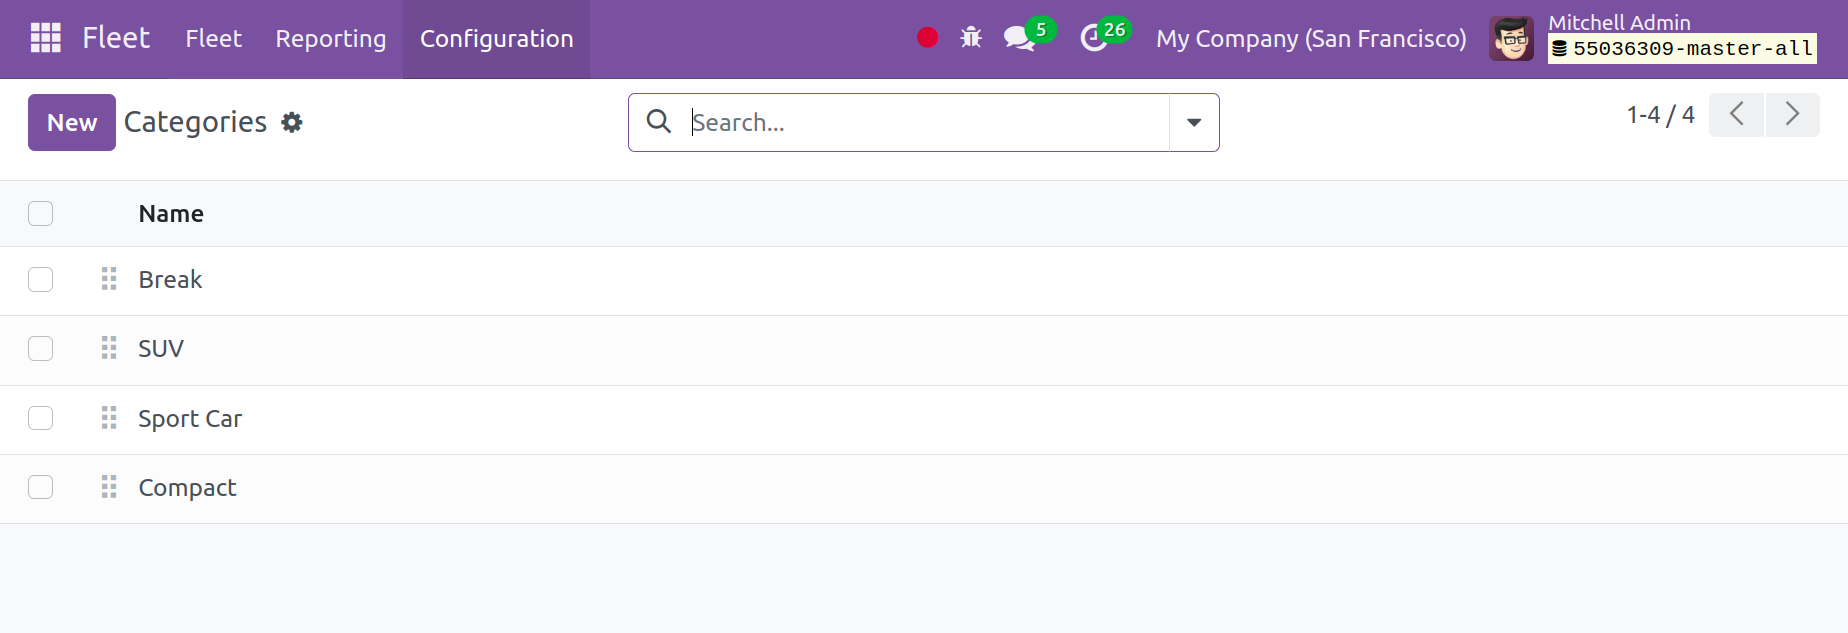
You can quickly add a new category to the list that has already been generated by
choosing the New option.
Service Types
You can create and manage services under the Configuration menu by using fleet
management. You may see a list of previously created service types on this page.
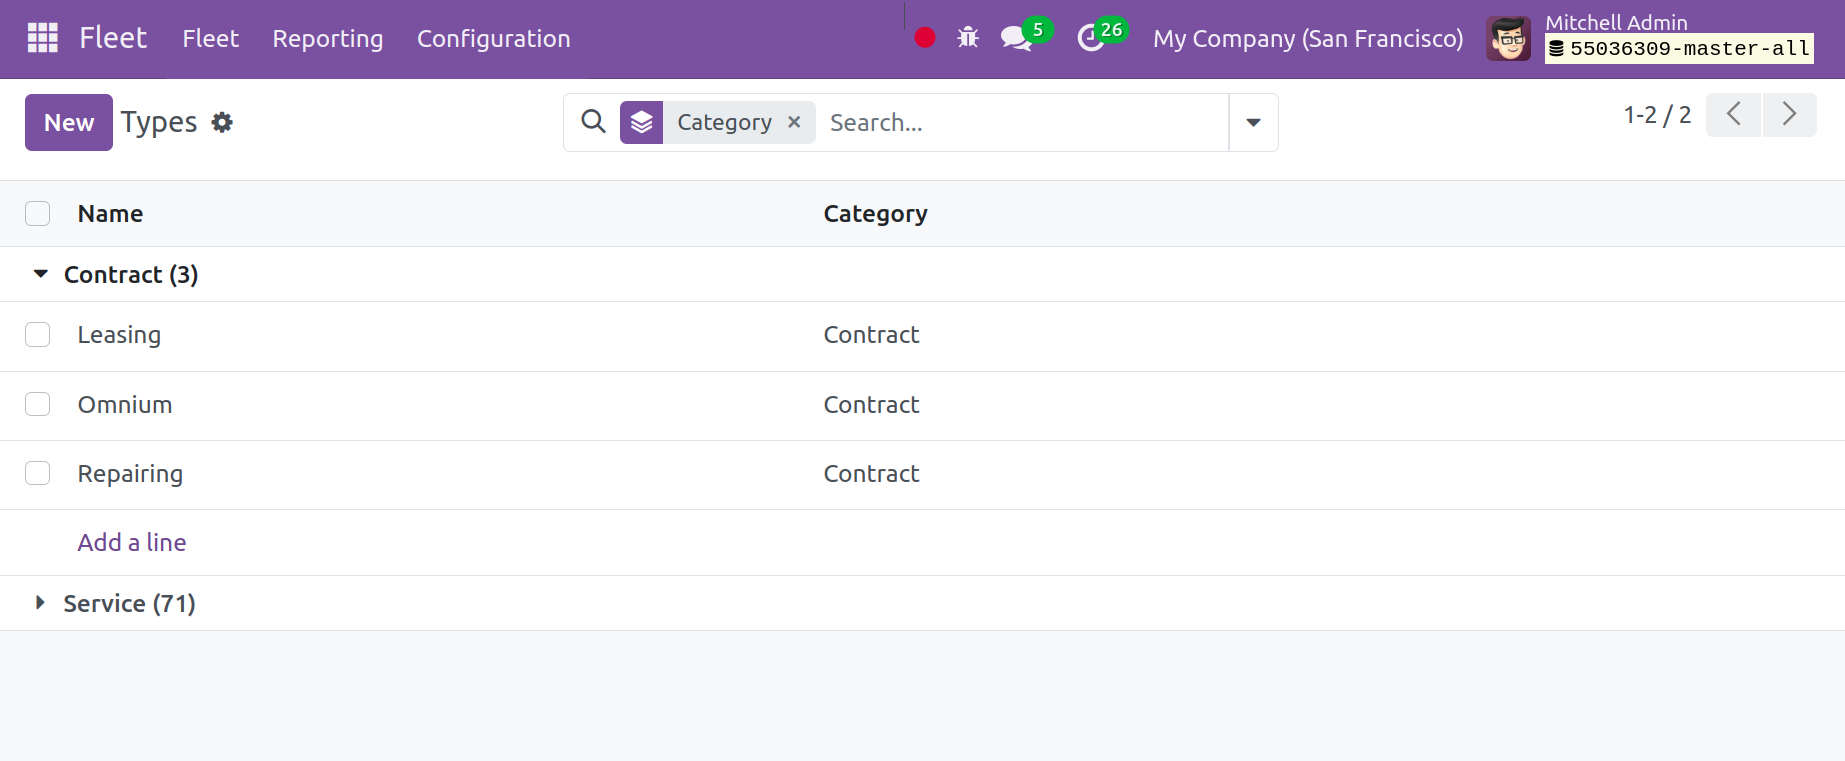
You will find the name and category on the page. Click the New icon to make one
that is comparable.

The category and service type are simple to put on the following line. Lastly, select the
Save icon.
Vehicle Status
You will be able to identify different stages for individual vehicles under Fleet
management so you can comprehend the actions taken on them. You can find the vehicle's
many stages under the Configuration menu.
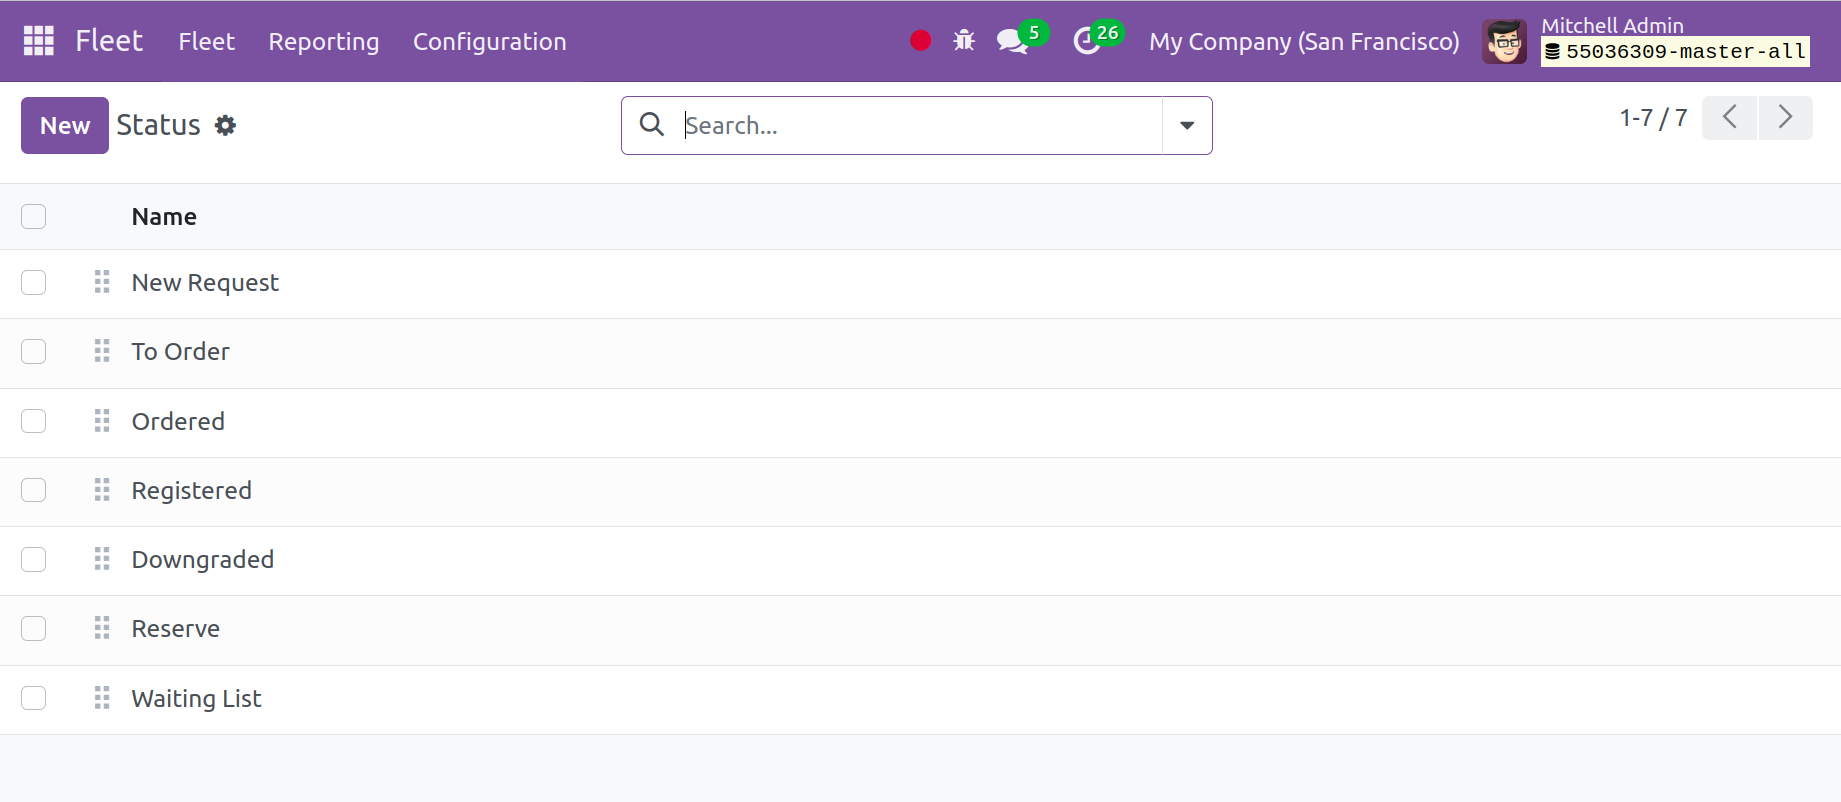
You can find information here on the vehicle's state and other characteristics. Then, to
add a new status, select the New icon. You can update the vehicle's status by
clicking the new line. Next, select the "Save" icon.
Tags
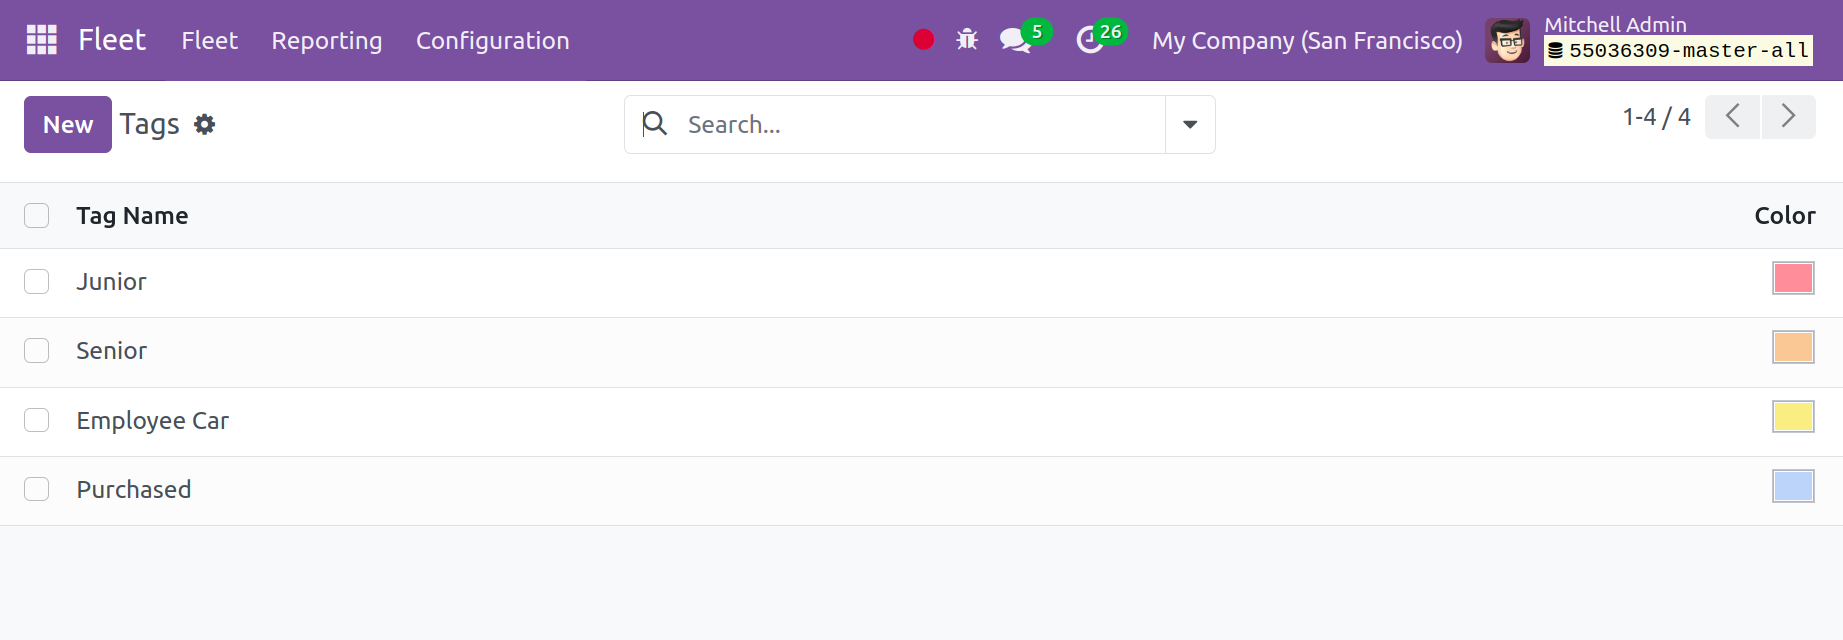
It is possible to search using tags. Thus, through the Configuration menu, the tags may
be seen and configured. Color and tag names are displayed. Click the New button
to add a new tag. To add the new tag name, add a new line under the list.
Activity Types
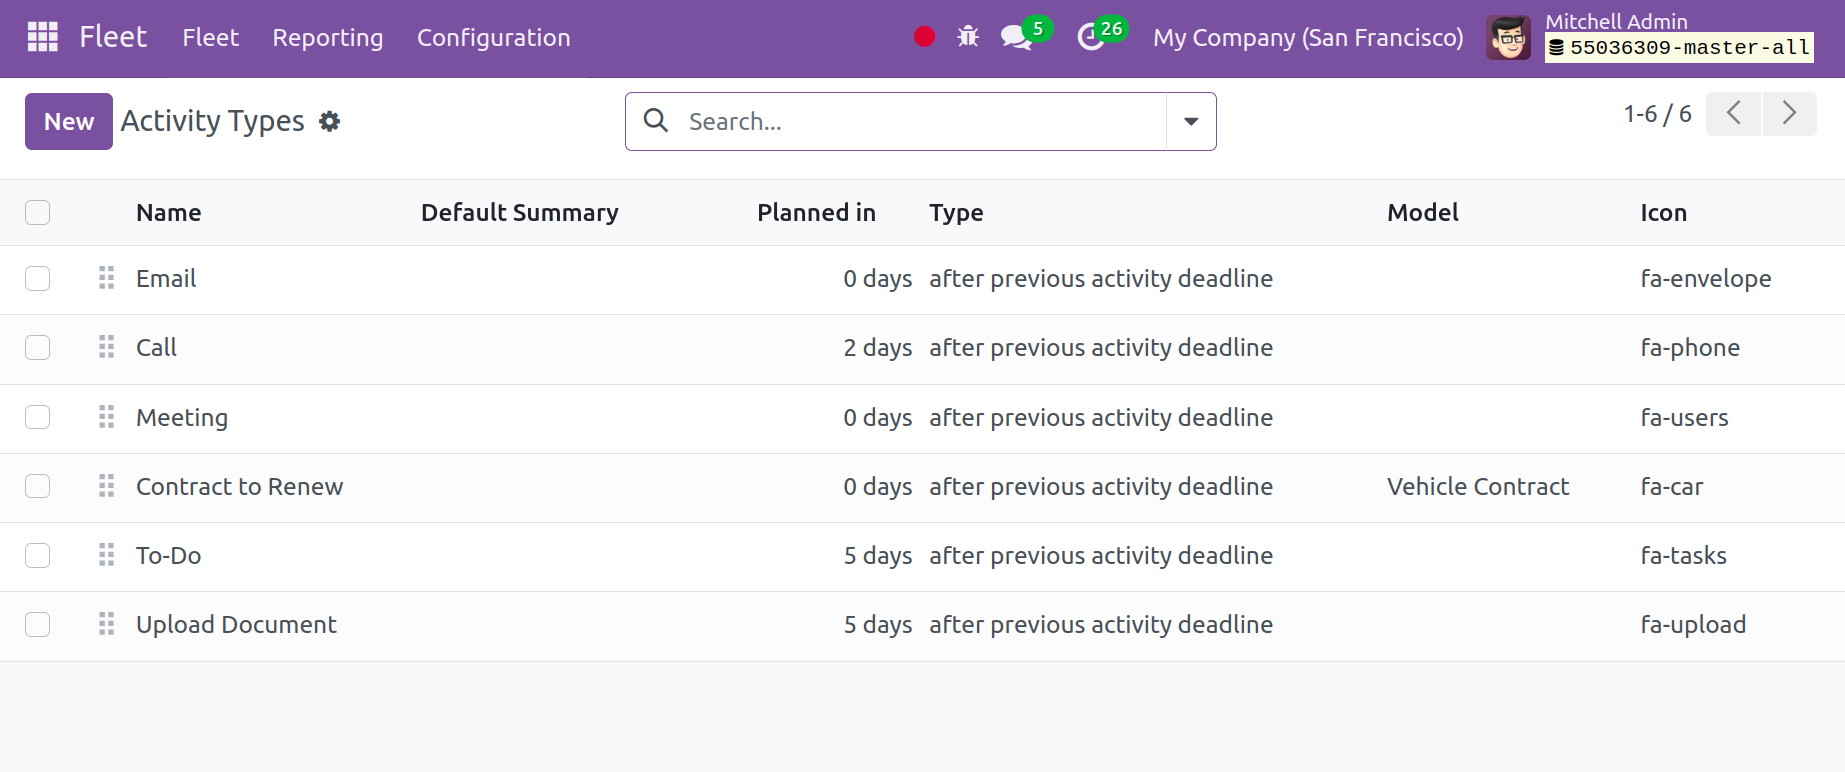
The Configuration menu displays all of the set Activity kinds. The list displays the
activity name, type model, planned in days, default summary, and icon. Tap the New icon
to add a new kind of activity.
Reporting
You can quickly create reports on the amount of money spent on services and different
contracts by using the Fleet module's Reporting option to analyze the management
of the fleet module. Using the page's graphical representation, this option allows for
an efficient type of research.
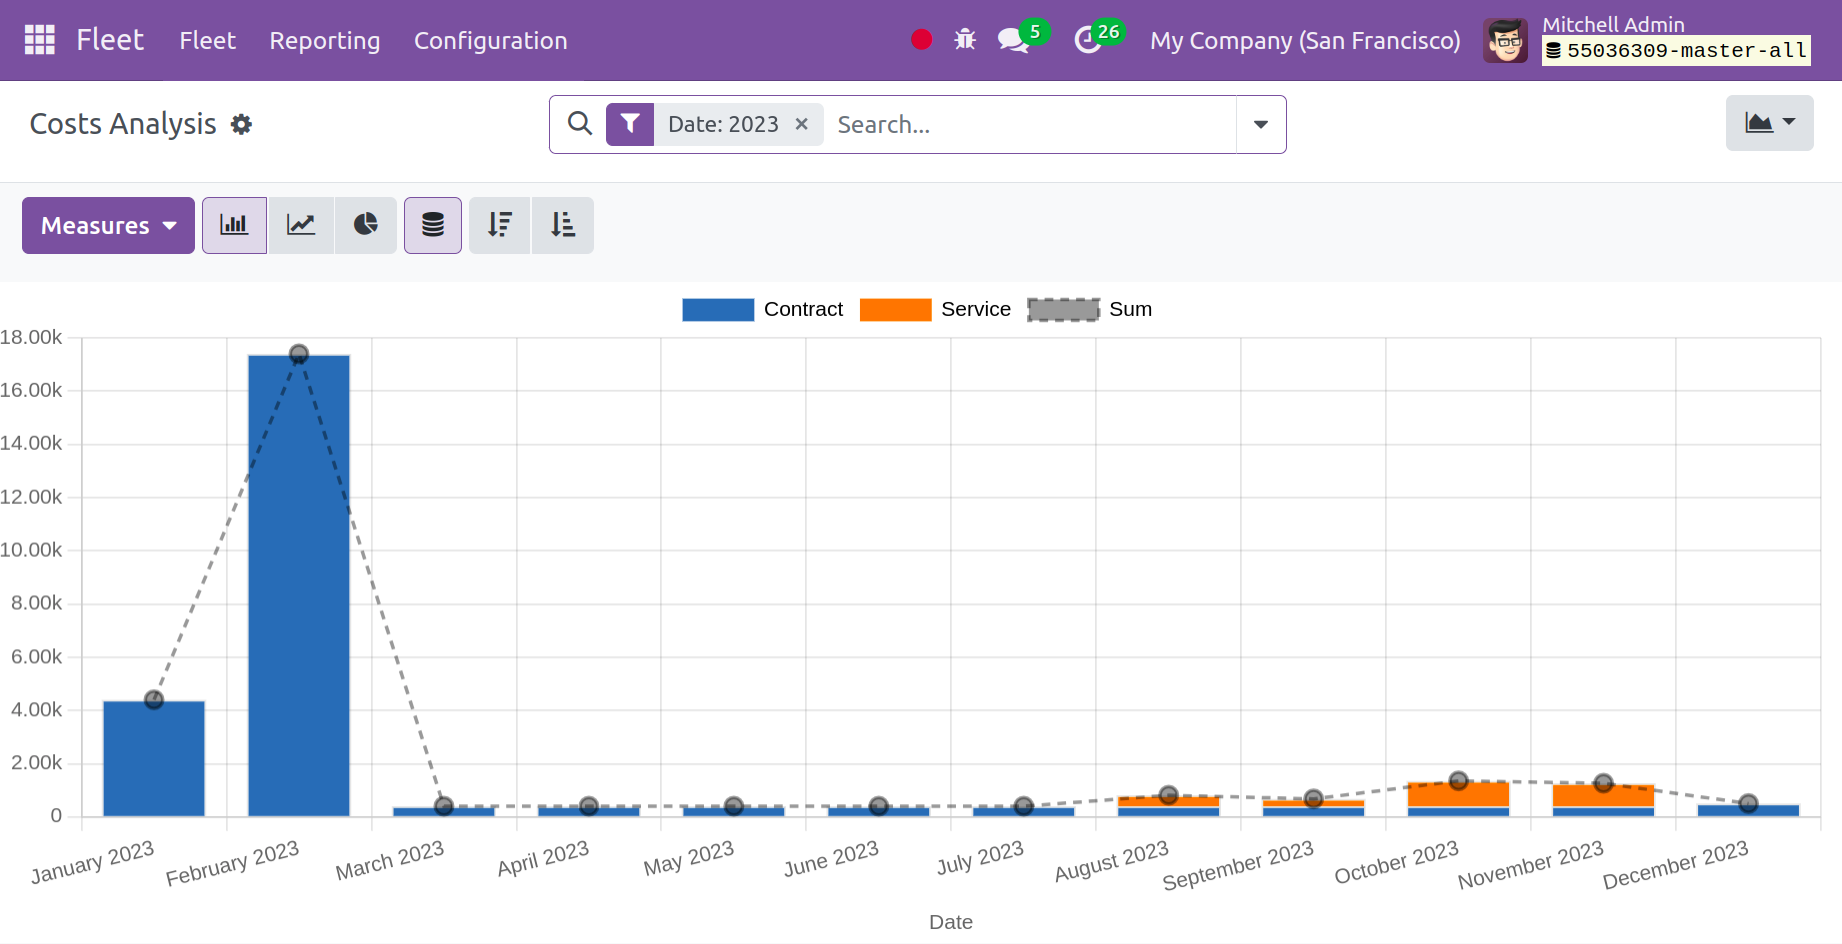
You may find some measurements here, including Count and Cost. By activating the
indicated icon located in the rightmost area of the page, users can view the page in
both the pivot and graphical views. Fitters and Group By are useful for sorting options
and creating corresponding confidential reports. The date is shown on the X-axis, the
same as in the illustration, and the cost is shown on the Y-axis.
After thoroughly reviewing the many features and capabilities of the fleet module thus
far, we are aware that we can utilize it to manage the fleet efficiently and without
wasting any time. We discovered that this module may solve the fleet operations problems
for the company. It's a useful area for managing contracts, vehicle insurance, fees
associated with the vehicle, various tasks, fuel statistics, and much more. If a module
of this kind is available, no external tracking of the car is needed. You can use the
module to manage all of the actions here with only a few clicks. You may combine this
module with the other relevant modules—employees, expenses, projects, and websites—with
the aid of Odoo 17. Thus, it is quite beneficial to the business.