Employee Management
The Employee module is a prominent module in the field of human resource management. The module aids users in organizing and analyzing all the information according to an employee's position inside an organization. Every employee's records are kept in one location. The specifics include contacts, details about the work they are doing, the employees' contracts, resumes, and many more. Maintaining all personnel data in an orderly manner at the office is an obligatory procedure. They should maintain well-organized records of their work experience, educational background, abilities, and career details. The company can design staff policies, skill development initiatives, recruitment campaigns, appraisal activities, and promotion programs.
You will see a page with numerous employee profiles in the main window of the Employee module.
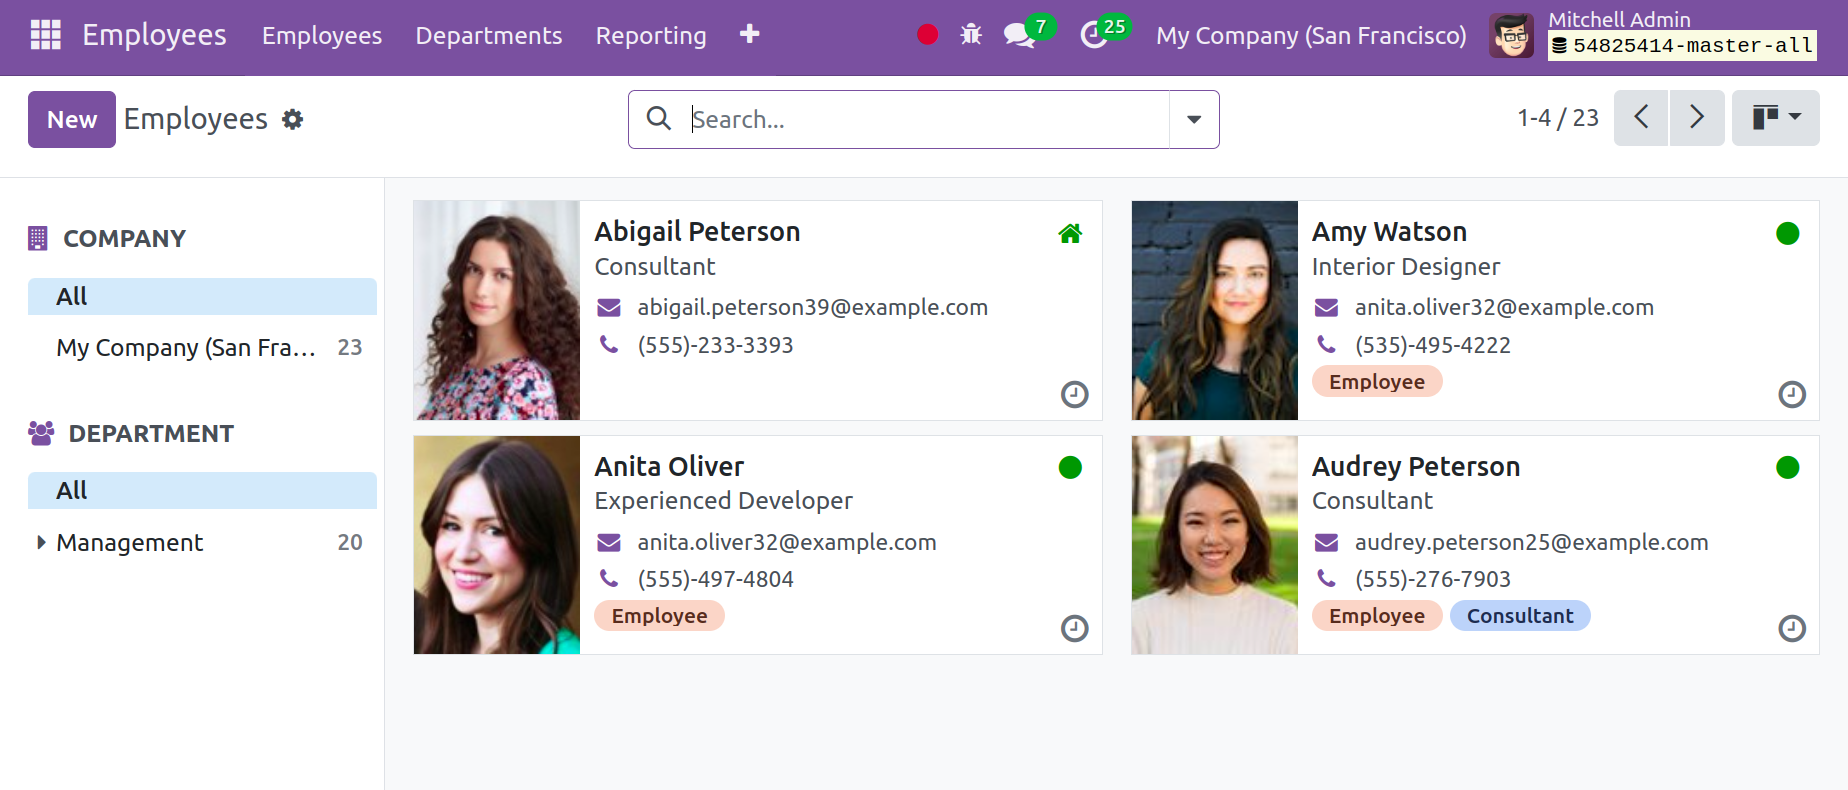
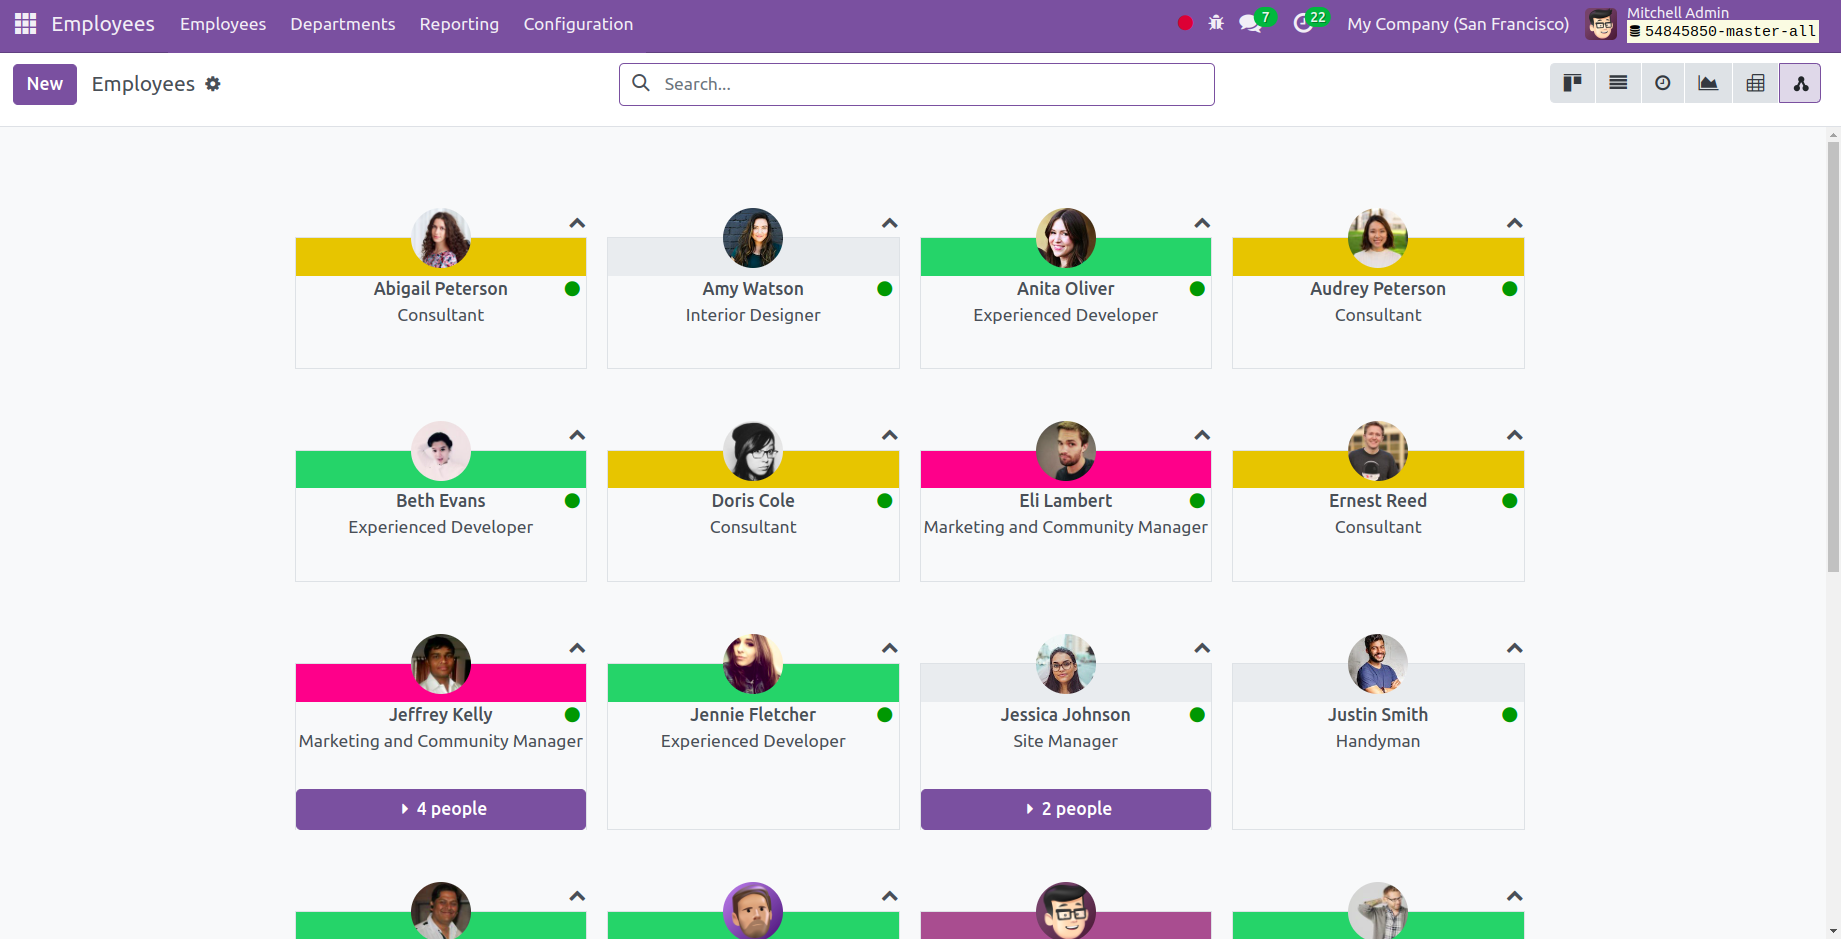
The window's Kanban view presents each employee's profile in an orderly fashion. Every profile is available to you there, along with pictures of each person. If necessary, the page can also be viewed in the List View, Activity View, Graph View, Pivot View, and Hierarchy View.
Here, Odoo 17 has added a new view called the Hierarchy View. This view will show the employee organization perspective of the company. It indicates that the manager, all employees, etc., were subordinate to the manager.
Group By, Filters choices are available to help you find the personnel. To sort a specific employee, you can use the customizable and default options.
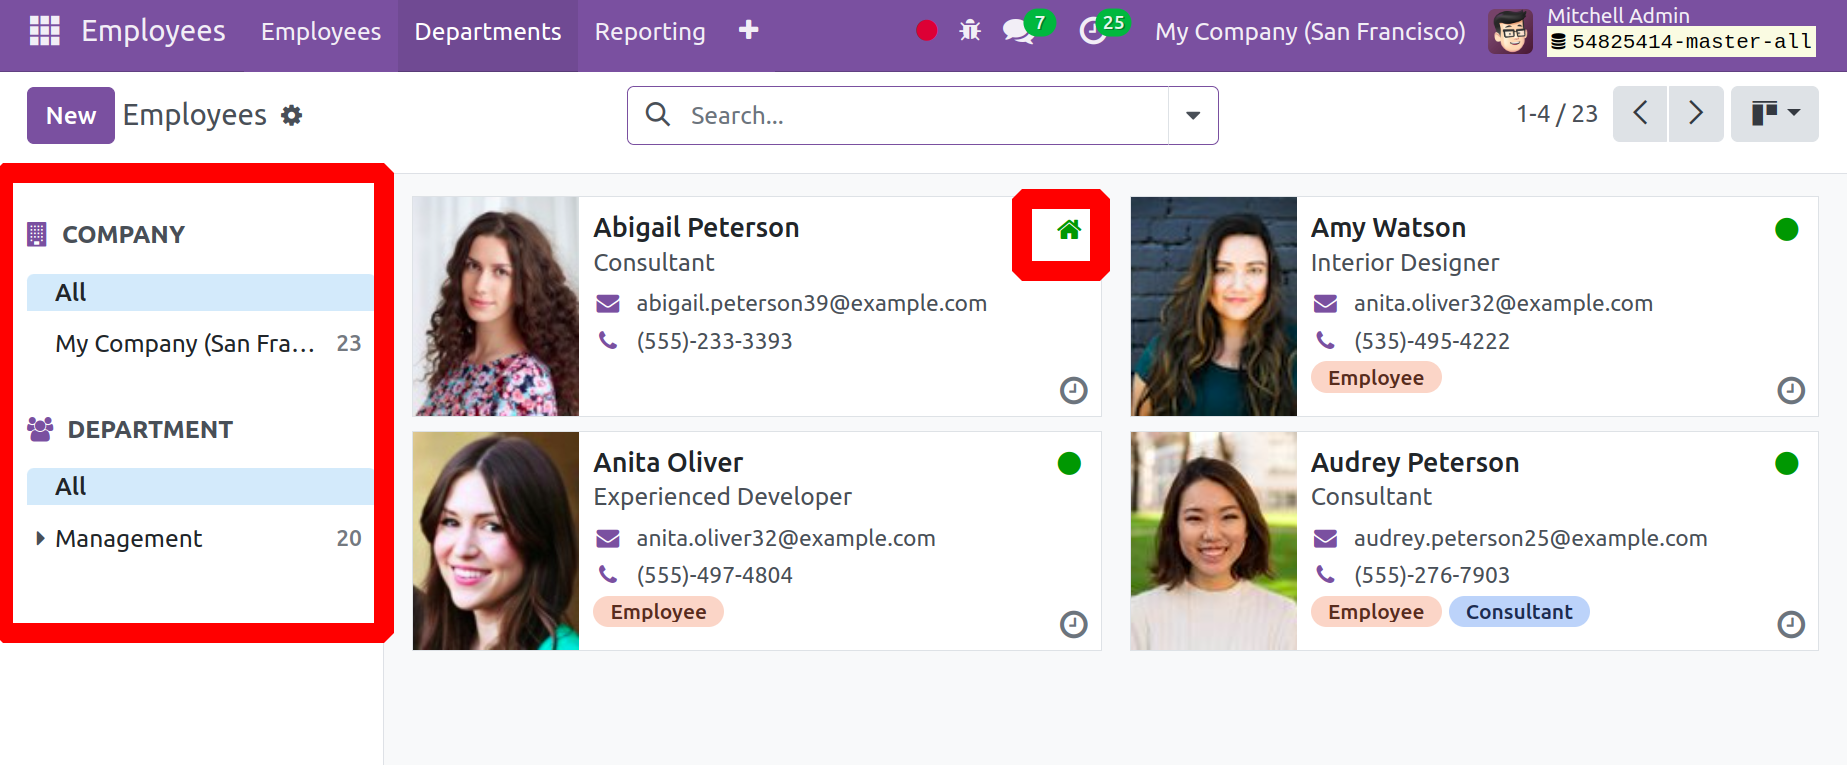
You may see a list of companies in the far left corner. If there are multiple companies involved in the operation, you can choose one that offers the data and profiles of each person. The Department list, which lists the number of employees in each department, is located beneath that. The department-based worker classification is aided by this option. There is a home icon on the profile, which implies that the employee's work location is Home. You can see the online status of each employee in the upper right corner.
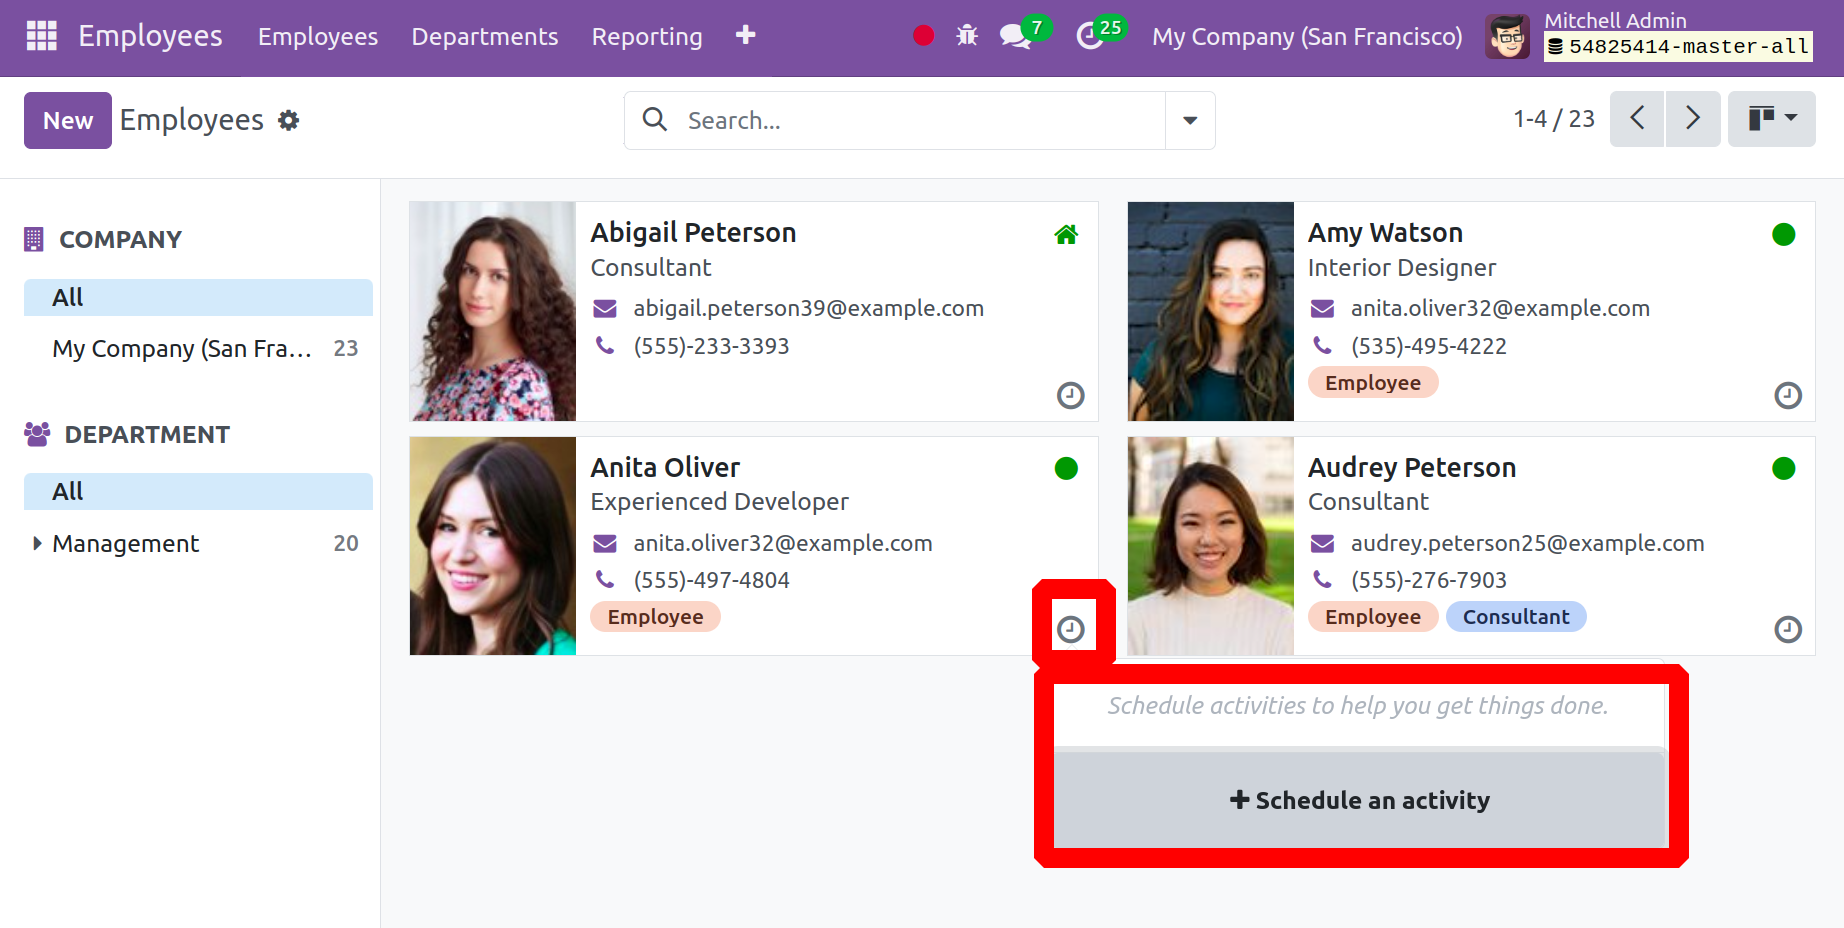
The clock option will assist you in managing certain tasks assigned to each employee. When you choose the clock option on the image, you will have the choice to schedule.
You may quickly create a new employee to add to this list by using the New option.
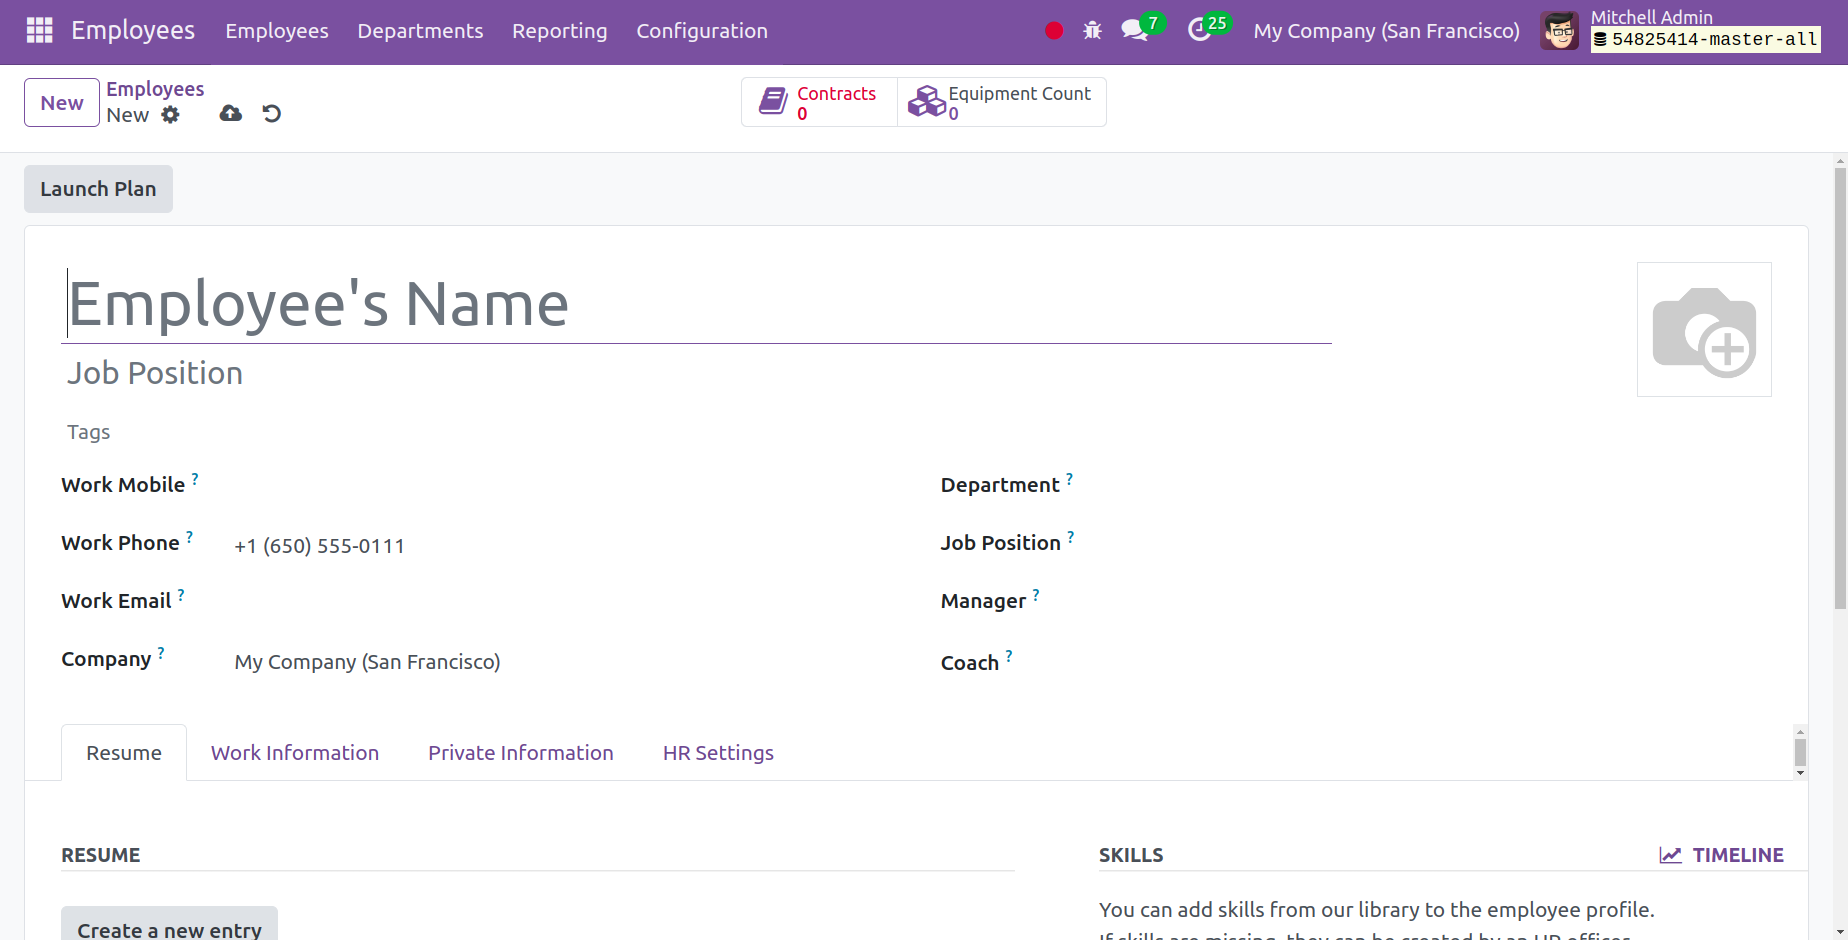
You can fill in the designated spaces on the employee creation page with the employee's name and work role. Subsequently, you can add the name of the department, the company, the manager's name, the employee's coach, and their work phone and email.
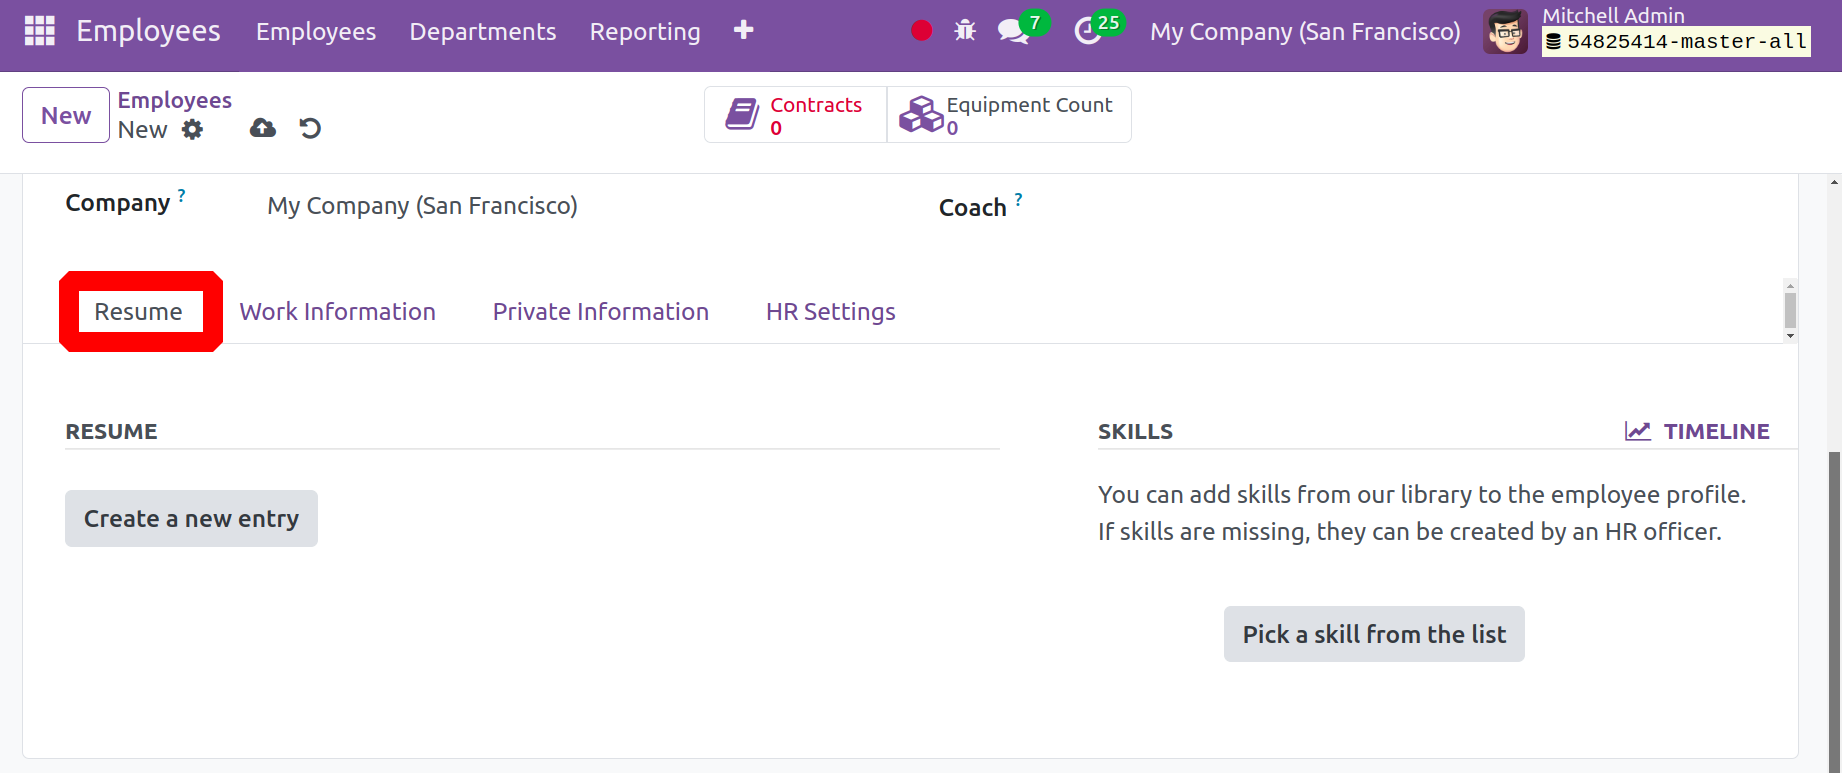
You can choose to put the employee's resume and skills under the Resume tab. This feature aids in program promotion and training. You can use the Create a new entry option to create talents. After that, a pop-up window will appear, as seen below.
You can add a resume title and a drop-down option type (experience, education, internal certification, or internal training) to the page. It is possible to select the classic, certification, or course display types. You can also enter the start and finish dates in the designated boxes. In this case, the date denotes the amount of time needed to finish a specific course. A brief resume remark is required under the description section. Save the resume at the end.
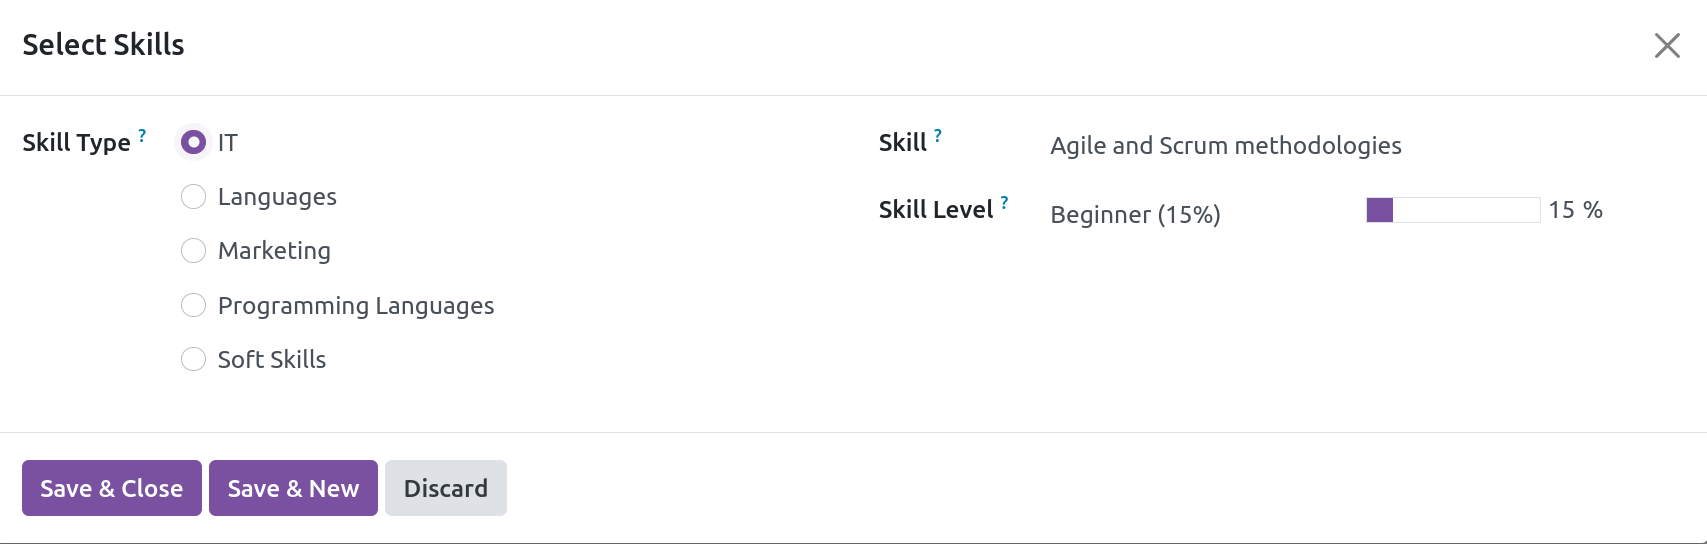
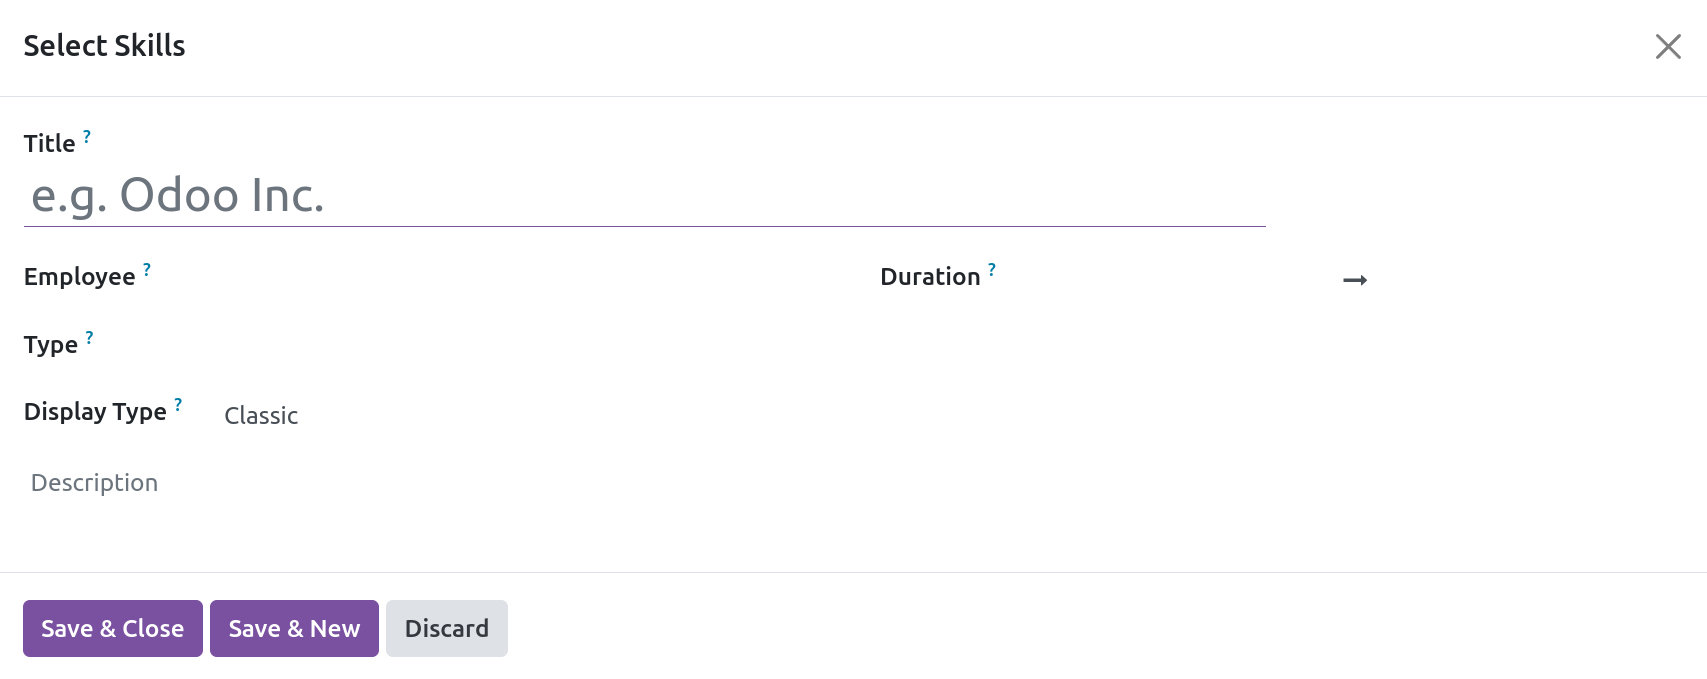
The skill type can be chosen on this page. It might be anything from music to marketing to language. The level of skill you possess is then determined by you, and you can describe it appropriately under the Skill level and Progress option. You will also see the skill kinds and skill levels in the setup menu when you activate the developer mode. Lastly, select Save and Close or, if you would like to add another, select Save and New.
The resume tab will appear as follows after the resume and skills have been added.
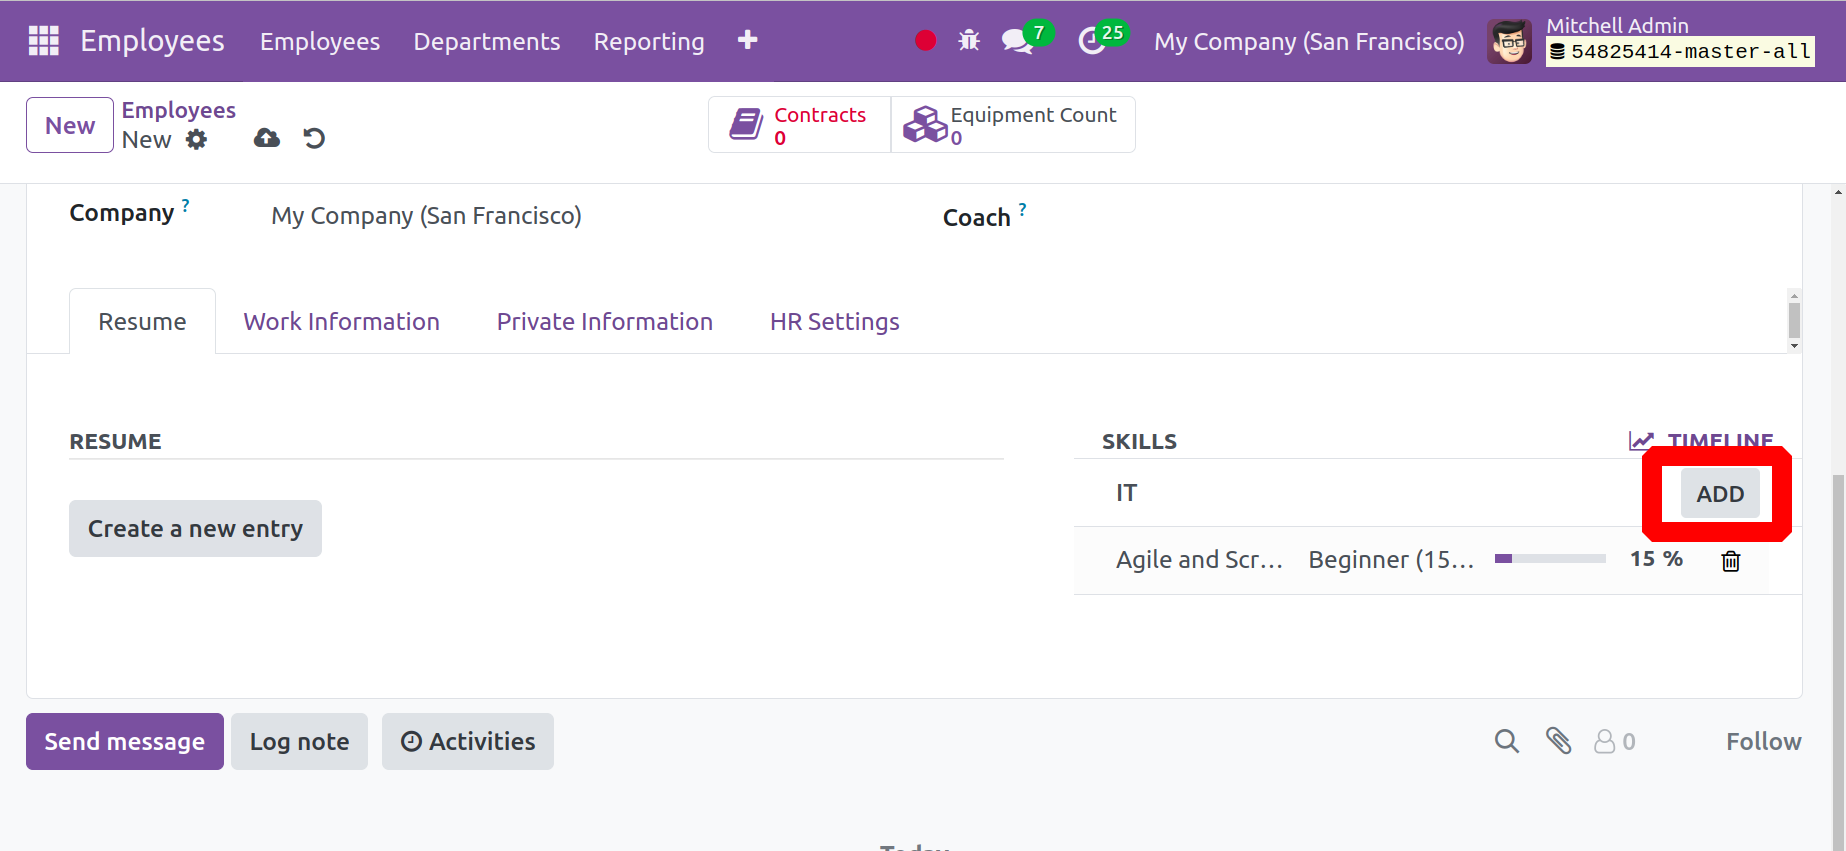
To add a new résumé or talent to the list, use the Add option, as seen in the image above.
You can enter the following information under the Work Information tab.
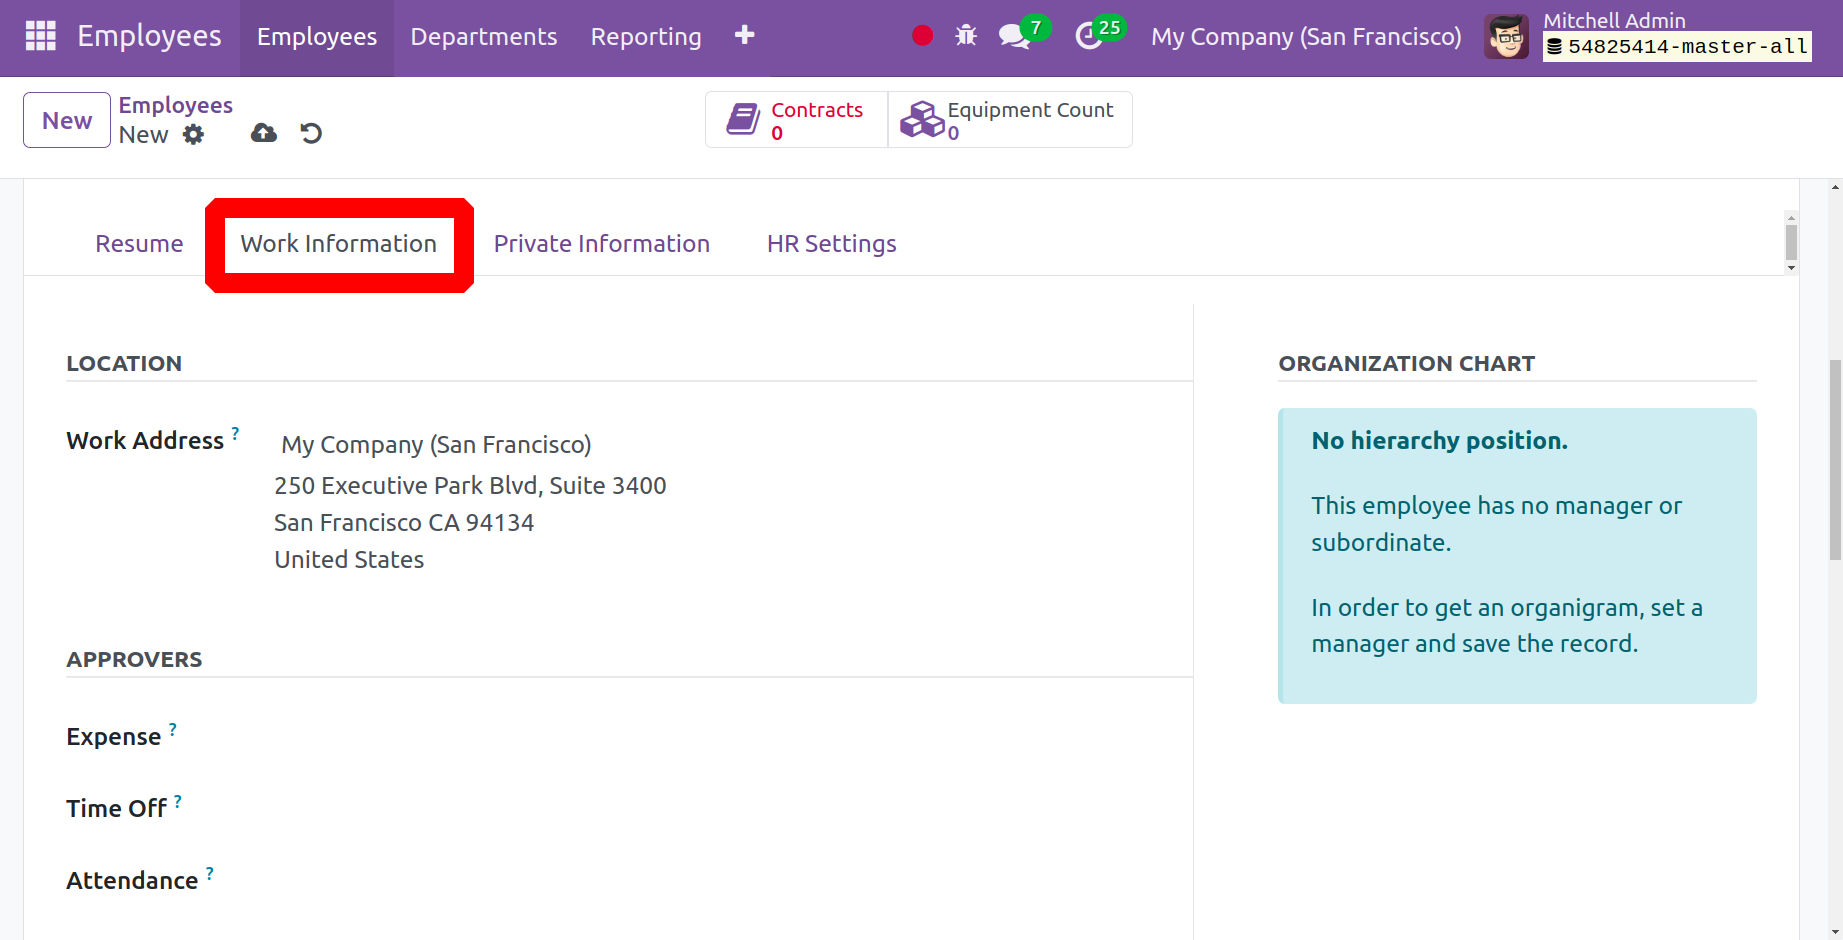
You can provide both the work address in the LOCATION field. We will set the work address to appear on its own, following the previous firm that we chose. The configuration menu now includes a work location option. You can choose a user and their expenditure on the expense and time off space under the APPROVERS option.
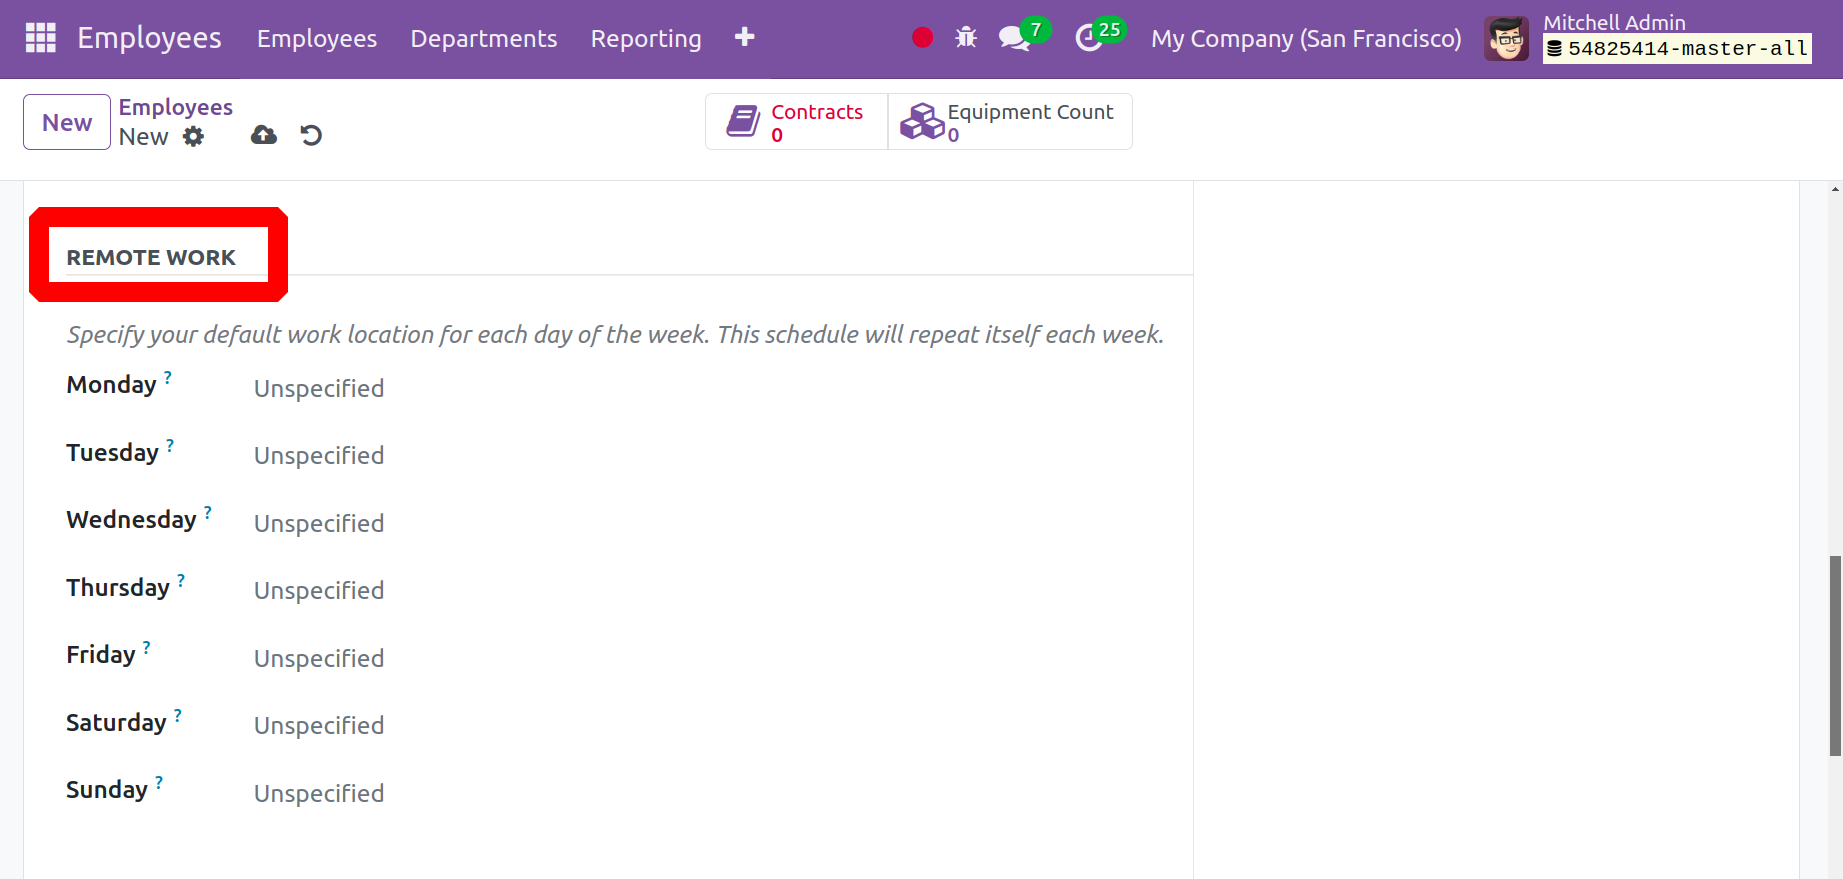
Users can specify the employee's default work location for each day of the week inside the REMOTE WORK section. Every week, this routine will be repeated.
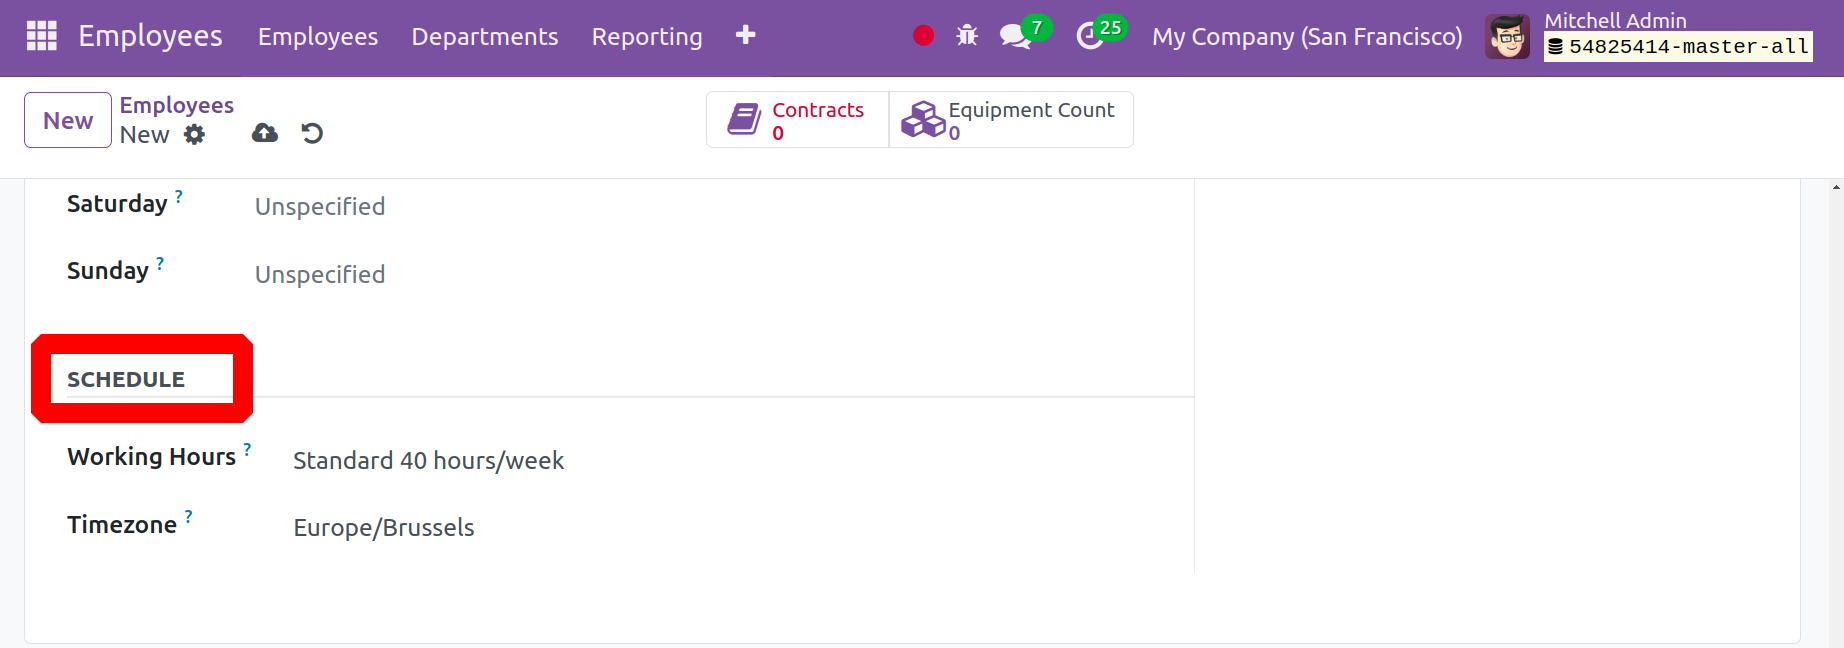
The schedule option also allows for the creation of working hours and a time zone. When a manager or coach is created and the profile is saved, an organization chart displays.
You now have a Private Information tab that contains personal information not related to work.
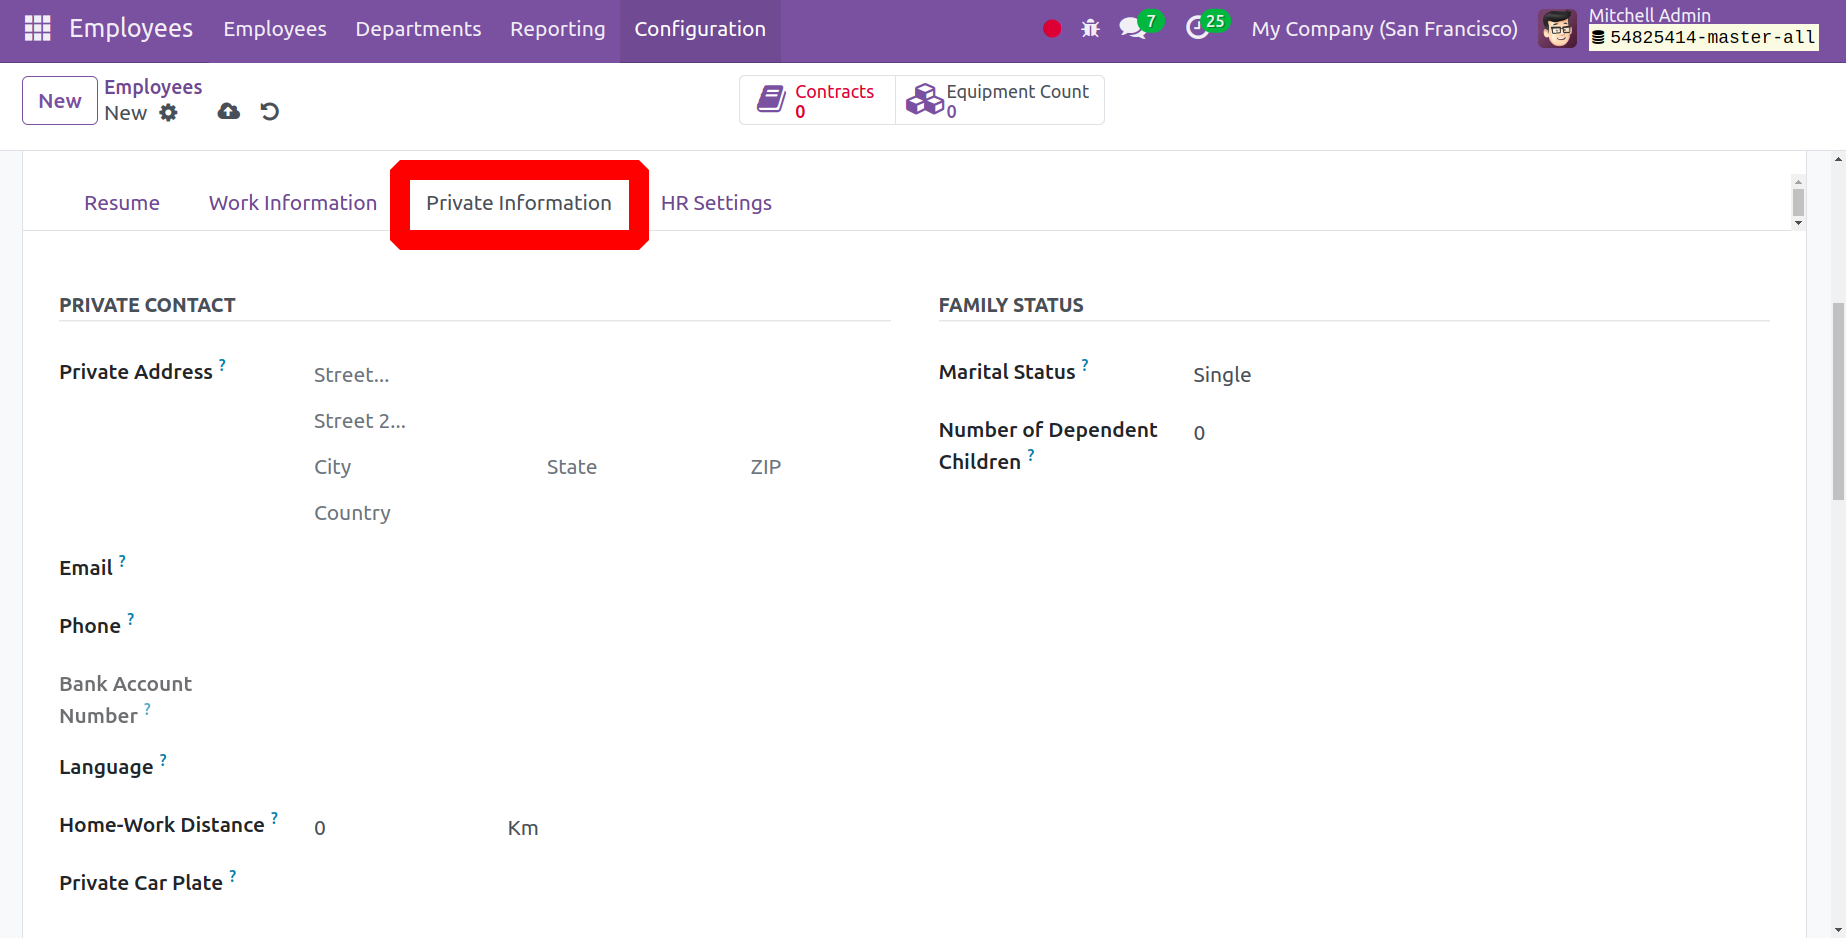
Details like private contact information (phone, email, address, language, bank account number, and distance from home to work) might be included here. You might include the number of dependent children and your marital status when discussing your family status. It is possible to put a contact name and phone number on the emergency option.
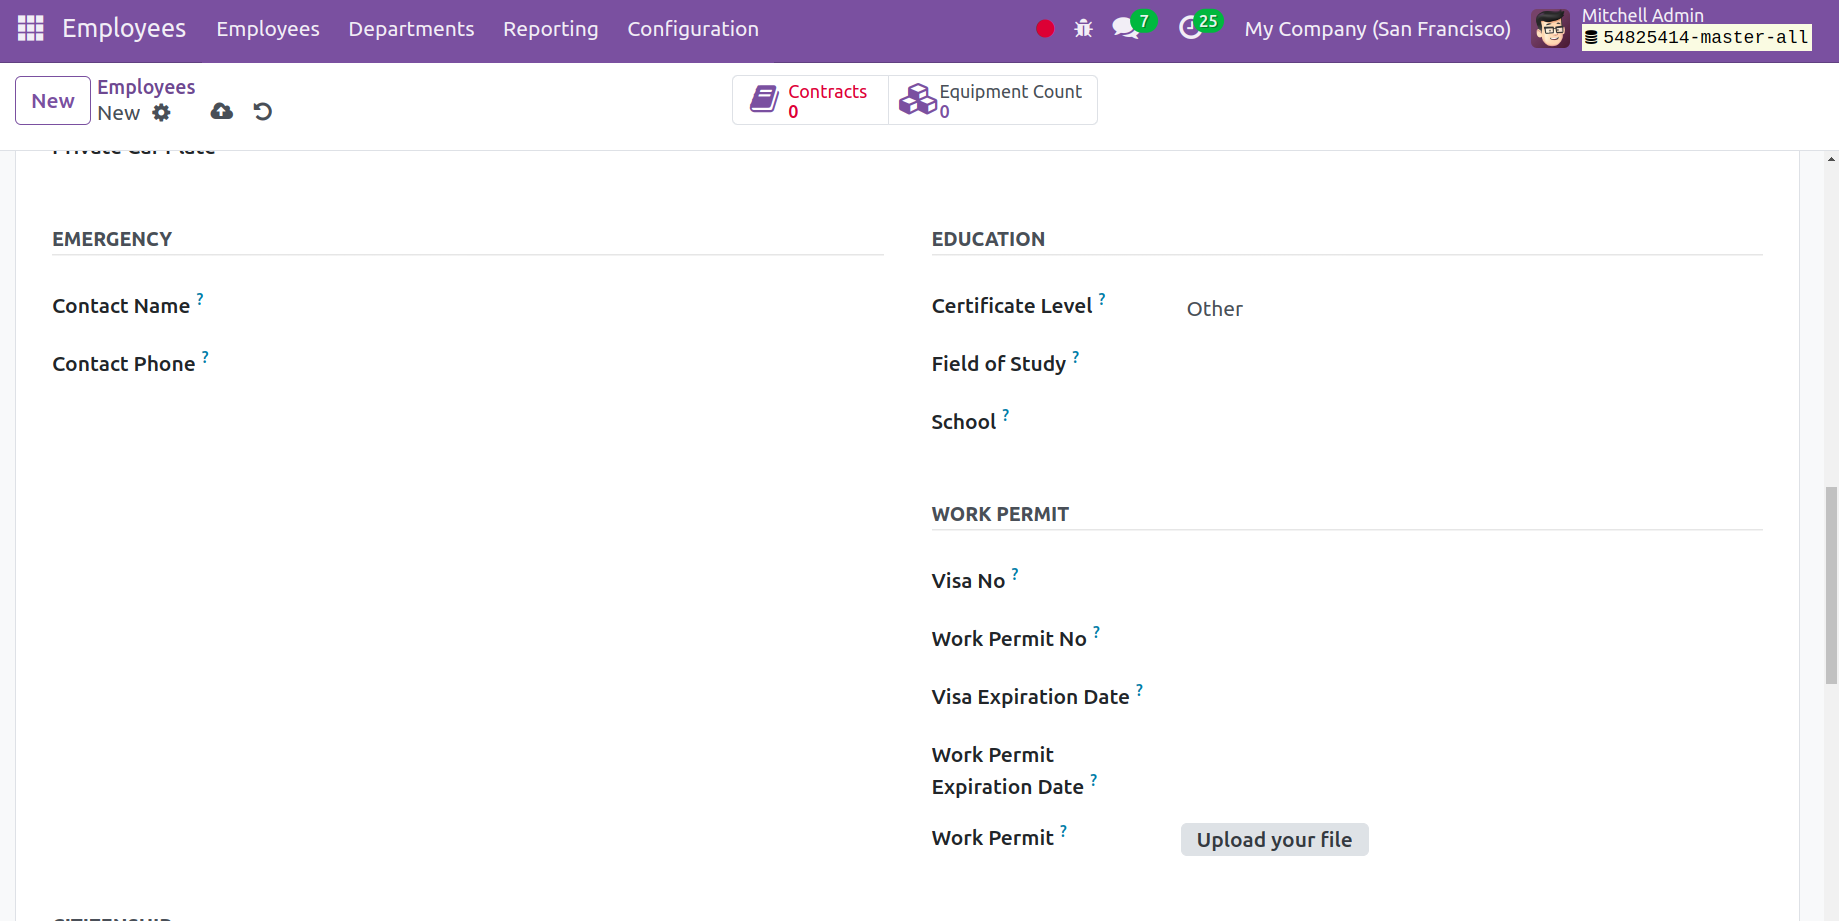
You can include the school, study area, and certificate level in the EDUCATION field. You can enter the nationality, passport number, date of birth, place of birth, gender, and country of birth, respectively, below the citizenship choice. You can include the work permit number, the visa number, and the work permit expiration date, and you can submit supporting papers under the work permit option.
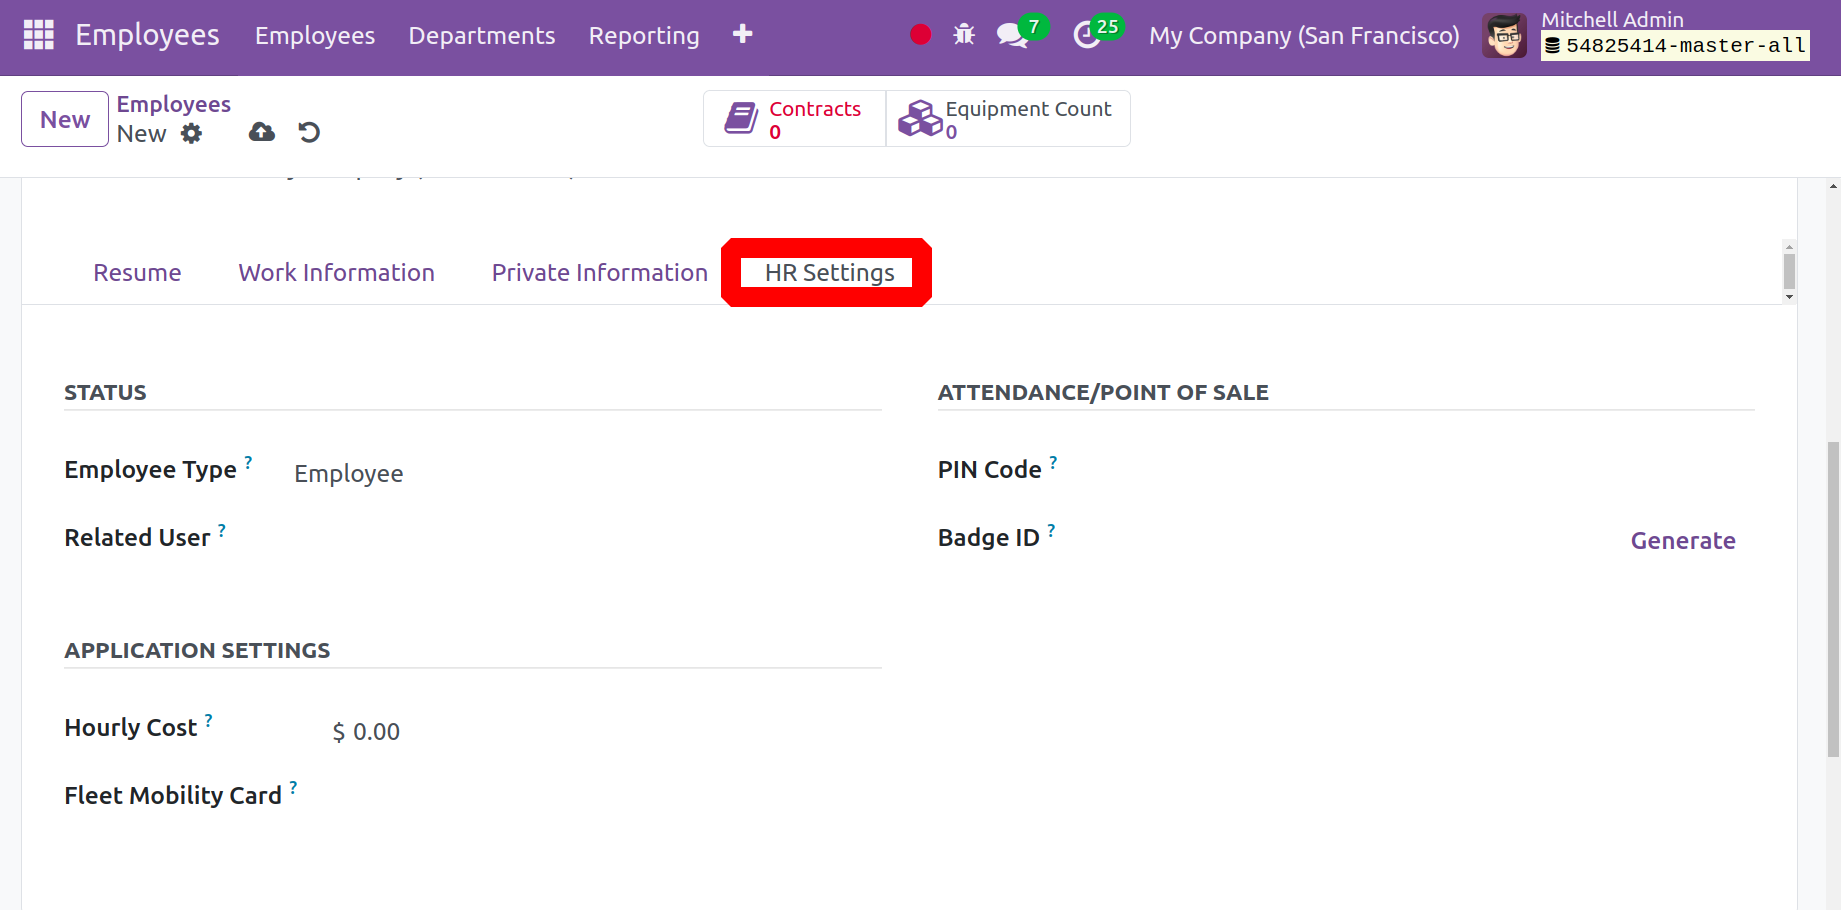
You can enter the employee type—employee, student, trainee, contractor, or freelancer—when you pick the HR settings in the employee section. Give the user the information based on the Related User. Since it grants access to administer the resources, this step is required. You can also include the current contract and employment position under the payroll option. The fleet mobility card and timesheet fee can be mentioned under the application settings option. You can enter the PIN code for check-in or check-out in the kiosk tab under attendance or point of sale to switch the cashier that is available in the point of sale module. For employee identification, badge IDs are simply created. You may quickly create the Badge ID code by choosing the Generate option.
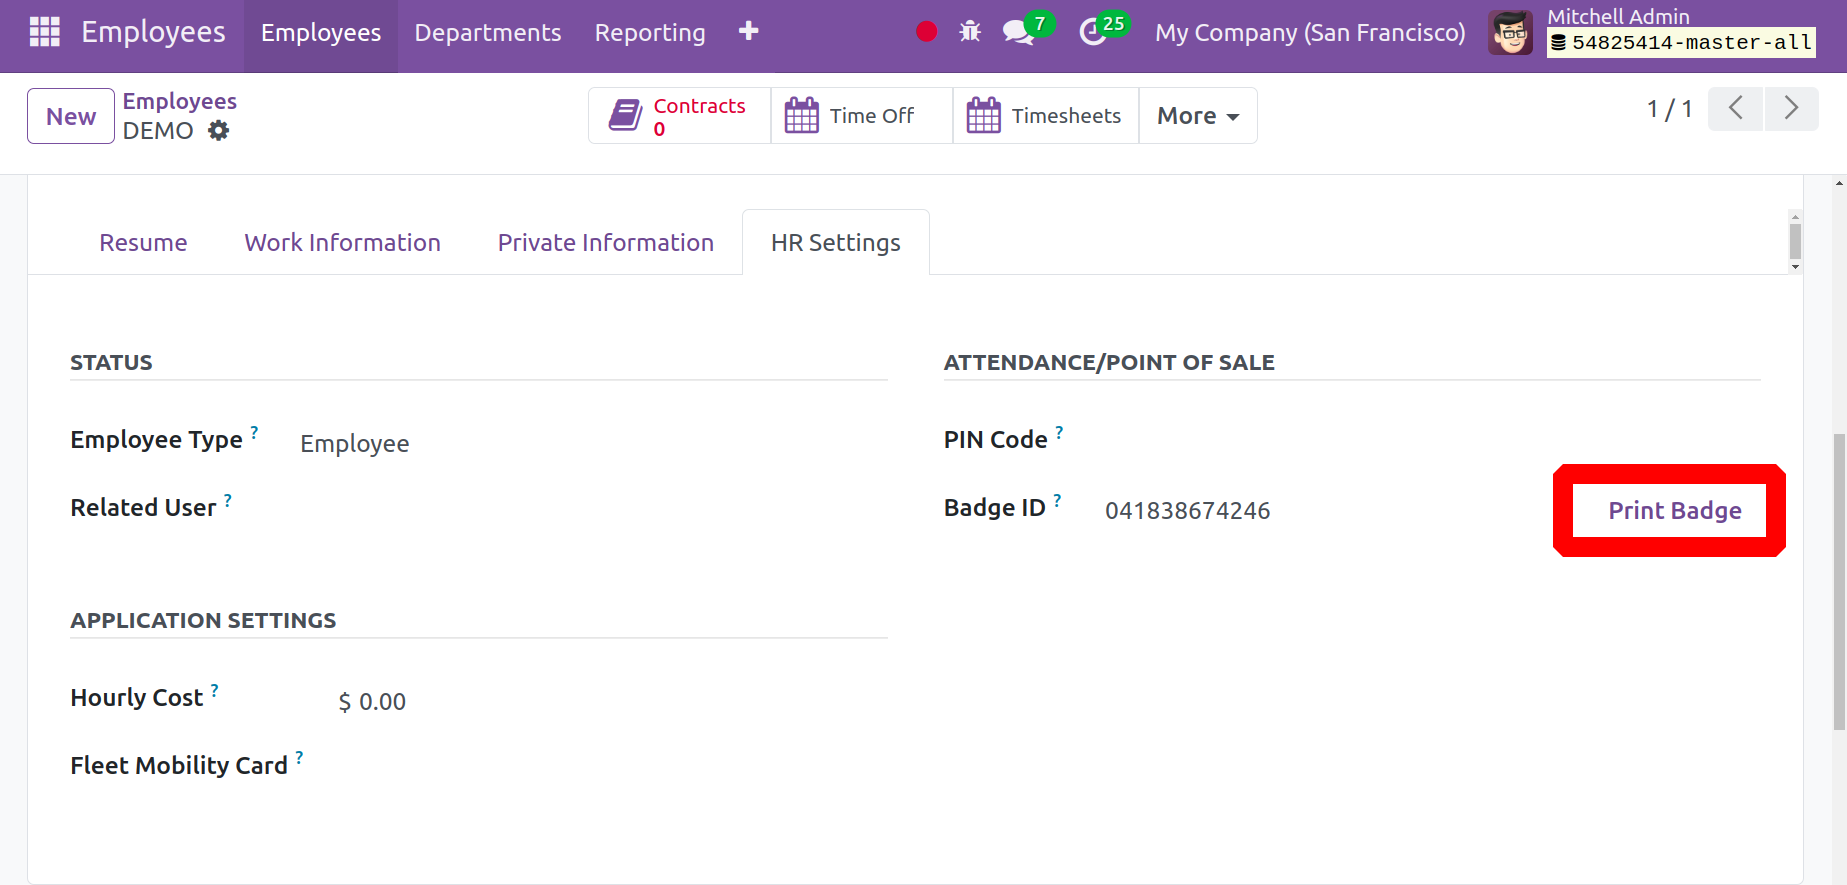
The printout of the badge will be generated upon choosing the print badge option, as indicated below.
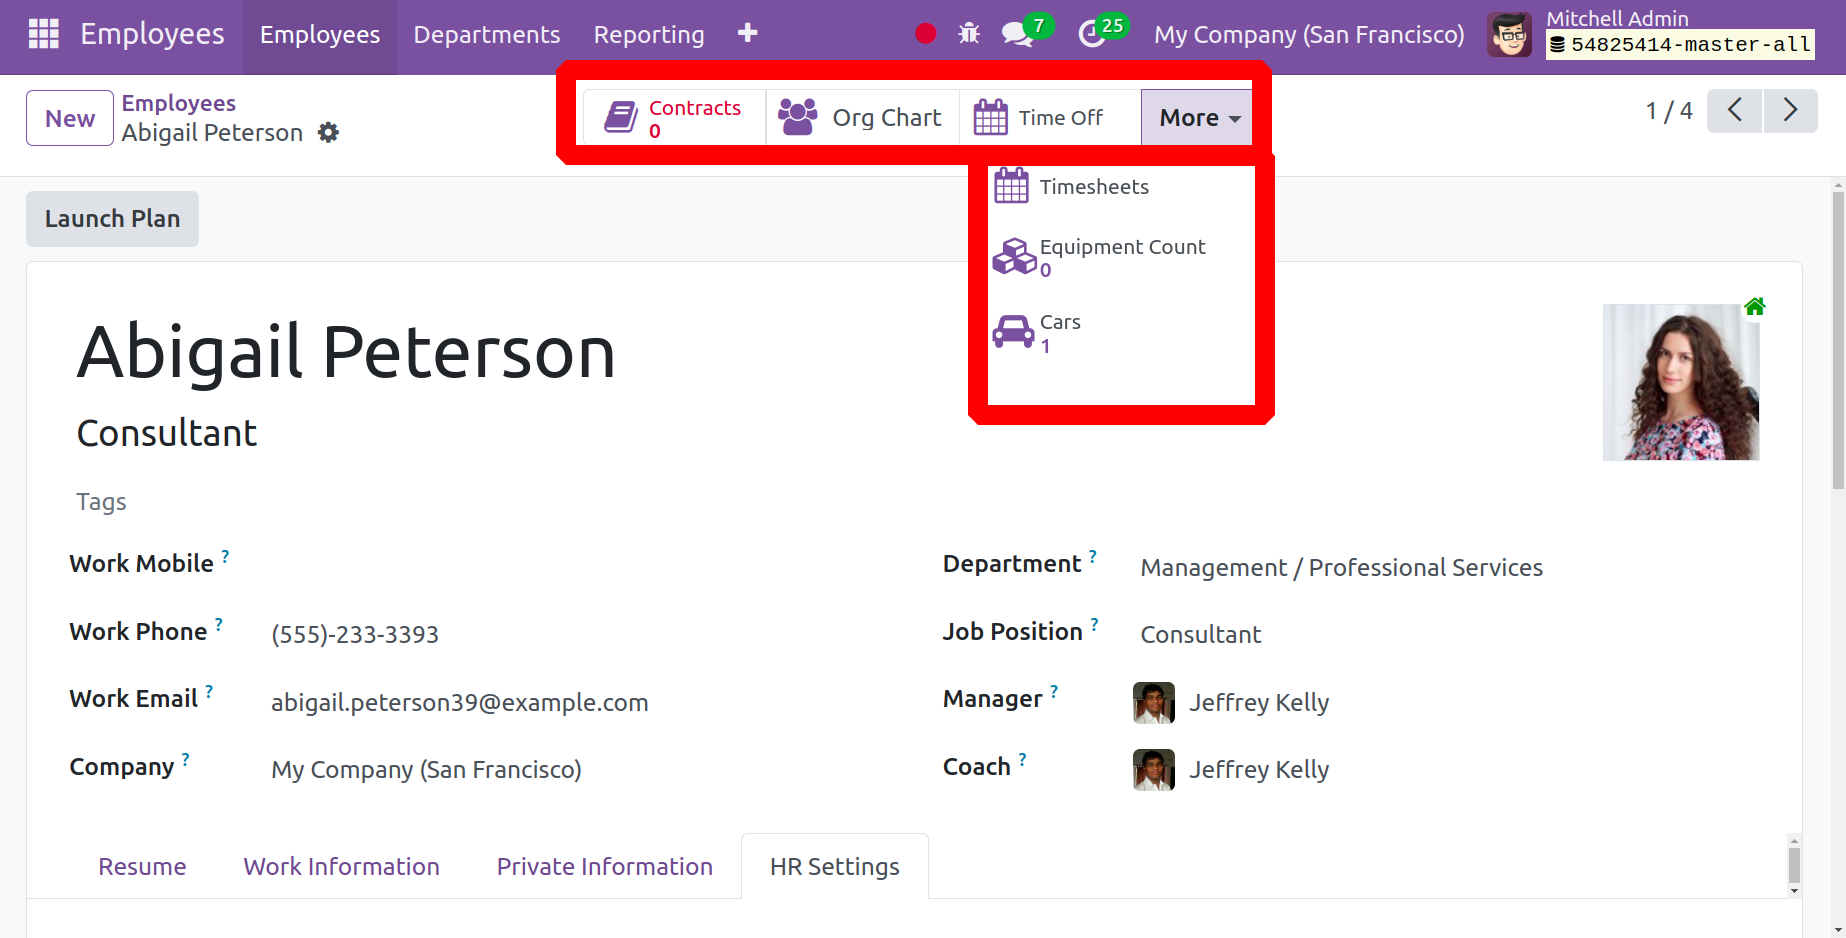
For this Contract, Org Chart, Time Off, Timesheet, Equipment Count, and Cars the generated profile will be accessible.
The contracts that are being made with this specific employee are available to you if you select the Contract option. You can obtain information about the remaining leaves and the time off by selecting the Time Off option. The Equipment choice will display the specifics of the apparatus that this worker has developed. The work entries and timesheet options will provide access to the work entry and timesheet-based data. Then the Org Chart will show a hierarchy view of the employee.
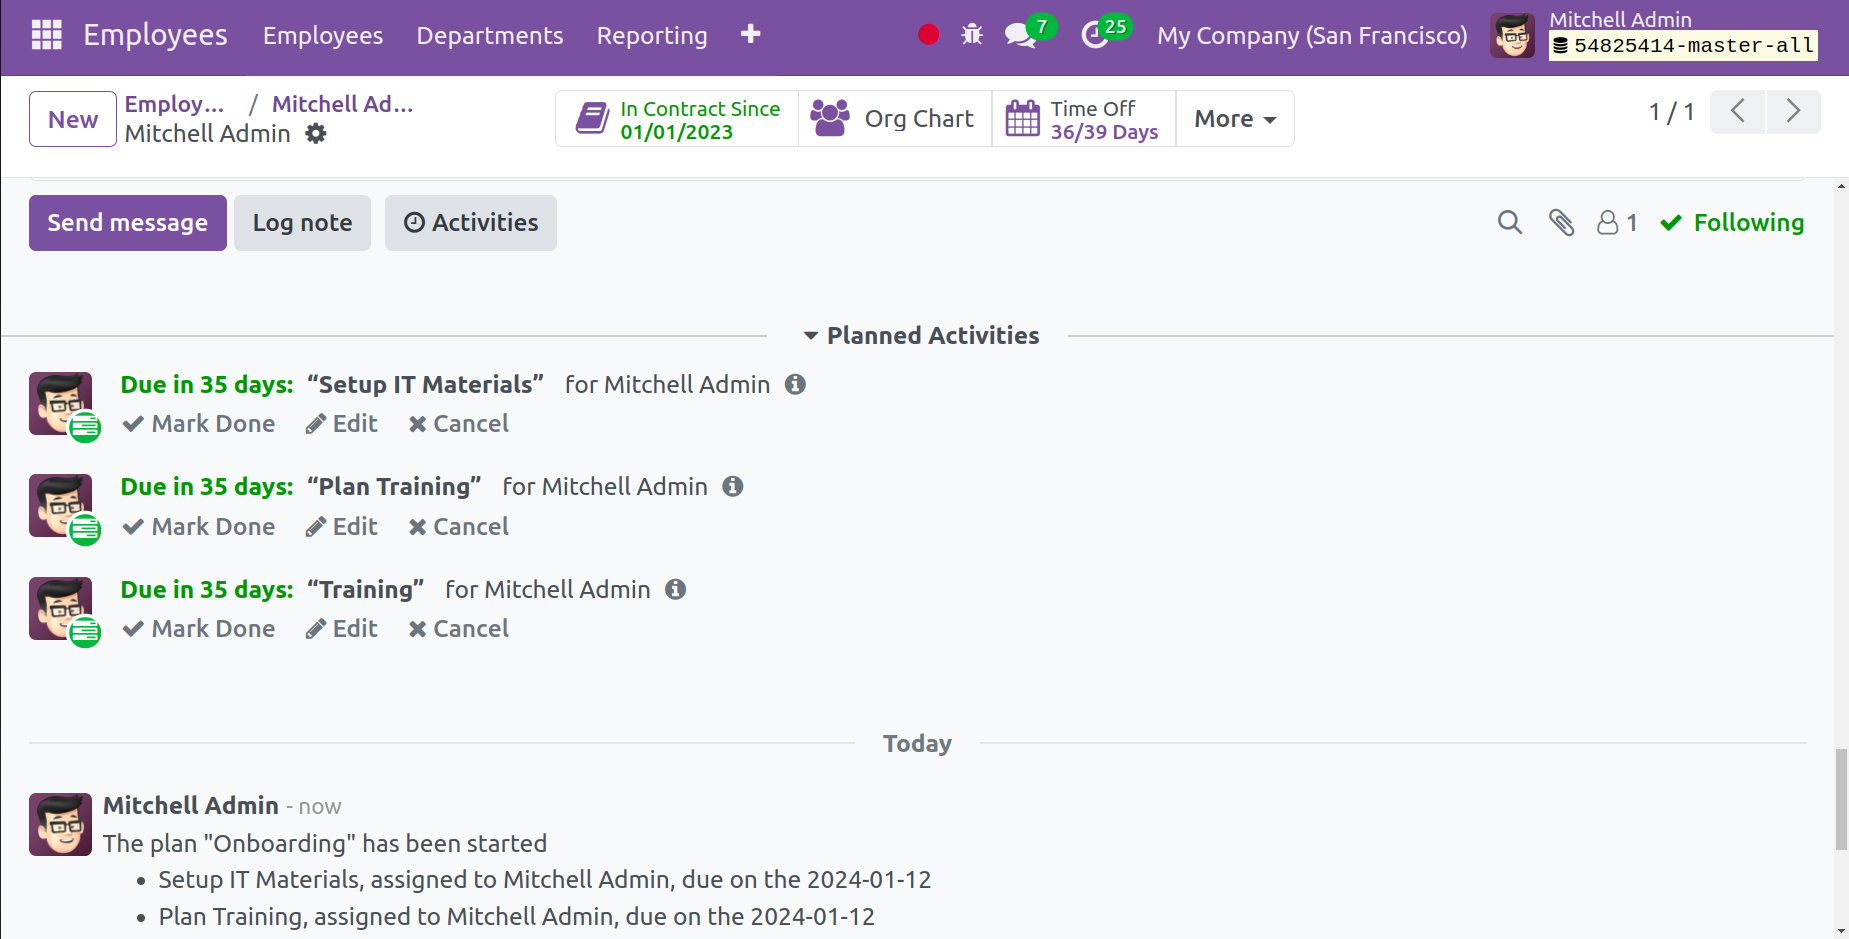
The option to Launch a Plan is to do so with that specific employee.
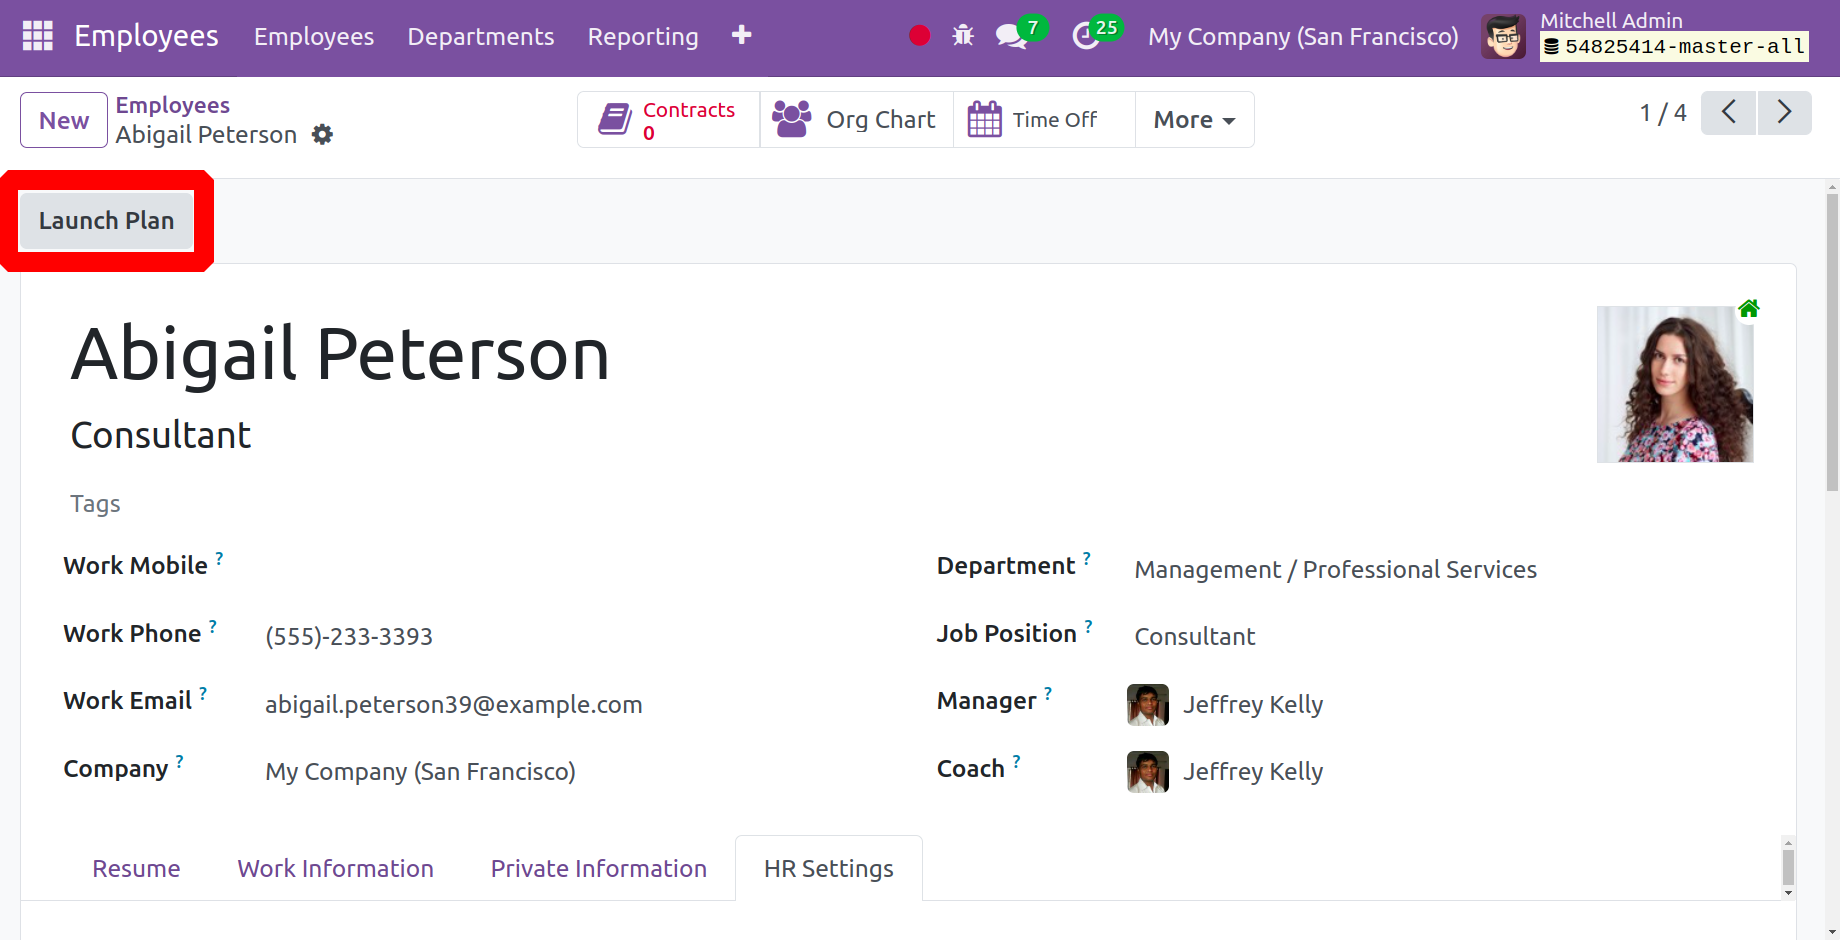
Assisting a new hire in becoming acquainted with the operations of the organization requires assigning certain tasks. When you choose, a window opens.
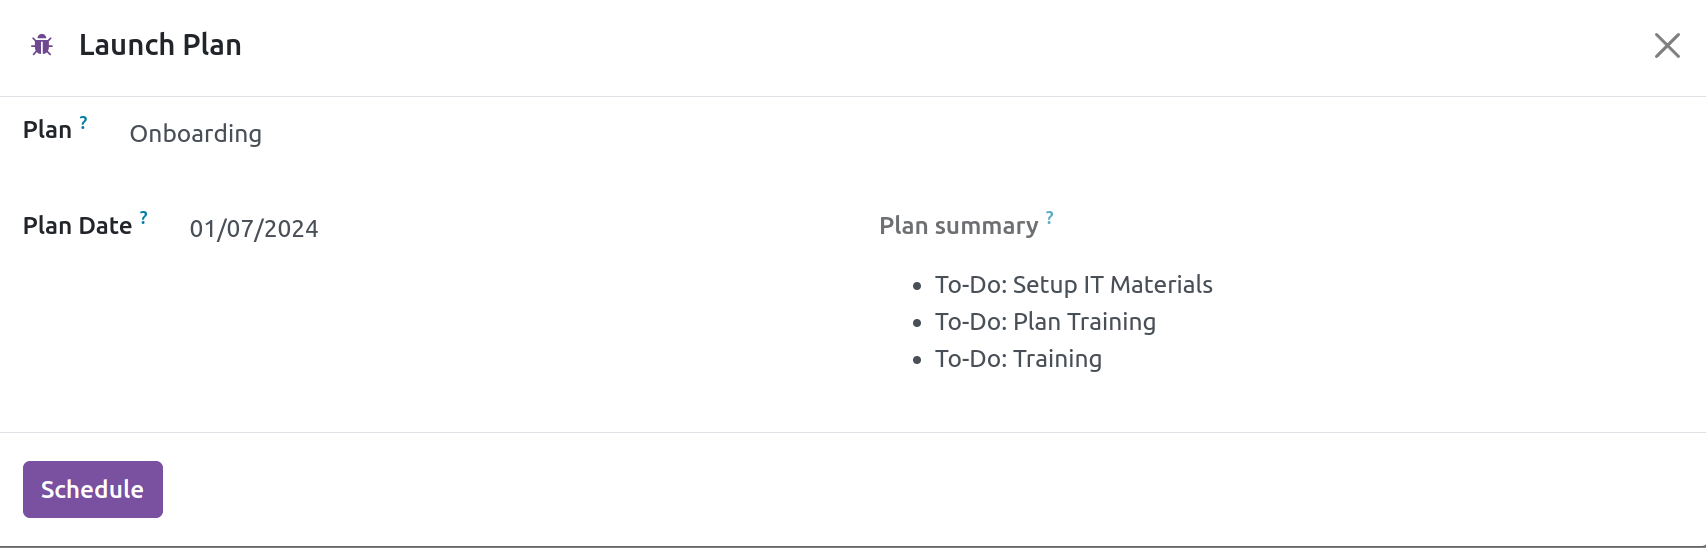
You can choose the onboarding option for the new plan. After that, the employee will be given it on their own. When an employee leaves the organization, you can also design off-boarding events for them.
These are the procedures to follow in order to create an employee profile in Odoo ERP's employee module.
Org Chart
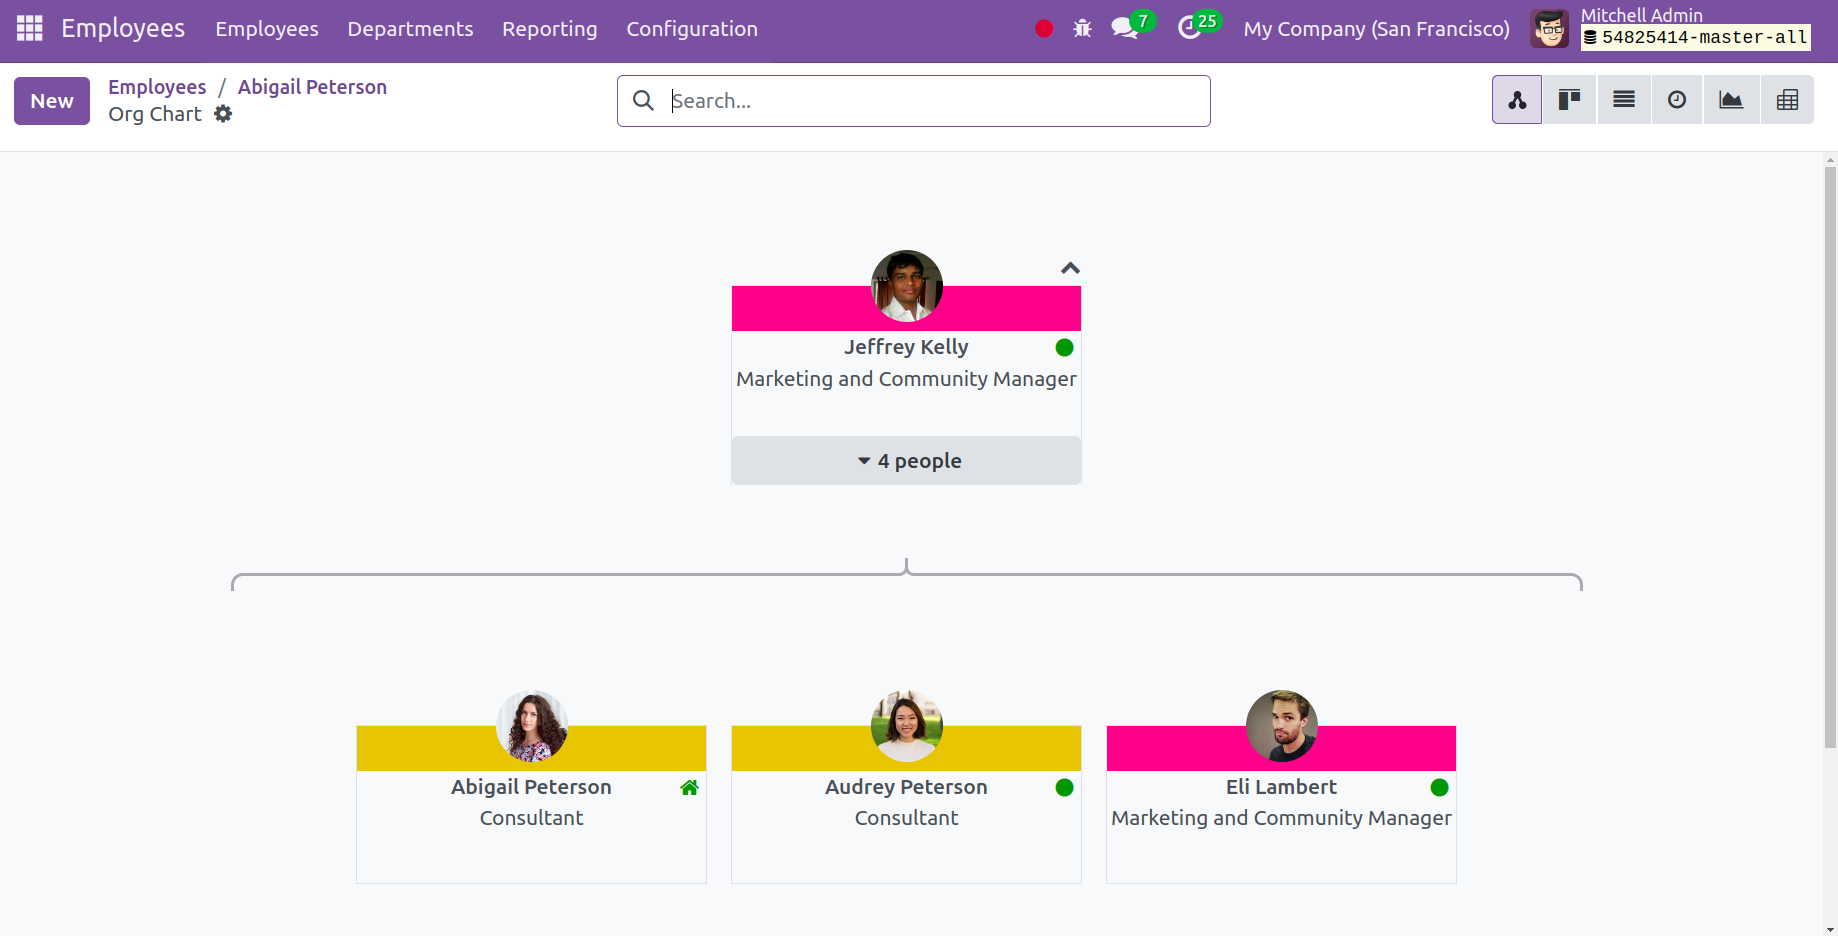
The employee organizational chart is now accessible to users via the Employees menu. To do that, click the Org Chart.
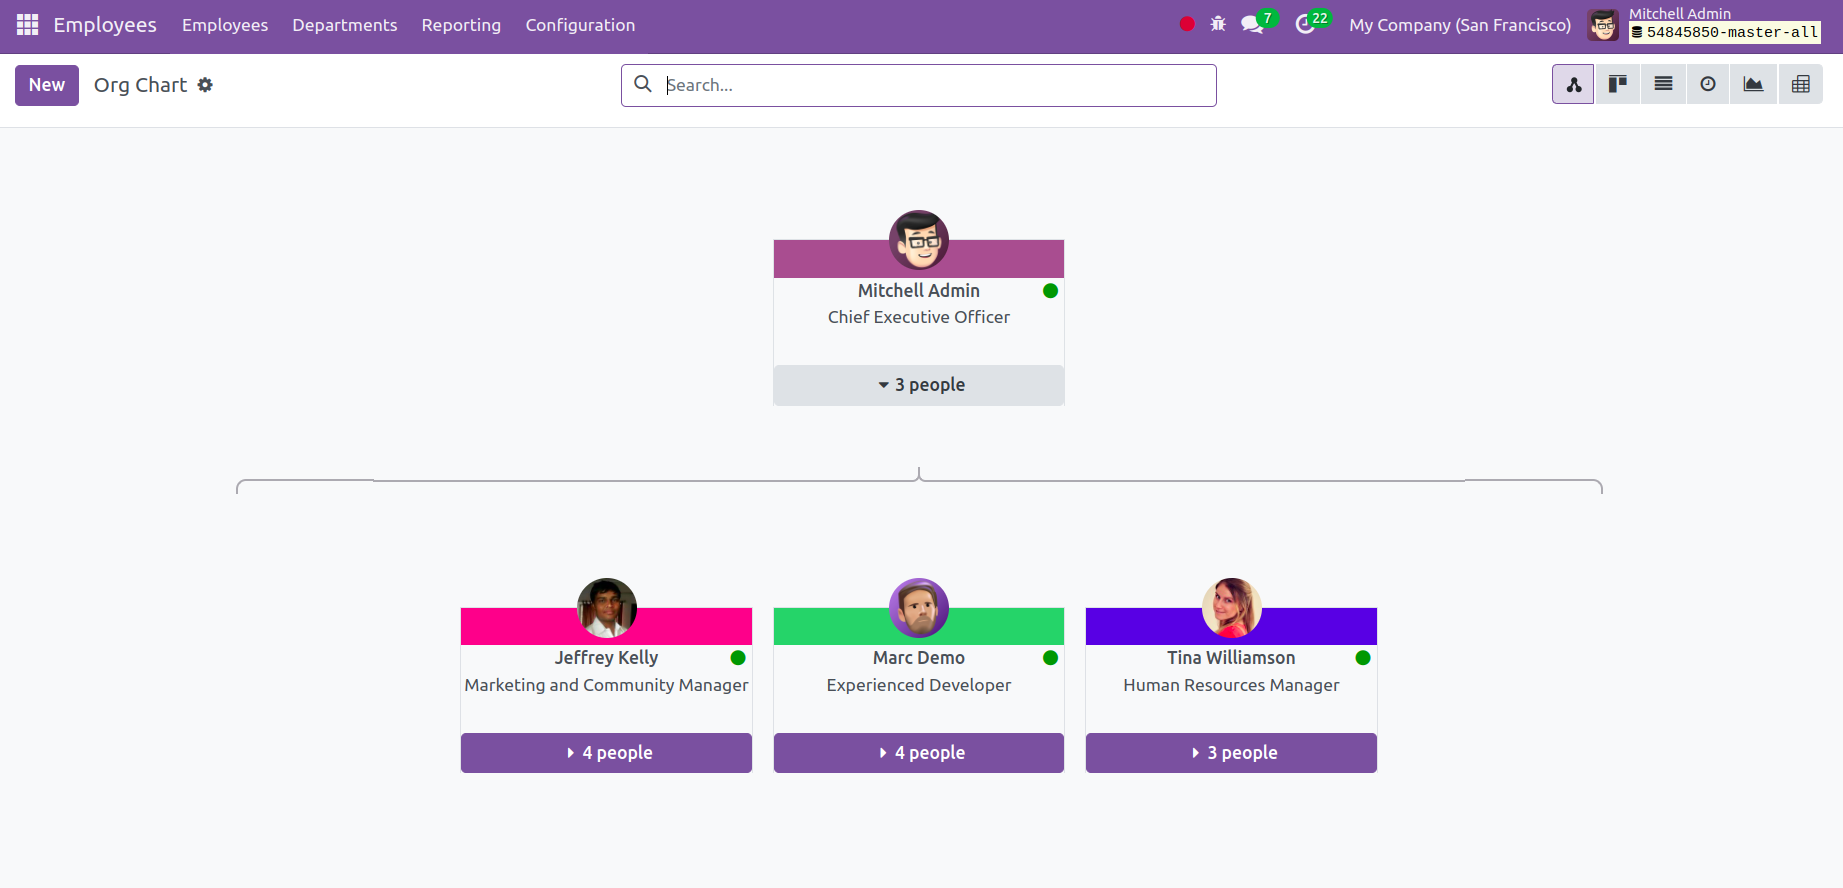
When you click on "3 people," the number of workers who report to each individual will be displayed, and further information about the subordinates who work under the management will be revealed. You may easily drag and drop the employee under the new manager if you wish to switch the employee's manager.
Contracts
It's regarded as a signed written agreement between the employer and the worker. Before beginning employment, it is essential to go over the obligations, duties, payment schedule, and working hours. The employee module has the necessary area for this phase. The Employee's menu will have the choice available.
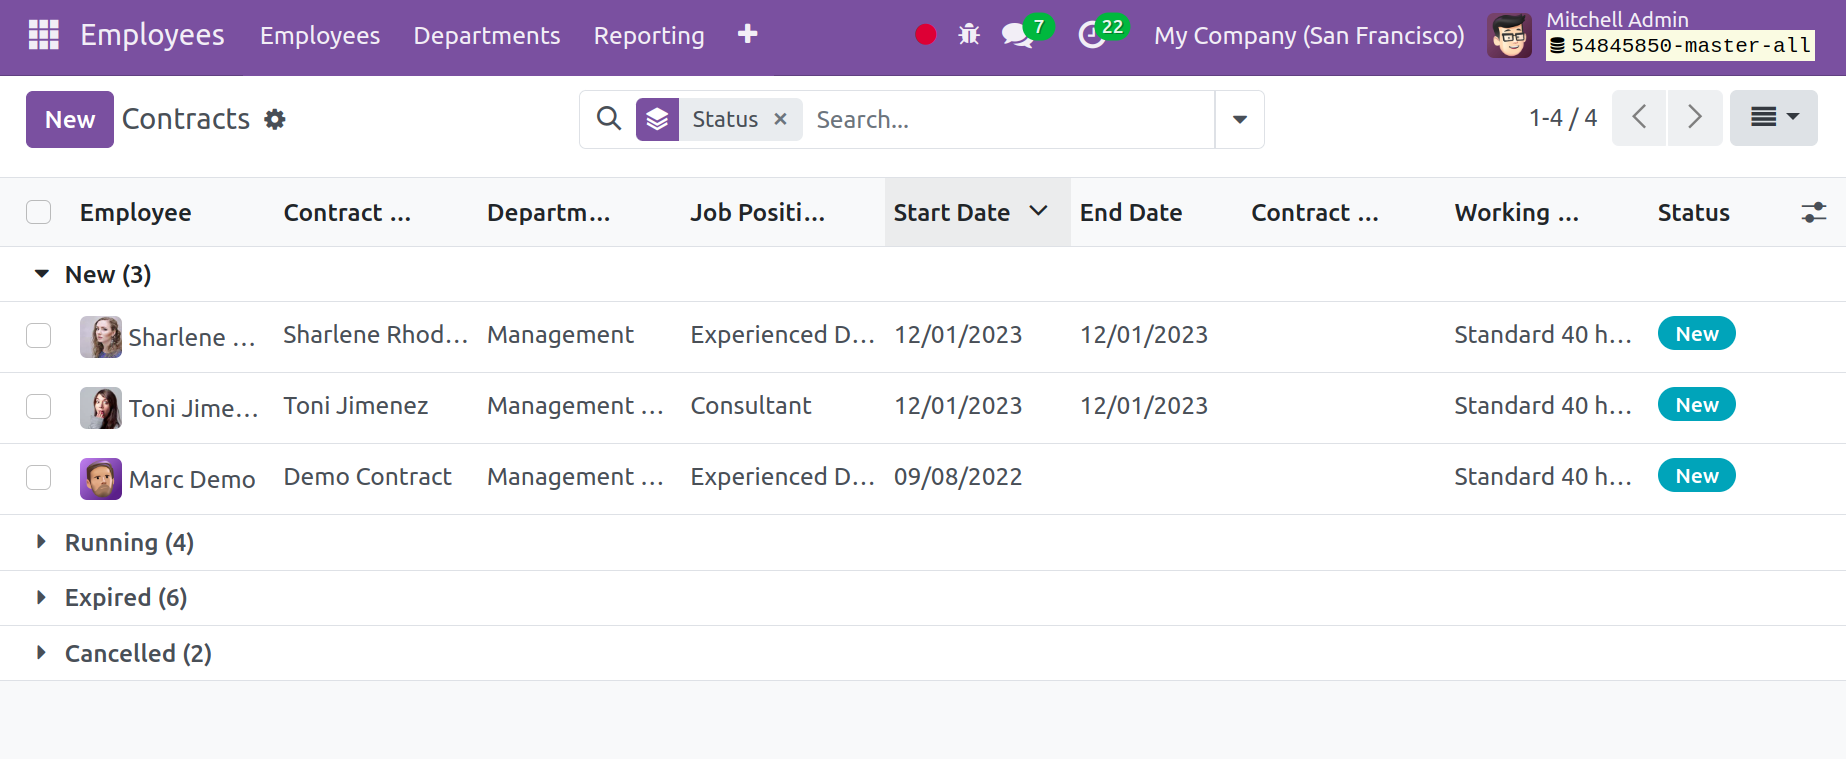
You will find the information here, on this page, including the employee's name, hire date, contract name, start date, and the contract's current status. The list of such contracts will be displayed on the page. The contract may be in effect, on hold, or expired. The Kanban view also displays the page. The employee's contracts, which cover work, employment position, contract terms, duties, compensation structure, contract validity, work permission, timetable, and many other items, are available under the Employees tab.
Making these contracts for the employee is simple. On the main dashboard, there will be a contract option
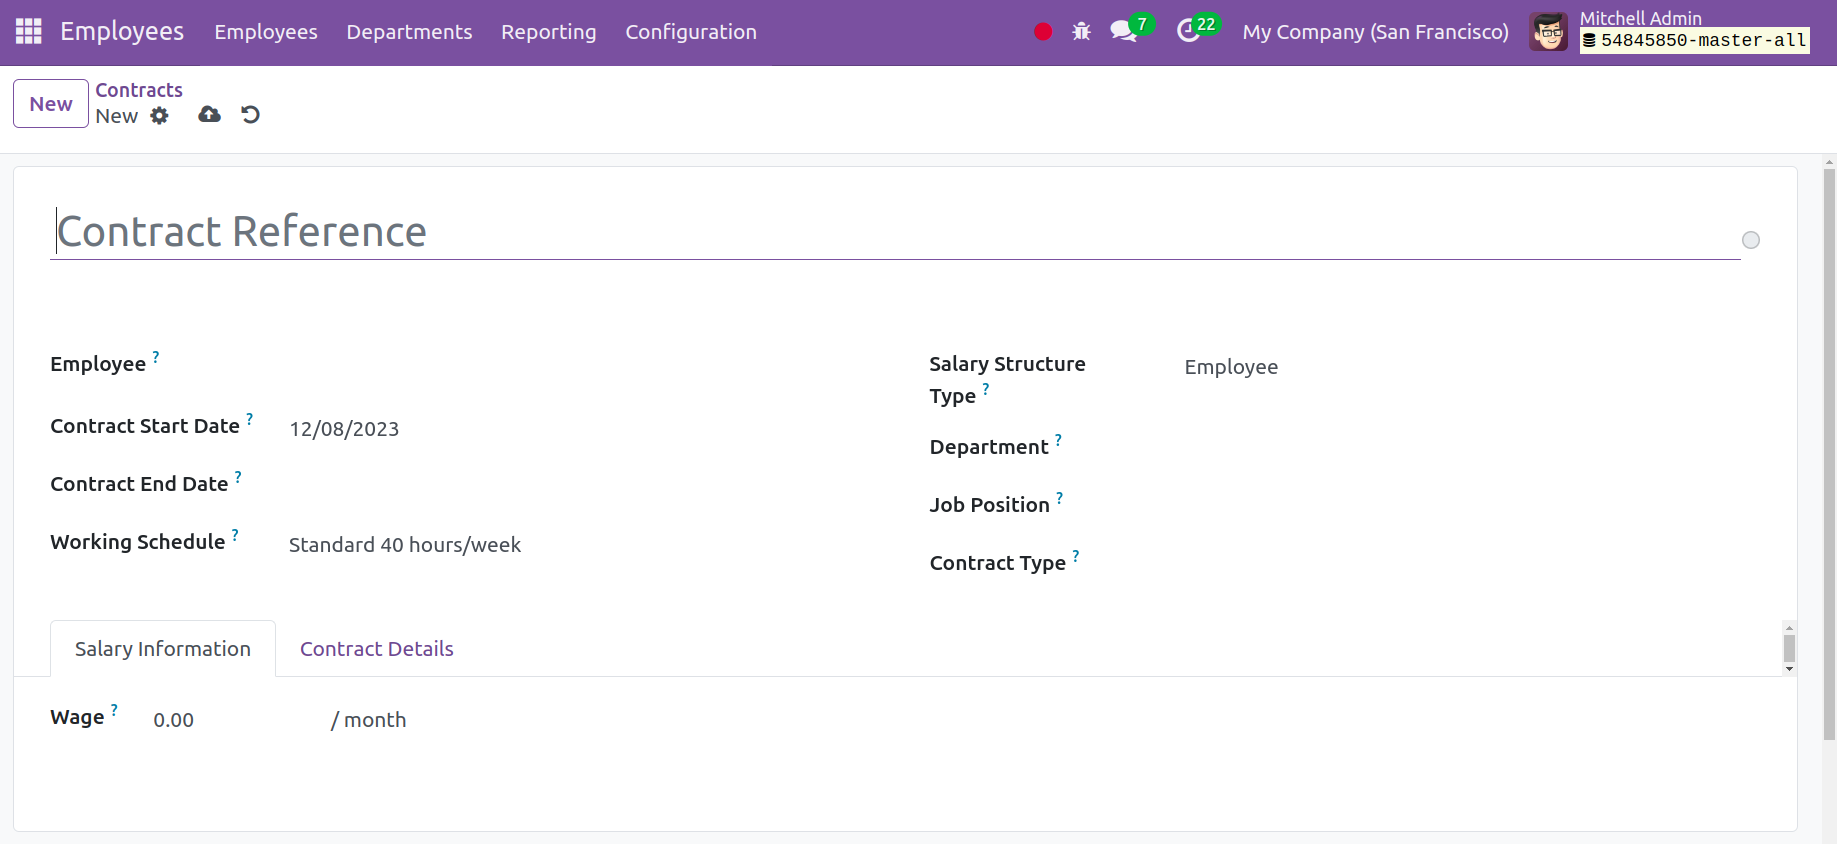
The above graphic will show up when you select the New icon on the contract page. In the designated areas, you can provide the name of the contract, the employee's name, the start and end dates of the contract, the kind of salary structure, the working hours, the department, the job position, the contract type, and the HR contact.

The external link can be used to modify the type of salary structure. You can enter the name of the country, the default working hours, and the type of structure, just like in the image. Similarly, you can use the external connection to set the working schedule.
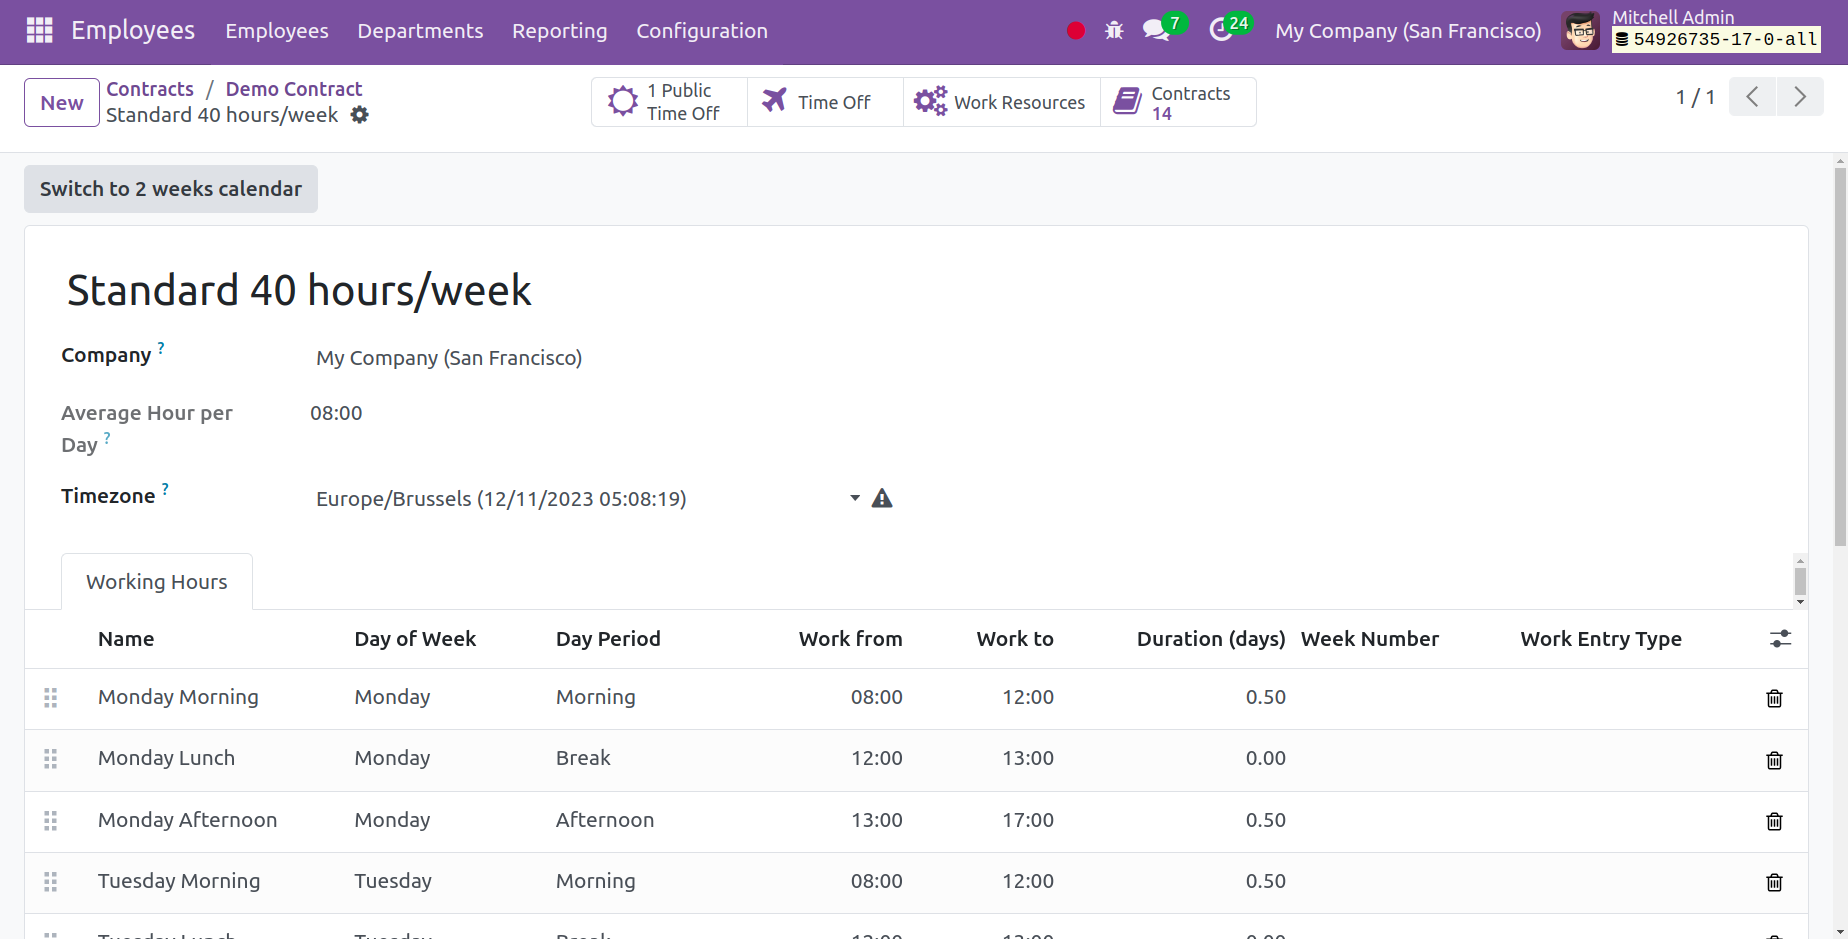
You can enter many details on the page, such as the average number of hours worked each day, the time zone in the designated area, the schedule for each working day of the week, and many more. To assist you in creating a work schedule for the designated two weeks, you can switch to a calendar icon that spans two weeks.
You can designate someone to handle contract validation in the HR department. Additionally, you have a notes option under the Contract Details where you can provide the terms and conditions. Salary information is the next tab in the contract, and it aids in adding data based on salaries.
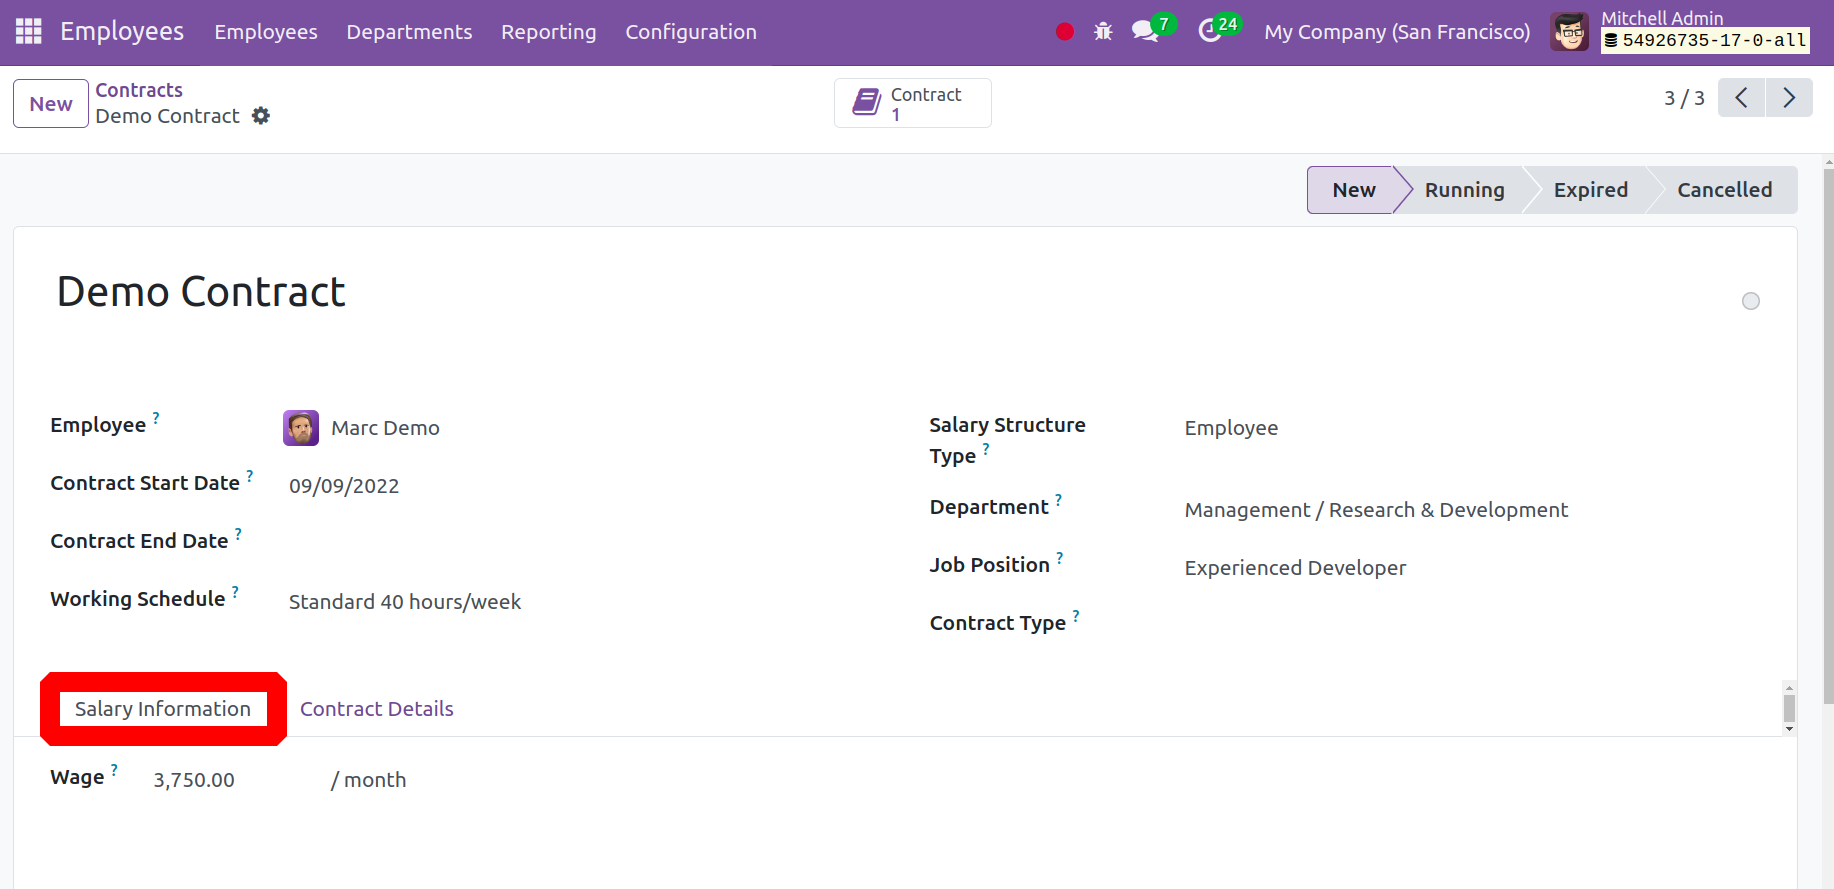
The monthly gross wage can be entered here in the designated field. Lastly, select the Save icon.
Departments
You can construct departments with the aid of the employee module's Department menu. Employee information can be controlled according to departments.
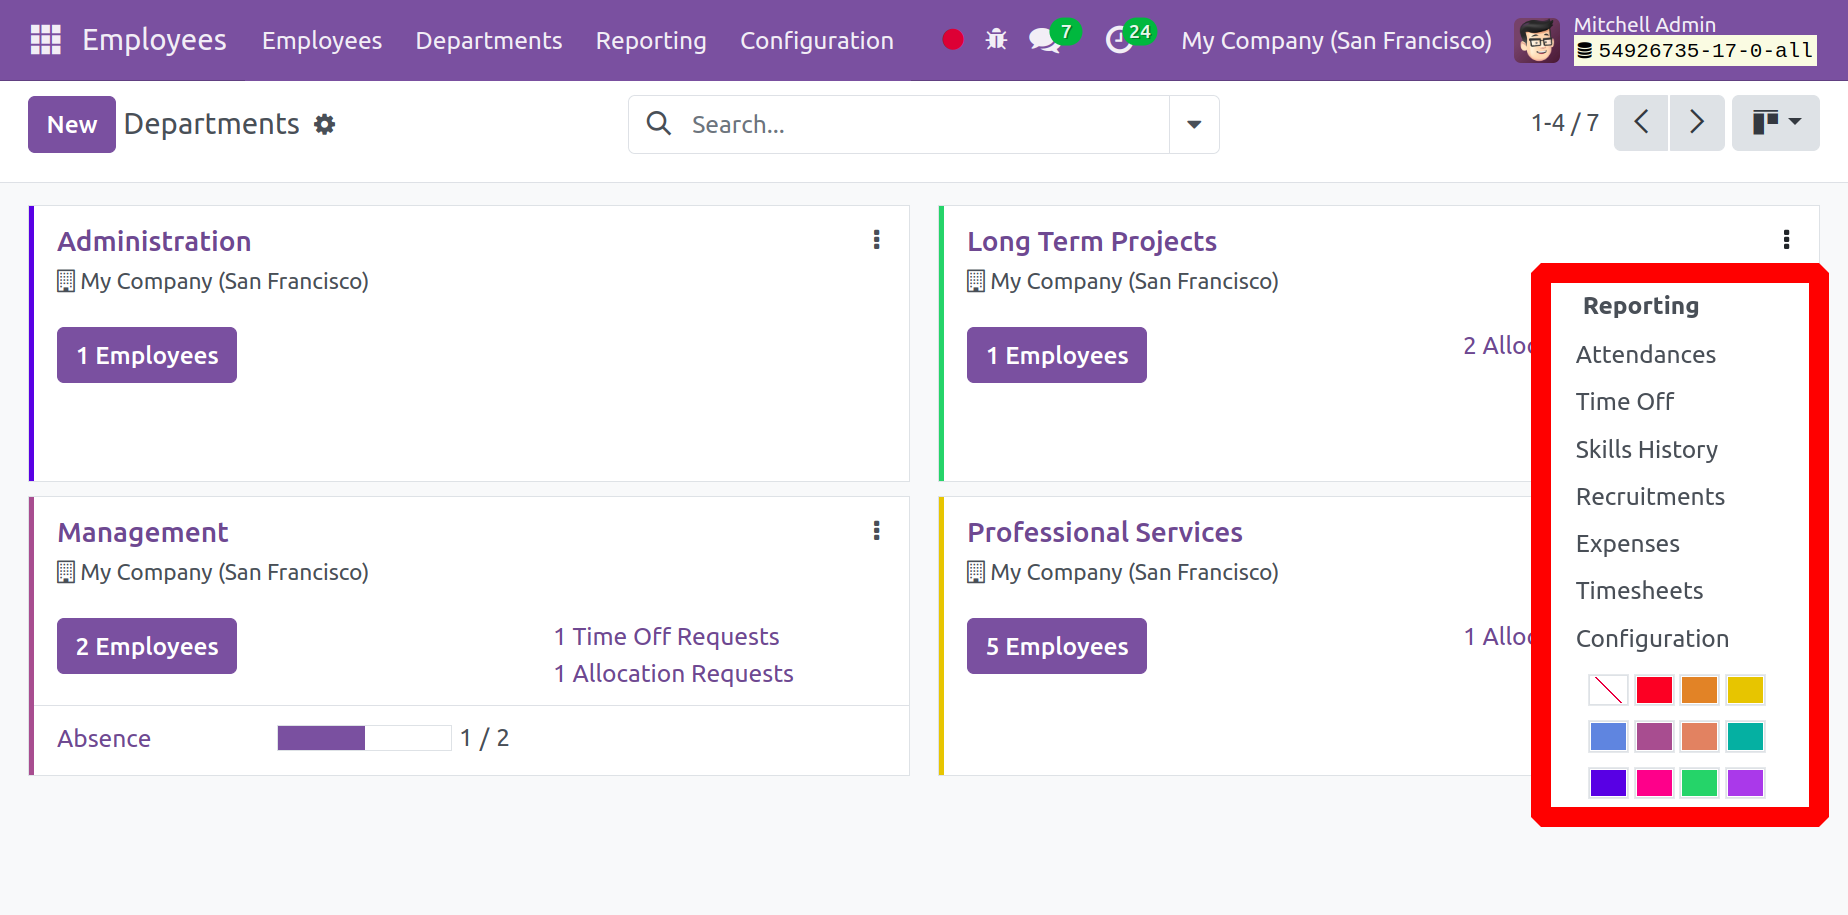
You are viewing the page in a new view right here on this page. There are several departments on this page. Several procedures can be easily controlled with the aid of sophisticated alternatives. Each department will be given to you independently, along with an emblem representing each employee. The option facilitates obtaining employee data under certain department headings. The quantity of absentees in each department will also be provided to you.
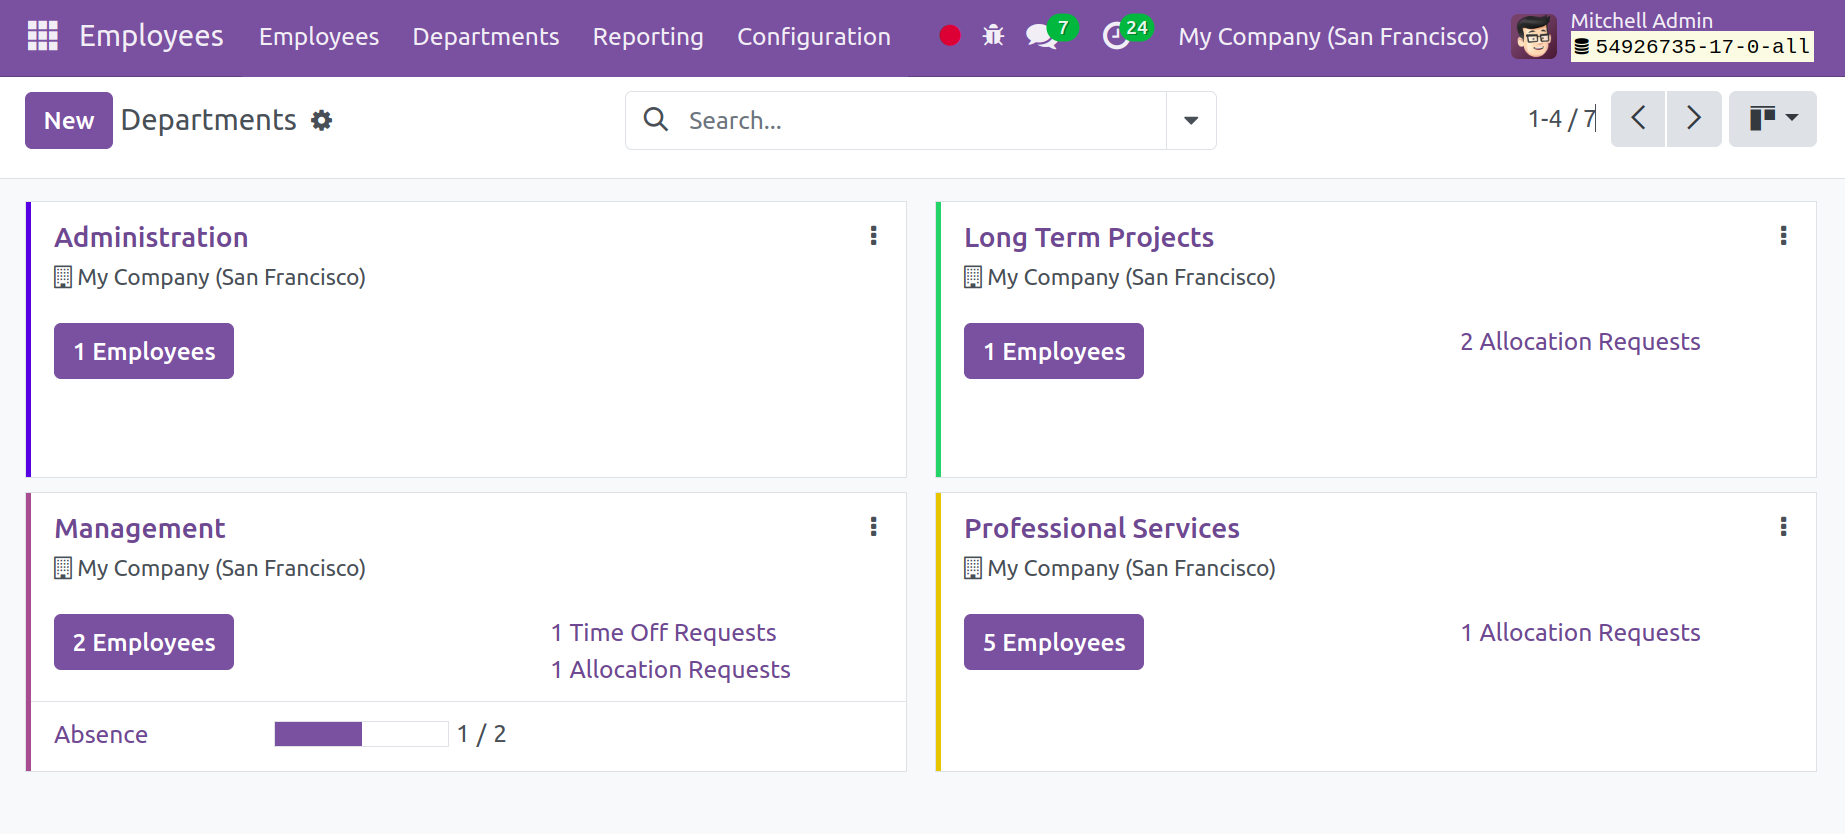
The dashboard, which has choices like time off requests, allocation requests, new applications, expense reports, and many more, will show the prior actions in each department. By choosing the specific one, you may control each one. You can find information about the specific department's requests for time off on this website. It can be accepted or rejected based on that. In a similar vein, you can control how the departments operate. As seen in the figure below, picking the three dots will give you the ability to generate reports on timesheets, spending, recruitment, attendance, and time off.
Next, select the New button to create a department on your own.
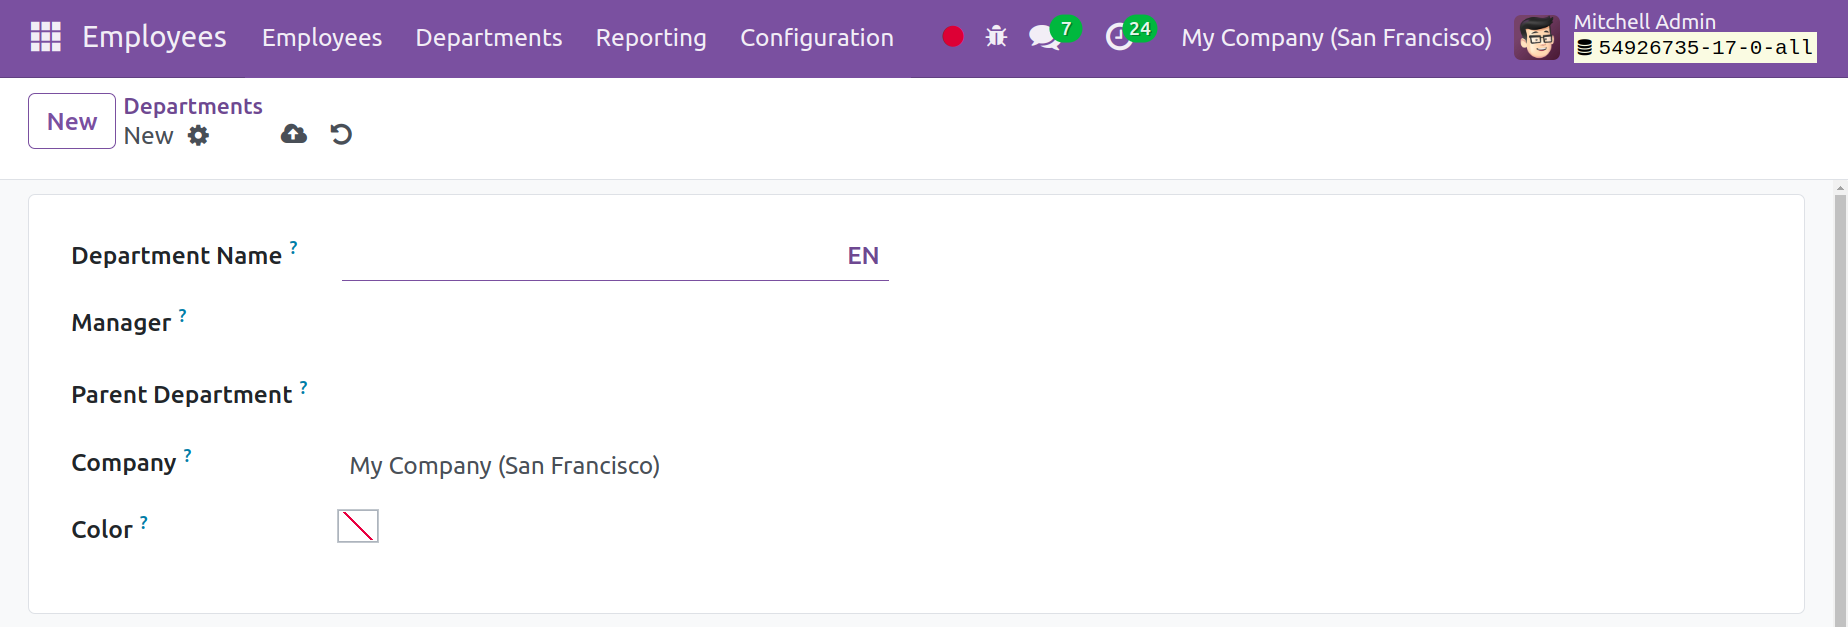
You can provide the name of the department, parent department, manager, and firm on the creation page. Lastly, select the Save icon.
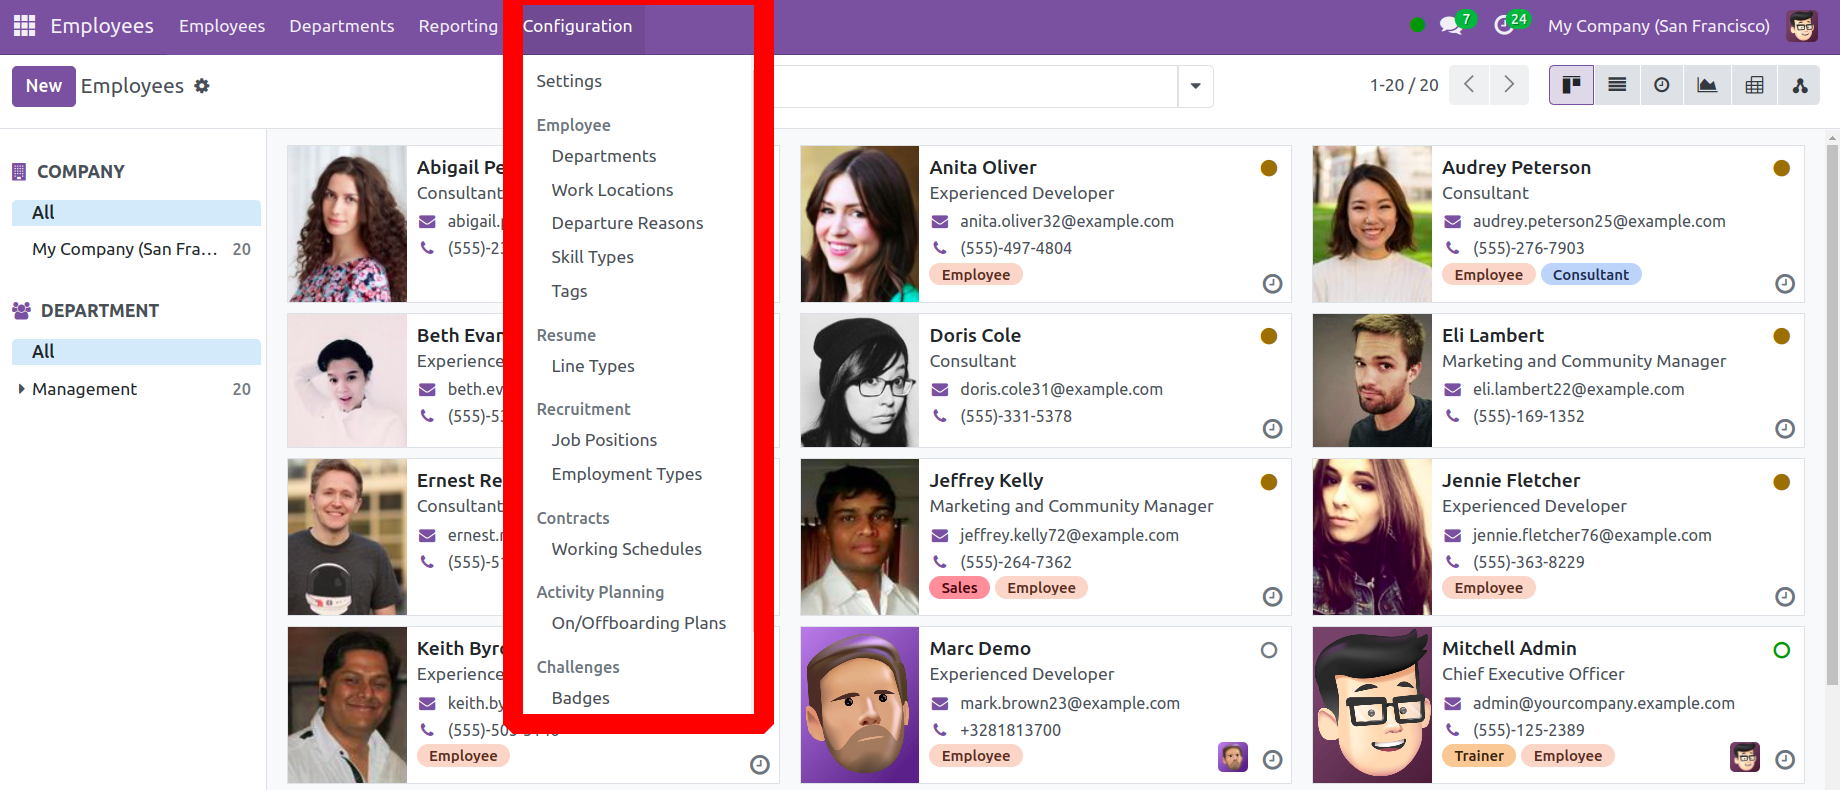
Configuration
Under configuration, there are several sections to add new configurations. Employee, Resume, Recruitment, Contract, Activity Planning and Challenges.
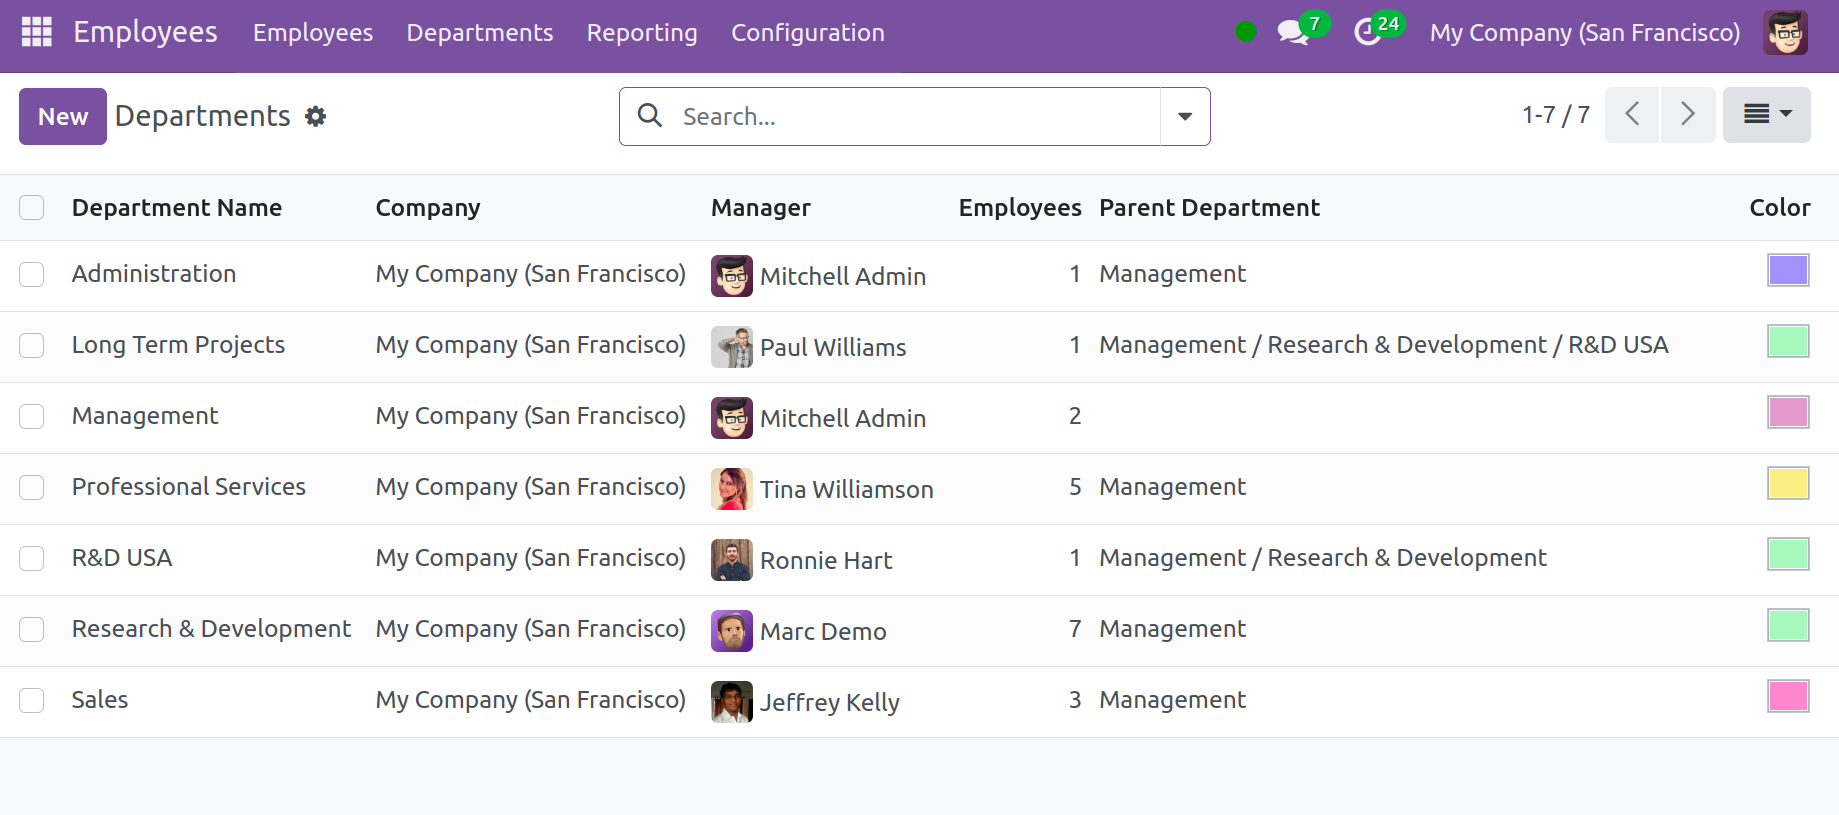
Department
Employees can be easily categorized by department by customizing the Odoo17 Employee module using the departments' data that are available in your organization. To configure the Departments in your company, navigate to the Configuration menu and select the relevant option. The Employees module contains the pre-configured list of departments, as shown in the screenshot below.
Work Locations
The company will be given different work locations to control distinct procedures. Under the configuration menu, the Employee module offers a work location option for the process.
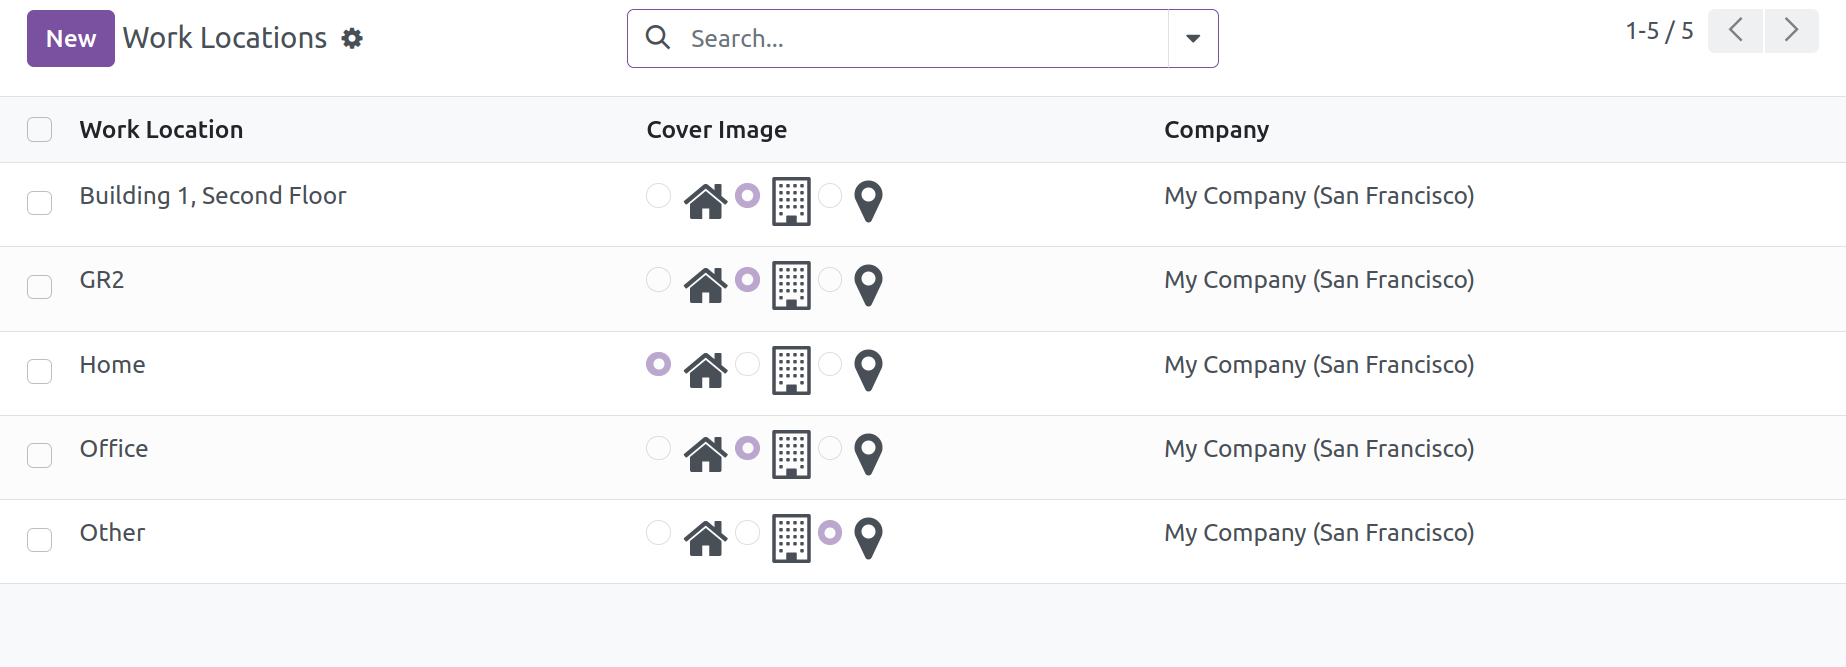
You may find the information on the page, including the company, work address, and location. All of the previously established work areas will be accessible here. Click the New button to create such a work location.
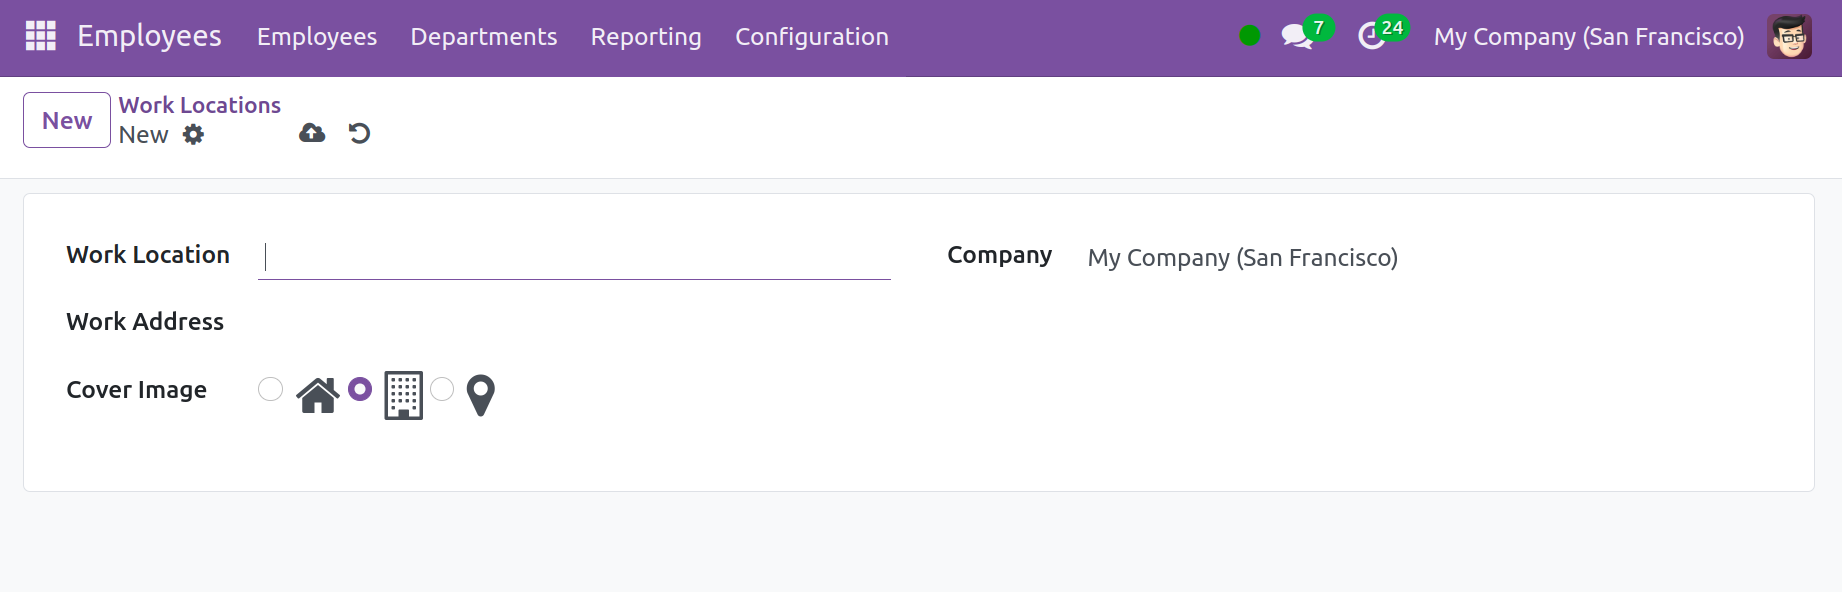
Here is where you may complete the Work Location form. Fill in the relevant fields with the Work Location, Work Address, Cover Image, and Company. After the configuration is finished, the work location's data will be stored in your database.
Departure Reasons
The ability to specify the reason for an employee's departure from the organization is called "Departure Reason." The Configuration menu will provide access to the window.
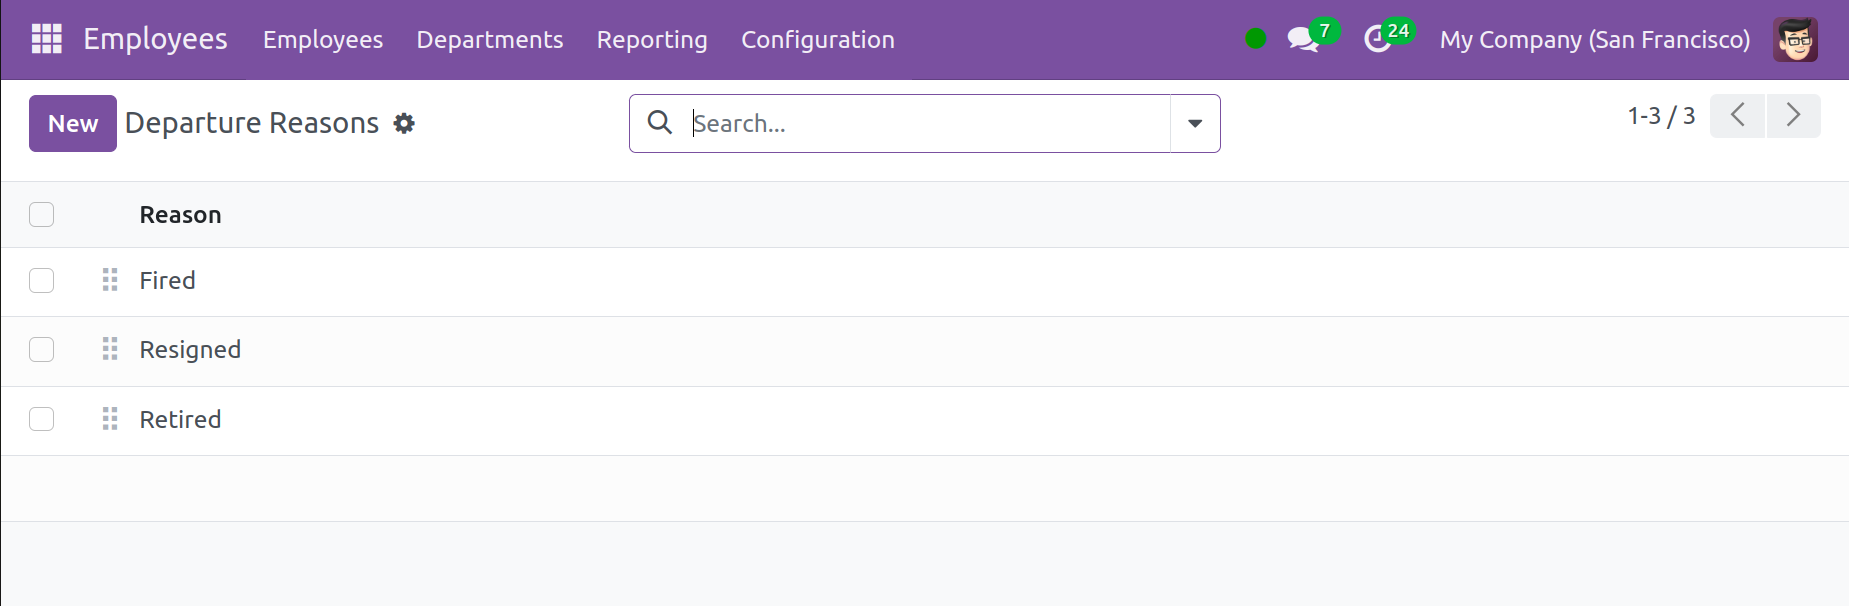
All of the previously made lists, together with details about the cause for departure, are displayed here. All it takes to add new reasons is to select the New icon.
Skill Types
When creating an employee profile for a company, it's important to include a variety of abilities. You will see the Skill Types option on the Configuration menu after turning on developer mode.
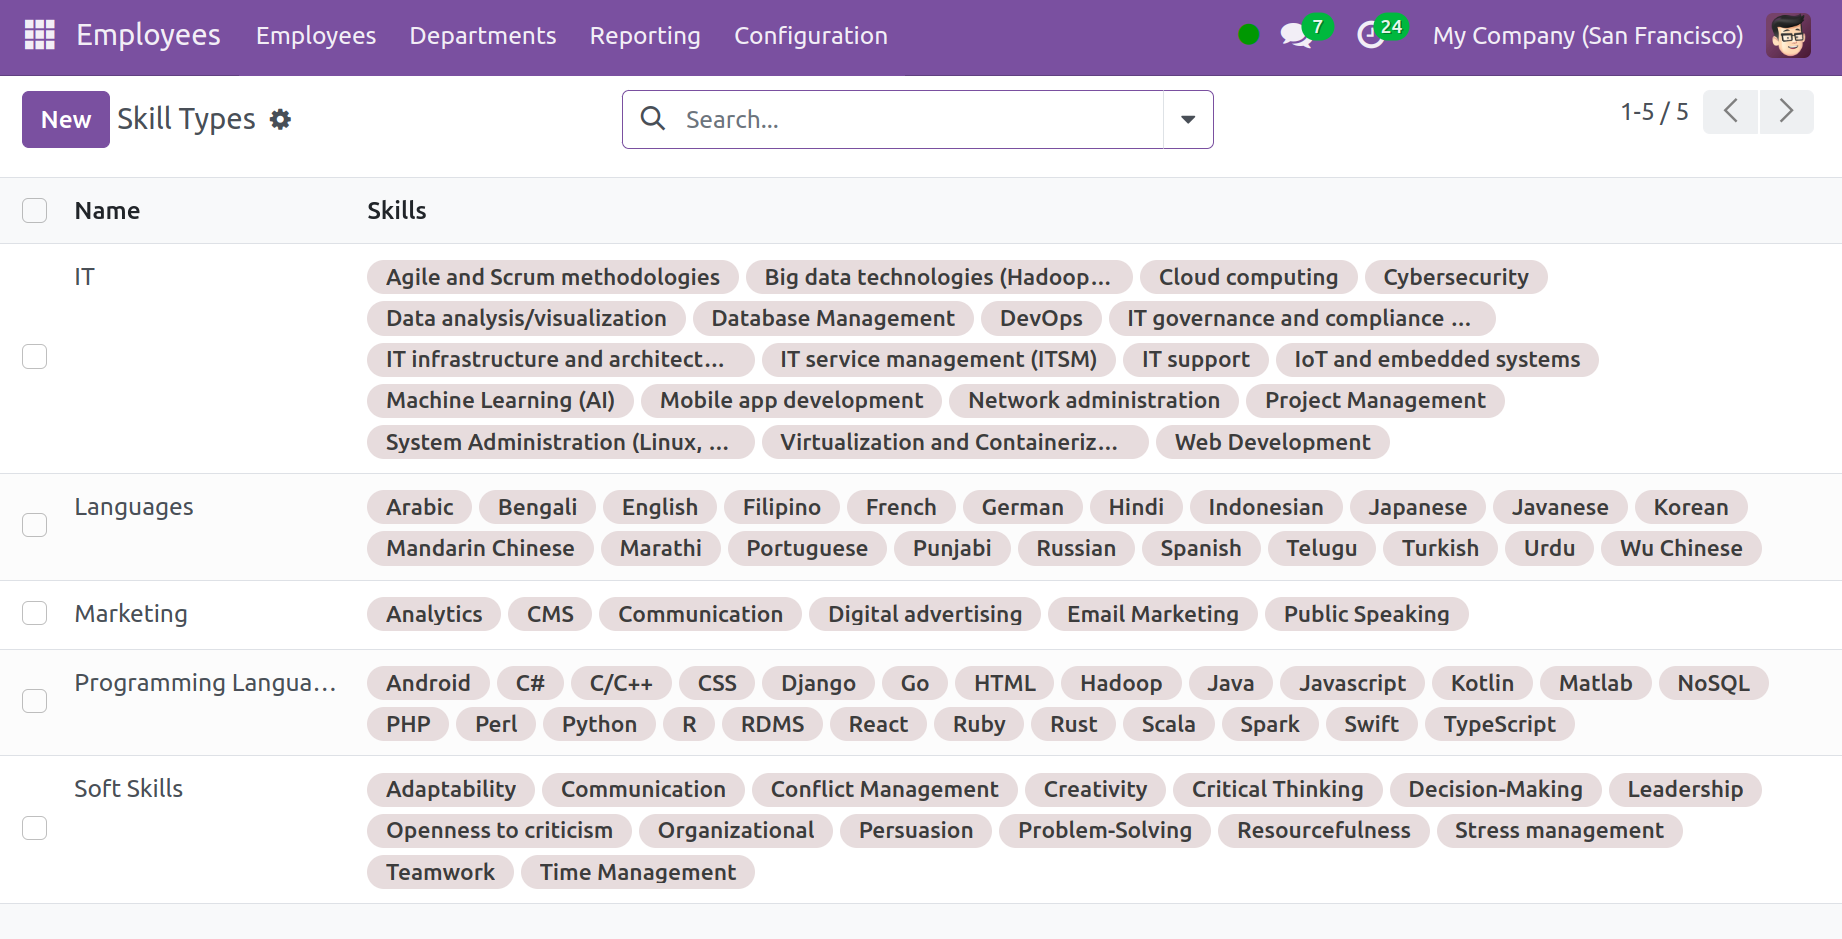
You will see a pre-made list of skills on the website. You can add a new skill to the current list by selecting the New icon.
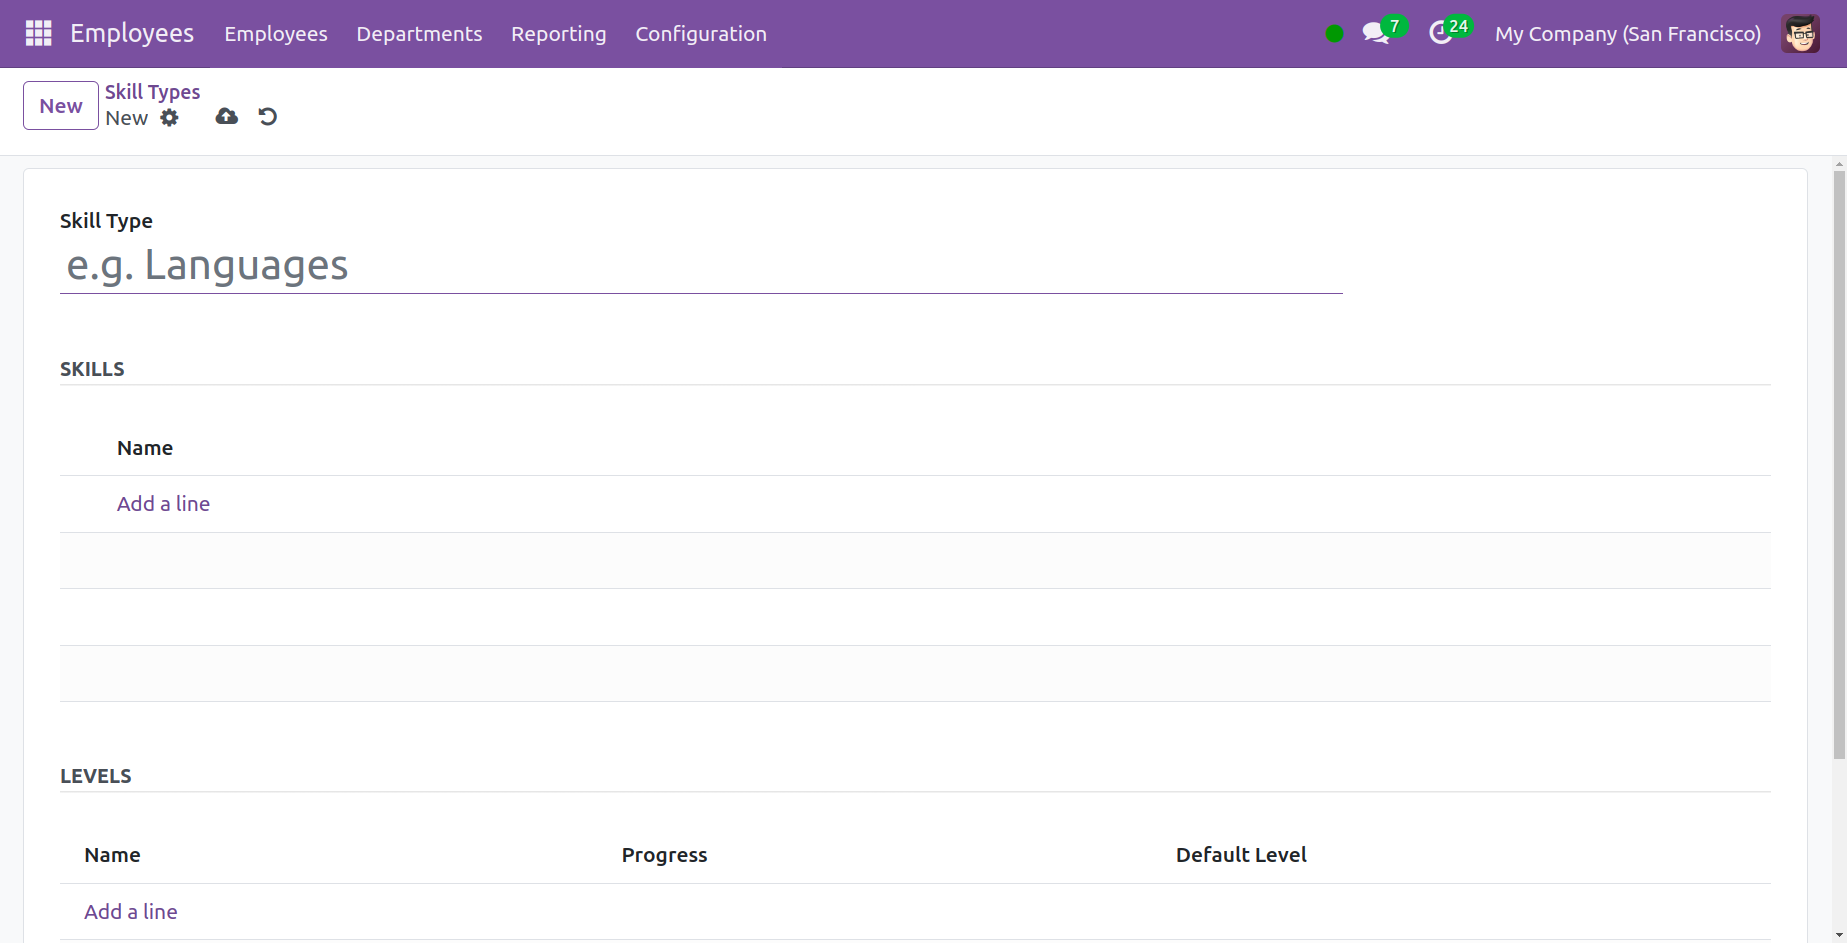
You must enter the skill type in the designated space here. Let's say you are choosing a specific language. In that case, the Add a Line option will allow you to enter multiple languages that you are familiar with. With the use of the Add a Line option, you can identify several levels beneath the Levels page to gauge your proficiency in a certain language.
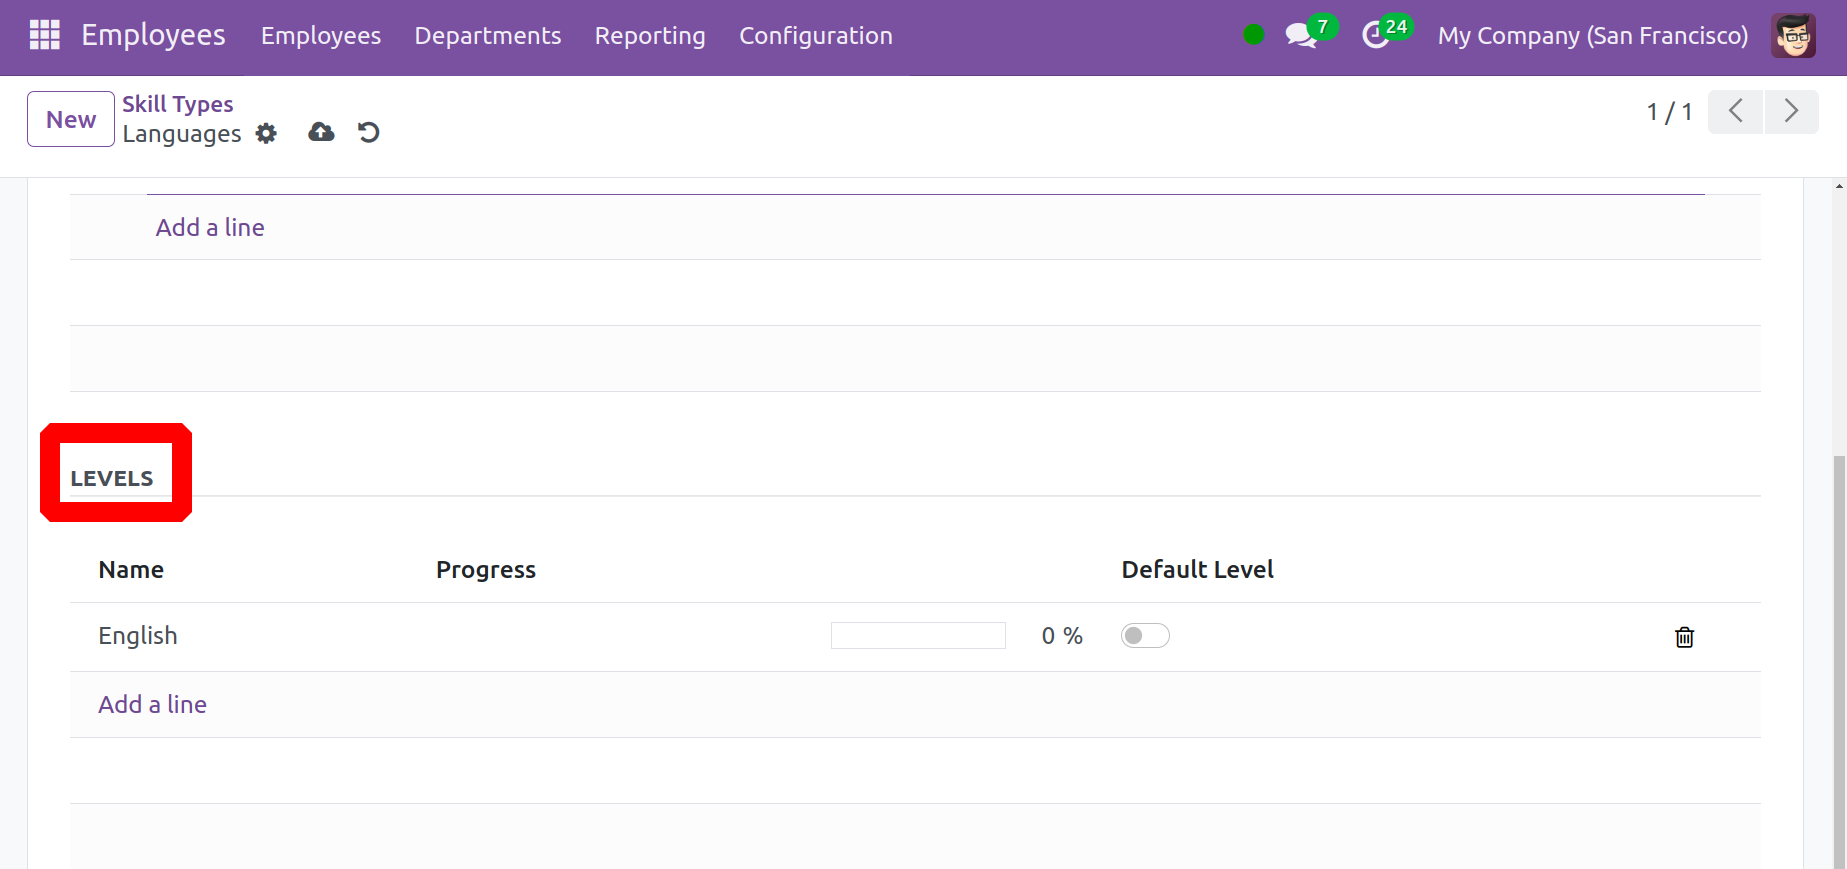
You must list the level name and the rate of progress on the page. Since the language is chosen as a skill, you can enter different levels to determine the level of proficiency in the given language. Once every procedure has been finished, you can click the Save icon.
Tags
Making tags for the staff is a simple process. You can use these tags after saving the new hire. You will be presented with this choice in the setup menu upon initiating developer mode.
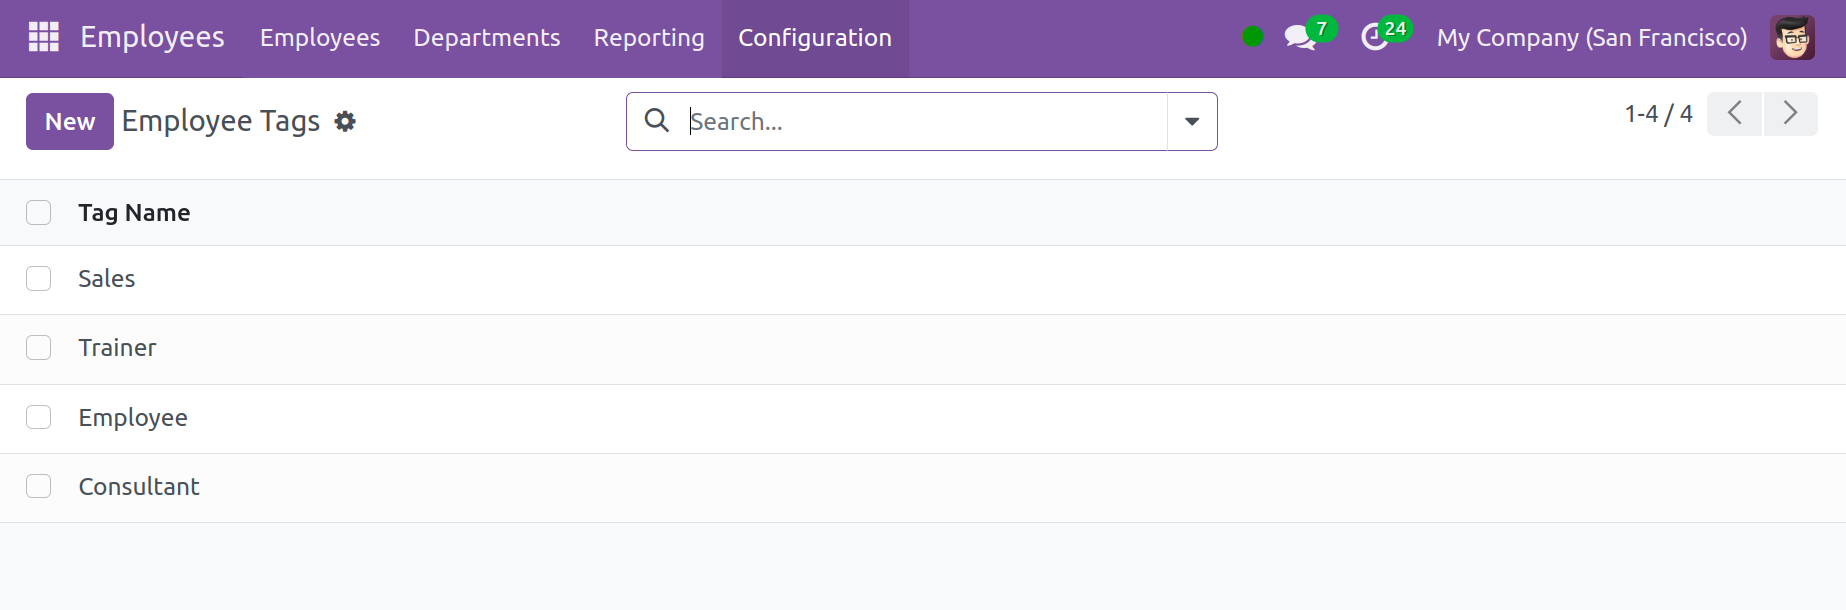
You may see a list of already created tags on the page. The additional lines provided make it simple to add a new tag to the list that already exists.
Line Types
You can configure multiple Resume Line kinds for the employee profile from the Employees module's Configuration menu, in a manner akin to how we configured skill kinds.
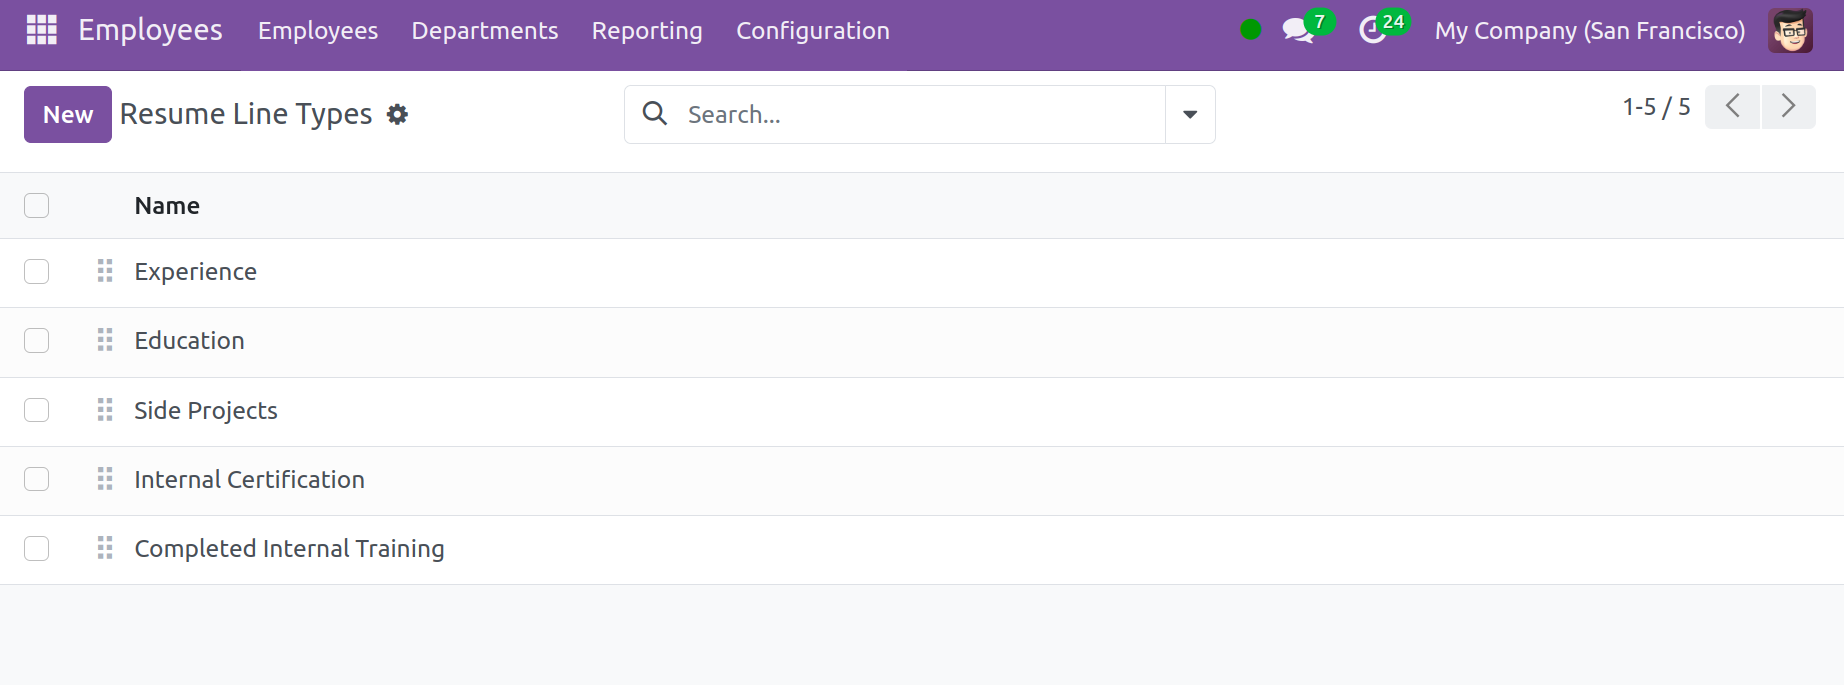
To create a new line, click the New button and enter the Name of the resume line type. After you click Save, your new resume line can be seen on employee profiles.
Job Positions
You can also add various employment positions, much like when you create departments. The Configuration menu will have the choice accessible.
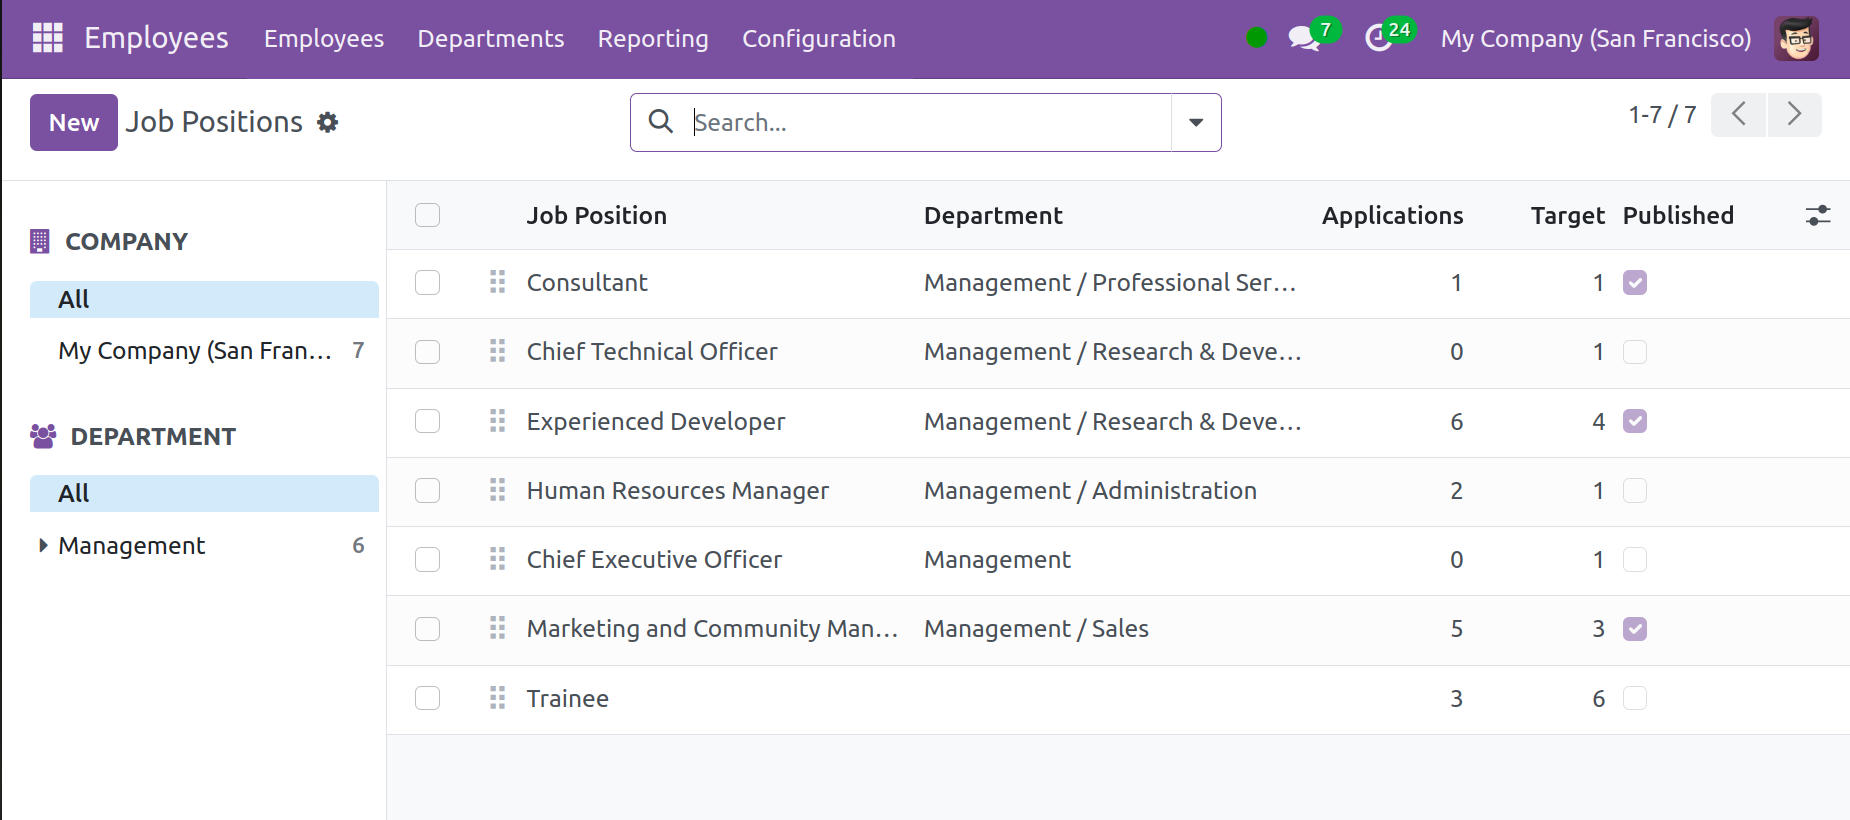
You will receive a list of all the open vacancies as soon as you select the choice. The list contains information on the job position, department, website, current employee count, anticipated new hires, total anticipated employee count, hired employees, status, published status, and company name, among other things.
A window opens when the create icon is selected.
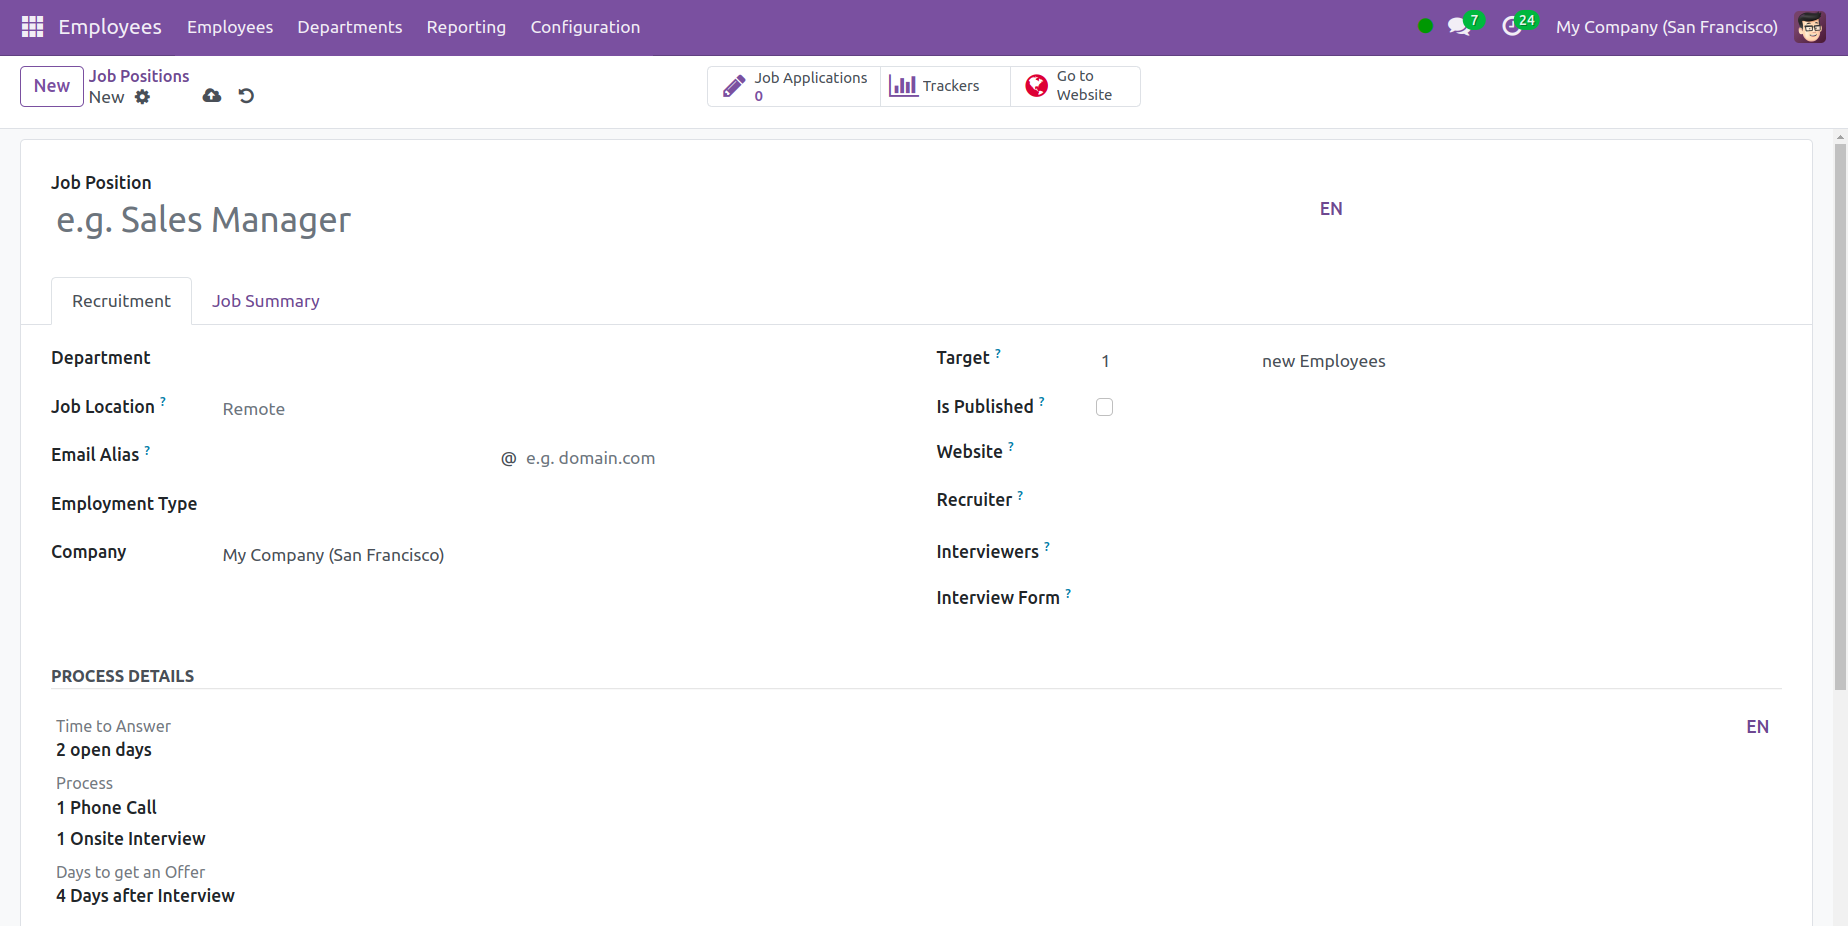
You can add a name to the job position on the page. The company, department to which the job belongs, job location, employment type, number of targets, recruiter, interviewees for candidate selection, interview form, website to which it should be posted, and process details are among the details you can include under the Recruitment tab regarding the recruitment of candidates for the job.
There are options for Days to Receive an Offer, Process Types, and Time to Answer. You can include a brief description of the job role in the Job Summary section. Lastly, select the Save icon.
Employment Types
Within a company, there are a wide variety of employee kinds. While some might be interns, others might be full-time workers. Use the Employment Types option from the Configuration menu to configure the various employee types in your organization.
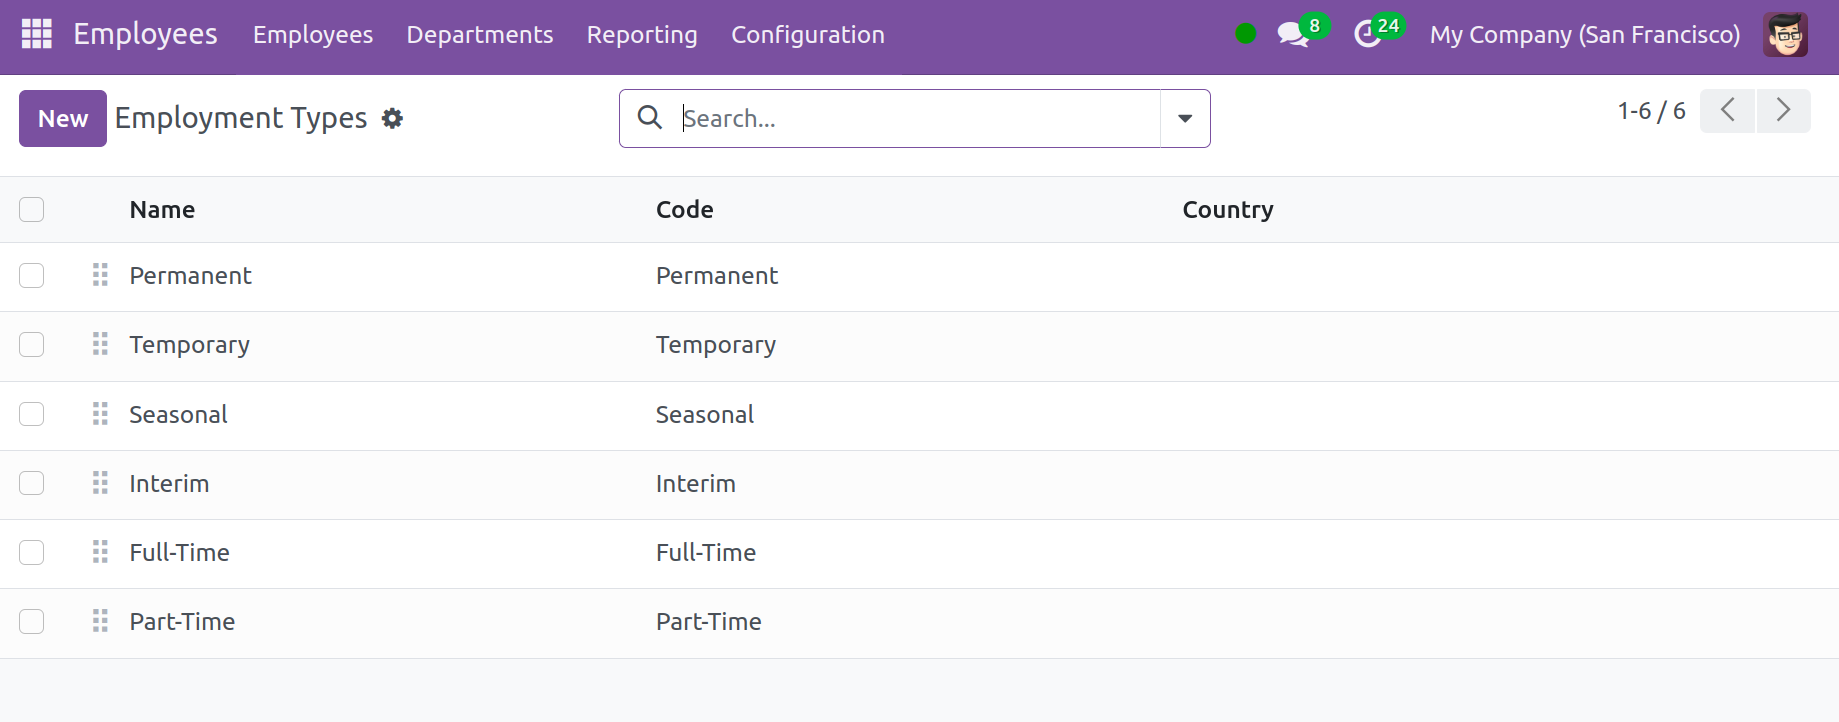
You may quickly create Employment Types by using the New button. Before you click Save, the Employment Type needs to be indicated in the designated box.
Working Schedule
Employee work schedules are created using the Configuration menu. Thus, choose the Working Schedule option from the Configuration menu. Included on the list are the company name, working time, work time rate, and the quantity of contracts that employ this. Thus, you can use the New button to add a new working schedule.
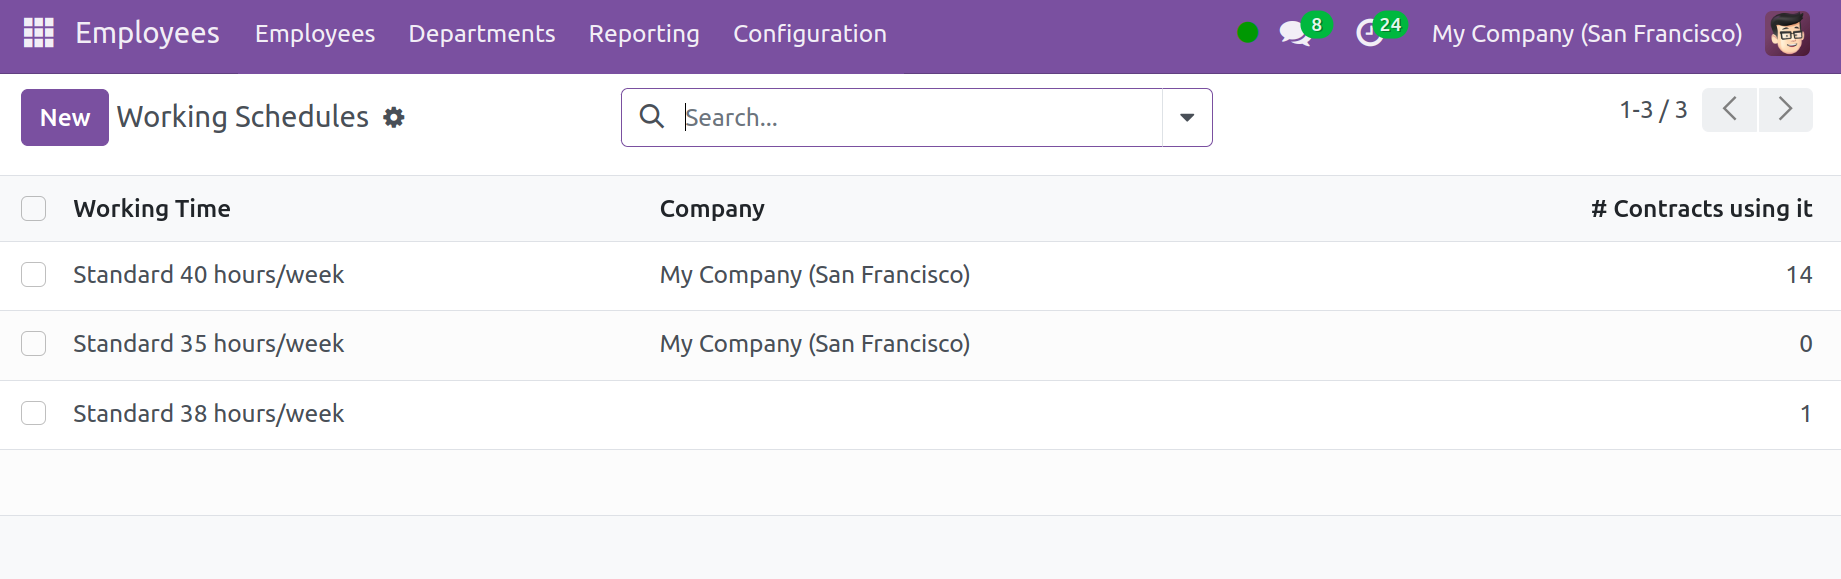
Include the company after providing the name of the schedule. Indicate how many hours a day on average a resource is expected to work with this calendar in the Average Hour per Day box. Next, include the Timezone. There is a tab in the view called "Working Hours." Users can include the employee's work schedule in that tab.

Activity Planning
Choose the Activity Planning option from the Configuration menu in the Employee module. With the help of this feature, you can create various activity plans for your employees that function similarly to a company's onboarding and offboarding procedures. As seen in the example below, the Plans window will display a list of previously specified plans.

By selecting the New button, a new form view will appear, allowing you to build a new activity plan for the staff.
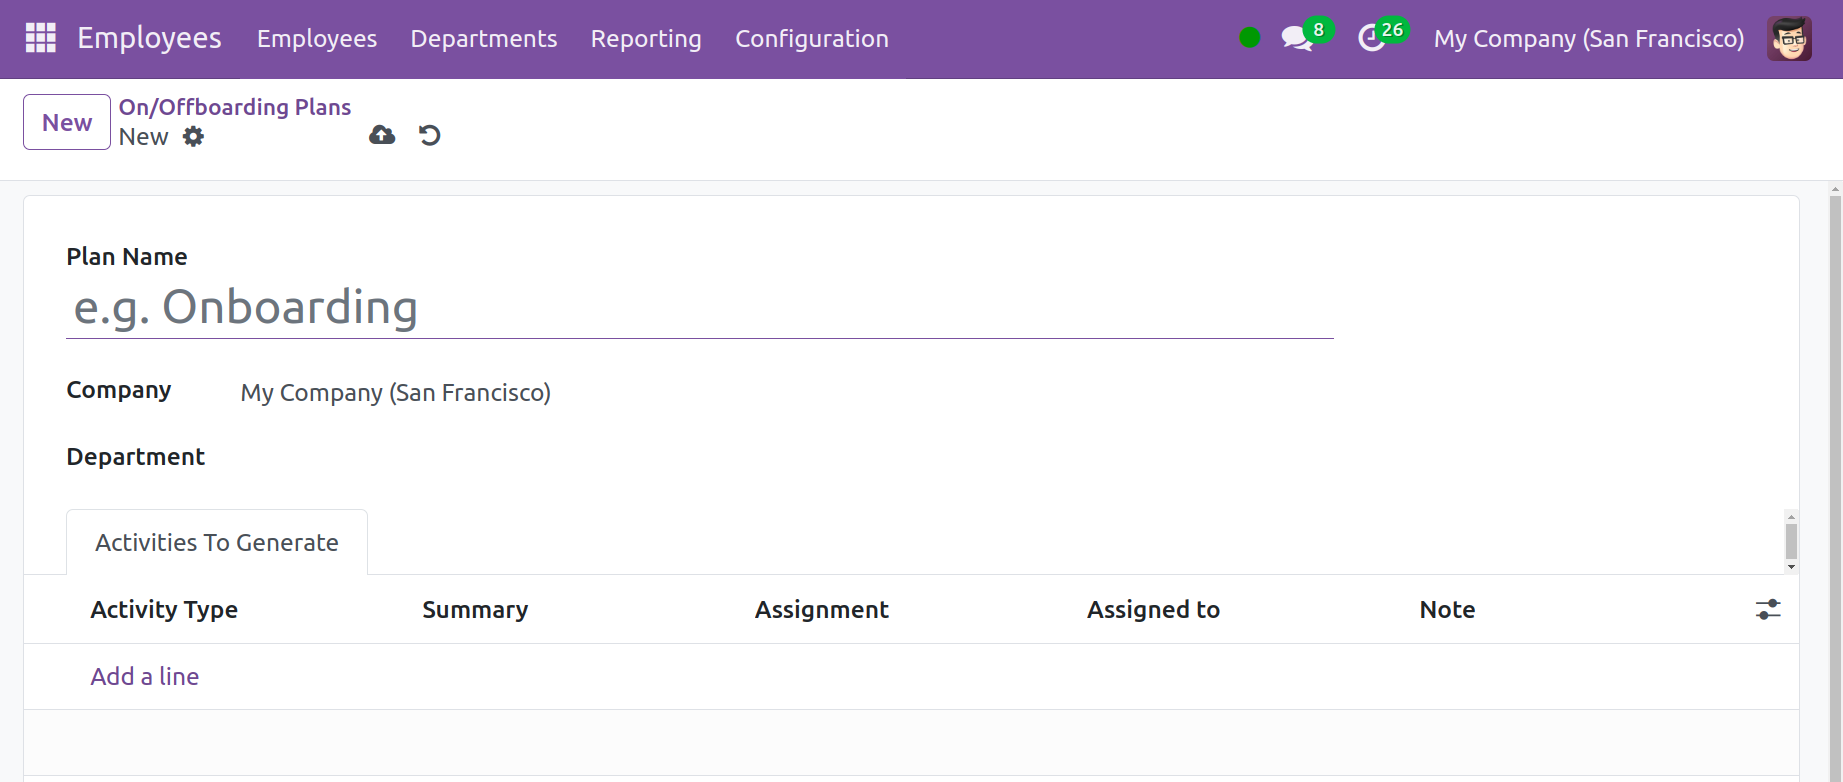
Once the Plan Name has been entered, you can specify the Department and Company in the corresponding fields. You can add activities to the Activities To Generate tab by using the Add a Line button.
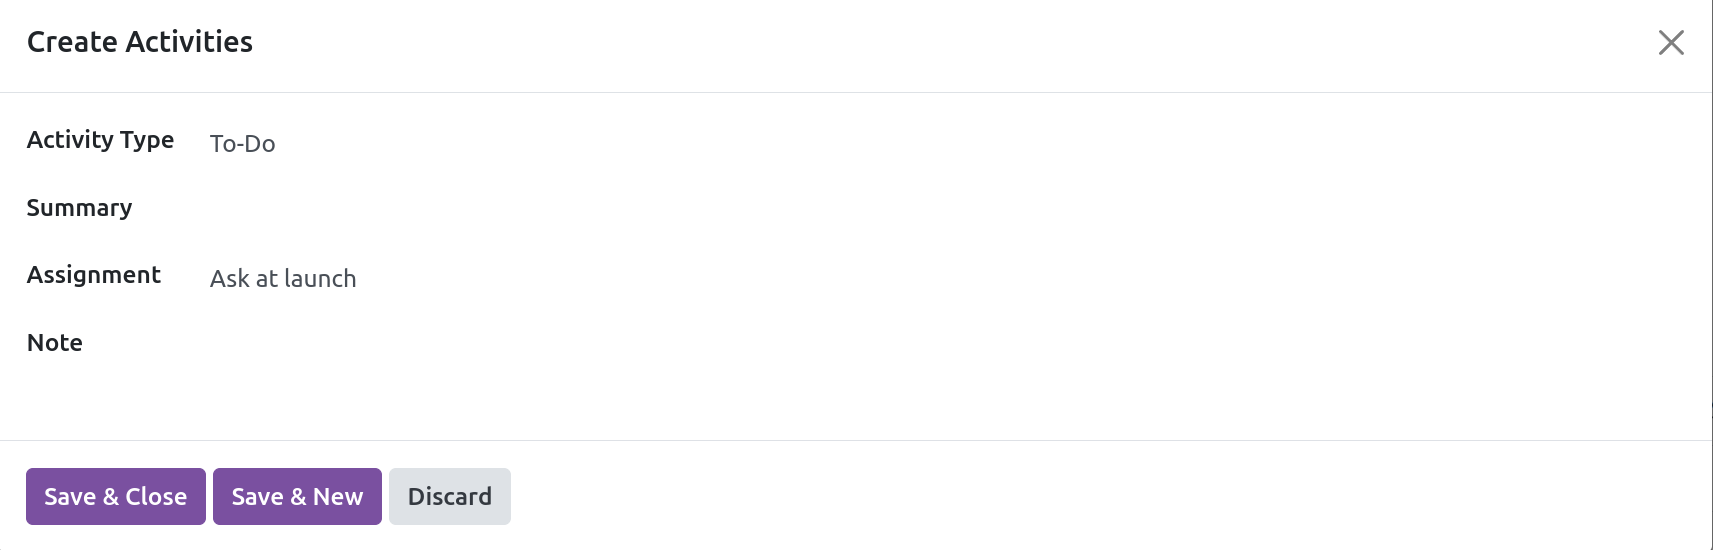
As seen above, a pop-up window will appear here. Fill in the relevant fields with details about the activity's Type, Summary, Company, Responsible, and Note. Once the required steps have been added, the new plan will be saved in your database.
Badges
Workplaces typically run a variety of appreciation initiatives to keep staff members more motivated. They are empowered and motivated to work by such programs. They will feel more confident and prepared to take on any tasks related to their duties if they receive such acknowledgment from the organization. Since they always have the team's backing, they will be finishing their work with enthusiasm. In the Odoo 17 Employee Module, badges and challenge choices are visible for activating these kinds of programs.
An employee's level of work performance will determine what kind of gifts and badges they receive. The Configuration menu displays the option.
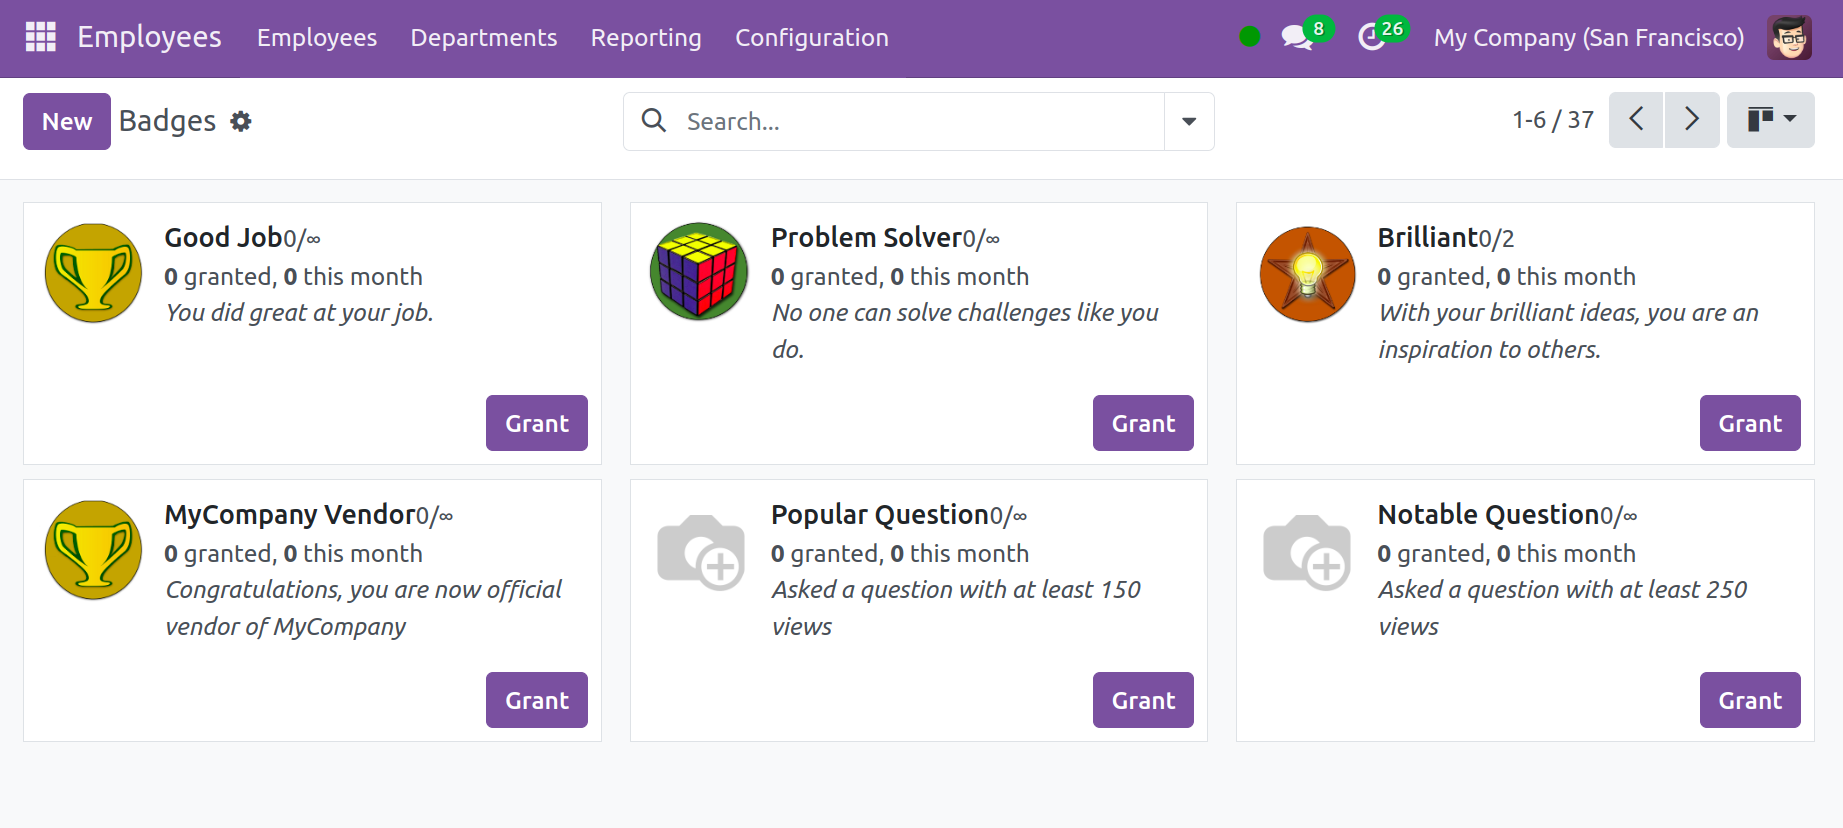
A list of all the badges that the staff members have earned for their greatest work is shown in the image. The list view is another way to see the page. A brief message about the badge and the quantity of employees who received it is attached to each one. You can give the employee a specific badge by using the Grant option found on each badge
Once you choose the Grant option, a popup similar to the one below will appear.

This is where you can give them an explanation of why they earned the specific badge. After finishing, you have the opportunity to choose the Grand Badge. Additionally, you will have the ability to make new badges on the dashboard.
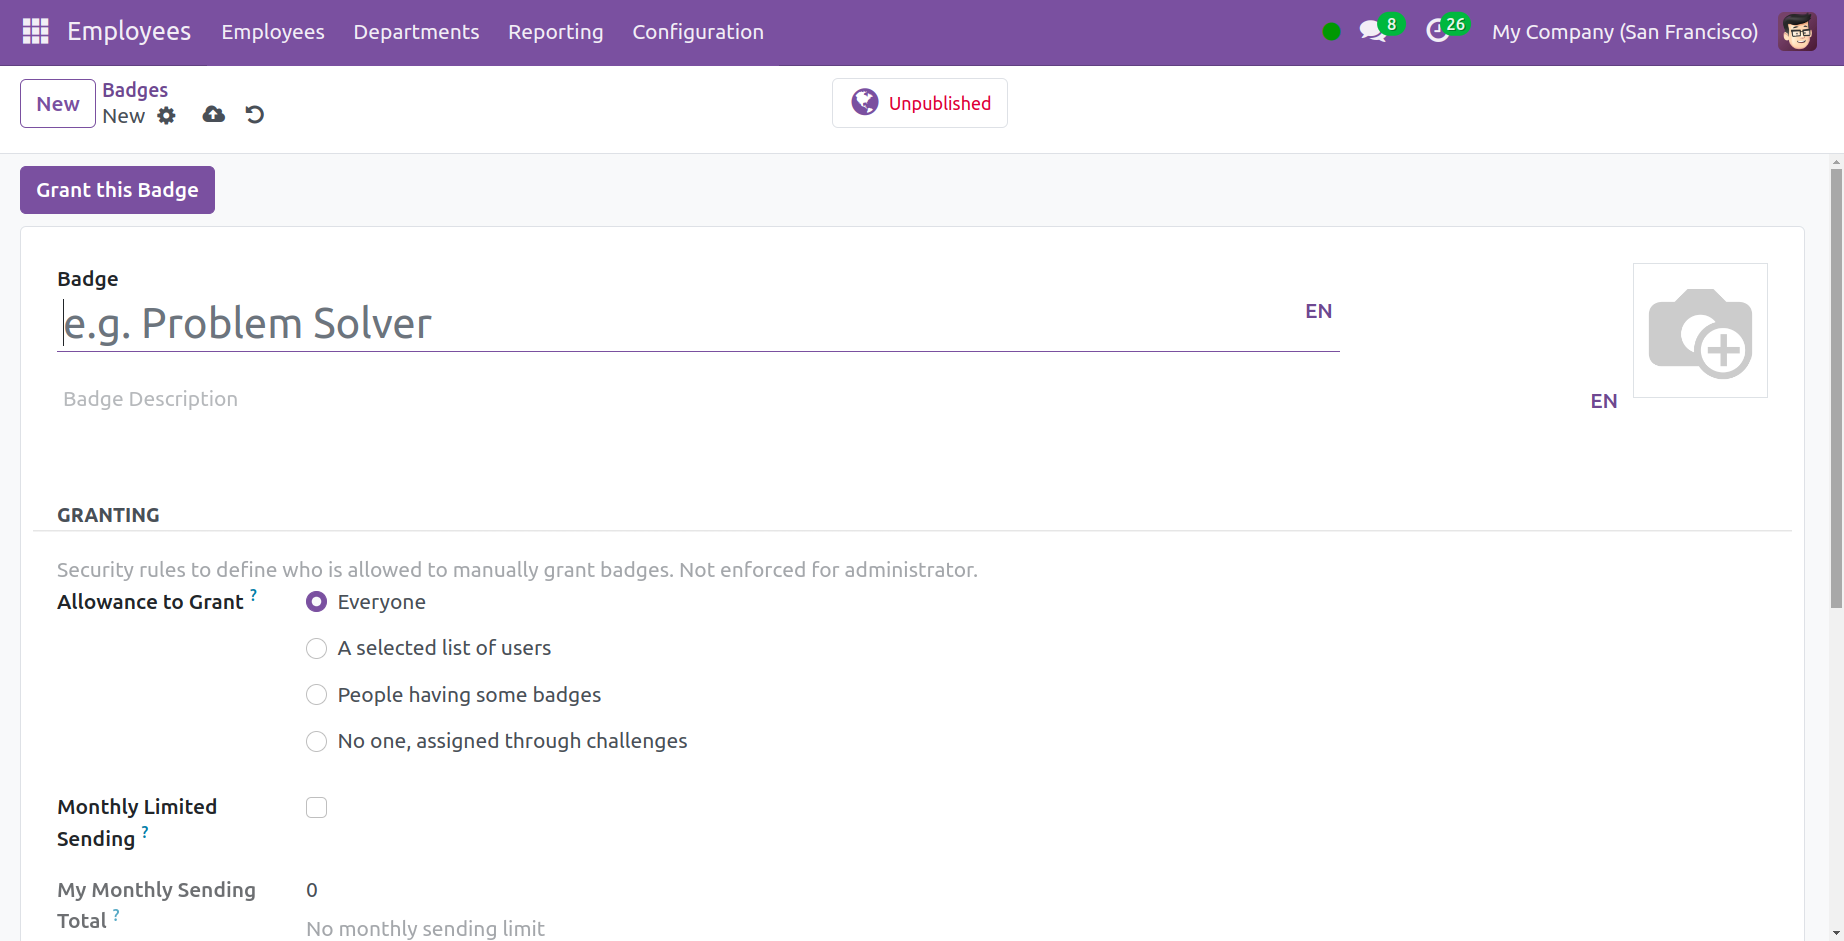
You may easily give the badge a name on the page. You can include a brief explanation of the badge under the description option. The designated space may also contain an image of the badge. You can grant permission to grant the badge under the Granting tab. It can be assigned through challenges and can be chosen as everyone, a specific list of users, individuals with a certain badge, or none at all.
You will see an additional entry labeled Limitation Number when you activate the Monthly Limited Sending option. This field indicates the total number of times the badge can be awarded each month. The total number of times the badge has been sent for that specific month can be seen on the My Monthly Total option.
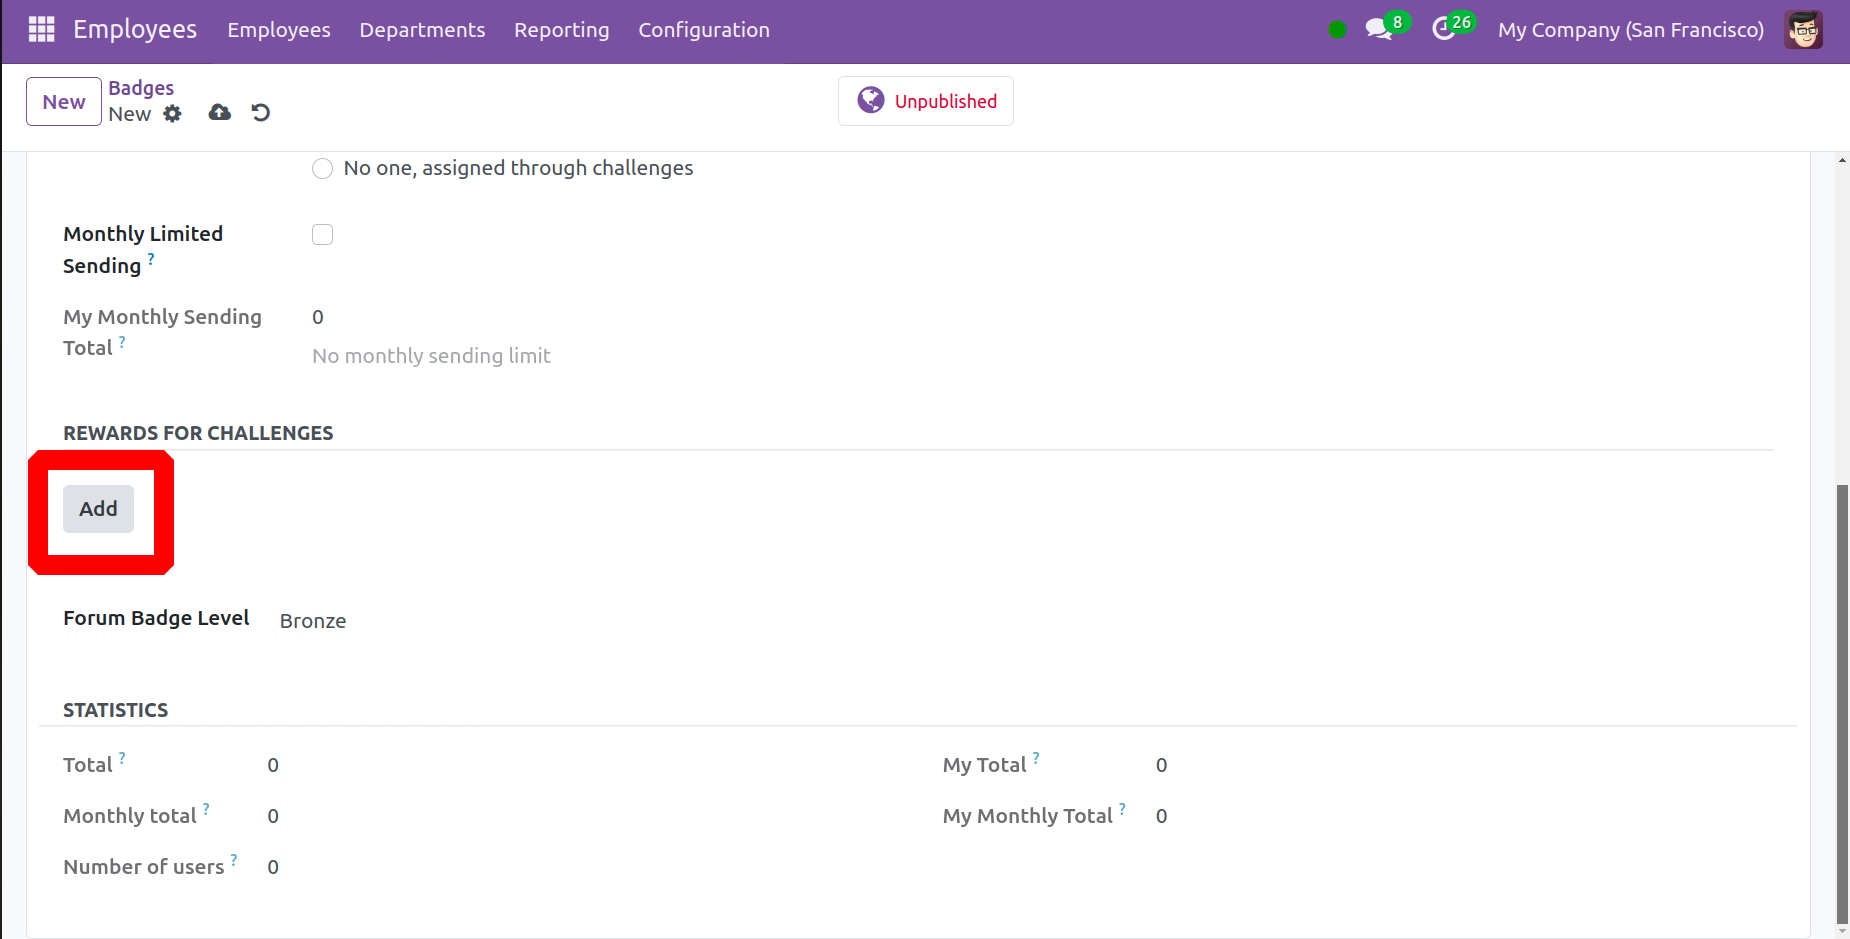
You can quickly add prizes for challenges that must be completed to earn these badges by using the Add button. You will then see a window like the one below after completing this.
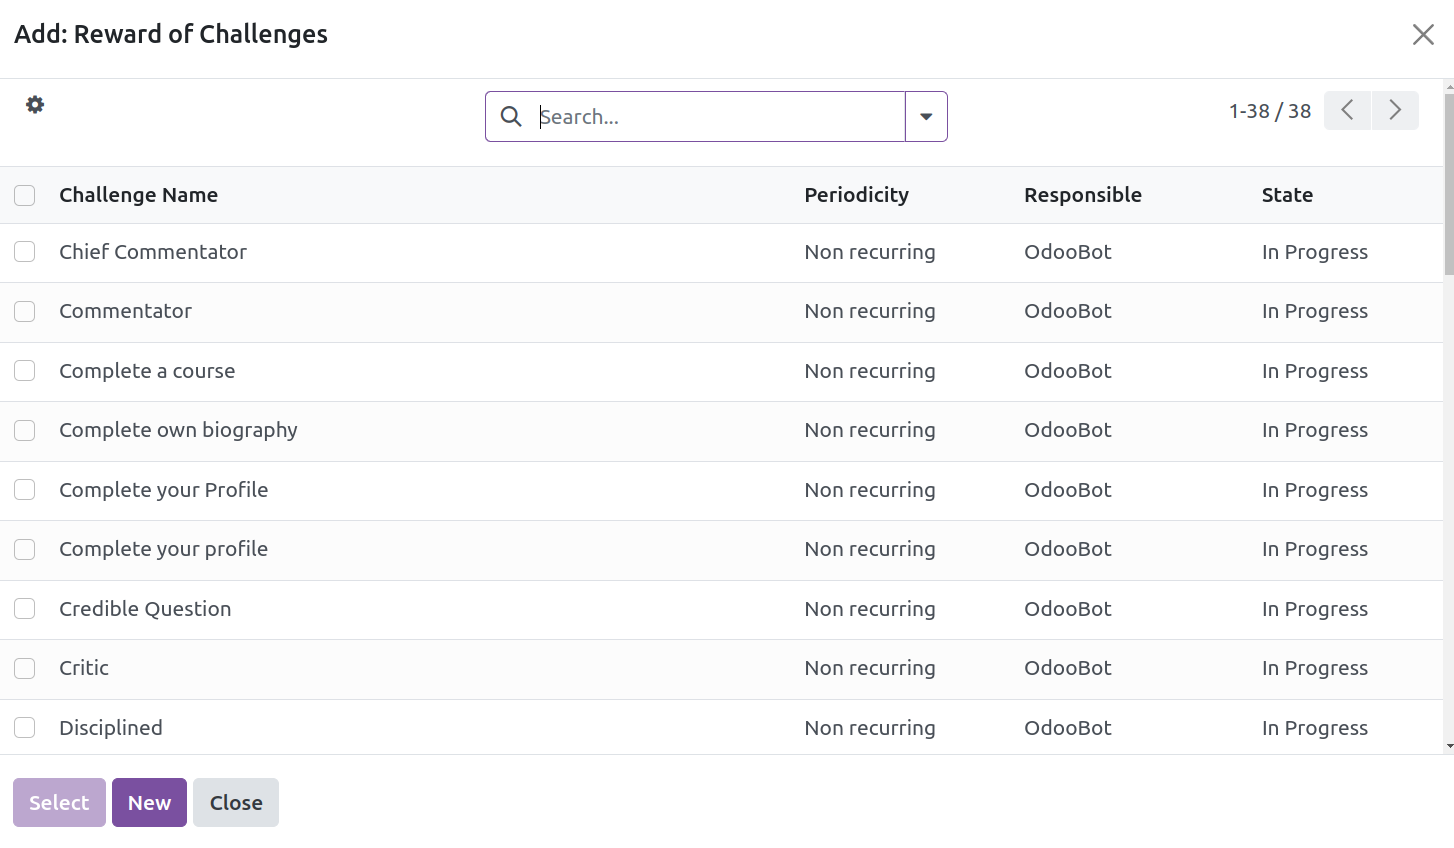
From this list, a specific challenge can be chosen and added to the badge. You can specify the new badge's level by selecting the Forum Badge option. The tiers consist of Bronze, Silver, and Gold. You can ascertain the badge level based on the badge's level.
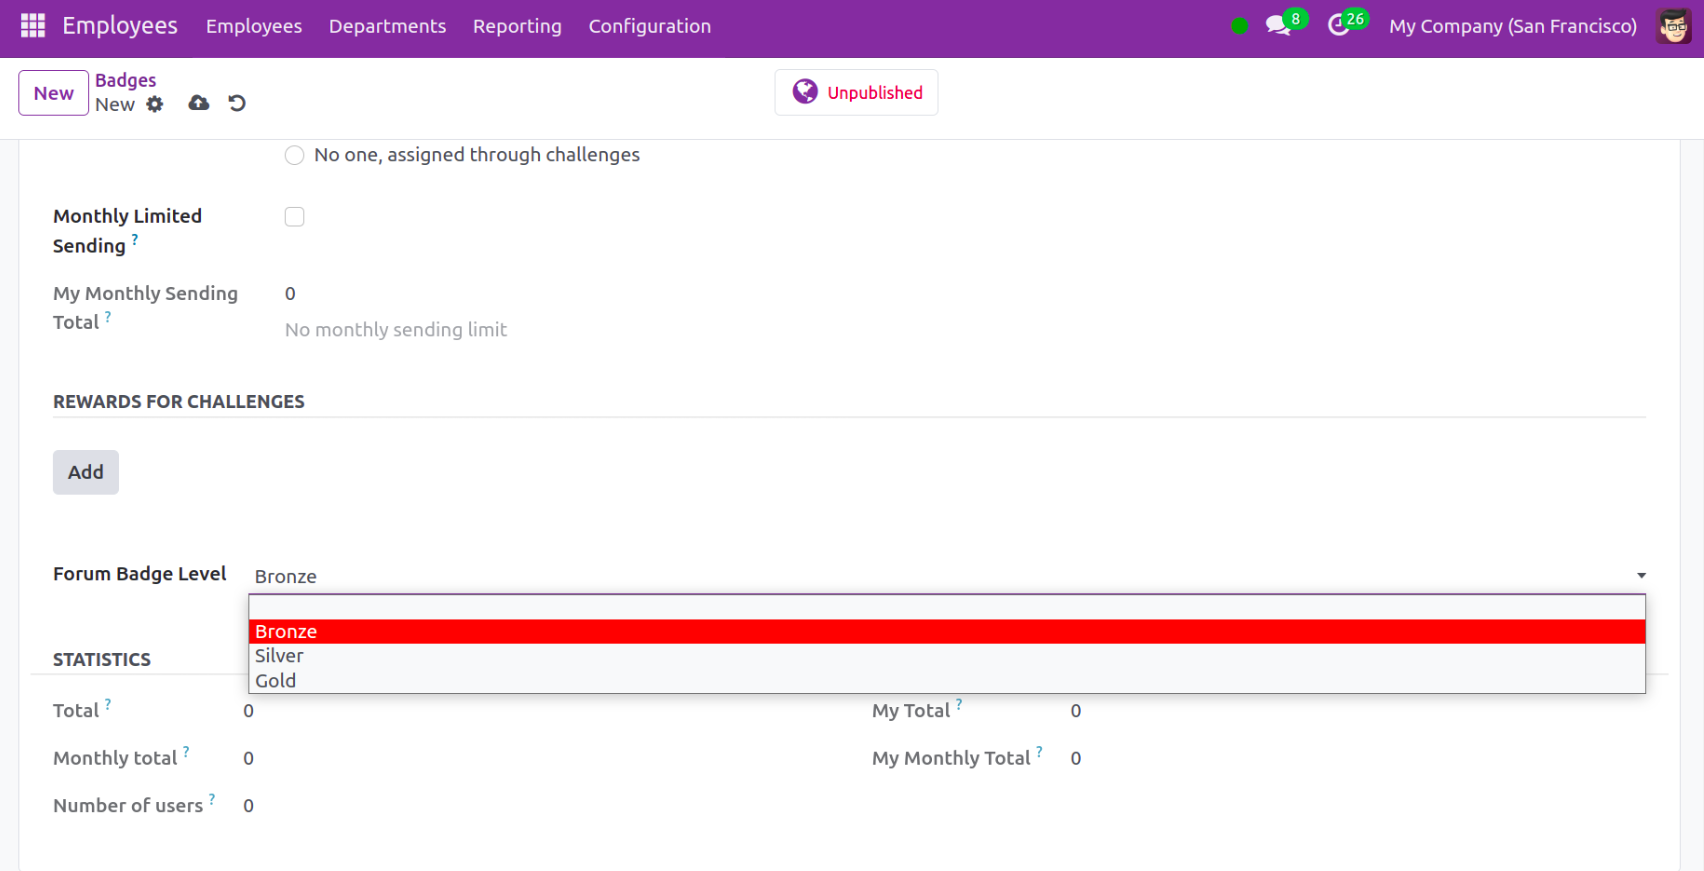
You can now select the options for total, monthly total, number of users, my total, and monthly total under the Statistics tab. Once all necessary information has been entered, select the Save icon.
Challenges
The Employee module's challenges feature, which includes badges, can assist you boost employee morale while working for a company. Odoo helps you create these kinds of issues. For those who finish the challenge and reach the objective, you will be able to set off certain awards.

You will see previously created challenges in list view on this page. It is also seen in the Kanban view. You can quickly create such a challenge by using the New icon.
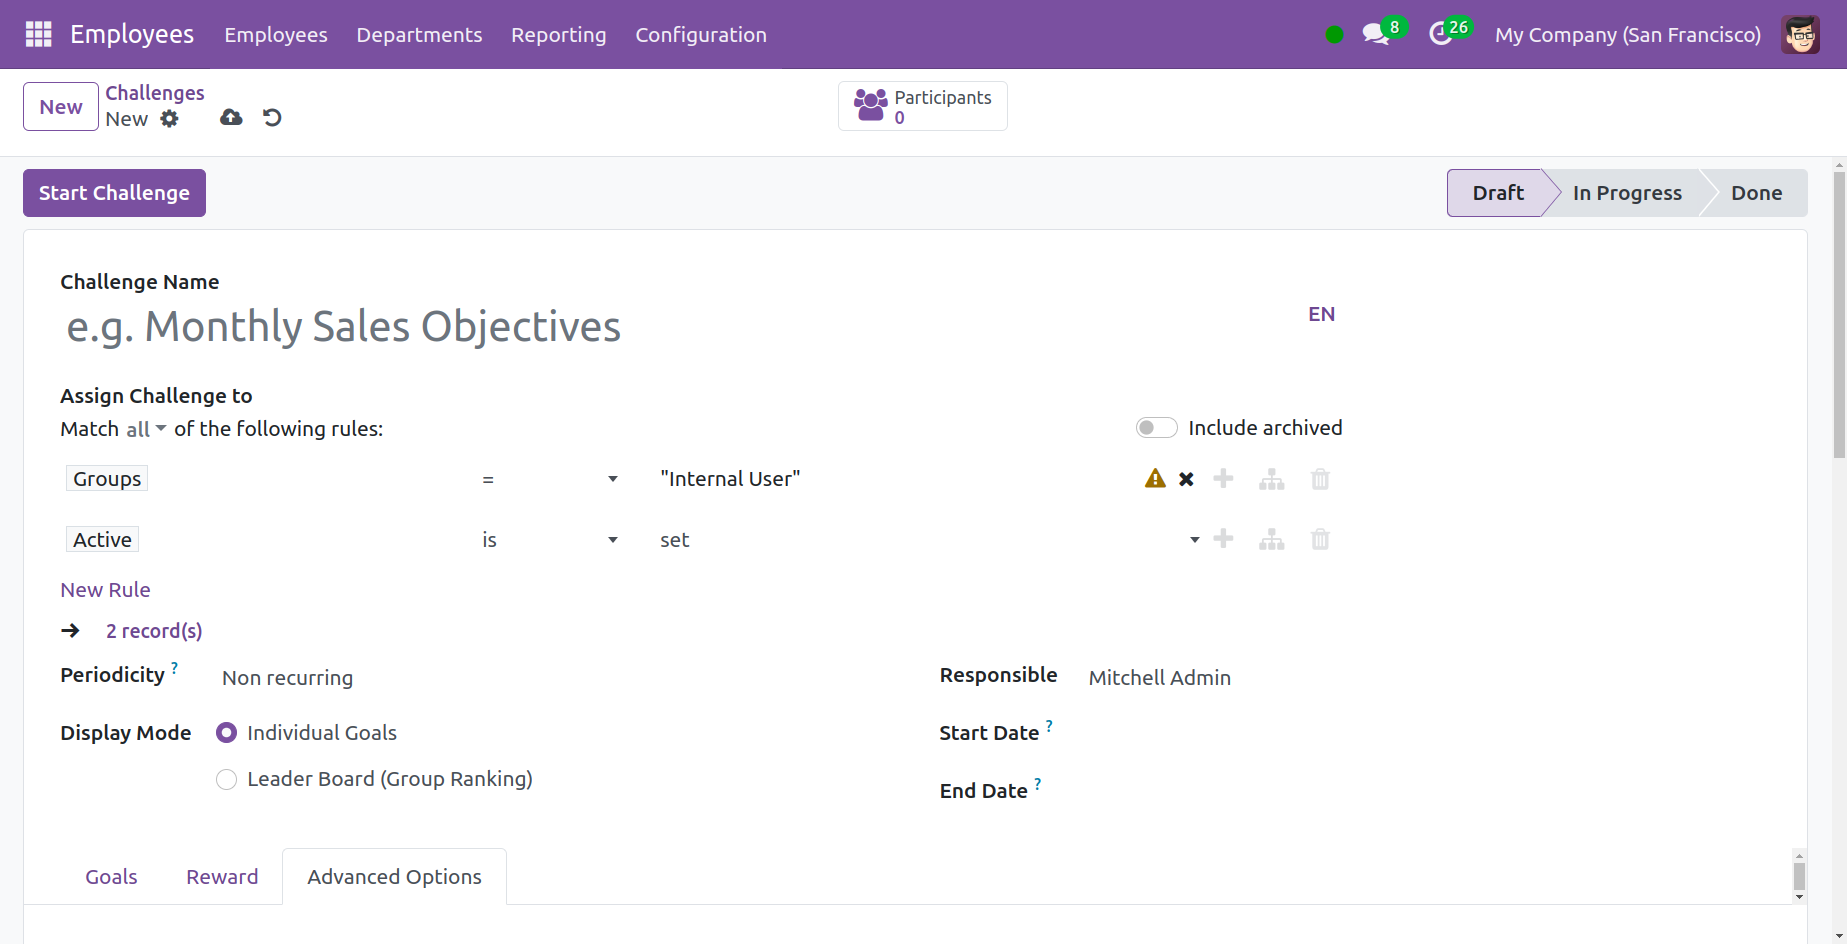
You can give the challenge a name on the page. The option to Assign Challenge allows you to include the participants. You can give the automatic goal work in the periodicity. This can be done annually, every week, every month, or every day. In the event that nothing is chosen, a human will choose the challenge.
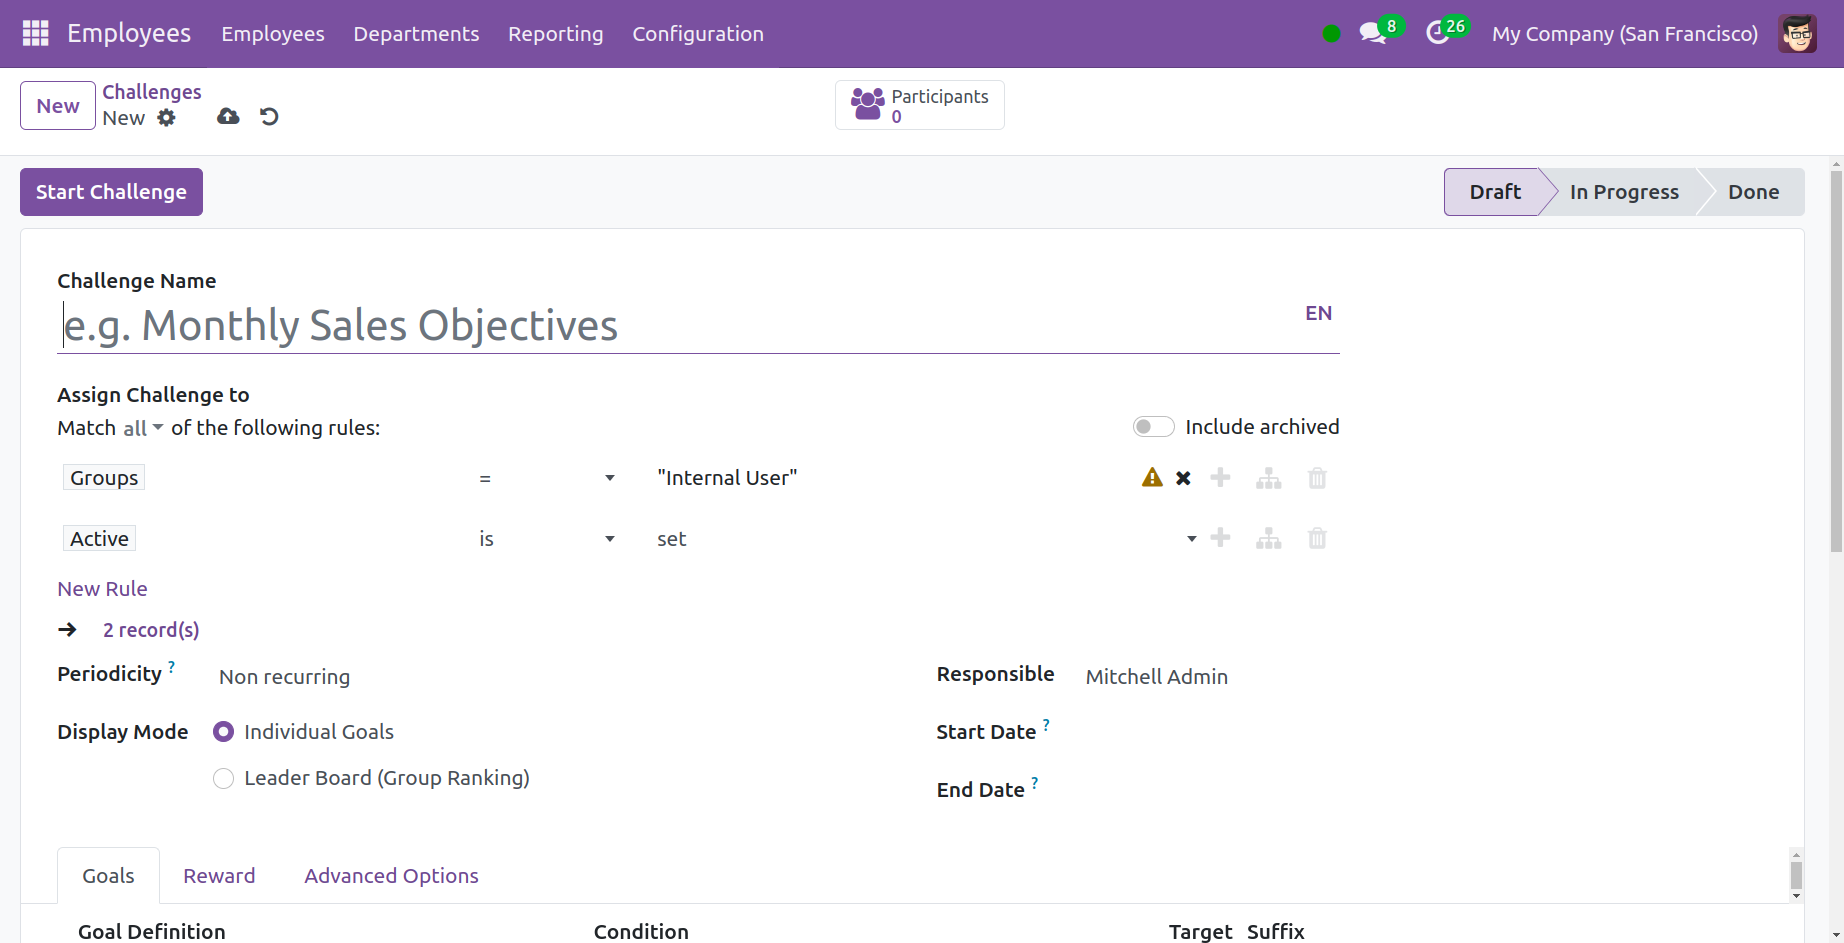
You can designate the challenge as either a leader boarding or individual goal in the display mode. You can choose whether this is a challenge for the group or for yourself. It is possible to identify the person who is accountable for this challenge under the responsible option. The challenge will begin on a certain day according to the start date and finish date.
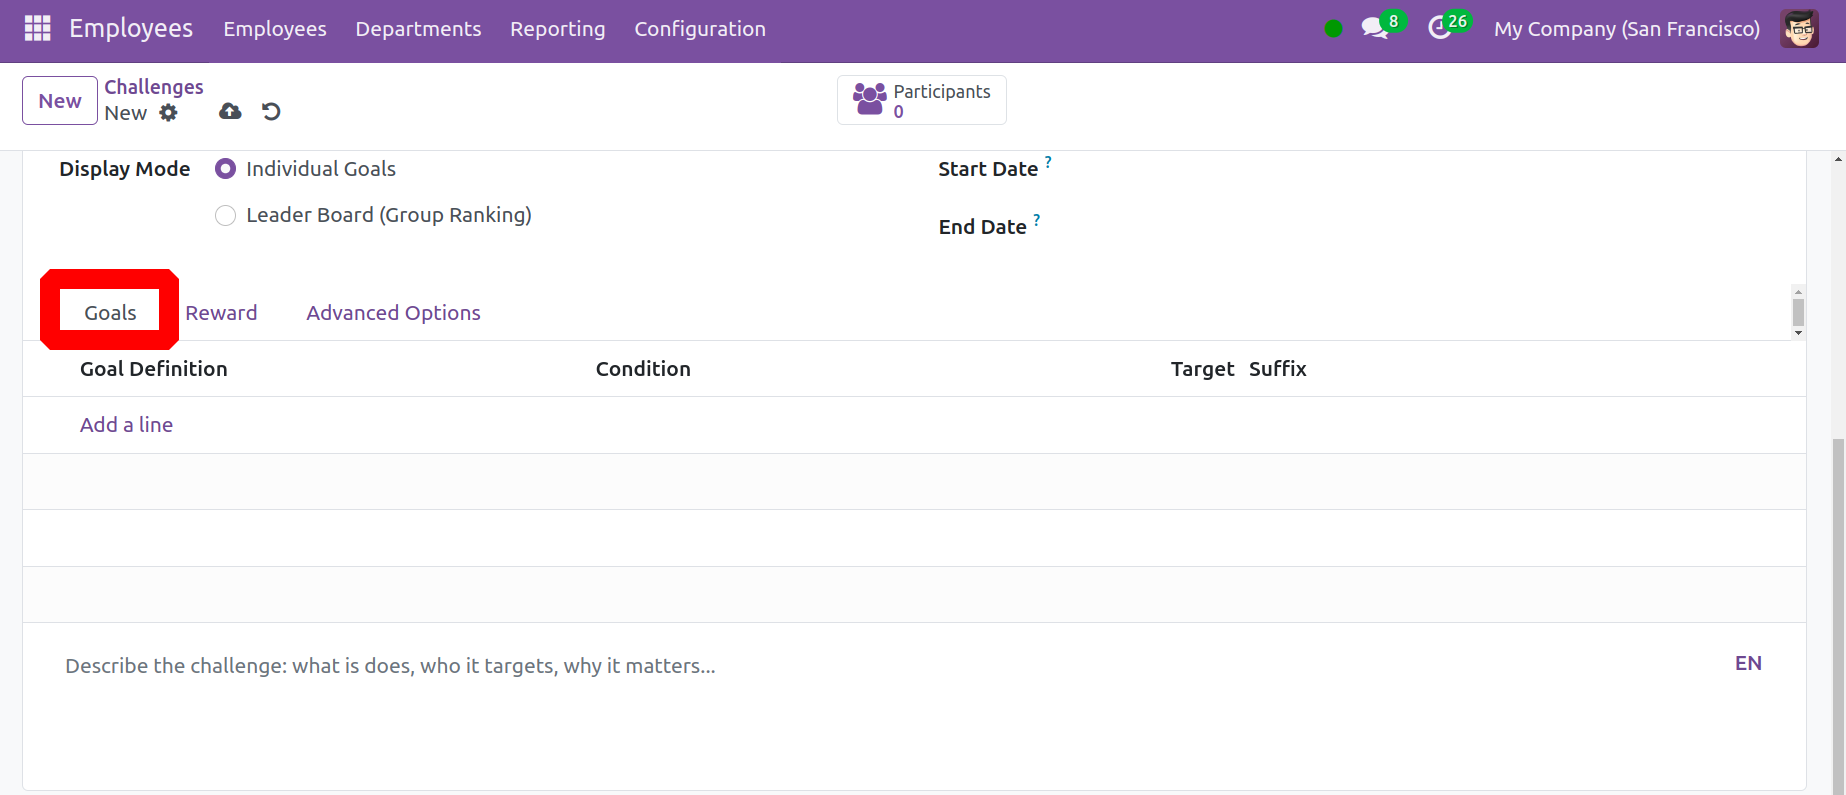
With the aid of the Add a Line option in the Goals tab, you can enter the list of goals. In the designated spaces, the goal definition and aim might be given in addition to it. To give a brief explanation of the task, there is also a description tab.
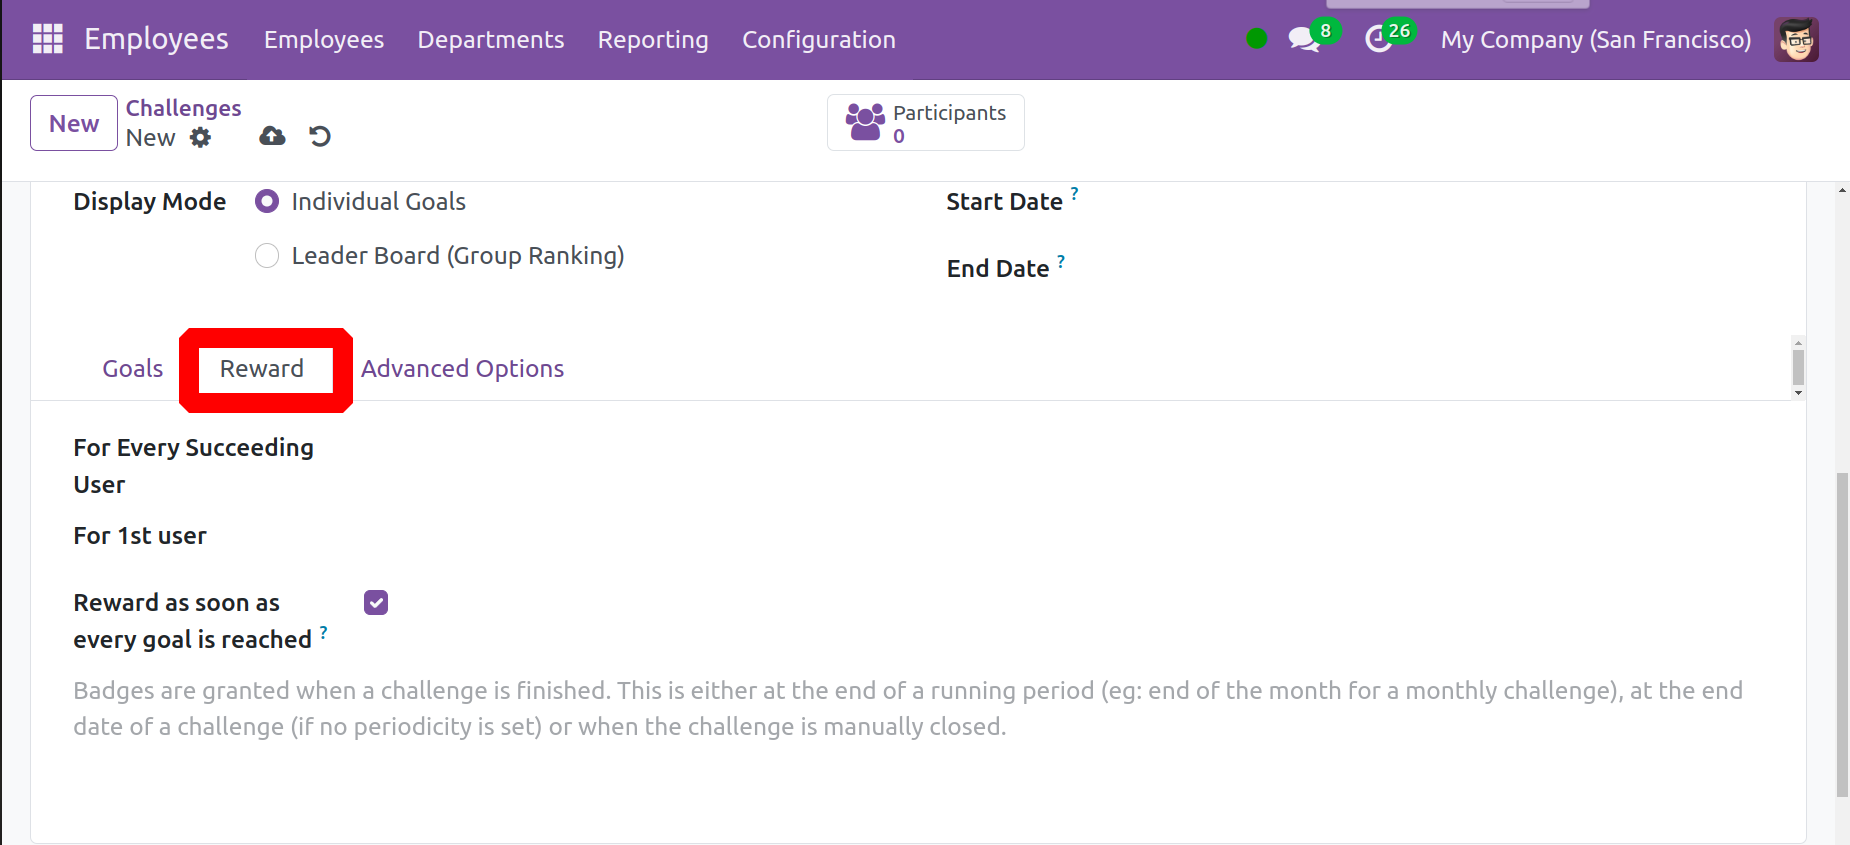
You can find the challenge's rewards in the Rewards tab. Every subsequent user who uses the drop-down menu will receive a prize, starting with the first user. Reward is an option that you can choose to activate as soon as each goal is accomplished. After completing the task and activating this option, you will be awarded right away.
You can also include the subscription, notification messages, and manual goal reminders under the Advanced Option.
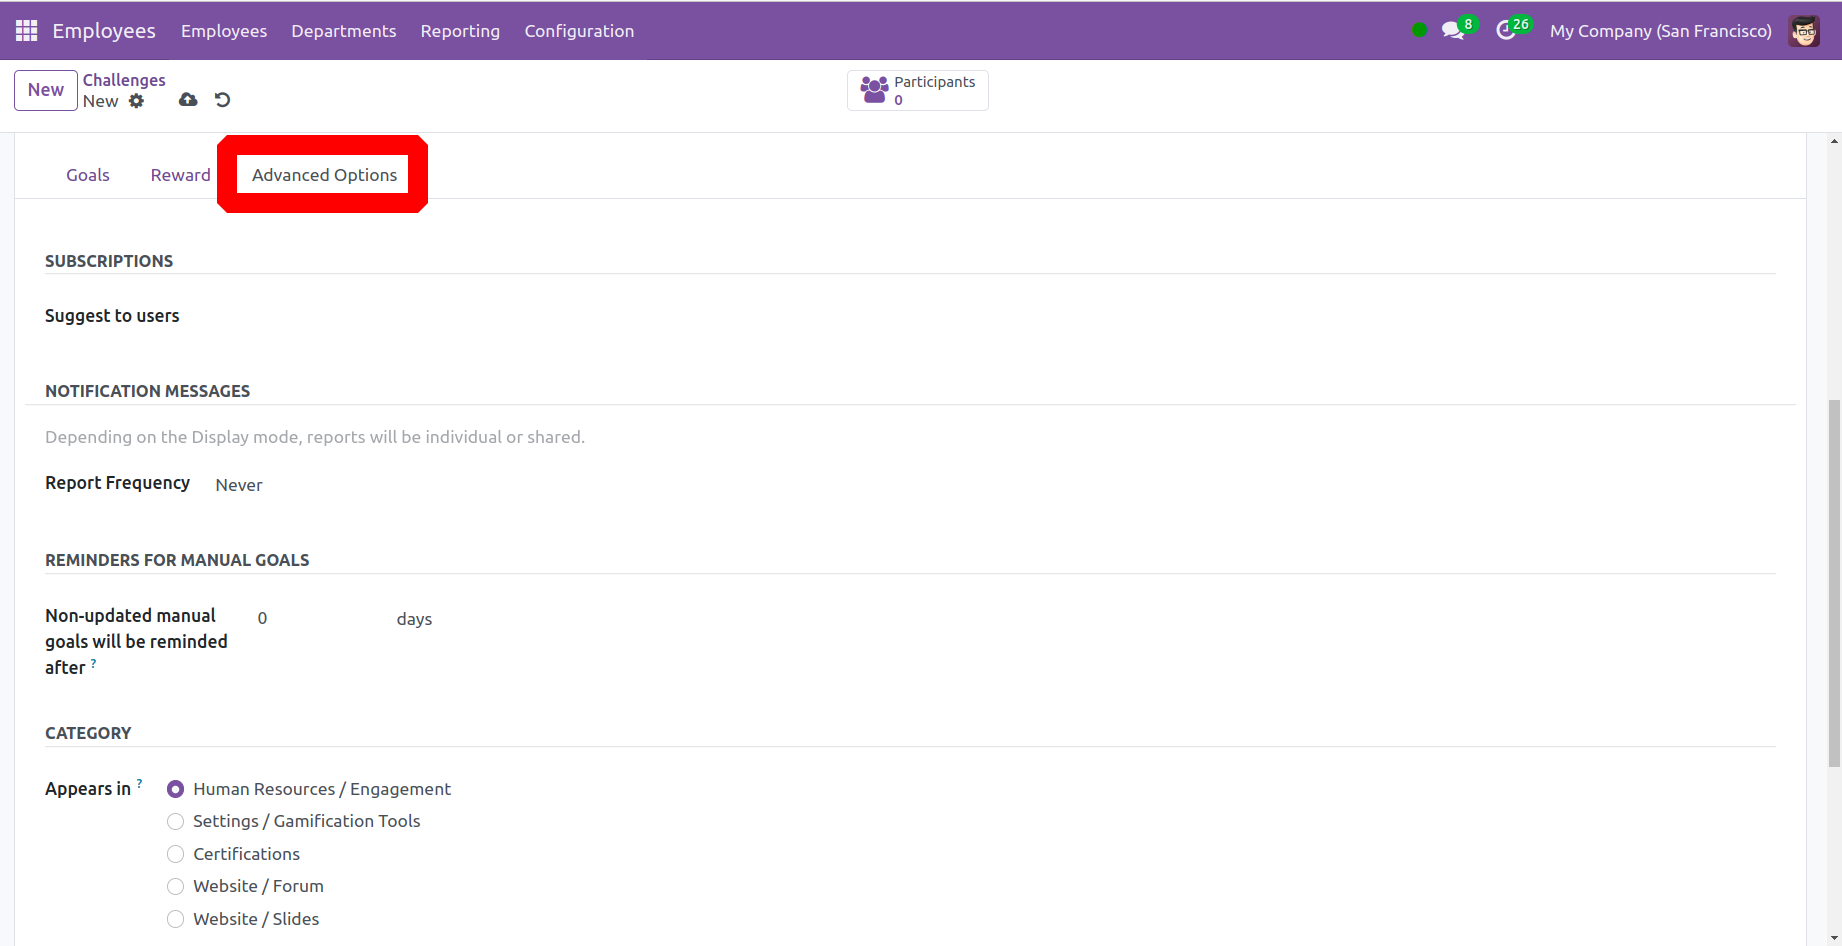
You can invite new users to suggest this challenge to others under the subscription section's "suggest to users" option in order to become a subscriber. Users can receive notifications by selecting the Report Frequency option. The individual or shared status of the report will depend on the presentation method we choose. Assigning reminders for manual goals is also an option. A predetermined number of days will pass before the non-update manual goals are displayed.
Once all of the steps have been completed, select the Save icon. The challenge can then be started by selecting the Start Challenge option.
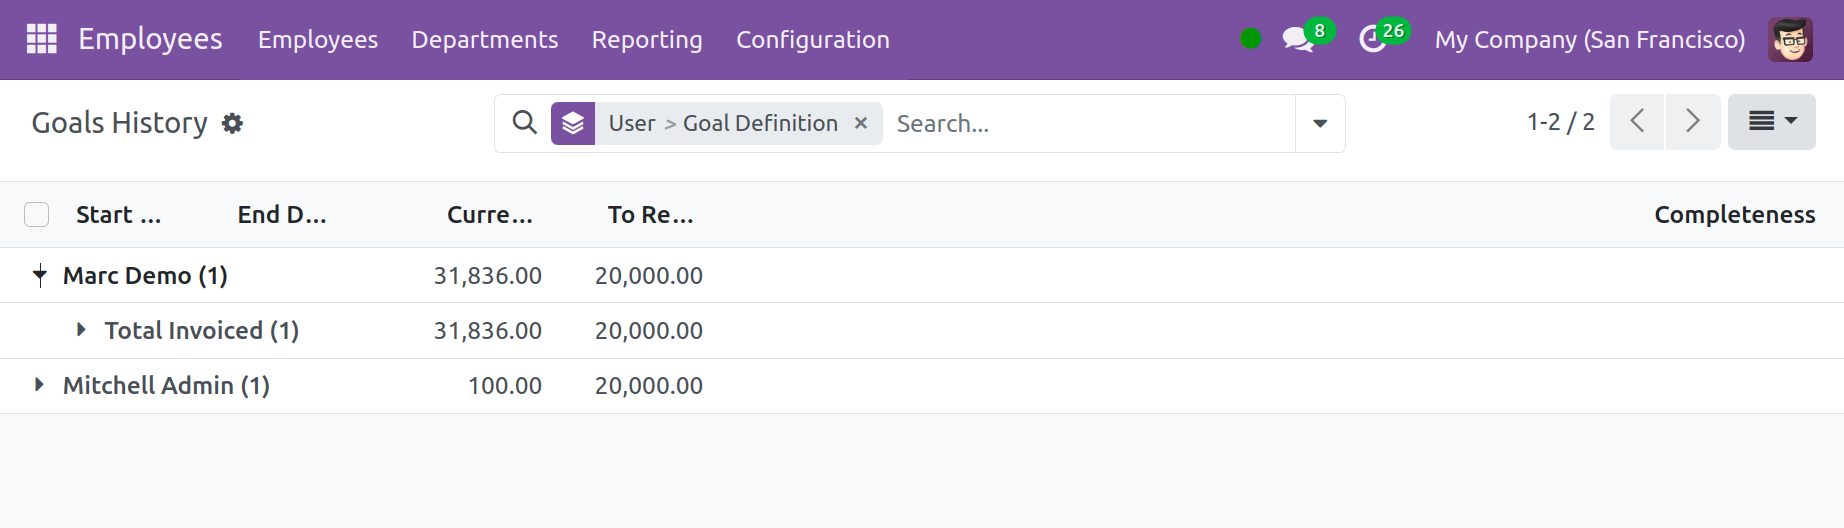
Goals History
The Goal History option will be available to you in the Configuration menu. The page will give you a history of all your goals along with their specifics, including start and finish dates, present status, reachable dates, and completeness.
Settings
You have various options under the Employee module's Settings to improve the module's proper operation.
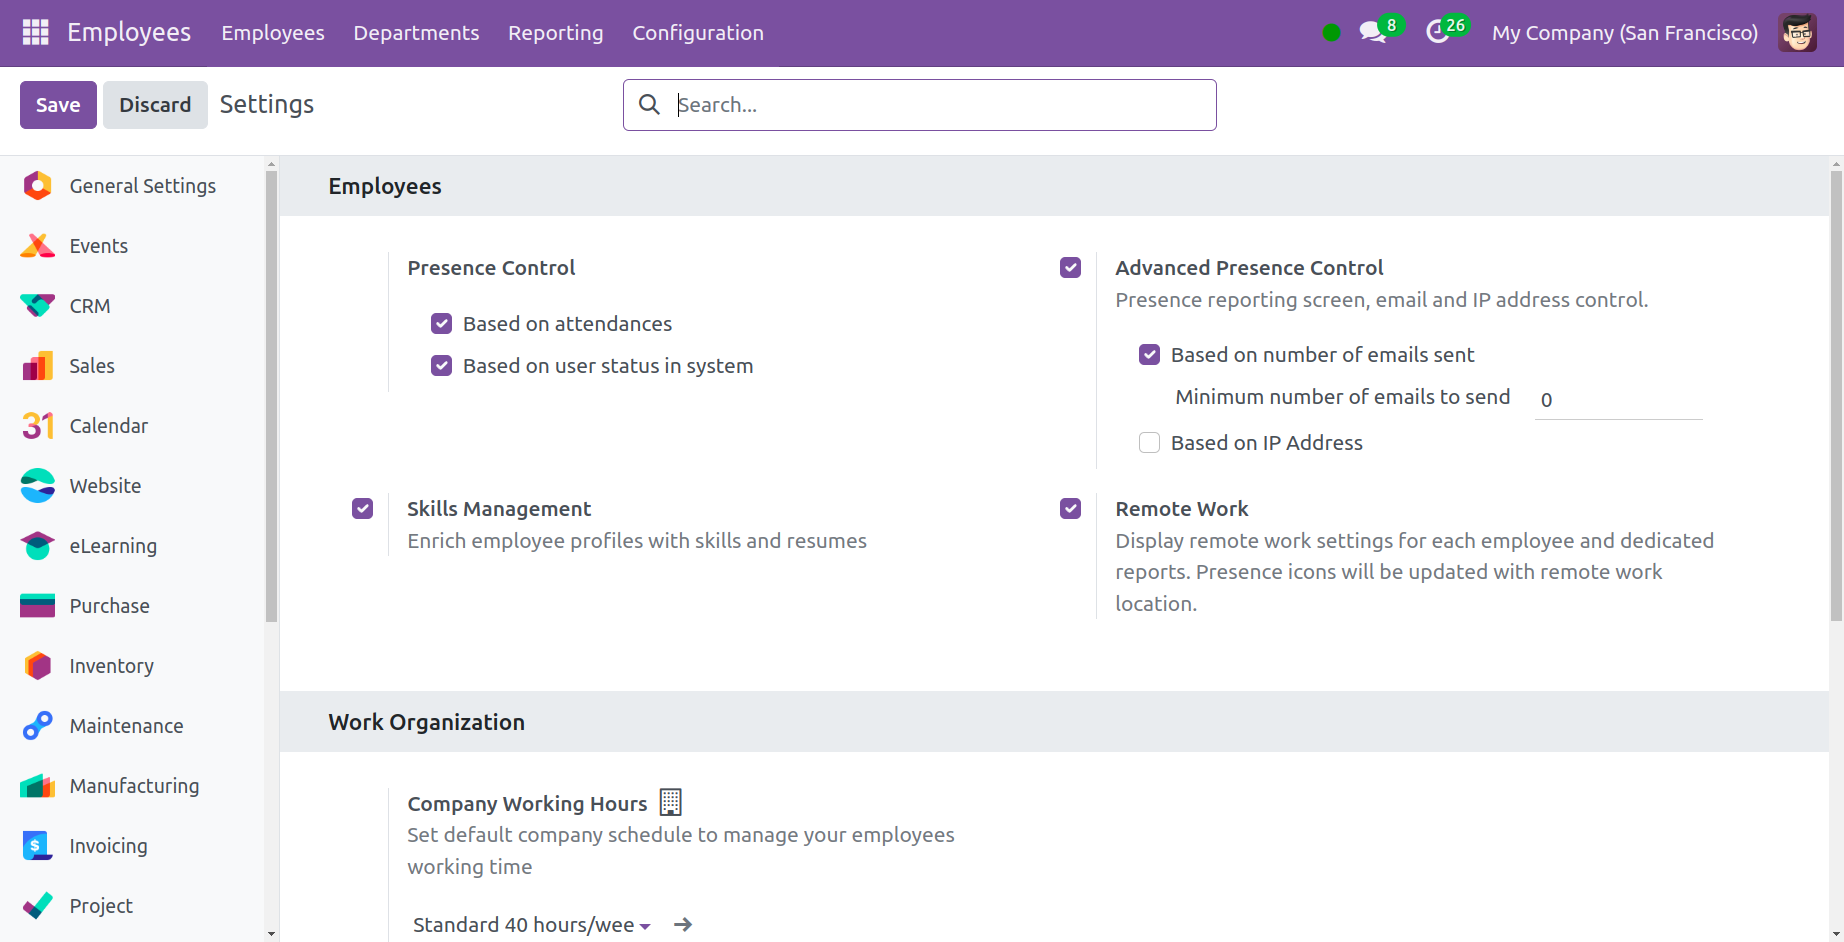
You need to make mention of the presence control option on the Employee tab. It is mentioned in accordance with the employee's attendance and user status presence. Employee advanced presence can be managed based on IP addresses and the number of emails they send under the Attendance Presence Control. You may now add an employee's resume and skills to the profile by using the Skill Management feature.
You can control your employee's working hours by activating the Company Working Hours found beneath the Work Organization option. By activating the Employee Editing option in the Employee update rights, you may allow employees to make changes to their personal information.
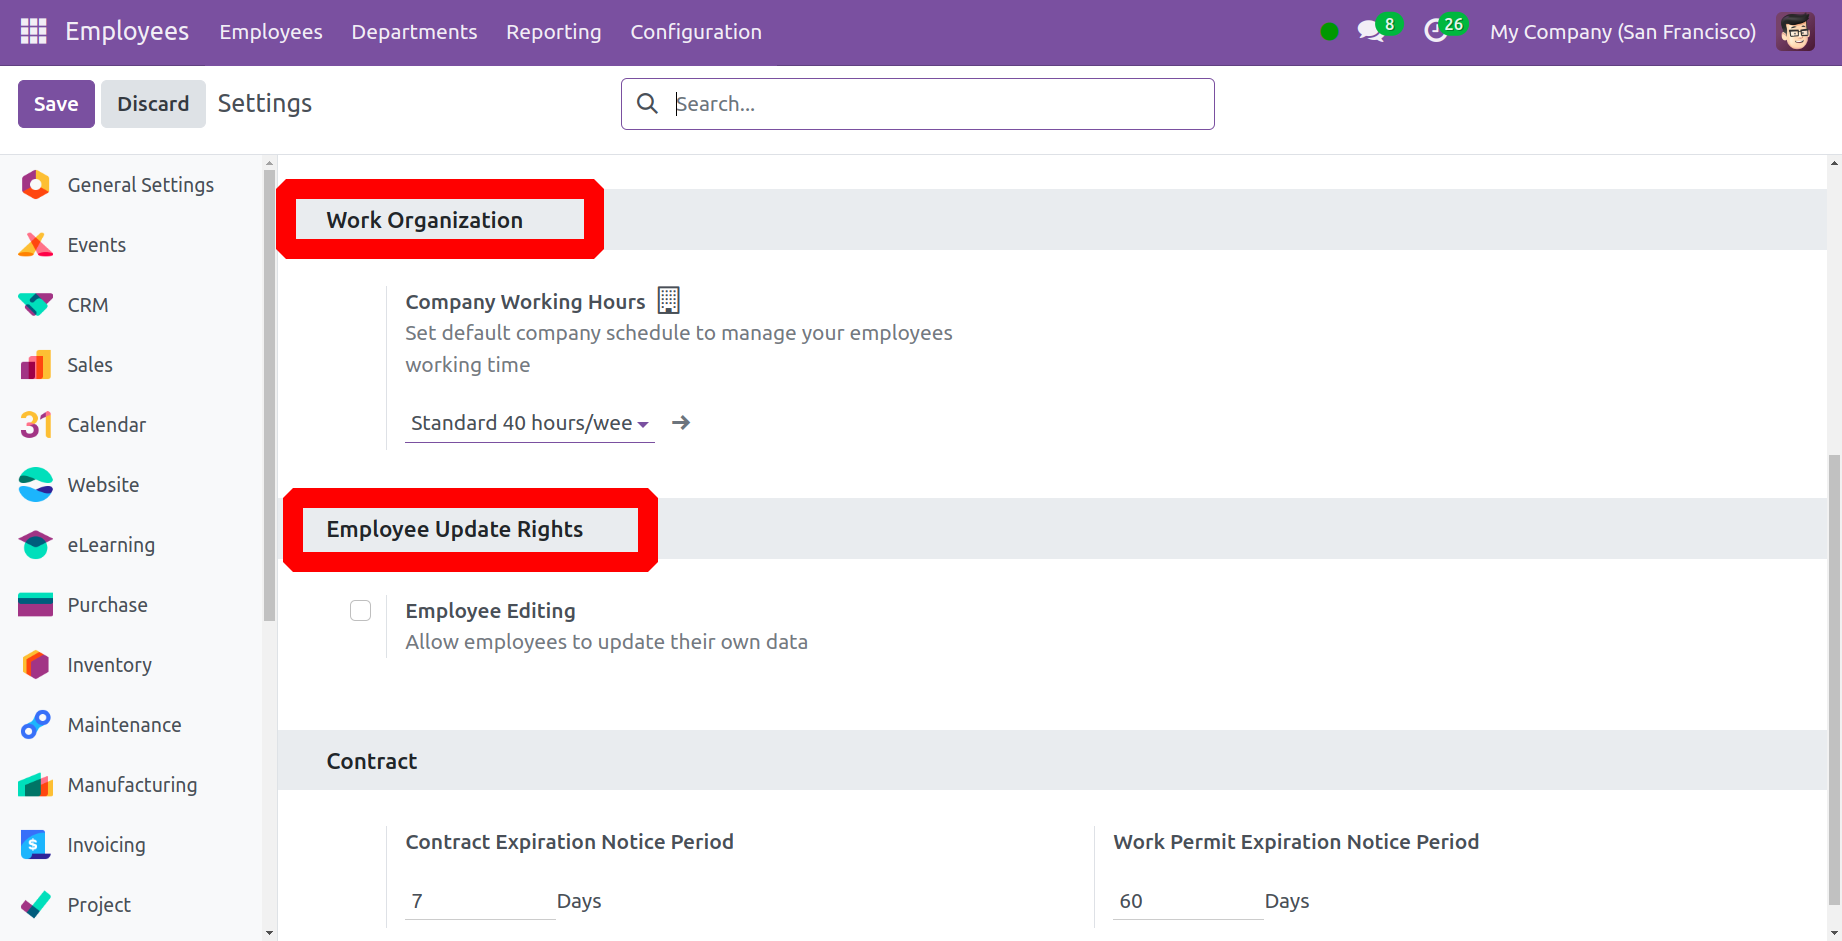
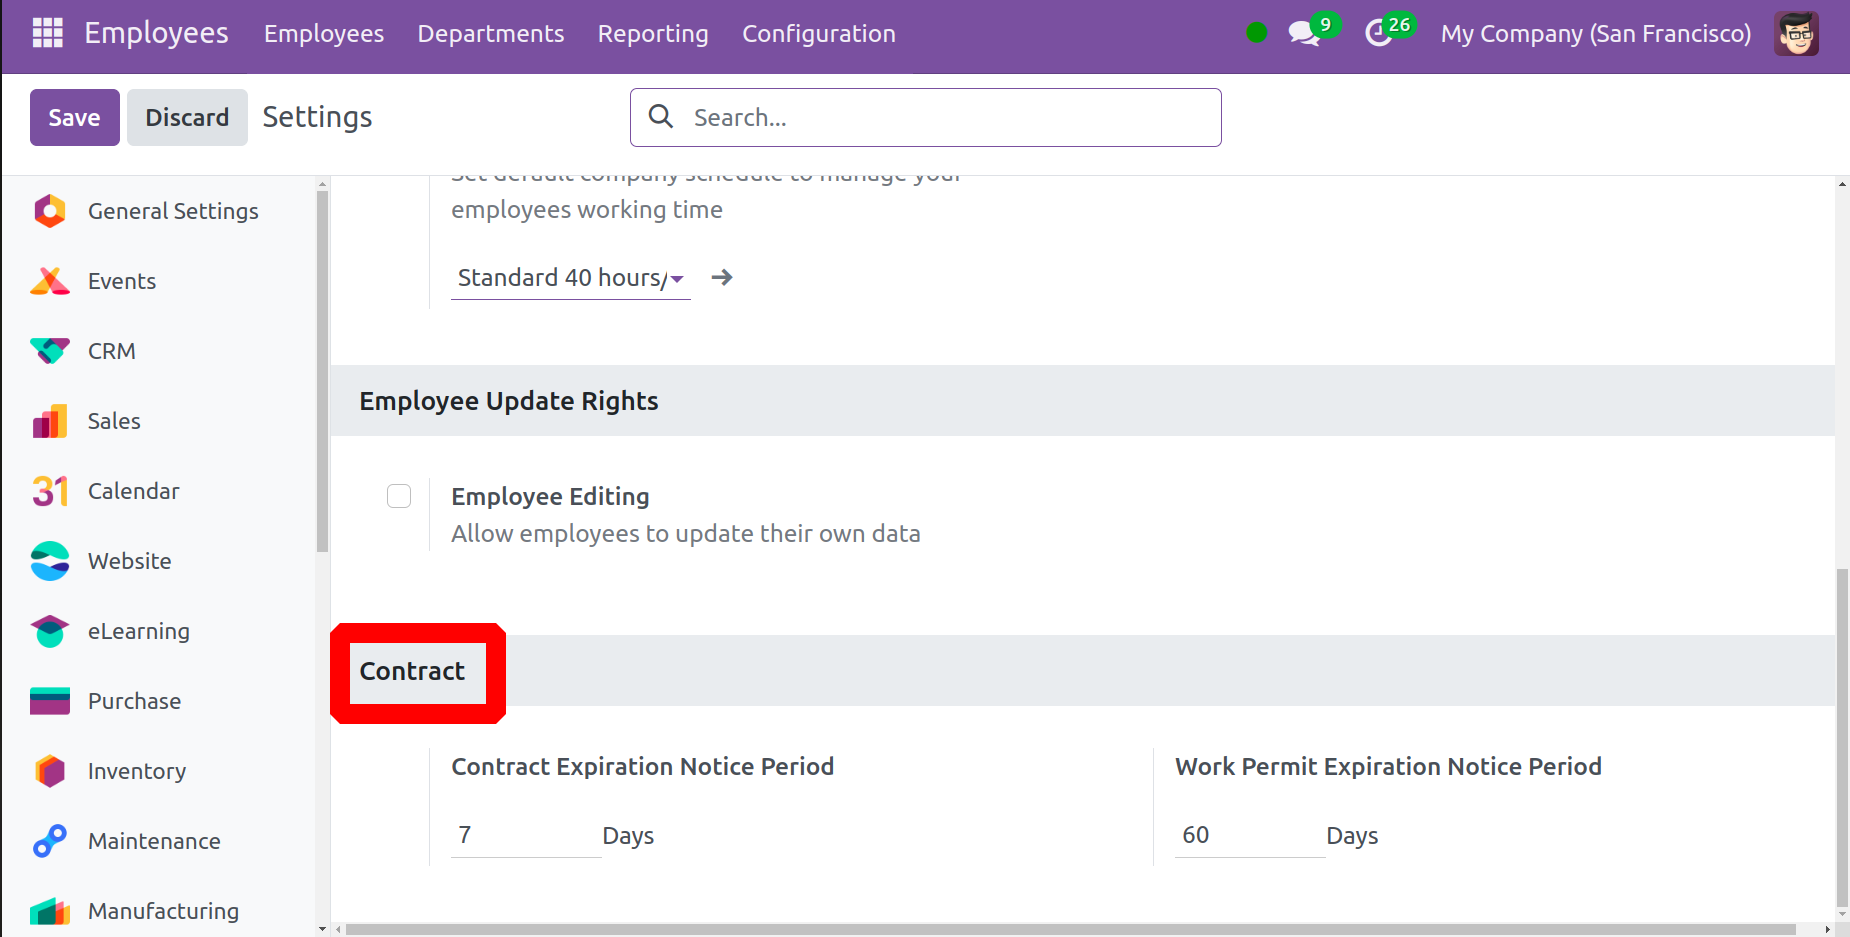
Under the Contract section, add the Contract Expiration Notice Period and Work Permit Expiration Notice Period.
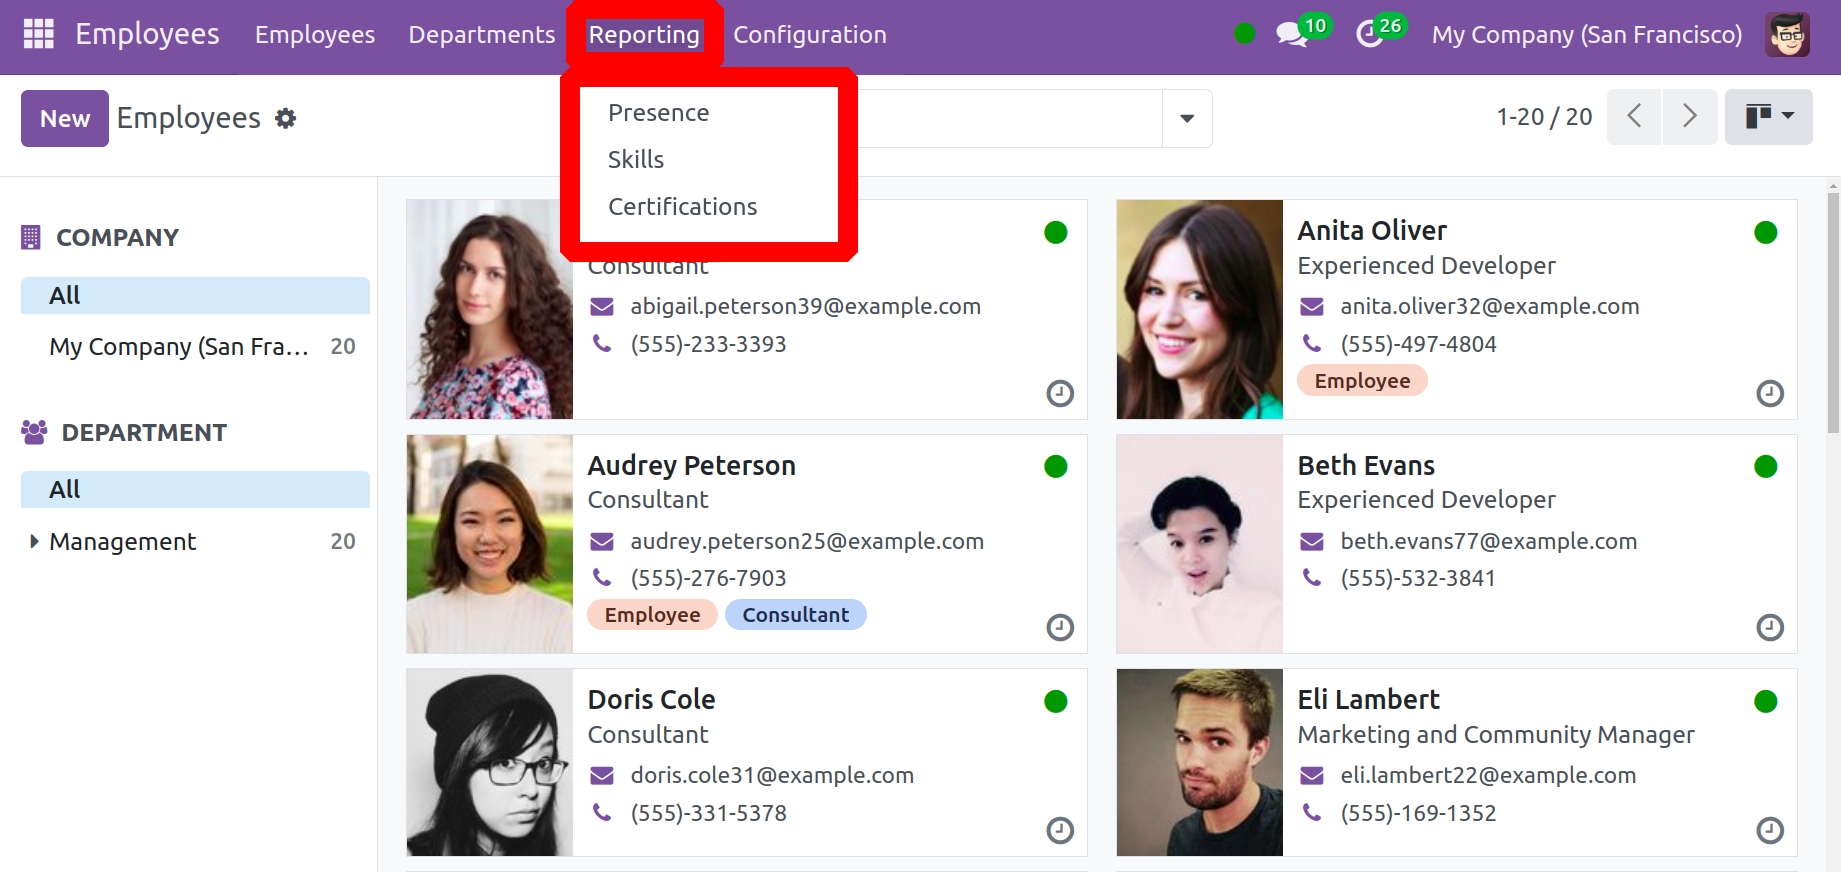
Reporting
The employee module's reporting feature facilitates the analysis of an employee's presence, skills, and presentation details.
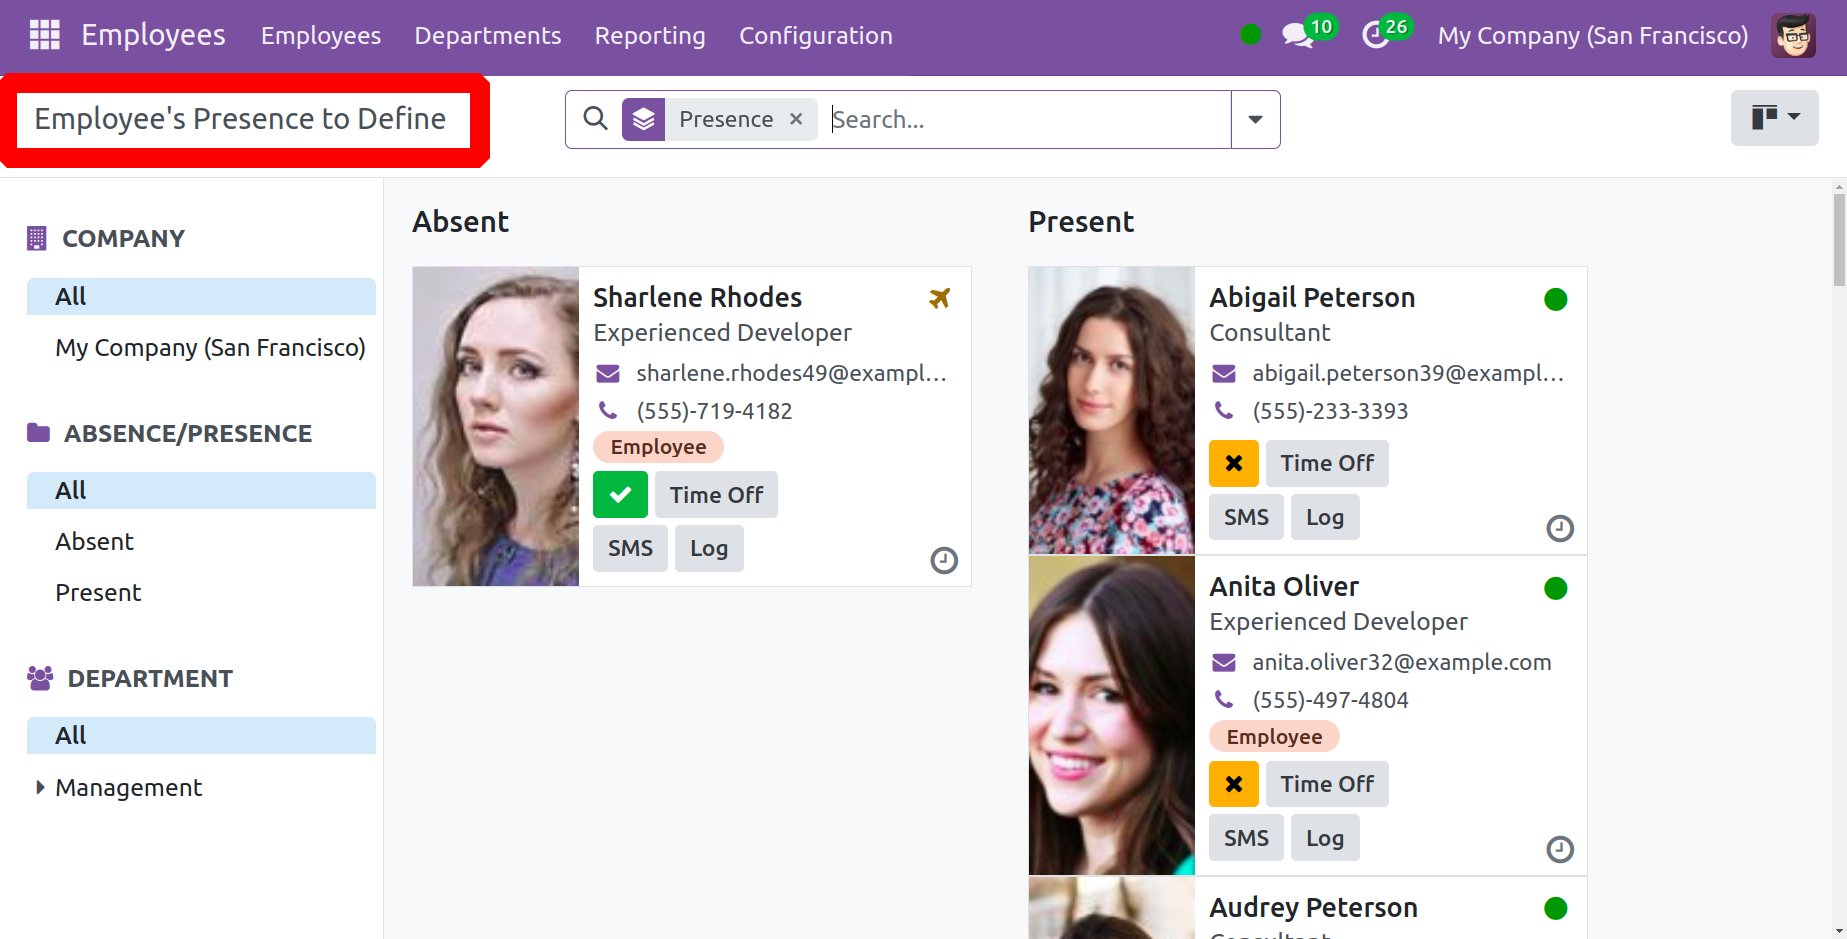
Employee Presence
The employees who are present and absent on that designated day are displayed on the Employee Presence page. You will find a list of present and absent employees on this page.
Both list and kanban views are available for this page. The list of personnel arranged by department and company will appear on the left.
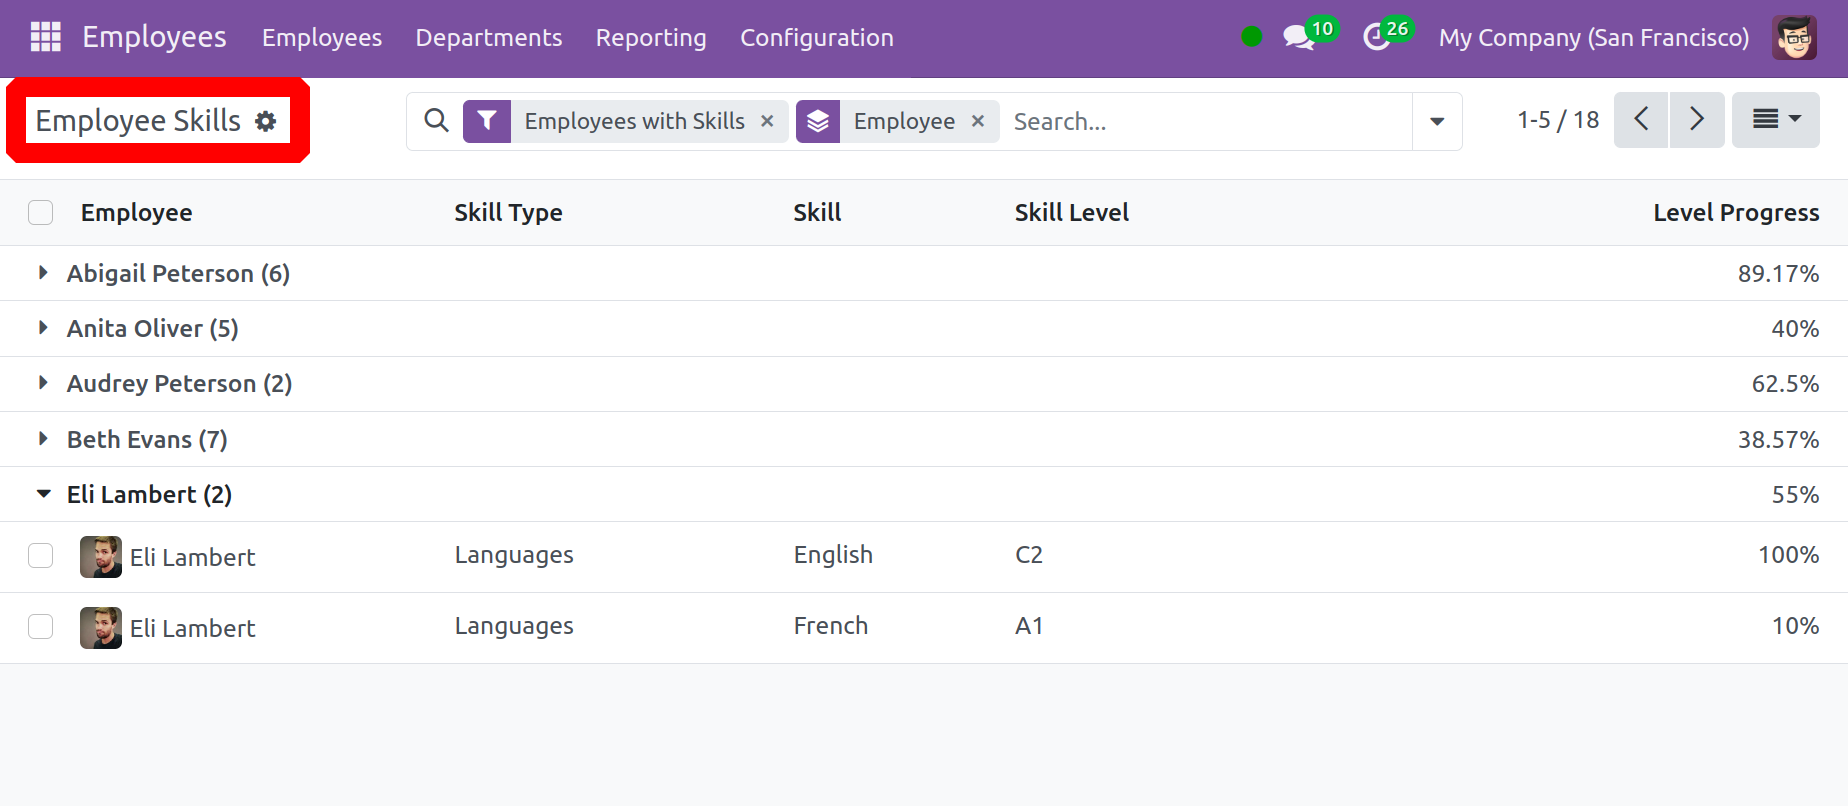
Skill
The reporting option under the Skill option will provide details about each employee's skill set. This page lists the employees along with their talent type, skill level, skill progress, and skill level. It is possible to view a specific employee's skill set by using the filters.
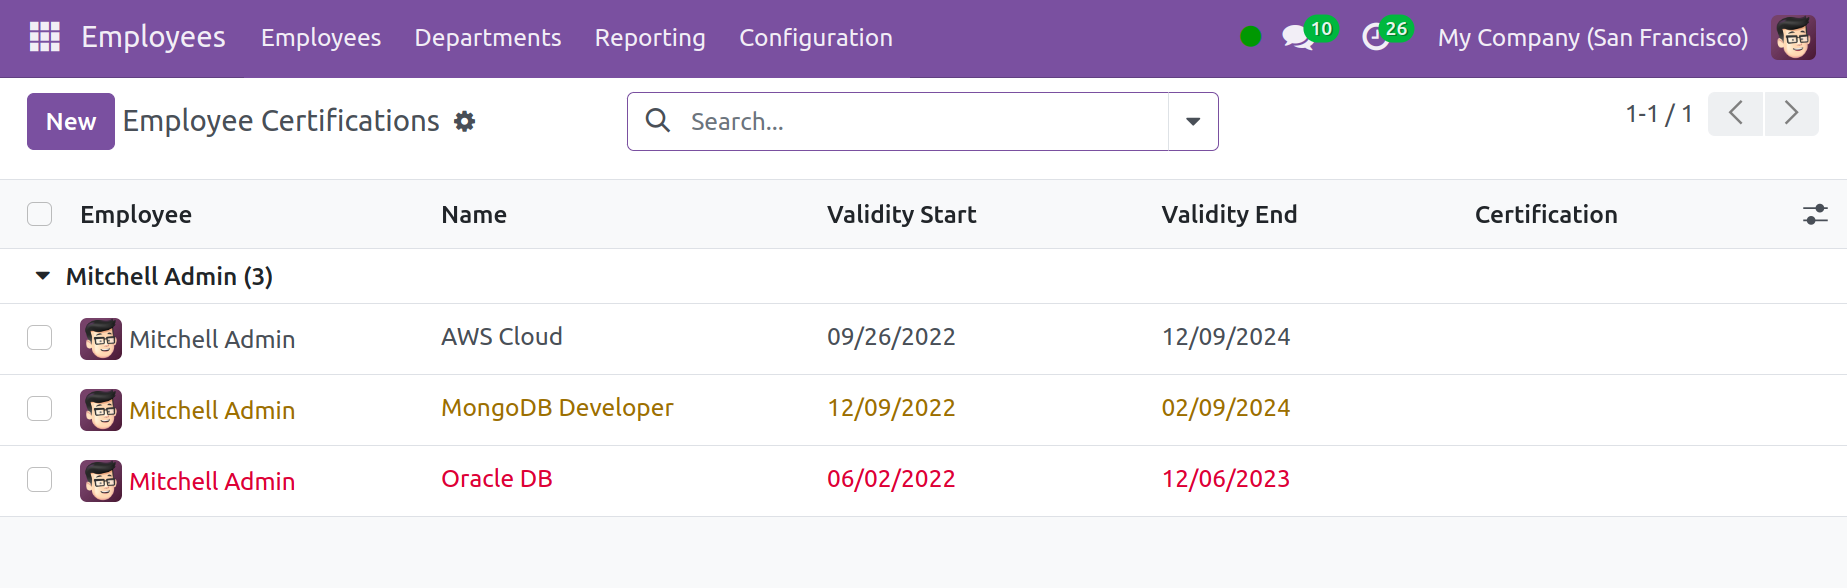
Employee Certification
The specifics of the employee certification will then be retrieved from the most recent reports. You can view the details of the employee, name, start and end dates of their validity, and certification.
The Employee Module assists a corporation in maintaining records of every aspect pertaining to its employees. And to a great extent, this module helps.