Creating a New Opportunity from a Lead
Every time you produce a new lead, you may convert it instantly into an opportunity.
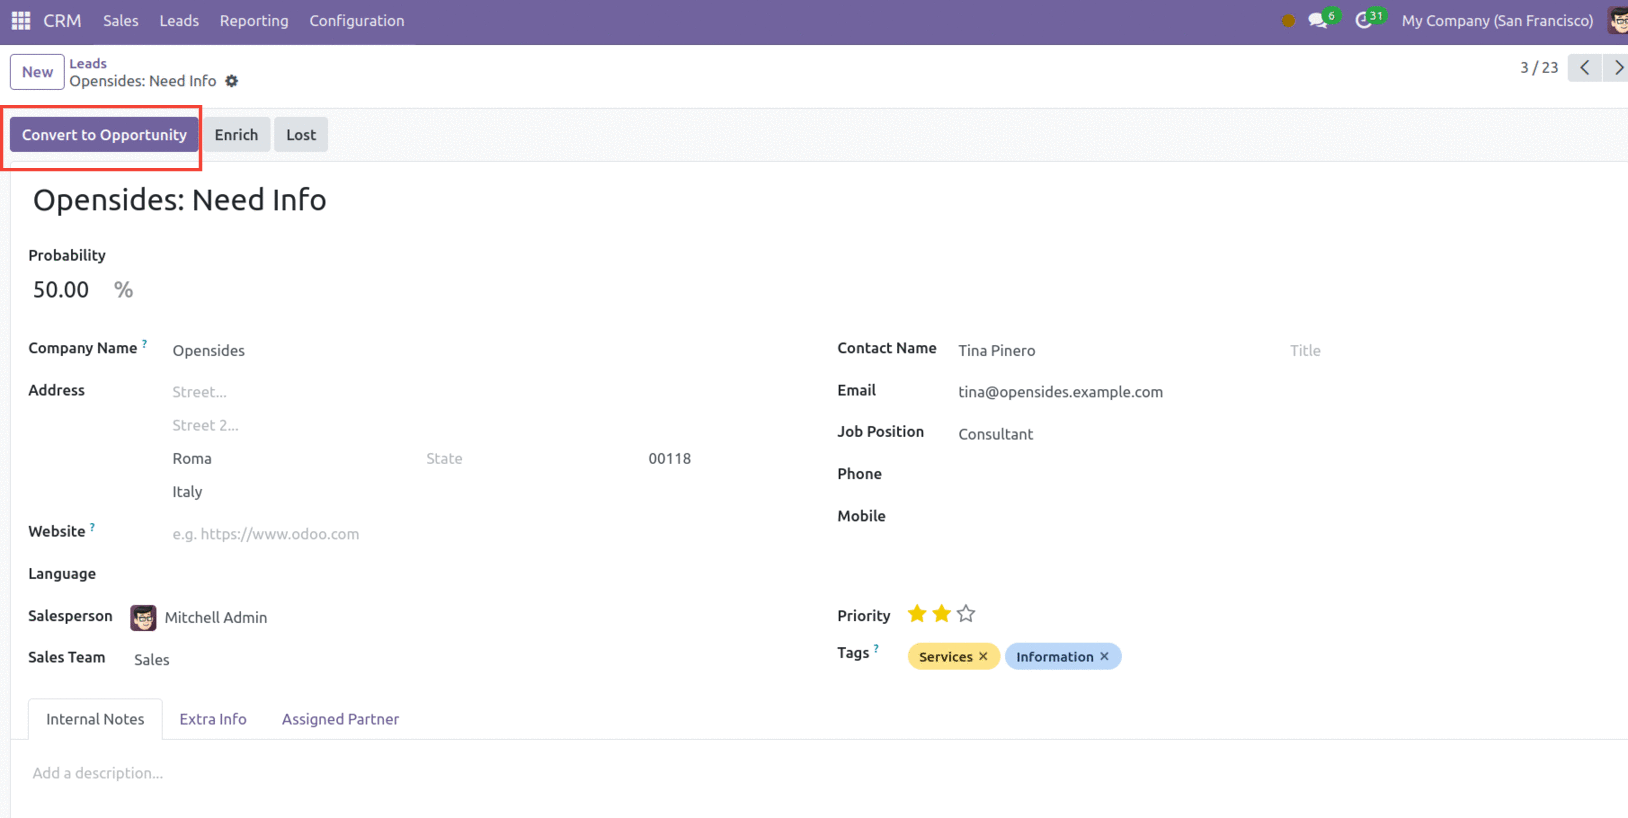
Converting a lead to an opportunity in this manner raises the likelihood of it eventually
becoming a sales order. A pop-up window will appear when you click "Convert to
Opportunity," as seen below.
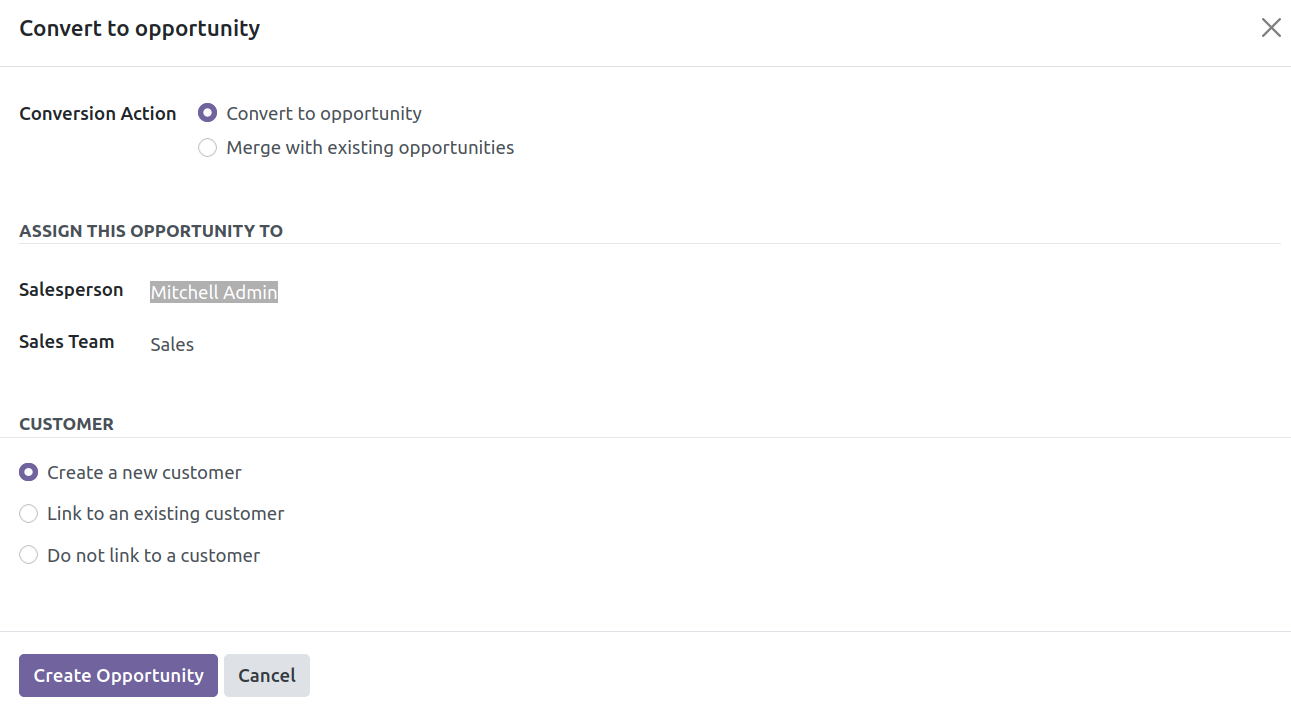
Odoo allows you to convert a lead straight into an opportunity or merge it with an
existing one. These choices are available for selection next to "Conversion Action."
Assign this opportunity to a sales representative and sales team. In the Customer area,
there are three options: Create a new customer, Link to an existing customer, and Do not
link to a customer. If you select 'Create a new customer,' the data will be added as a
new customer record. When you choose "Link to an existing customer," a drop-down list
will appear allowing you to choose the client with whom you wish to associate this
opportunity. Select "Do not link to a customer" if you don't want to attach it to a
client. After entering the required details, click on ‘Create Opportunity.’
The Pipeline window will provide the information on all freshly converted leads. To get
to this section, select 'My Pipeline' from the Sales tab's dropdown list. This window
shows how opportunities have been categorized into New, Proposal, Qualified, and Won
categories according to how they are progressing. If you wish to add a new category,
click on "Stage." If you want to modify the stage of an opportunity, simply drag & drop
it to the desired phase.
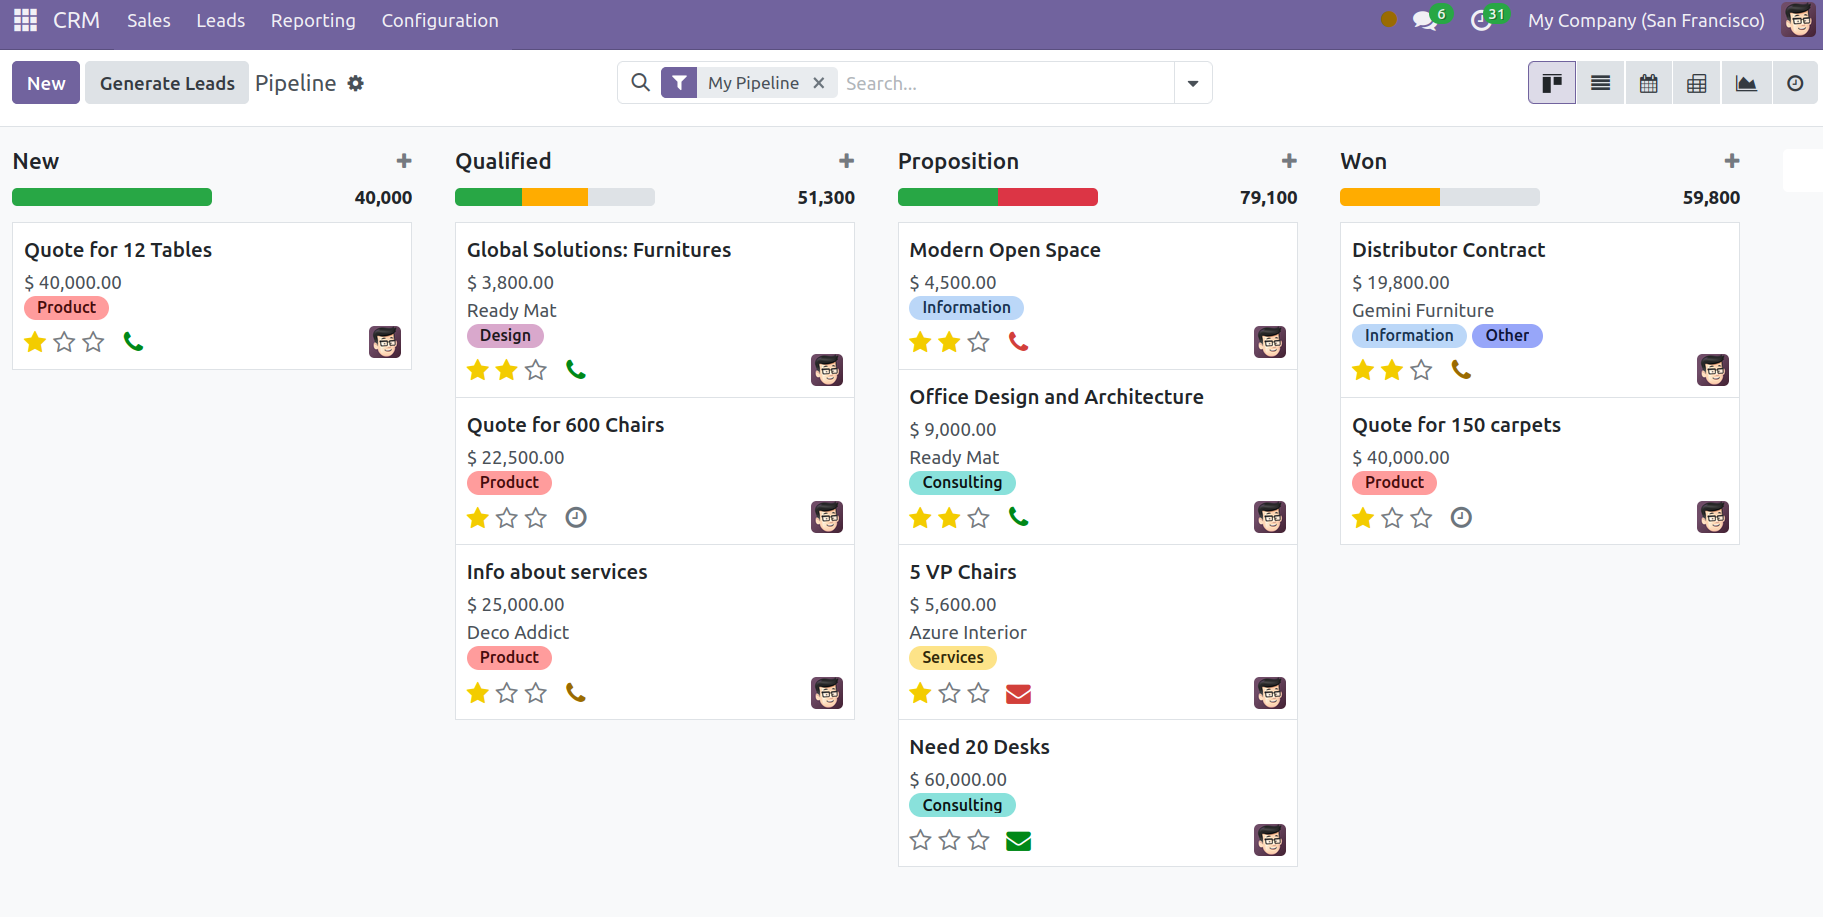
By default, the Pipeline window shows its contents in Kanban view. The icons in the upper
right corner of the window correspond to List, Calendar, Pivot, and Graph views, which
you may switch to from this one. You may get the necessary data depending on your
preferred parameters by using the Filters and Group By options.
Use 'Filters' to separate records based on various criteria.
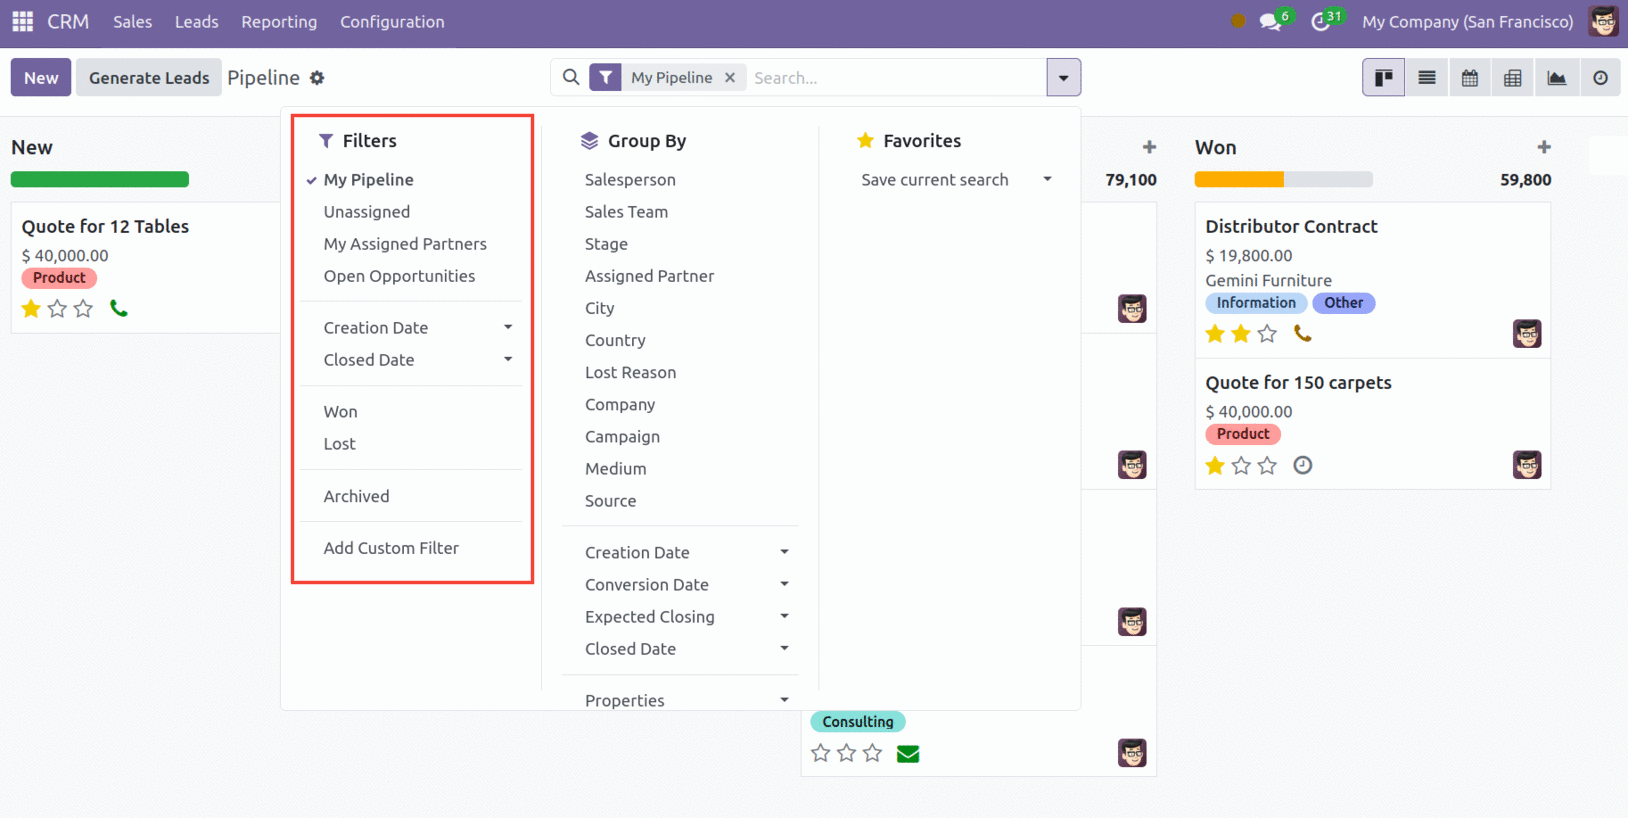
The 'Filters' dropdown menu includes choices such as My Pipeline, Unassigned, My Assigned
Partners, Open Opportunities, Unread Messages, Creation Date, Closed Date, Won, Lost,
Archived, and Add Custom Filter. You may select any filter that best suits your needs
and quickly identify the information you want.
The Group By option performs a similar job, grouping entries depending on the constraints
you provide.
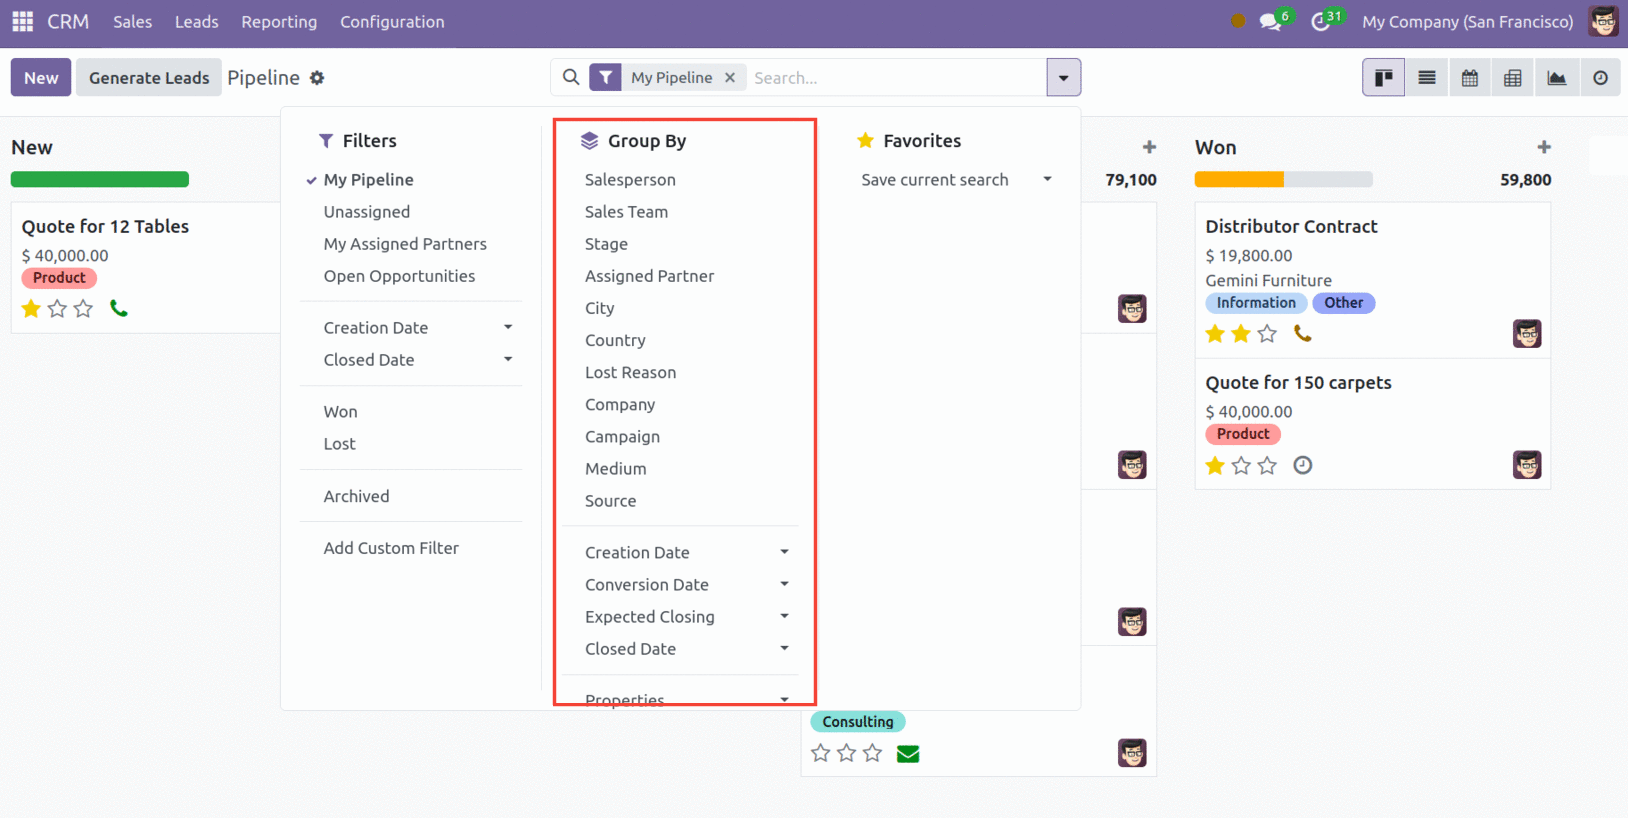
The 'Group By' dropdown menu includes choices such as My Pipeline, Unassigned, My
Assigned Partners, Open Opportunities, Unread Messages, Creation Date, Closed Date, Won,
Lost, Archived, and Add Custom Filter. You may select any group by data that best suits
your needs and quickly identify the information you want.
‘Favorites’ allows you to save important filters so that you don’t have to reapply them
every time.
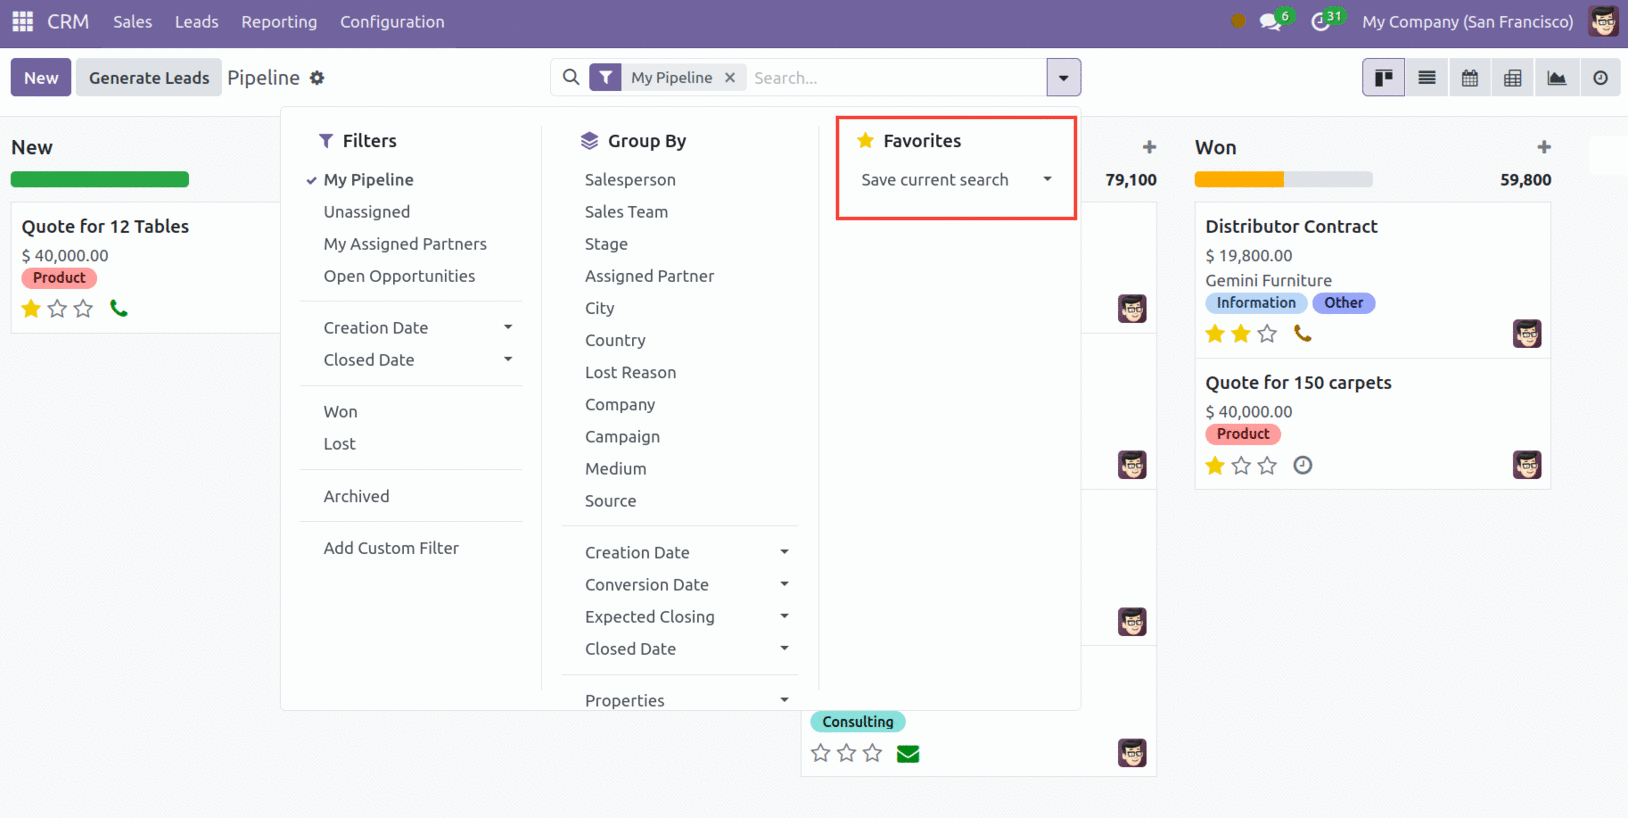
The 'Favourites' dropdown menu contains options like Save current search. You may add the
previously applied filters and groups to "Favourites" by using "Save current search."
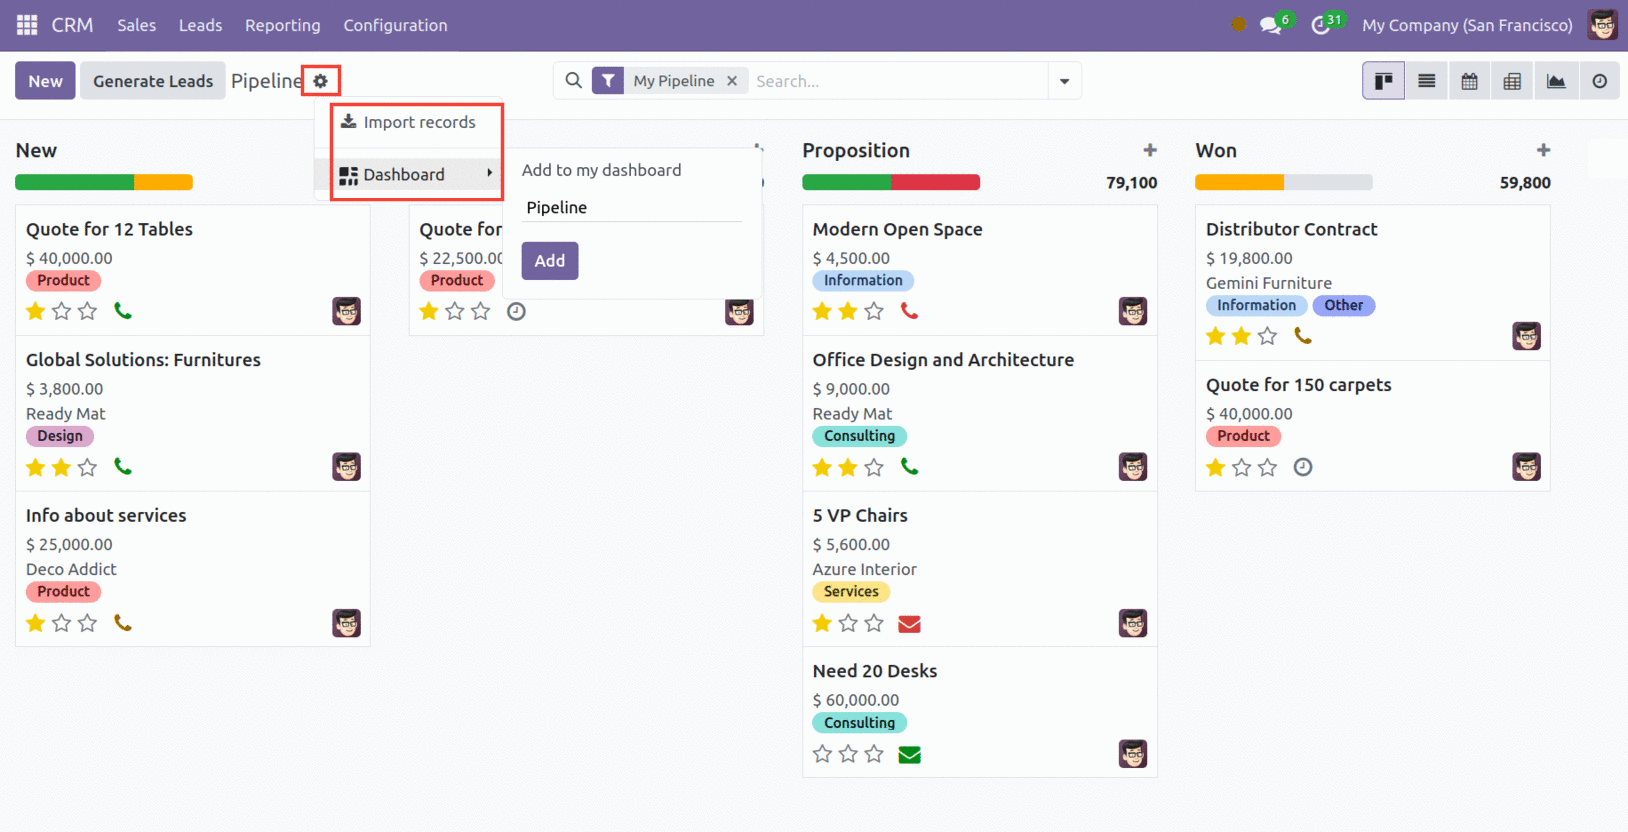
The 'Import records' option near the settings menu of the pipeline allows importing data
from the form view into the system, eliminating the need to manually input this
information. If you want the filtered data to display in the Dashboard module, select
'Add to dashboard' in the same settings icon beside the pipeline in the CRM module.
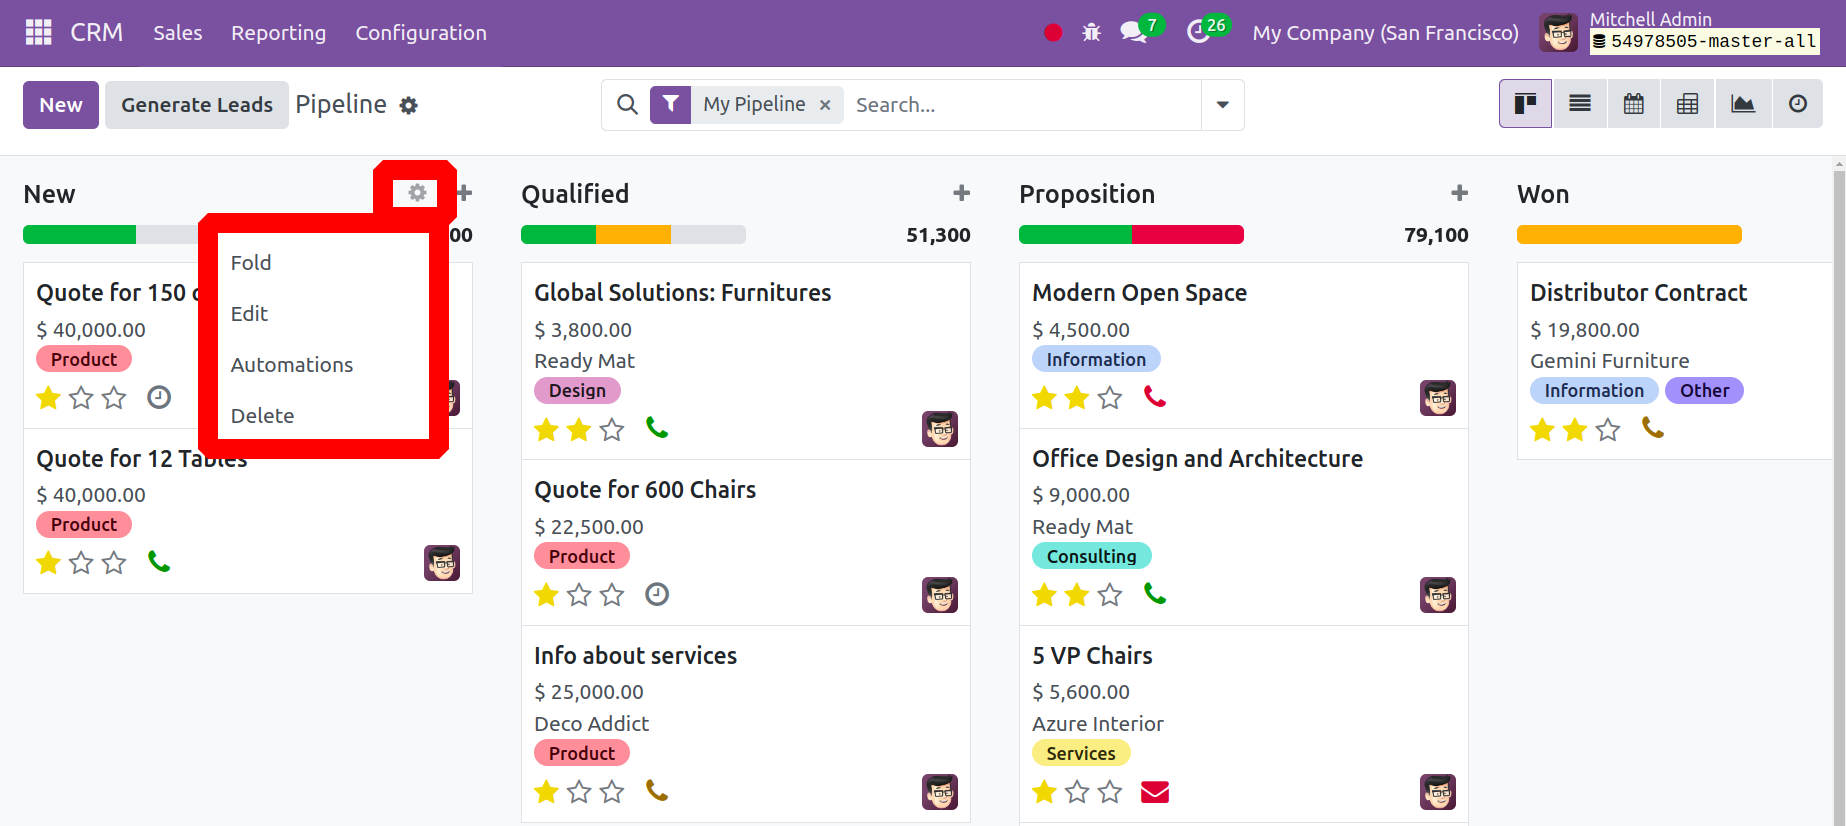
Users can see several actions, such as Fold, Edit, Automate, and Delete, by
clicking on the stage's settings button. Click the Fold button to fold the
selected step from this view. To make changes to the stage, click the Edit
button.
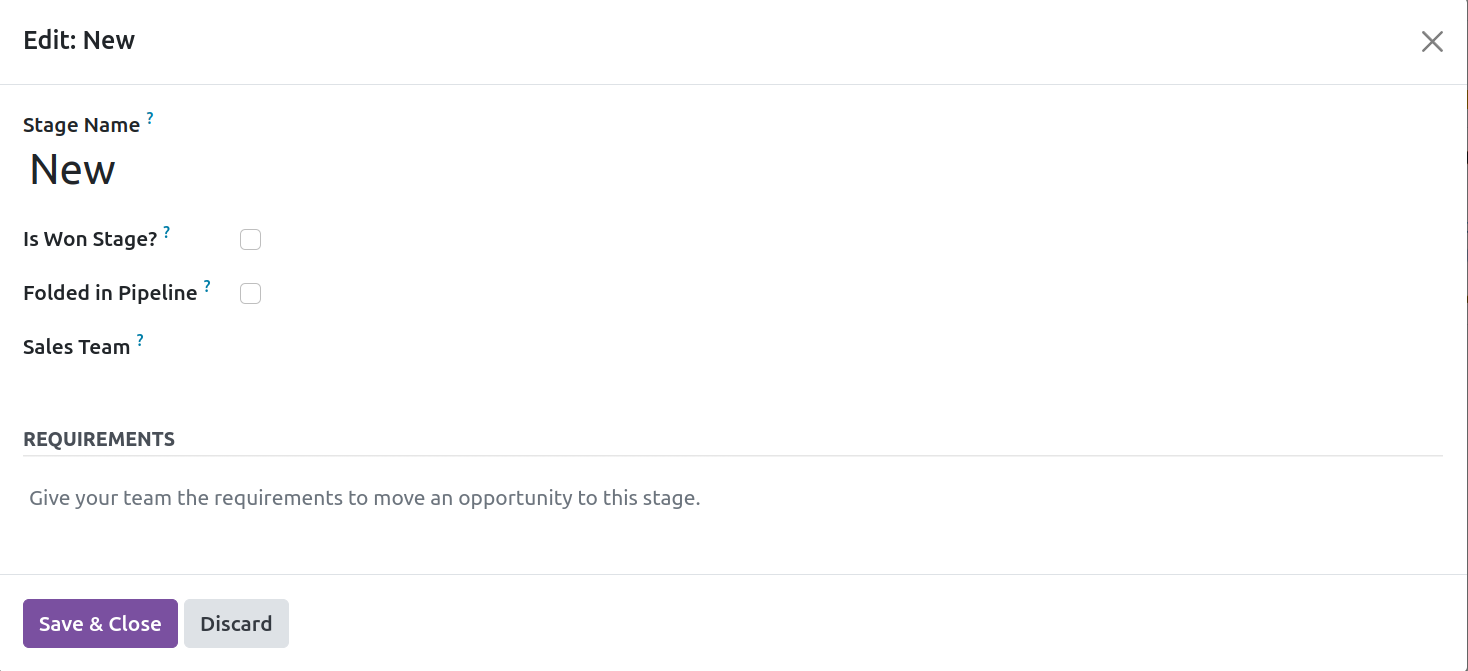
The screenshot below illustrates how another window will then appear. To mark the stage
as won, add the stage name and activate the Is Won stage. Enable the Folded in
Pipeline in order to fold the stage. Next, designate the sales team to handle
leads at this point. Select the "Save & Close" option.
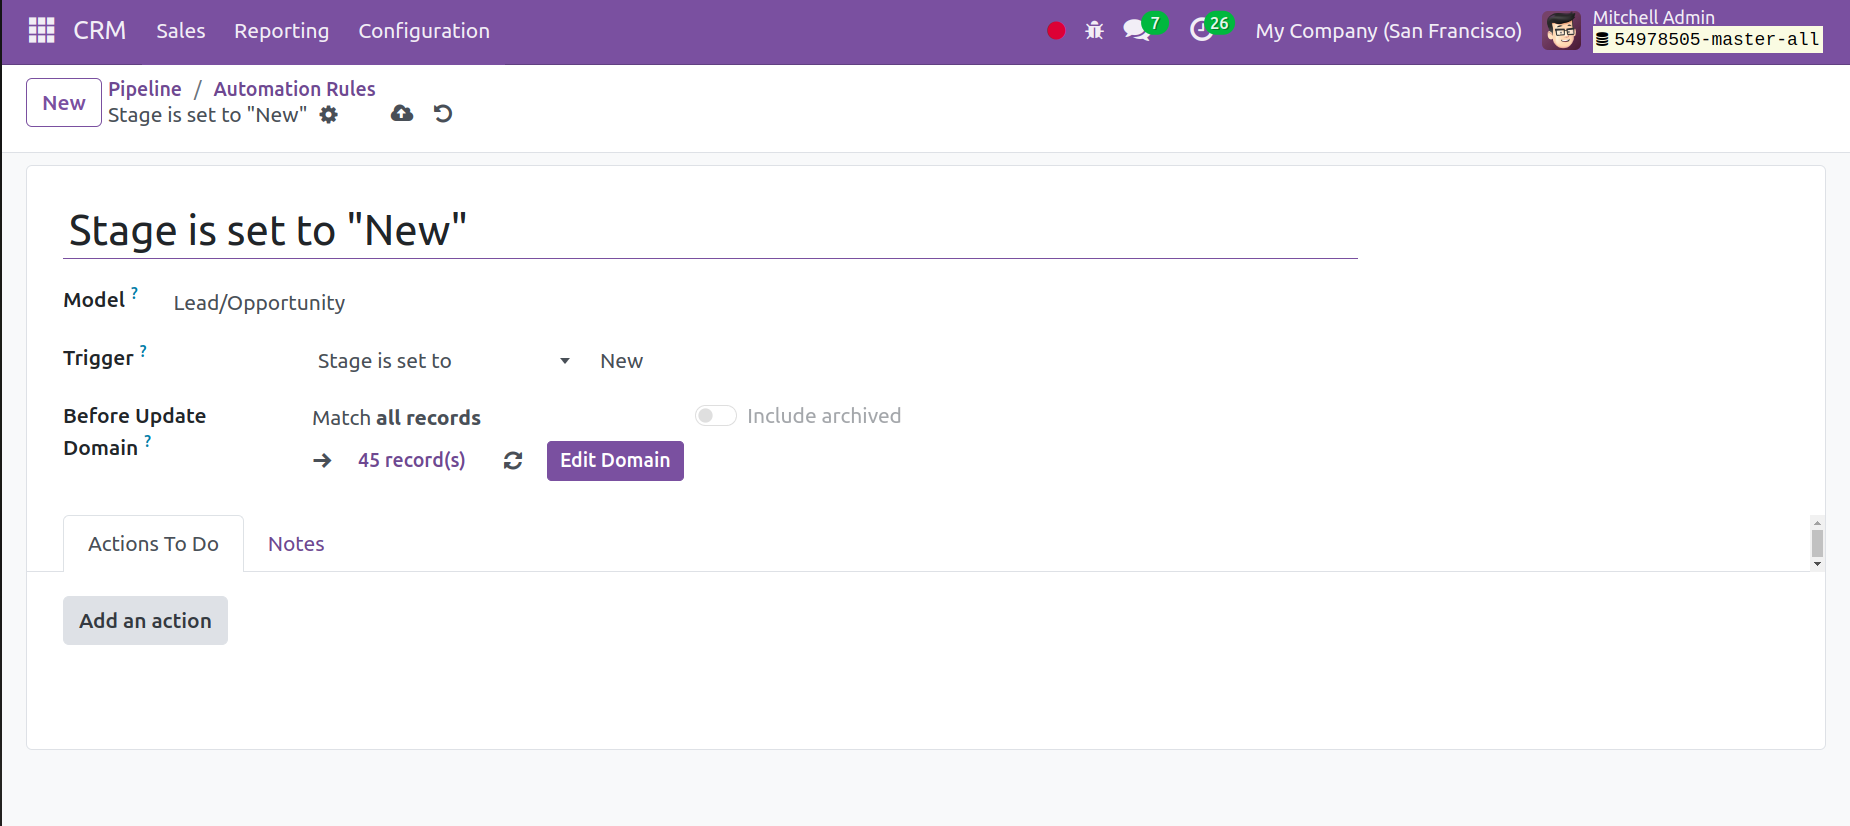
Then, Automation is a new feature that was included in Odoo 17. Users can utilize
this to program certain automated tasks to be carried out at various stages. Select the
Lead/Opportunity model first. Set a Trigger action after that. Before updating
the record, any rules that may have been set inside the Before Update Domain must
be met. Next, select the necessary activities from the Actions To Do tab.
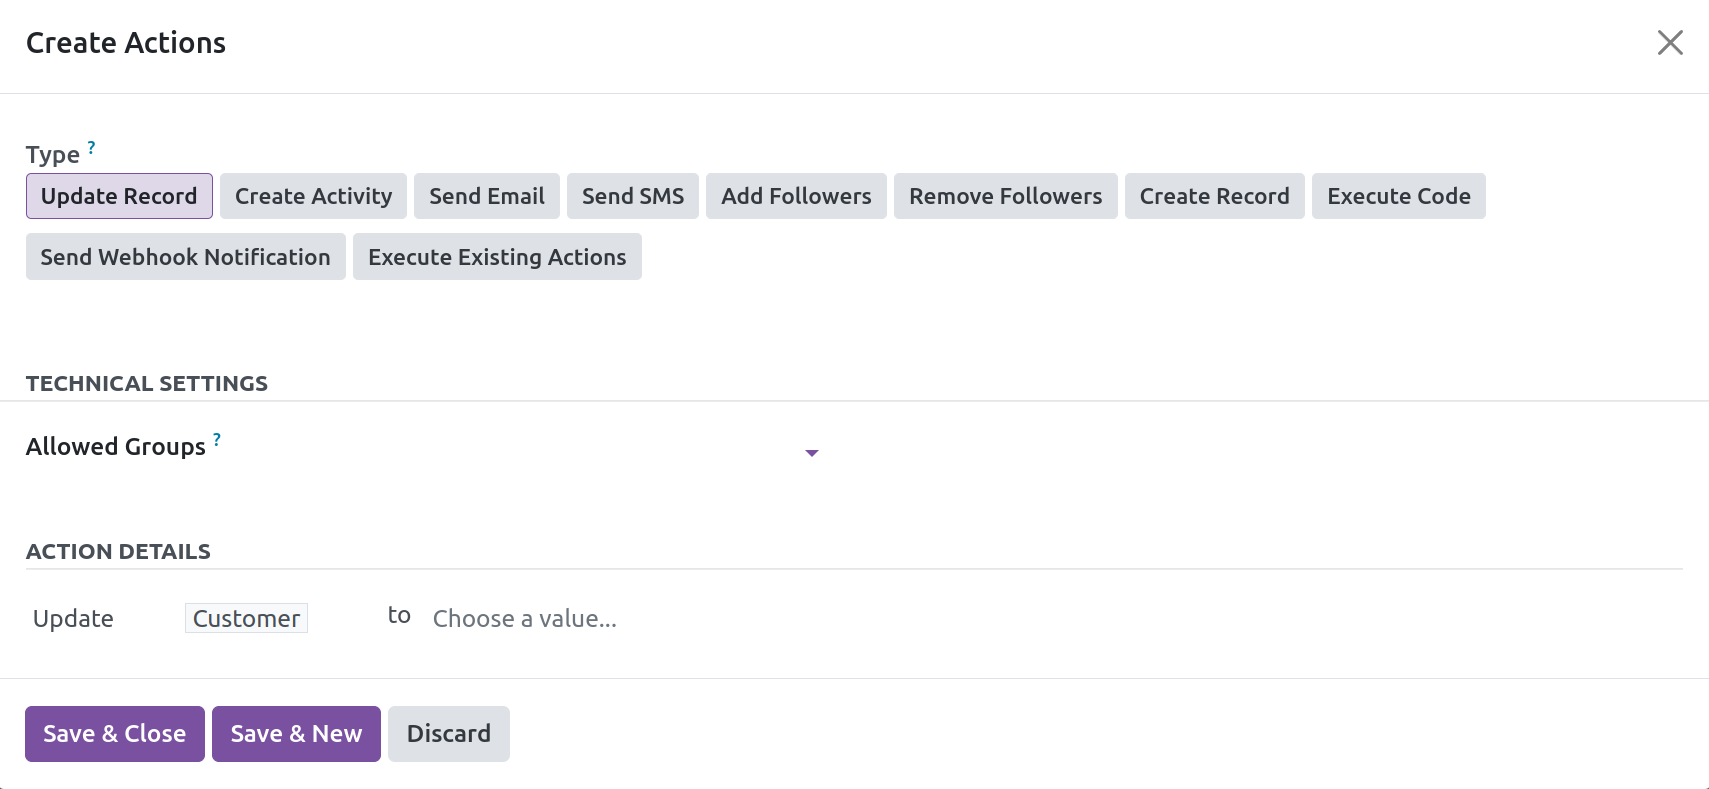
Select the desired action type first from the list. Next, within the Allowed
Groups, set the Groups allowed to do the server action; if all groups are
permitted, leave it empty. Set the Action details after that. To save the created
activities, click the Save & Close button.
The stage will then be permanently deleted by pressing the Delete button
The Pipeline window enables you to generate opportunities from the same window. Click the
New button to use this feature. As indicated below, a dialogue window will
appear.
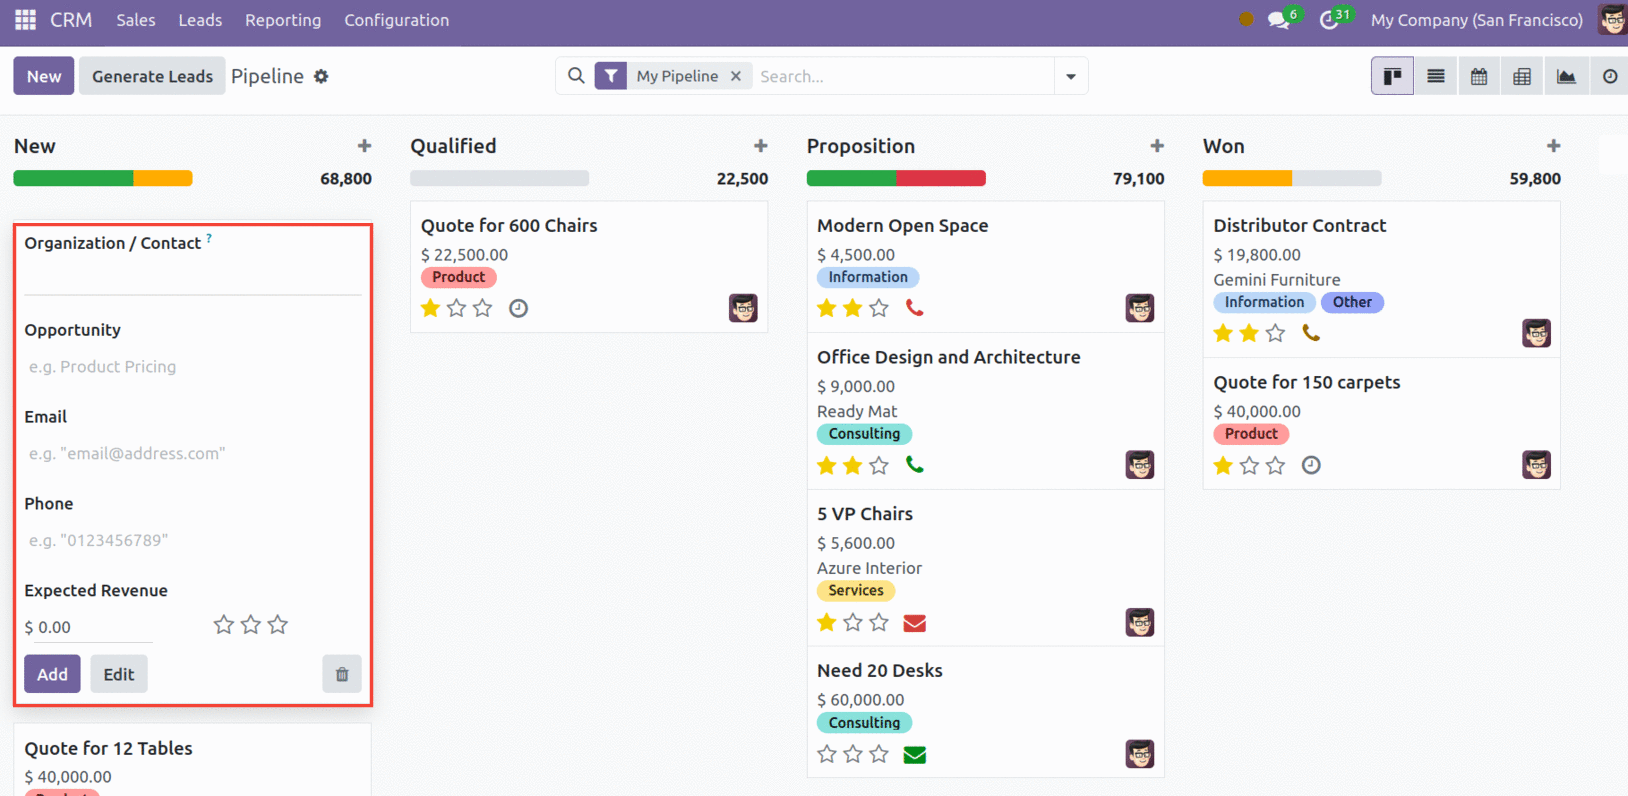
Fill in all of the essential information, such as Organization/Contact name, Opportunity
name, Email, Phone, and Expected Revenue. To make modifications to this opportunity in a
more detailed window, click the Edit button. Click "Add" once the correct information
has been entered. The Pipeline window will display the just created record.