Time Off Types
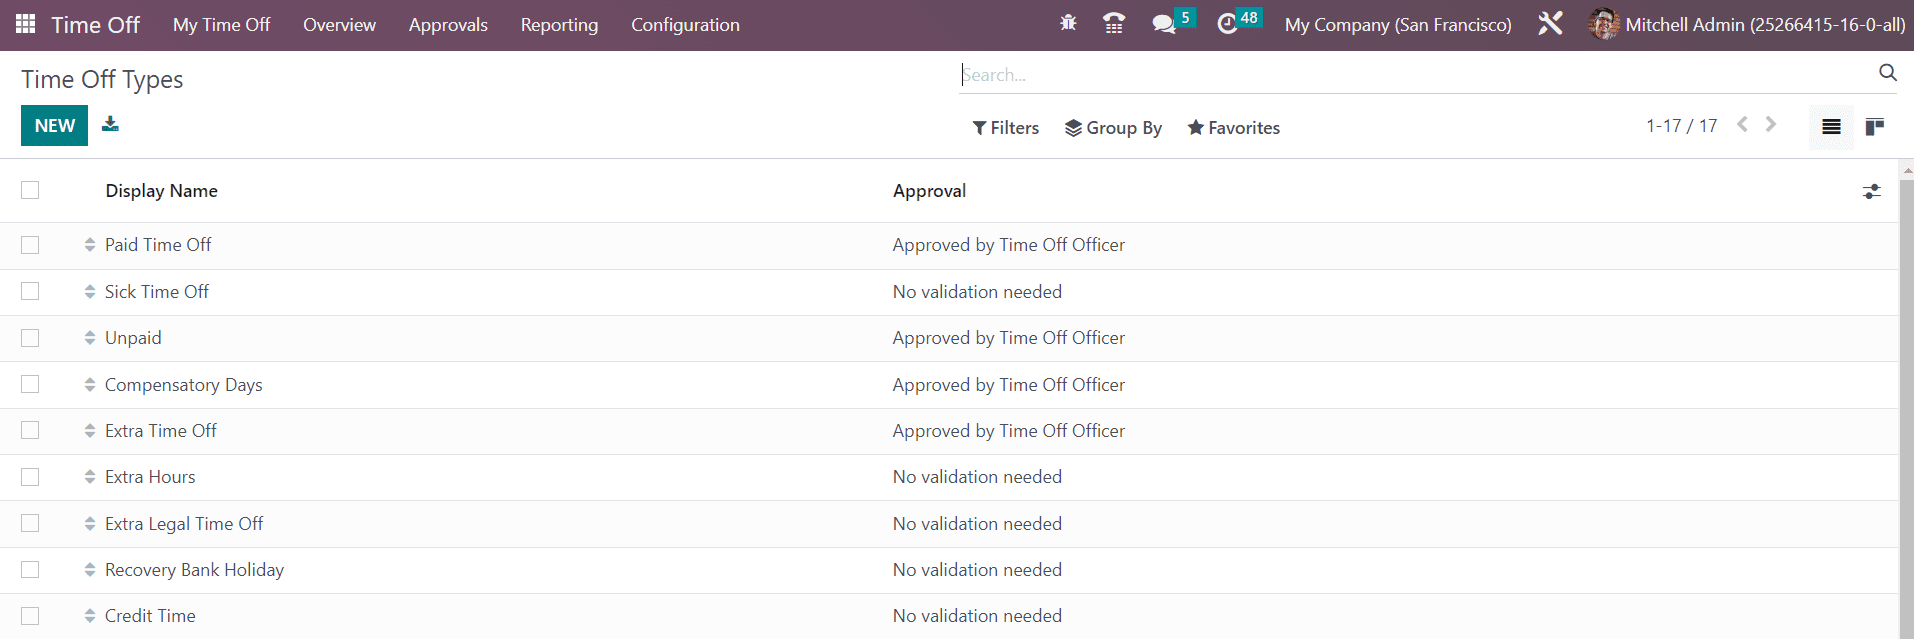
The Configuration menu of the Time Off module includes the Time Off Types option that will help you to create various types of time off easily. The list view of this platform is shown below. You can observe the Display Name and Approval here.

According to your requirements, you can create suitable types for time off from this window. Click on the New button to create a new one.

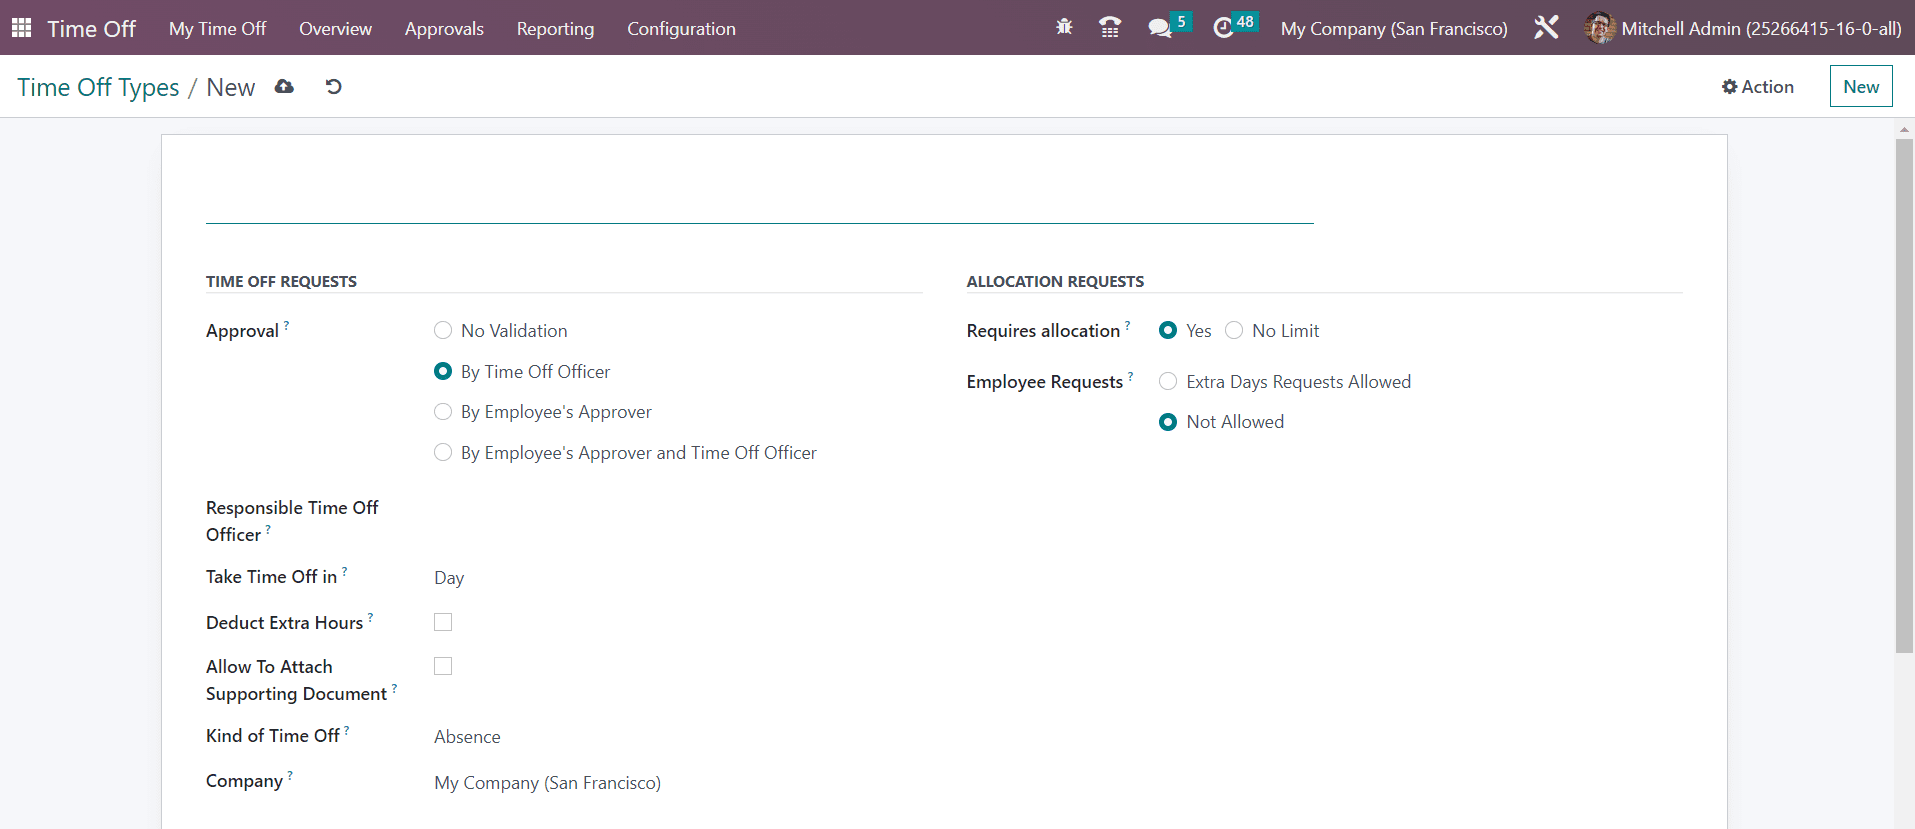
Clicking on the New button will lead you to a form view as shown above. Provide a name for this time off type in the given space. Under the Time Off Requests tab, you can set rules for Approval. If you want to remove approvals on time off, you can select the No Validation option. Otherwise, you can set the Approval as By Time Off Officer or By Employee’s Approver. Selecting the By Employee’s Approver and Time Off Officer indicates that the request requires double approval to get confirmation. You will get an additional field called Responsible Time Off Officer, where you can select the Time Off Officer who will be notified to approve allocation or Time Off requests.
In the Take Time Off in field, you can set the period of the time off as Day, Half Day, or Hours. By activating the Deduct Extra Hours feature, extra hours from the attendance will be deducted once a time off of this type is approved. You can allow attaching supporting documents by activating the corresponding field. The Kind of Time Off can be set as Absence or Worked Time in the given field. The distinction between working time and absence will be used in the computation of the accrual’s plan rate. The name of the Company will be auto-populated in the respective field.
Under the Allocation Requests tab, you can find the field Requires Allocation. Selecting the Yes option indicates that the Time Off requests need to have a valid allocation. It can be set as No Limit if the Time Off requests can be taken without any prior allocation. Once you select the Yes option, you will get a new field called Employee Requests. Here, the user can request an allocation for himself by choosing the Extra Days Requests Allowed option. By selecting the Not Allowed option, the user cannot request an allocation.

In the Payroll tab, select a suitable Work Entry Type from the drop-down menu. Set Color and Cover Image for display. After adding the required data, the new Time Off type is ready.