Quality Alerts
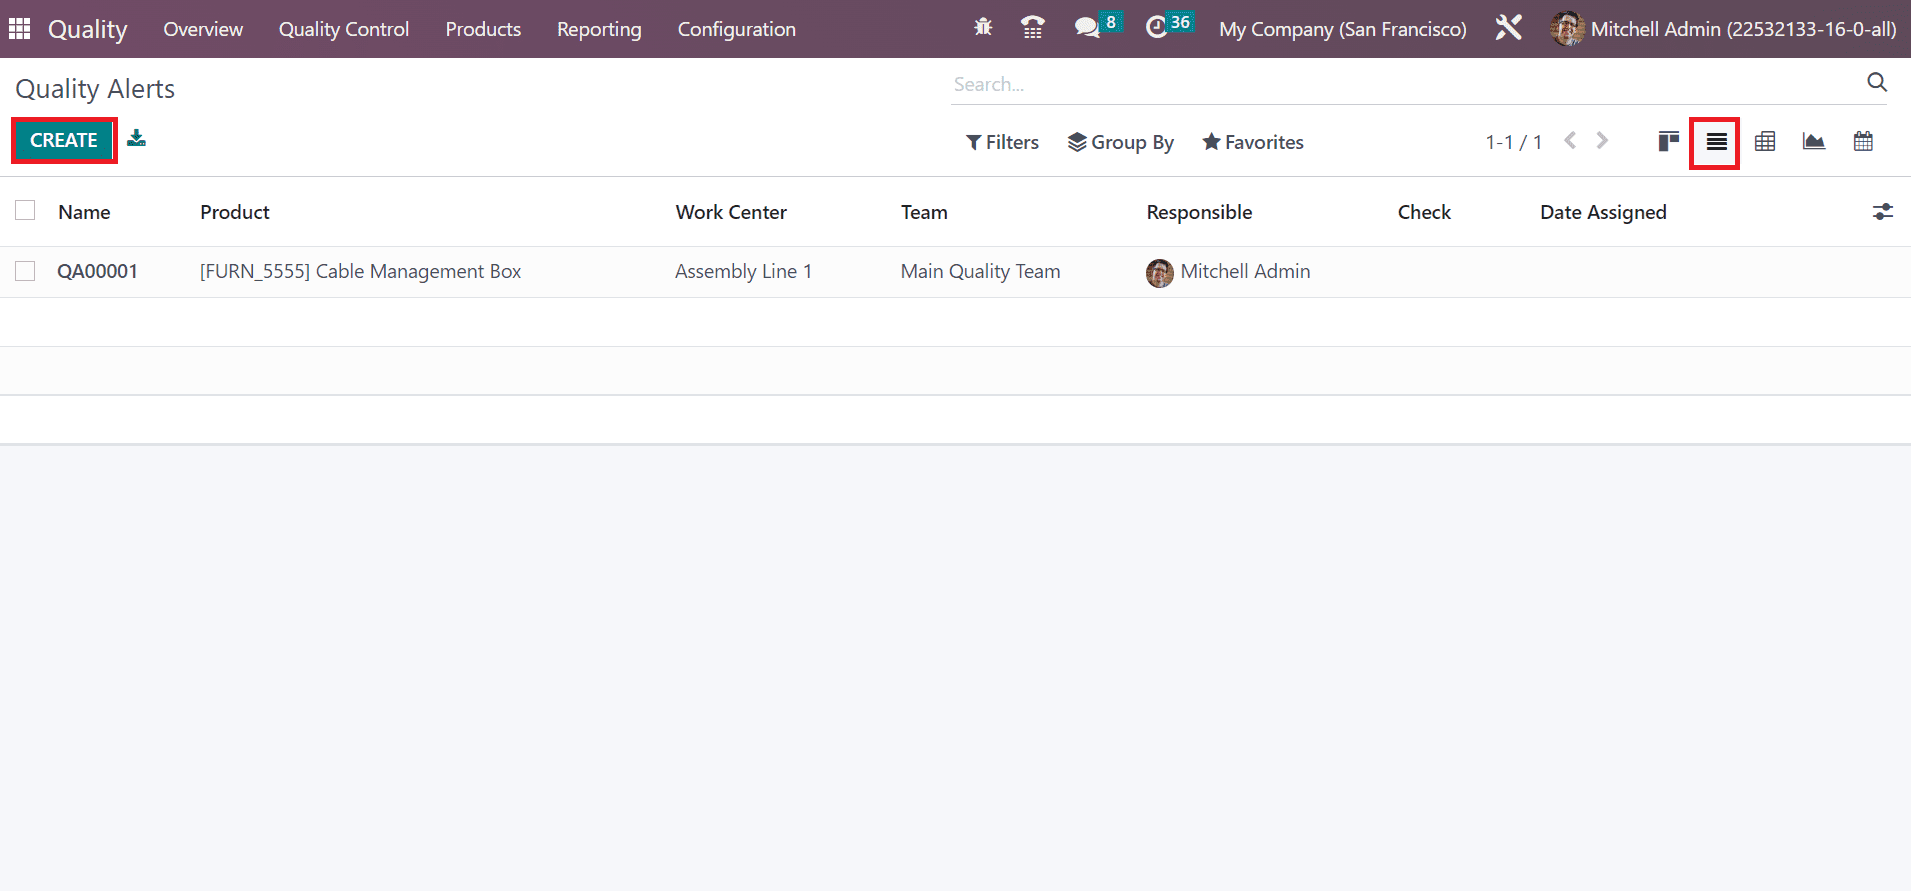
In Odoo 16, we can set quality alerts for services and delivery instead of manufacturing orders. It is easy to remind the responsible person to check product/service quality once they set quality alerts. You can visible the data of quality alerts once choosing the Quality Alerts menu in the Quality Control tab. Details of each alert, such as Name, Work Center, Responsible, Date Assigned, Team, etc, are separately in the List view. To generate a new alert, click the CREATE icon in the Quality Alerts window.
We can insert various details on the displayed page. Let’s check out the details of each option in the Quality check window separately below:
Title; You can add the quality alert name in the Title field.
Product: A list of all items in your firm is visible in the Product field. Choose the specific product needed to set a quality alert in the Product option.
Product Variant: The combination of items refers to the product variant having different colors and sizes. Select the variant concerning to chosen commodity in the Product variant field.
Lot: The identification number of specific material or quantity from a single manufacturer is a lot number. In the Lot field, the user can add the lot id of the product.
Work Center: The unit where all manufacturing activities are carried out refers to a work center. Choose the primary center of your product /equipment situated in the Work Center field.
Picking: Set the product warehouse within the picking field. You can specify the picking id of your product to set the quality alerts.
Team: Allocate a team to verify the quality alert of products. Users can mention the team name from the Team field.
Responsible: Choose the user who validates the quality checks of products/services in the Responsible field.
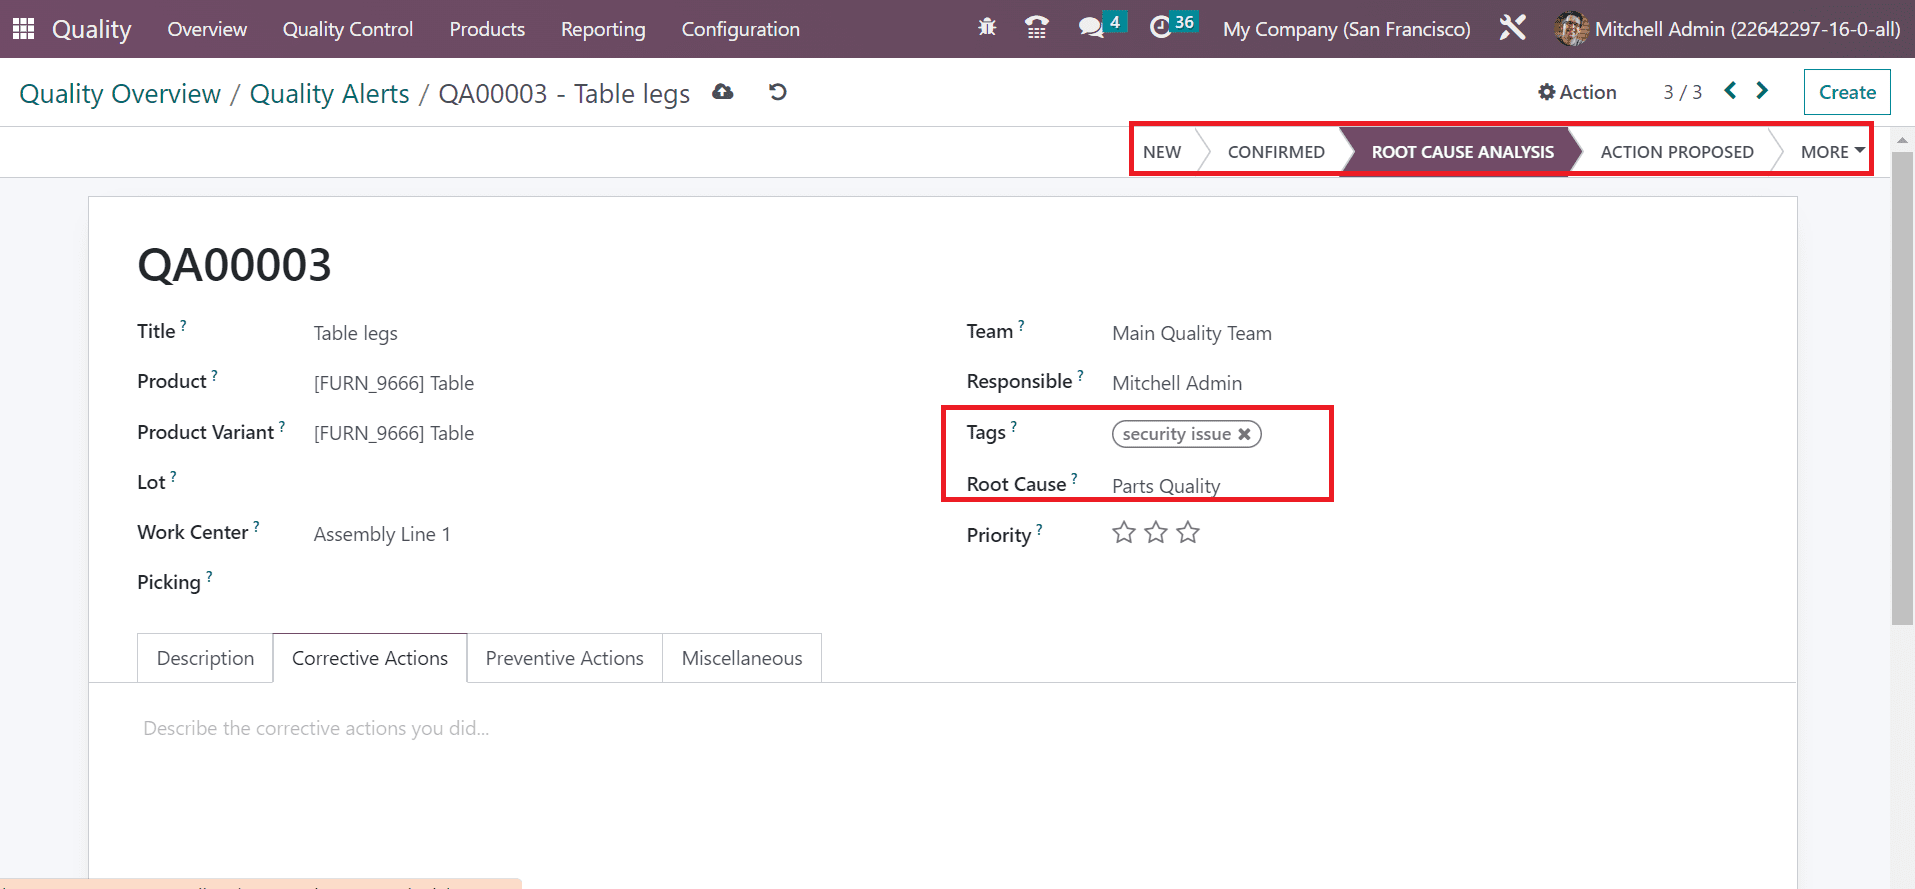
Tags: A label attached for the identification purpose of specific products mentioned as tags. You can select necessary tags related to quality alerts in the Tag option.
Root Cause: We can add the reason for quality alert generation in the Root Cause. It is possible to set the reason as Workcenter failure, Work Operation, Parts Quality, Others, etc.
Priority: By choosing the star icon in the Priority field, you can specify the importance of quality alerts. The main team working in the backend will resolve the prior one easily.
Description: It is easy to define the root cause of the issue below the Description tab.
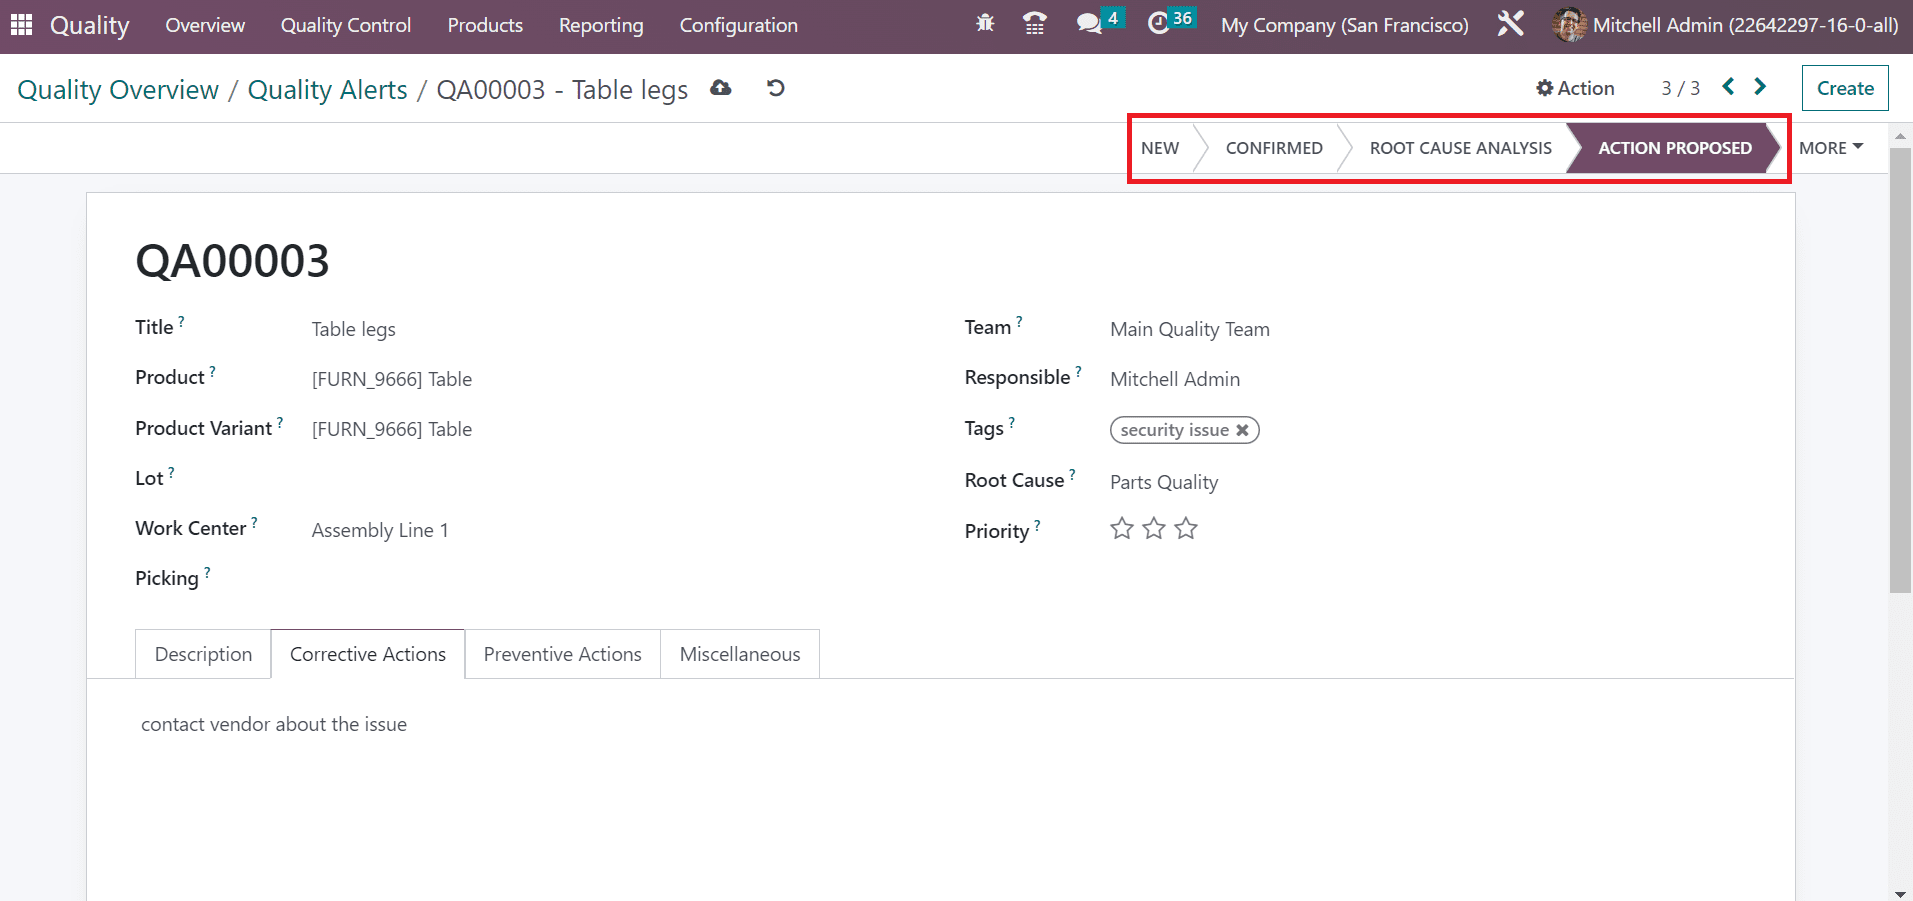
Corrective Actions: You can describe the actions to resolve product issues in the Corrective Actions tab.
Preventive Actions: The precautionary actions to save your commodity from failure are defined below the Preventive Actions tab.
Miscellaneous: Data related to a company, assigned date, vendor, and email are acquirable under the Miscellaneous tab.
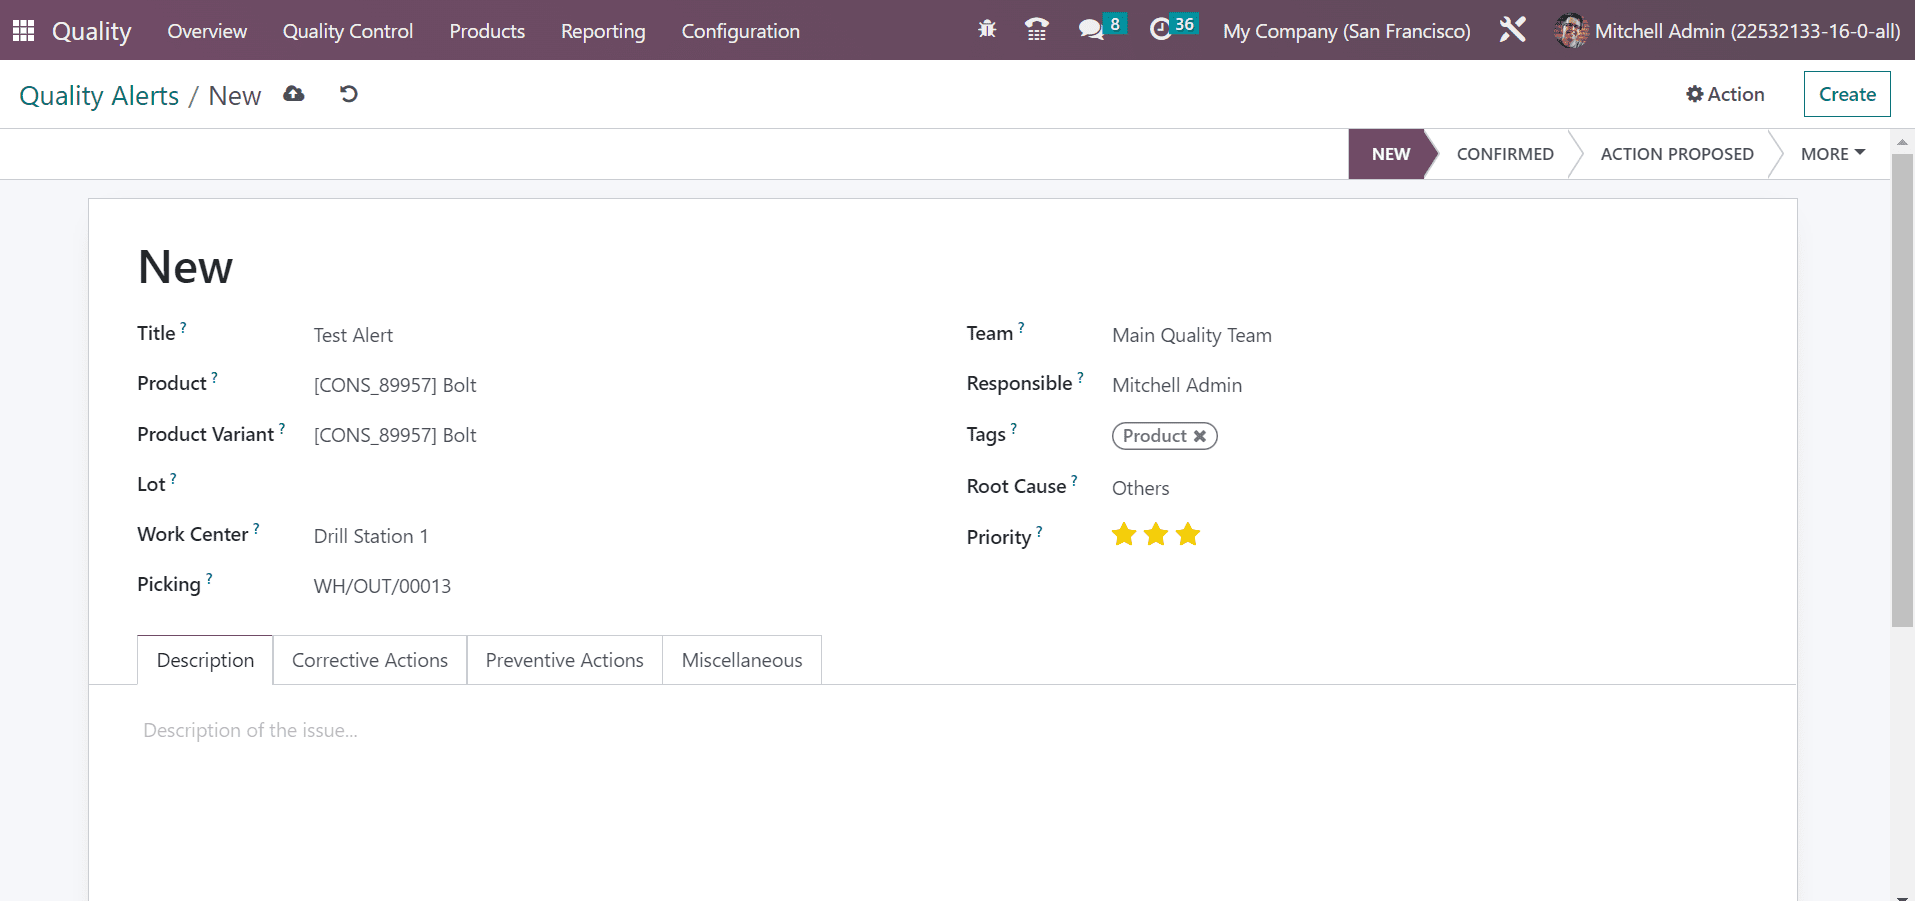
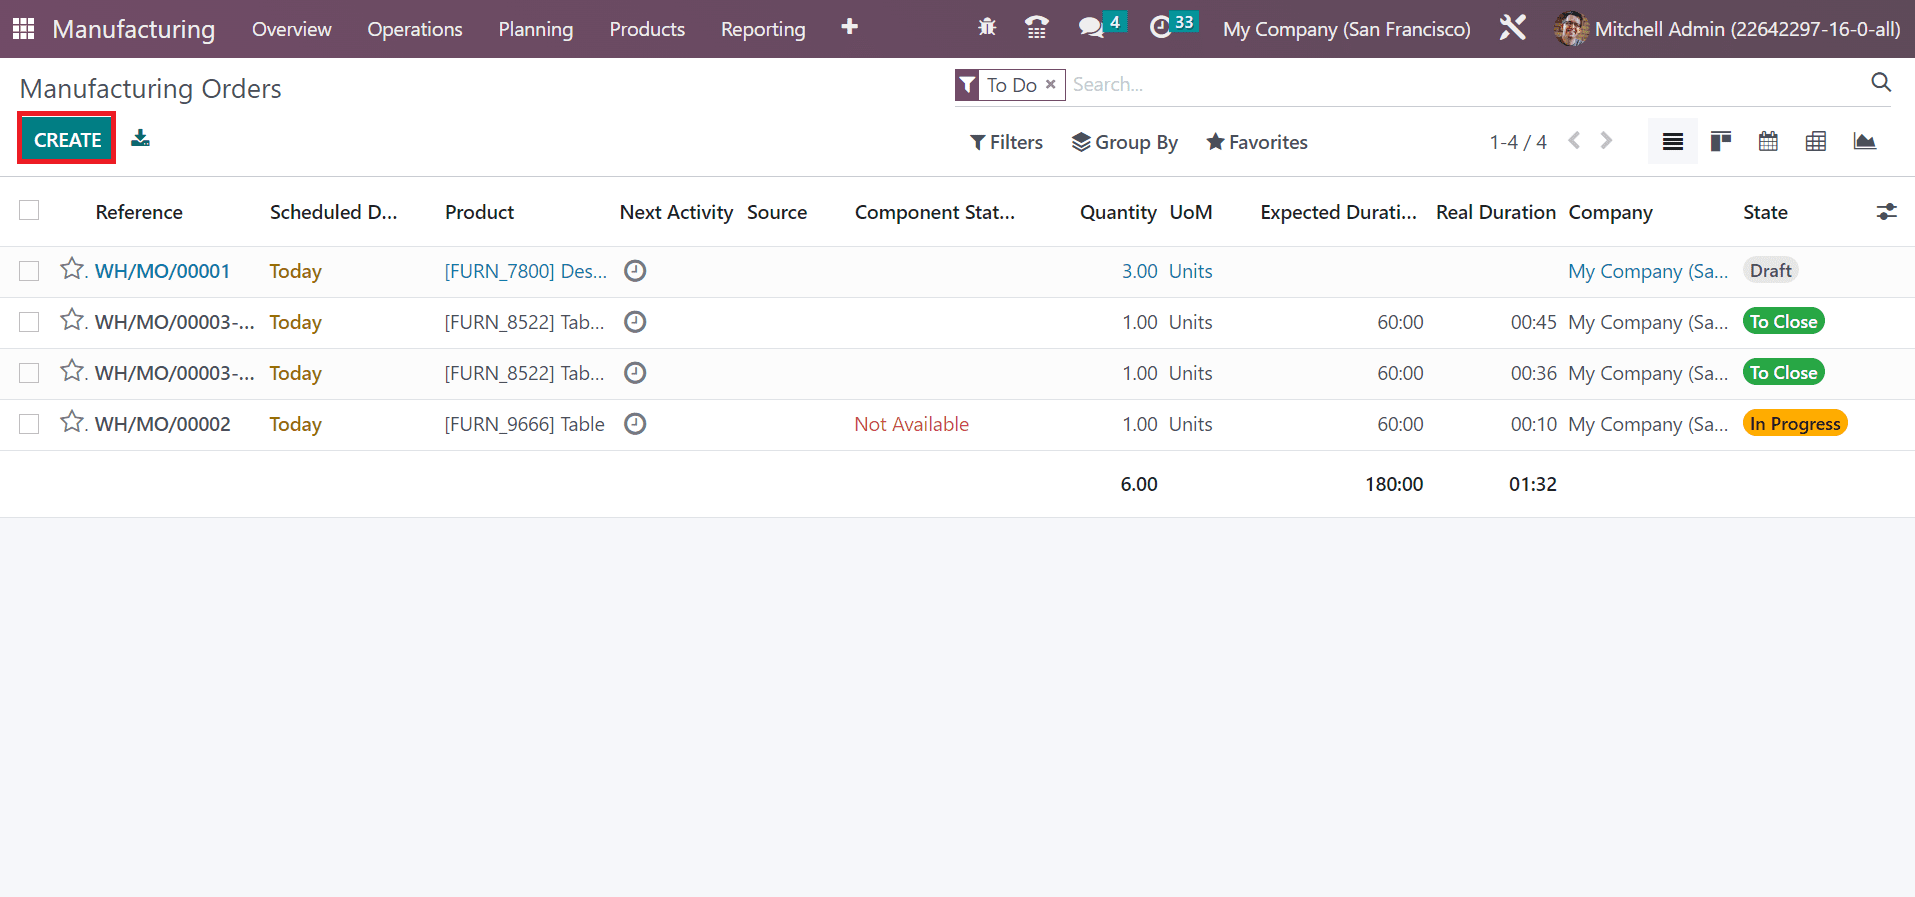
Each entered data is saved manually in the Odoo 16 Quality module. The stages of Quality Alert consider NEW, CONFIRMED, ACTION PROPOSED, etc. and it varies based on each operation. Let’s see an example of a quality alert setup from a manufacturing order using the Odoo 16. Select the Manufacturing Orders menu within the Operations tab. All created manufacturing orders list is acquirable to the user and depict the data such as Reference, Product, Component Status, Quantity, etc. Click the CREATE icon on the Manufacturing Orders page to generate a new order.
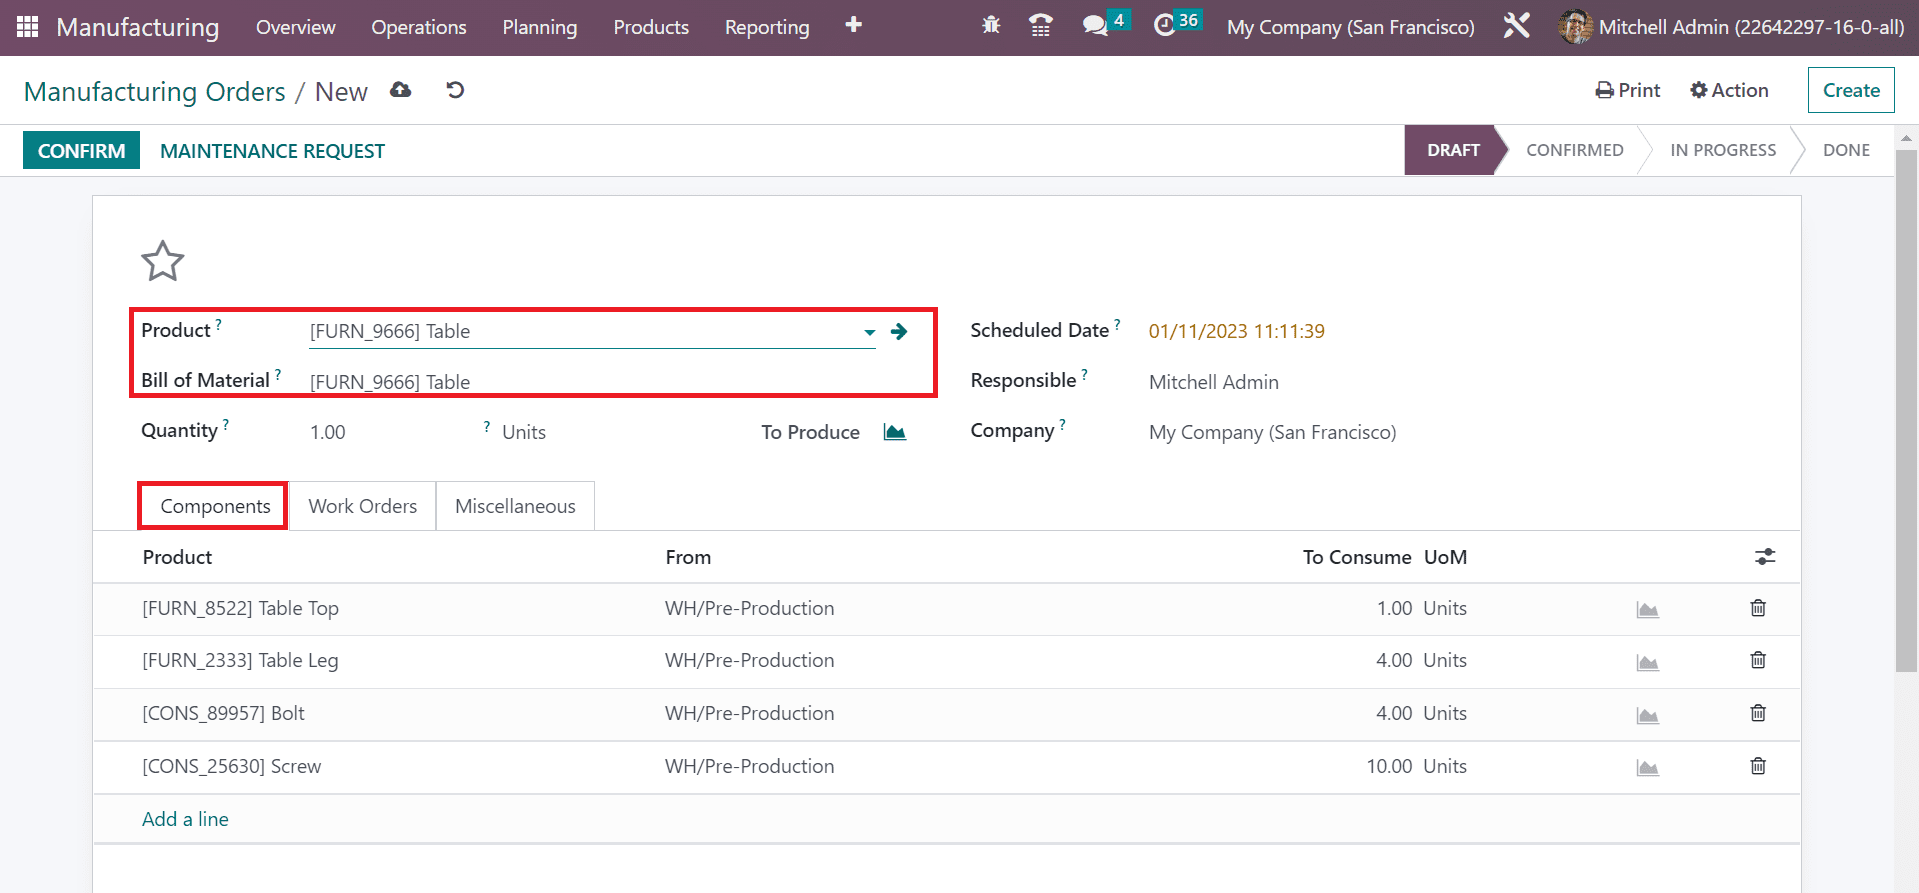
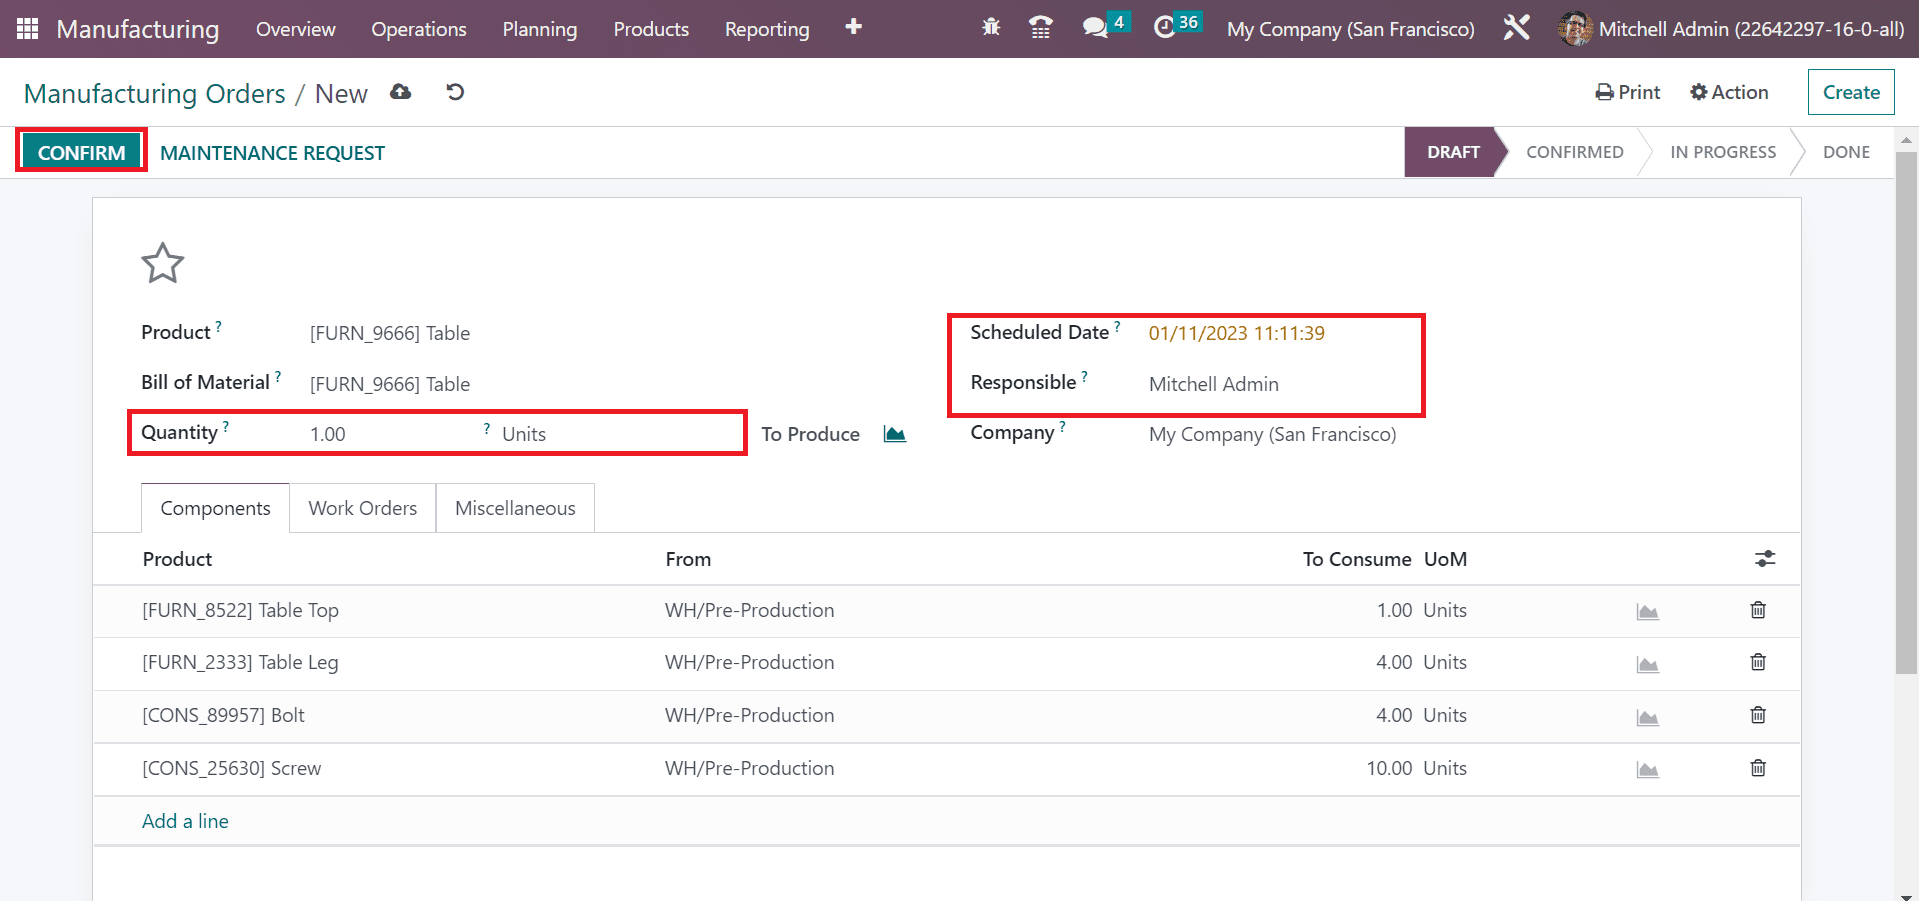
A new screen appears before you, and choose your commodity in the Product option. Next, select your created BoM Table, and the list of required items is visible under the Components tab.
Mention the number of units to produce in the Quantity field. Moreover, you can access the planned date of the manufacturing order in the Scheduled Date field. Later, set the user who is responsible for the manufacturing order in the Responsible option. Once managing each data, the details are saved manually in the Odoo 16. Click the CONFIRM icon once saving your data.
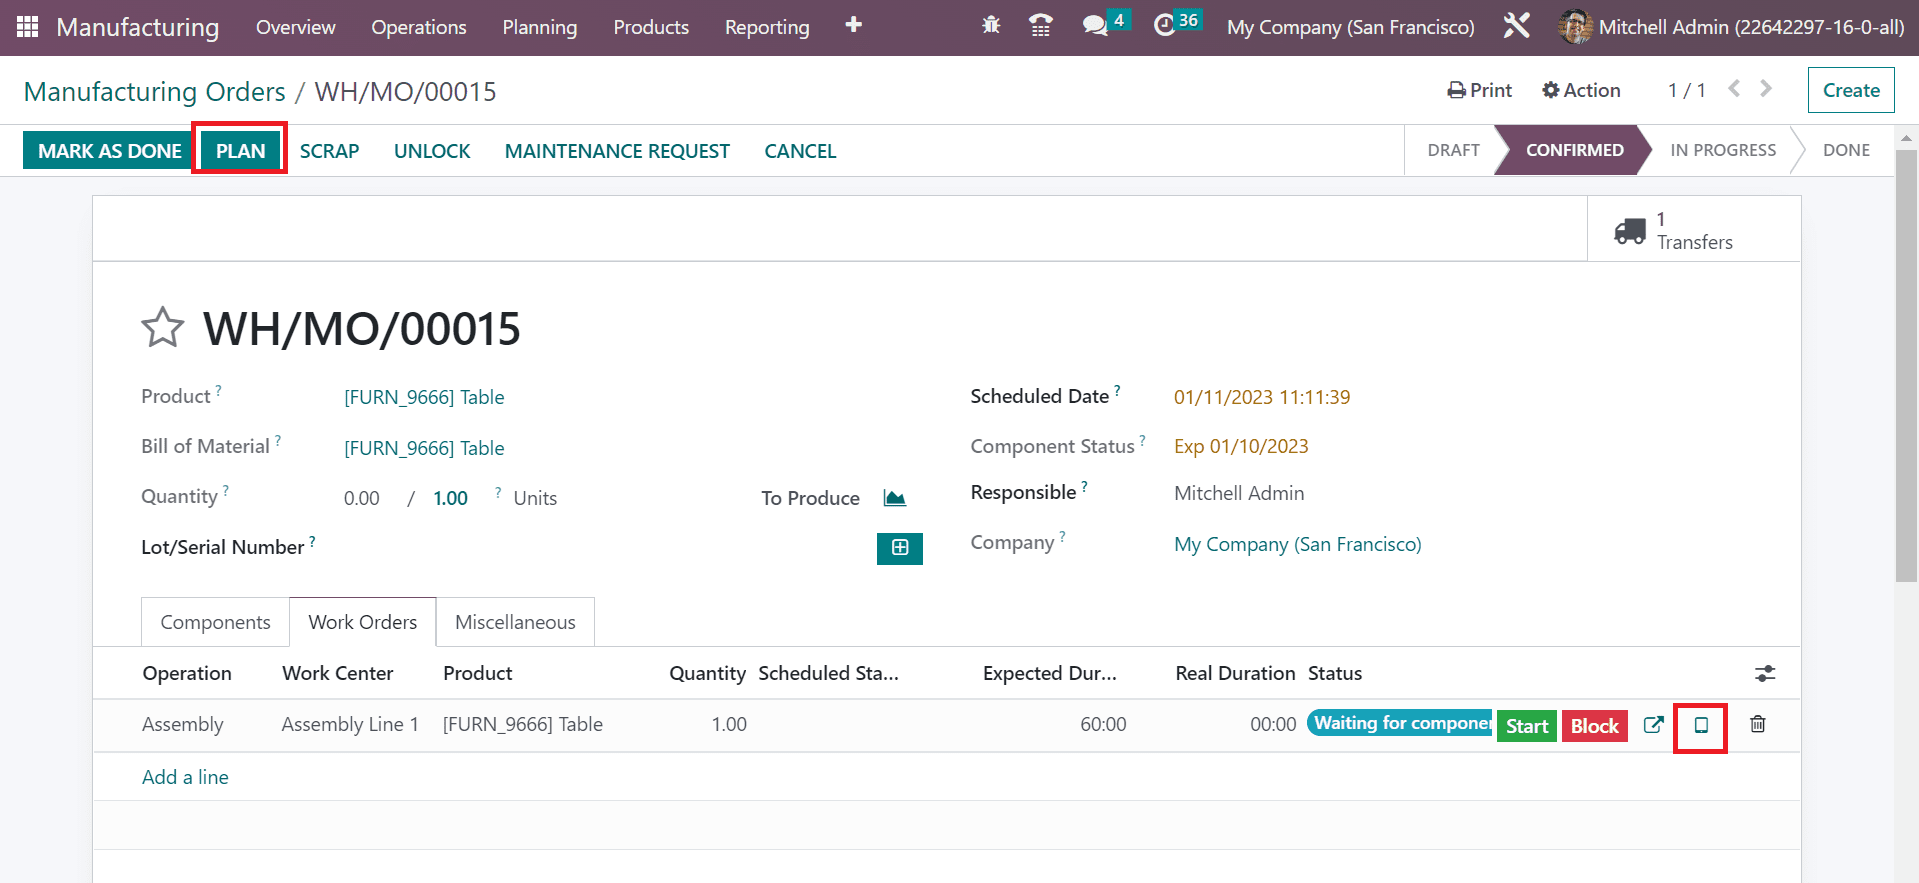
Afterward, press the PLAN button and select the tablet view under the Work Orders tab. You can view the information about the work center under the Work Orders tab.
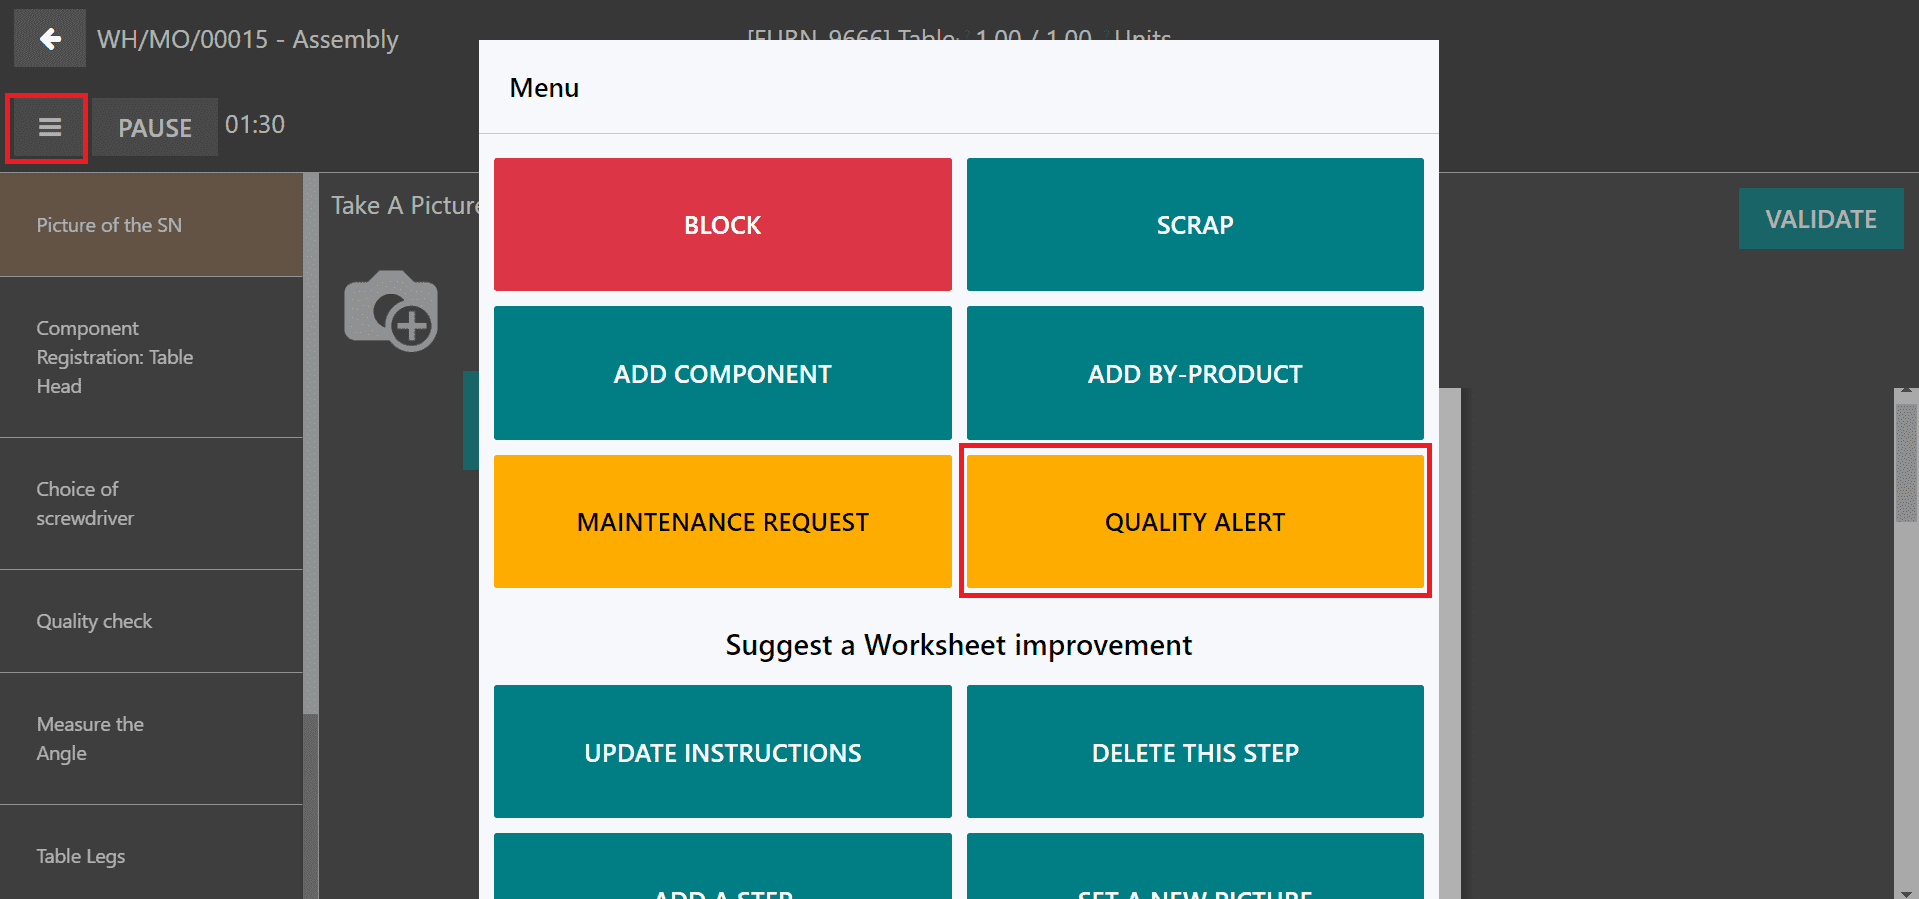
You can obtain the product information in the new window. The employee can define a quality alert if they have encountered a problem. Select the Top left menu in the window, and various options, such as SCRAP, ADD COMPONENT, BLOCK, etc are visible to the user. Click the QUALITY ALERT menu visible to the user.
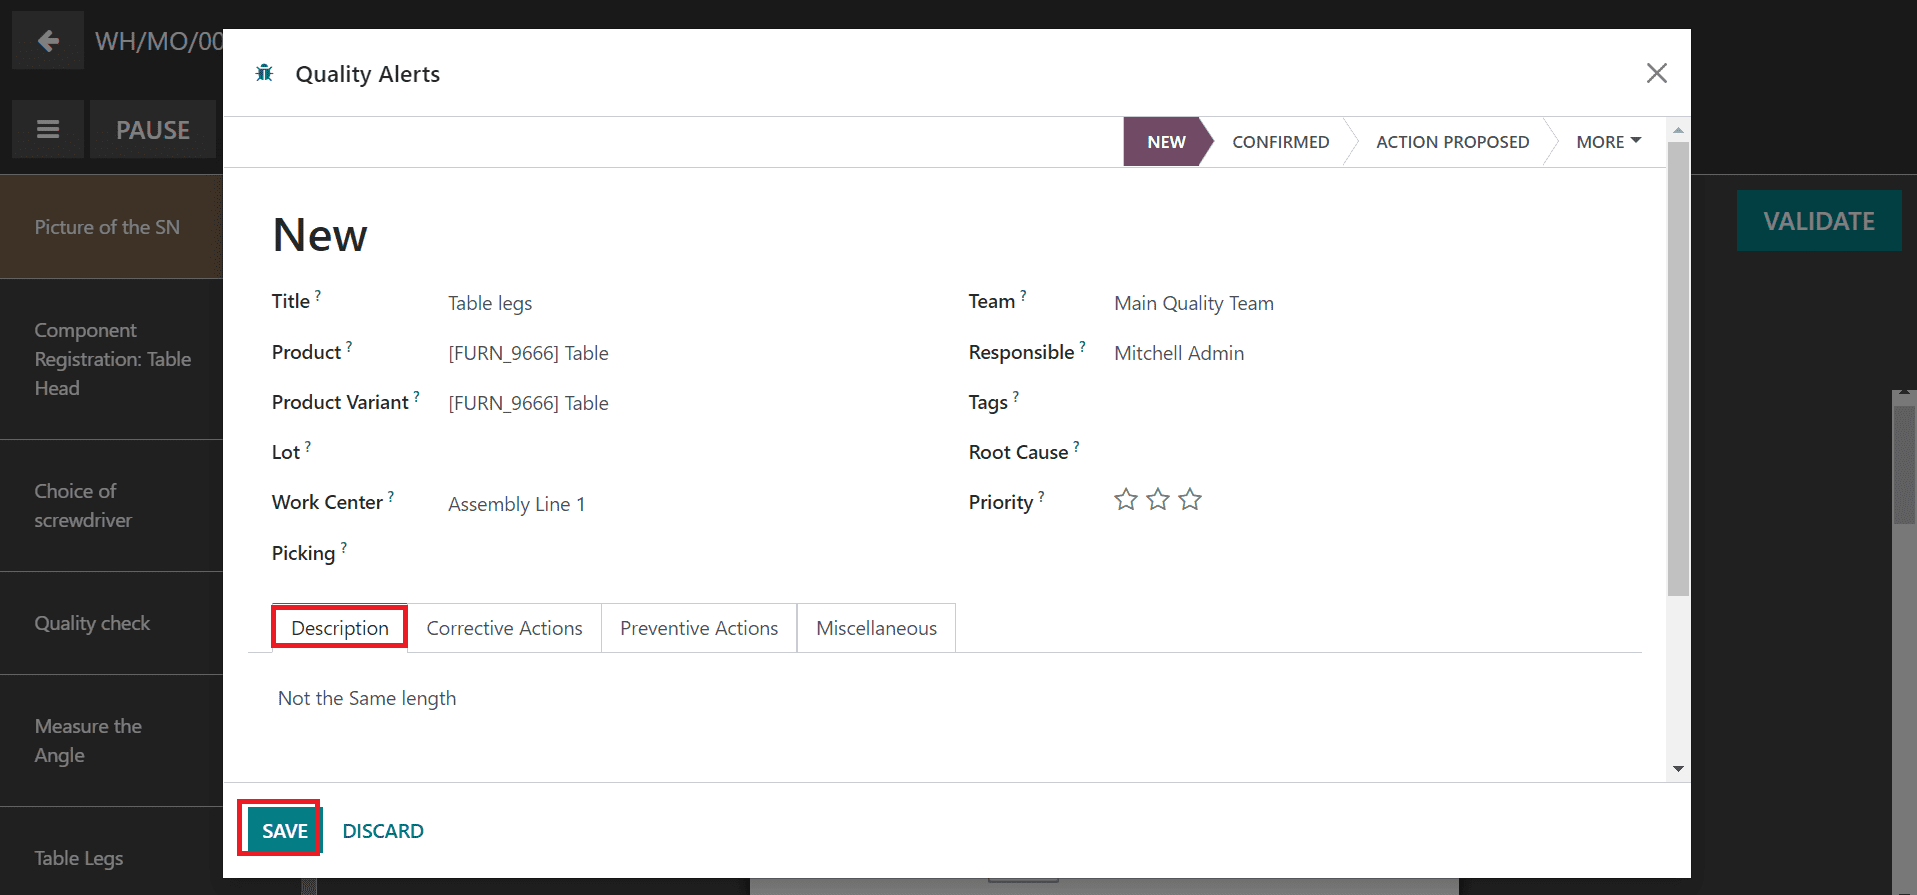
Add the quality alert name in the Title field, and other information is automatically updated for user. Below the Description tab, you can mention the reason for the product quality alert and select the SAVE icon.
Now, let’s move to Odoo 16 Quality module and check out the Quality Alerts window. You can see the created quality alert for Table inside the NEW stage.
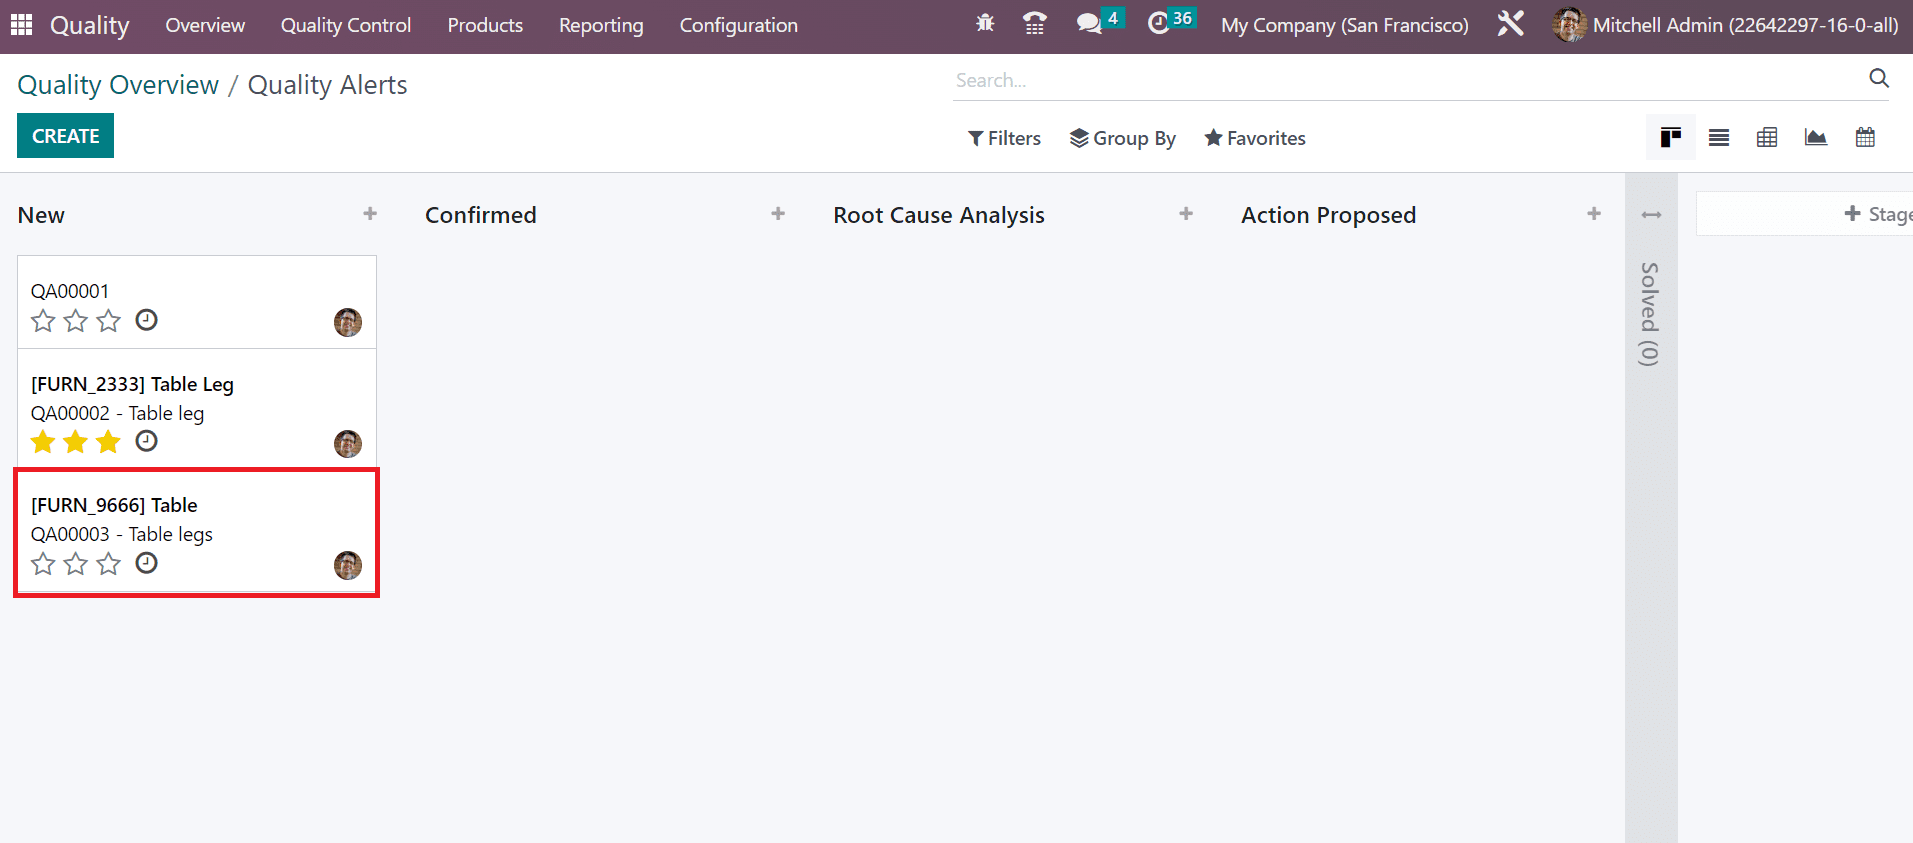
Change the stage of quality alert into ROOT CAUSE ANALYSIS and add the tag security issue. Next, specify the reason for the product quality alert in the Root Cause field.
After managing the data, change the stage into ACTION PROPOSED.
Now, let’s move to the Odoo 16 Manufacturing module and select your Manufacturing Order. We can see that one quality alert is generated for the order.
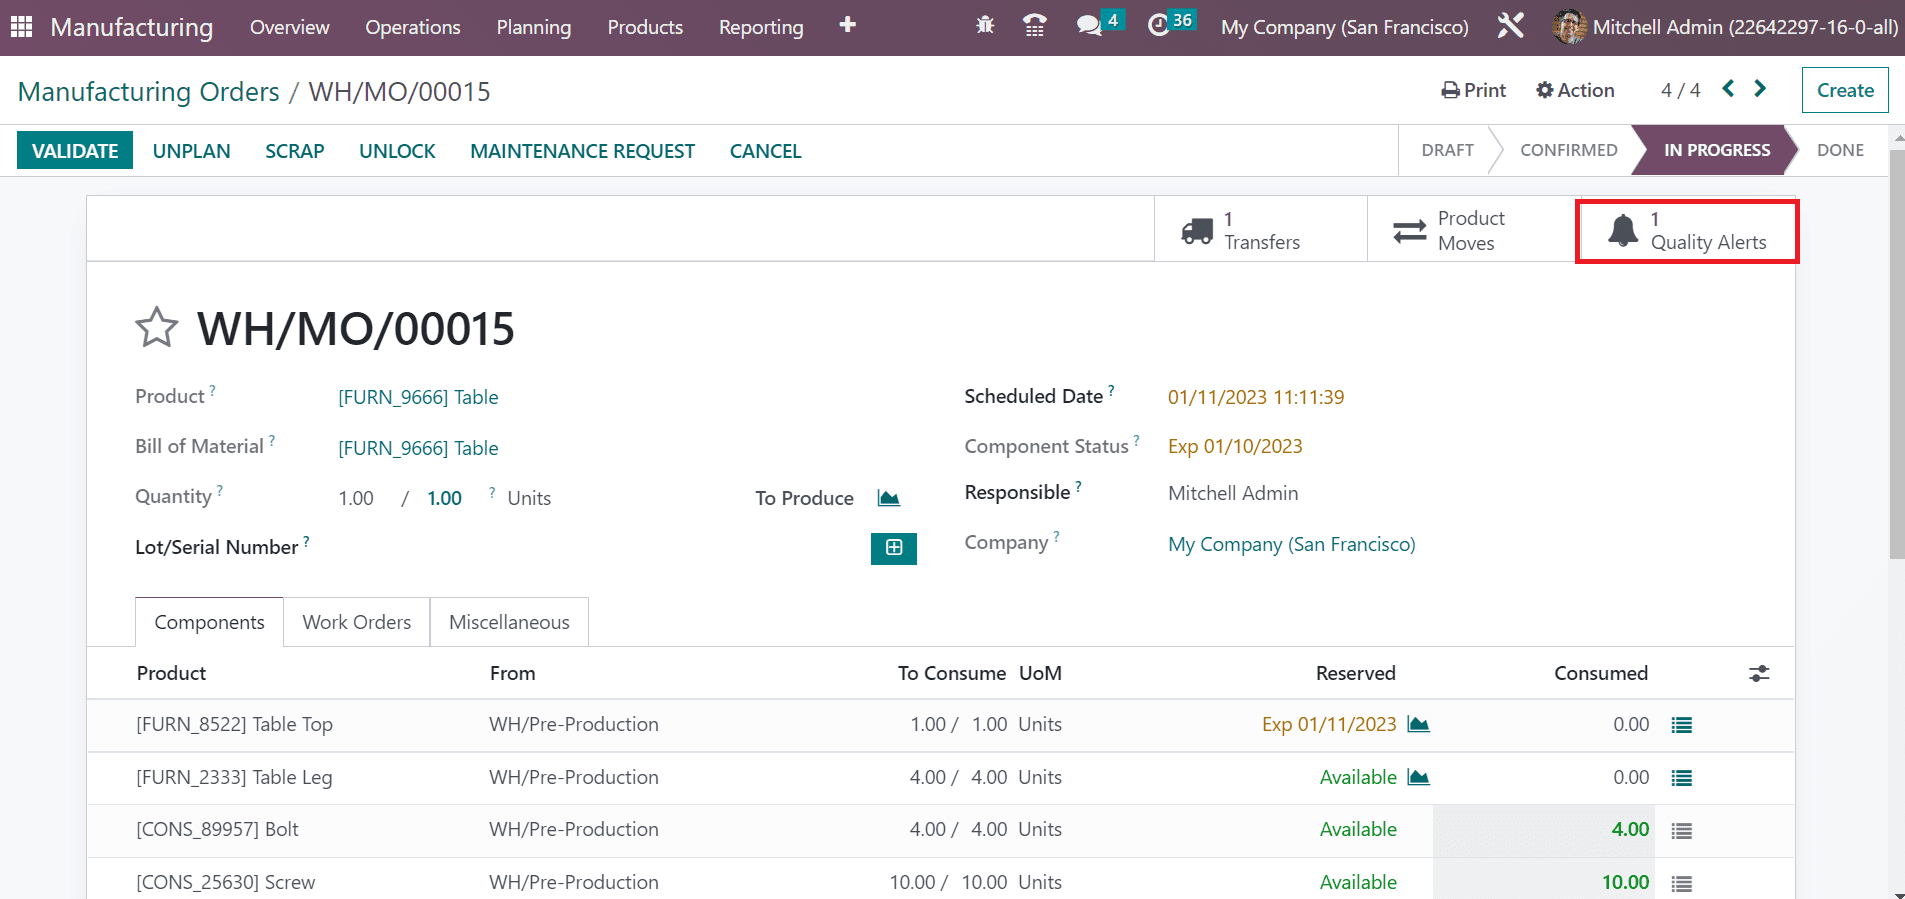
Hence, passing the quality alert within a manufacturing order is easy.