Vendor Bills
Generating vendor bills is one of the crucial steps in the operation of purchase that requires utmost attention and accuracy. The payment to the vendor will be registered in the form of a vendor bill with the assistance of Odoo without any difficulties. Such generated vendor bills will be directly linked to the vendors configured in Odoo. The vendor bills can be generated based on the ordered quantities or the delivered quantities based on your company policies. You can set this billing policy from the Settings menu of the Purchase module.
The screenshot of the Settings menu of the Purchase module is given below.
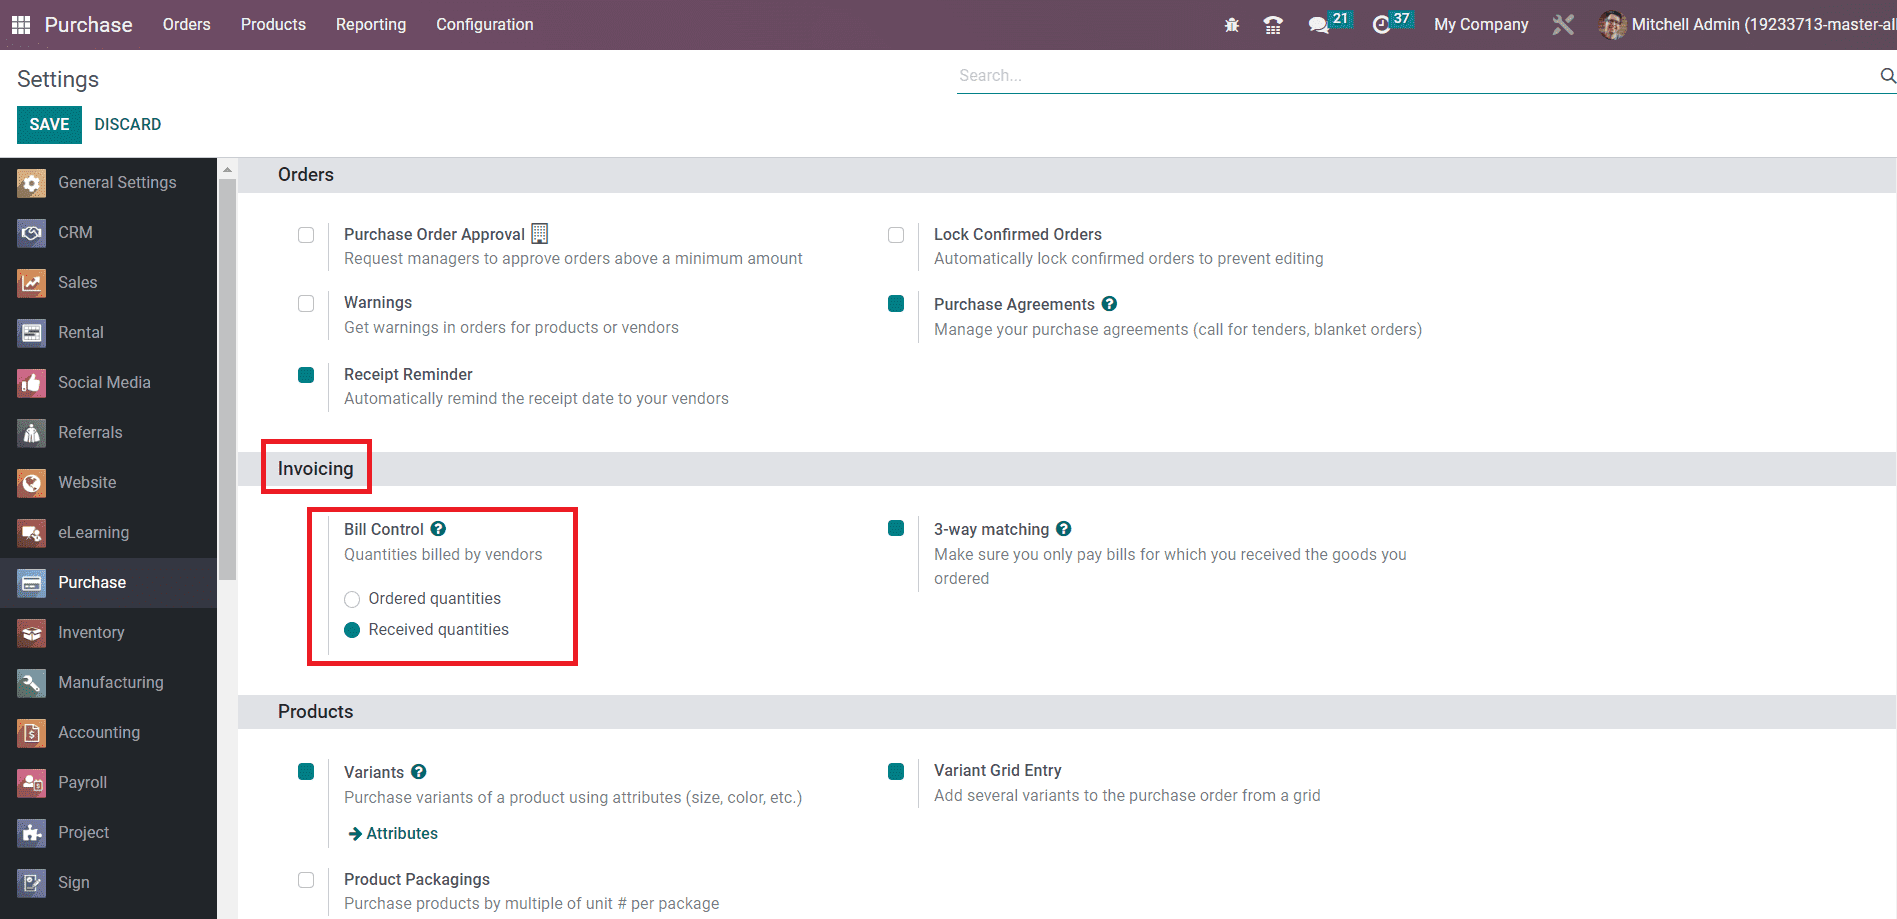
Here, you will be able to see the Bill Control option under the Invoicing tab which will help you to set the policy to create vendor bills. You can decide how the vendor bills should be controlled with the help of this option. The control policy you select here will decide when the vendor bill needs to be paid after confirming a purchase order. You can pay your vendor bills before receiving products or after receiving products. After confirming a purchase order, you can immediately pay your vendor bill for the products that you ordered using the Ordered Quantities bill control option. Here, the quantities mentioned in the respective purchase order will be considered to generate a draft vendor bill. The Received Quantities option can be used to generate vendor bills after receiving the ordered products. You can pay the vendor bill using this option based on the quantities you have received.
Once you choose a suitable Bill Control option from the Settings menu, Odoo will set this control policy as default on all new products created. If you want to change the default control policy of a particular product, it can be done from the product detail form of that product.
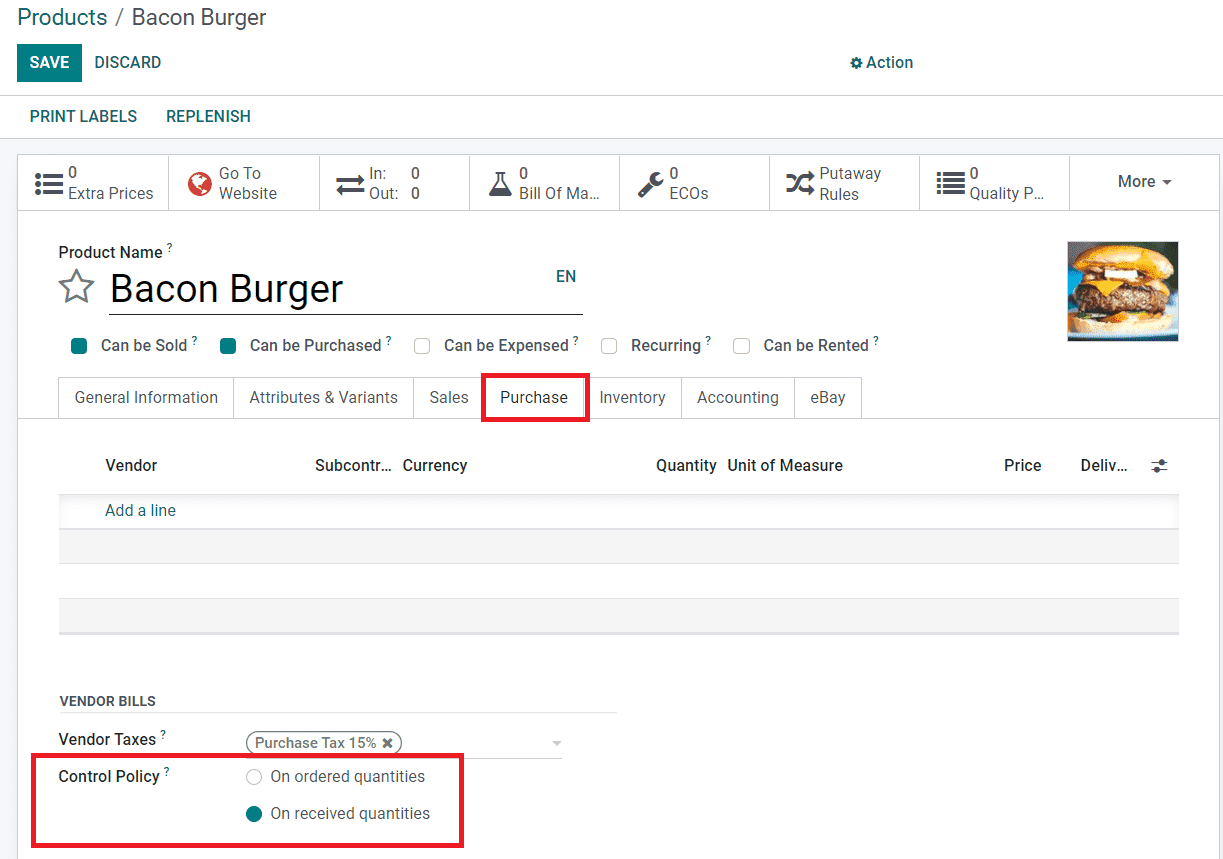
As highlighted in the image above, you will get the option to manage the Control Policy under the Purchase tab of the product. This option is available for all products. You can use this feature to directly control the billing policy of required products.
Now, let’s take a look at the creation of the vendor bill and its payment procedures.
After confirming a purchase order, you will get the option Create Bill as highlighted in the screenshot below in order to generate the vendor bill.
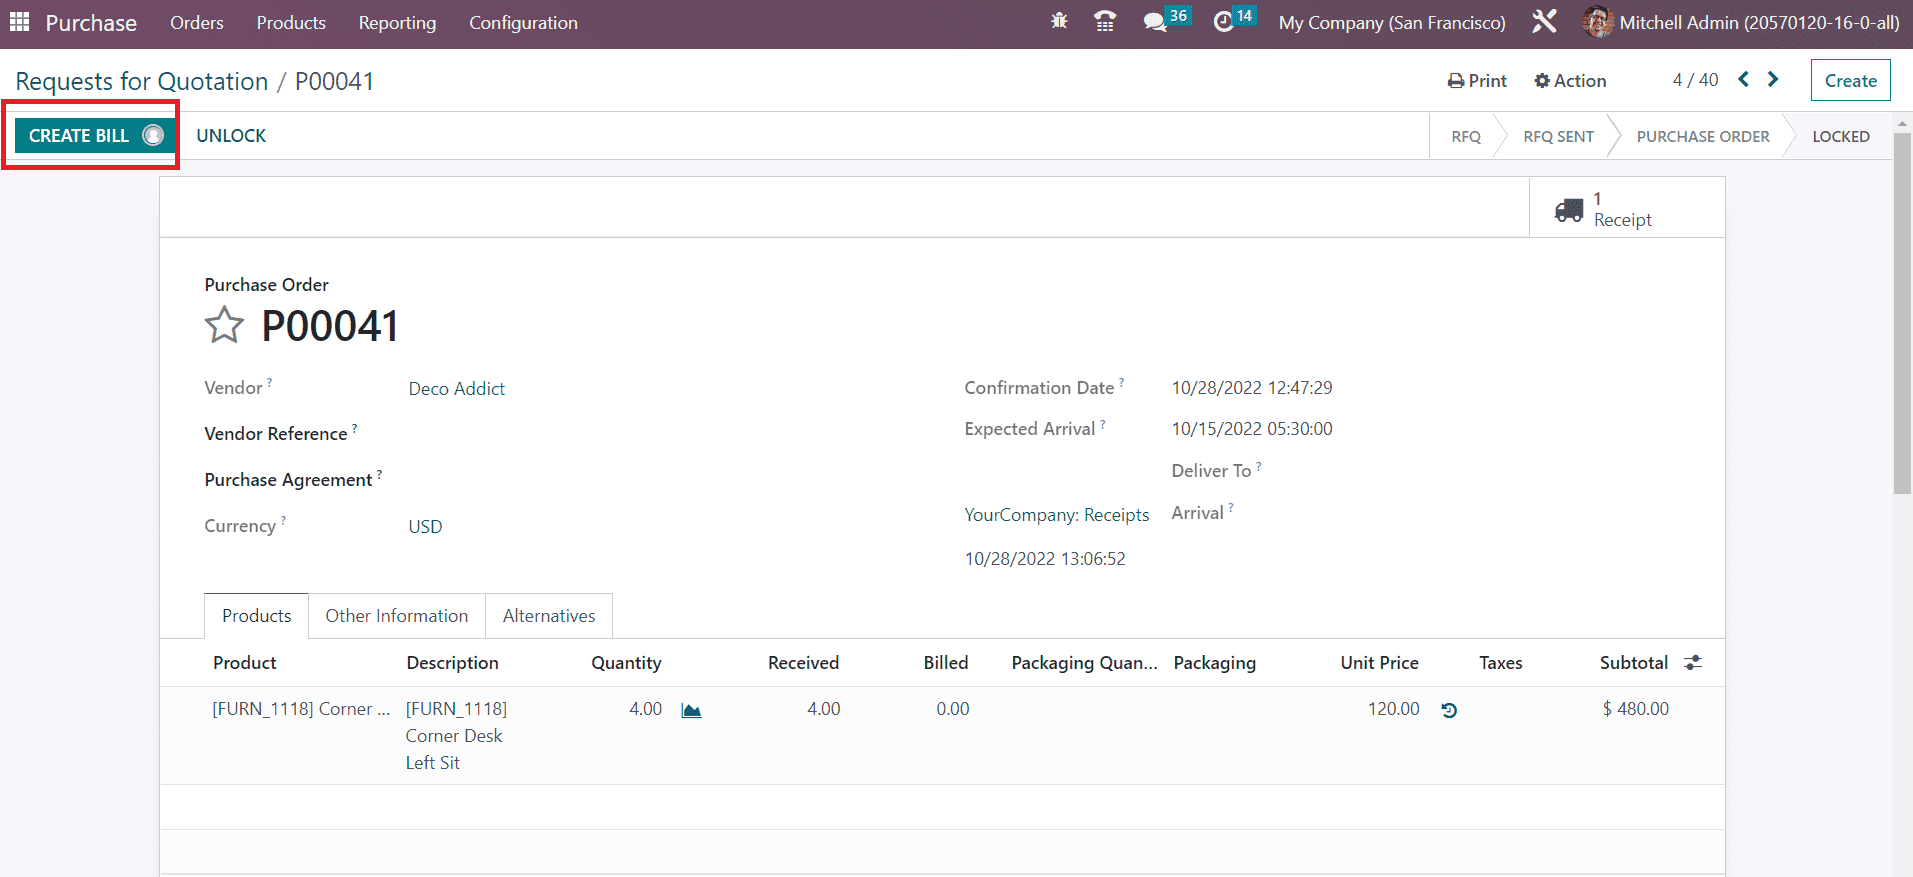
As soon as you click on this button, Odoo will lead you to a new screen where you will get the draft form of the vendor bill.
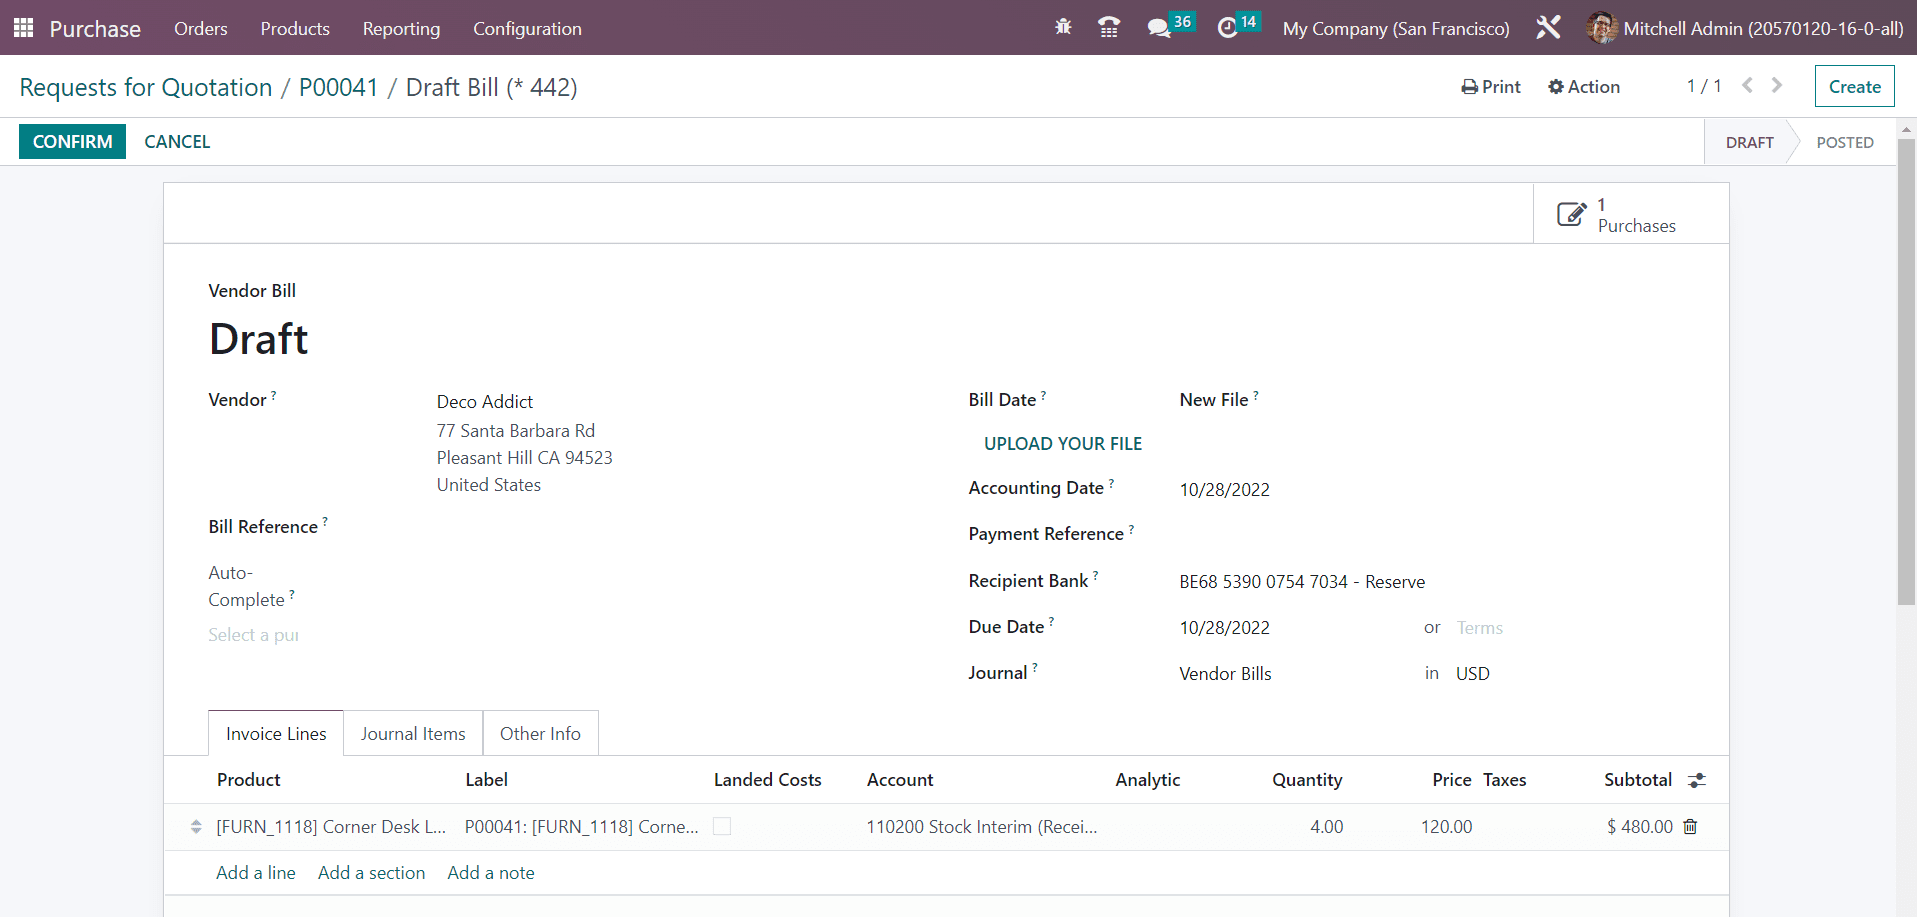
You can check the details given in the draft vendor bill before confirming it. It includes the details of the Vendor, Bill Reference, Bill Date, Accounting Date, Payment Reference, Recipient Bank, Journal and Due Date. You can add a past bill or purchase order to auto complete the form.
In the Invoice Lines , you can see the list of products you ordered. The journal items and other information regarding the vendor bill can be observed in the corresponding fields. Click the Confirm button to confirm the vendor bill.
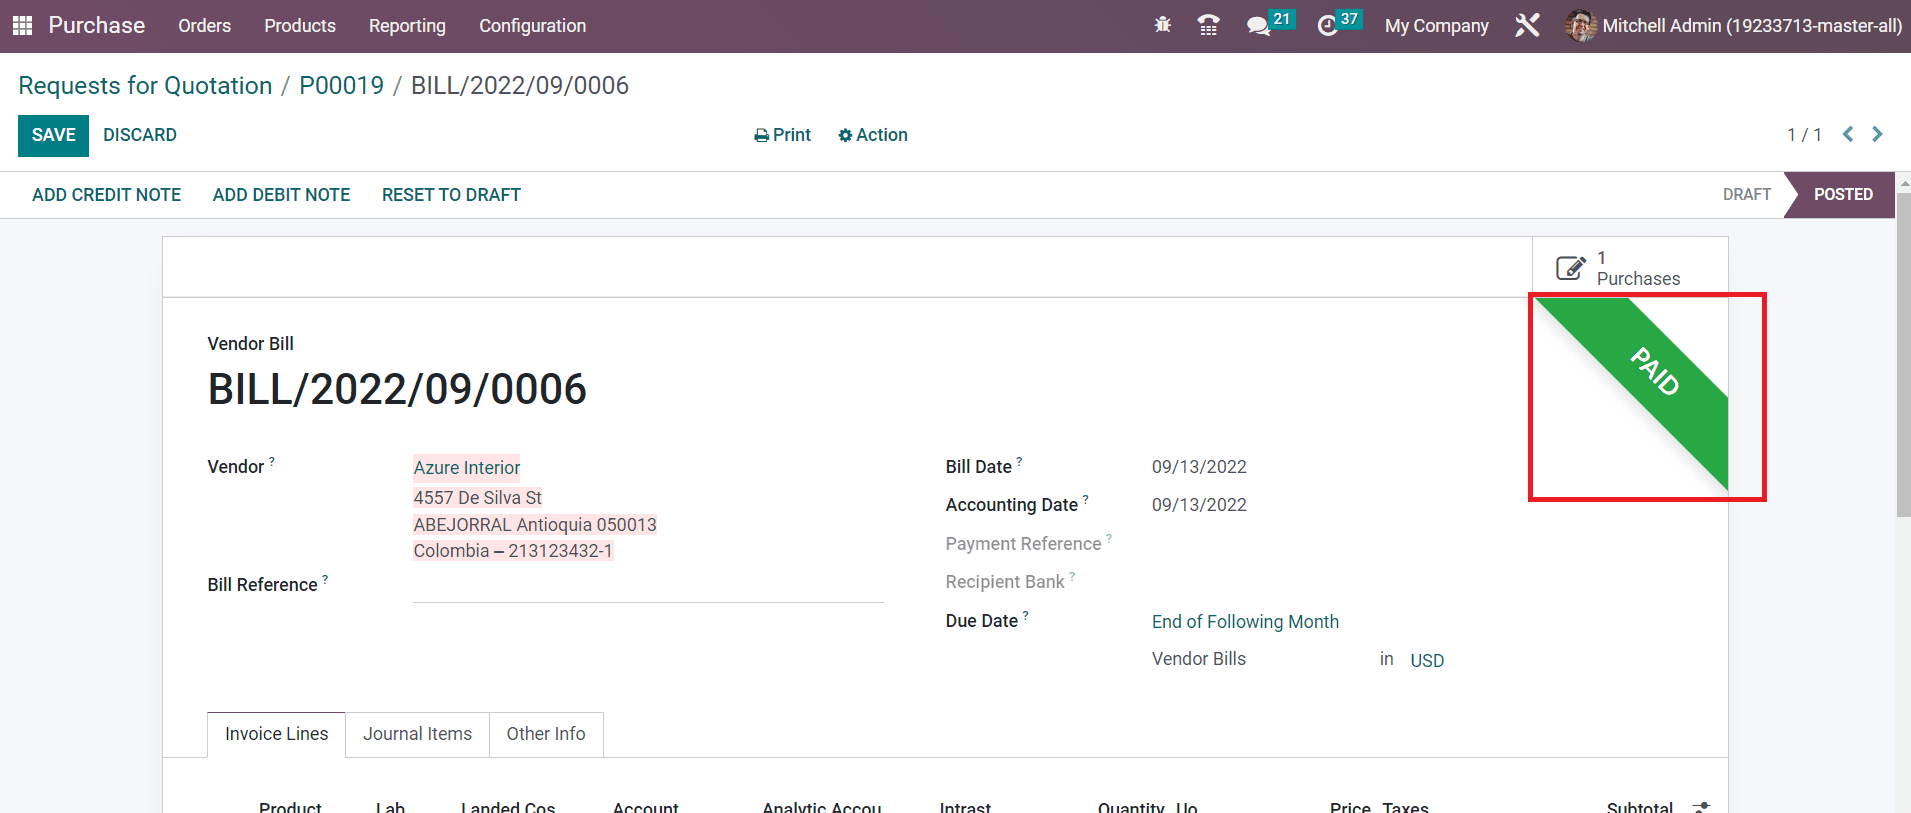
After completing all payment procedures, the status of the vendor bill can be seen as Paid as depicted in the image above. This is how we generate vendor bills for the received products.
As we are clear on how Odoo generates vendor bills, now let’s discuss the creation of purchase agreements in the Purchase module.