Work Orders
A manufacturing order comprises various operations to get a perfectly finished product. In the Odoo Manufacturing module, you can specify all these operations as Work Orders while configuring a manufacturing order. These work orders will process operations at specific work centers. In order to get this option in the Manufacturing module, activate the Work Orders feature from the Settings menu.

This feature allows you to create and manage various manufacturing operations that should be performed in your work centers in order to manufacture a product.
Along with this, you can activate the Work Order Dependencies feature also, which will determine the order to perform the configured work orders. If the manufacturing of a product contains various elements, you can create a list of components required to get a finished product using the Bill of Material. Activating Work Order Dependencies will set an order to perform work orders to manufacture and combine the elements of this bill of material. You can activate this feature within the Miscellaneous tab of each Bill of Materials.
All operations related to a manufacturing process can be added under the Work Orders tab of the respective manufacturing order.
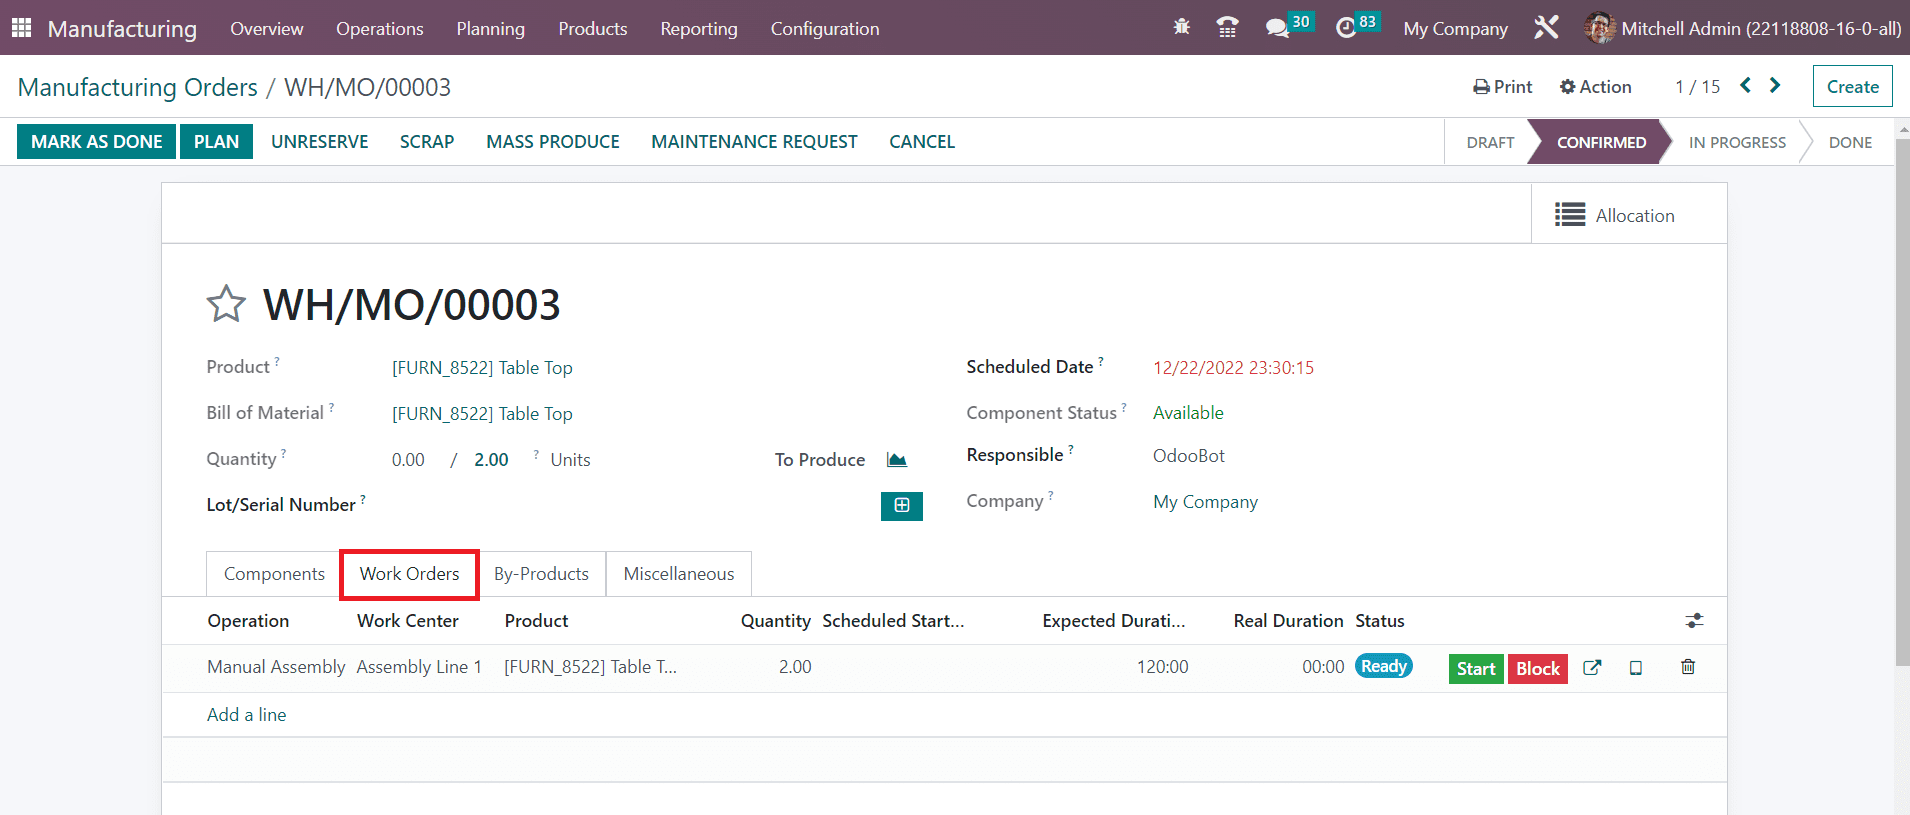
Using the Add a Line button, you can create and specify the details of a work order. The external link available in the operation line can be used to open the respective work order.
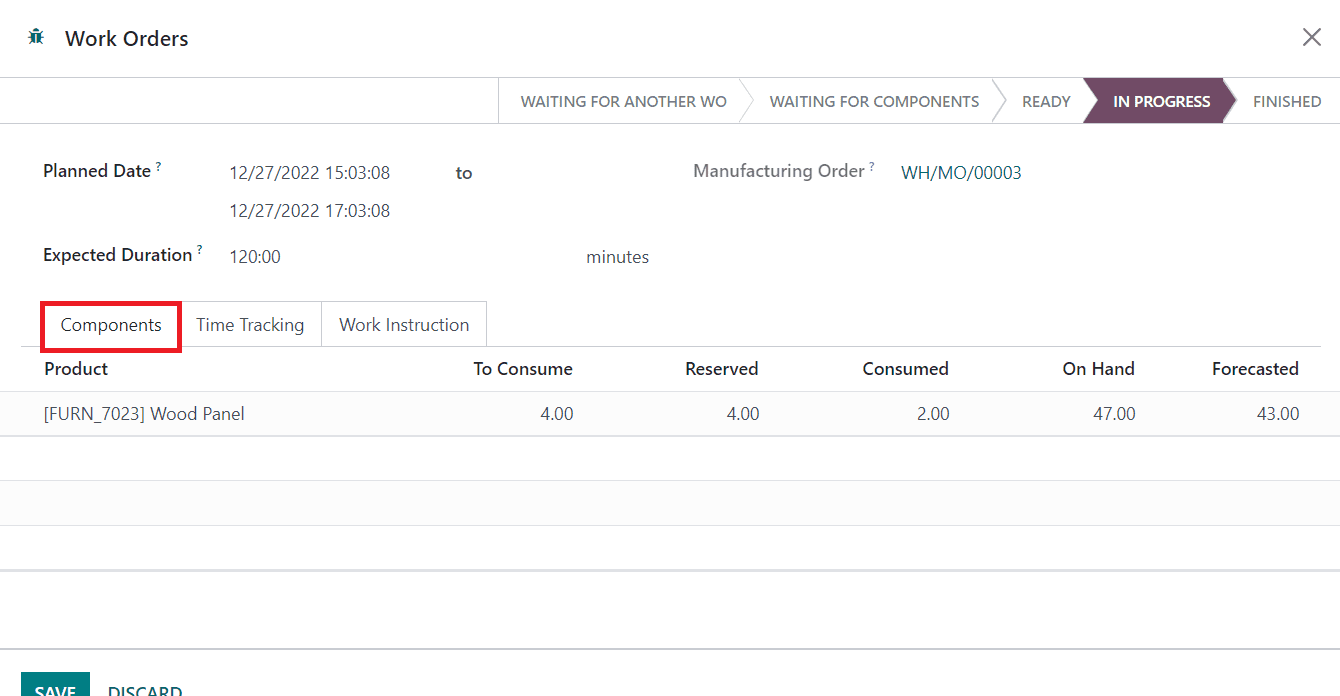
It shows the Planned Date, Manufacturing Order, and Expected Duration of the work. Under the Components tab, you can observe the components required in this work order.
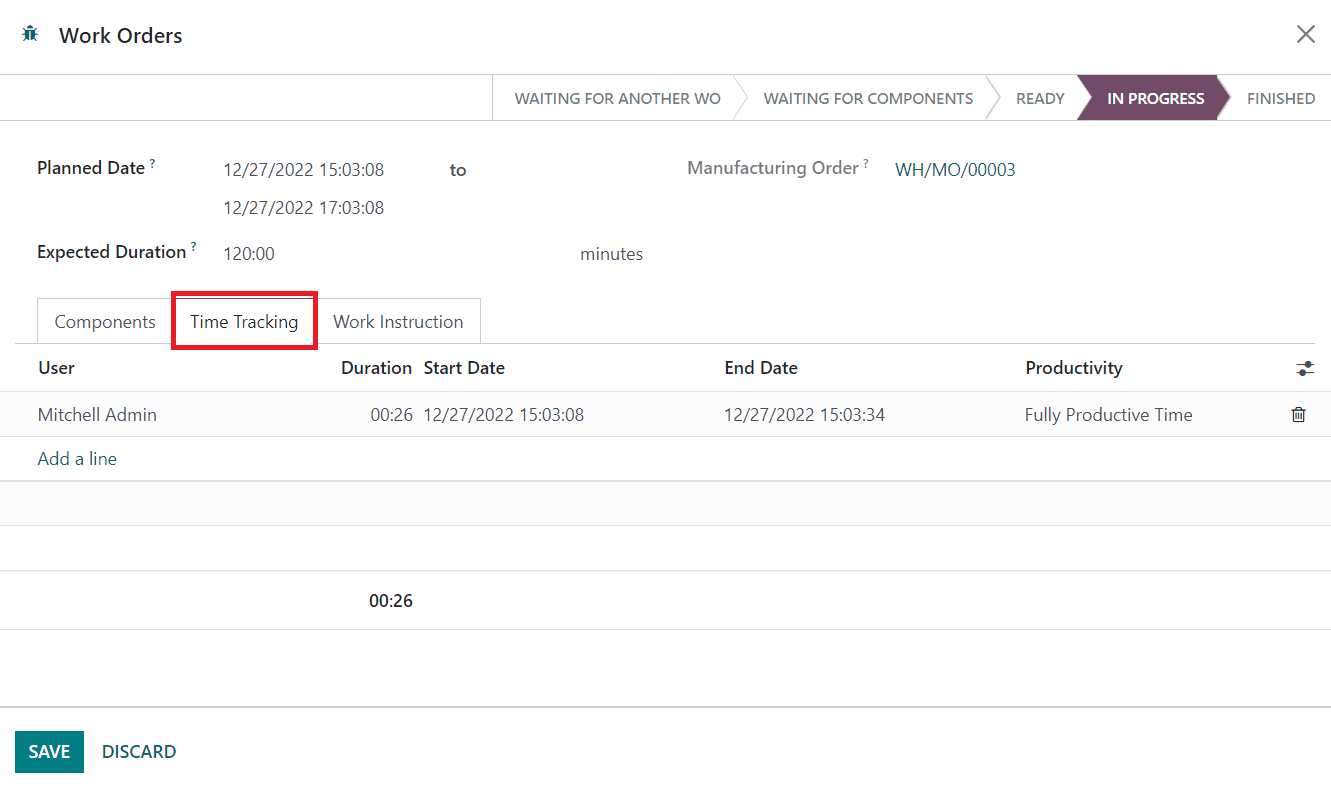
The Time Tracking tab will show the tracked time of this work order with the details of the User, Duration, Start Date, End Date, and Productivity.
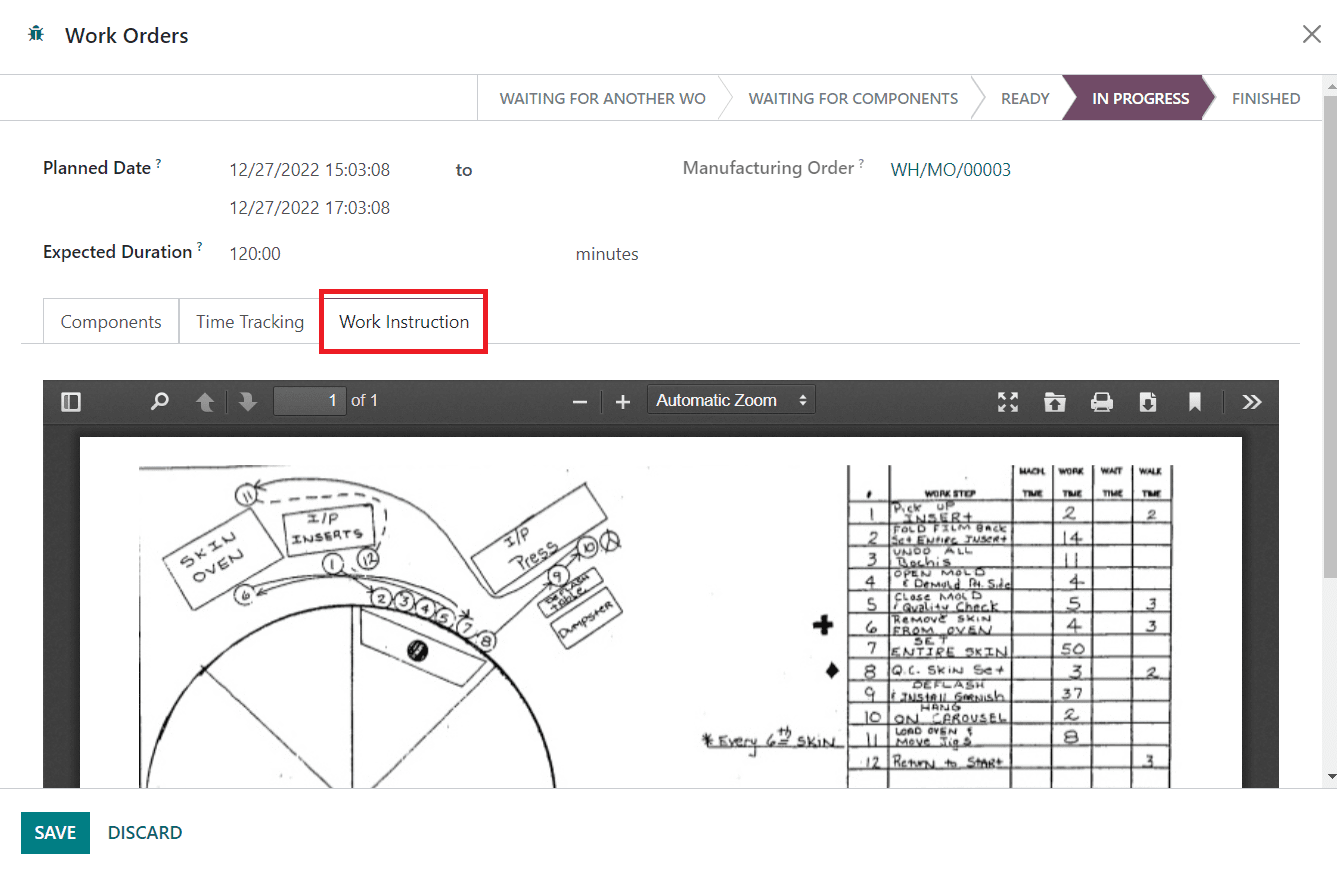
You can mention the instructions for the work order under the Work Instructions tab as shown in the image above.
Under the Operations menu of the Manufacturing module, you will get a separate platform to record all such work orders from various manufacturing orders. The list view shows the Operation, Work Center, Manufacturing Order, Product, Quantity, Scheduled Start, Expected Duration, Real Duration, and status. It is possible to alter the view between Kanban, List, Pivot, Calendar, Graph, and Gantt views.
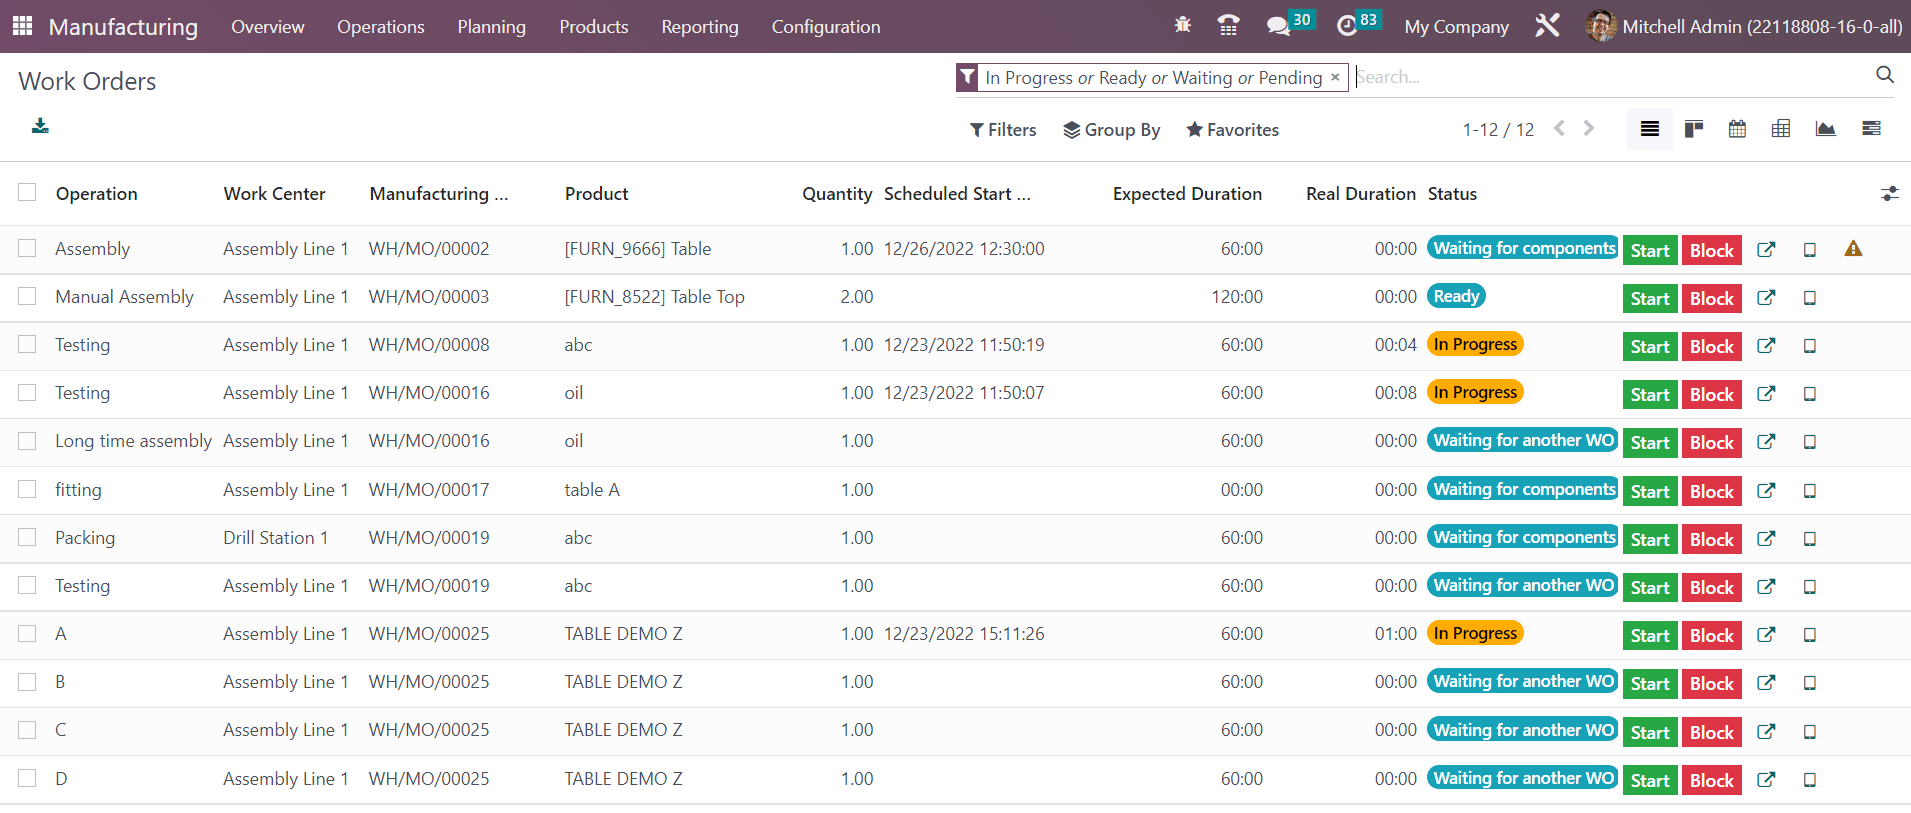
You can use In Progress, Ready, Waiting, Pending, Draft, Finished, and Late as the default Filters. The available default Group By options are Work Center, Manufacturing Order, Status, and Scheduled Date.

Clicking on the Start button will start to record the Real Duration of the work order. During the break time, you can click the Pause button. If the work order is completed, you can click on the Done button. The Block button will allow you to block the work center based on specific reasons. You will get a pop-up to mention the reason.

Provide a small description for the loss reason and click the Block button.

To get a tablet view of the work order, you can click on the small tablet icon highlighted in the image above.
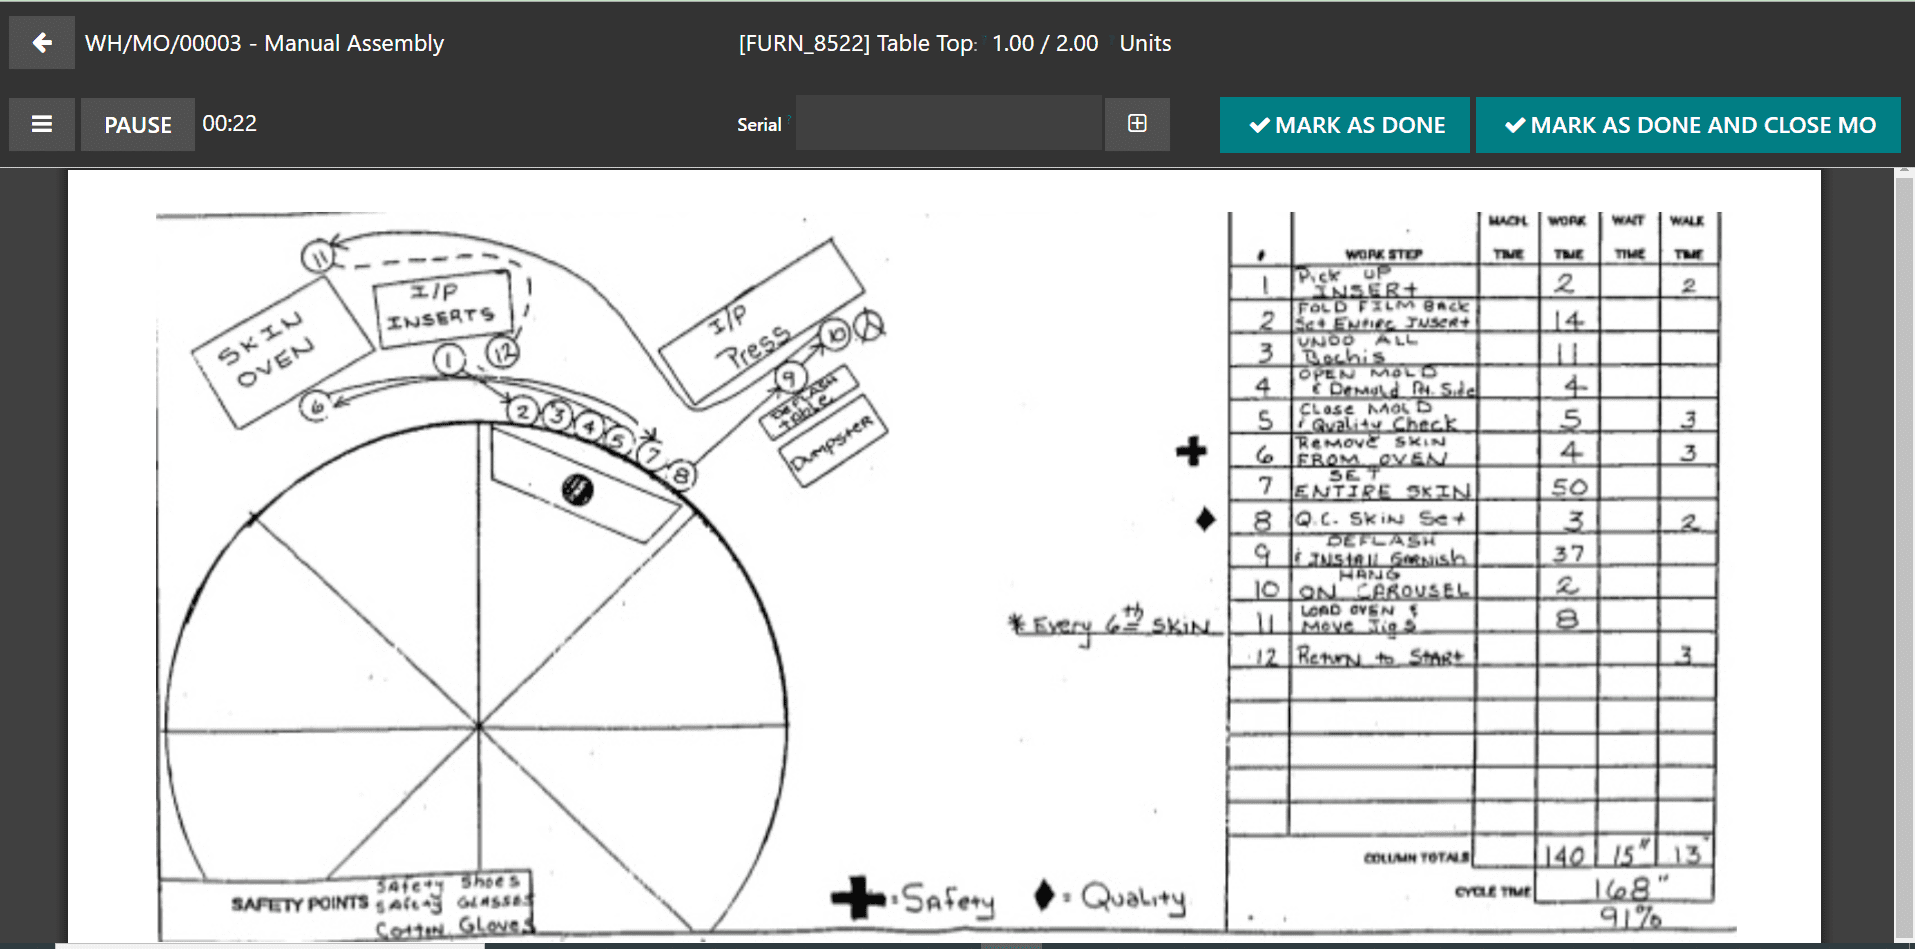
It will open the tablet view of the respective work order.
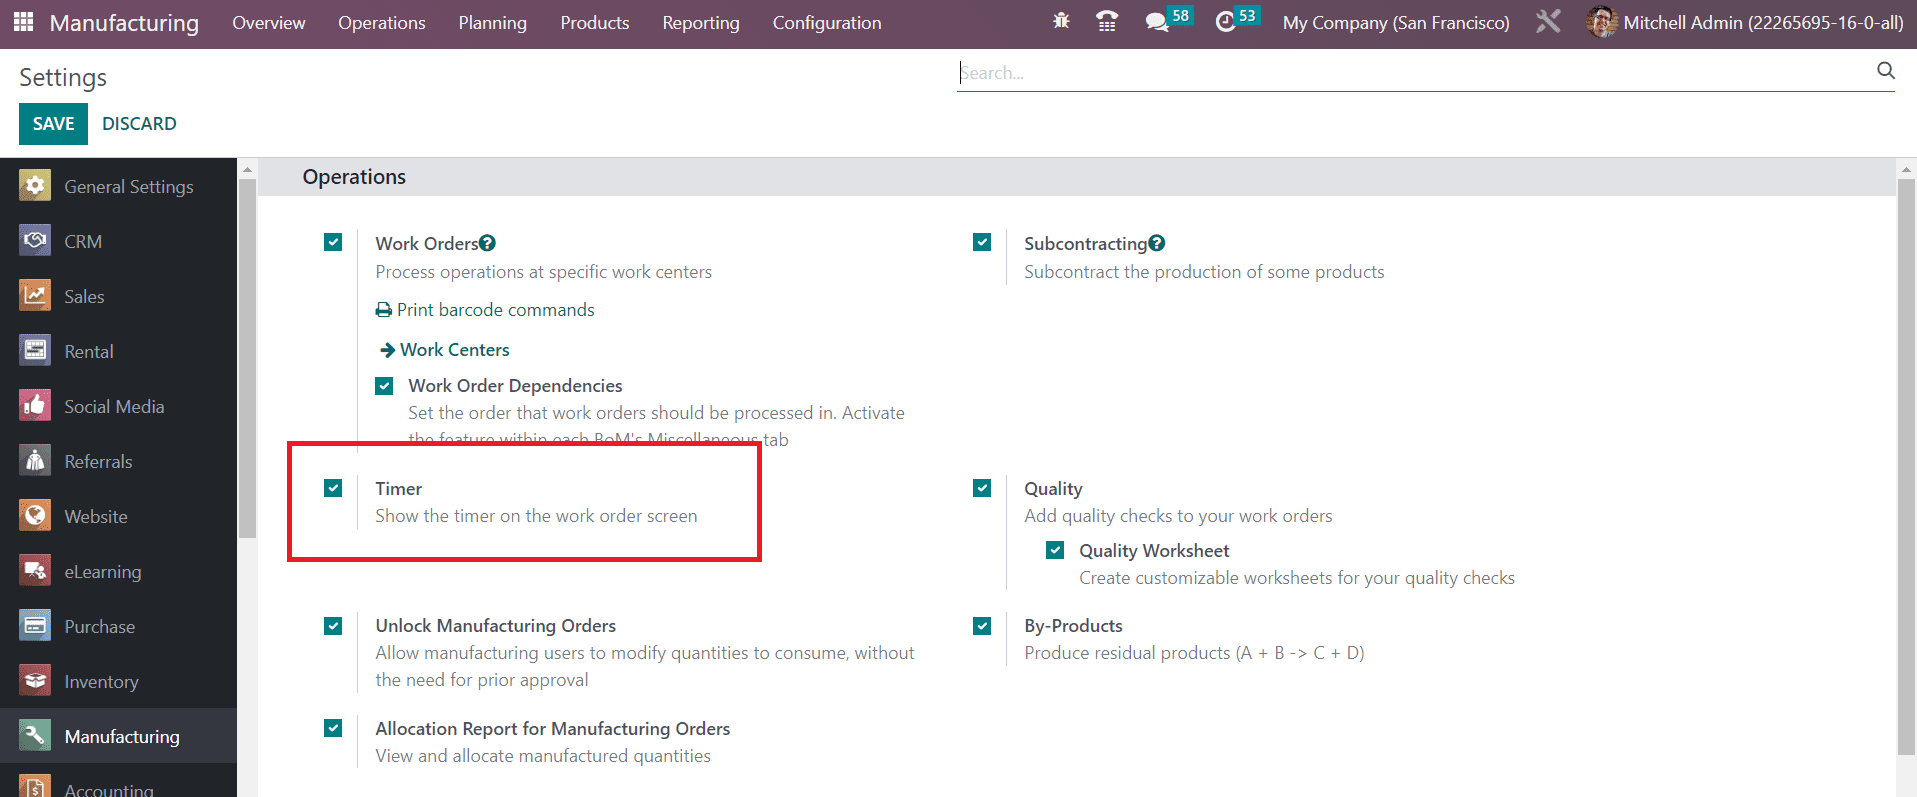
To show the timer on the work order screen for recording the real duration of the tasks, you can activate the Timer feature from the Settings menu of the module.
You can activate the Quality Check feature from the Settings menu in order to add quality checks to your work orders.
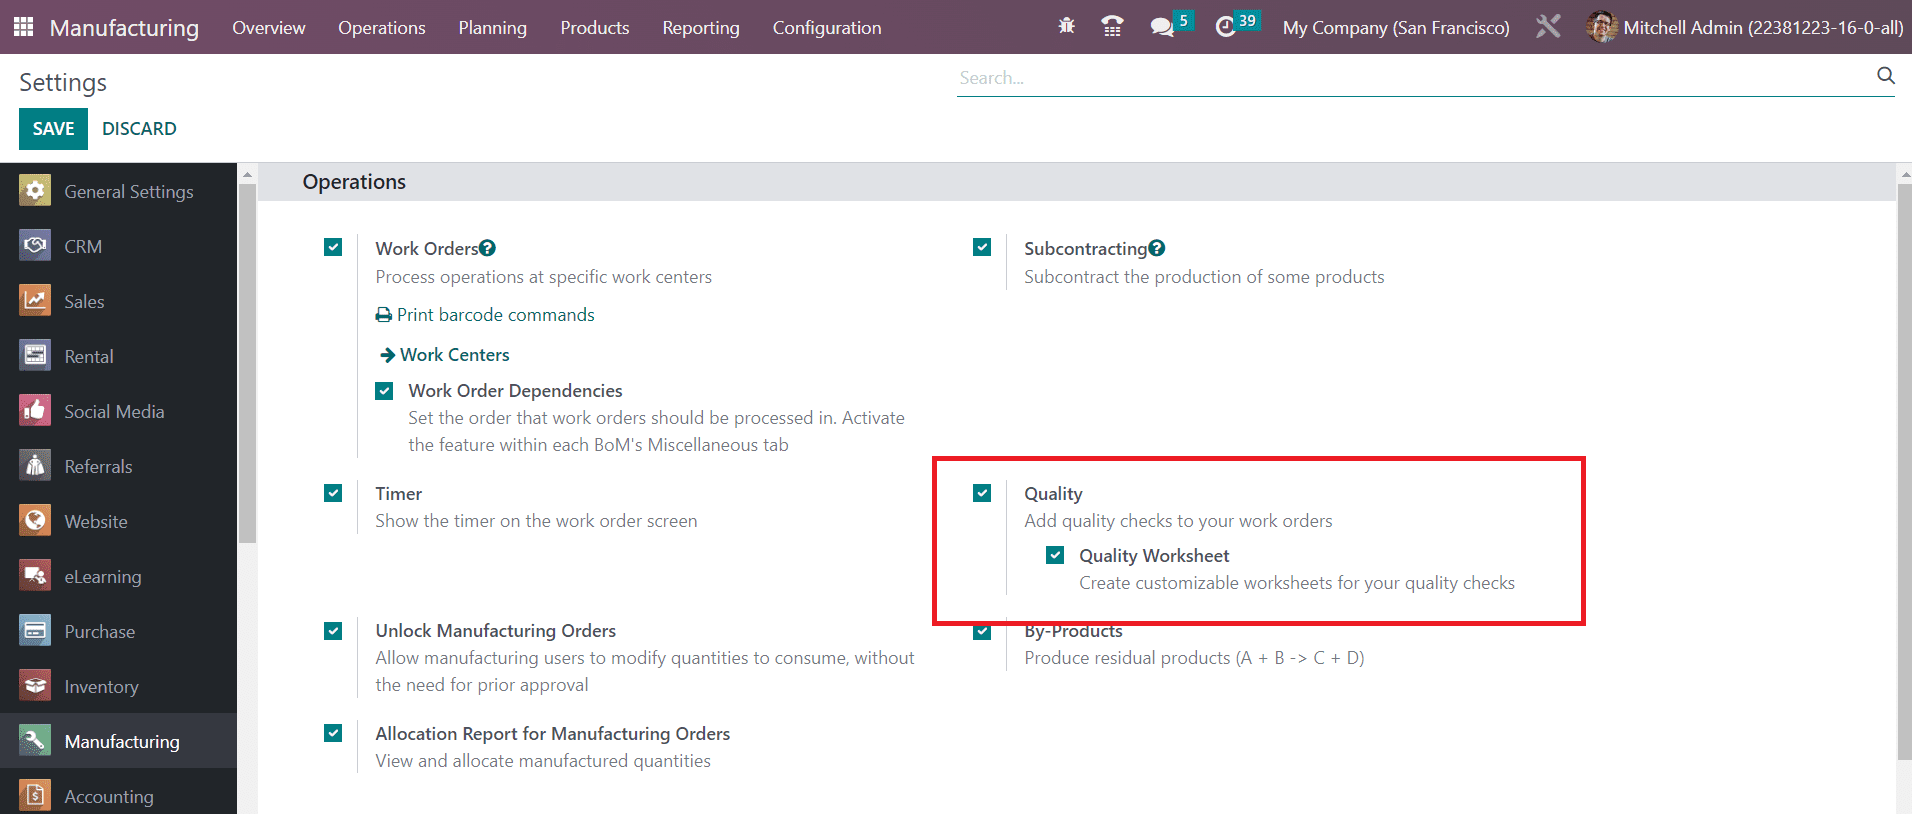
Along with this feature, activate the Quality Worksheet option also, which allows you to create customizable worksheets for your quality checks. After activating this feature, you can perform quality checks on work orders.
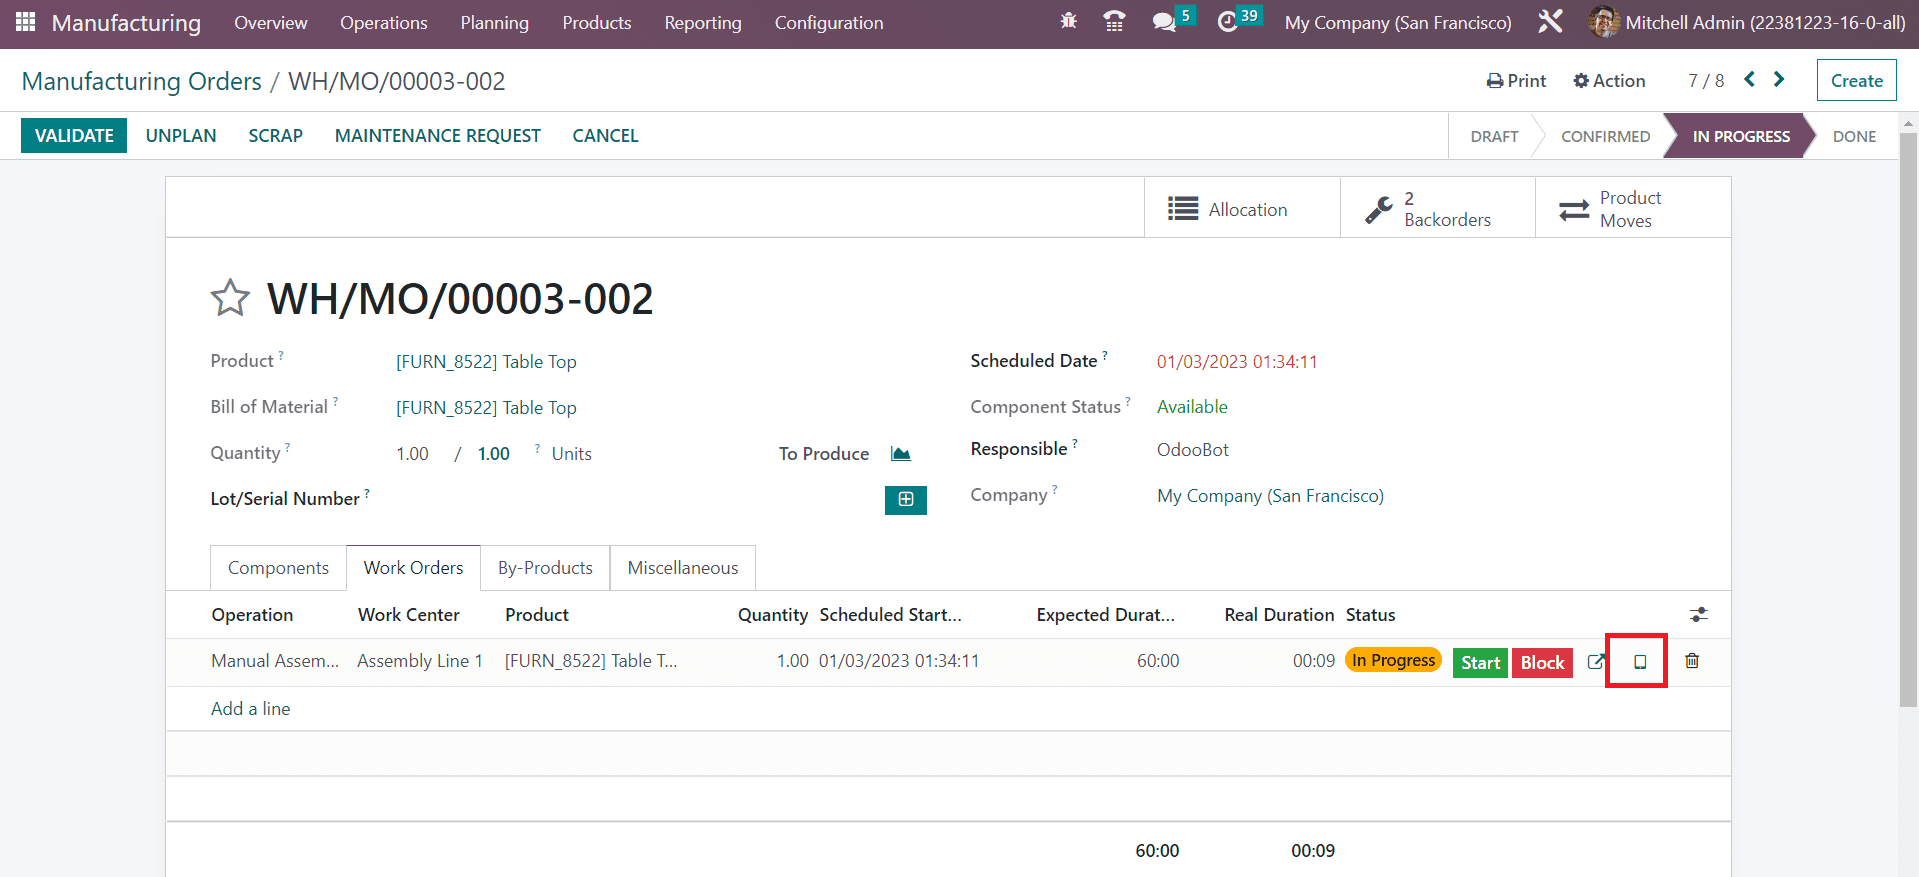
From the Work Orders tab, you can use the tablet view to perform the quality check.
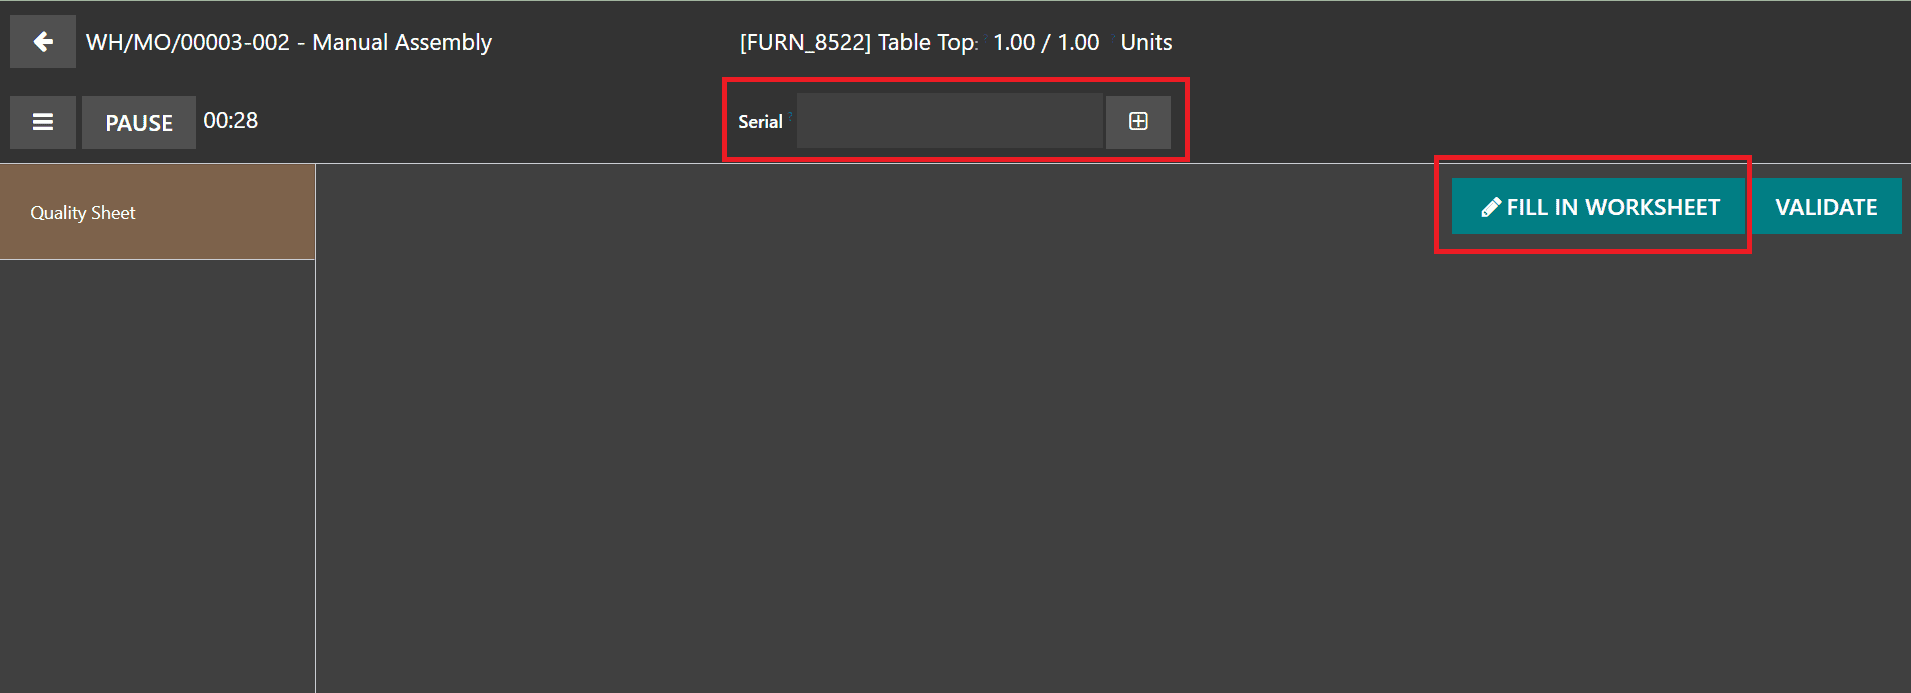
Here, you can create a quality sheet for the work order. Mention the serial number of the product and click the Fill in Worksheet button to specify details related to the quality of the product. This will open a pop-up window as shown below.
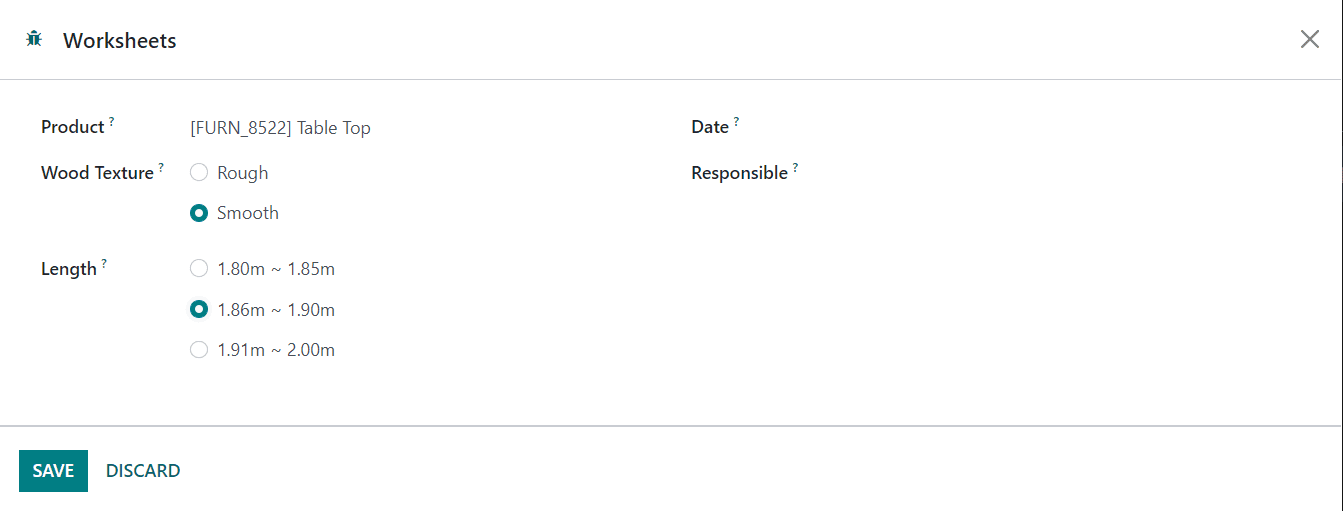
Here, you can mention the Product name, Wood Texture, Length, Date, and Responsible employee in the respective fields. After clicking the Save button, you will get the Summary of the quality check.
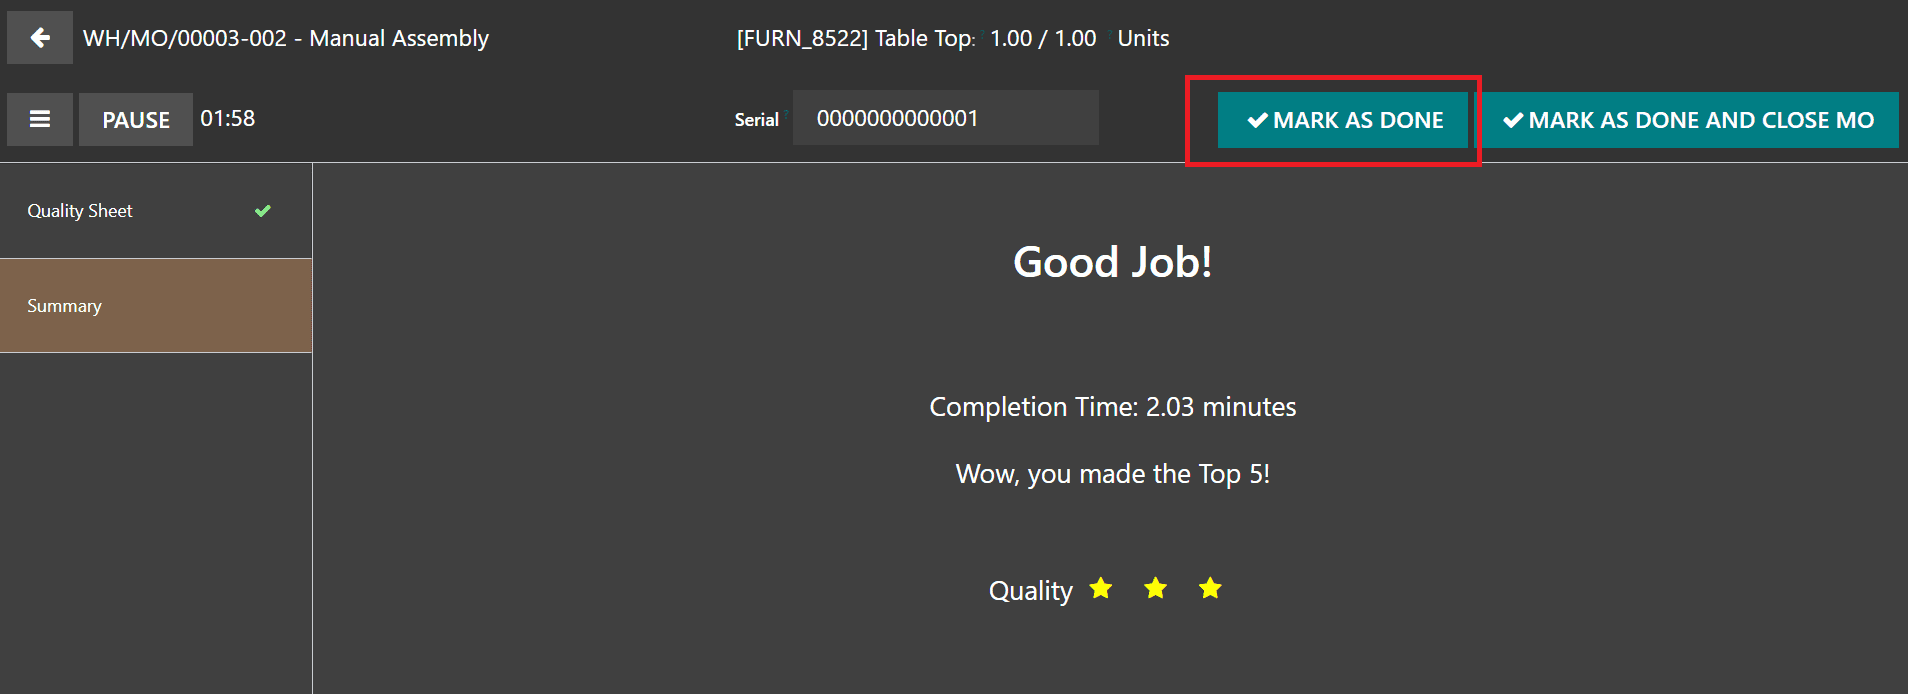
Click the Mark as Done button to complete the quality check operation. Near the Pause button, you can find a small icon which will open a new window with various operation tools as shown below.
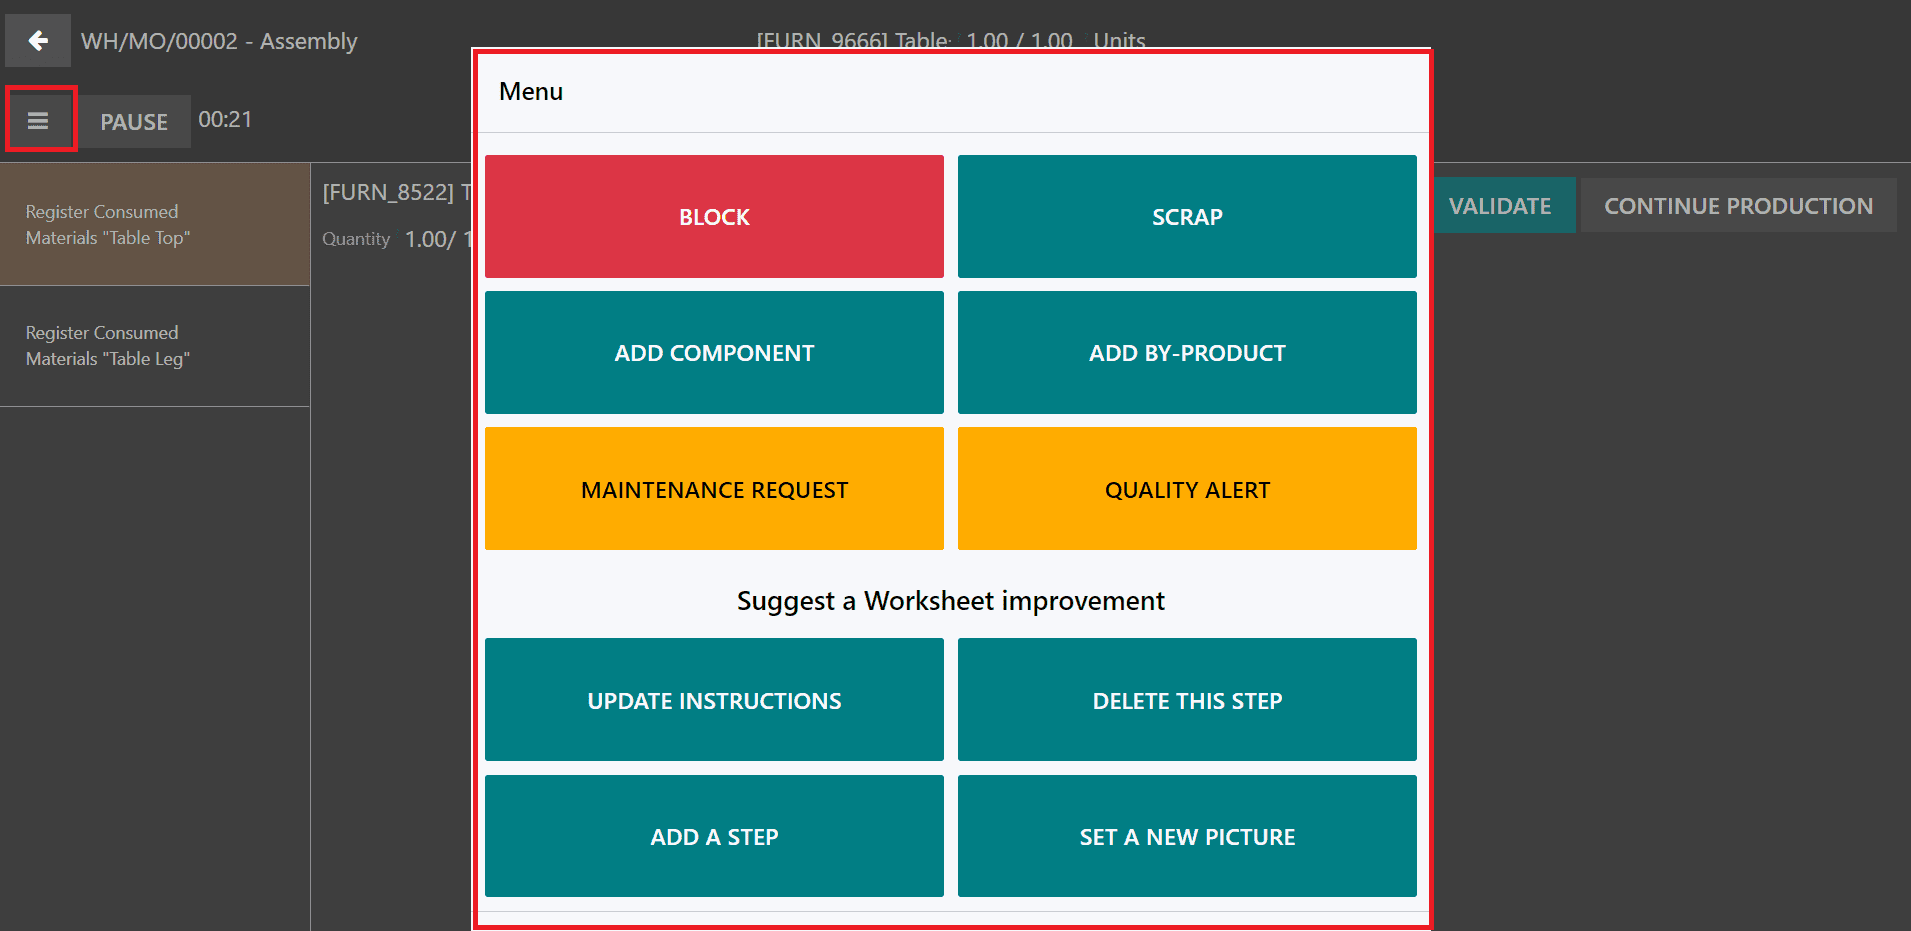
This menu includes options to Block the work center, add product to Scrap, Add Component to the operation, Add By-Product, send Maintenance Request, and Quality Alert. You will also get some additional tools that will suggest a worksheet improvement. It includes the option to Update Instructions of the work order, Delete this Step, Add a Step to the operation, and Set a New Picture.