Equipment
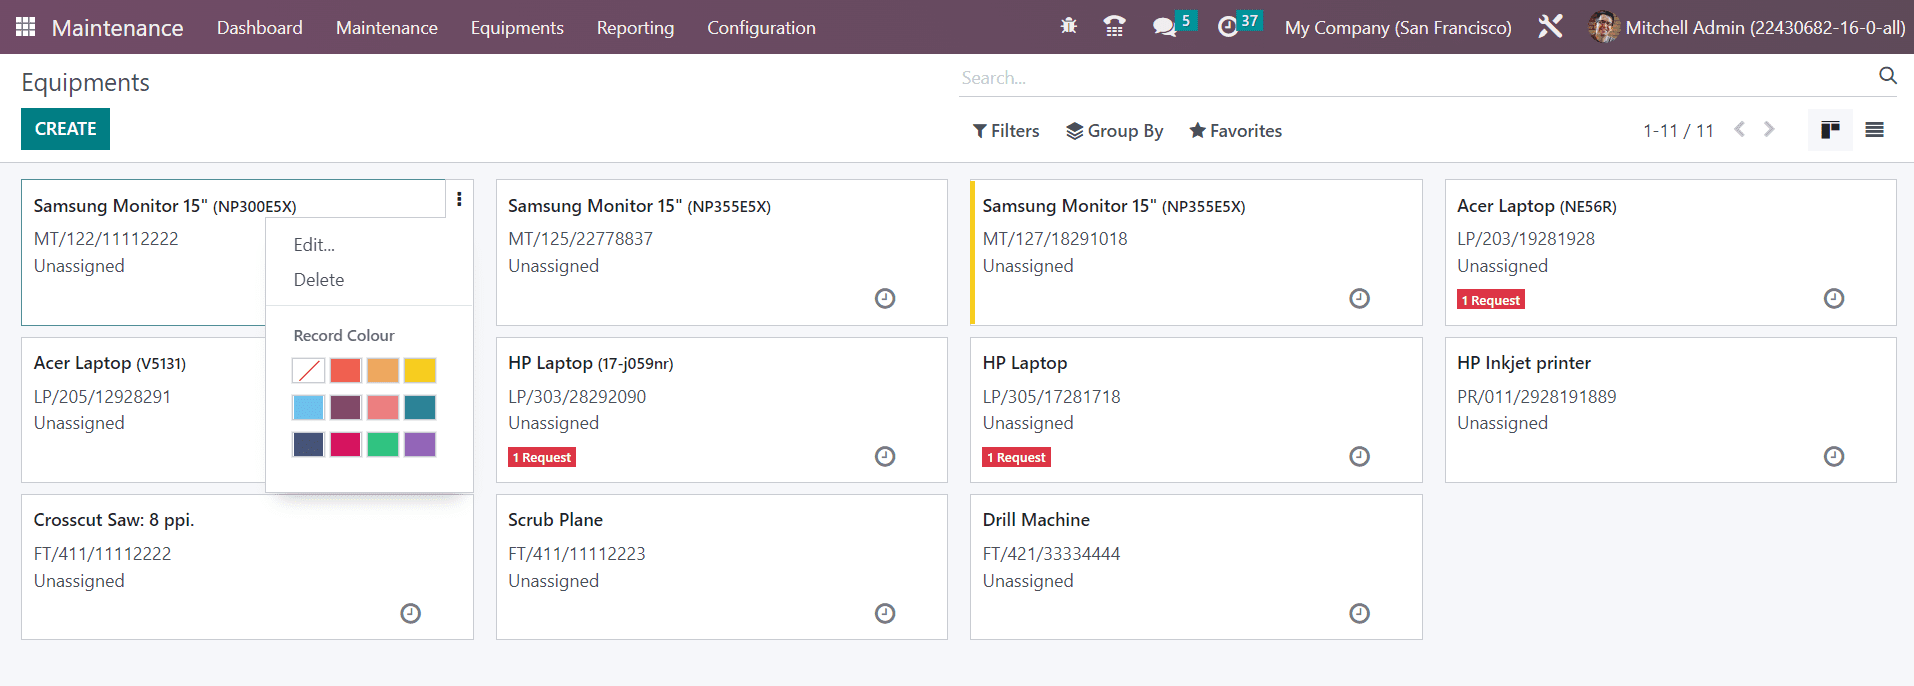
For the operations of maintenance, you need equipment and the record of the equipment should be also maintained. Using the Machines & Tools option available in the Maintenance module, you can create a list of all equipment used in your company for maintenance. This option will be available under the Equipment menu of the module.

From the Kanban view of the platform, you will see all configured equipment in your company. The small three dots on each equipment tab will give the Edit and Delete buttons for the respective operations. You can use default filters such as My Equipment, Assigned, Unassigned, Under Maintenance, Unread Messages, and Archived. The Group By feature offers the Technicians, Category, Owner, Vendor, Employee, and Department to group the equipment. Using the small clock icon, you can schedule various activities for the equipment.
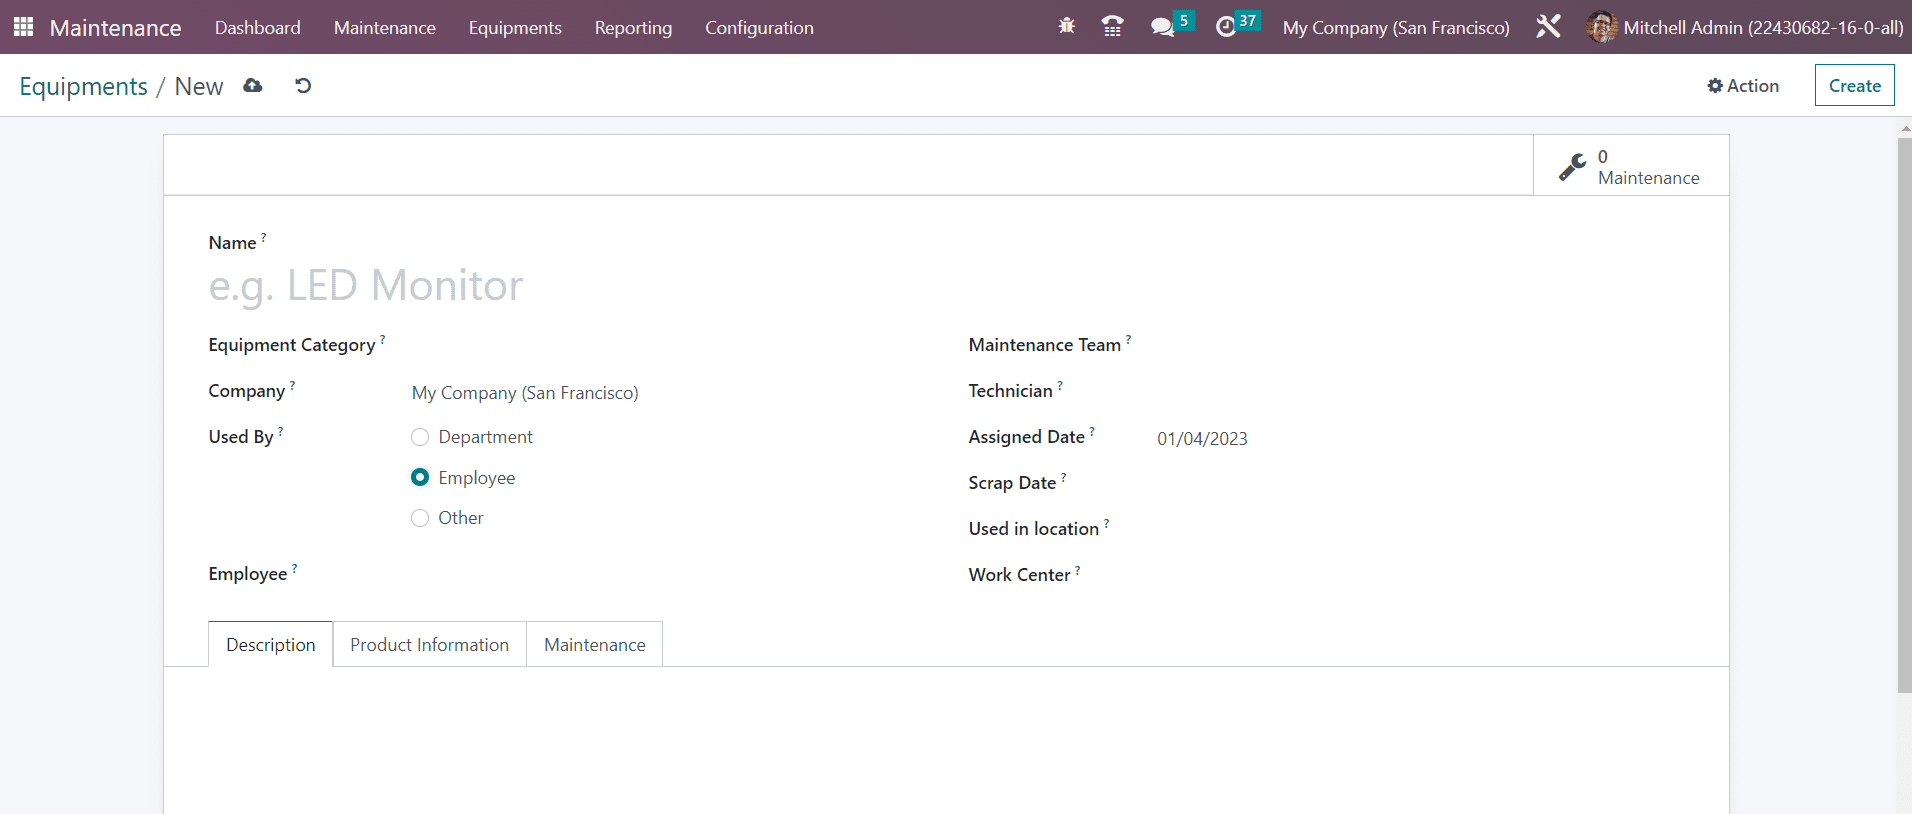
Clicking on the Create button will lead you to a new configuration window as shown below. You can provide a Name of the equipment in the given space.

Select the suitable Equipment Category from the dropdown. The Company name will be auto-populated in the respective field. In the Used By field, you can specify to whom this equipment is assigned. It can be either Department, Employee, or Other. According to the option you select, you will get an additional field to specify the Employee or Department. Now, you can assign this equipment to a particular Maintenance Team by mentioning them in the given field. In the respective fields, mention the Technician who is in charge of this equipment, Assigned Date, Scrap Date, Used in Location, and Work Center. Under the Description tab, you can add a description of the equipment.
Now, go to the Product Information tab, where you can specify the details of the equipment. If the equipment is purchased from another company, you can mention the Vendor and Vendor Reference .

The Model and Serial Number of the equipment can be added in the respective fields. Effective Date indicates the date on which this equipment will become effective. You can use this date to compute the mean time between failures. Specify the Cost and Warranty Expiration Date in the corresponding fields.

The next action date of the equipment will be available in the Next Preventive Maintenance field. This will be available based on the Preventive Maintenance Frequency you set in the respective field. The Maintenance Duration using this equipment can be specified in hours. The Expected Mean Time Between Failures can be added in days. Based on the Effective Date you mentioned, the Mean Time Between Failures will be automatically computed. The Estimated Next Failure will be shown by considering the latest failure date and mean time between failures. The Latest Failure date will be available in the given field. The average time taken to repair the equipment can be seen in the Mean Time to Repair field. Once you specify all the necessary details, the equipment configuration will be completed.
In order to create different categories for the equipment, you can select the Equipment Categories option from the Configuration menu. The list of already configured equipment categories can be found in this window.

The list will show the Name, Responsible, and Company of the Equipment Category. Click the Create button. This will open a new window as shown below. Here, you can specify the Category Name in the given space.

Assign an employee who is in charge of this equipment category in the Responsible field. The Company name will be available in the given field. Any note related to this equipment category can be added in the Comments field. After configuring the equipment category, you can use the Equipment smart button to get the details of the equipment assigned under this category. The Maintenance smart button will show the list of maintenance requests created for the equipment under this category.