Help Desk Team
In order to manage the tickets, you can create different help desk teams in the
Help Desk module. This will help you to solve issues and queries raised by customers
quickly and systematically. When a new ticket is being created in the module, the
admin can assign that ticket to a team and that particular help desk team will be
responsible for closing the ticket within the time limit. You can find the Help
Desk Team option under the Configuration menu of the module.

Already configured help desk teams can be observed here. The preview of the list
includes the Name, Email Alias, and Company. You can use the New button to create
a new help desk team.
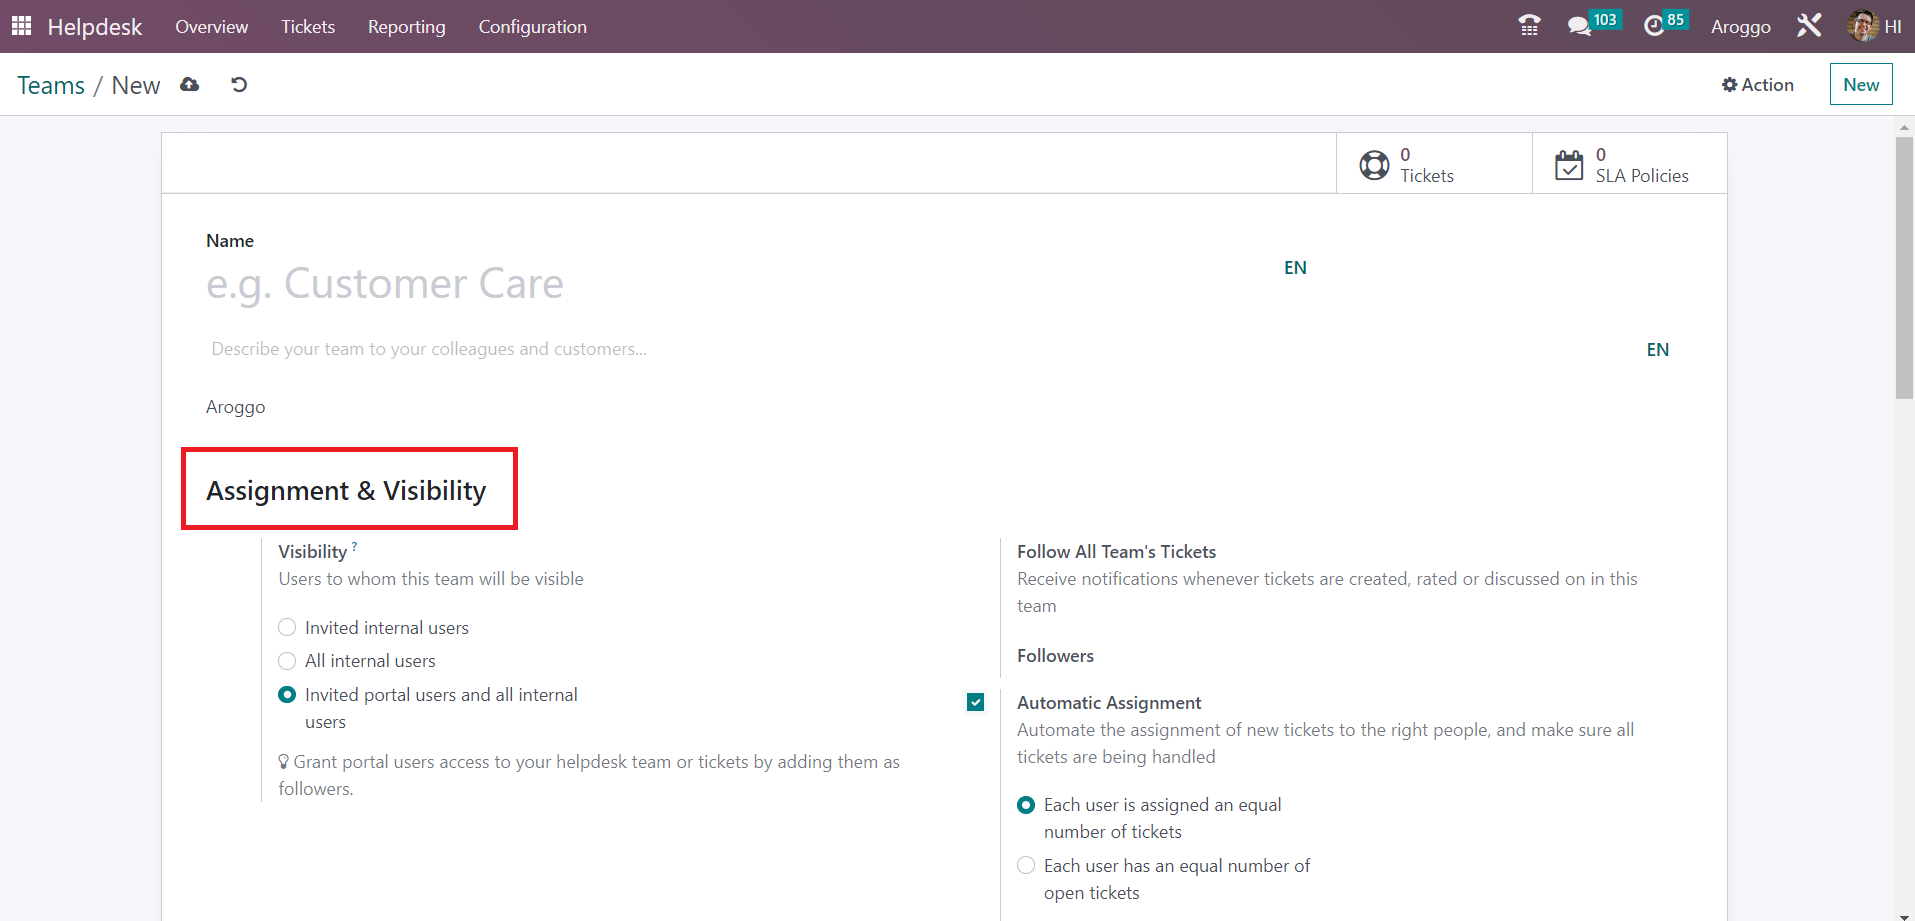
The form view of the Team creation window is shown above. Here, you can provide
the name of the team in the given space. After mentioning the name of the team,
you can add one tow line to describe this team to your colleagues and customers.
Specify the name of the company in the given space. The Assignment & Visibility
tab can be used to define the visibility of the team. Here, you can decide the people
to whom this helpdesk team and its tickets will be visible. You can set the visibility
to Invited internal users, All internal users, or Invited portal users and all internal.
In the Followers field, you can mention the followers of this team so that they
will receive notifications whenever tickets are created, rated, or discussed in
this team. By activating the Automatic Assignment, you can automate the assignment
of new tickets to the right people, and make sure all tickets are being handled.
Here, you will get two options to decide the method of assignment such as Each user
is assigned an equal number of tickets and Each user has an equal number of open
tickets.
The Channels tab can be used to define the channels to collect the tickets. You
can activate the Email Alias to create tickets by sending an email to an alias.
It is possible to set the email Alias in the given space. Activating the Live Chat
option allows you to enable a live chat option on your website so that you can easily
get in touch with your website visitors. You can enable the Website Form to get
tickets through an online form.
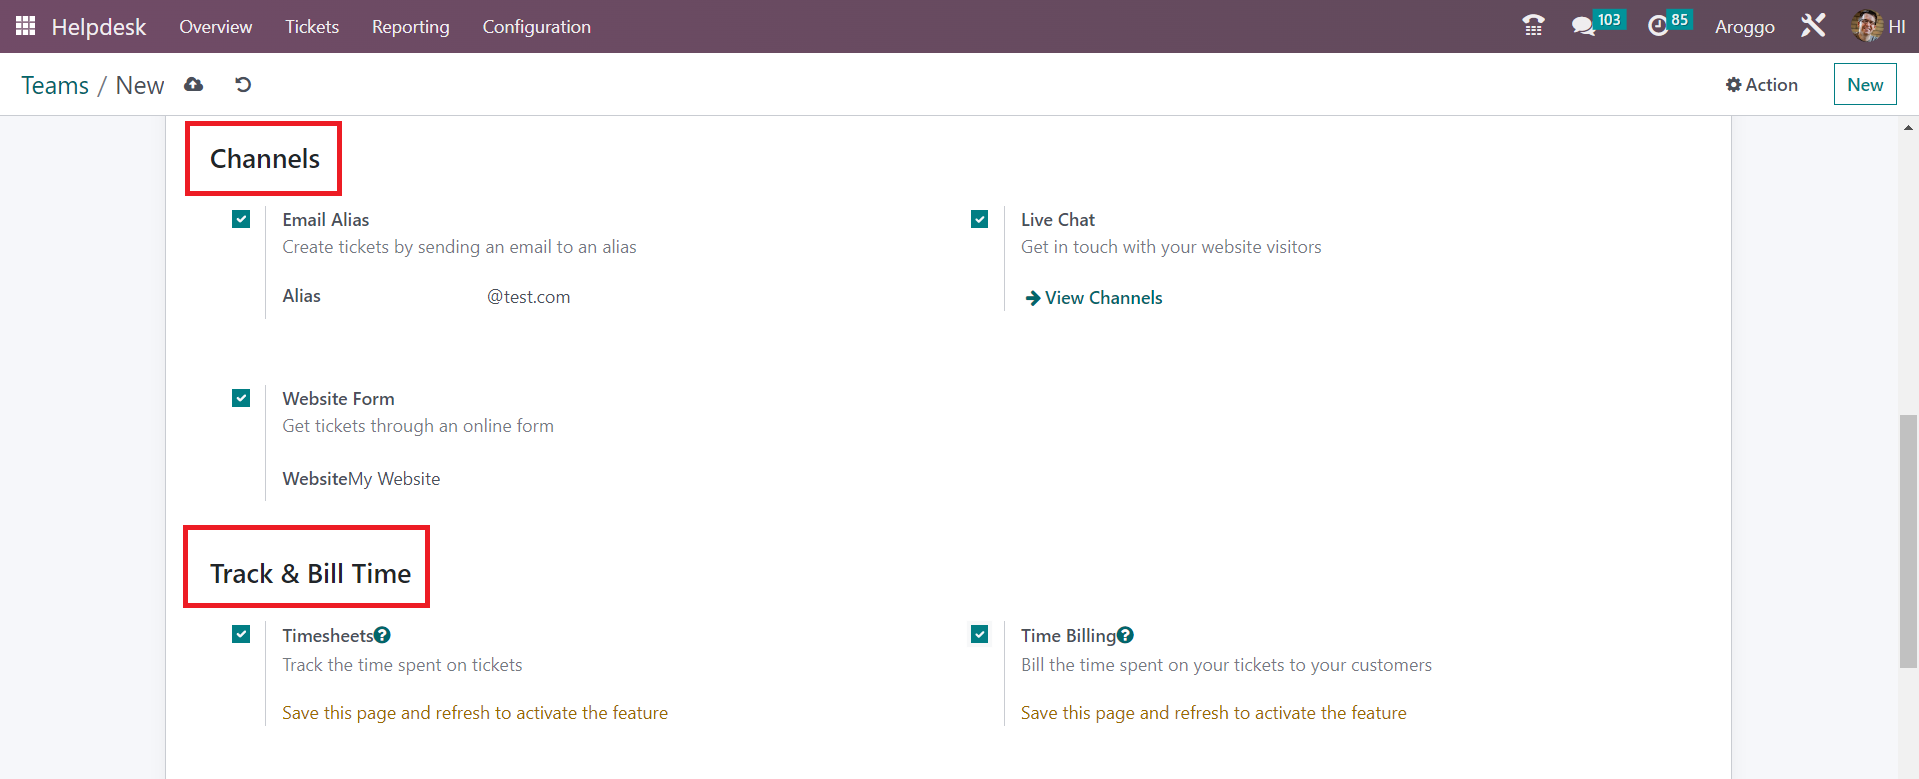
By activating the Timesheets option, you can track the time spent on tickets. Here,
you can mention a project to which the timesheet of this helpdesk team’s tickets
will be linked. In order to bill the time spent on your tickets to the respective
customer, you can enable the Time Billing option from the Track & Bill Time tab.
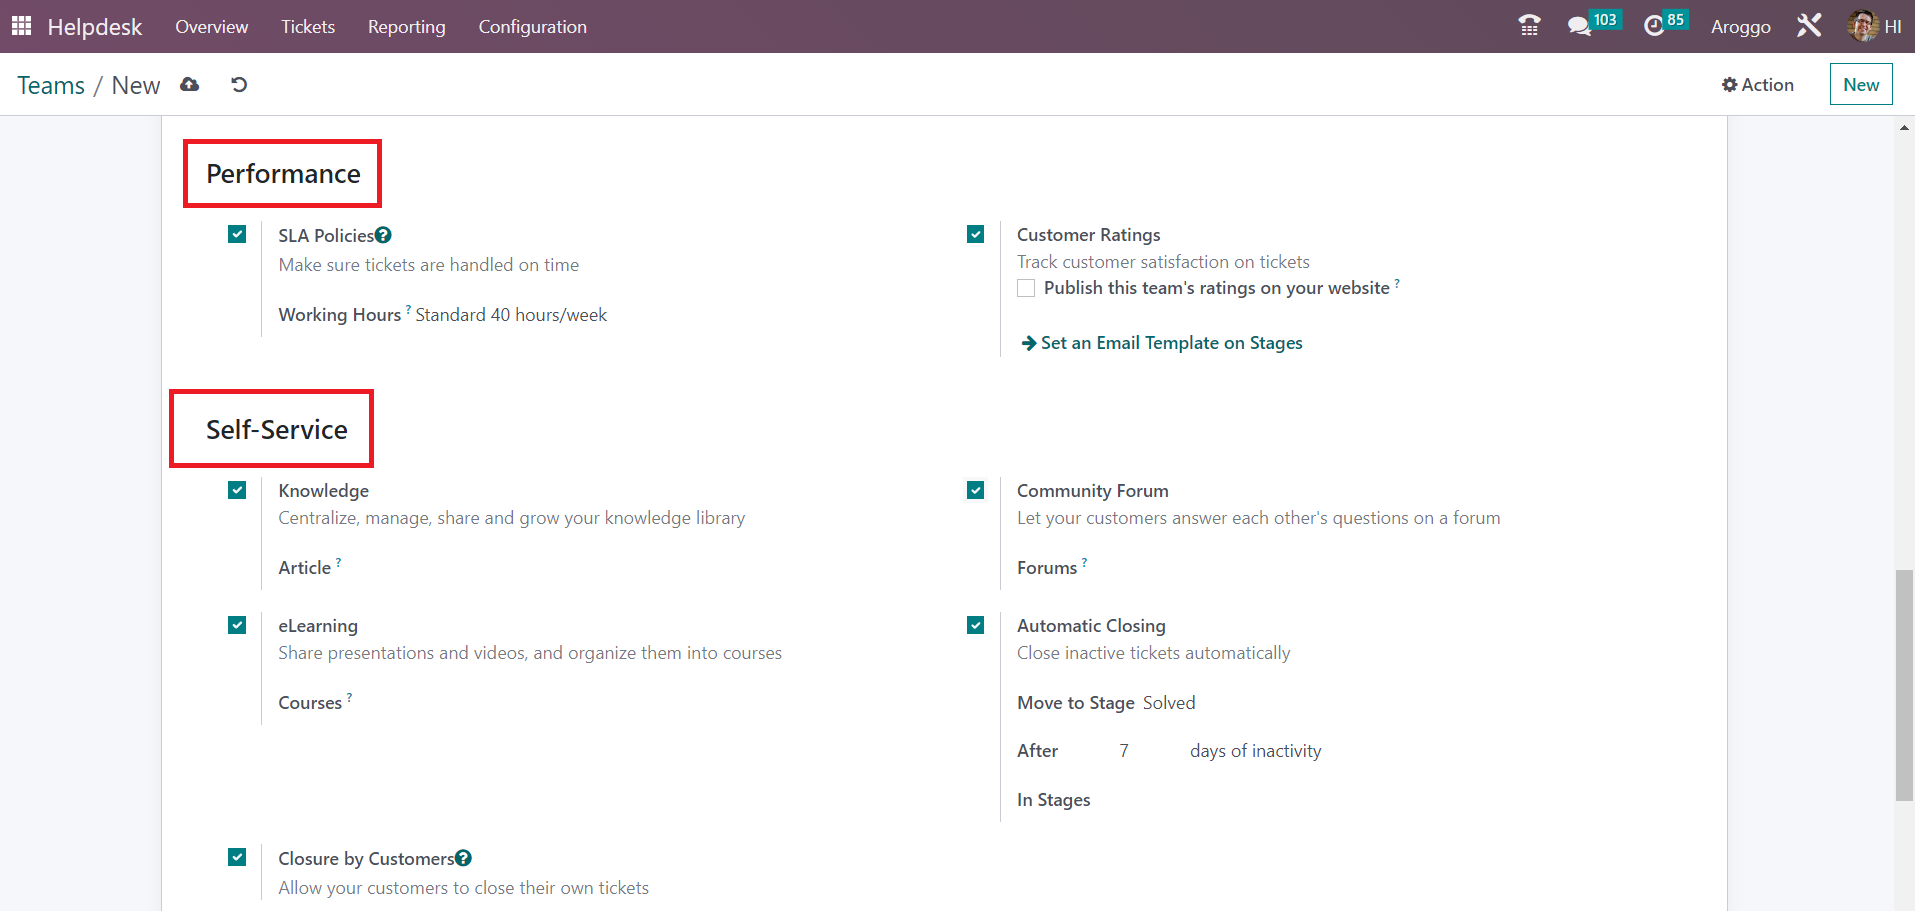
Activating the SLA Policies will make sure that the tickets are handled on time.
The working hours used to determine the deadline of the SLA Policies can be specified
here. In order to track customer satisfaction on tickets, you can use the Customer
Ratings option. Once you activate this option, you will get an additional field
which can be enabled to publish this team’s ratings on your website.
You can use the Knowledge feature to centralize, manage, share, and grow your knowledge
library. Set an Article in the given field on which the customer will land by default
and to which the search will be restricted. The eLearning option can be activated
to share presentations and videos and organize them into courses. The courses can
be mentioned in the given space. You can let your customers answer each other's
questions on a forum by activating the Community Forum option. You will get a space
to mention the Forums in this window. Activate the Automatic Closing option to close
the inactive tickets automatically. By activating this option, you will get a space
to mention the stage to which the closed tickets will be moved. You can also mention
days of inactivity here so that Odoo will automatically close tickets after the
mentioned days of inactivity. Activating the Closure by Customer option will allow
your customers to close their own tickets.

In the After Sales tab, you can activate the Refunds option to issue credit notes
for customers, Returns option to return faulty products, Field Service option to
plan onsite interventions, Coupons to grant discounts or free products, and Repairs
to send broken products for repair respectively. Once you complete all fields, your
new helpdesk team is ready to use.
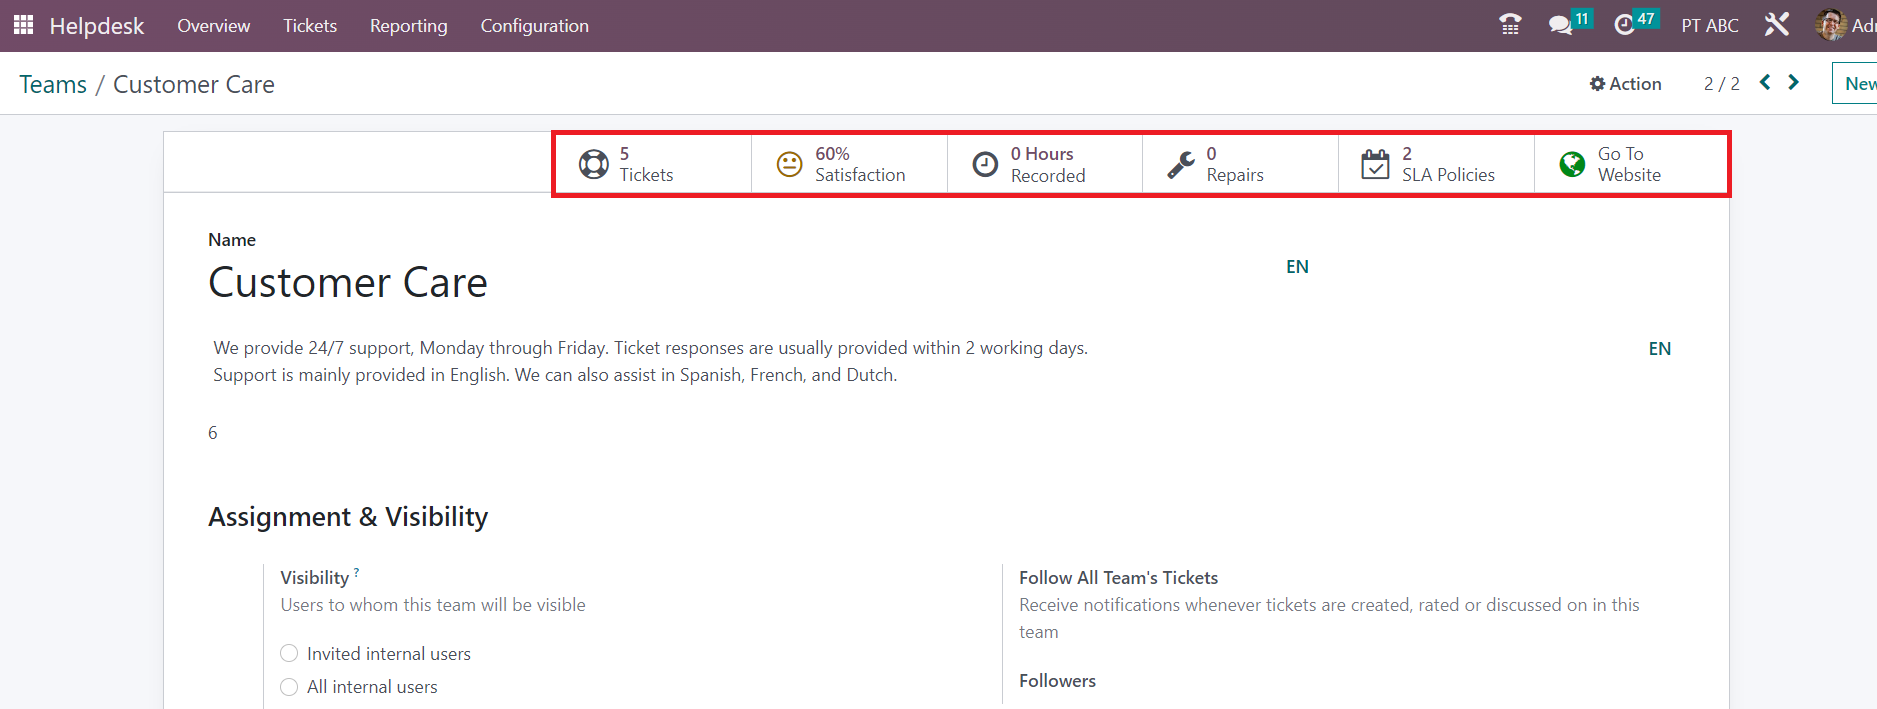
As you can see in the screenshot above, the user will get some smart buttons on
the form view to manage the operations related to the helpdesk team in a single
place. The Tickets button will show the list of tickets assigned to this particular
helpdesk team. The customer satisfaction rating for this team can be seen in the
Satisfaction smart button. The total working hours recorded for this helpdesk team
is shown in the Recorded button. The Repairs button can be used to manage the repair
orders created from the tickets of this team. The SLA Policies associated with this
will be available in the respective smart button. Using the Go To Website button,
you can go to the website view of this team.
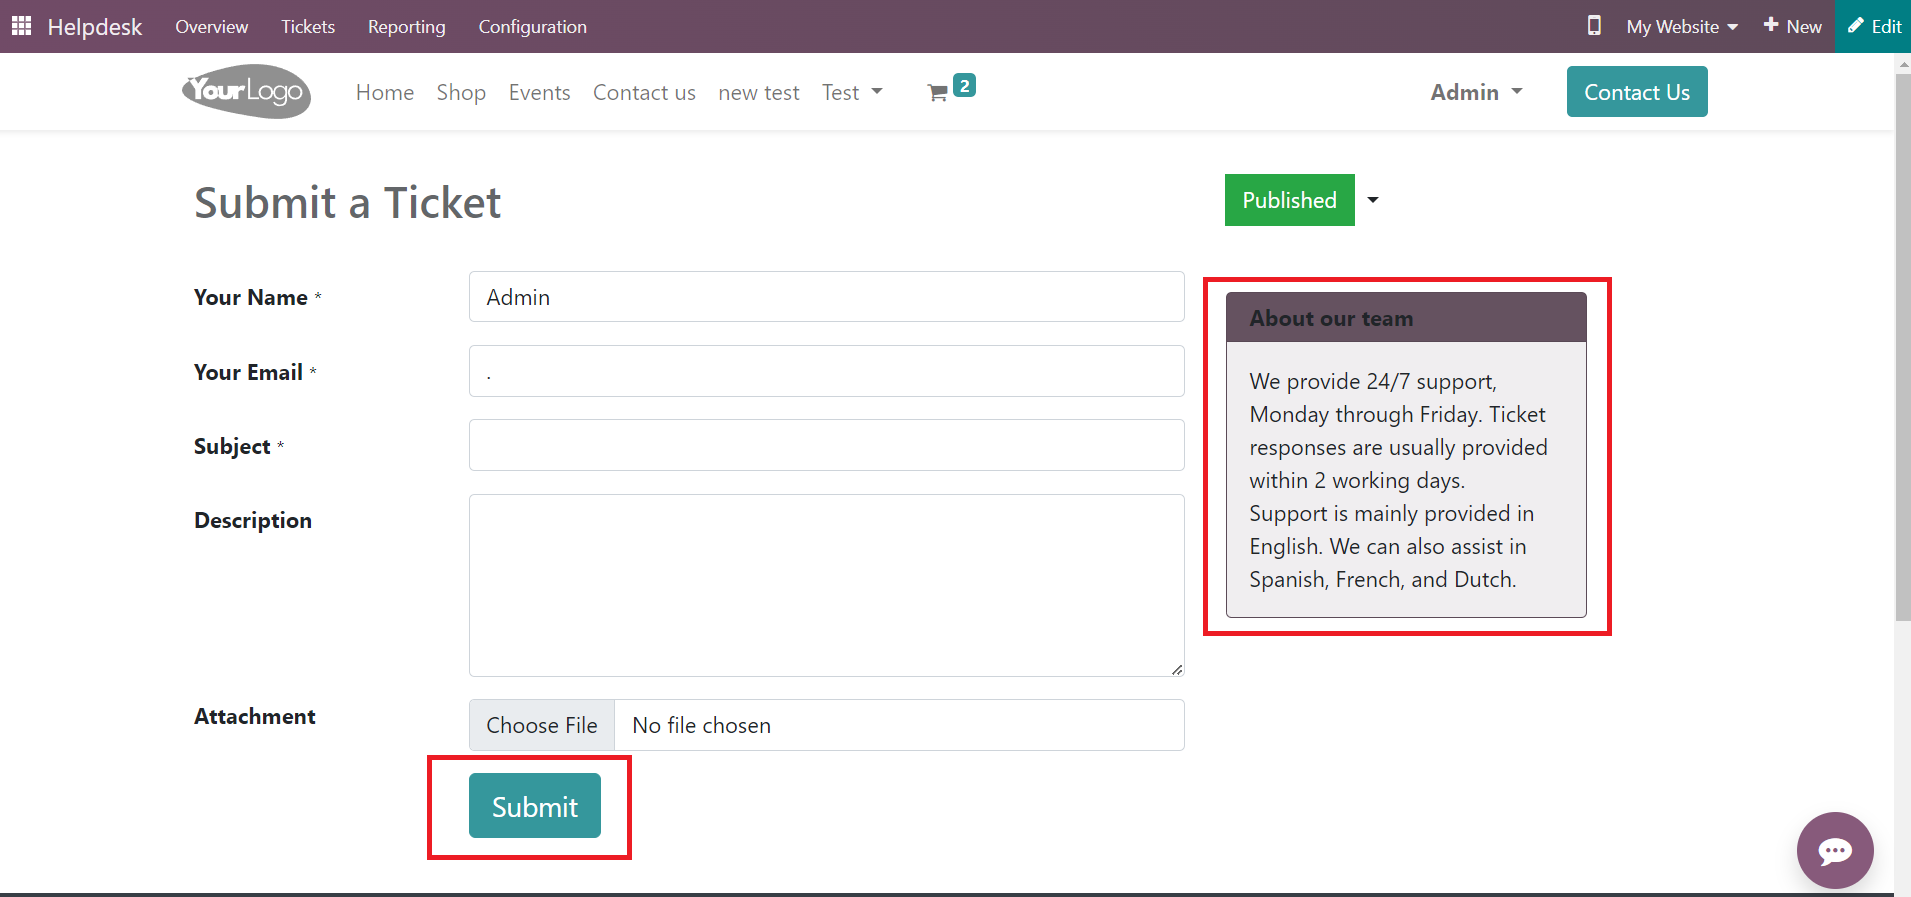
This is the customer preview of the helpdesk contact page. Here, you can view the
description that you created for your team on the right side of the screen. The
customer can submit a ticket using this form. They can mention their issue in this
form and click on the Submit button. When the customer clicks on the Submit button,
a new ticket will be created in the Helpdesk module and automatically assigned to
the respective team.
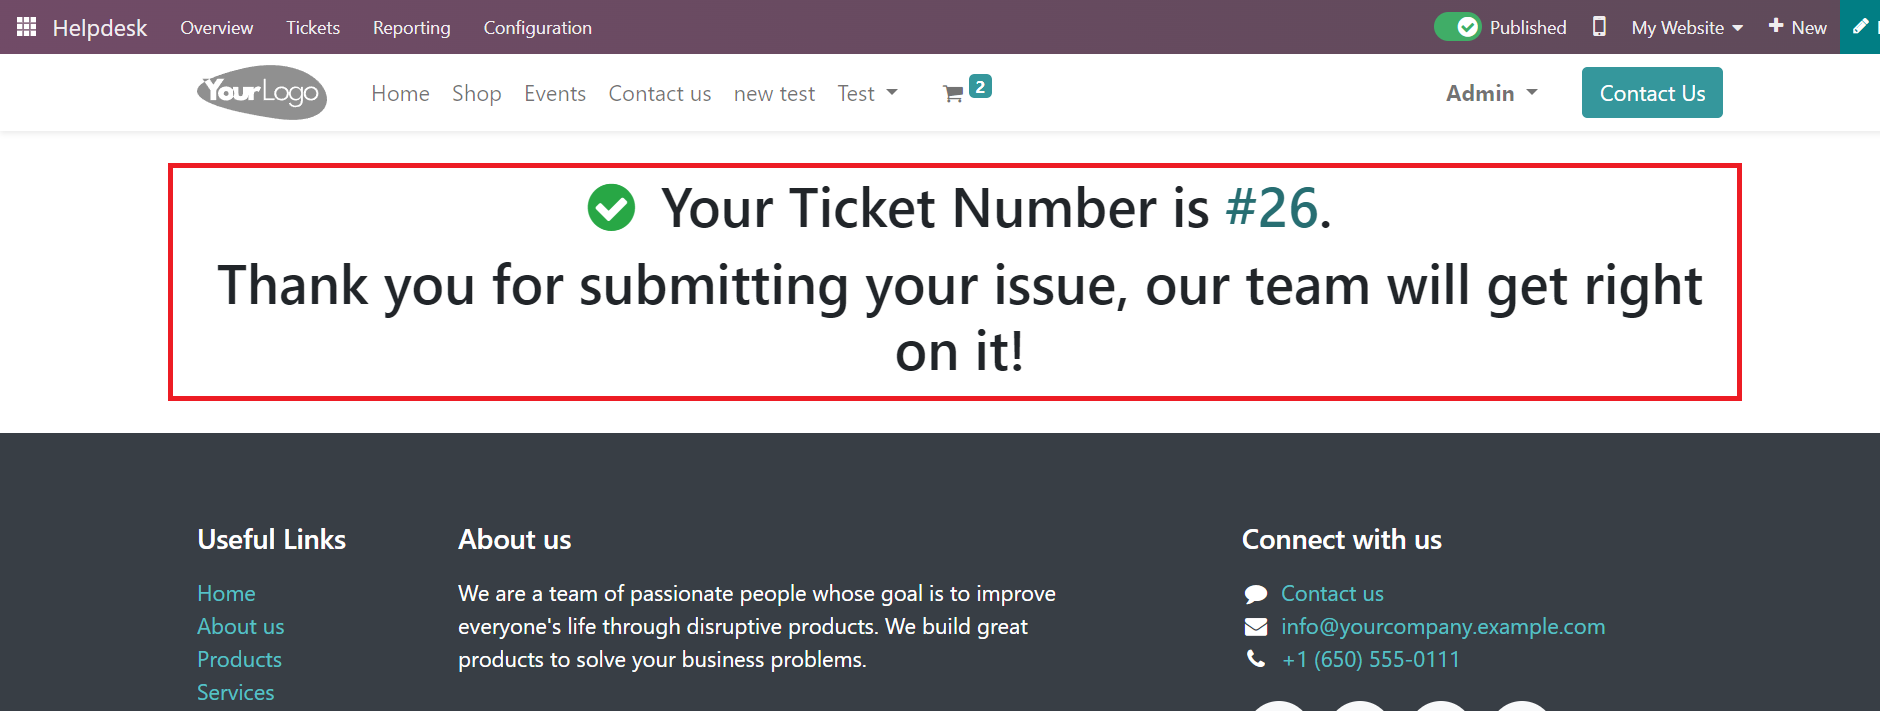
The customer will get the ticket number and a message from the team, as shown in
the screenshot above. Now, the assigned helpdesk team can work on this ticket and
solve the issue as soon as possible. The operations related to this ticket can be
managed in the Tickets menu available in the Helpdesk module.