Configuration
The Configuration tab of the Odoo Referral module includes the following options.
- Rewards
- Levels
- Friends
- Alerts
- Onboarding
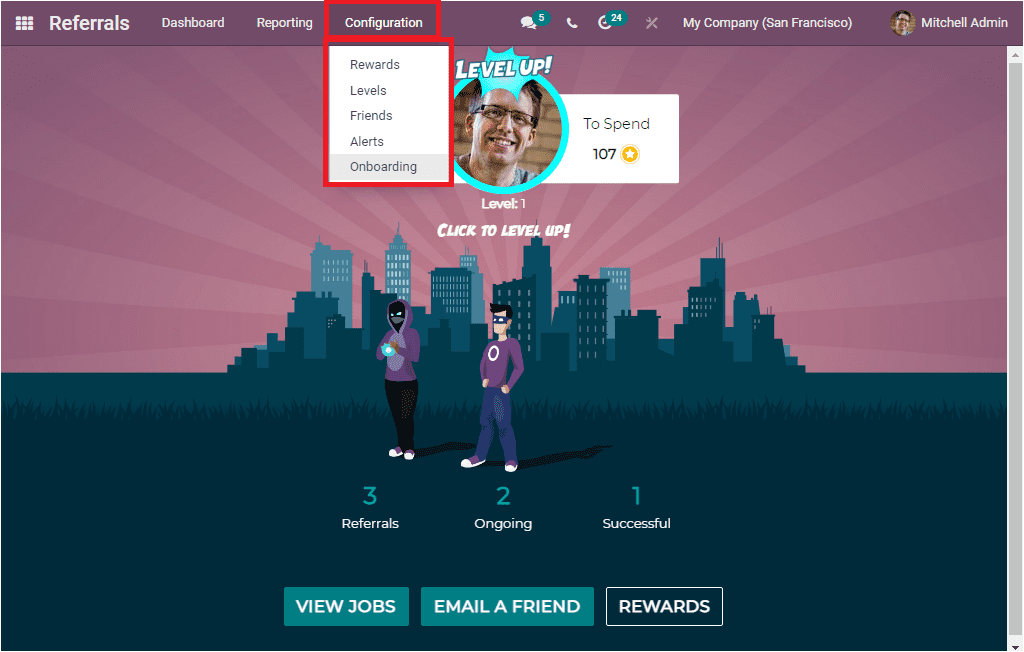
Rewards
The Odoo Referral module is functioning based upon the points and rewards for each of the referrals being carried out by the employees for company recruitment. Each of these received referral points could be used for the product purchasing that can be done from the company website or the details store. The Rewards window available in the Odoo Referral module will allow you to create and list various rewards defined in the platform. The below image shows the Rewards window.

In the Rewards window, you can keep all the rewards records created in our organization. You can access this window in both Kanban and List format. In the List view, the defined rewards are listed along with the Product Name, Cost, Next Activity, Awarded Employees, and Company. If you want to create new records, you can select the CREATE button. The below image depicts the Rewards creation window.
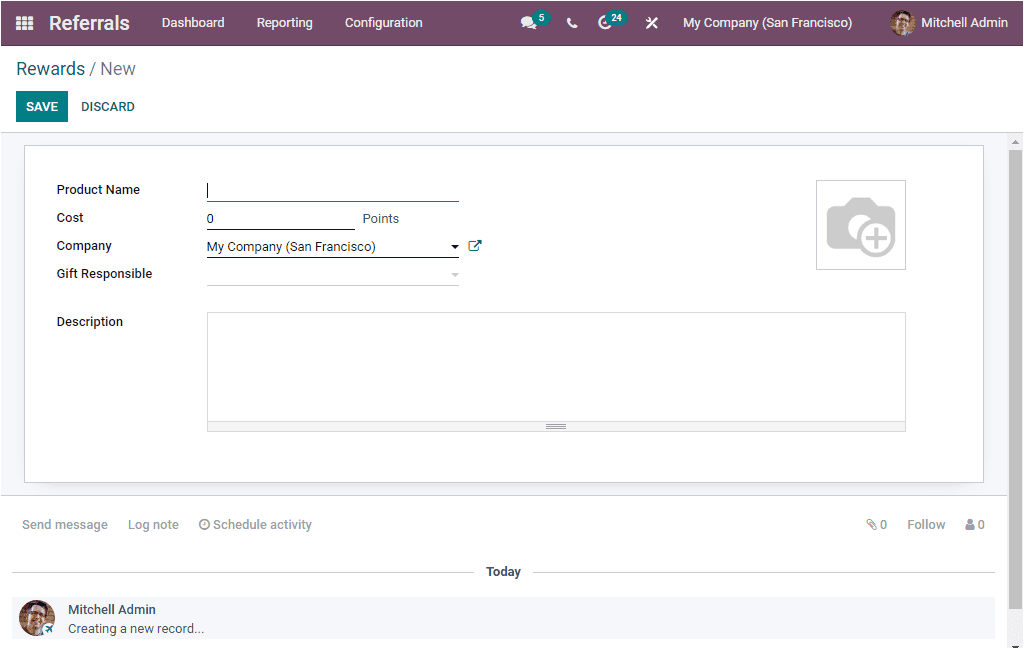
Here you should provide the Product Name and define the required points in the Cost field. The user responsible for this gift will be allocated in the Gift Responsible area. Furthermore, you can represent the responsible Company and also include a Description.
As we clear on the Reward option available in the module, let us discuss the Levels feature.
Levels
Odoo system gives you the right to assign various levels of recruitment operations to the employees for each referral. The Level menu available under the Configuration tab of the Odoo Referral module will allow you to access the Levels window. This feature was implemented in Odoo for various levels of recruitment operations to the respective employees for their valuable referrals. The Levels window demonstrates various levels defined in the platform.
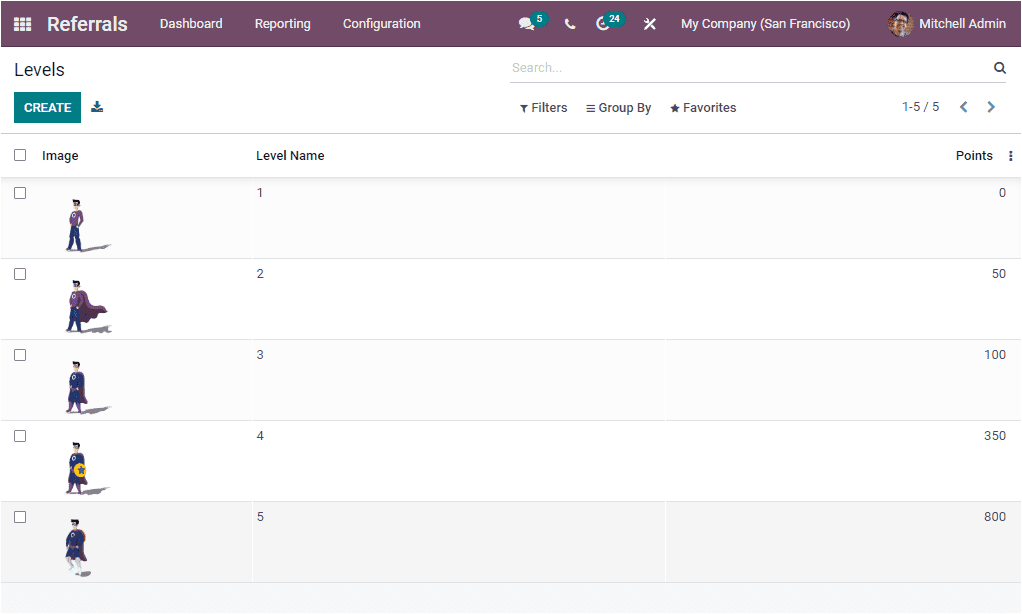
Odoo furnishes this window with all the specified Referral Levels along with the illustration image, Level Name, and the Points required for each stage in a list format. For creating a new level, you can click on the CREATE button. The image of the creation window is depicted below.
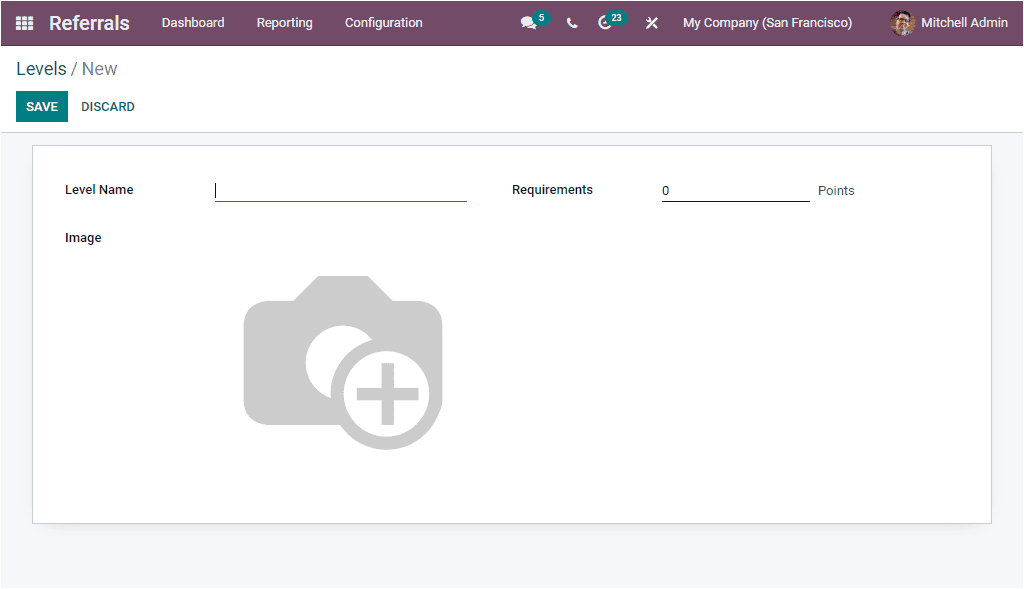
In the creation window, you can give the details such as Level Name, required points in the Requirements field, and the illustration image. Once you provide all the details, you can save the details for adding them to the Levels window.
So we understand the Levels option and now let us look at the Friends menu that can also be accessed under the Configuration tab.
Friends
The functioning of the Odoo Referral module is purely based on multiple animations and appealing options. The system assists you in configuring various animations and images to illustrate the candidates in the respective referral operations of the company. For configuring multiple animation images into the platform, Odoo manages a separate Friends window. You can access the Friends menu from the Configuration tab of the module. Upon selecting the Friends menu, you can navigate into the Friends window. The image of the window is depicted below.
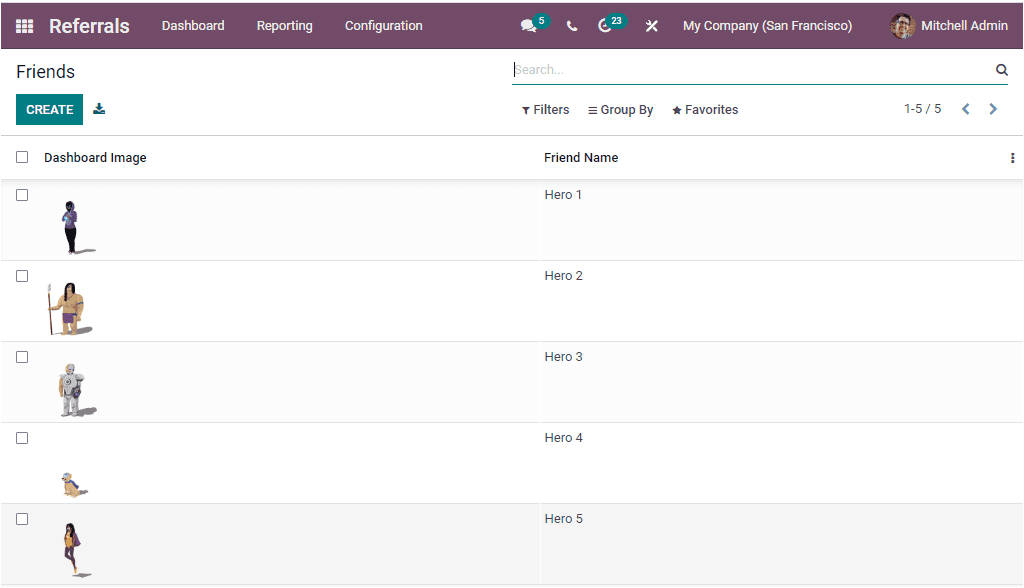
This window will display all the Friends that are already created on the platform. Each friend that was defined on the platform will be added to this window. Using this window itself, you can create various animation images. This can be done by clicking on the CREATE button available.
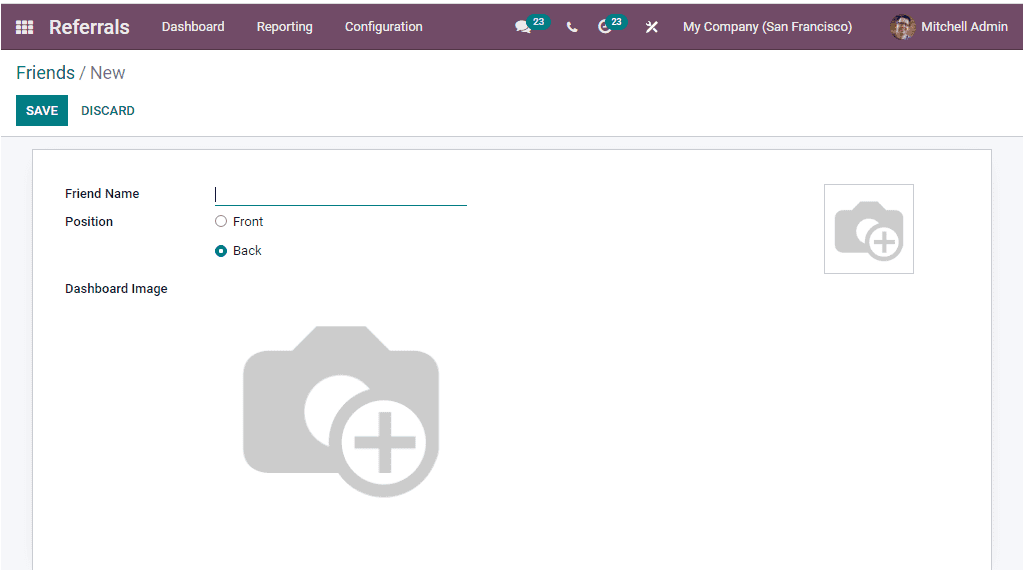
In the Friends creation window, you have to provide a Friend Name, and also, you should define the position of the friend. It can be defined as either Front or Back. If it is a small friend like a dog or any other things, you can select the Front option for placing it on the front of the dashboard. After allocating these fields, you should choose the image for the friend on the dashboard in the Dashboard Image area. The image should be limited to 1024*1024px. Apart from this option, you will also be able to provide another picture, and this image is used for the head's friend when you must choose a new friend.
The Friend aspects of the module are evident and now let us look at the Alerts window.
Alerts
The emergency messages and alerts will be there to send out. The Alerts menu available under the Configuration tab of the Odoo Refferrel module can send out informational alerts. It will also remind or notify the receivers about an upcoming event or other things. It will benefit you and your employees to receive alert notifications on the various job postings. For accessing this window, we can go to Referrals -> Configuration -> Alerts. The screenshot of the window is displayed below.

This window will manage and list out all the preconfigured Alerts. For configuring new Alerts, you can click on the CREATE button. The image of the creation window is depicted below.
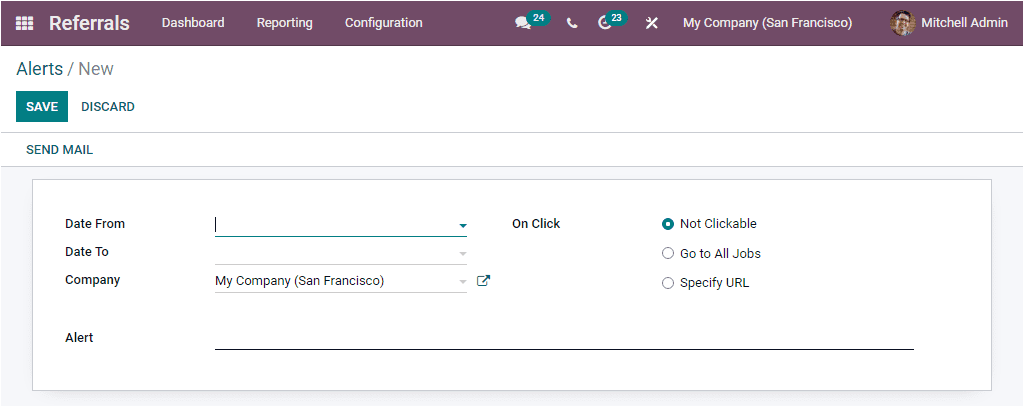
In this Alerts creation window, you should specify the Date From, Date To, Company, and Alert message. In addition, the On Click area can be defined as Not Clickable, Go to All Jobs, and Specify URL. After explaining all these required details, you can save it.
As we understand the Alerts aspect of the Odoo Referrals module, it is now time to discuss the Onboarding menu available under the Configuration tab.
Onboarding
The Onboarding menu available under the Configuration tab of the Odoo Referrals module is designed to create new onboarding messages. The below image shows the Onboarding window, and there you can access a list of various predefined onboarding messages in the Odoo system.
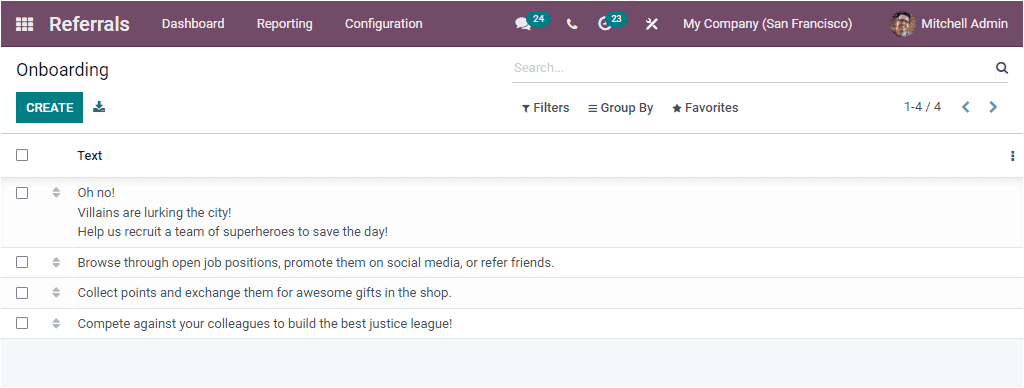
For creating new onboarding messages, you can click on the CREATE button. Now you will depict a creation form as shown in the below screenshot.
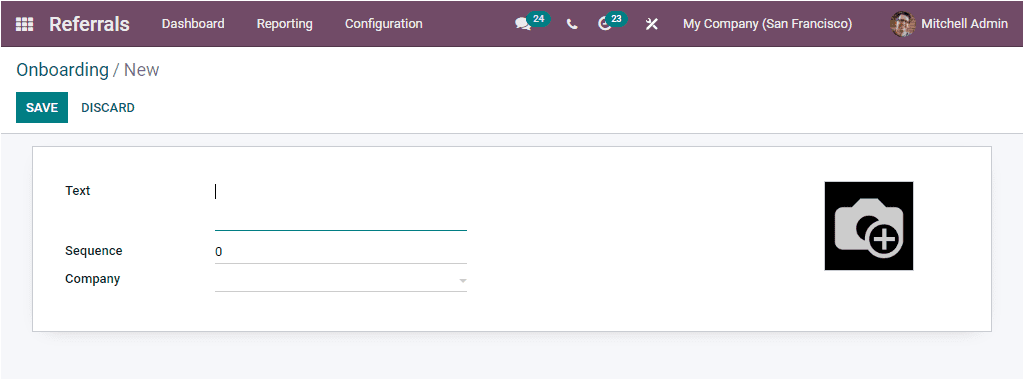
In the creation form, you can allocate the Text message along with the Sequence and Company.
So far, we have been discussing the Configuration tab of the Odoo Referrals module and now let us have a deep analysis on the functioning of the Referral module.