Settings
The Settings window of the Odoo Website module includes various advanced features. When
you check each of the Odoo modules, you can view a well-defined Settings window where
you can view multiple tools, and these tools Odoo included to have more in-depth
features at the respective modules. By using this Settings window, you can view so many
features that can be activated based on the requirements of your business policies. To
have a more featured and productive website application, you can check the Settings
window and activate the additional features to make your website a full-fledged website
application.
For viewing the options in the Settings window, you can go to the Settings window of the
Odoo Website module. The Settings window includes various options, and all these options
are described under different sections. The different sections included in the window
are
- Select the Website to Configure
- Website
- Features
- Products
- Pricing
- Shipping
- Invoicing
- Orders follow up
- Communication
- Web Push Notifications
- SEO
Select The Website To Configure
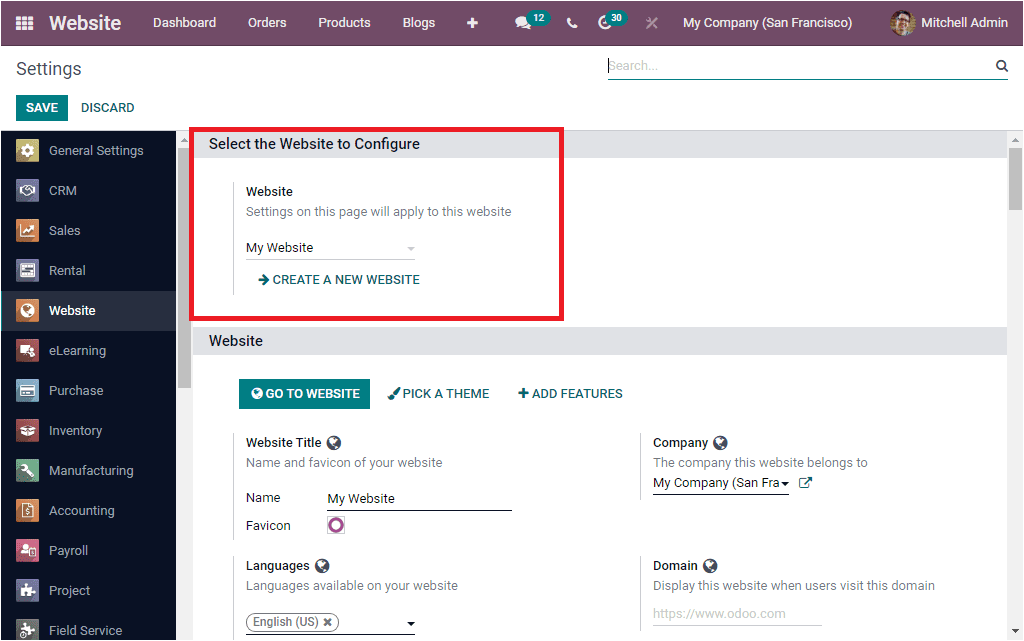
Here in this section, you can mention the name of the website you will configure. Here,
you can also view a CREATE A NEW WEBSITE button, which is the direct link to create a
new website.
Website
In the Website section, you can view various options. The O TO WEBSITE button allows you
to go to the Website. The PICK A THEME button can be selected for choosing a default
theme for your website. When we click on the ADD FEATURES button, you will be redirected
to the Odoo Applications window to install related applications. These three options are
beneficial for designing your website pages.
The image of the window is depicted below.
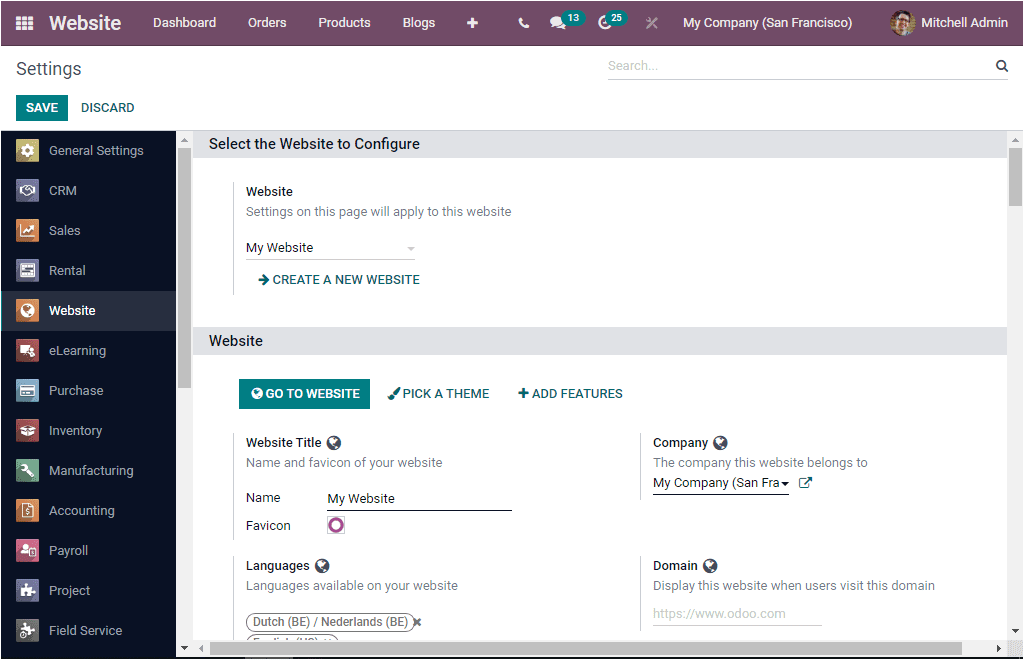
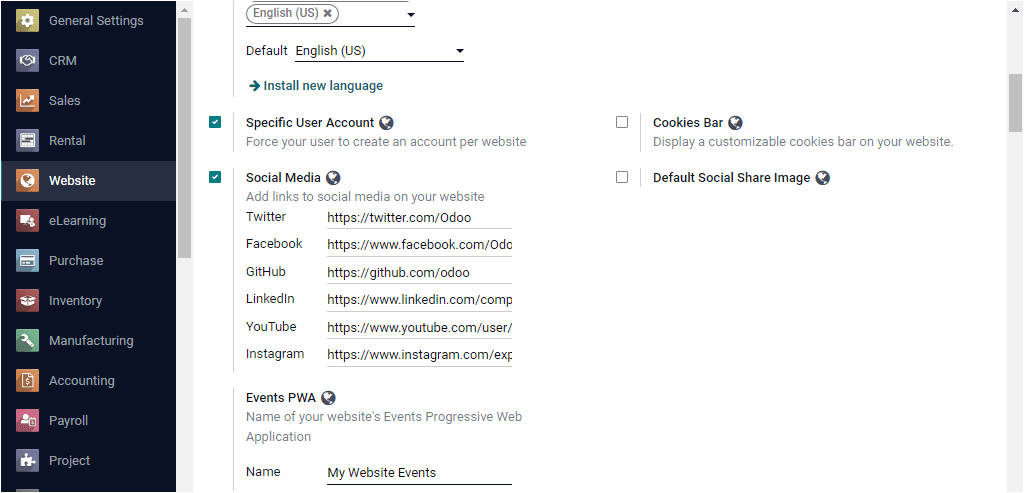
Under the Website section, you can also describe the Name and favicon of your website. In
addition, this section allows you to list out the languages you want to make available
on your website. The default language can also be specified. The Install new
languagemenu can be selected for installing new languages. Moreover, the
Company and Domain can be defined under the respective section.
The Specific User Account option can be activated to force your user to
create a specific account per website. The Social Media option allows
you to include links to social media on your website.
By activating the Cookies Bar option, you will be able to display a customizable
cookies bar on your website. Once you activate and provide a Default
Social Share Image, it will help you to replace the website logo as the default social
share image.
Features
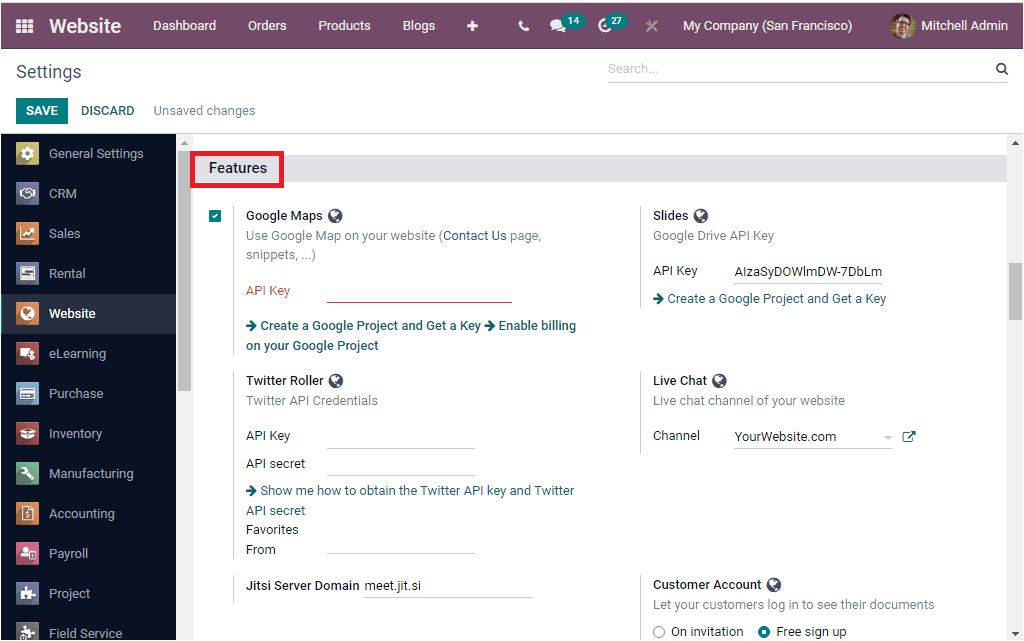
When you look into the Features section of the Odoo Website Settings window, you can view
the various options such as Google Maps, Twitter Roller, Slides, Live Chat, and Customer
Account options. When you activate this option, you will be able to use google maps on
your website, especially for the operations of the Contact us page, snippets. For
activating this option, you should provide the Google Maps API Key in the given space.
Similarly, the Twitter API credentials can be mentioned under the Twitter Roller option.
Furthermore, you can provide a Live Chat channel name for creating a live chat channel
for your website. In addition, the Odoo platform allows you to set up a customer account
for letting your customers log into the system to view their documents. You can define a
customer account either On invitation or Free sign up.
Products
In the Products section of the Website Settings window, you can view various
product-related features that can be activated for exclusively defining your products.
Here you can view the options such as Variants, Digital Content, Stay on page after
adding to cart, Optional Products, Wishlists, Product Comparison Tool, and Base Unit
Price.
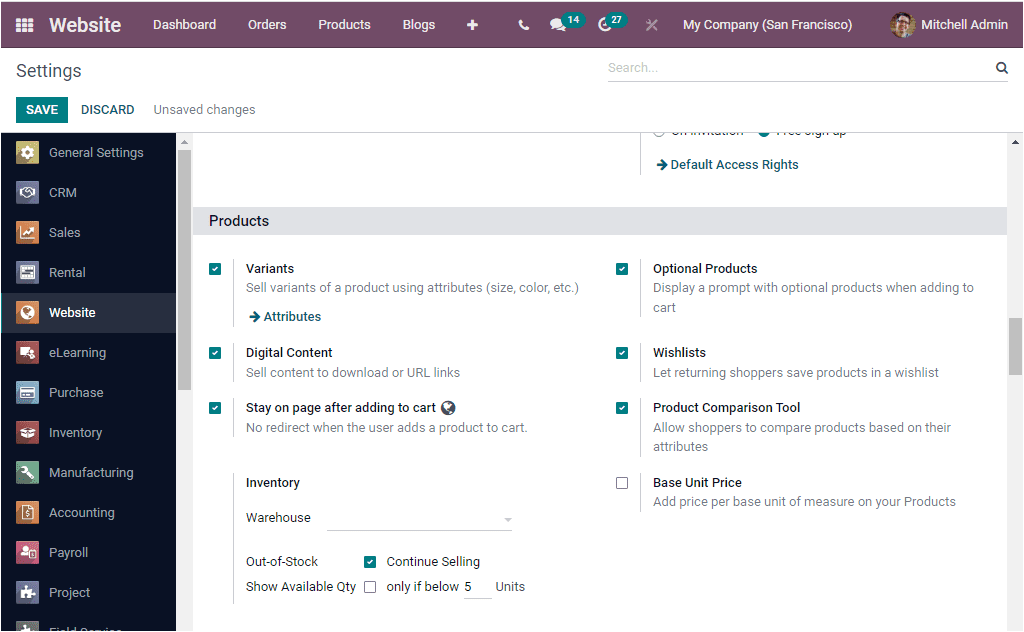
The Product Variants option can be activated to configure different
product variants when adding the product to the cart. The Optional
productsoption can also be activated to display the prompt with optional
products when adding to the cart. Moreover, the Digital Contentoption
can be activated by checking the box near the option. And you should mark the changes by
clicking on the SAVE button available. Using this option, you can provide customers with
product-specific links or downloadable content on the confirmation page of the check-out
process if the payment gets through. To do so, attach some files to a product using the
new files button and publish them. The examples for digital content are considered the
electronic product or associated contents created and delivered digitally. The primary
examples for digital products are video tutorials, webinars, articles, study materials,
electronic tickets, coupons, etc.
Odoo also offers you the option Stay on page after adding to the cart,,
and this option will be an advantageous feature when dealing with the cart operations.
After adding a product to the cart, you can stay on the same page on the website if you
had activated the Stay on page after adding to the cart option. That means no redirect
will happen when the user adds a product to the cart.
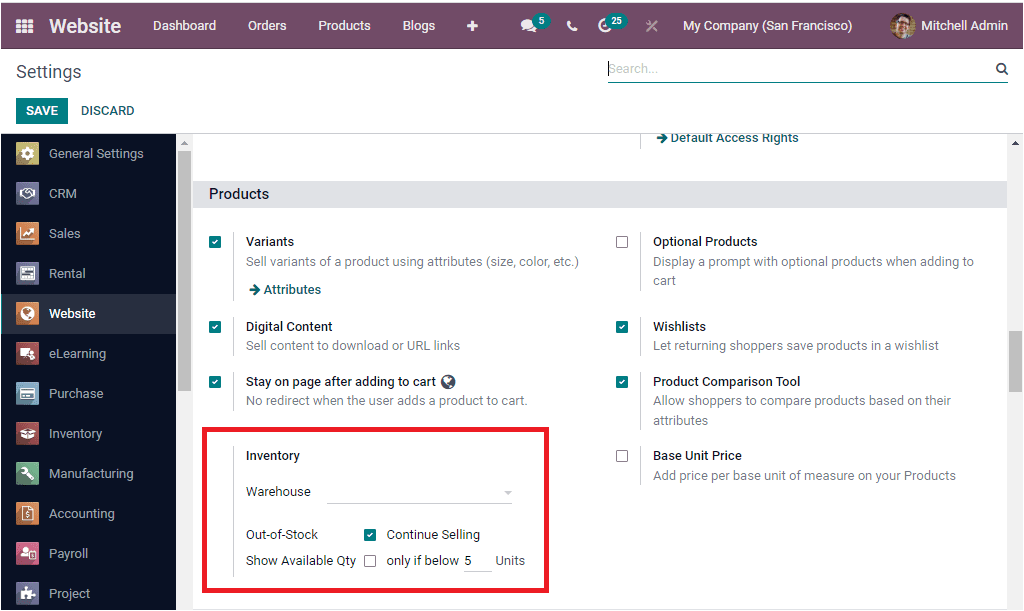
The default availability mode can be set on newly created storable products. This can be
done by activating the corresponding field in the Inventory option. Here you have the
provision to define the Warehouse. You can continue selling the product when it is out
of stock by activating the related option in the Inventory option. You are also able to
show the available quantity under this same option. Here you can specify the number of
units. So that the number of units below this unit will show up as a custom message.
The Wishlists option can be activated to let the shoppers add products
in a wishlist to return to the list in the future to buy the desired products. The
Product Comparison Toolis a good tool that allows your shoppers to
compare the products based on their attributes. And the final option available under the
Products section of the Odoo Website Settings window is the Base Unit
Price.If you captivate this option, you will be able to add price per base
unit of measure on your products.
Pricing
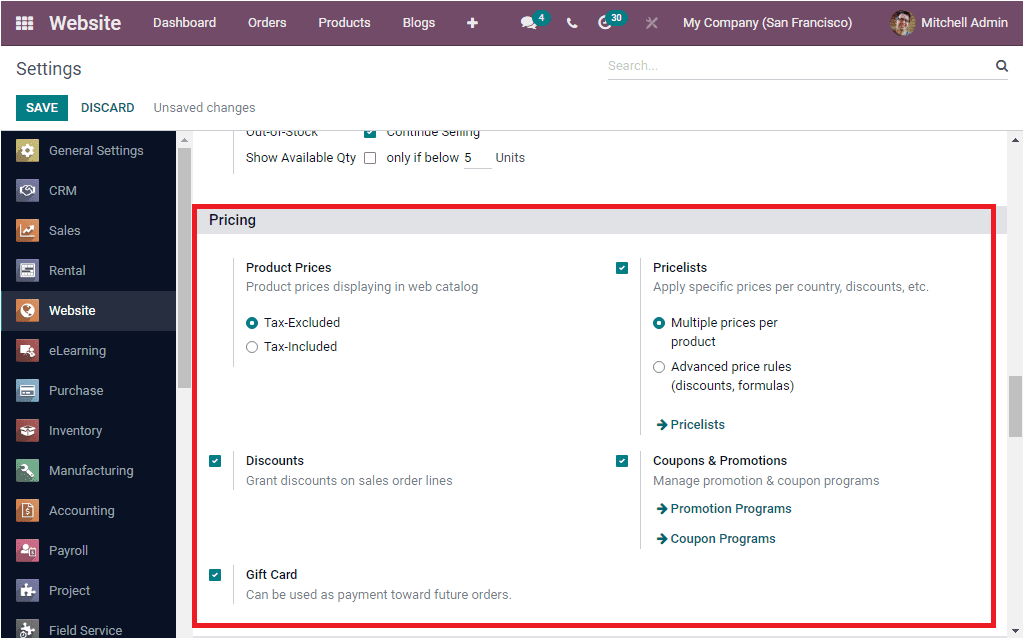
Under the Pricing section of the Odoo Website Settings window, Odoo includes the
following options such as Product Prices, Pricelists, Discounts, Coupons Promotions, and
Gift Card. Odoo provides you the provision to define Product Prices
displayed in the web catalog in two ways. It can be done either Tax-Excluded or
Tax-Included by selecting the respective one. Moreover, the Pricelists
option can be activated for applying specific prices per country, discounts, and many
more aspects. This can be applied in two ways. Either Multiple prices per product or
Advanced Price rules (discounts, formulas). With the Multiple prices per product mode,
you can set several prices in the product configuration page(from the sales tab), and in
the second case, you can set prices and computation rules from Pricelists.
Another option available under the same section is the Discountsoption.
You can activate this option to grant discounts on the sale order line. Furthermore, you
can activate the Coupons & Promotionsoption. This is an effective tool
to boost your sales with two unique kinds of discount programs with promotions and
coupon codes. The system allows you to set specific conditions for the program such as
products, customers, minimum purchase amount, period). The reward can be given either
discounts or free products. Moreover the discounts can be a particular percentage or a
particular amount. It is also possible to view a Gift Card option. This
new option in the Odoo 15 edition can be used as payment towards future orders.
Shipping
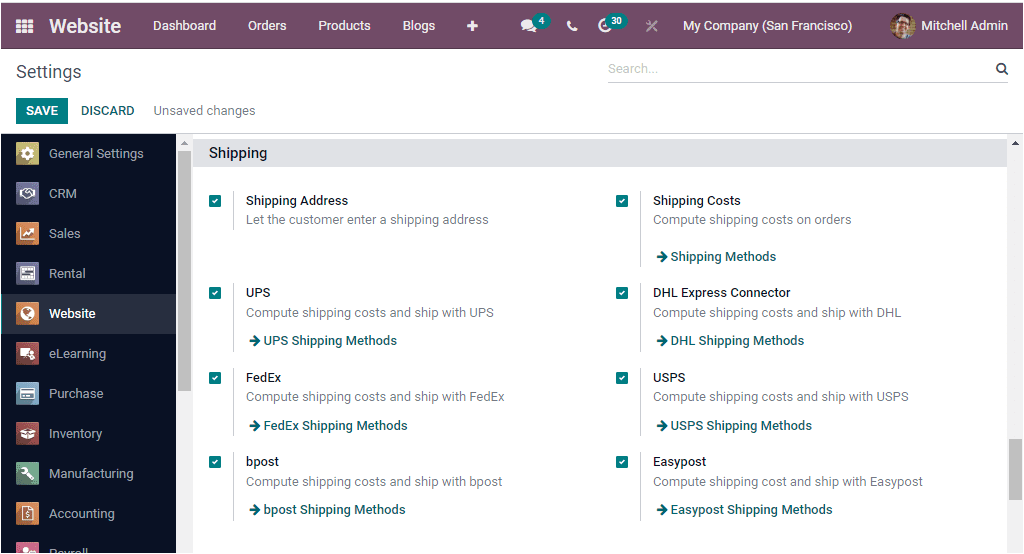
In the Shipping tab of the Odoo Website Settings window, Odoo enlisted
various powerful options to support the shipping operations of the platform. The options
included in this section are Shipping Address, UPS, FedEx, bpost, Shipping Costs, DHL
Express Connector, USPA, and EasyPost. The Shipping Address option lets
the customer enter a shipping address. You can also enable the Shipping
Costsoption to calculate the shipping costs on orders. In addition, you can
activate various shipping providers such as UPS, FedEx, bpost, DHL Express connector,
USPA, EasyPost for computing shipping charges and ship with this provider.
Invoicing
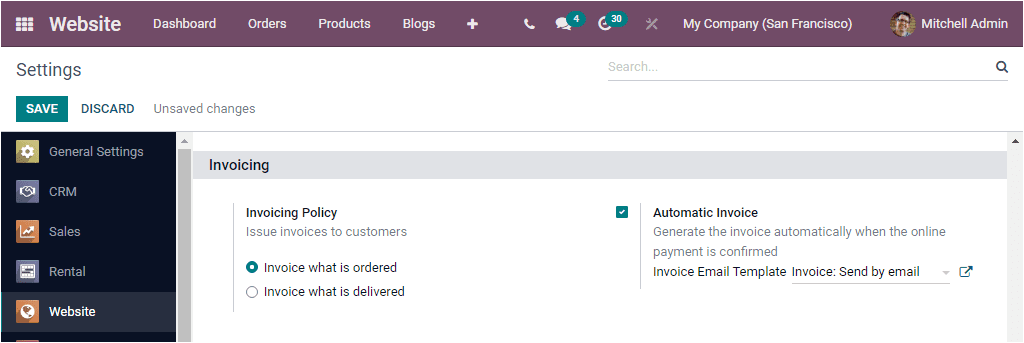
The Invoicing tab available under the Website Settings window allows you to set the
Invoicing policy on your products. Odoo will enable you to define Invoicing Policy in
two ways: Invoice what is ordered and Invoice what is delivered. You can use either of
these options for issuing invoices to customers. Odoo will help you generate invoices on
all ordered quantities if you select the invoice what is ordered option.
Moreover, you can activate the Automatic Invoiceoption to generate an
invoice automatically when the online payment is confirmed.
Orders Followup
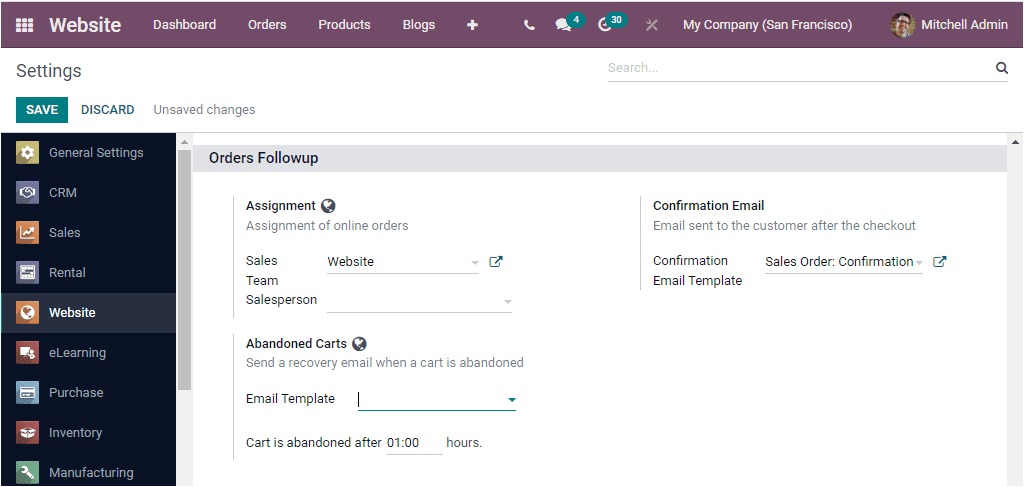
The Orders Followup tab available in the Odoo Website Settings section allows you to take
care of assignment of online orders. You can mention the respective Sales Team and Sales
Person using the dropdown menu available under the Assignment option.
The Abandoned Carts option allows you to send a recovery email when a
cart is abandoned. So you can specify the Email Template and define the number of hours
after which the cart will be considered abandoned. Additionally, the
Confirmation Emailoption allows you to send an email to the customer
after the checkout. Here also, you can define a Confirmation Email Template so that the
email will be sent to the customer once the order is paid.
Communication
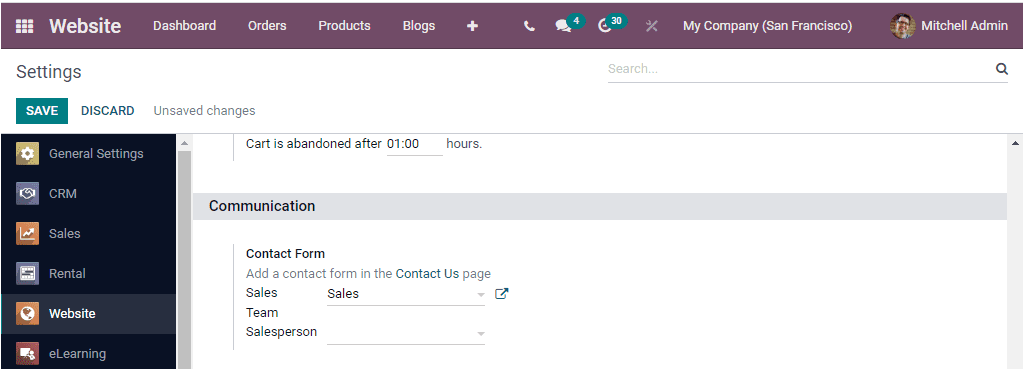
In the Communication section, Odoo offers Contact Form, and you can add
a Contact Form on the Contact Us page. The default Sales Team and Salesperson for
managing new leads created through the Contact Us page can be defined under this option.
Web Push Notifications
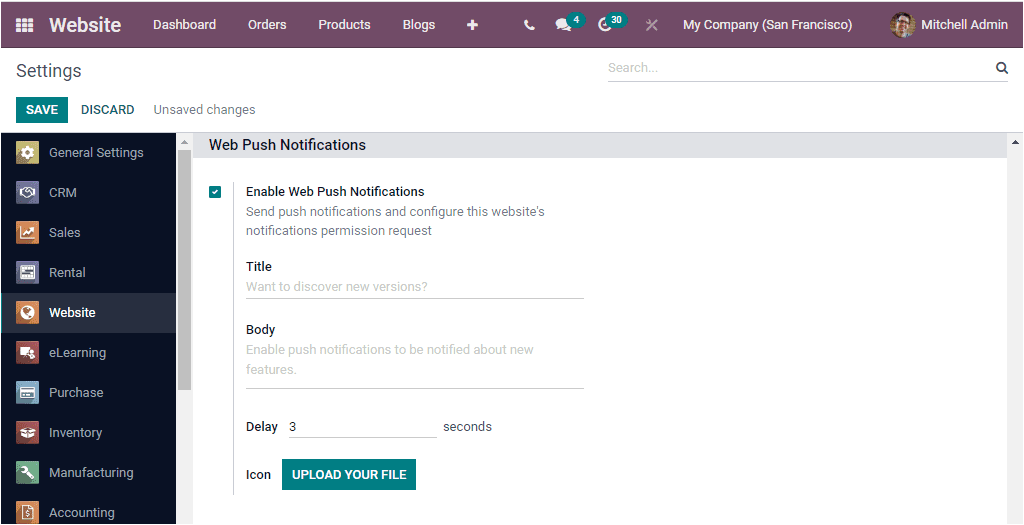
You can activate the Enable Web Push Notifications to send push
notifications and configure this website’s notifications permission request.
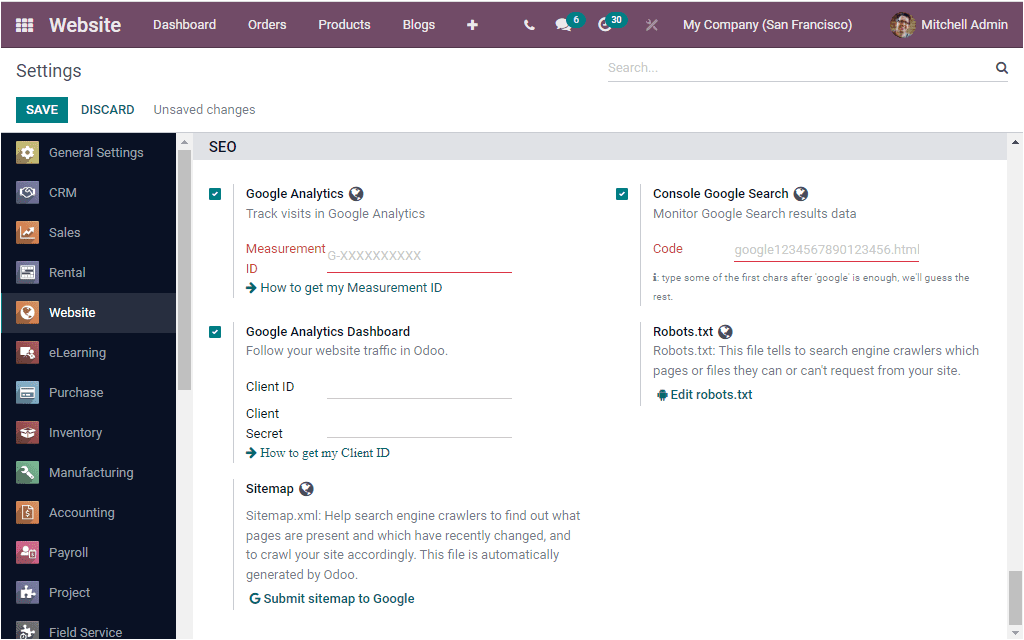
SEO
In the SEO section of Odoo Website Settings window, Odoo offers Google Analytics, Google
Analytics Dashboard, Console Google Search, Sitemap, and Robots.txt tools. The
Google Analyticsoption can be activated for track visits in Google
Analytics. You should need credits to activate these options. If you have credentials,
you can also activate the Google Analytics Dashboard option, and this
option will be helpful for tracking your website traffic in Odoo. To do this, you should
provide the Client ID and Client Secret.
The Sitemap.xml helps search engine crawlers to find out what pages are
present and which have recently changed, and to crawl your site accordingly. Odoo
automatically generates this file. Finally, the Console Google Search
option can consider monitoring Google Search result data. Moreover, the
Robots.txtdescribes which pages or files they can or can’t request from
your site to search engine crawlers.
So far, we discussed the Settings menu of the Odoo Website module. Now let us discuss
some additional features that will depict under the Configuration tab when you activate
the developer mode.