Product Catalog Customization
The Product Catalog set out on the company website can easily be customized in the Odoo Website module. This can be done based on the needs and requirements of your company or business. For perfectly managing all the operations, Odoo introduces various advanced customization options.
You can access the multiple customization options of the website catalog from which the customize tab is available. The product catalog on your website can be viewed under the Shops page of the dashboard.
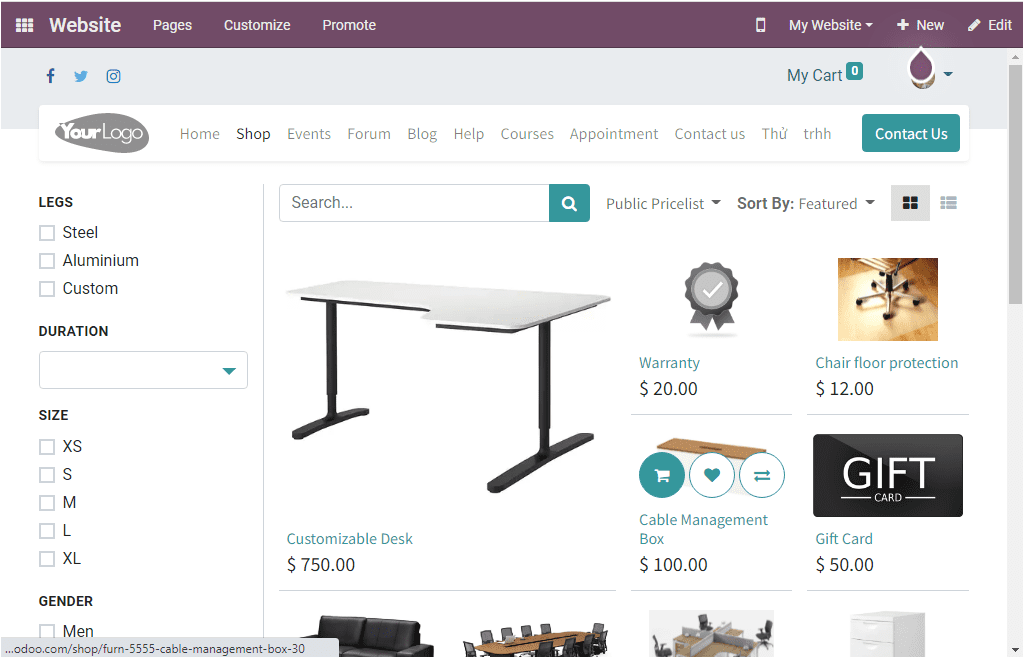
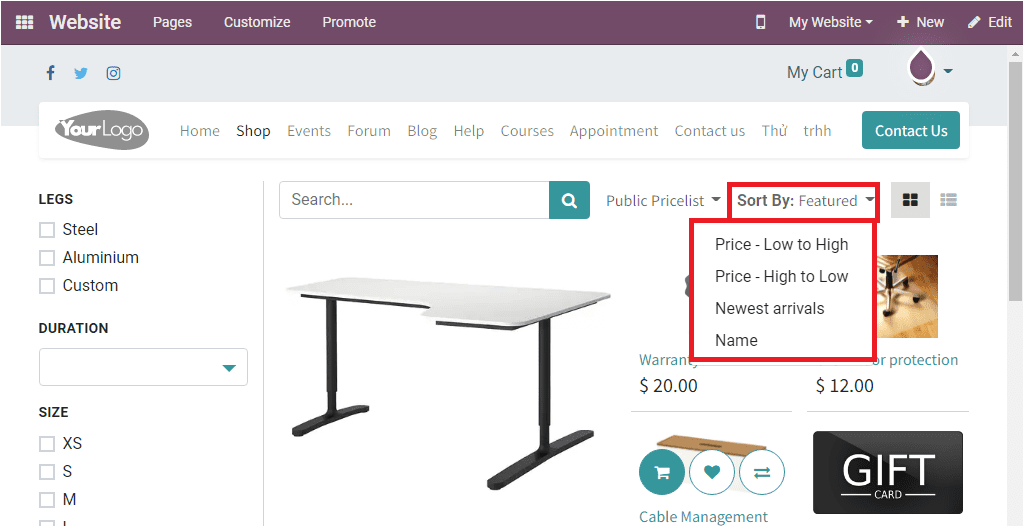
The above image of the product catalog window will display all the products available in your catalog. You have the search option that will allow you to quickly find your product from the product catalog. You are also able to sort the data as per the price( in both sense price high to low and price low to high), Newest arrival, and Name. You can access these options under the Sort By option available.
Additionally, the Shops page can be viewed in both Grid and List view. The List view of the window is shown below.
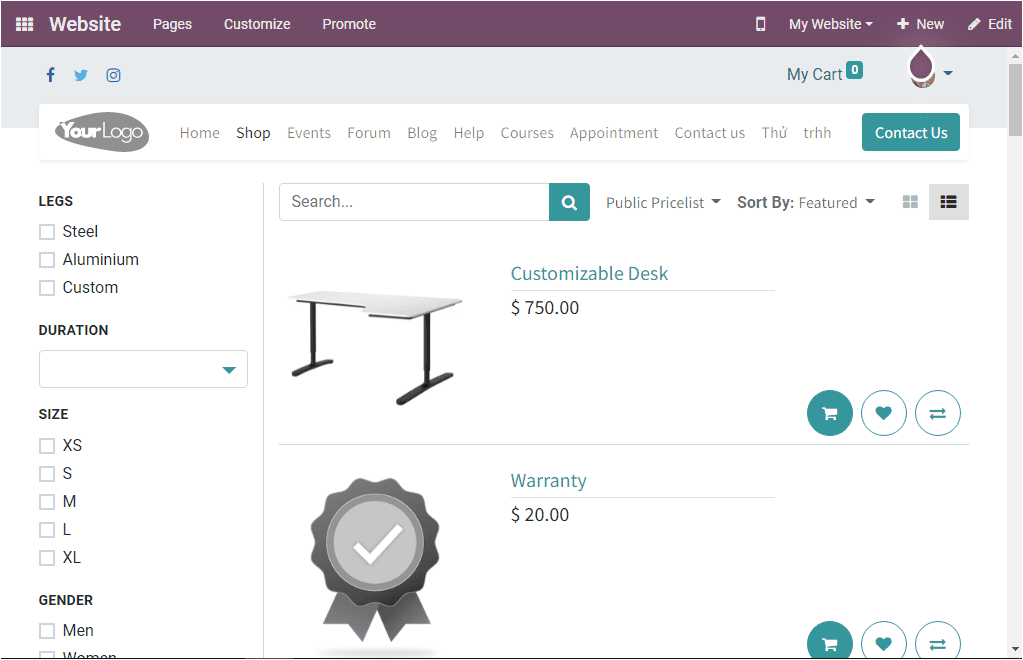
Each product in the list is furnished with its name, image, and price. The icons for conducting various actions such as Shopping Cart, Add to Wishlist, Compare is always displayed.
When you look at the left portion of the website page, you can view the various filtering options. You can filter the list based on Legs, duration, size, gender, fabric, and many more aspects. Icons displayed for accessing My Cart, Facebook, Twitter, and Instagram are also viewed on the top of the window.
Product Comparison Option
The product comparison option is available on the shops page. Under each product described, you can view a double arrow mark and it is mentioned as the product comparison
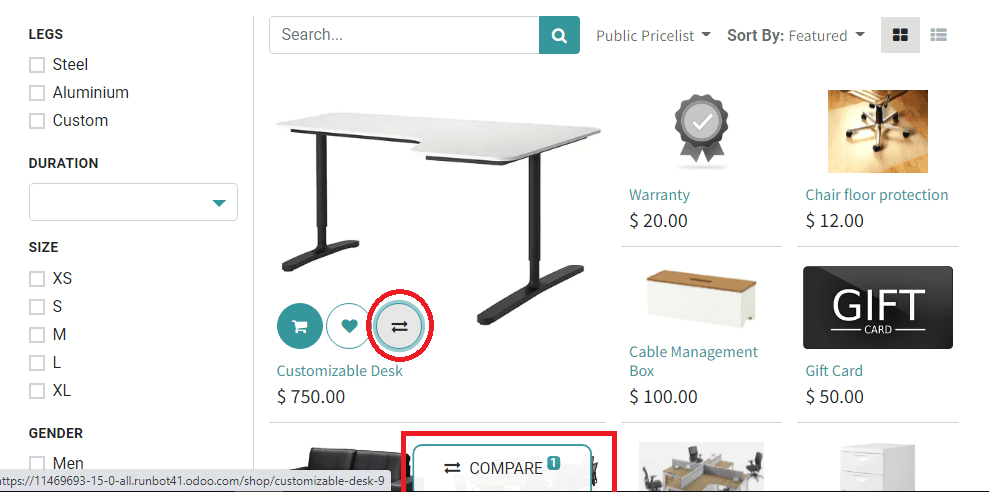
When you click on this Compare menu, your product will be added to the COMPARE PRODUCTS page. All the selected products will be displayed in a pop-up, as shown in the image below.
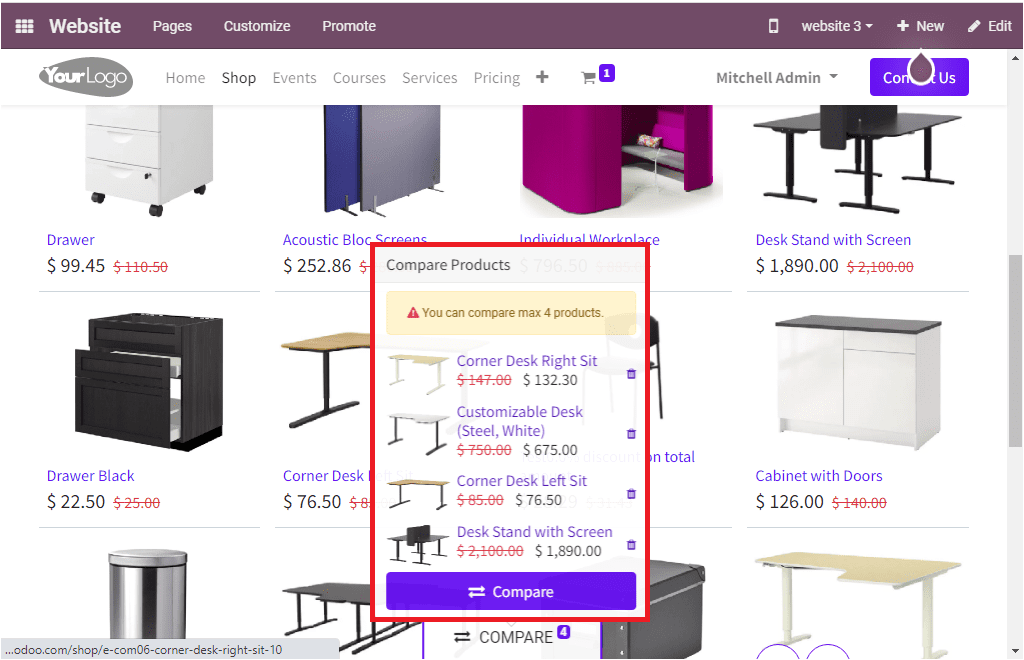
Odoo allows you to compare four products at a time. When you click on the Compare button available in the pop-up, you will be taken to another page to view all the selected products, as shown in the image below.
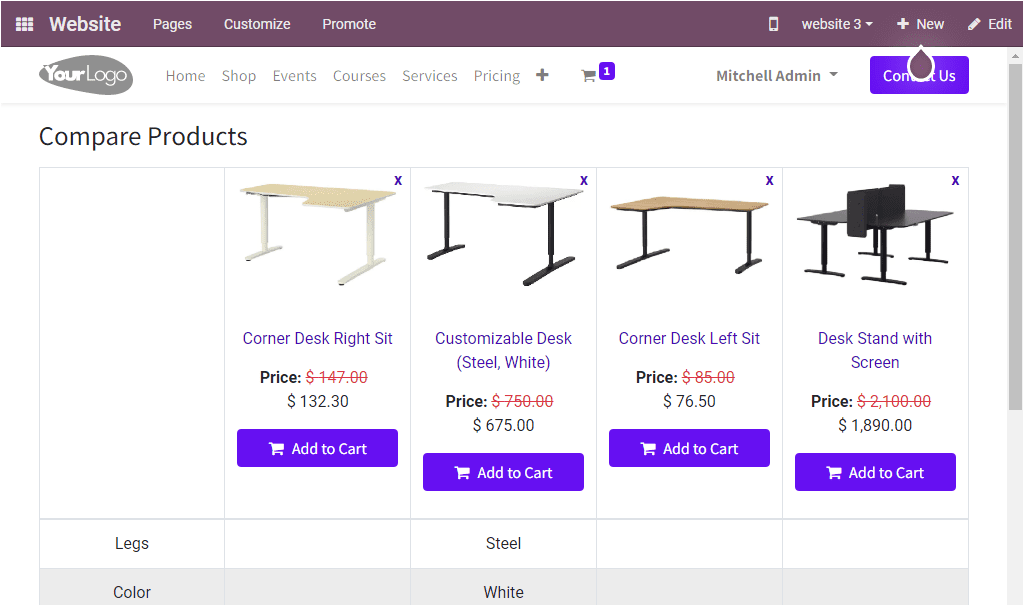
As we clear on the product comparing aspect of the Website module and now let us have a look at the Wishlist operation.
Wishlist
Apart from the Product comparing option, Odoo put forward the Wishlist option. This wishlist option is defined to provide your customer or visitors a better experience in their shopping. Moreover, it can be considered as a marketing technique by allowing the customers to add their exciting products or the product that they have a chance to buy in the future to a list without missing it. The customer can keep a personalized collection of interesting products with the intention to buy them in the future. The Wishlist option is also available under each of the products described on the Website page. This option is marked with a heart symbol, and it is the perfect way for the shoppers to keep their desired products to a separate user account other than the Cart option.
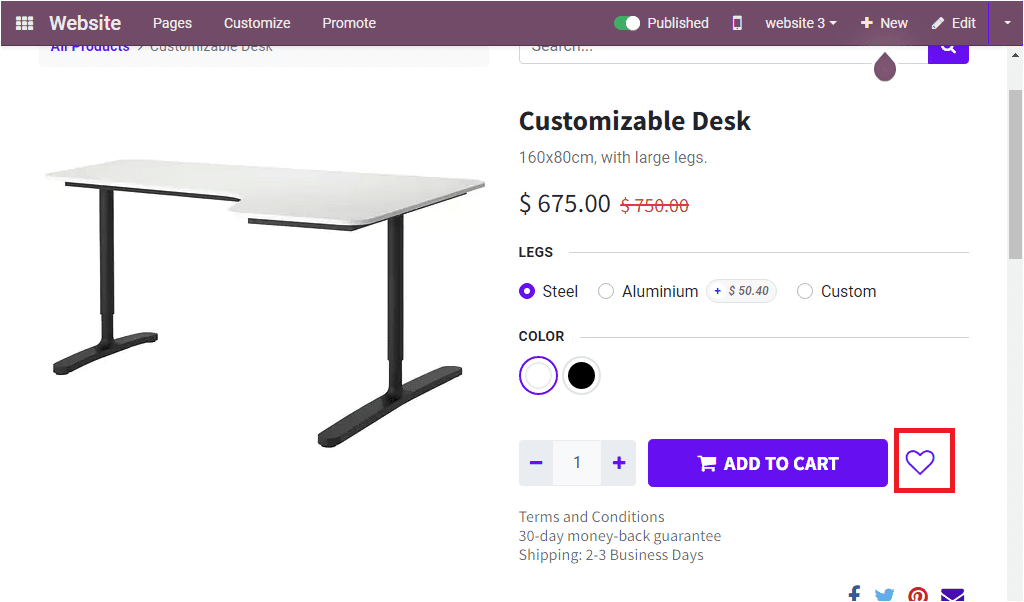
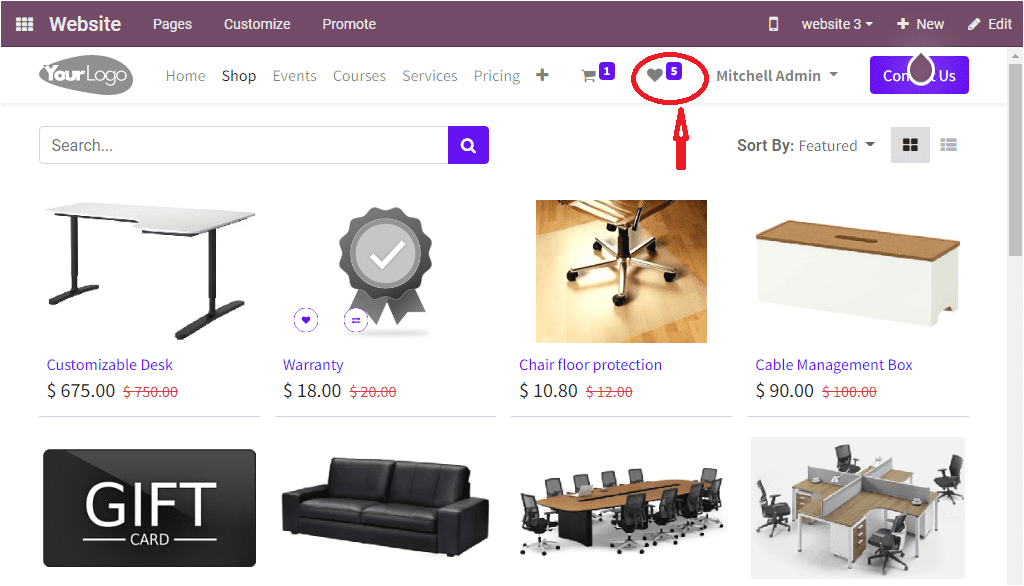
You can add so many products to the wishlist as per your wish. All the products that are added to the wishlist will be notified in the wishlist symbol available on the top of the page, as highlighted in the below image.
Now let us have a look at the Cart option.
Add to Cart
The Add to Cart option is essential. It was a beneficial tool for the shoppers to list out the required items they intended to purchase in a separate section. This temporary list will be very helpful for the consumers to buy several items at a time. You can activate the Add to Cart option from the customization menu. Once you activate this option, the option will be displayed under each item displayed on the page.
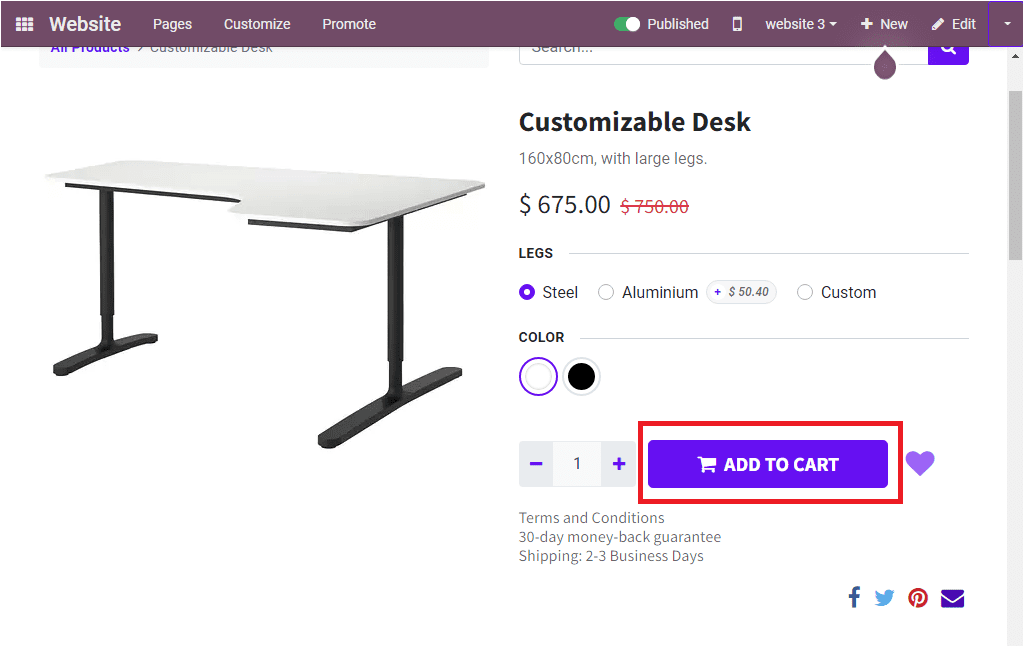
You can click on the Add To Cart button to add the product to the cart. Then you can click on the Cart symbol available on the top of the page for viewing the items in the cart.
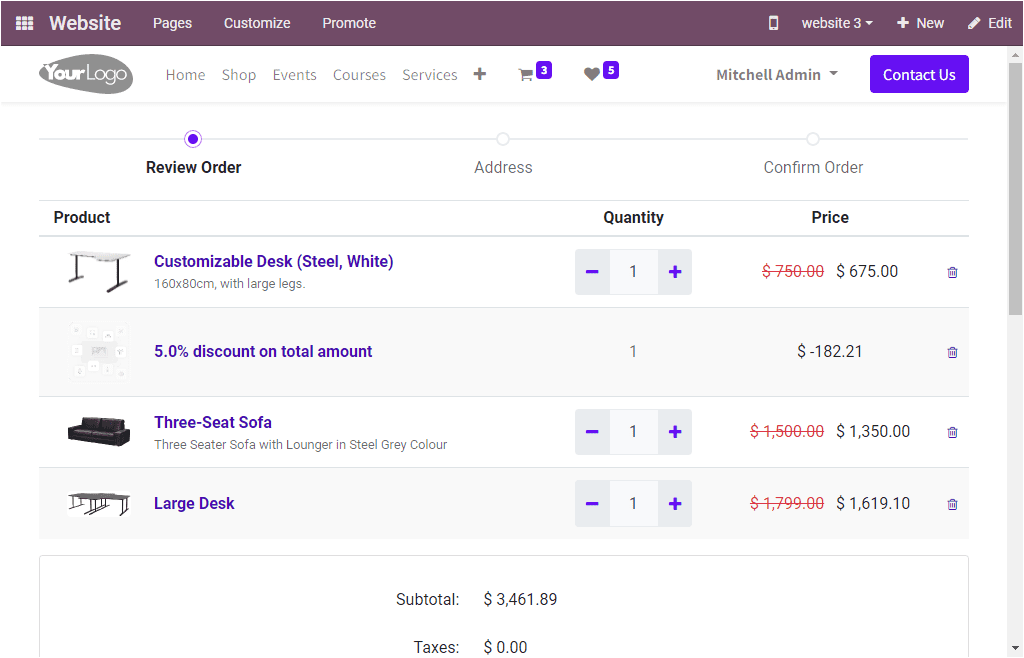
All the items we added to the cart page will be displayed on the cart page as shown in the above image. If there are any offers or discounts for product or service, its details also will be displayed in the cart. Moreover, the optional products that we set along with the product description will also be displayed if the consumer wants to buy the optional product recommended along with the main product. If you want to delete an item, click on the Delete icon. Also, the Quantity of the product can be increased or decreased by clicking on the plus or minus button given. Additionally, the window will also depict the subtotal amount, Taxes amount, and Total amount along with the promo code, if any. For viewing these details, you can scroll down the window.
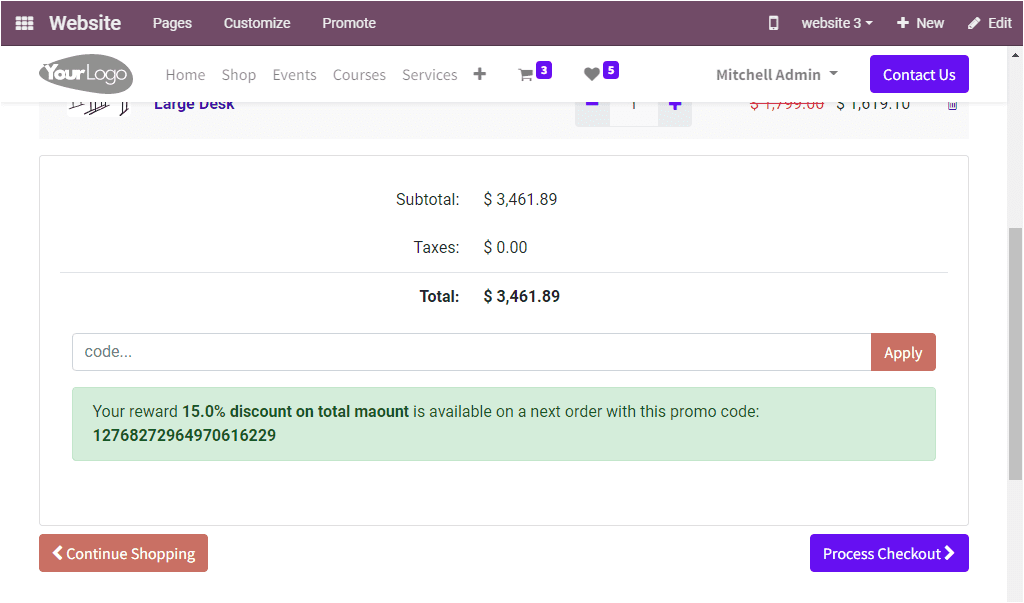
The Continue Shopping button available on the bottom left corner of the window allows you to shop for more items. On selecting this button, you can go back to the Product list page. Once you have checked and reviewed the items in the cart, you can submit your order and proceed to checkout by selecting the Process Check out option available on the top right bottom. Now your order details, billing and paying details will be displayed.
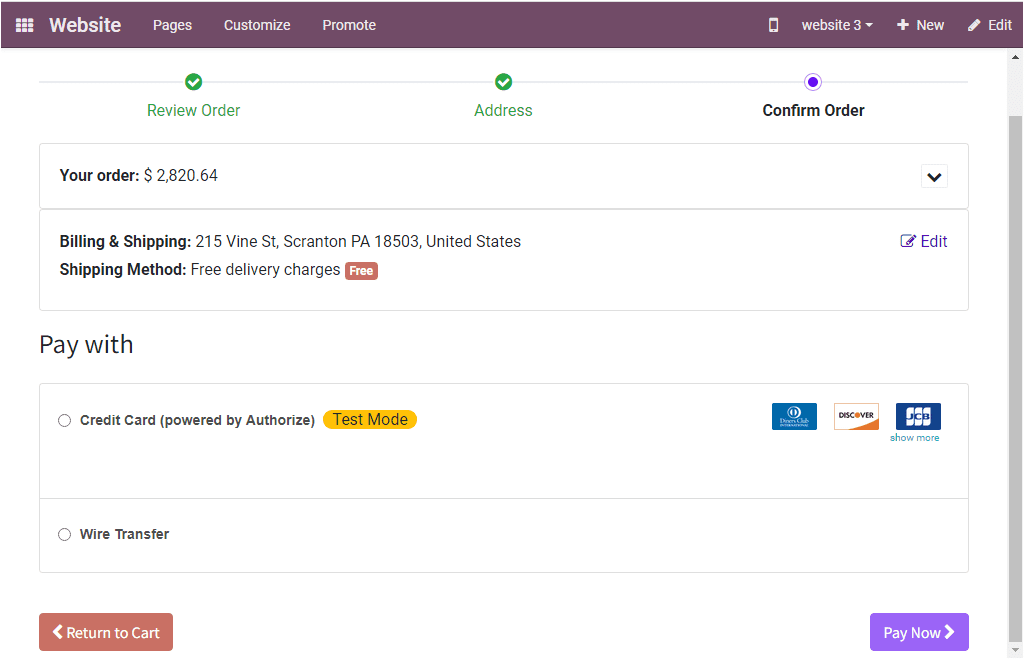
You can view the Credit Card and Wire Transfer options. If the payment is proceeding through a Credit Card, you can fill up all required details. This window includes the Pay Now and Return to Cart options at the bottom. After verifying the details, you can select the Pay Now option. Then you will be depicted with payment information in the following window if the payment is successfully made.
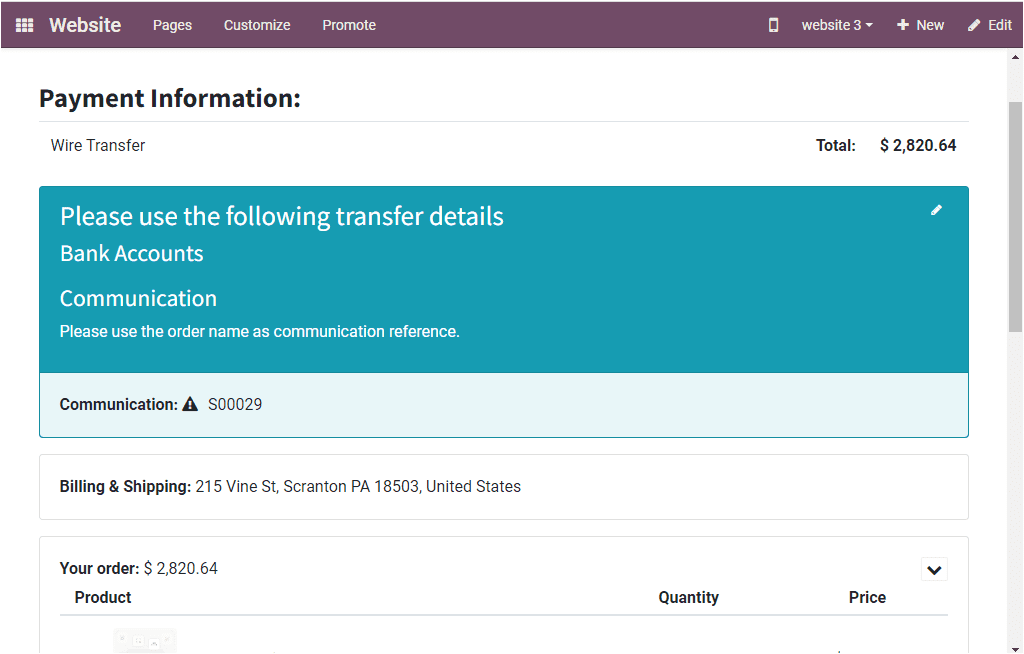
The payments can be made as per the different payment acquirers described in the back end of the platform, and the platform also supports installing additional payment gateways.
As we clear on the Add to Cart option available on the platform, let us discuss how we can create and publish specific content for your website.