Orders
Odoo Website module displays an Orders tab that includes various sub-menus such as Orders, Unpaid Orders, Abandoned Carts, and Customers. The dedicated Odoo platform designed the Orders tab for order management, and all the orders arose from the eCommerce on different operations, and the details are listed in this tab.
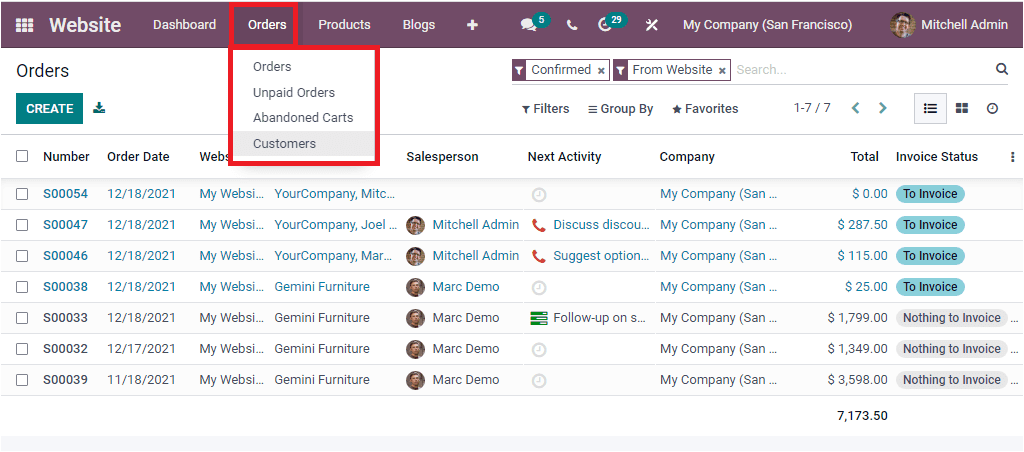
Let us discuss each of the options available under the tab in detail. The first menu available under this tab is Orders.
Orders
The Order menu found under the Orders tab of the Website module can be used to view all the orders, and also, the window gives the tracking functionalities in each order. You can click on the Orders menu to enter into the window.
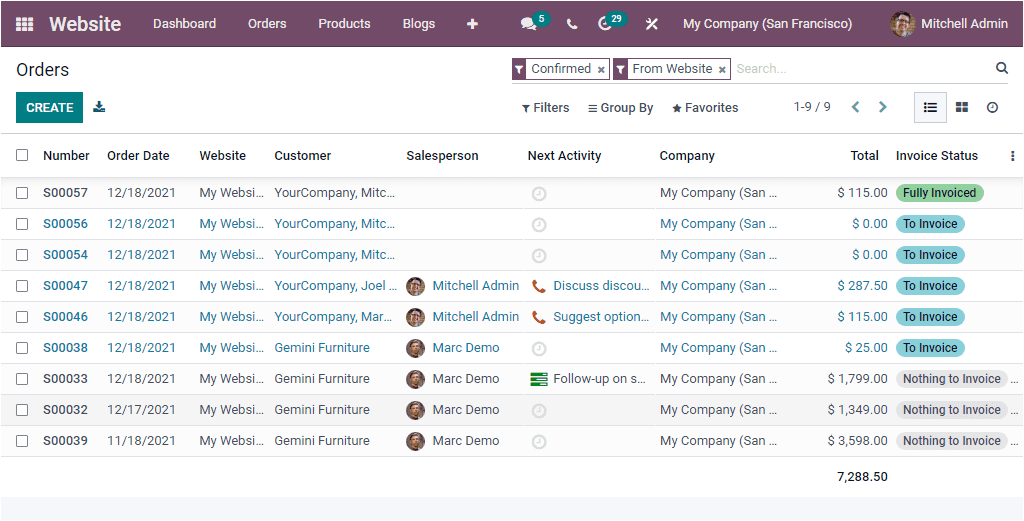
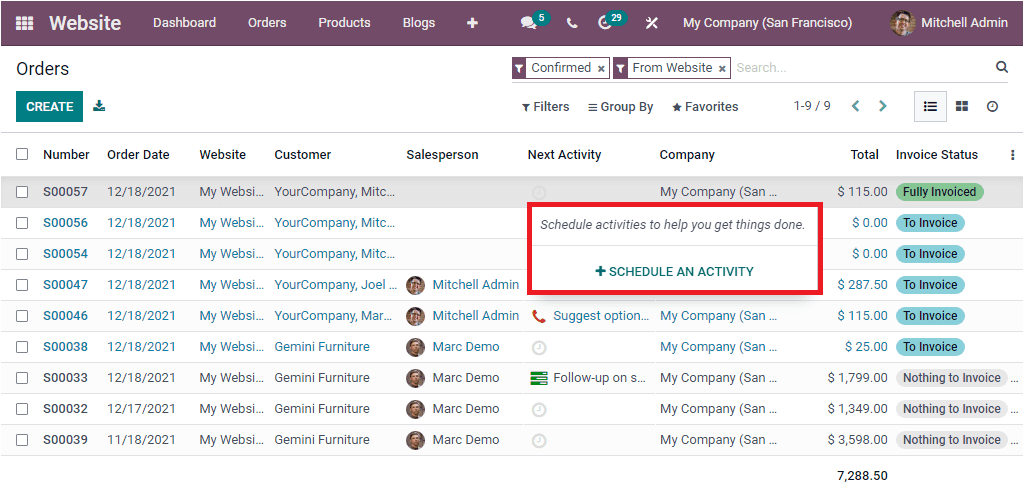
The above image depicts the Orders window. As you see, the window will list out all the orders received in the system along with their Order Number, Order Date, Website, Customer, Salesperson, Next Activity, Responsible Company, Total Amount, and Invoice Status. Each of these Order details can be selected and viewed in detail. Odoo allows you to schedule any activities directly from the window. To do this, you can click on the Next Activity icon. Then you will depict a wizard where you can click on the SCHEDULE AN ACTIVITY button.
Moreover, the system enables you to apply various default and customizable sorting functionalities to easily access the required information. The Filters, Group By, Favourite, and Search options are exclusively designed for this purpose.
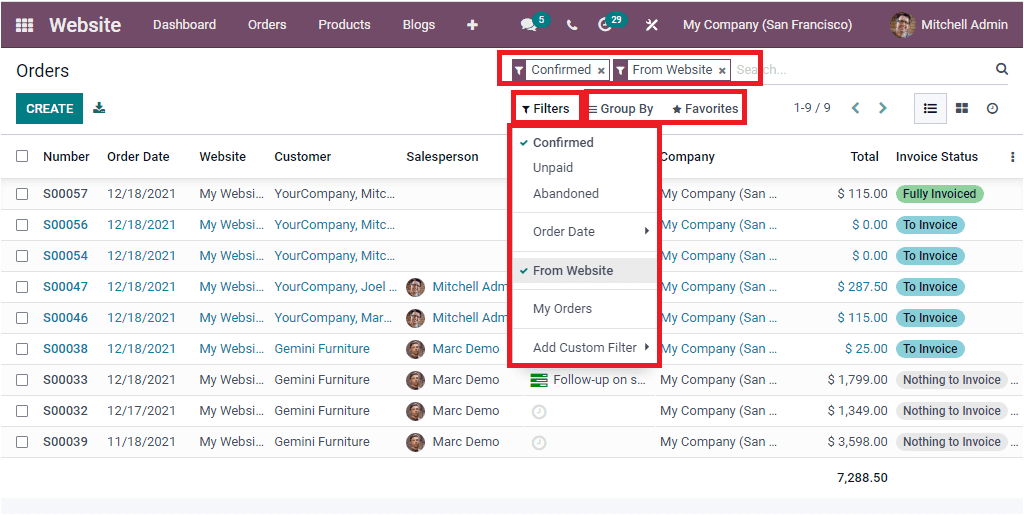
The default filters available in the window are Confirmed, Unpaid, Abandoned, Order Date(Month, Quarter, and Year), From Website, My Orders, and Add Custom Filter options. When you select the Confirmed option, the window will only depict all the Confirmed orders. Like this, you can apply your required filters.
The default categorizing options available under the Group By options are Sales person, Customer, Order Date, and Add Custom Group options. Furthermore, the system allows you to view the window in List, Kanban, and Activity views.
As we clear on the Orders tab, let us take a look at the Unpaid Orders menu.
Unpaid Orders
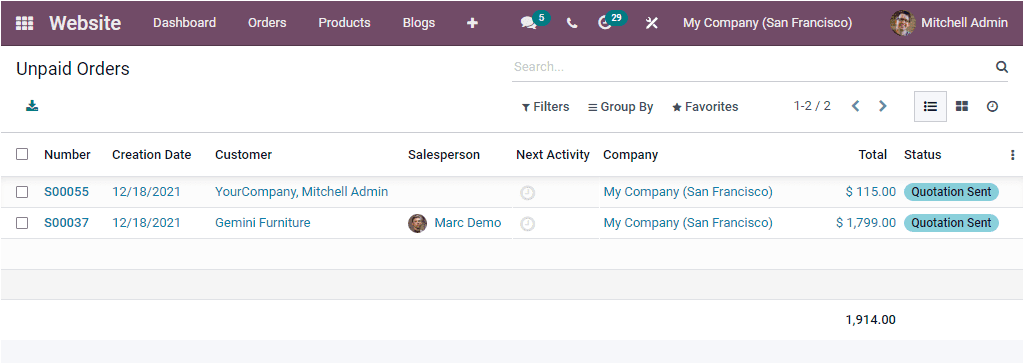
Every unpaid order detail taken from the eCommerce website will be kept and managed under the Unpaid Orders window to easily find out unpaid orders and take suitable actions without any delay. For accessing this window, you can click on the Unpaid orders menu.
Let us look into the following menu, Abandoned Carts
Abandoned Carts
The Orders tab available in the Odoo Website module even tracks and describes the Abandoned Carts order details. The window will help you to view and understand the order carts that the visitors have placed. In addition, the added products to this cart but not take further proceedings or confirmation can also be viewed. This option can be considered an excellent way to understand your customer needs, feedback, interests, drawbacks and weak points of your business and products. By viewing all these abandoned carts, you can take further actions like sending out emails for these customers to ask about their decisions and choices. Odoo helps you to send these emails automatically.
To send auto-generated emails for the abandoned carts recovery, you should set up an email template in the Odoo Website Settings. The provided email template will be suggested by default when you send a recovery email. To do this, you can go to the Settings window of the Odoo Website module. In the Settingswindow, under the Orders Followup tab, you can access the Abandoned Carts option as shown in the screenshot below.
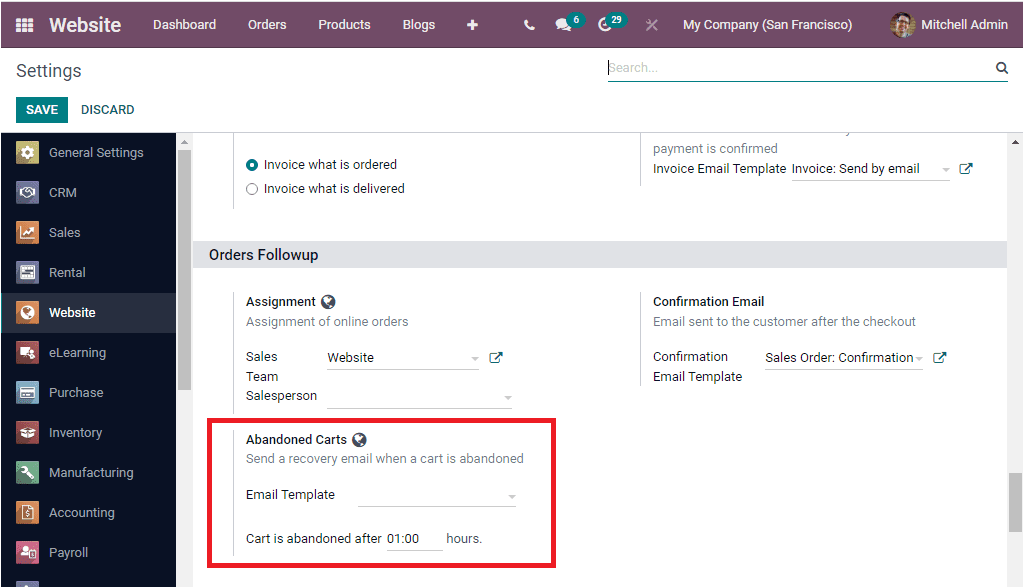
Along with the Email Template, you can also mention the time in hours, after which the cart is considered abandoned.
Now let us take a look into the Abandoned Carts window. For this, we can click on the Abandoned Carts menu available under the Orders tab.
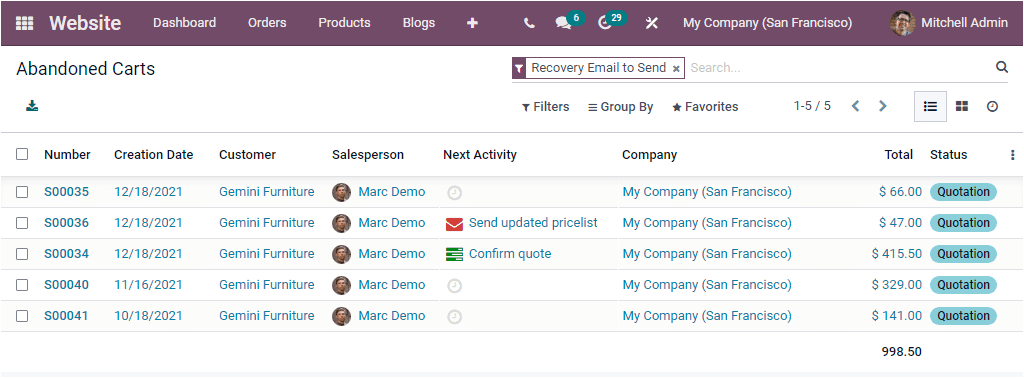
This window will display a preview of the Abandoned Carts records. Each of the records is listed out along with the details such as Number, Creation Date, Customer, Salesperson, Next Activity, Company, Total, and Status. All the records in the window can be selected and viewed in detail as shown below.
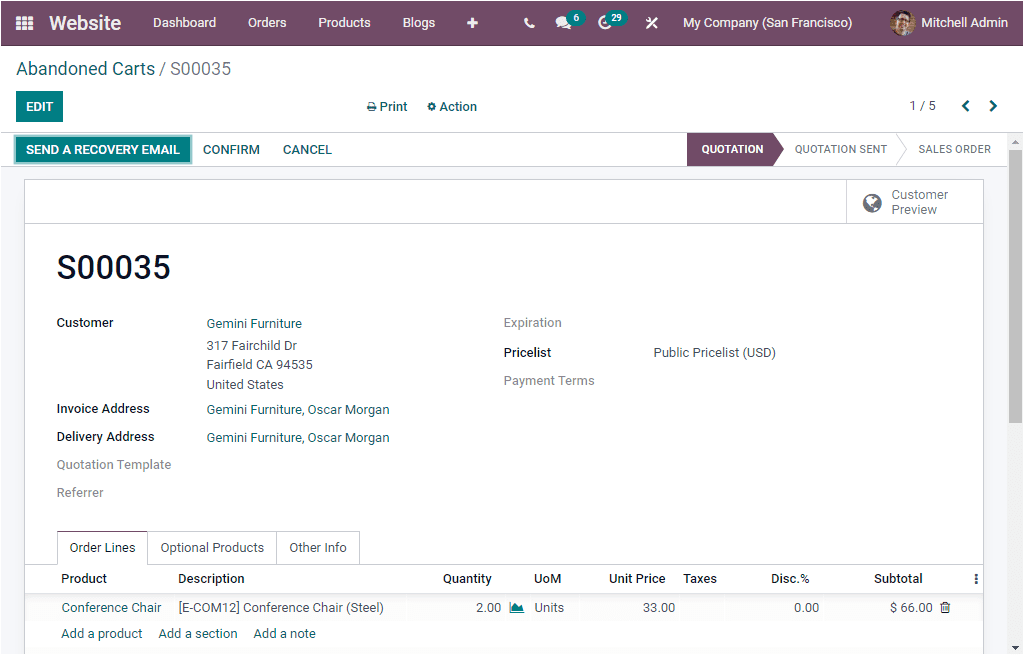
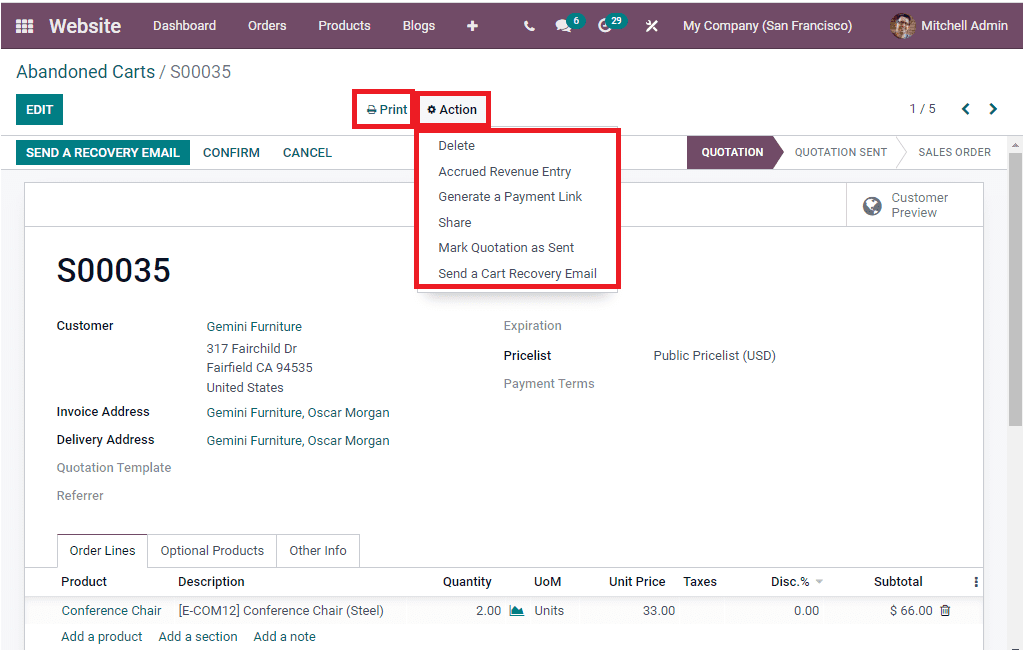
Here you will depict all the details regarding this record. You can edit the details if any, with the help of the EDIT button. The window also provides options for further actions such as SEND A RECOVERY EMAIL, CONFIRM and CANCEL. Moreover, you can view the Print and Action button on the top center of the window. The Print button includes two sub-menus: Quotation/Order and Pickup and Return Receipt.The additional actions button consists of the Delete, Accrued Revenue Entry, Generate a Payment Link, Share, Mark Quotation as Sent, and Send a Cart Recovery Email.
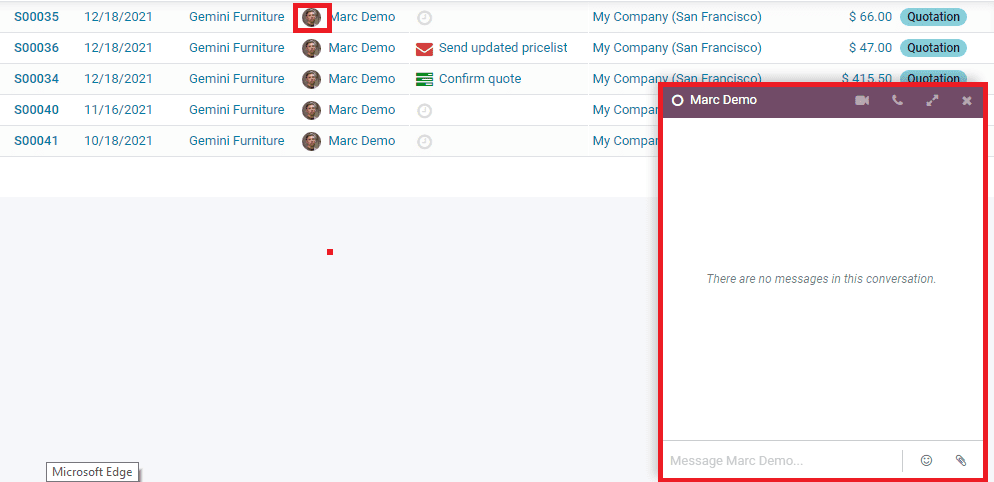
The preview window can also be viewed in Kanban, List, and Activity views. If you want to communicate with the Salesperson directly, you can click on the photograph of the Salesperson available in the window. So that it will display a chat pop-up window as shown below, and using this wizard, you can chat with the respective salesperson.
We can discuss the Customers window.
Customers
The last but not least menu available under the Orders tab of the Odoo Website module allows you to keep all the details of your customers in one place. Let us have a look at the window.
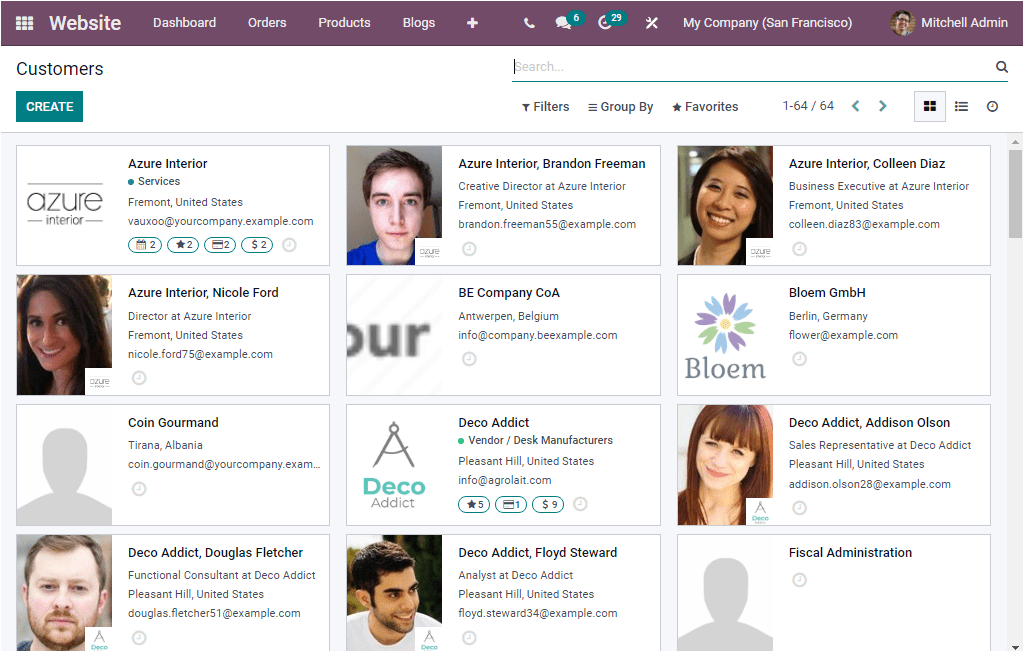
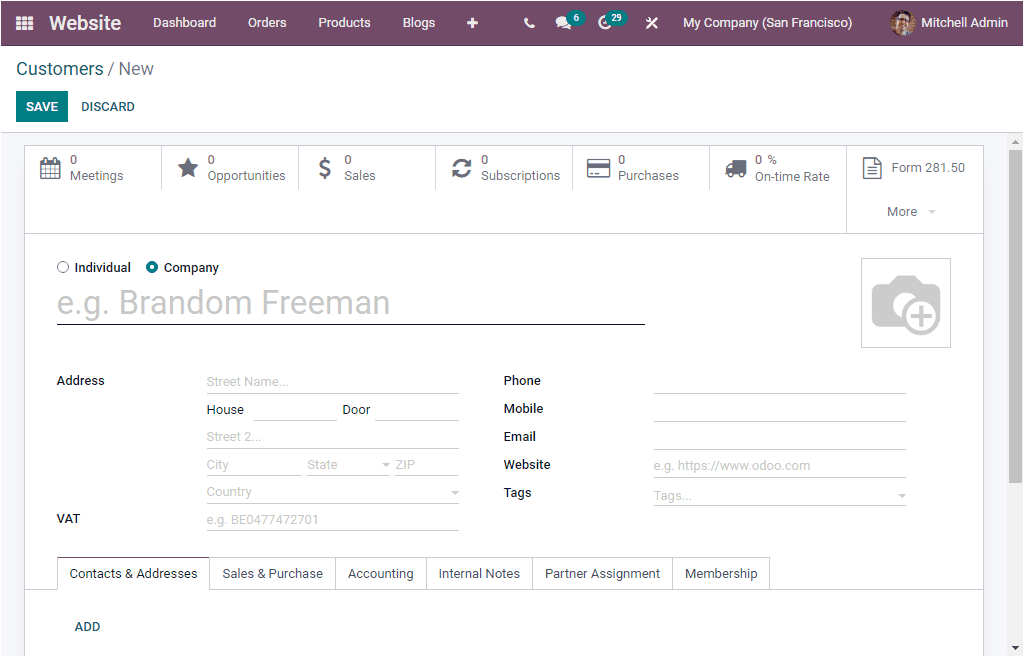
The above image depicts the Kanban view of the Customers window, and you are also able to view this window in List and Activity views. In the Kanban view, the details of each employee are displayed in a card-like structure, and it will list out the few important data along with the photograph of the customer. You can select the card for viewing the customer in detail. The window includes various default and customizable sorting functionalities such as Filters, Group By, Favourite, and Search options. Using these options, you can quickly sort out and categorize your needful data. The default filters available in the window are Individuals, Companies, Customer Invoices, Vendor Bills, Subcontractors, and Archived. You can also categorize your window using the default group by options such as Salesperson, Company, and Country. To create a new customer, you can click on the CREATE button. Then you will depict a creation form as shown in the below image.
So far, we discussed the Orders tab available in the Odoo Website module, and now let us look over how much the module takes care of the Product management operations.