Online Appointments
The Online Appointments menu available in the Odoo Website module allows you to schedule
online appointments. This feature in Odoo will be very fruitful for managing business
meetings and appointments. This feature provides the customers the privilege to book
sessions with you. Please note that you should install the Appointment module from Odoo
apps for getting the advantages of this feature. So that the highly integrative nature
of this module brings this feature into the Website and Calendar module. When you click
on the Online Appointments menu in the Website module, you will depict the Online
Appointments window as shown below.
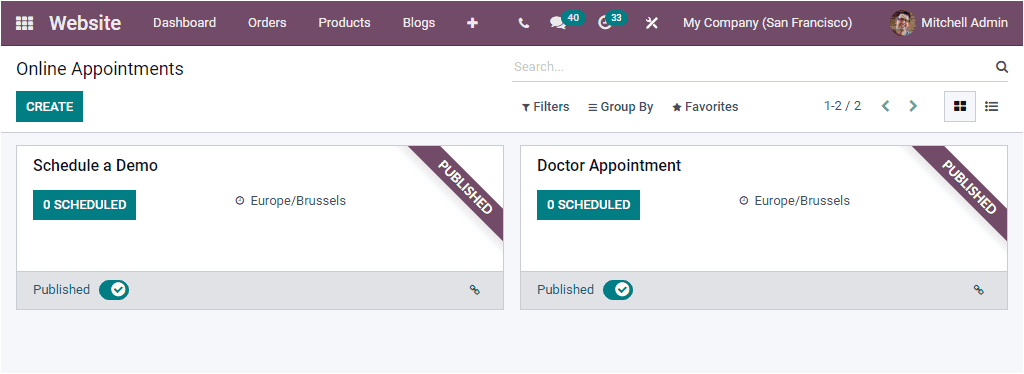
This window is designed to enlist and store all the already created online appointments.
The system displays this window in both Kanban and List view. To start new online
appointments, you can select the CREATE button. Then you will be navigated into the
online appointments creation window, as shown in the screenshot below.
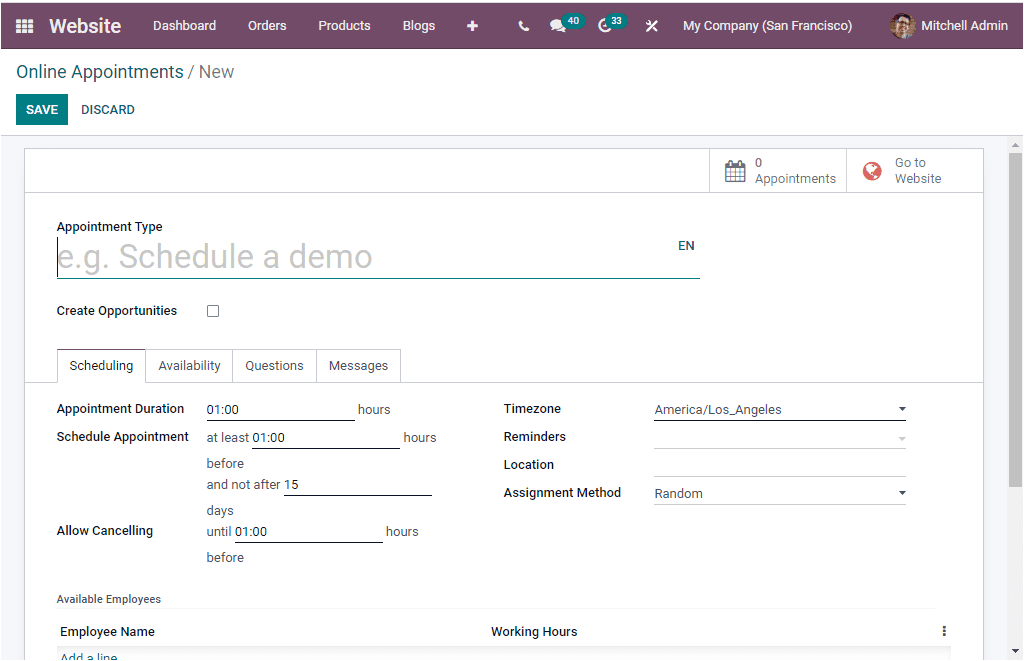
Here in this form, you can mention the appointment type in the specified field. Then you
can enable or disable the Create Opportunities option based on your business
requirements. If you enable this option, it will be helpful for creating new
opportunities and assigning them to the responsible employee for each scheduled
appointment.
Under the Scheduling tab, the Appointment Duration in hours can be specified. In the
Schedule Appointment field, you can mention the details. You can say how many hours
before you want to schedule an appointment. And also have the option for canceling
appointments. So you can provide the time in hours in the Allow Cancelling field. The
Time zone where appointments will take place can be given along with the location of the
appointment.
Moreover, the Reminders can be set in the specified field. The Assignment Method field
allows you to define how employees will be assigned to meetings customers book on your
website. This can be set either Random or Chosen by the customer. Under the Available
Employees section, you can add employees or staff details by clicking on the Add a line
option.
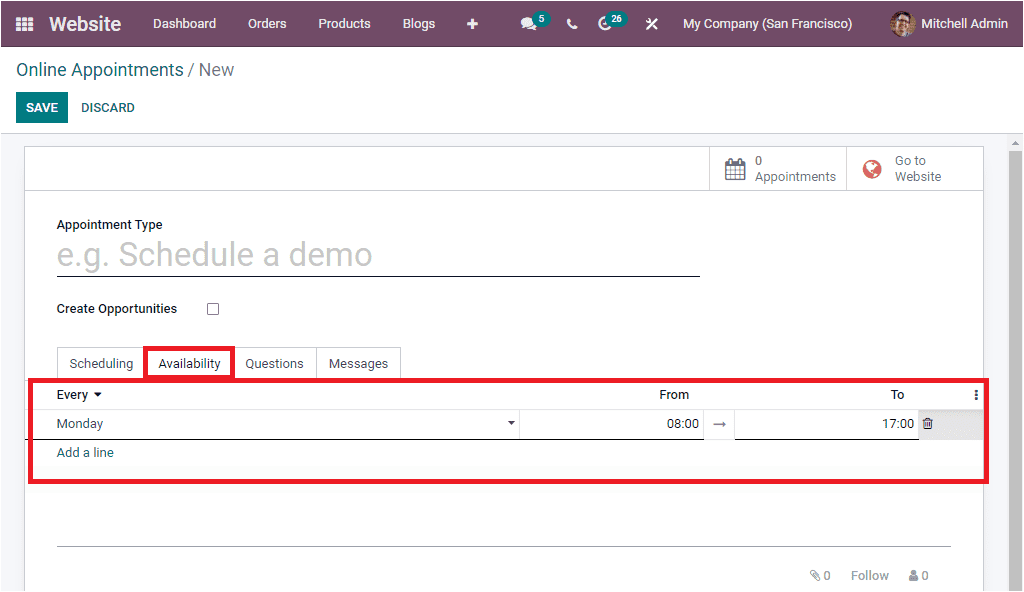
Similarly, you can fill the fields in the Availability tab. You can enter the day and
time of appointments. You can select the Day from the dropdown menu and also can mention
the starting hour in the from field and the ending time in the To field.
If you want to ask questions to the participant while creating an appointment, you can
define it under the Questions tab. To add questions, you can click on the Add a line
button. Then you will get a pop-up window for creating questions.
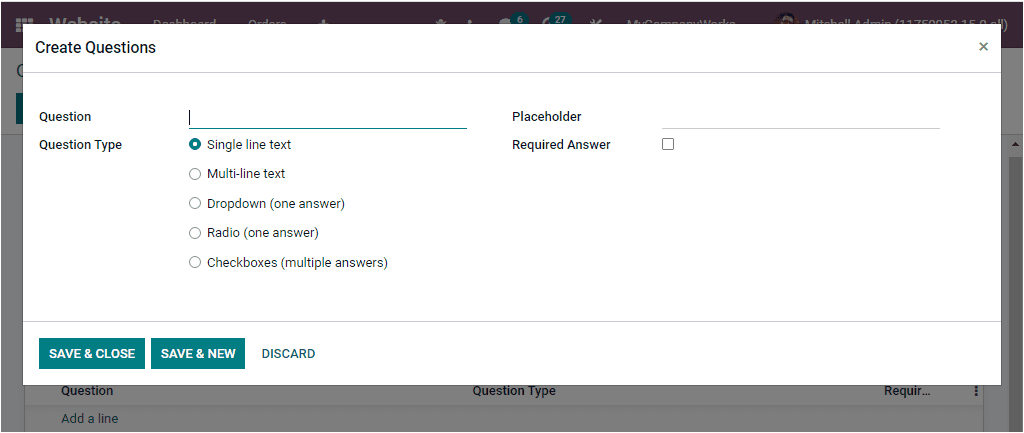
Here you can mention the Question along with the Question Type. The system allows you to
define the Question Type in different ways, such as Single-line text, Multiline text,
Dropdown(one answer), Radio(one answer), and Checkboxes(multiple answers). Finally, in
the Messages tab, you can describe the Appointment Introduction and the Appointment
Confirmation in the given space. Once you complete all these steps, you can save the
details. When you look at the top right corner of the window, you will depict the smart
buttons according to the Odoo modules you installed in your system. Here you can view
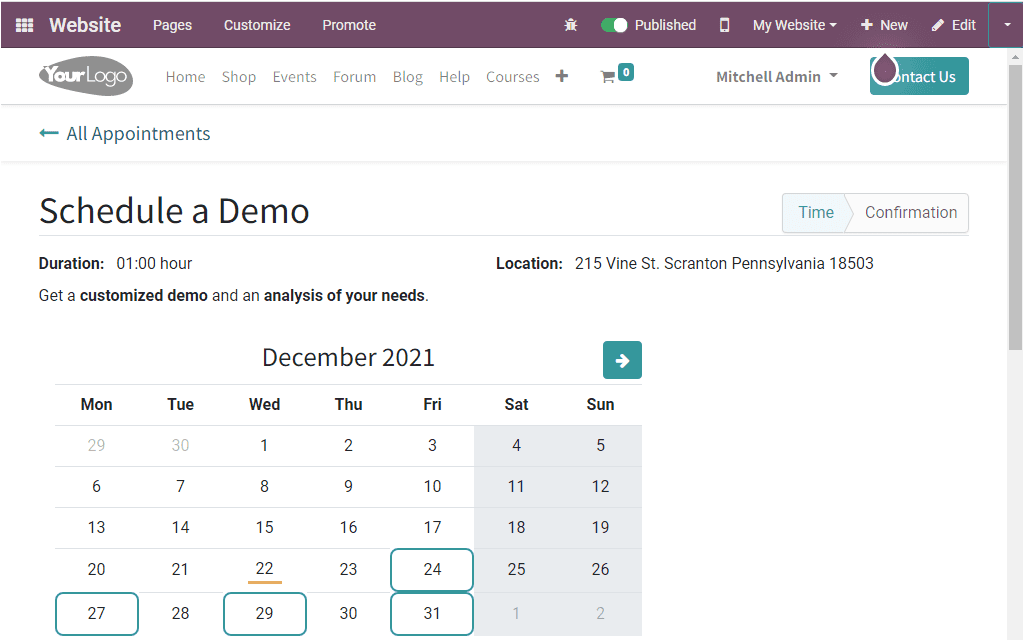
the Appointments and Go to Website buttons. When you click on the Go to Website button,
you will navigate the website page as shown in the image below.
So far, we have been discussing the Online Appointment feature and the Odoo platform
offers its users the Online Appointment as a separate module. We can discuss this module
separately in detail later.