Blog operations in the back end
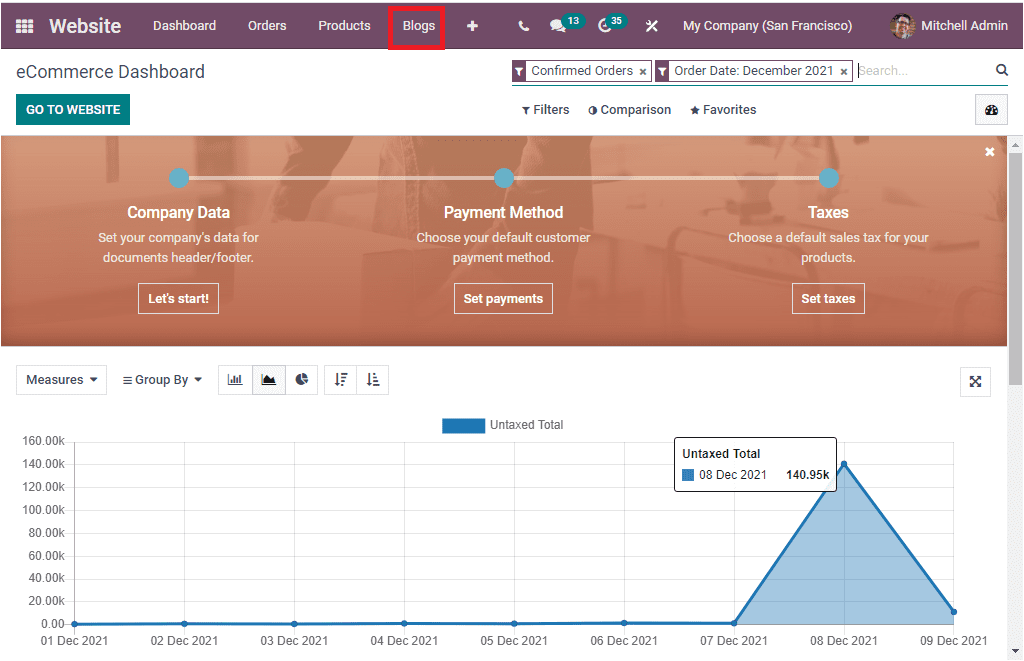
The Odoo ERP is a robust platform to manage every business operation. It also enables an exclusive platform to handle blog posting pages on the website module. You can instantly create a blog posting page using this platform. It will take only a few simple clicks. For conducting the blog posting operations at the back end, you should go back to the eCommerce Dashboard. In the eCommerce Dashboard window, you will definitely get access to the Blogs menu. You can access this menu from the main menu bar of the window, as shown in the image below.
You can click on the Blogs tab to open the Blog Posts window. The Blog Posts window will display every blog post described in the platform. You will get all the essential information such as Title, Author, Blog, Website, Number of Views, Last Contributor, Last updated date, and time. The List view of the window is depicted below.
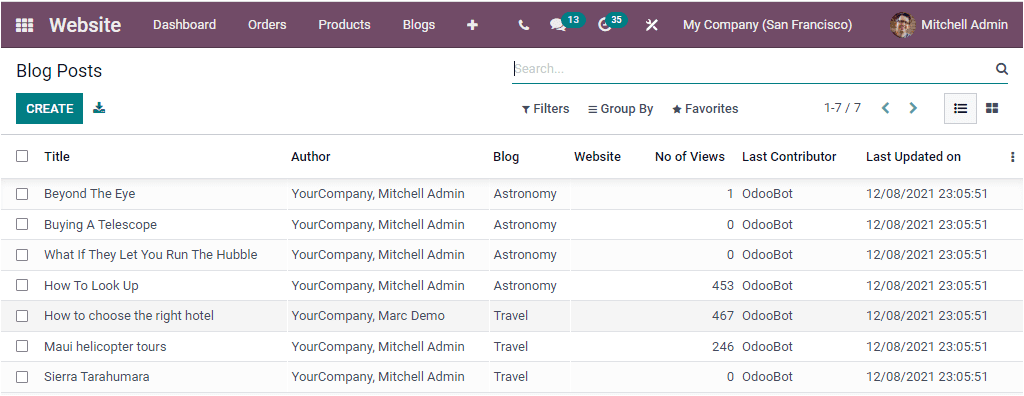
Odoo also allows you to view the details in Kanban format. You can click on the Kanban menu available on the window's top right corner to access it. Additionally, the window is also furnished with the default and customizable Filters, Group By, Favourite, and Search options that will be a great assistance to you to soothe the searching, filtering, and categorizing process of the listed blog posts.
For creating new blog posts, you can select the CREATE button available on the top left corner of the window. Now you will depict a blog post creation window. Using this window, you can create and customize new blog posts.
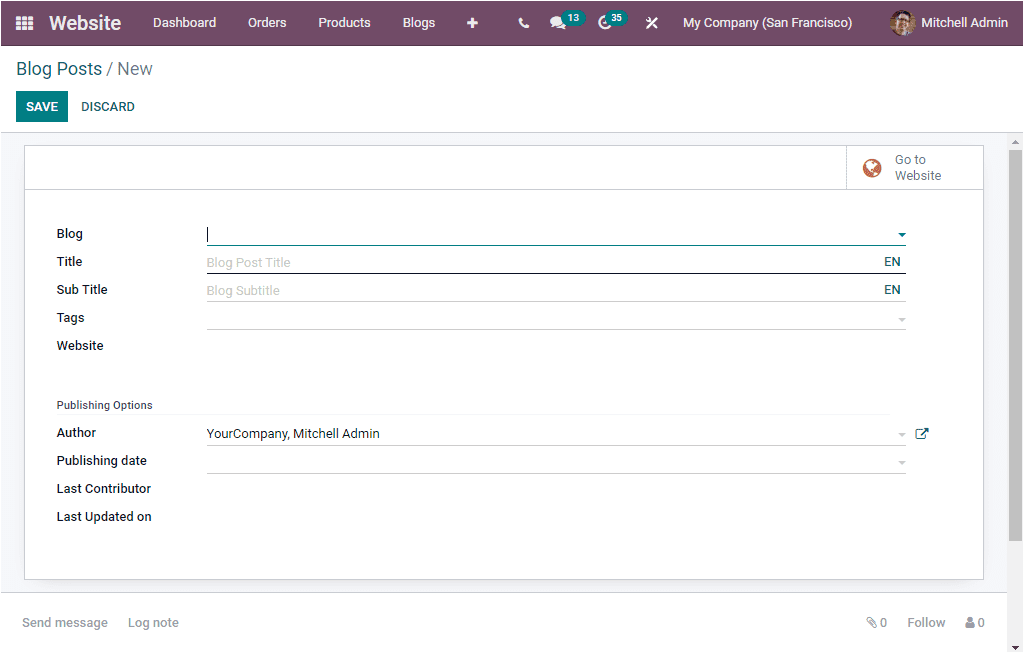
In this form, you can fill up all the required details. First of all, you can mention the purpose of the blog in the Blog option. You can define it using the dropdown menu available. Then you can provide the Blog Post Title, SubTitle, Tags related to this blog post, and the Website if you are operating with multiple website options.
In the Publishing Options section, you can mention the Author Name and the Publishing date. In addition, you can allocate the Last Contributor and the Last Updated On if the platform has already published one blog post which is still undergoing editing.
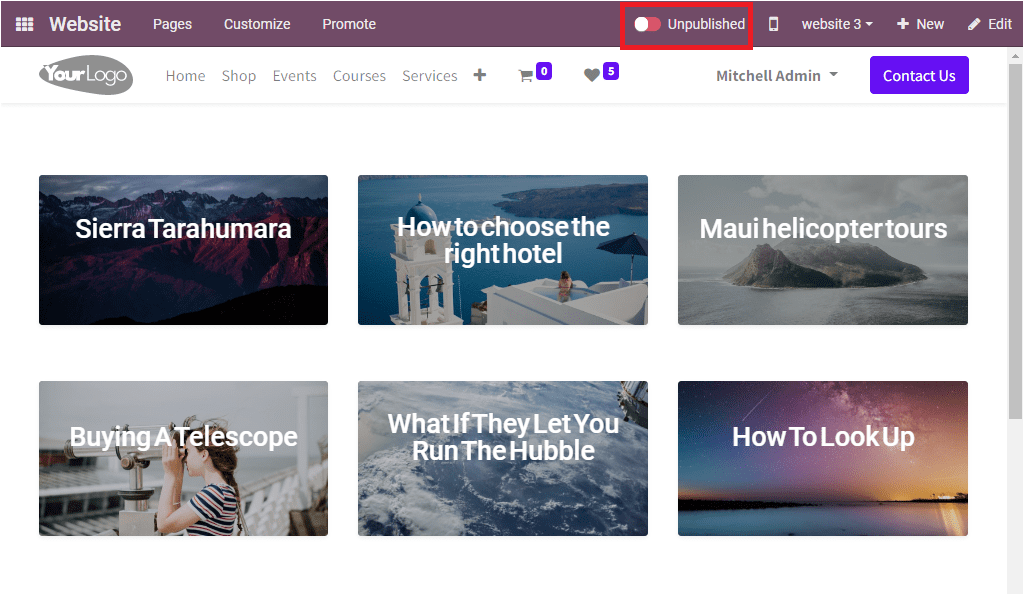
Once you complete all these steps, you can click on the SAVE button to save the given details. The window also displays you a link to the Website page in the form of a smart button. You can see the Go to Website smart button on the top right corner of the window. This button allows you to navigate into the website where you can create the blog using the various editing options given in the page. After designing the page, you can change the unpublished dongle available on the top of the window into Published. Now the newly created blog will be published on your website.
As we are clear on the configuration steps of the Blogs in the back end, When you look at the Configuration tab of the Website module, you can view the Blogs, Tags, and Tags Categories menus in the Blogs section. These options allow you to configure various blogs, tags, and tags categories suitable for the blog posts that you are creating in the website module. All these configured Blogs, Tags, and Tags Categories will be displayed in the dropdown menu, and you can easily apply them for your new blog posts.
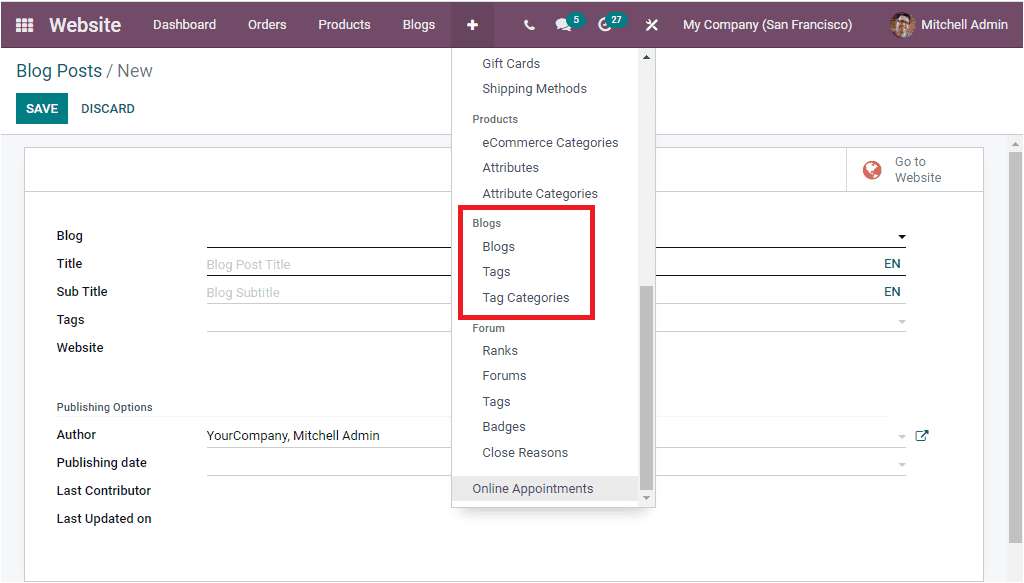
Let us discuss each of them below.
Blogs
The Blogs menu available under the Configuration tab of the Odoo Website module will allow you to create various blog categories. It will be very useful for categorizing blogs based on their topics so that it will be very convenient to access. Once you click on this menu, you will depict a Blogs window as shown in the image below.
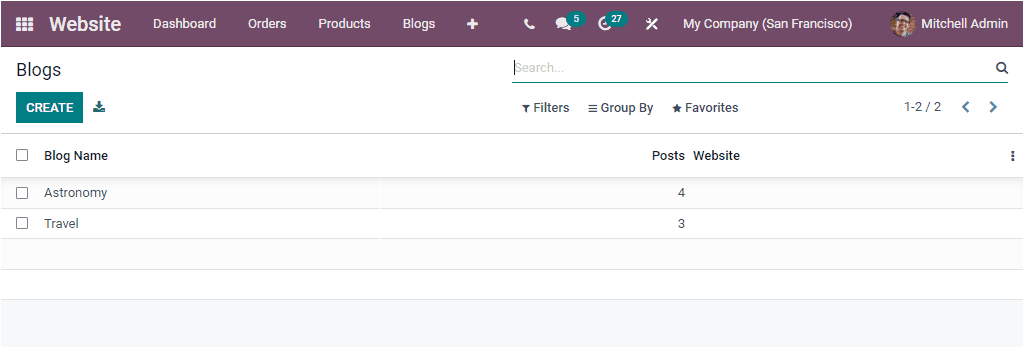
This preview of the Blogs window will list out all the configured Blogs along with the Blog Name, Number of Posts on each blog type, and the responsible Website details. To configure new blogs, you can click on the CREATE button. Now you will depict a creation form as shown in the below image.
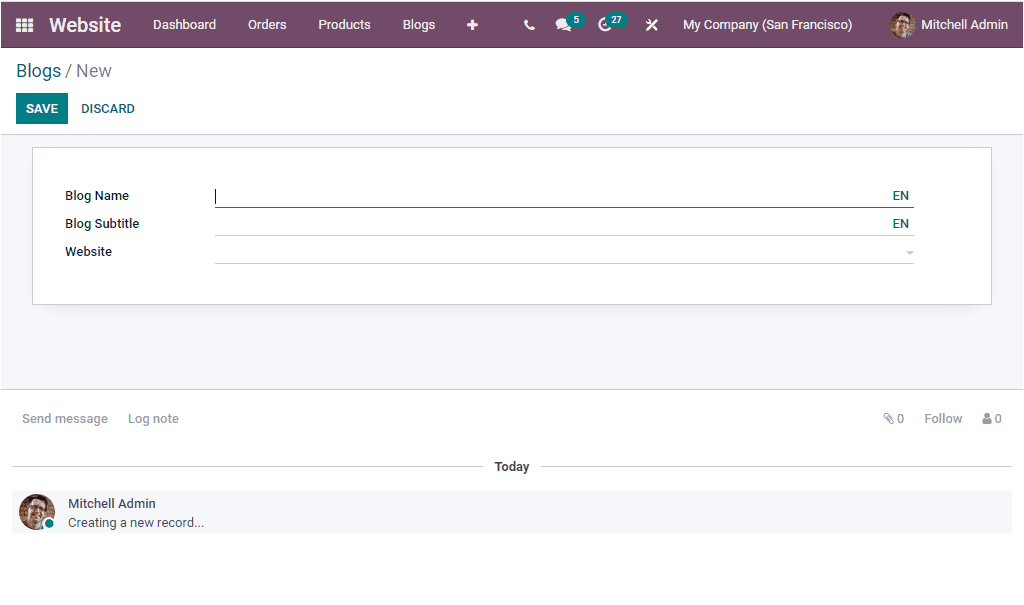
If the system uses multiple website options, you can include the Blog Name,Blog Subtitle, and the Website name in the creation form. After providing these details, you can click on the SAVE button to save the details. If you name it as a Technical blog, we can check whether it is displayed in the Blog posts window or not.
For viewing it, let us open the Blog Posts window. We can click on the dropdown menu available in the blog field.
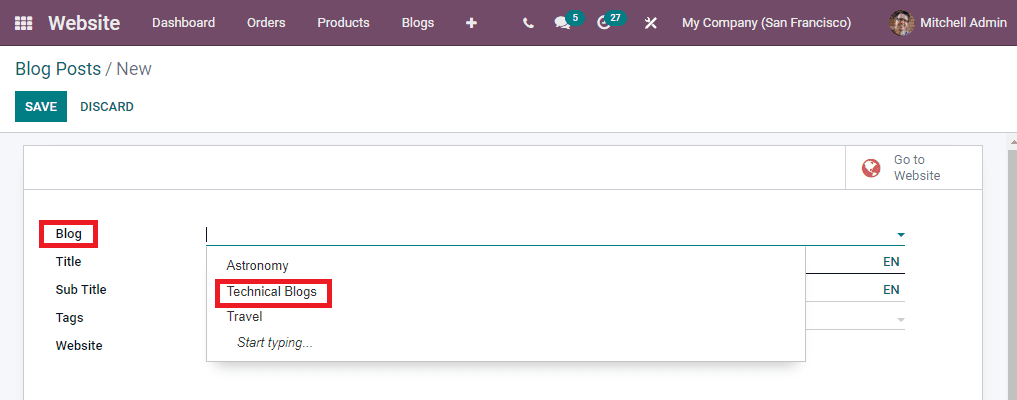
Here, the dropdown menu displays the newly configured blog details.
Now let us look into the Blog Tags option.
Blog Tags
The Odoo Website module also allows you to configure various blog tags suitable for the blog posts which you are creating with the help of this system. You can find the Blog Tags menu under the Configuration tab of the Odoo Website module. You can click on the menu to access the Blog Tags window, and the screenshot of the window is depicted below.

The Blog Tags window also displays all the Blog Tags you already defined in the platform. Each record in the window can be selected and viewed in detail. To create new Blog Tags, you can click on the CREATE button. The creation form is given below.
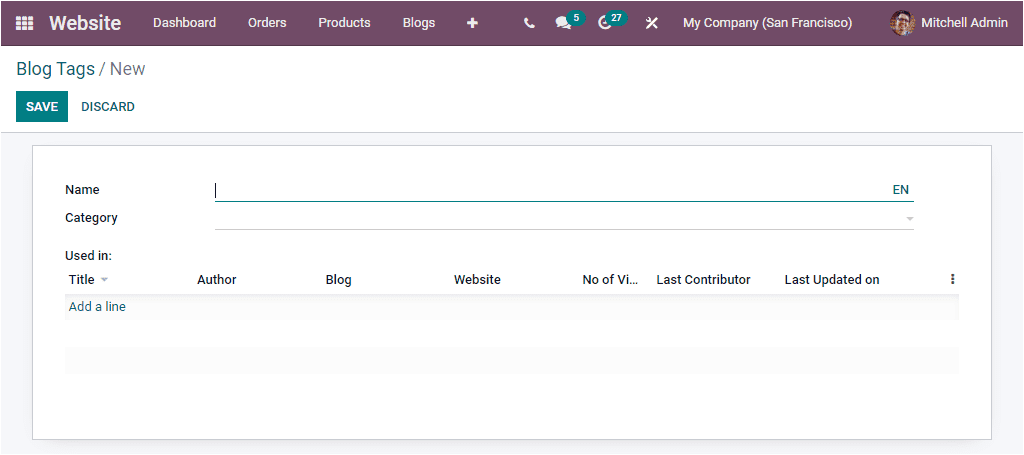
In the creation window, you can provide the Tags name and Category. You can also mention the blog's details on which the tag is used. To do this, you can click on the Add a line menu. Once completed, you can save it by clicking on the SAVE button.
Tags Category
The Tags Category can also be configured separately using the Tags Category option available under the Configuration tab of the module.

You can provide the Name of the Tag Category in the given space and save the detail.
As we are clear on all aspects of the configuration of Blog Posts in the system, let us discuss how to create and manage Forums in the Website module.