Posts
You can create new posts from the Feed itself using the New Post button.
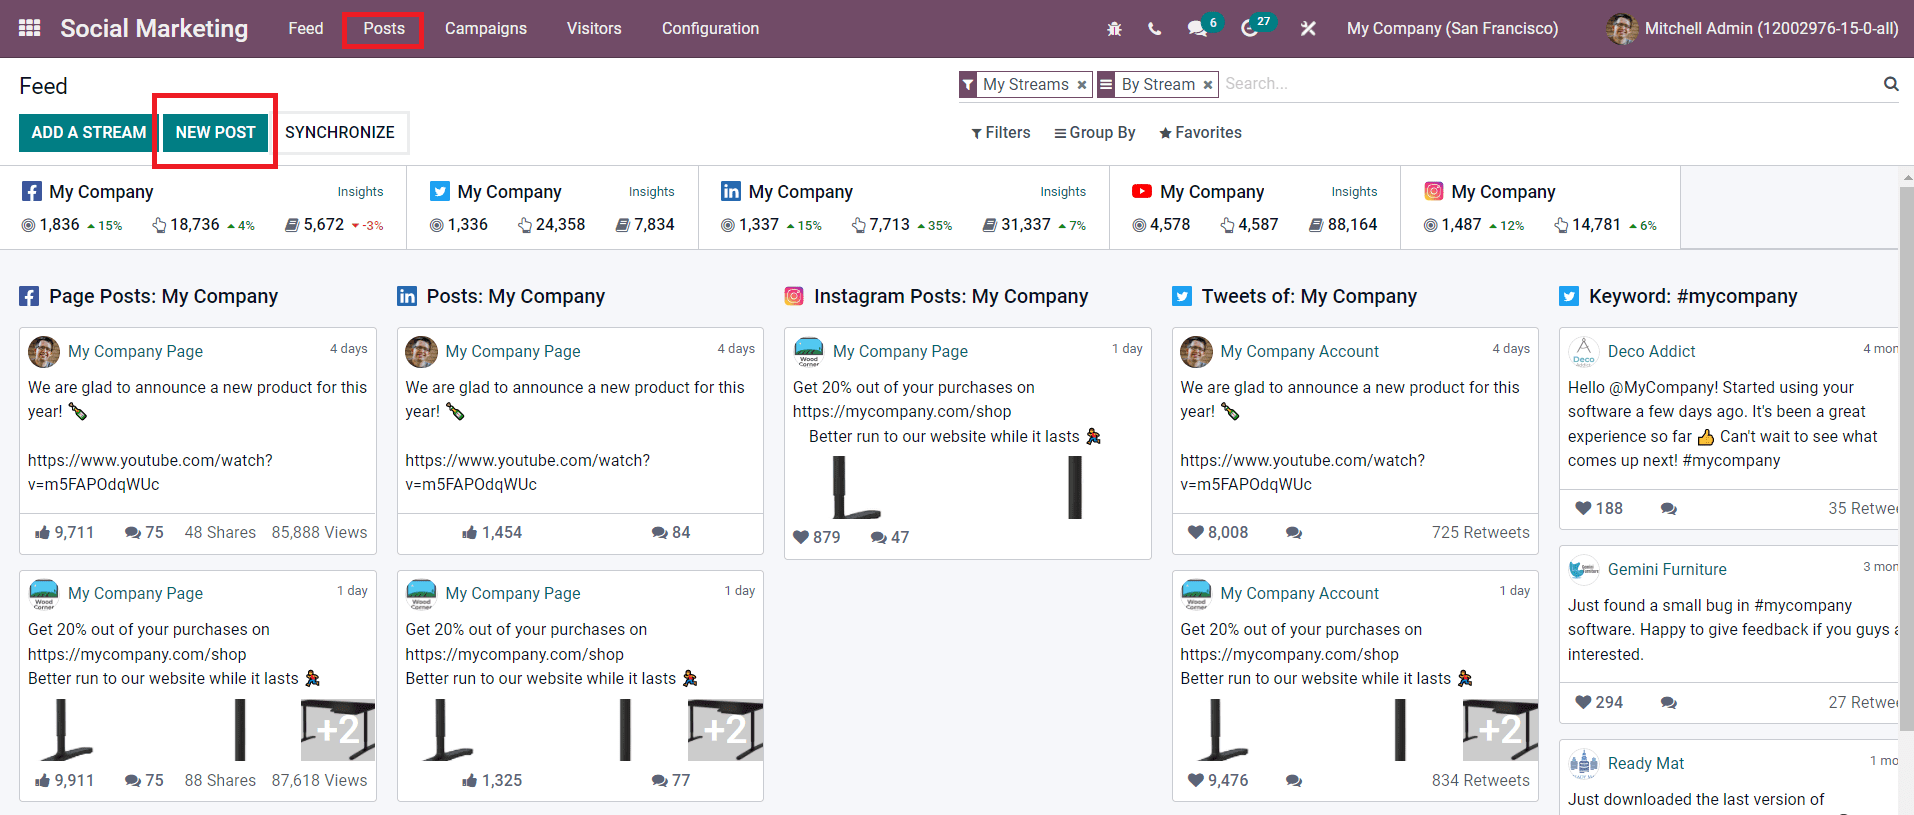
Or else, we have a separate platform called Posts in the Odoo Social Marketing module. This platform will show all new posts created for the accounts linked in the Social Marketing module. You can publish posts about the launching of new products, event updates, and all other marketing information about your business.
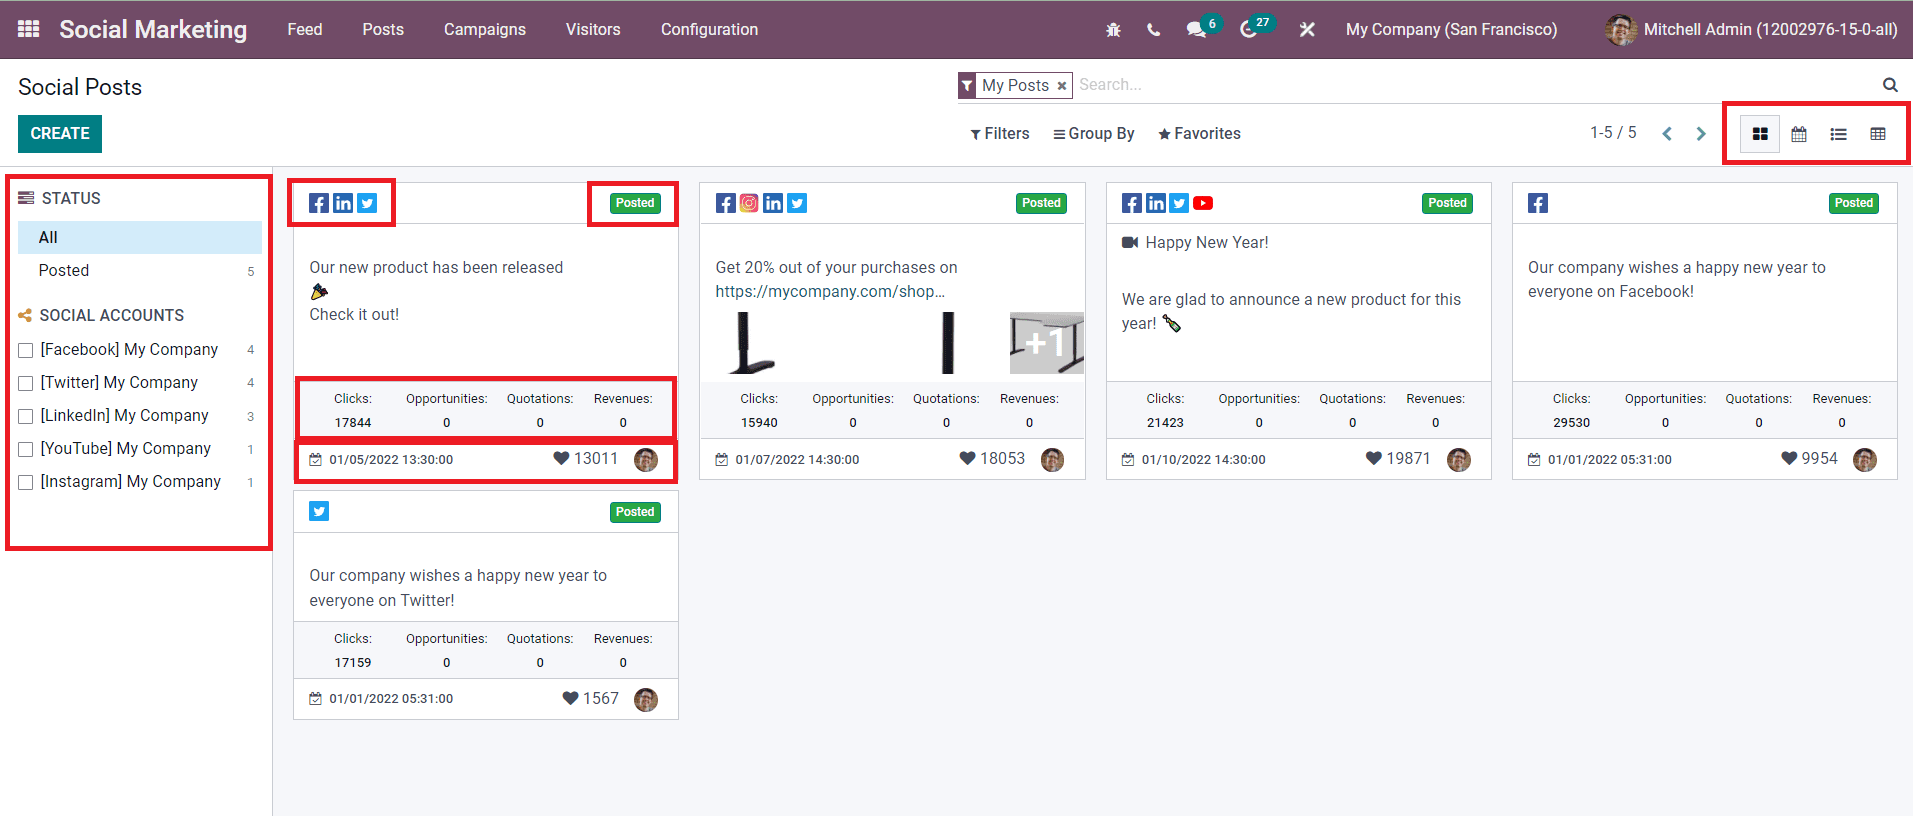
As you can see in the image above, the Kanban view of the platform will show each post in separate tabs. Each post will show the icons of accounts on which the post is published along with the status of the post. You will get the number of Clicks, Opportunities created, Quotations generated, and Revenue gained from each post. The tab will also display the date and time of publication. On the left side of the window, you will get a filtering panel that can be used to filter the posts according to their status and social accounts. You can alter the view of this platform into Calendar, List, and Pivot views according to your requirement.
Now, click the Create button to create a new post.
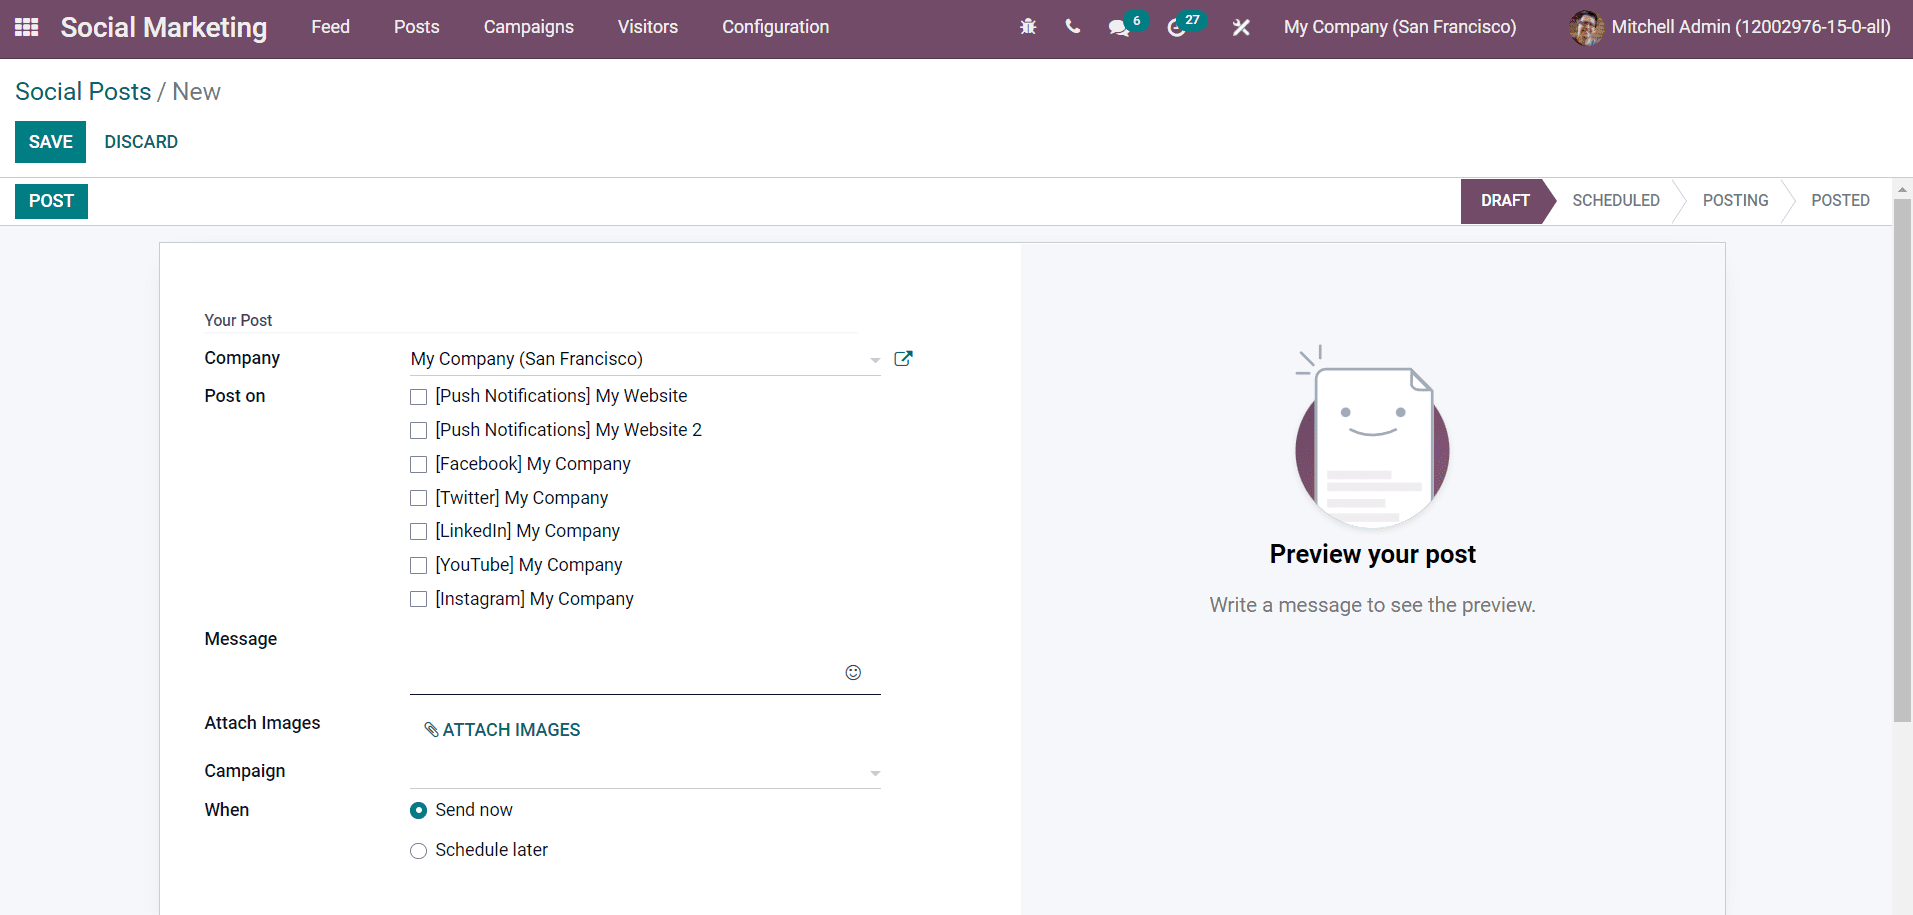
You can mention the name of your Company in the specified field. In the ‘Post On’ field, you can select the accounts on which this post will be published. The message that you want to add to the post can be mentioned in the Message field. You can attach images to the post using the Attach Images option. If the post is a part of any kind of campaign, you can add that campaign in the corresponding field. You can publish the post instantly after creating the post by selecting the Send Now option in the When field. The Schedule Later option will help you to select a suitable time and date to publish the post.
While selecting accounts to publish the post, the options include the Push Notifications feature. Push Notification will help you to send notifications to your customers when you post something on your accounts. To get notifications on customers’ devices, they have to allow push notifications from your accounts. If they have enabled this feature, you can send notifications to them about new products, events, articles, announcements, updates, and many more whenever you publish them on your social media.
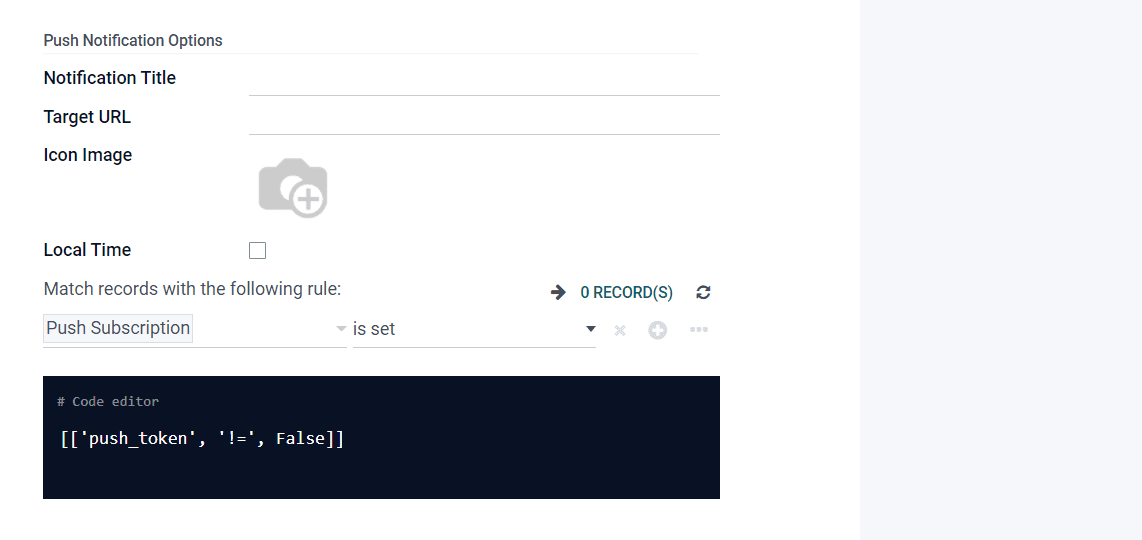
After selecting the Push Notification option from the ‘Post On’ field, you will get some additional options to define in the post creation window. You can specify the Notification Title, Target URL, and upload an Icon Image which will be displayed in the browser notification in the corresponding fields. By enabling the Local Time, the customer will get a notification on their local time. For example, if you post at 15:00 your time, all visitors will receive the post at 15:00 their time. You can set the domain to send notifications to visitors in the specified field. You can click on the Save button after adding all details.
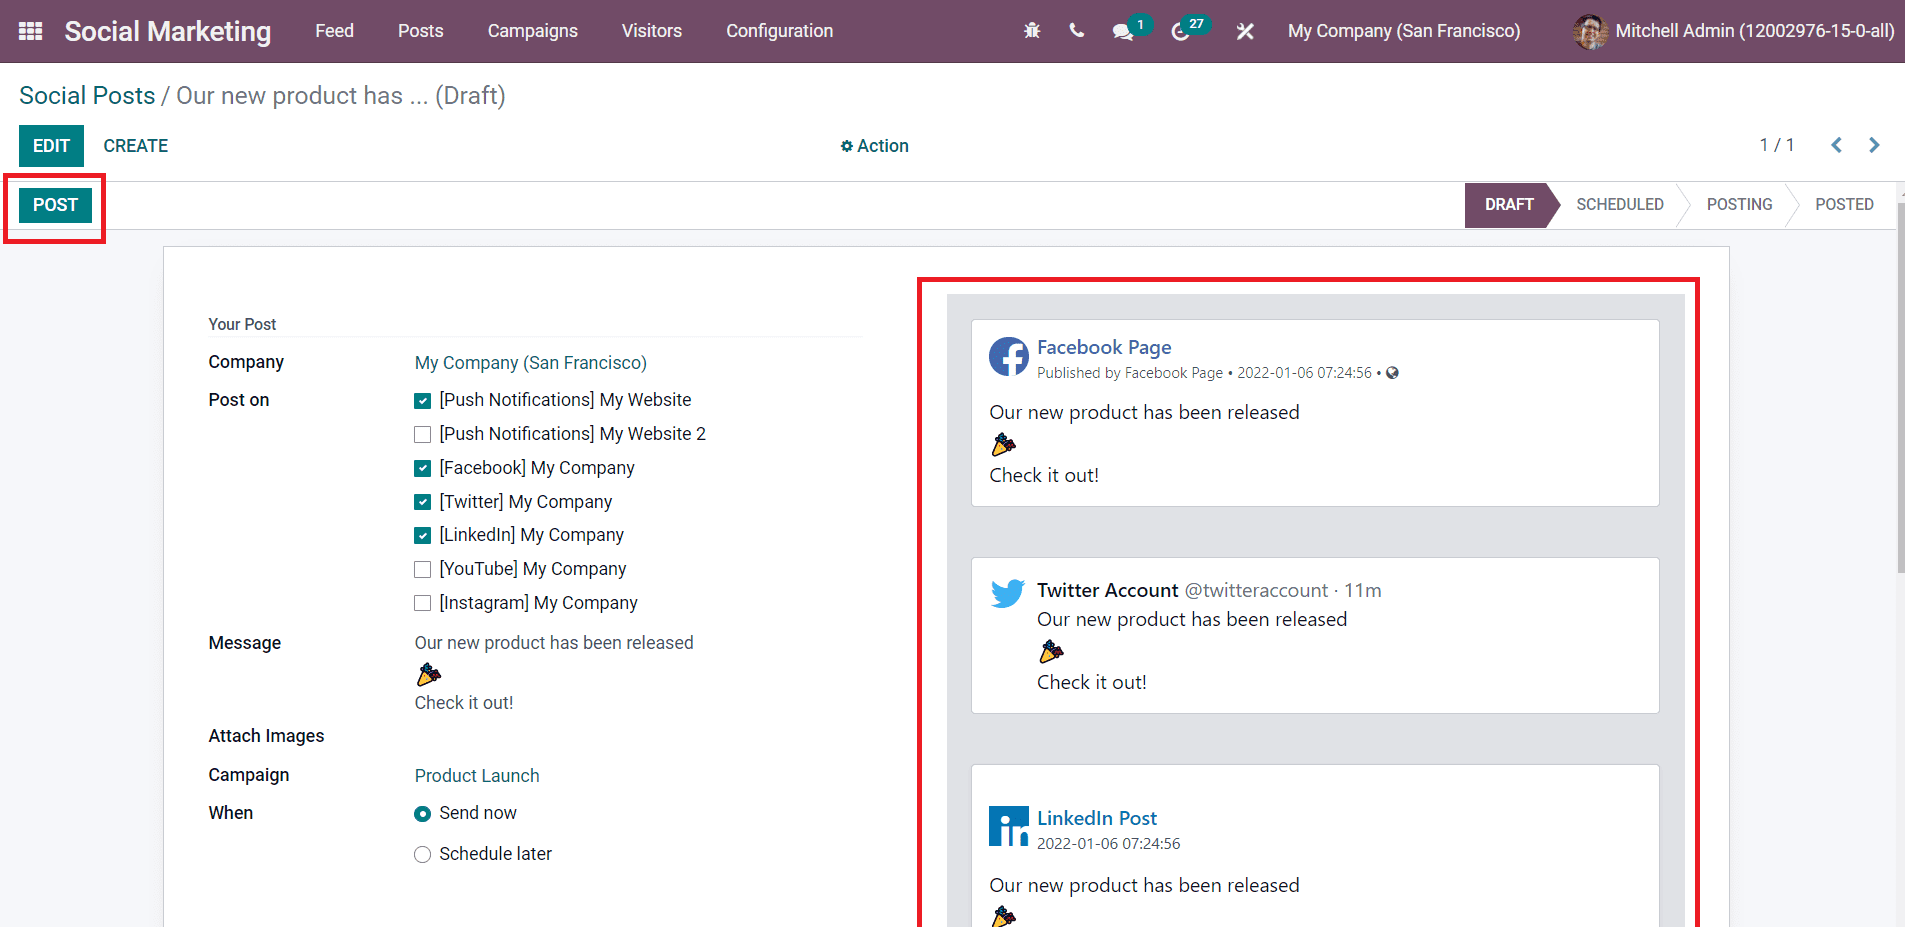
You will get the preview of the post in the window as marked in the screenshot above. To post, click on the Post button and the content will be published on the selected social accounts.