Tasks
Under every project you can add tasks related to the project. These tasks will help to achieve the goal of the project. Before creating tasks in the project, you should enable the required Task operations from the Settings. From the Configuration tab, select the Settings option. At the Task Management menu you can enable options such as:
Sub Tasks: If you want to split the task to organize your work into sub milestones enable this option.
Task Dependencies: By enabling this option you can determine the order in which to perform tasks.
Recurring Tasks: This will allow you to auto generate tasks for regular activities.
Project Stages: By enabling the project stages option, you can track the progress of your projects.
After enabling all the required options you can start creating tasks under projects.
You can view your tasks by selecting the My Tasks tab. Or else you can view every task by selecting the projects from the Project tab.
The tasks are displayed on the screen in Kanban view in the My Tasks tab. Every task is categorised according to their personal stages. These stages are Inbox, Today, This Week, This Month and Later. You can Filter the tasks with the options available such as My Team's Task, Unassigned, My Projects, My Favourite Projects, Followed Projects, Starred, Later Tasks, Tasks in Overtime, Unread Messages, Employees on Time Off, Tasks in Conflict and Archived. Also the tasks can be grouped on the basis of Stage, Personal Stage, Assignees, Project, Customer, Sales Order Item, Kanban State, Deadline and Creation Date. You can view the tasks in Kanban, List, Calendar, Gantt, Map, Pivot, Graph and Activity view.

From the Kanban view of Tasks, you can prioritize the Task by enabling the Star located with the Task. The task can be moved from one column to another according to their progress, simply by selecting and dragging them.
You can schedule activities to make sure that these activities that fall under the particular task are done on time. The task can have activities scheduled at a particular time. To enable this, select the clock sign from the task. A small pop up window with ‘ + SCHEDULE AN ACTIVITY’ option will be displayed. By selecting the option you will have the Schedule Activity window opened. At the displayed window enter the Activity Type. You can configure these Activity Types from the Configuration tab. We will discuss it later. After entering the Activity Type, insert a brief description of the activity that must be performed in the Summary field. The date on which the activity should be performed can be mentioned at the Due Date option. The employee responsible for overlooking the activity should be mentioned at the Assigned To option. Any further notes regarding the activity can be included in the Log a note space provided.
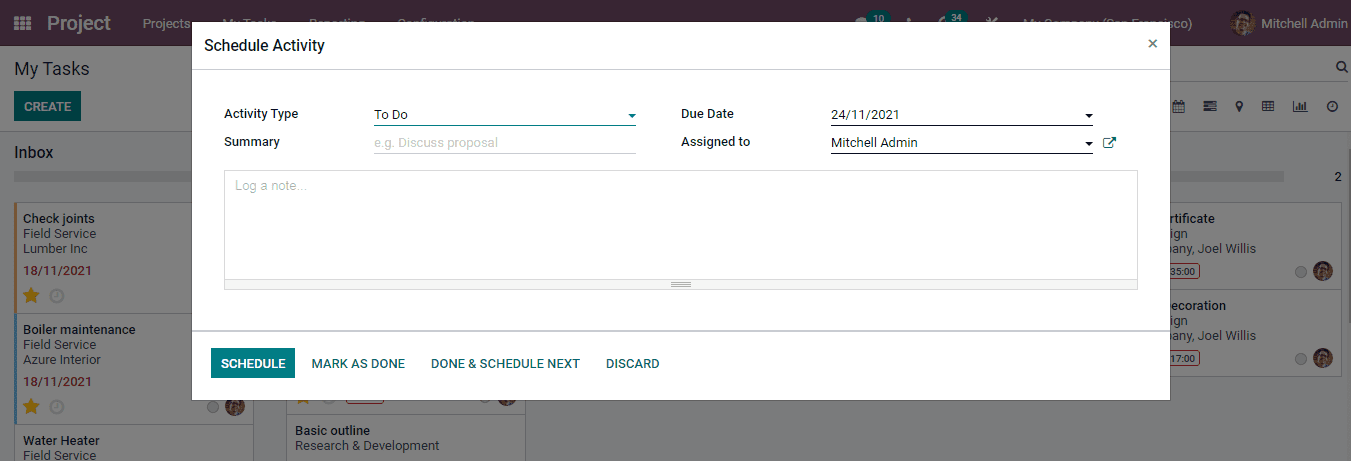
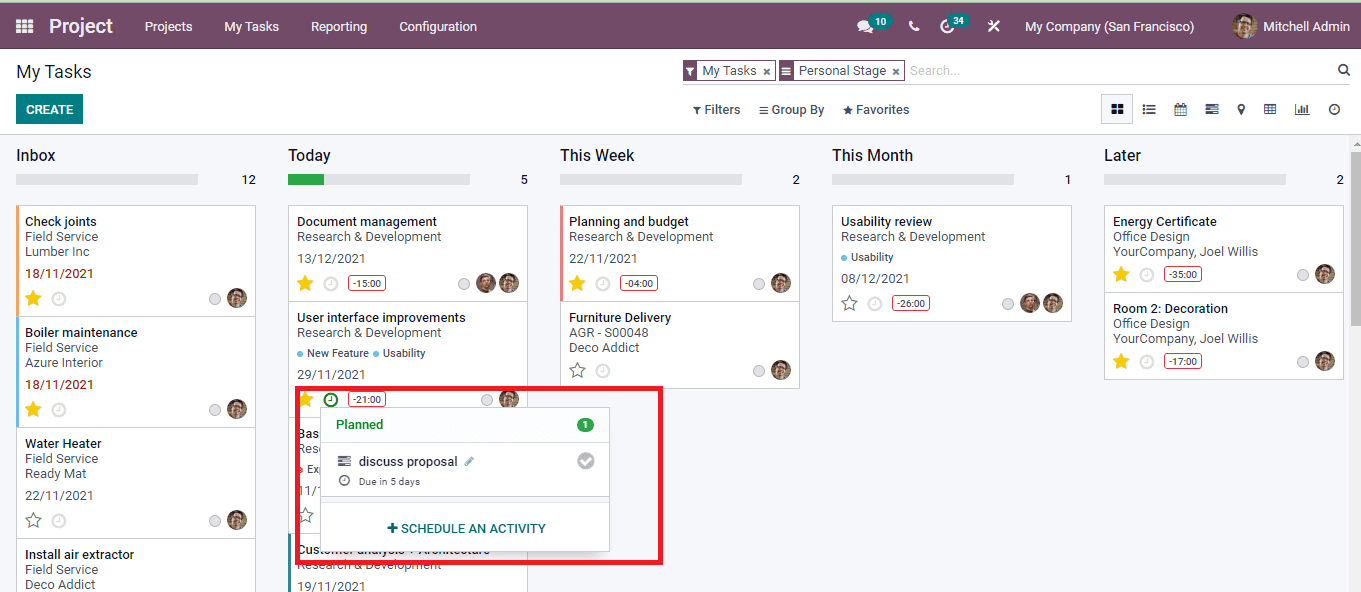
When an activity gets scheduled the colour of the clock turns to green and by selecting it you can view the planned activity along with the number of days due for the activity. If the activity is completed, check the activity as done.
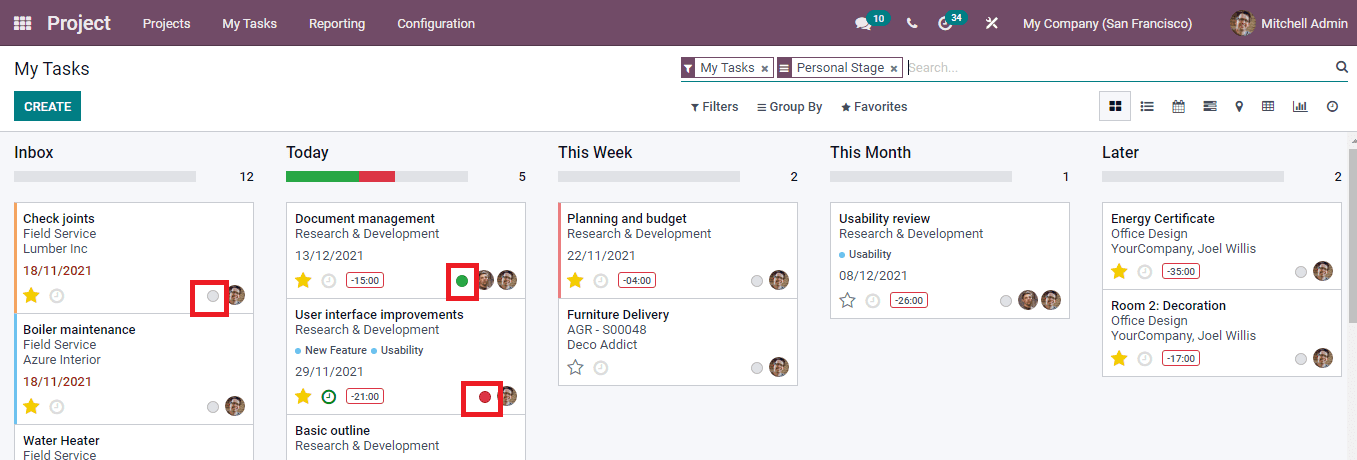
The tasks can be marked according to their progress, so that the employee in charge can easily understand whether the task is ready for shifting it from one column to another. If the authorised assigned employee s oaky with the progress of the task, then he can mark the task with the Ready button. The Ready button is of green colour indicating that it is good to proceed. In other cases, if the task activity is not up to the expectation and requires changes, the authority can select the Blocked option which will provide a red coloured button. This will give out a message that the particular task is blocked and requires changes. If the task is in progress and the result is not available, then you can give the task an In Progress status, which will be marked with white colour. Every task by default is grouped in In Progress status.
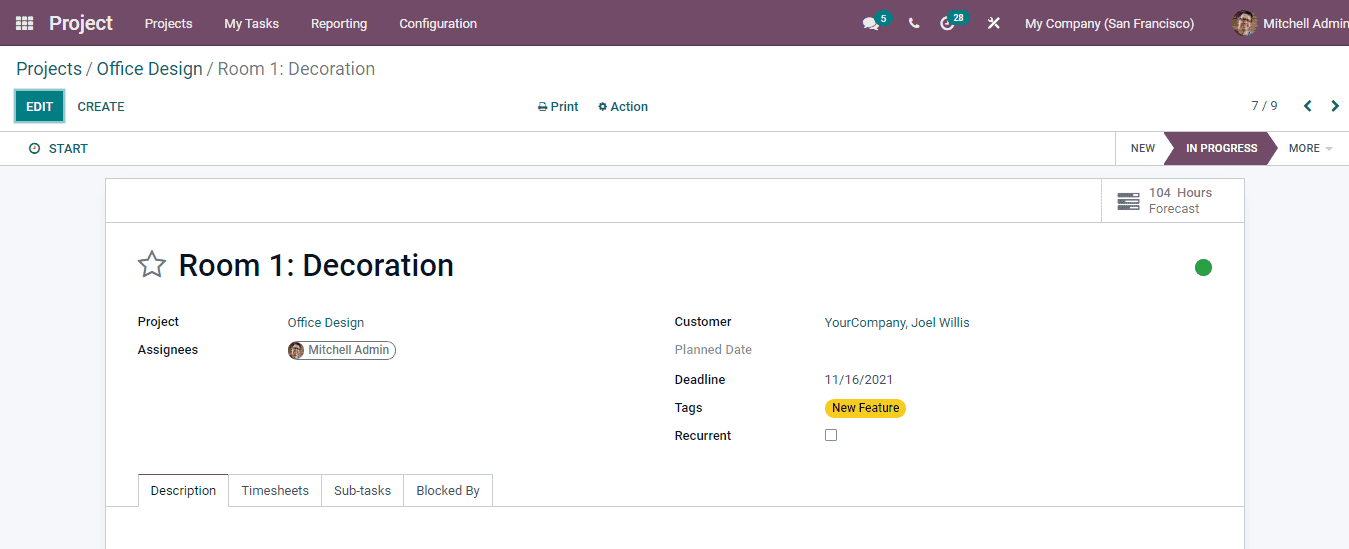
By selecting the Task, you can view the details related to the task such as the Planned Date, Assignees, Hours Forecast and much more. You can share the report of the task by selecting the Send Report option from the Actions.
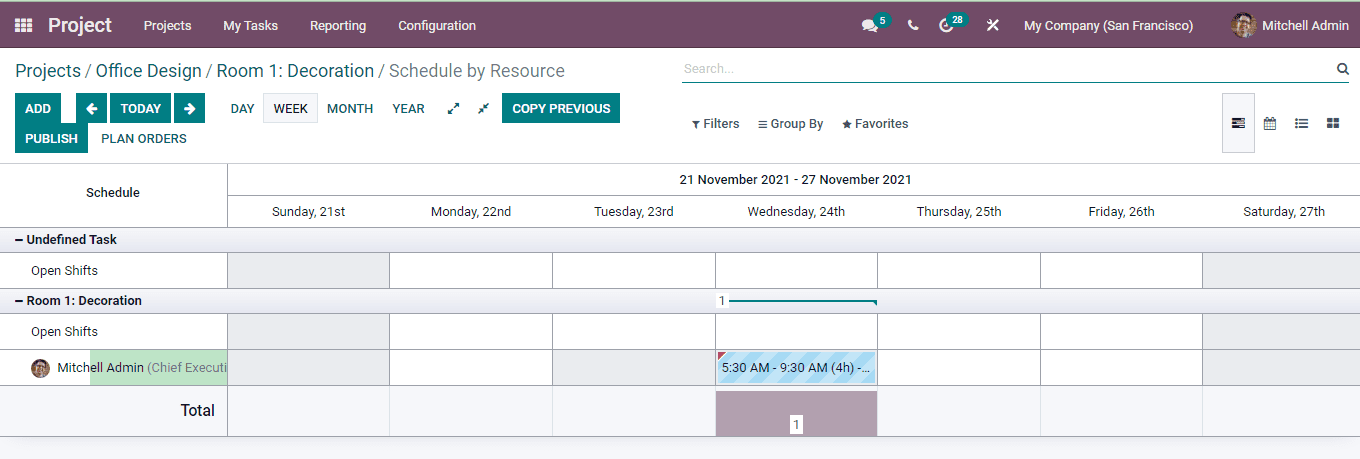
By selecting the Hours Forecast tab, you can view the shifts. Shifts are periods allocated to your resources for a specific role. The schedule is displayed in the calendar form. You can view the details of the shift by placing the cursor on them from the calendar. From there you can view details such as the Allocated Hours, Effective Hours and Sales Order Item. The schedule can be published using the PUBLISH button. You can also copy the previous shift if it is a repeating shift, using the COPY PREVIOUS button. Sales Orders can be assigned to the schedule by selecting the PLAN ORDERS button.
Now let us see how to create new tasks under projects.