Project Settings
The major configurations of the projects can be done by choosing the Projects option from the Configuration tab. If you want to have a quick glance over all the projects at once, then this is the right option. The list of the projects with details such as the name of the Customer, Company, Start Date, End Date, Project Manager and Status of the project is displayed.

With the filtering feature you can display certain projects according to their categories such as My Favourites, Followed, My Projects, Open and Archived. The projects can be grouped on the basis of Project Manager, Customer and Status.
By selecting the projects from the list, you can view the configurations and details of the project. Every detail of the project can be viewed from here.

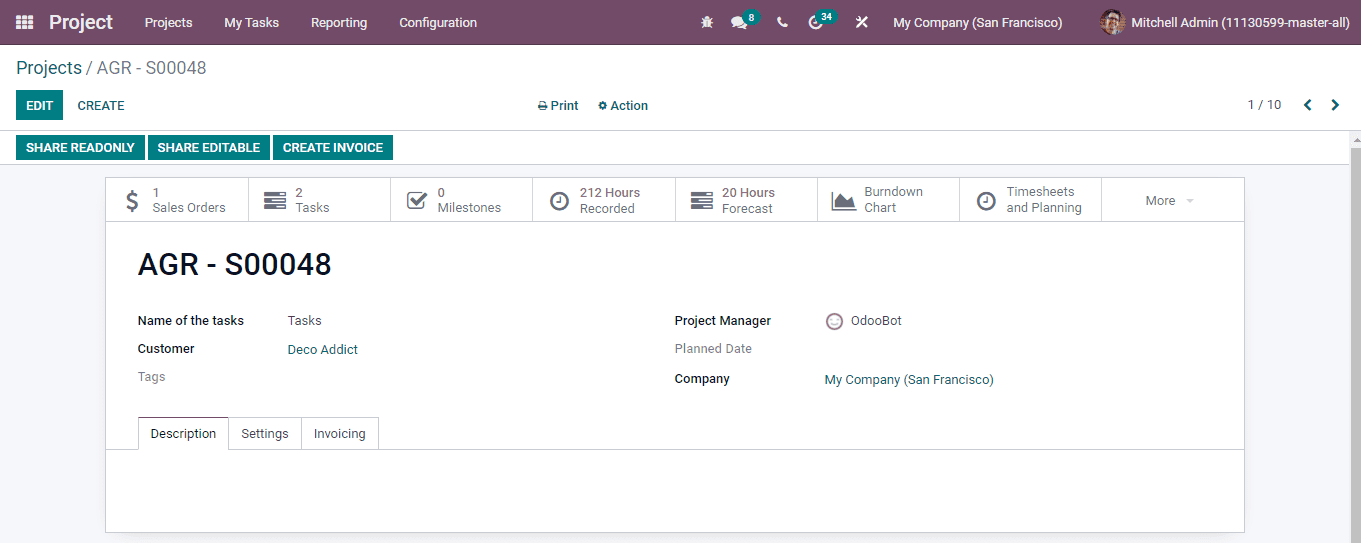
You can share the project details either as a readable document or as an editable document by selecting the SHARE READONLY and SHARE EDITABLE buttons respectively. While sharing the project a window will appear where you can invite people by adding their contact to the Invite People field. You can also add a note while sharing. Press the SEND button after adding the details.

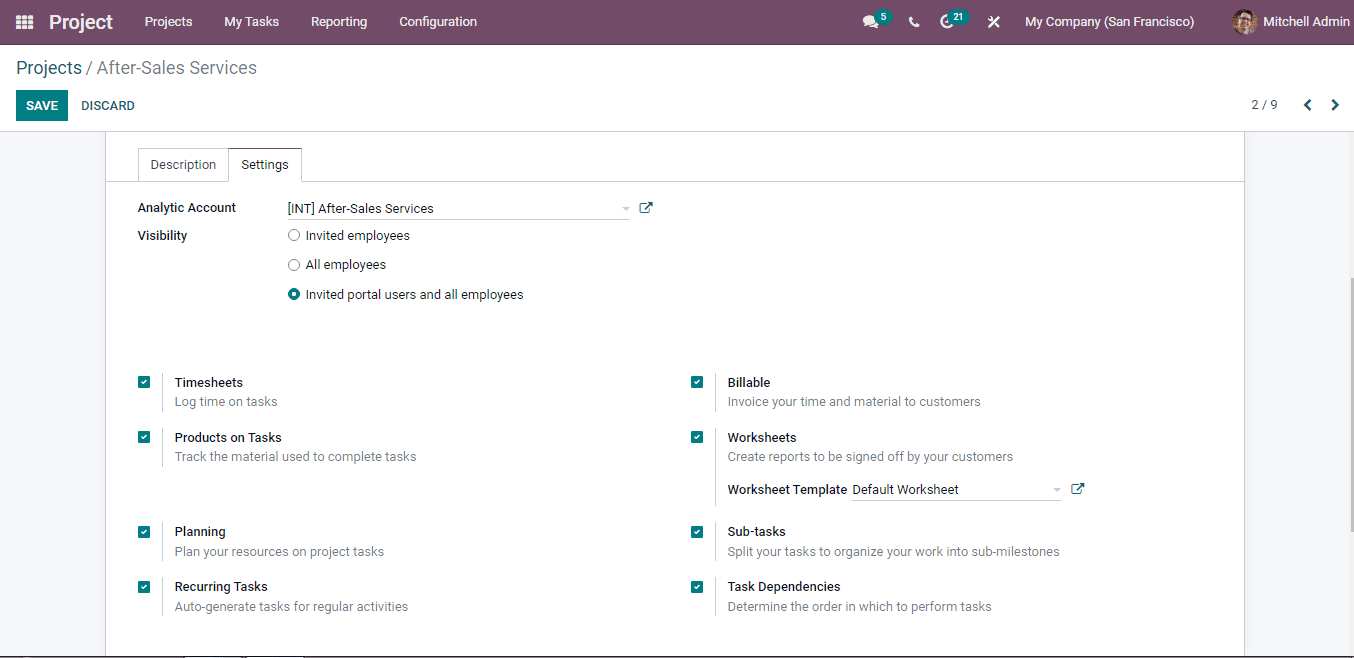
You can view the Sales Order that comes under the specific project, Tasks that comes under the project, Milestones you have set, Recorded Hours of work, Forecast hours, Burndown Chart, Timesheets and Planning, Billable Time, Costs/ Revenues Contracts, Budget, Gross Margin, Status and Collaborators of the project. At the Description tab you can see a brief description of the project. Next to the Description tab is the Settings. From here you can view the internal settings of the Project. These include Analytic Account related to the Project and Visibility of the Project. At Visibility you can opt, either Invited Employees, All Employees or Invited portal users and all employees. In cases when you don't want every employee to have the visibility of the project you can choose the Invite Employees and if you need to give visibility of the task to every employee and also to the invited portal users, then select the last option.

Other than Analytic Account and Visibility, there are other settings that can be enabled. They are:
Timesheets: By enabling the Timesheets you can enable the time sheeting on the projects. You will be able to log and record the working hours on tasks.
Products on Task: Different projects may require a variety of products to complete the tasks. By enabling this option you can track the materials that have been used to complete the task.
Planning: Beforehand planning of the task is necessary for efficient and smooth running of the projects. By checking the Planning option you can plan resources for the completion of the project.
Recurring Task: At times some tasks are recurring ones, they might need to get repeated at certain intervals. In such projects, you can enable the Recurring Task option which will allow you to auto generate tasks for regular activities.
Billable: Sometimes you will have to inform the customer about the time and material. In such cases you can enable the Billable option of the project which will allow you to share the invoice containing the cost related to the time and material used for the task.
Worksheets: When you need to get sign from the customers regarding the reports created based on the task, you can enable the Worksheet option. After enabling the option, select the worksheet template from the already created templates.
Sub-tasks: Some tasks can have sub tasks for easy completion of the work. To make these subtasks, at first you need to enable them from project settings. Enable this option to create subtasks under the concerned project.
Task Dependencies: Enable the Task Dependencies option to determine the order in which to perform tasks.
