Payslips
Odoo system manages Payslip operations in its complete Payroll application systematically and efficiently. For generating a Payslip for your employee, you should set up a contract with a salary structure. We have already discussed the configuration of Contracts and Salary structures. If a payslip was generated, Odoo allows you to export the generated payslip as a Pdf. the manager or concerned authority can quickly confirm and approve the payslips. Odoo also helps you to generate its associated journal entry on accounts.
In the Odoo Payroll system, Odoo designed a separate tab to manage all the Payslip operations. The Payslip tab includes the sub-menus such as To Pay, All Payslips, and Batches. Let us discuss each of them in detail.
Payslips To Pay
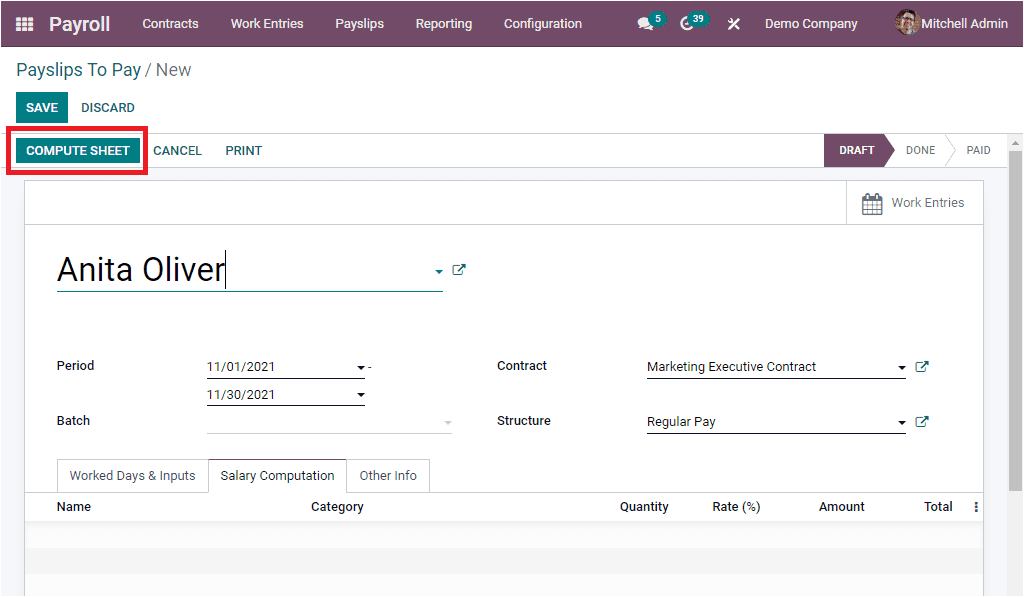
The first menu available under the Payslips tab of the Odoo Payroll module is the Payslips To Pay. The Payslips To Pay menu will depict a list of employee payslips to be paid. The CREATE button available in the window will allow you to create new Payslips. The image of the creation window is depicted below.
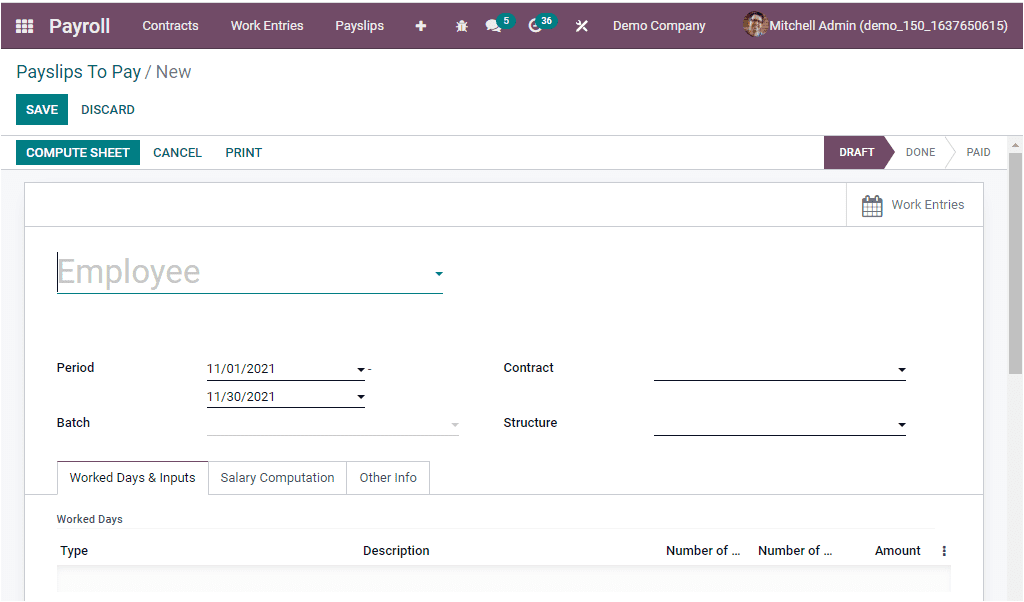
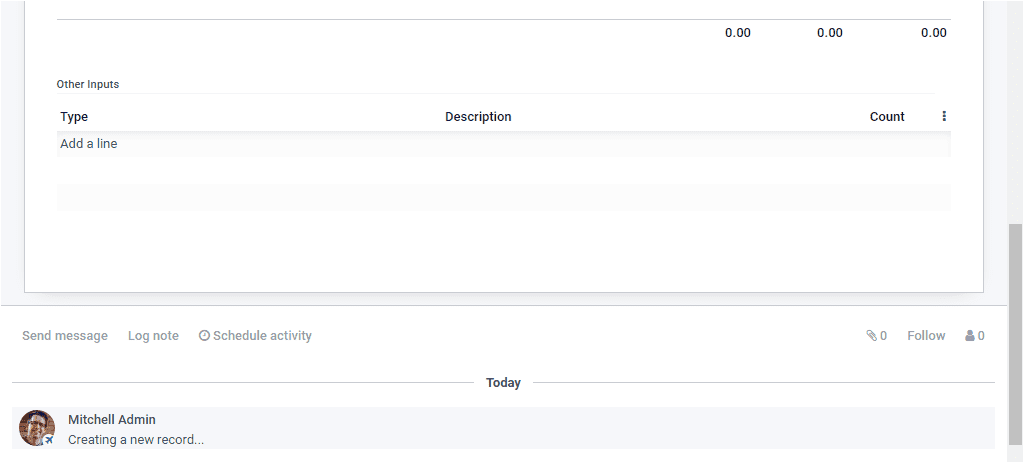
Using this creation form, you can create a new payslip by providing all the crucial details. First, we can specify the Name of the Employee whom you need to generate the payslip. You can select the employee using the dropdown menu available. The dropdown menu includes the names of all the employees you defined in the platform. In addition you can create a new employee here itself. Then you can specify the salary period under the Period field available. After that you can allocate the Batch, Contract, and Salary Structure. In addition, the creation form also includes three tabs such as Worked Days & Inputs, Salary Computation, and Other Info.
Under the Worked Days & Inputs tab, you can list out the total worked hours based on the working schedule selected on the contract. Once you choose the employee, the data is computed automatically. So that you can easily analyze the working days, and working hours of the employee. Additionally, the number of leaves taken by the employee in a specific period are also described. The total count of each category also differentiated.
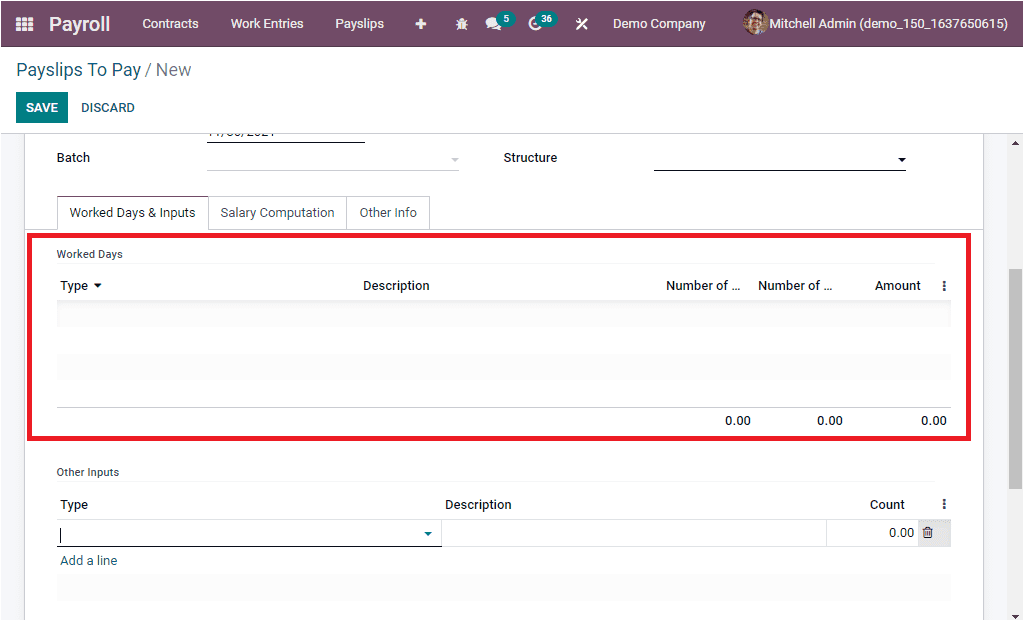
Moreover, the Other Input Type can also be defined under the Worked Days & Inputs tab. Here you can provide the Type, Description, and Count.

Salary Computation
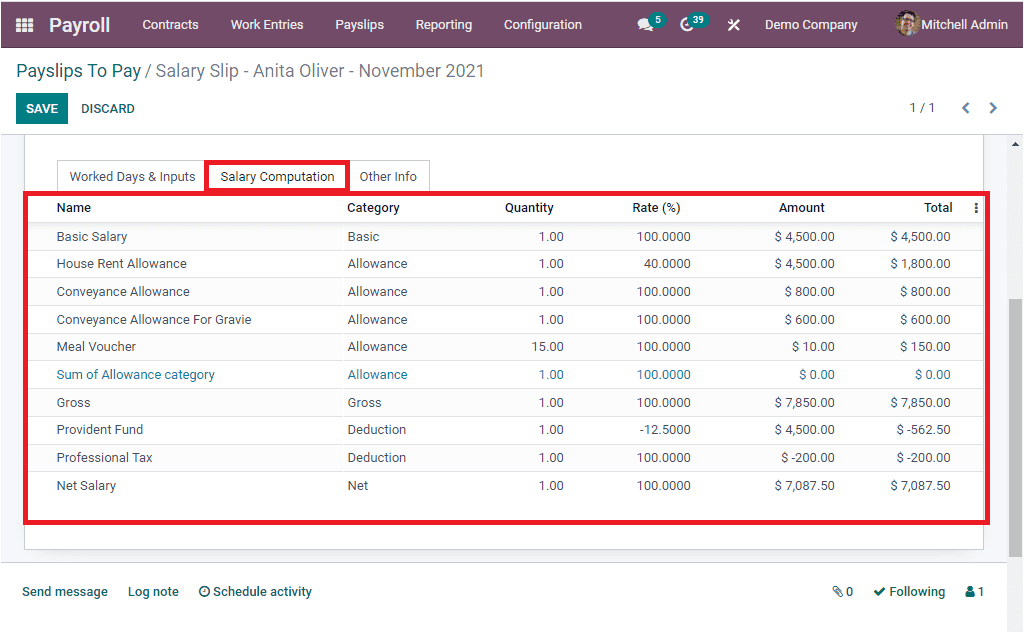
The Salary Computation tab available in the Payslips creation window will help you list out the salary computation done on the payslips based upon the Salary Structure and Salary Rule defined for the employee. The Salary Type Name, Category, Quantity, Rate (%), Rule, Amount and Total can be listed.
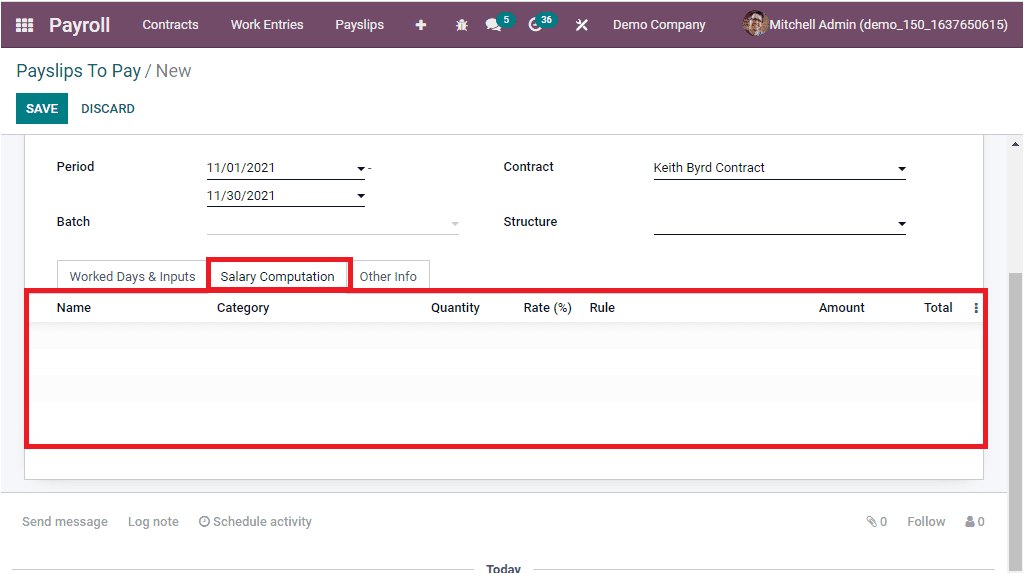
When you select the employee and define the Contract and Structure for this particular employee, you can click the COMPUTE SHEET button. The COMPUTE SHEET button is highlighted in the below image.
When you click on this button, the Salary Computation details will be displayed in the below image.
Other Info
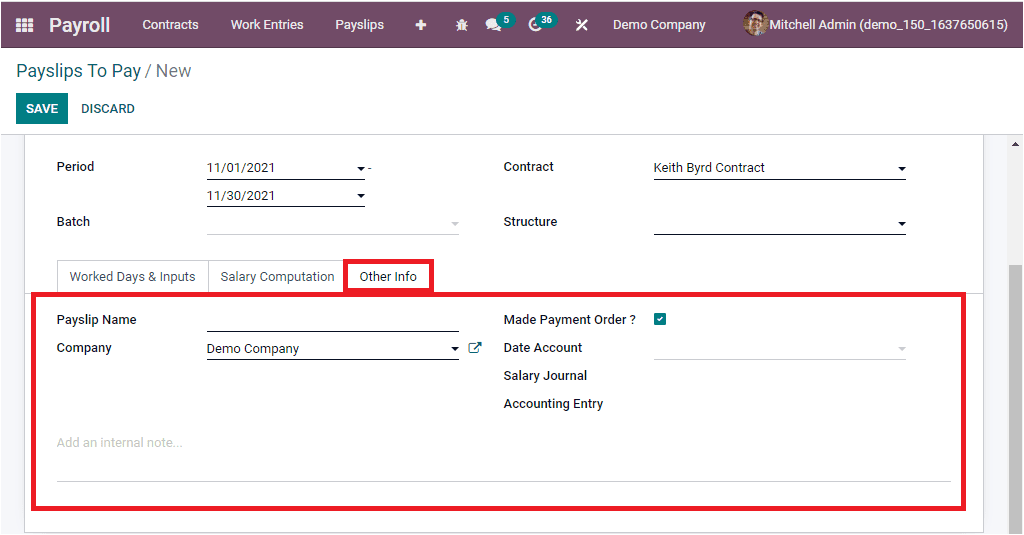
The Other info tab in the Payslip creation window will allow you to define the Payslip Name, Company, and other information.
Apart from all these options, Odoo includes a direct link to the Work Entries window through a smart button called ‘ Work Entries’.
Now we can move on to the All Payslips menu.
All Payslips
The All Payslips menu will depict all the Payslips generated in the platform along with the details such as Reference, Employee, Batch Name, Company, Basic Wage, Net Wage, and Status.
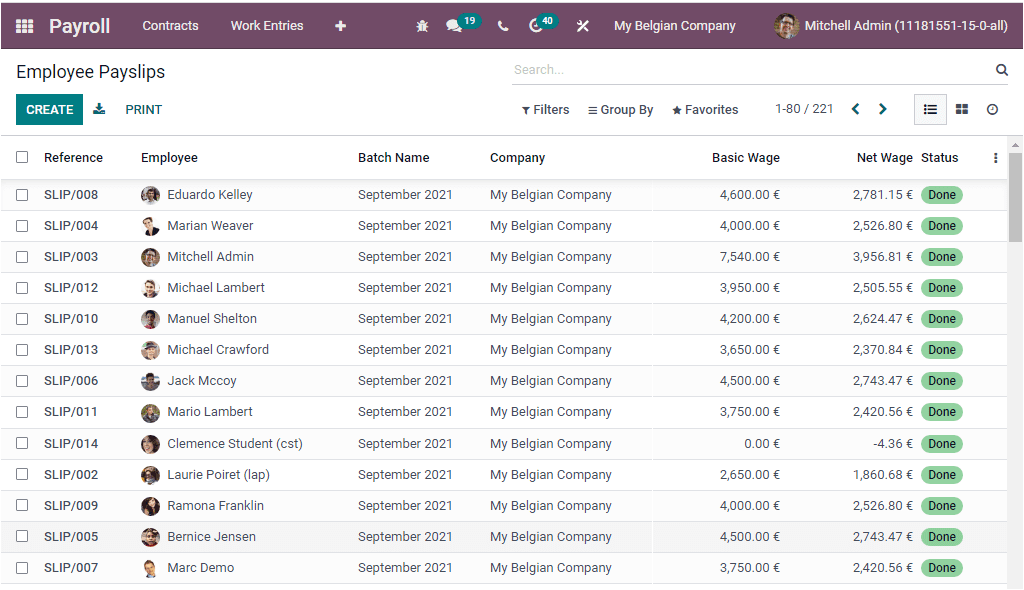
You can apply various filters for sorting out your data. The default filter options are To Compute, To Confirm, Done, Date, and Credit Notes. The Add Custom Filter menu allows you to customize more filters based on your requirements. Similarly, you can group these records using various default as well as customizable options. The default Group By options is Employee, Department, Job Position, Status, Batch, and Company. You are also allowed to view the window in Kanban view.
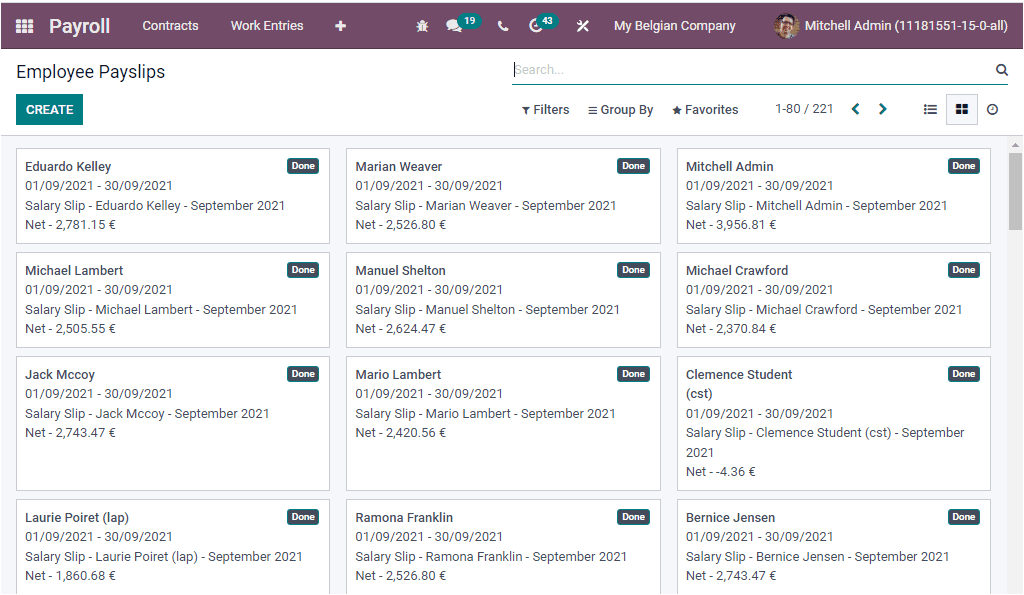
Moreover, Odoo includes an Activity scheduling window for scheduling various activities with employees. The menu icon available next to the Kanban view icon will help you to access the Activity window.

You can also access the CREATE button to create a new payslip, as discussed in the Payslips To Pay window.
Payslips Batches
The Payslip Batches menu is available under the Payslip tab of the Odoo Payroll module. This feature is an excellent support to you for generating a payslip for a batch of employees. The Odoo Payroll system allows you to create and manage batches. Let us have a look at the Payslip Batches window.
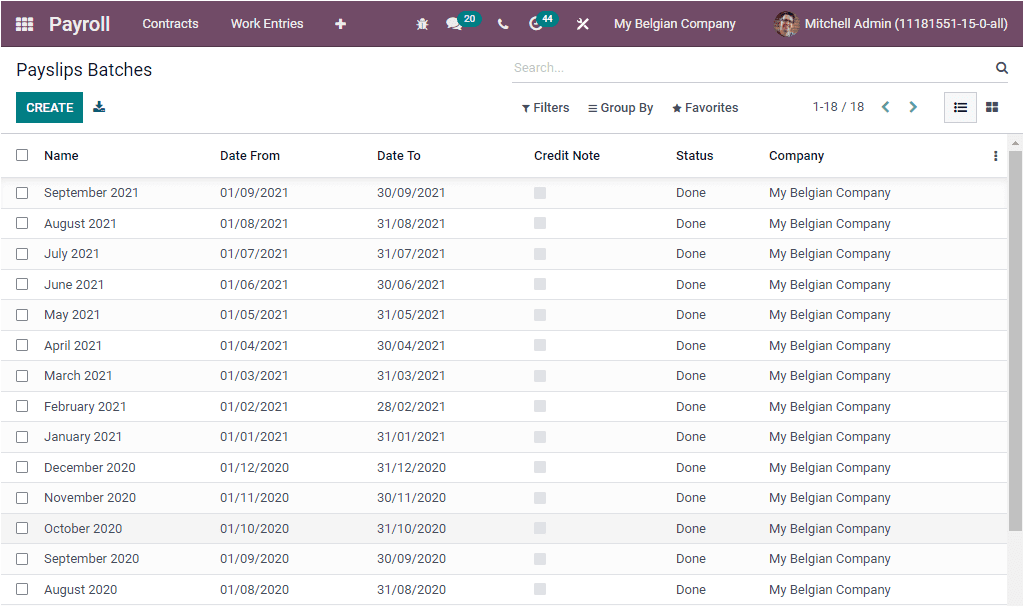
The Payslip Batches window should contain all the Payslip Batches created in the platform along with their essential details such as Name, Date From, Date To, Credit Note, Status, and Company. You can view each of these payslips in detail by clicking on them. Odoo also allows you to manage Payslip batches in Kanban view.
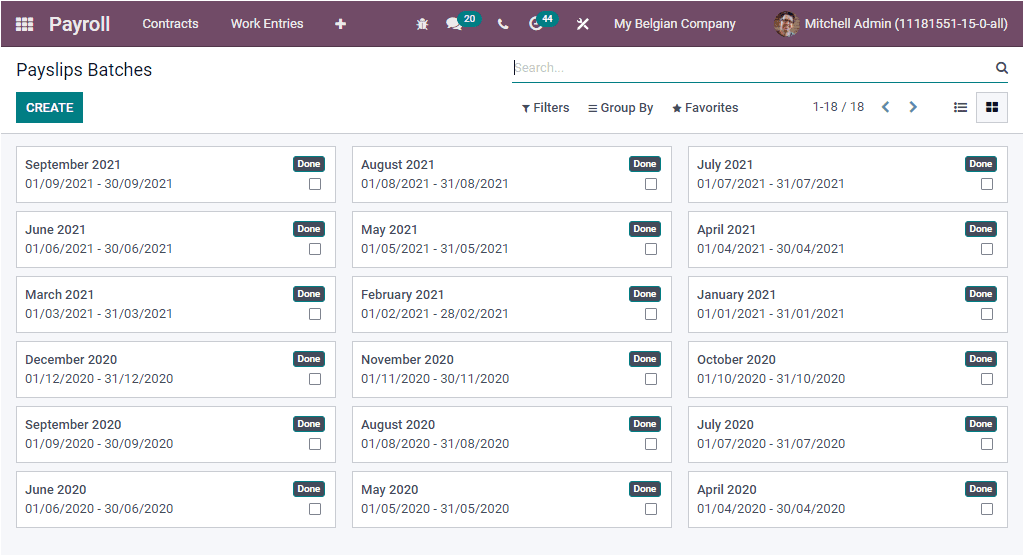
You can filter your Payslip Batches based on their stage of operation. You can do this by selecting the default filter options such as Dreft and Done. You can also create custom filters using the Add Custom Filter option. Similarly, you can group your Payslip Batches using the Group By option. The CREATE button allows you to create new Payslip Batches. The screenshot of the creation window is depicted below.
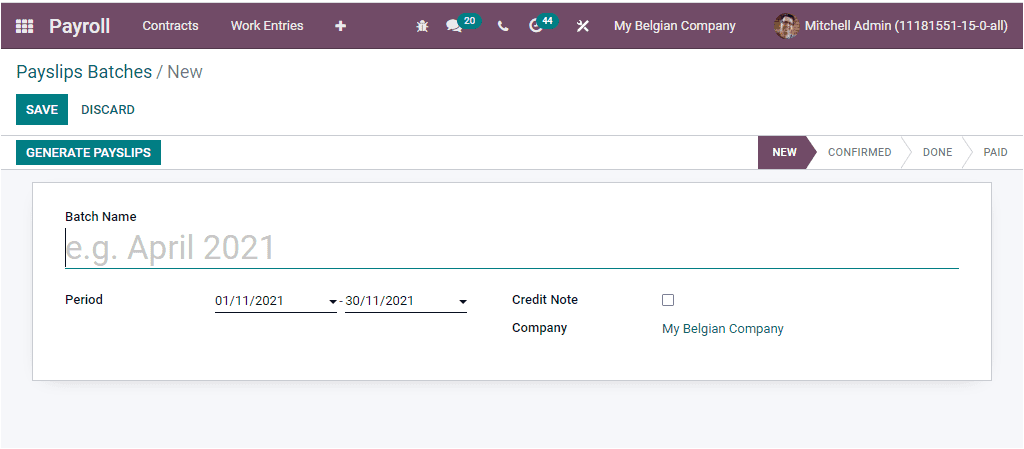
In this Payslip Batches window, you can provide the Batch Name and the Period. Then you can view a Credit Note option where you can check the box if all the payslips generated here are refund payslips. The Company will be auto-allocated. If you provide all the necessary details, you can click on the GENERATE PAYSLIPs button for selecting multiple employees. As soon as you click on this button, you will depict a new window, as shown in the below image.
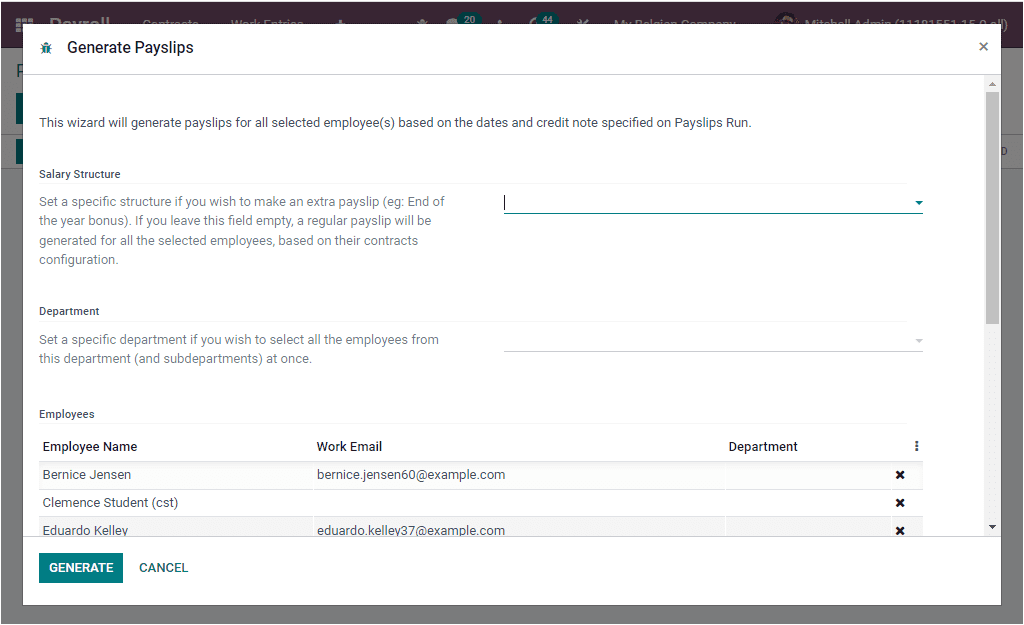
This page will help you generate payslips for all selected employees based on the dates and credit notes specified on the Payslip creation form. Here in this window, you can set a specific salary structure if you want to generate an extra payslip like the end of the year bonus or any other. If you do not provide any salary structure here and leave this field empty, it will generate a regular payslip for all selected employees. It would be best if you kept in mind that it will be defined based on their contracts configuration. In addition, you can also set a specific department if you are required to select all the employees from this department and sub department at once. After setting up all these aspects, you can click on the GENERATE button at the left bottom to create a payslip for selected employees.
So far, we discussed the Payslips menu available in the Odoo Odoo Payroll module, and now let us discuss the reporting aspects of the Payroll module.