Event Tracks
In the Odoo Events module, it is possible to accept talk proposals from different speakers and publish the schedule of the event on your website. The Event Tracks menu in the Events module will record all tracks of the events published on the website. From the Settings menu of the module, activate the Schedule & Tracks option.
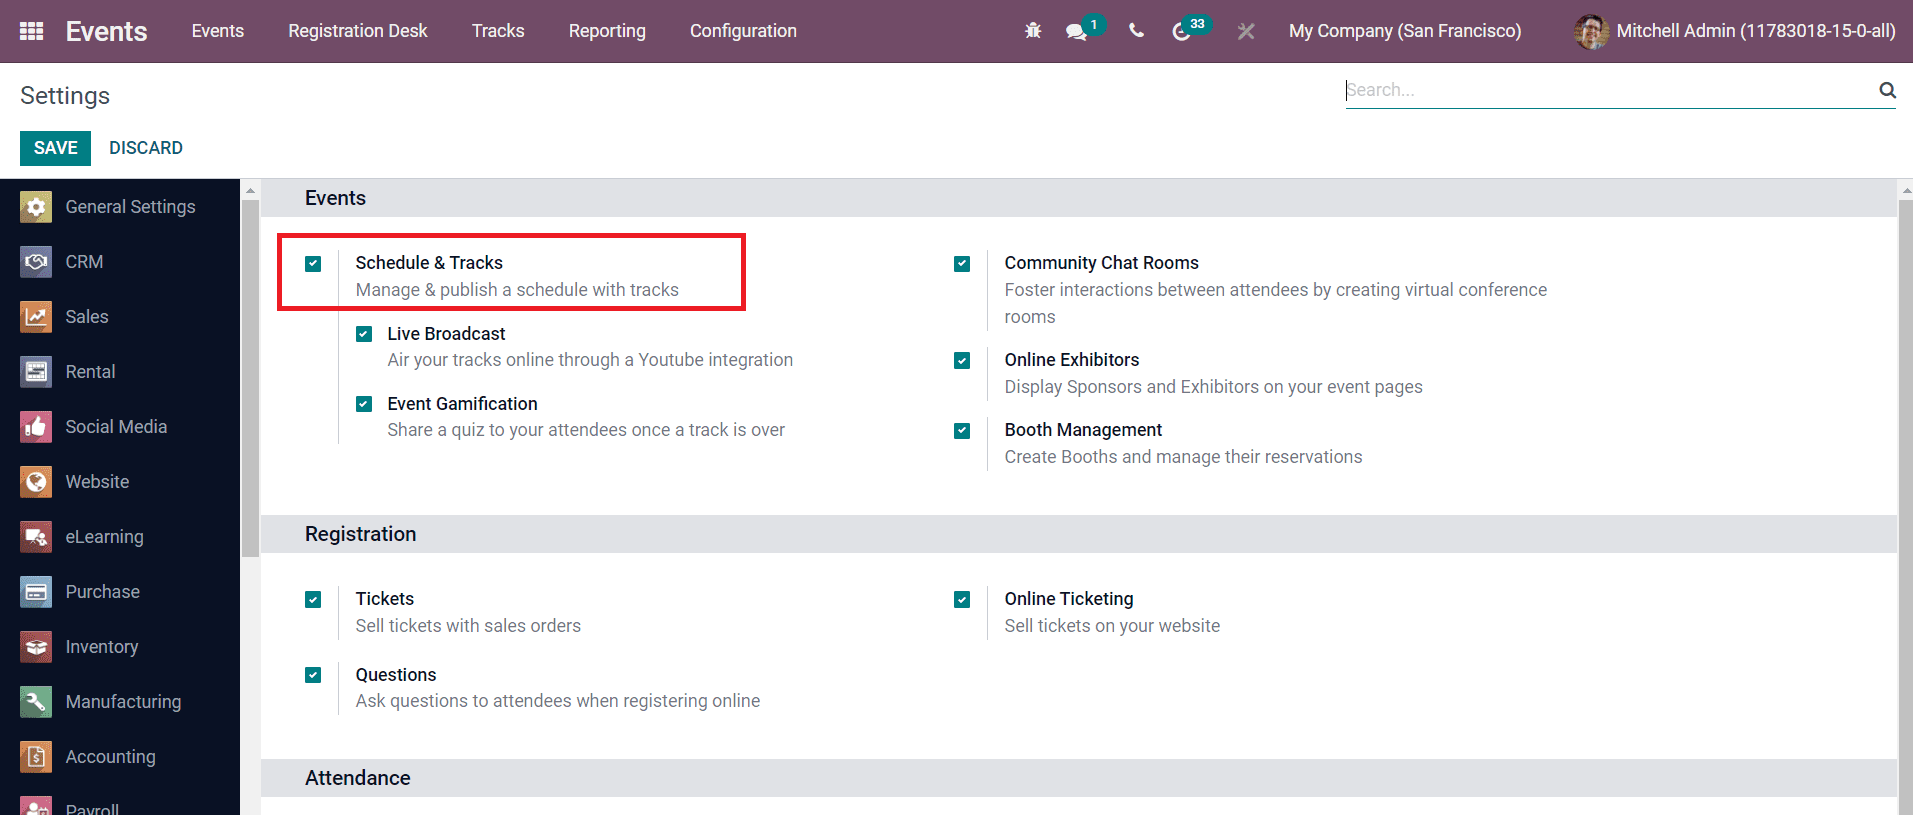
This will add a navigation menu to your event web pages with a schedule, tracks, and a track proposal form.
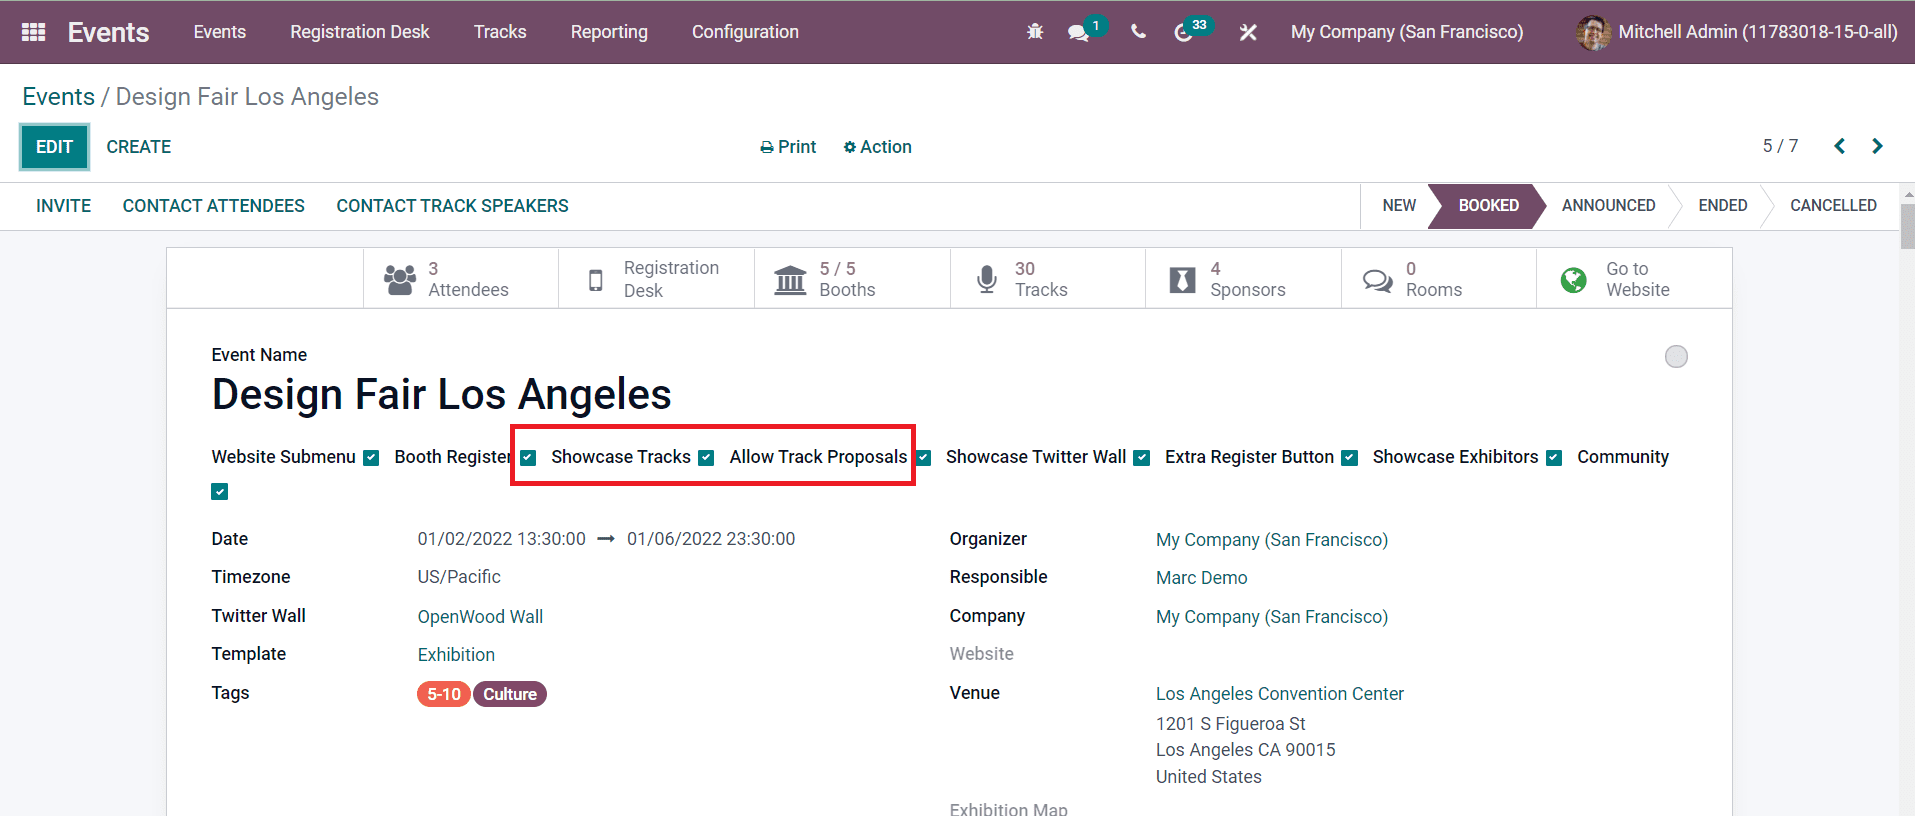
In the event creation window, you can enable the Showcase Tracks option to display the tracks of the event and Allow Track Proposals option to provide a track proposal form for speakers on your website. By clicking on the ‘Go to Website’ button, Odoo will lead you to the web page of this particular event.
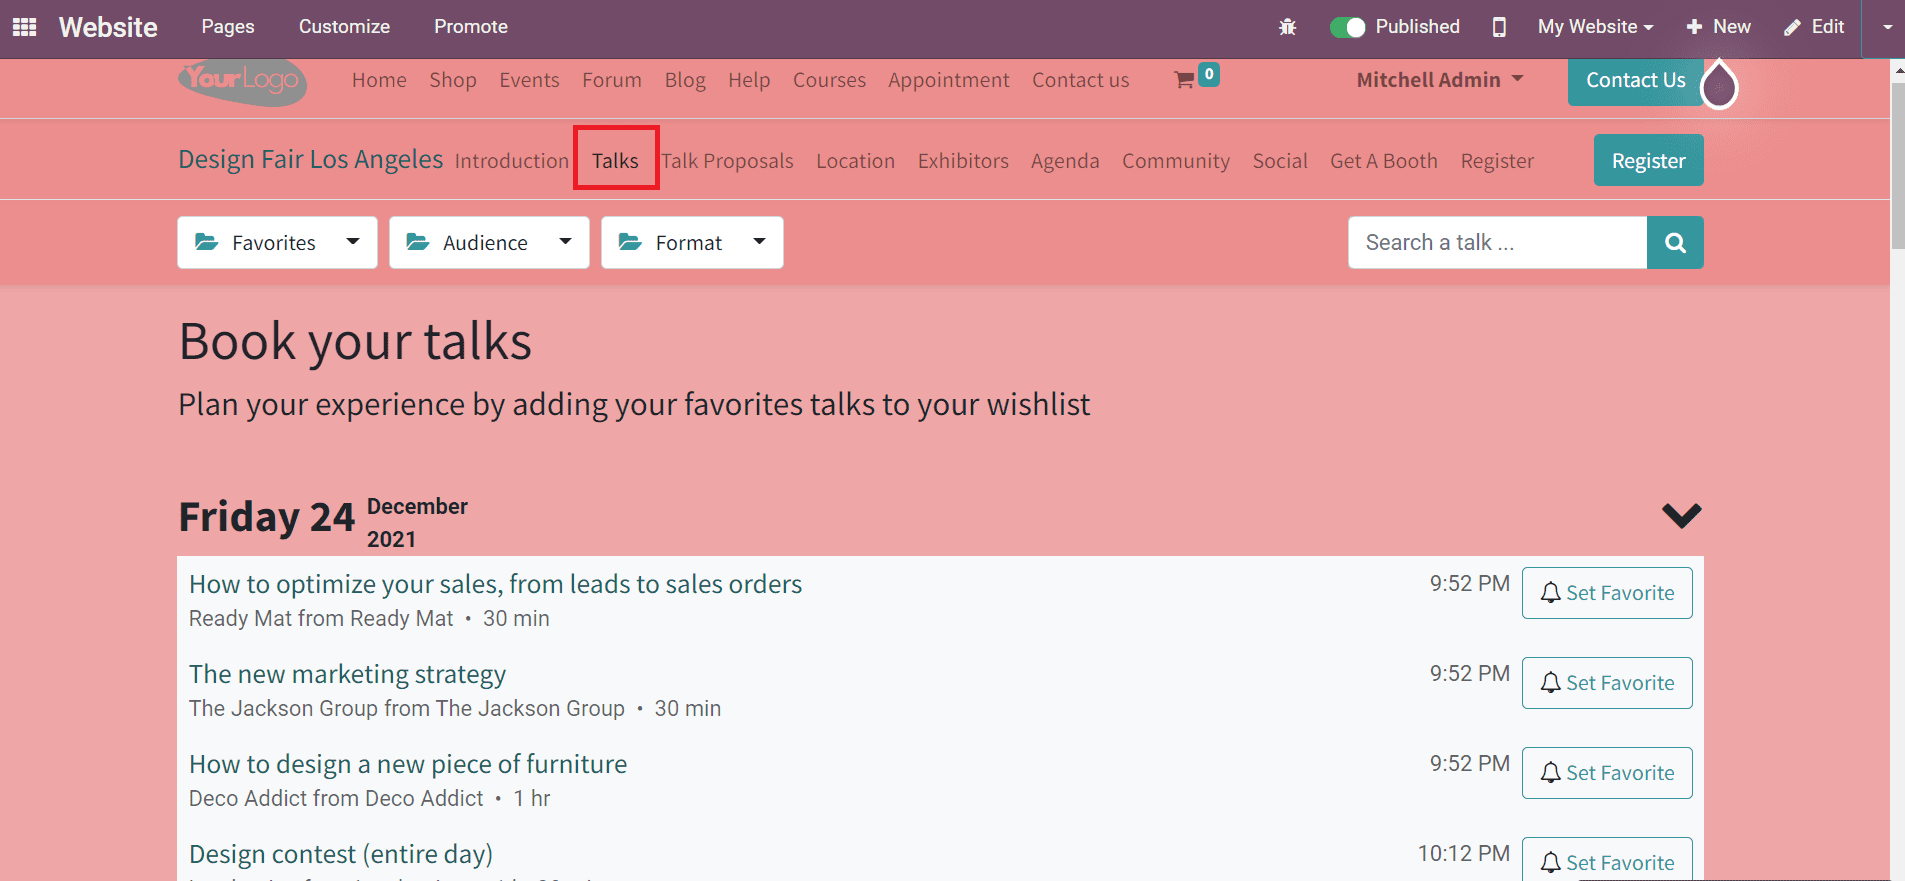
As you can see in the image above, the Talks tab shows all talks related to the event from different speakers. The Talk Proposal tab will provide a form for speakers to fill and send a proposal for a talk at the event.
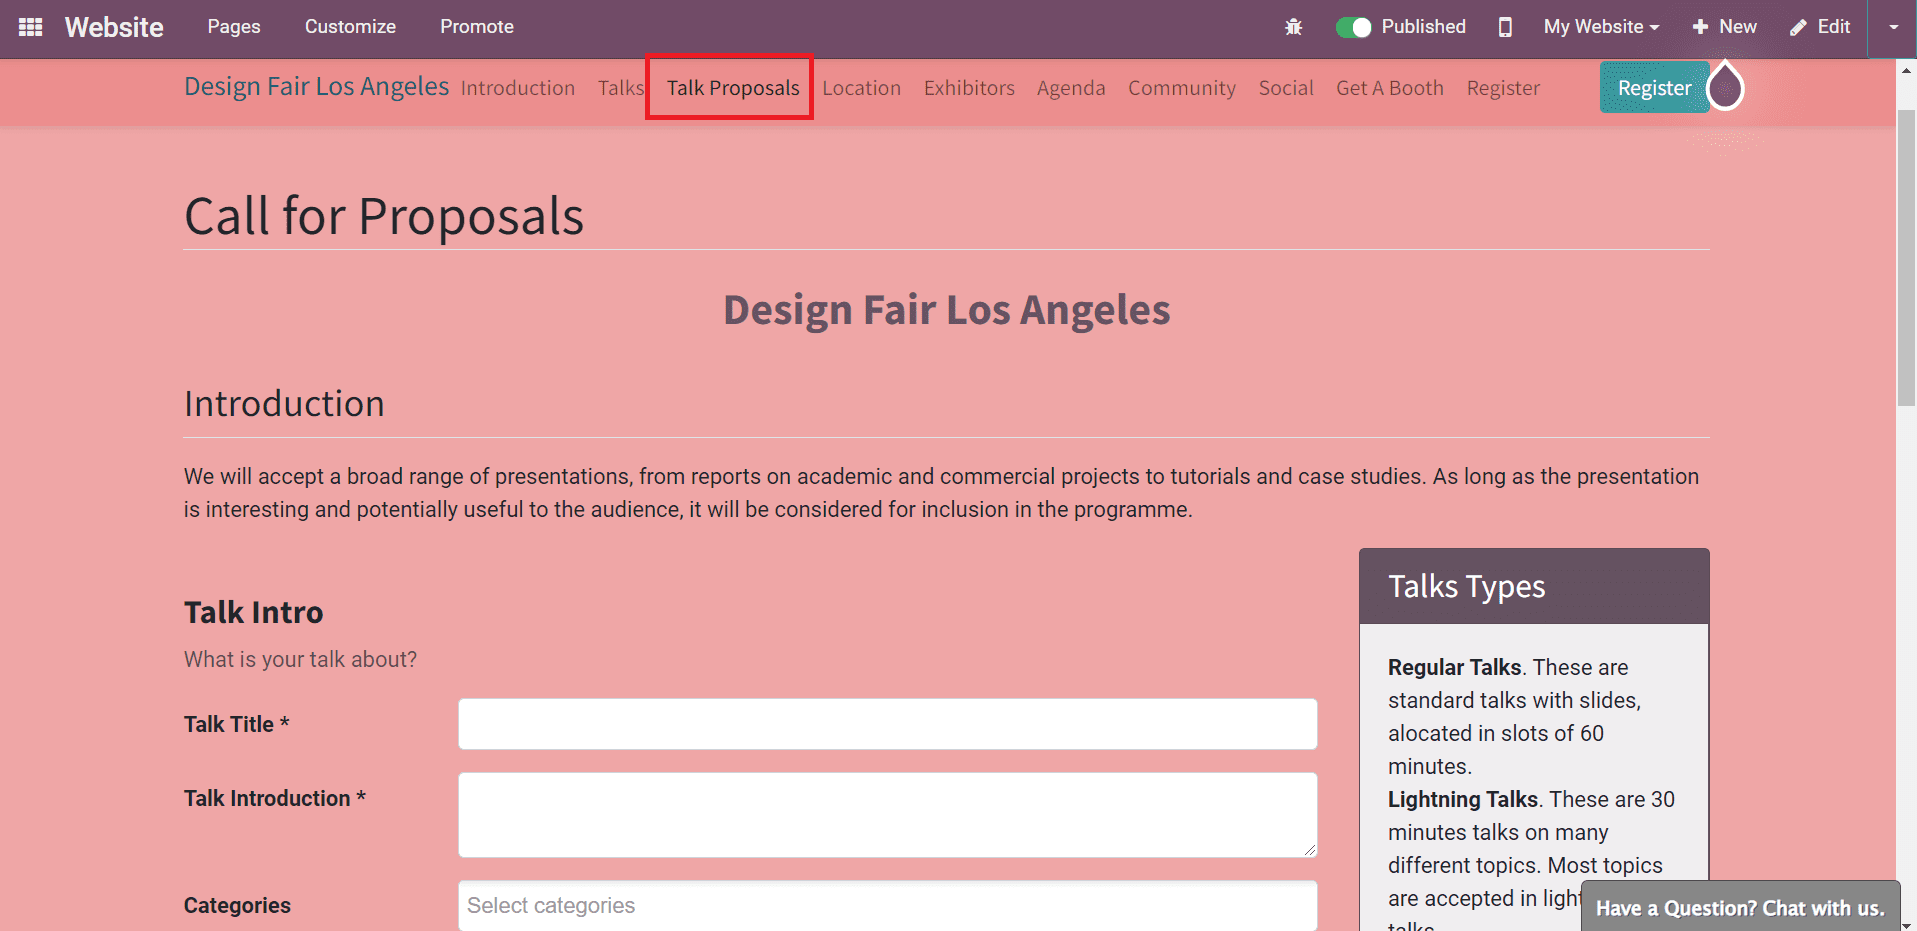
The speaker can mention the details about the talk in the Talk Into field. This field includes Talk Title, Talk Introduction, and Categories of the talk.
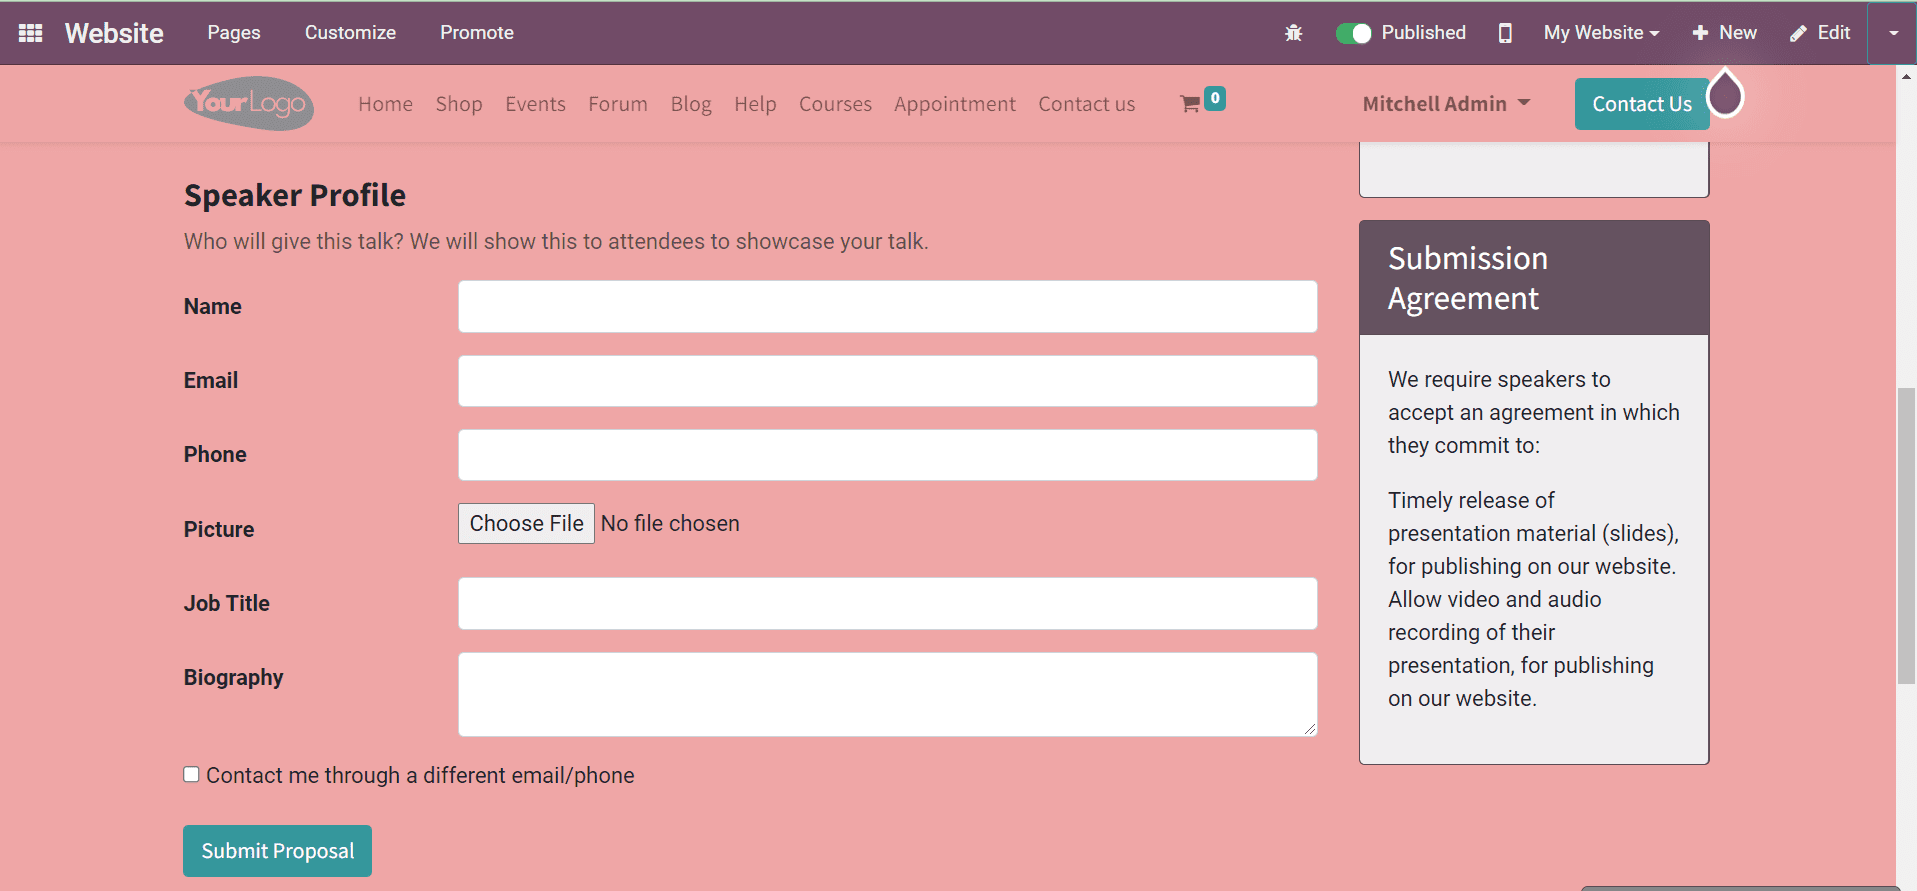
In the Speaker Profile, the user can mention the Name, Email, Phone, Job Title, and Biography of the speaker and upload an image of the speaker in the Picture field. By activating the ‘Contact me through a different email/phone’ option, the user will get additional fields to mention supplementary contact information.

Click the Submit Proposal button to submit the proposal.
You can easily manage all these submitted proposals in the backend from the Tracks menu in the Events module. This menu will be available on the Events module only after activating the Schedule & Tracks option from the Settings menu.
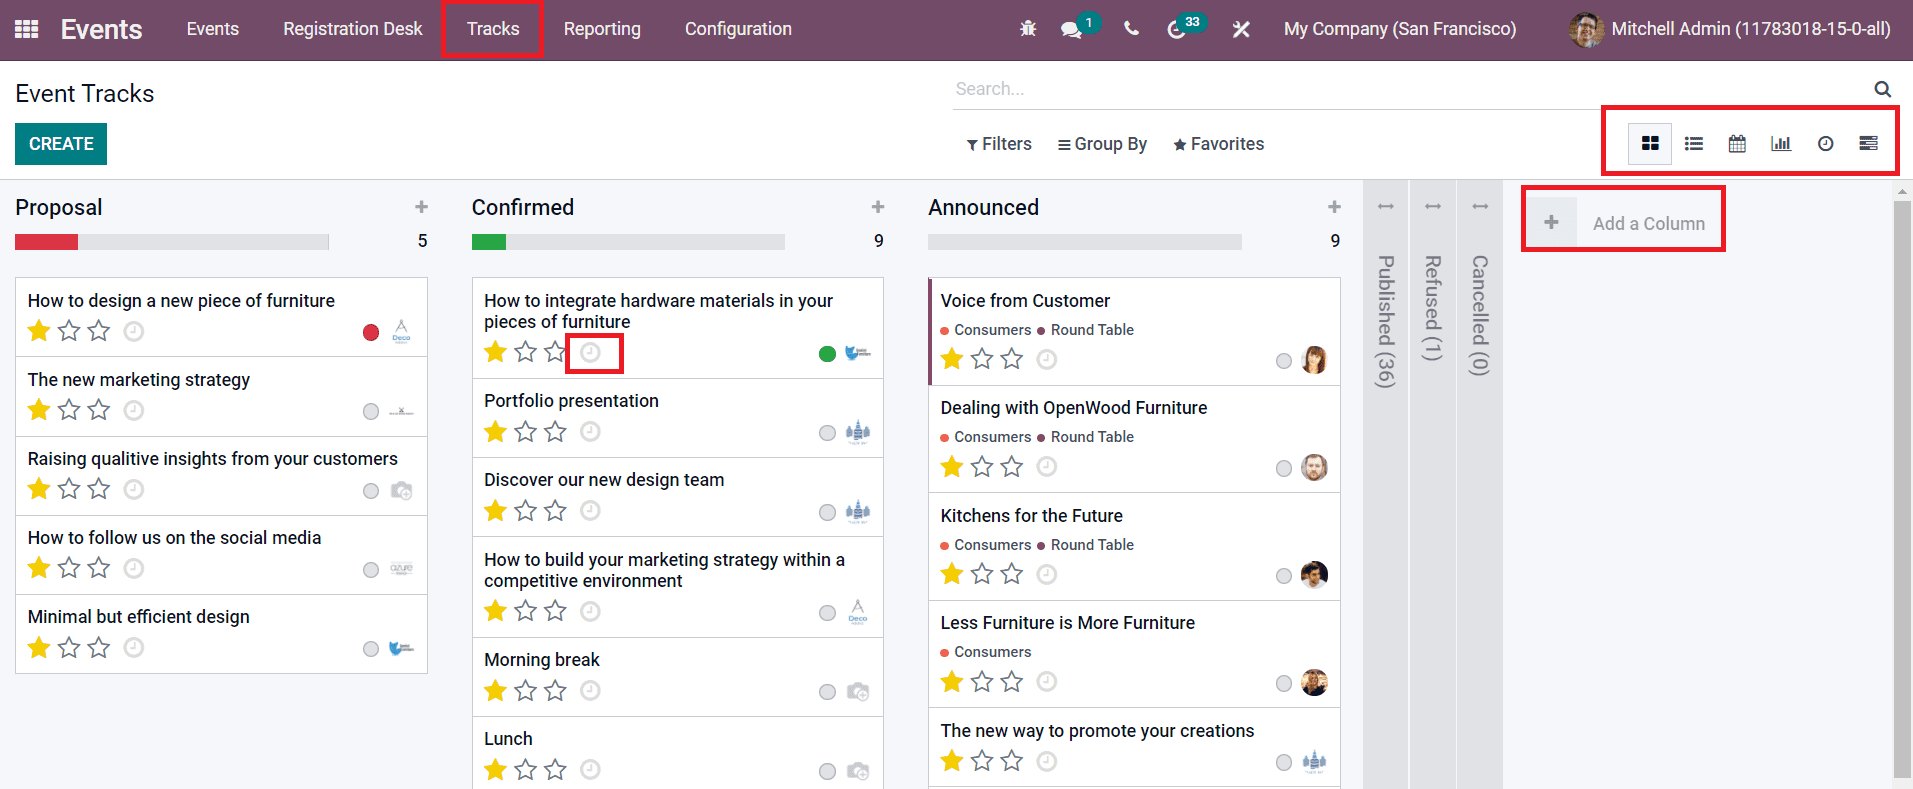
This window displays all event tracks and track proposals from different speakers. In the Kanban view, the event tracks are arranged under various stages. Using the Filters and Group By options, you can categorize the event tracks according to your requirement. You are allowed to use the + icon near the Add a Column option to add a new stage for the tracks. You can use Kanban, List, Calendar, Activity, Gantt, and Graphical views on this platform. The Clock icon can be used to schedule activities for the selected track.
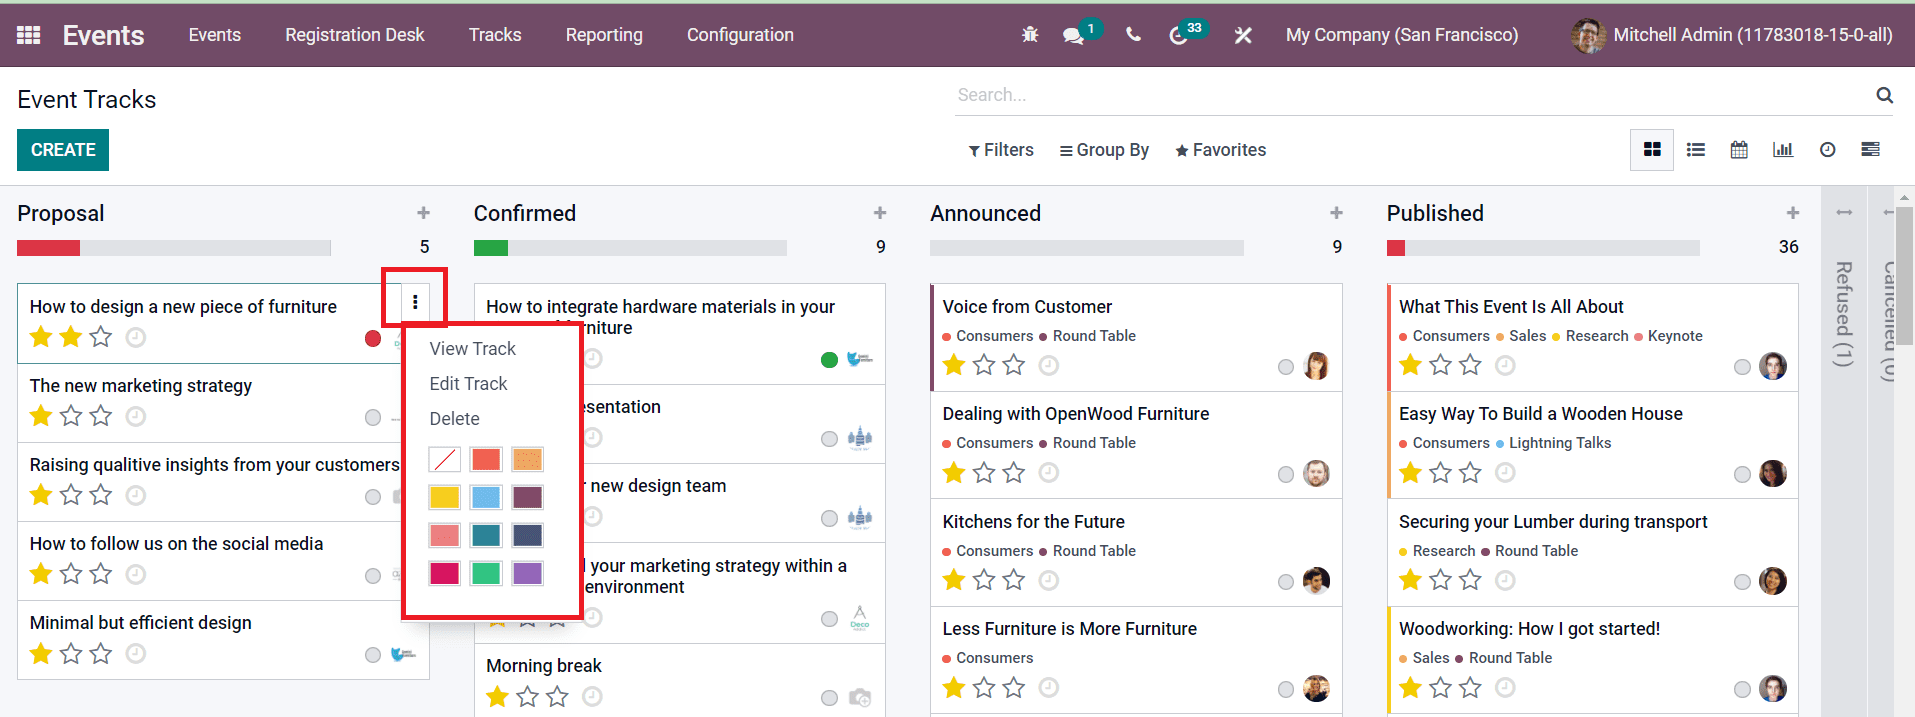
The three vertical dots given on each event track can be used to View Track, Edit Track, and Delete Track. If you want to add a new event track under a specific stage, you can use the + icon shown on the right side of the title of the stage.
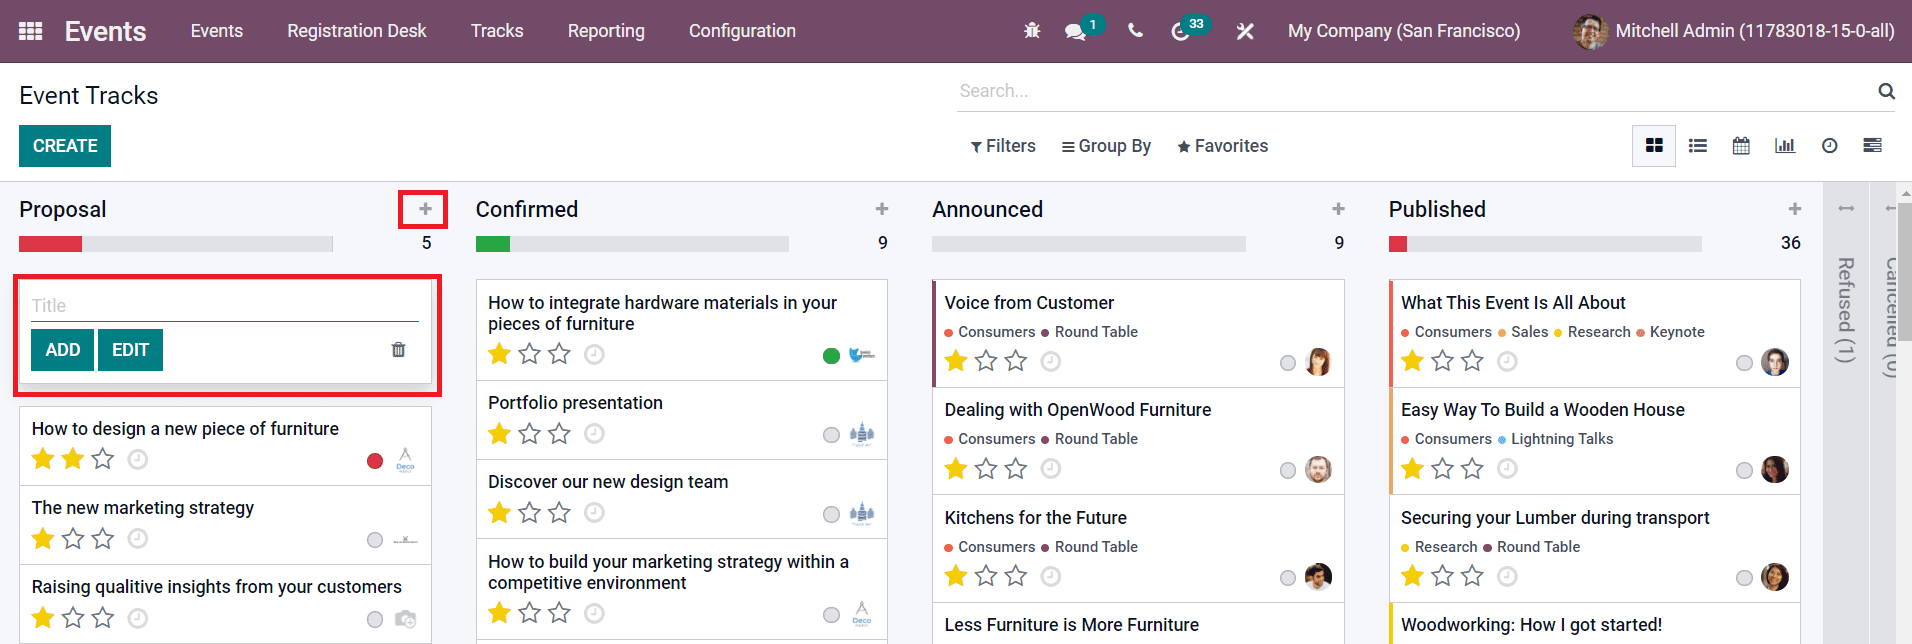
Mention the title of the track in the given space and click on the Add button to add the track under the selected stage. You can also use the Create button to create a new event track on this platform.
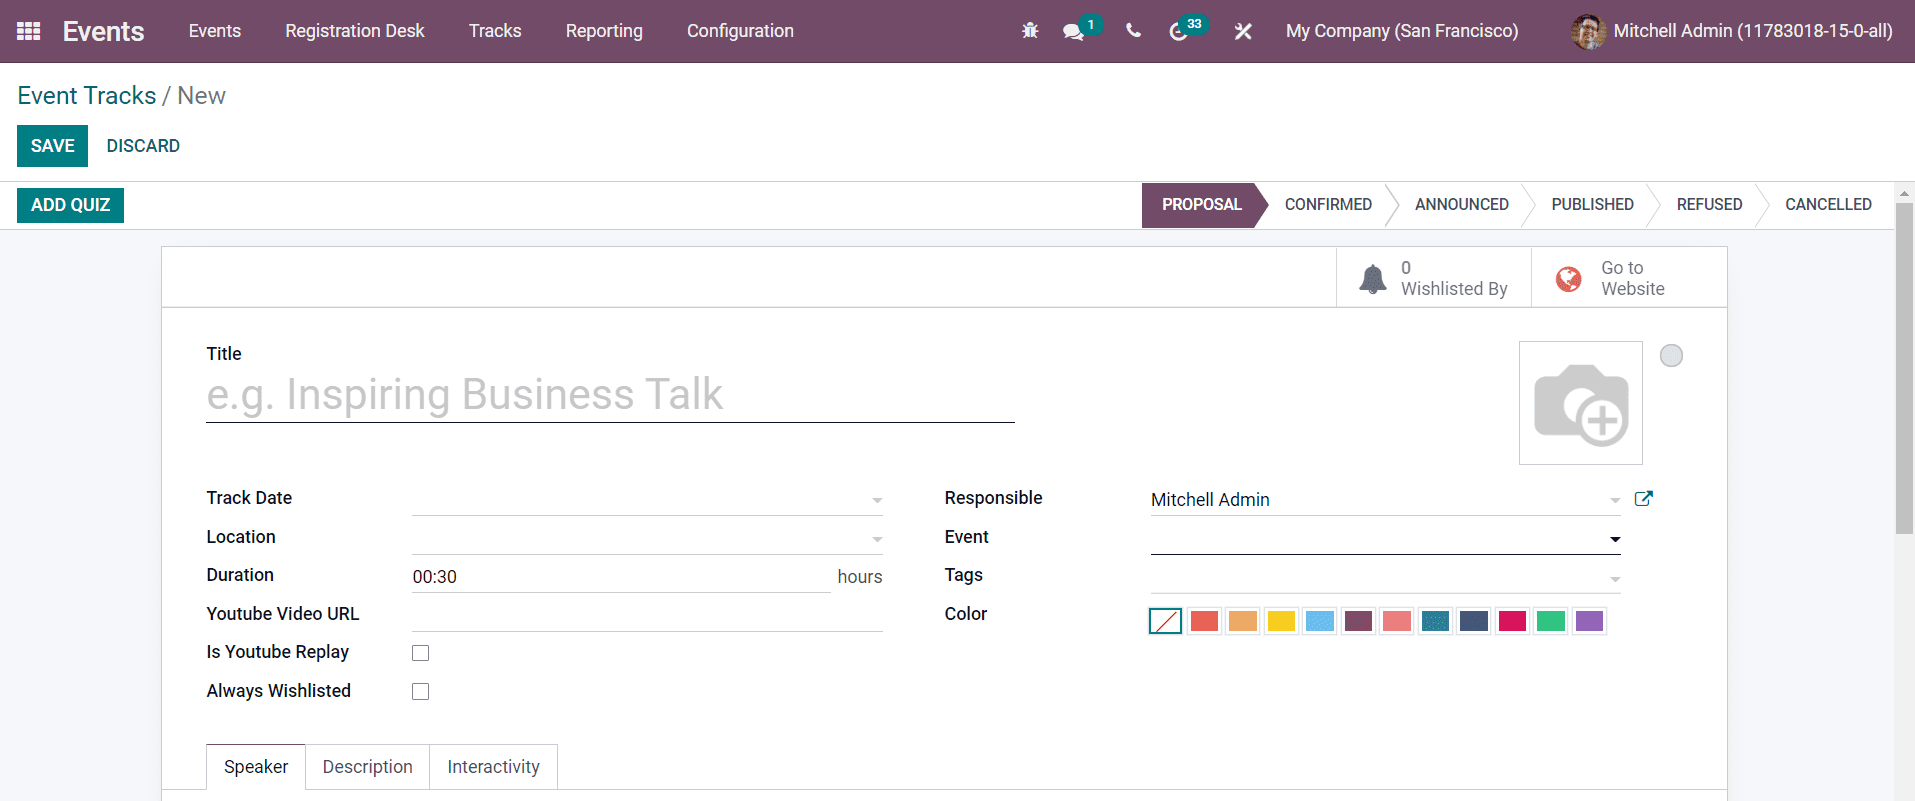
In the Title field, mention the title of the event track. Similarly, mention the Track Date, Location, and Duration of the track in the corresponding fields. You can mention the Youtube Video URL of the track in the specified field so that the attendees can see your track on youtube. If the video is already available on youtube, you can activate the ‘Is Youtube Replay’ option. By activating the ‘Always Wishlisted’ option, the talk will be set as favorite for each attendee registered to the event. Add Responsible Employee name, Event, suitable Tags, and color in the respective fields.
Under the Speaker tab, you can add information about the speaker of this talk. This includes Contact Details and Speaker Bio.
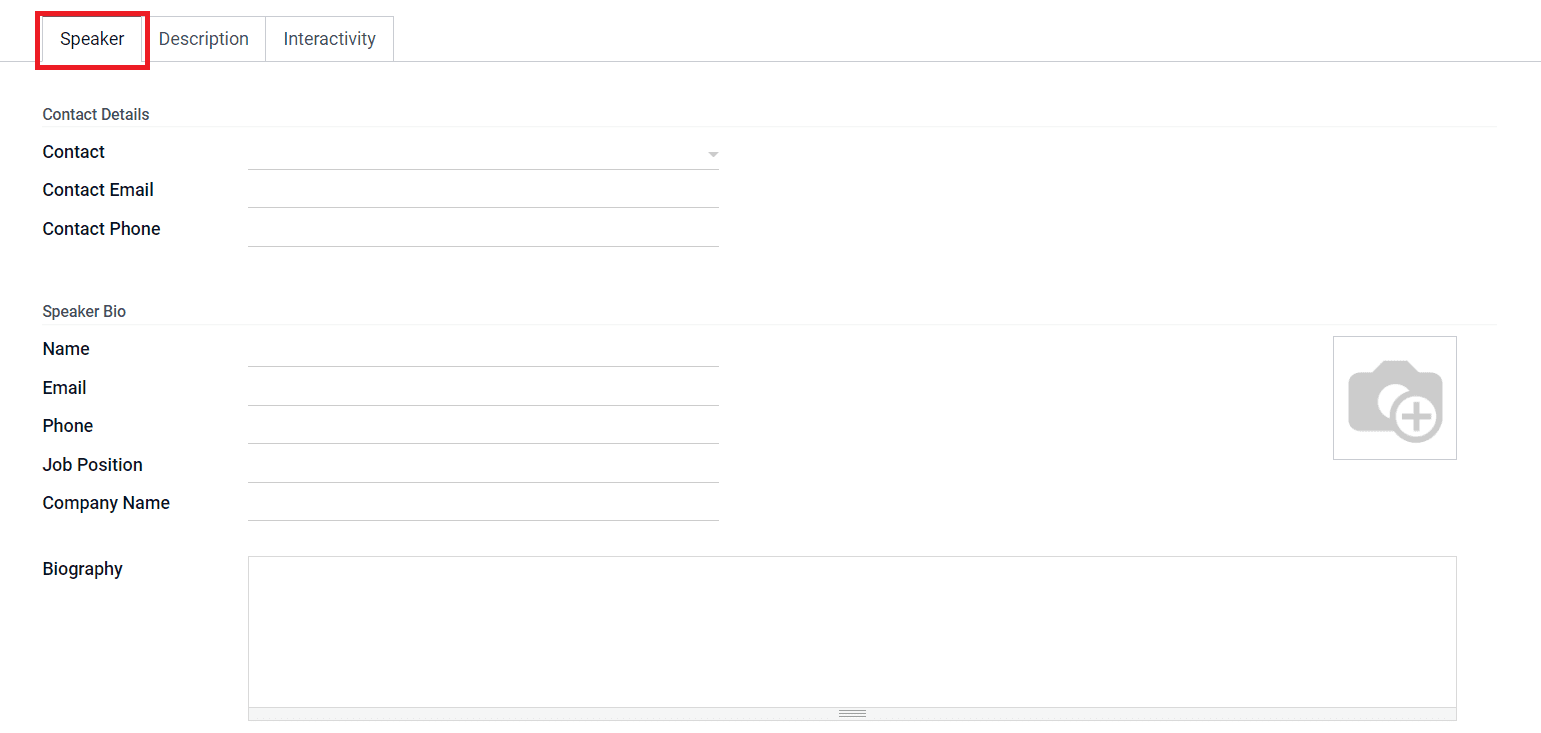
You can specify the Contact Name, Email, and Phone number in the contact details field. Speaker Bio includes the Name of the speaker, Email, Phone, Job Position, Company Name, and Biography. You are also allowed to upload a picture of the speaker in the given field.
The Description tab can be used to mention instructions and important information related to the talk.

In the Interactivity tab, you will get an option called Magic Button to activate. By activating this option, Odoo will display a call to action to your attendees while they are attending your talk.
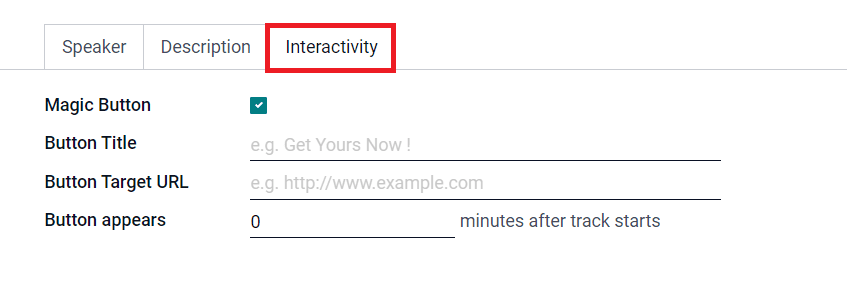
In this tab, you can specify the Button Title, Button Target URL, and Button Appearing Time.
Now, you can click on the Save button to save the newly created track. Once the track is over, you can ask questions related to the talk to the attendees. In Odoo, you can activate the Event Gamification option to add questions to your track.

Now, you can see the ‘Add Quiz’ option on your event creation window.
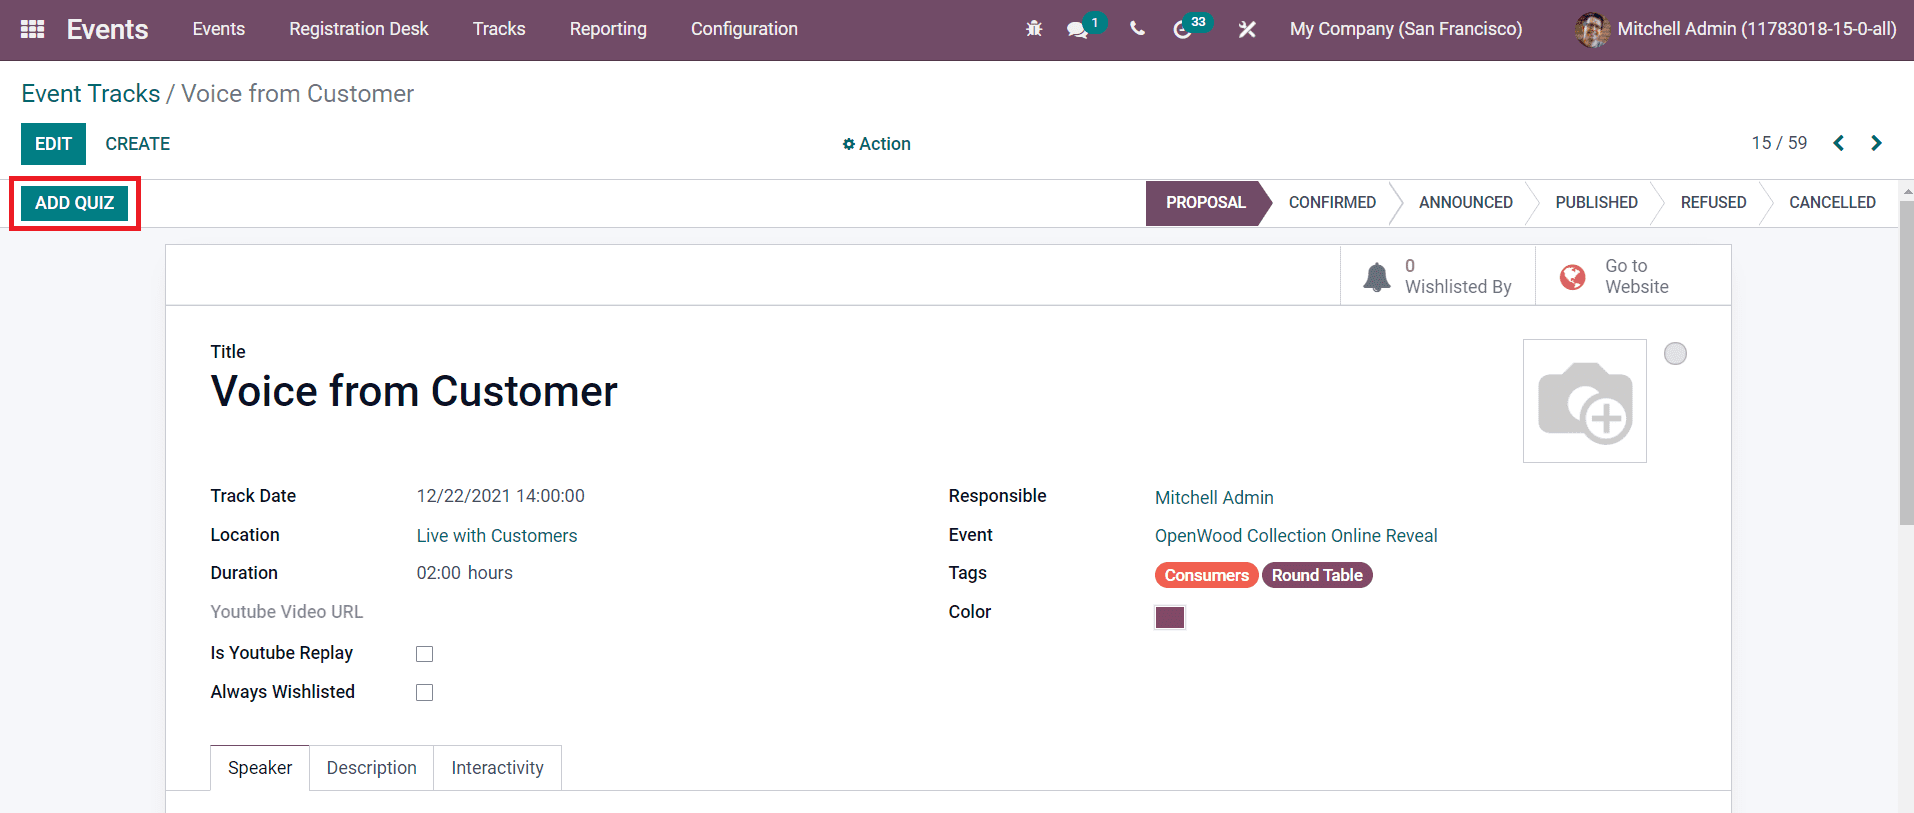
Now, click on the Add Quiz button to add questions for the event track and you will be directed to a new window as shown below.

You can add a title for the quiz in the given space. The ‘Allow multiple tries’ option can be activated to let the attendees reset the quiz and try again. The name of the Event and Event Track can be seen in this window. You will get the Add a Line option to configure questions under the Question tab.
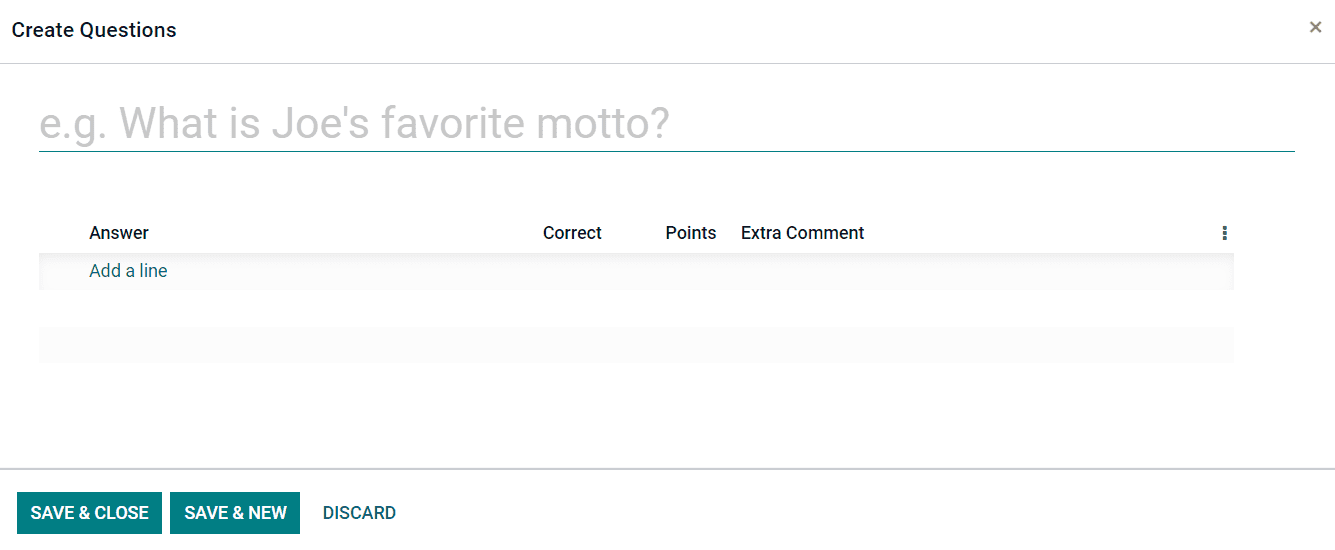
In the pop-up window, mention the question in the specified field and add answer options under the Answer line. Among the specified answer options, you can mark the correct answer and specify points for the correct answer in the corresponding fields. When an attendee selects the correct answer for the given options, he/she will get the specified points as a reward. If you want to add any Extra Comments for the answer line, you can also add them in this window. Finally, click the Save button to save the quiz.
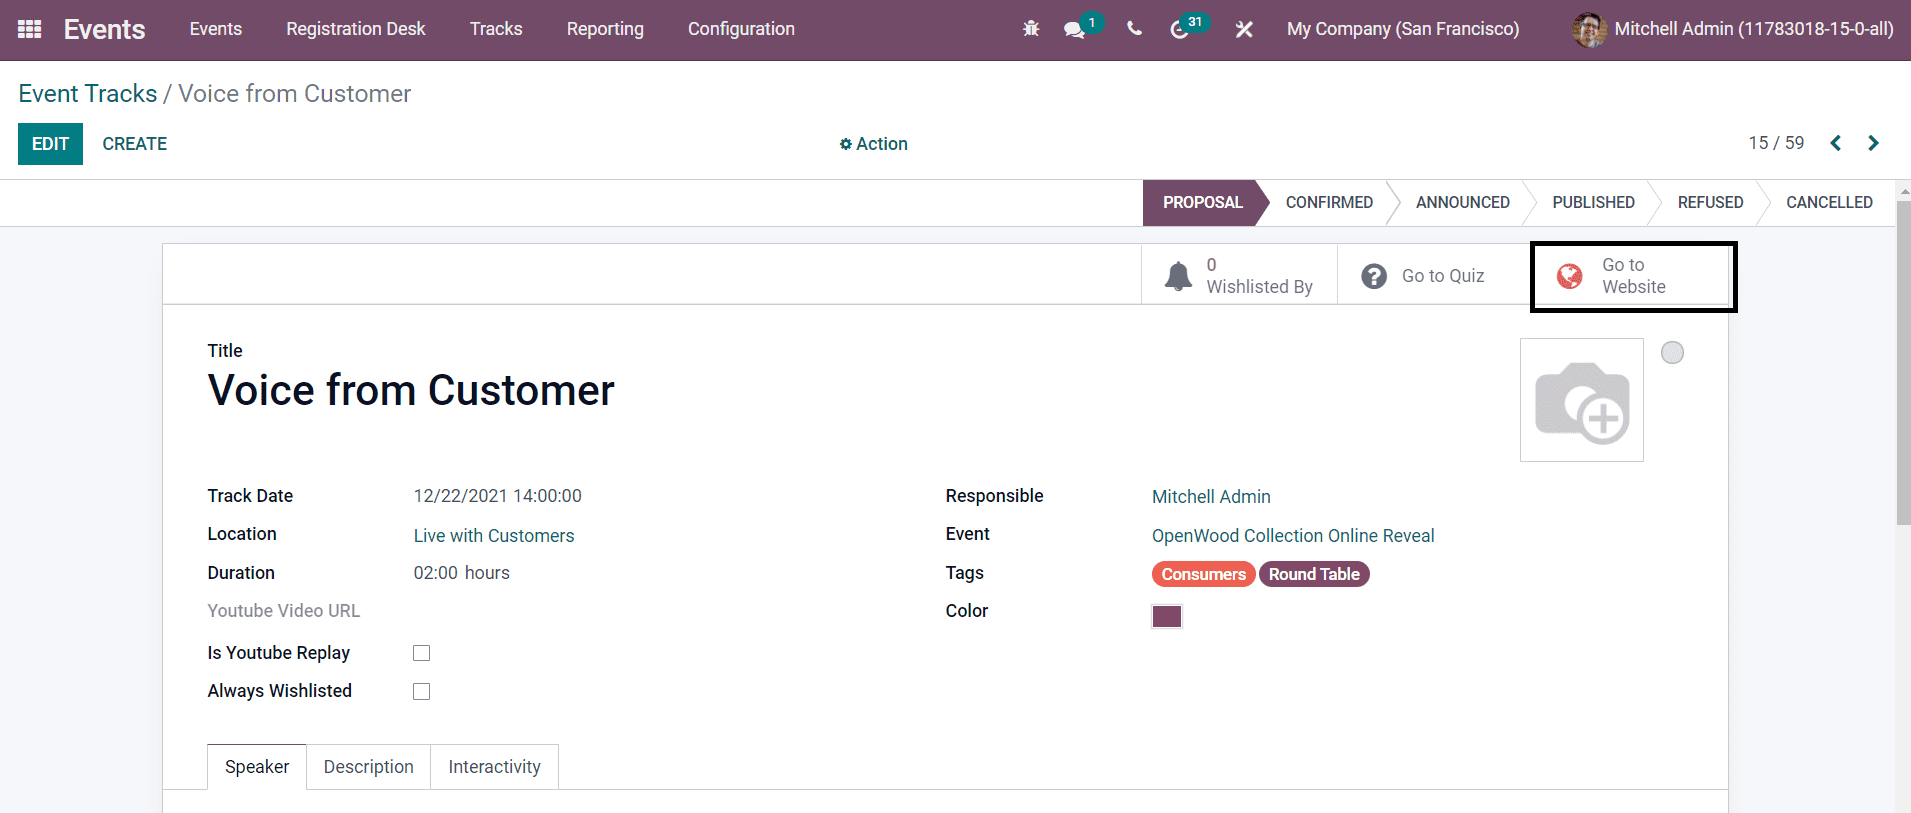
Now, use the ‘Go to Website’ button to publish this event track on your website.
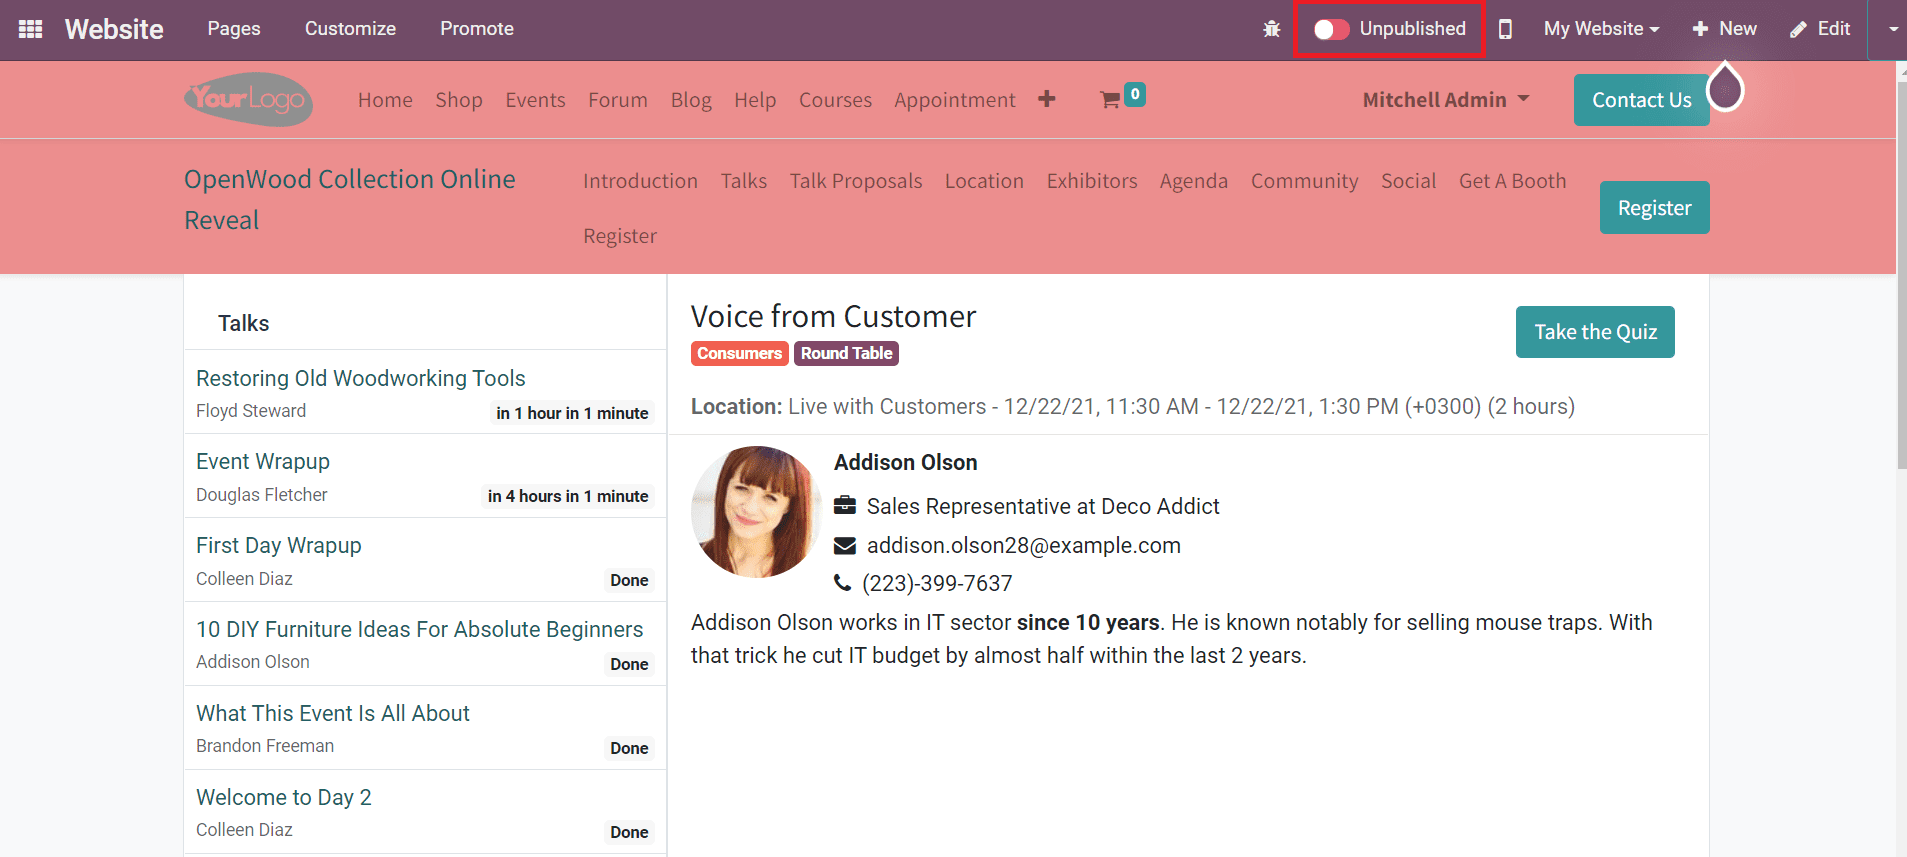
Click the Unpublished button as marked in the screenshot and change the status to ‘Published’.
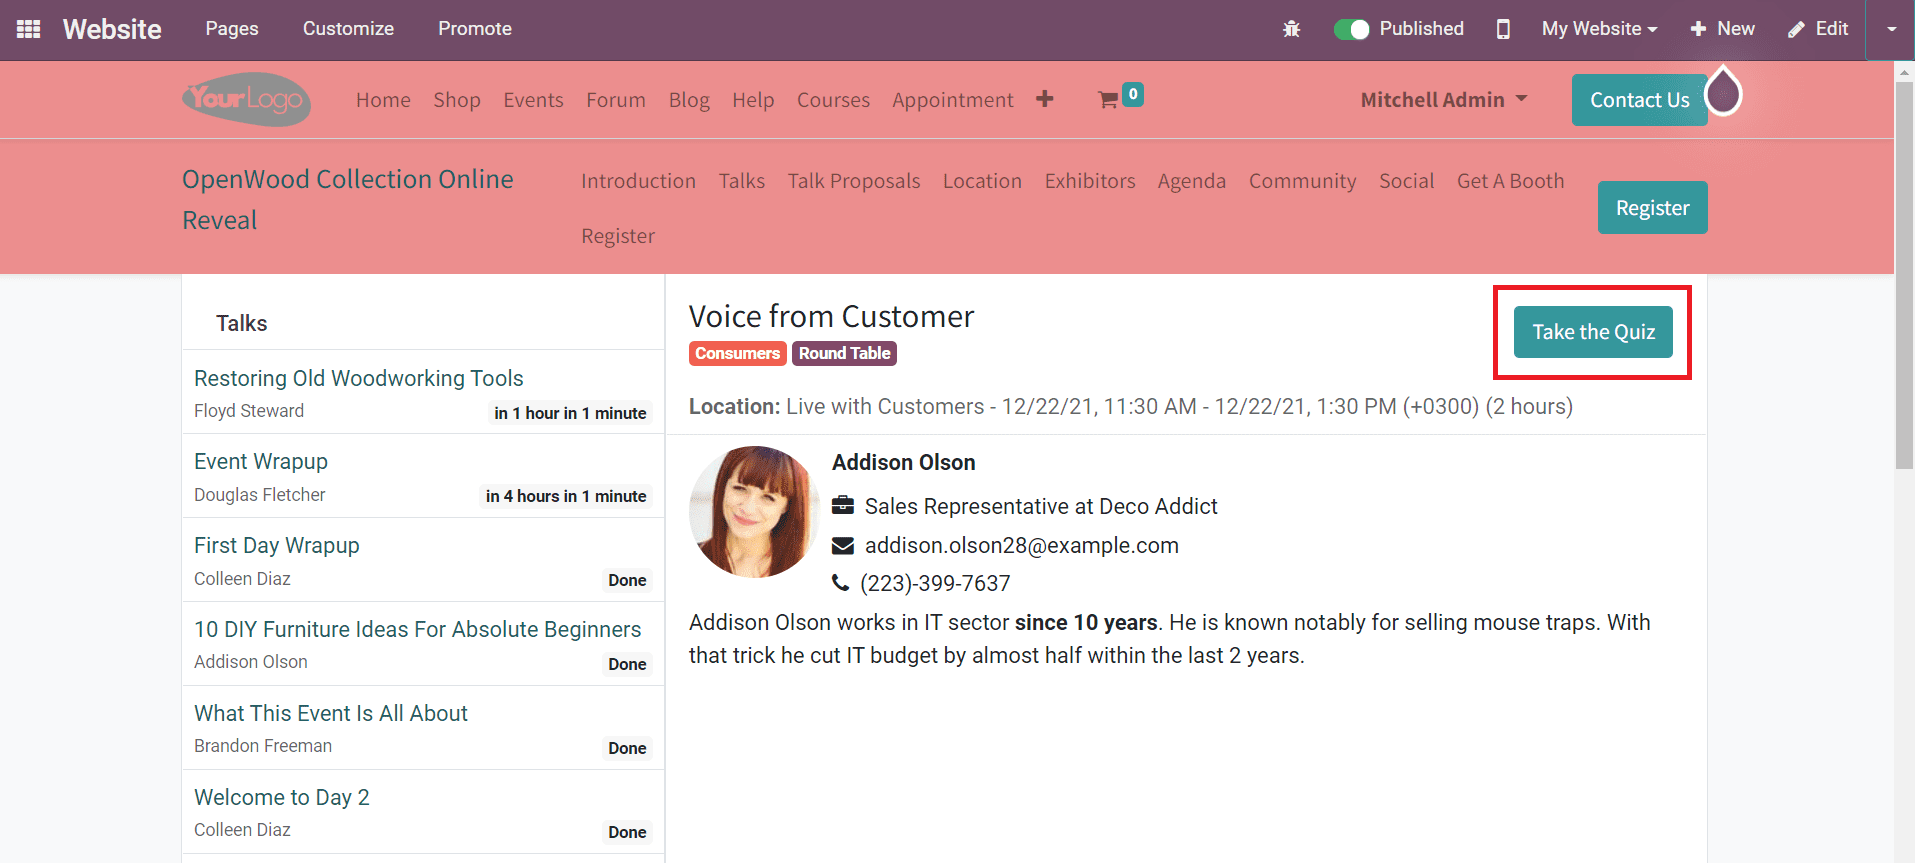
After attending the talk, the attendees can click on the Take the Quiz button.
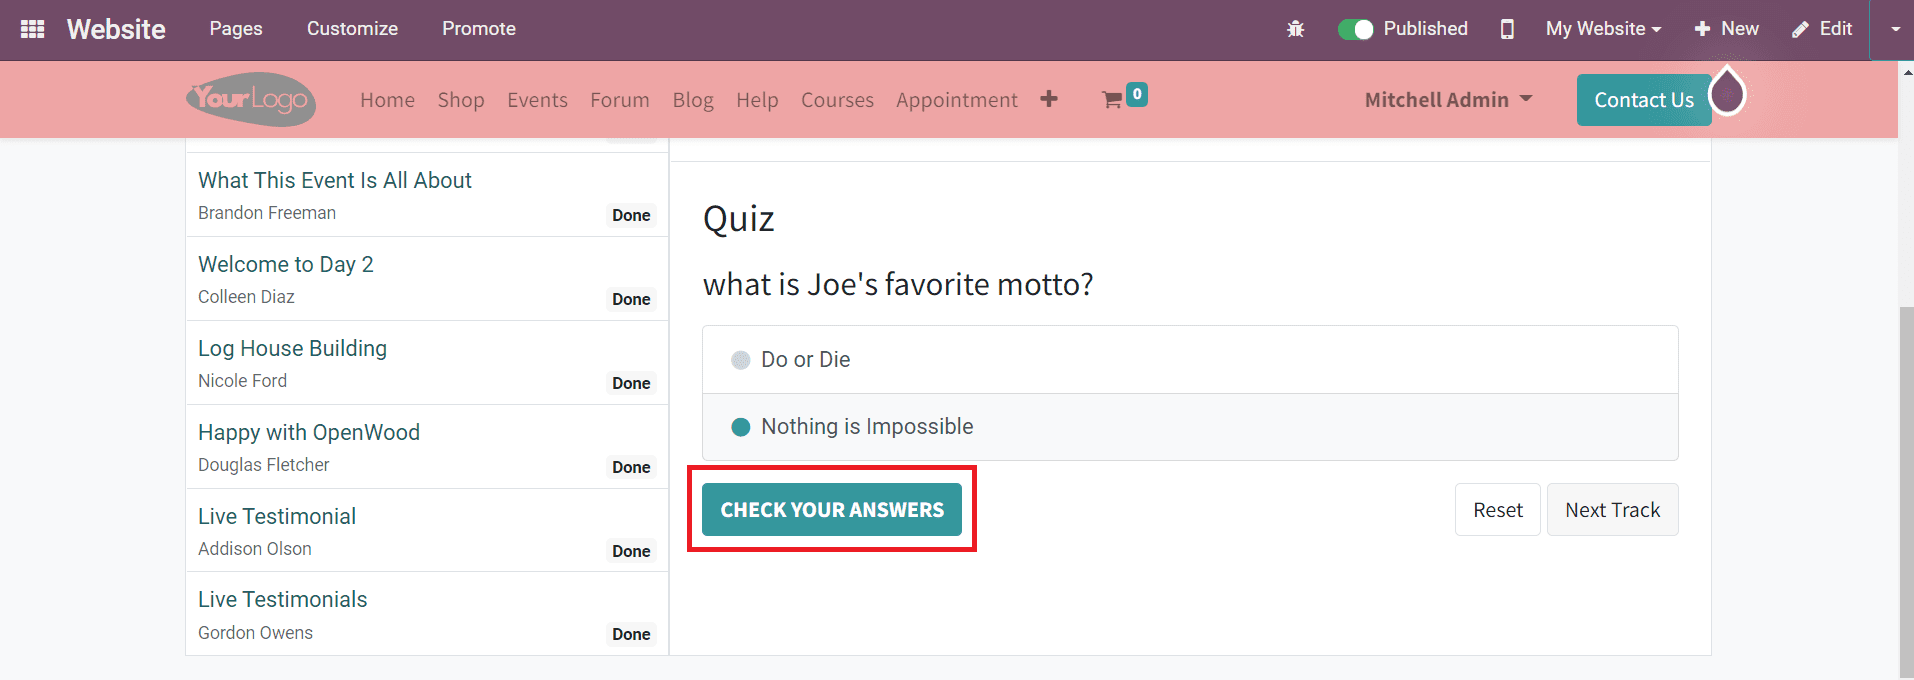
The Check Your Answers button will check your answers and show the correct answer.
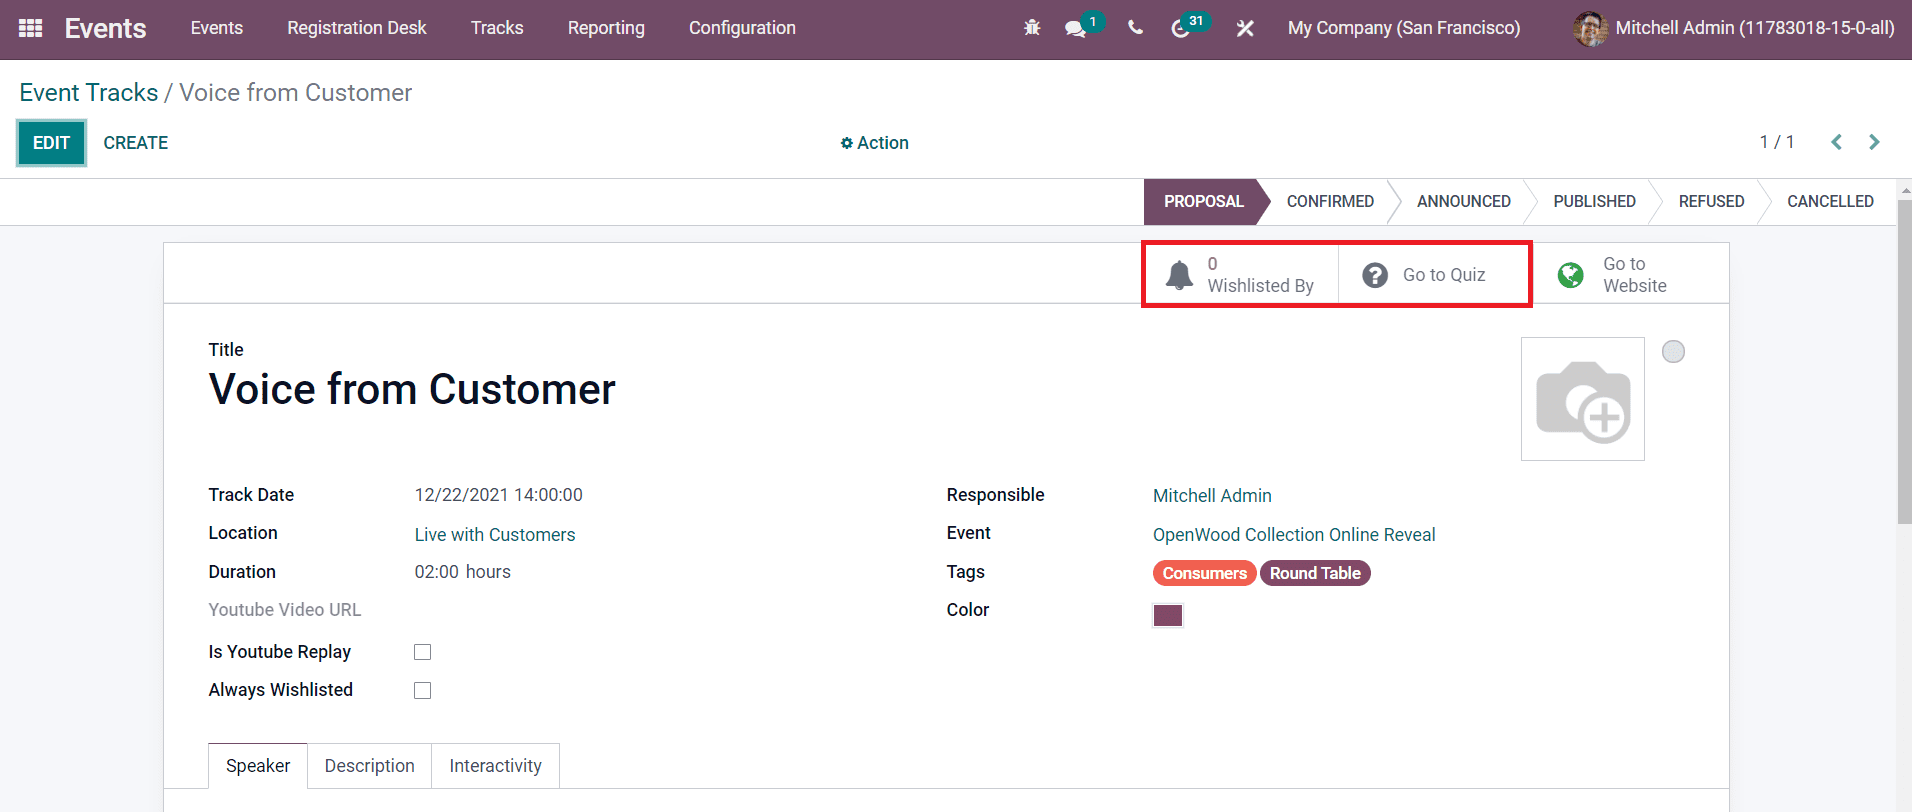
You will get the number of visitors who added this event track to their wishlist in the ‘Wishlisted By’ button available in the smart tab as marked in the screenshot above. The ‘Go to Quiz’ button will lead you to the platform which contains the questions of the quiz.
Now, let’s discuss the options available under the Configuration menu of the module.