Online Appointments
Based on the availability of employees and clients, it is easy to schedule online appointments in the Odoo Calendar module. Once you install the Appointment module in Odoo from AppStore, you will get the option to manage and schedule online appointments in the Calendar module. The online appointment feature will reduce the difficulties in scheduling meetings with clients. You can find the Online Appointments menu in the main menubar of the module.

As you can see in the image above, this platform will show all scheduled appointments in this module. To create a new appointment you can click on the Create button.
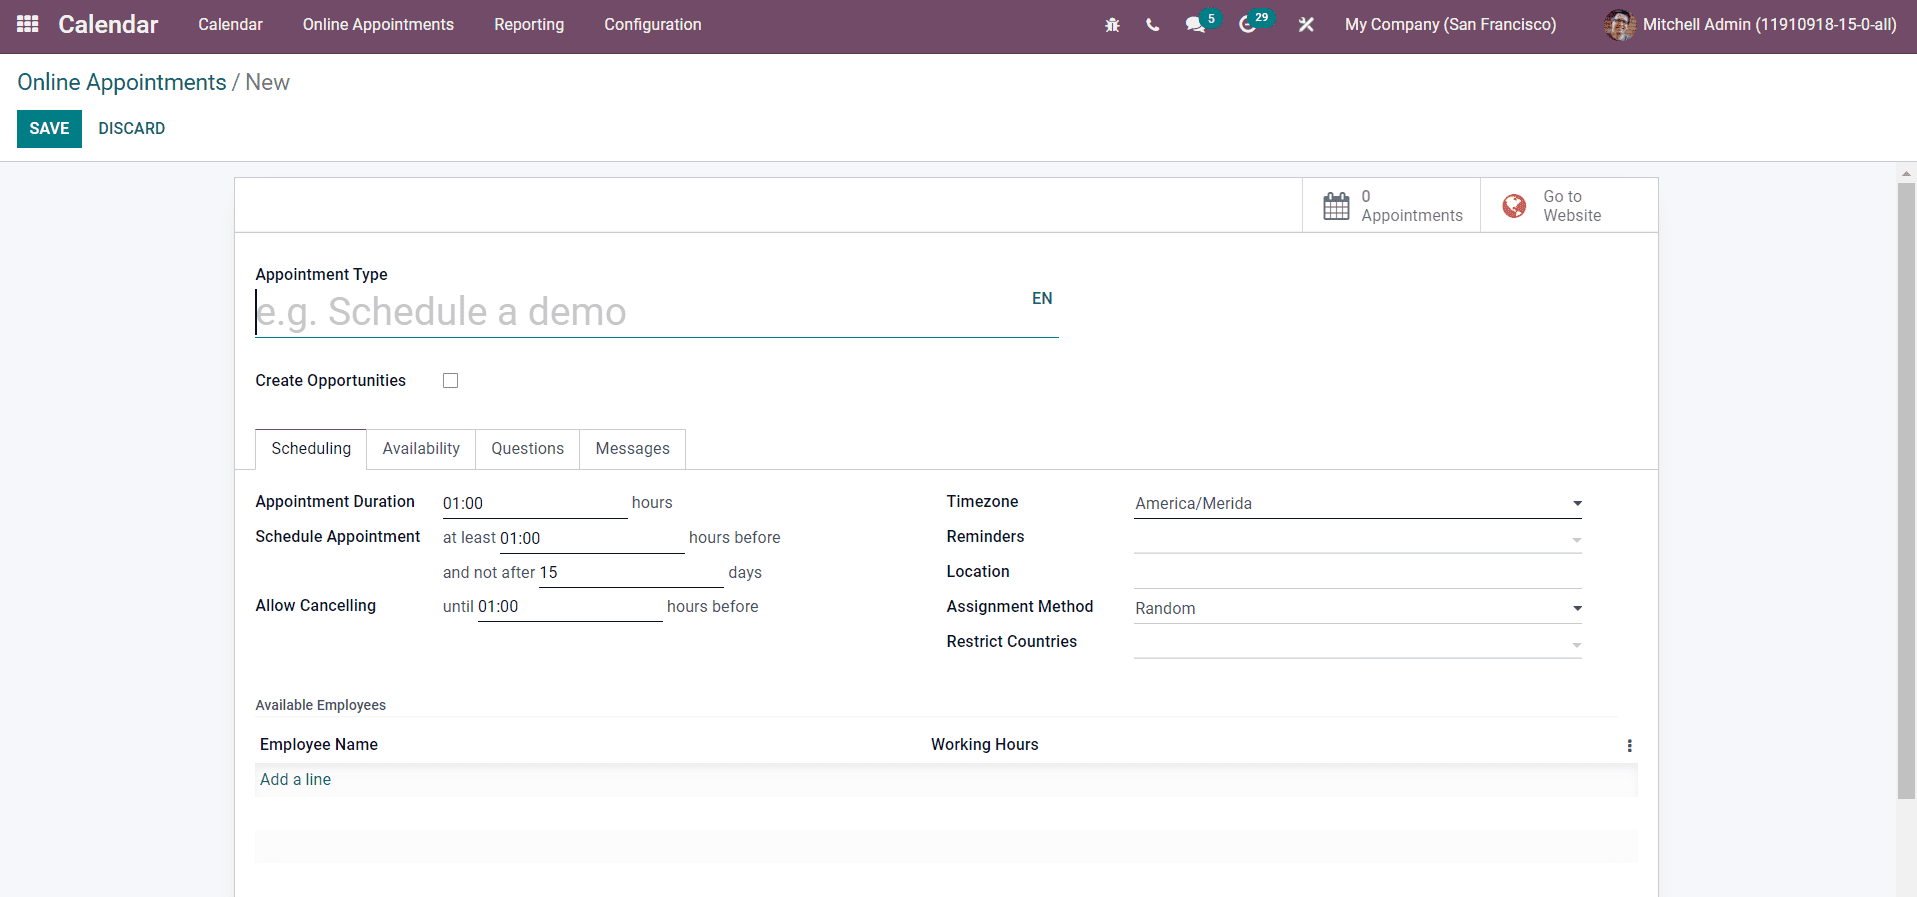
In the Appointment Type field, you can mention the type of appointment. You can create new opportunities and assign them to the responsible employee for each scheduled appointment by activating the Create Opportunities button. Under the Scheduling tab, you can define the Appointment Duration, Schedule Appointment, Allow Cancelling, Timezone, Reminders, Location, Assignment Method, and Restrict Countries. The Schedule Appointment field can be used to mention the time to schedule the appointment. Odoo will allow you to cancel the appointment until the specified time in the Allow Cancelling field. The Assignment method will define how employees will be assigned to meetings customers book on your website. It can be set as Random or Chosen by the customer. You can allow visitors from selected countries only and restrict visitors from particular countries by mentioning the countries in the Restric Countries field. The list of available employees can be added under the Available Employees tab.
The availability of the appointment in a week can be mentioned in the Availability tab using the Add a Line option.

You can add questions for the appointment under the Questions tab.

A pop-up window will appear when you click on the Add a Line button.
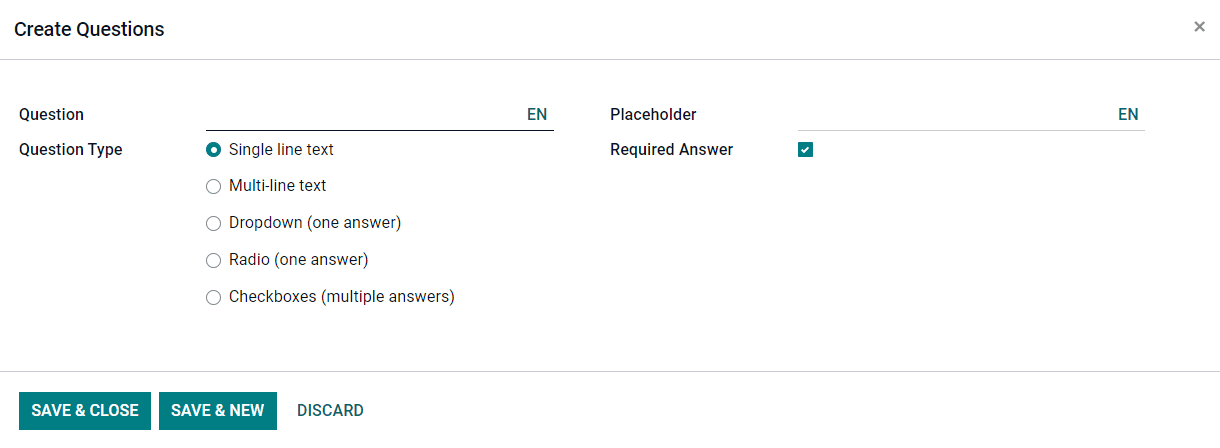
In this window, mention the question in the given field. You can select the Question Type as Single line text, Multiline text, Dropdown, Radio, or Checkboxes. Mention the Placeholder and enable the Required Answer field if answering is compulsory.
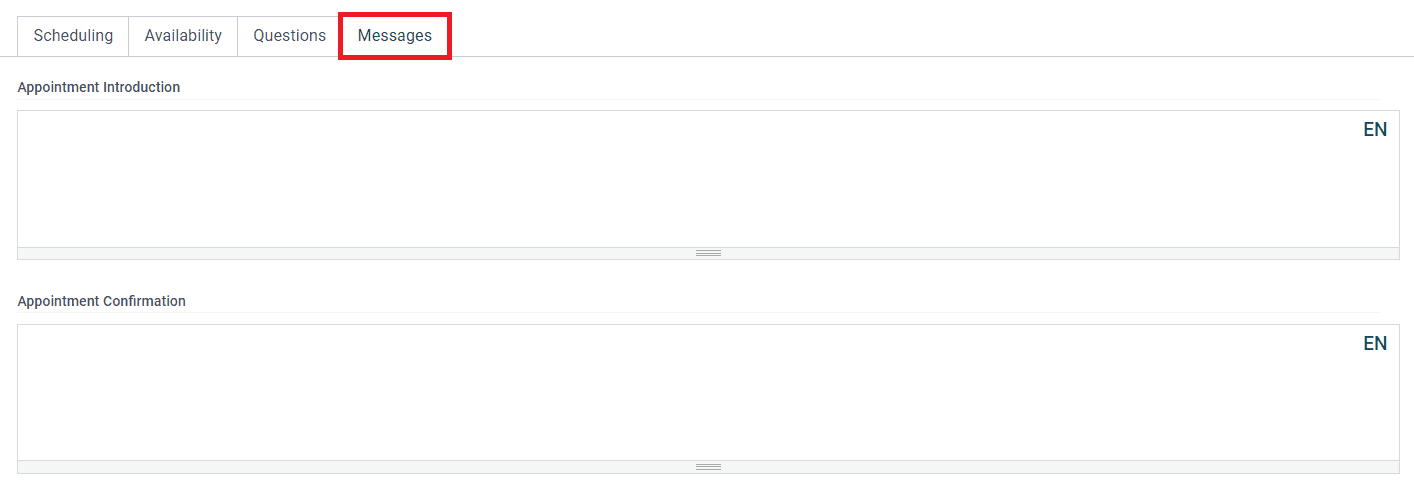
You can add Appointment Introduction and Appointment Confirmation messages under the Messages tab. After adding details in all fields, you can click on the Save button.
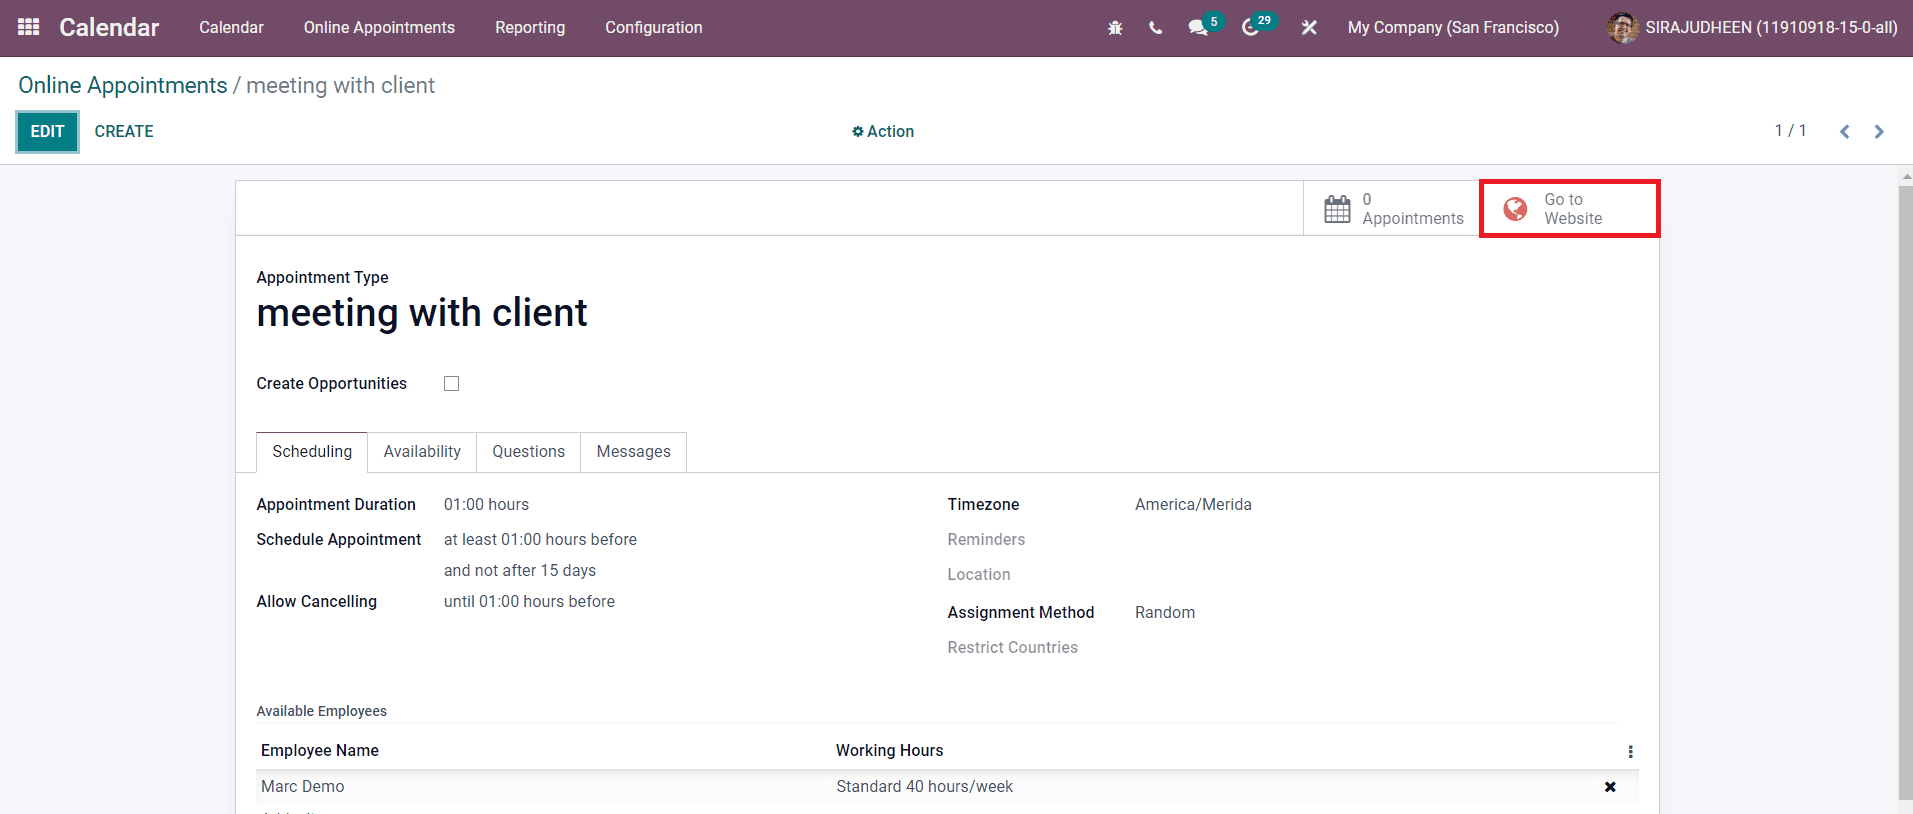
To publish this on your website, click on the Go To Website button.
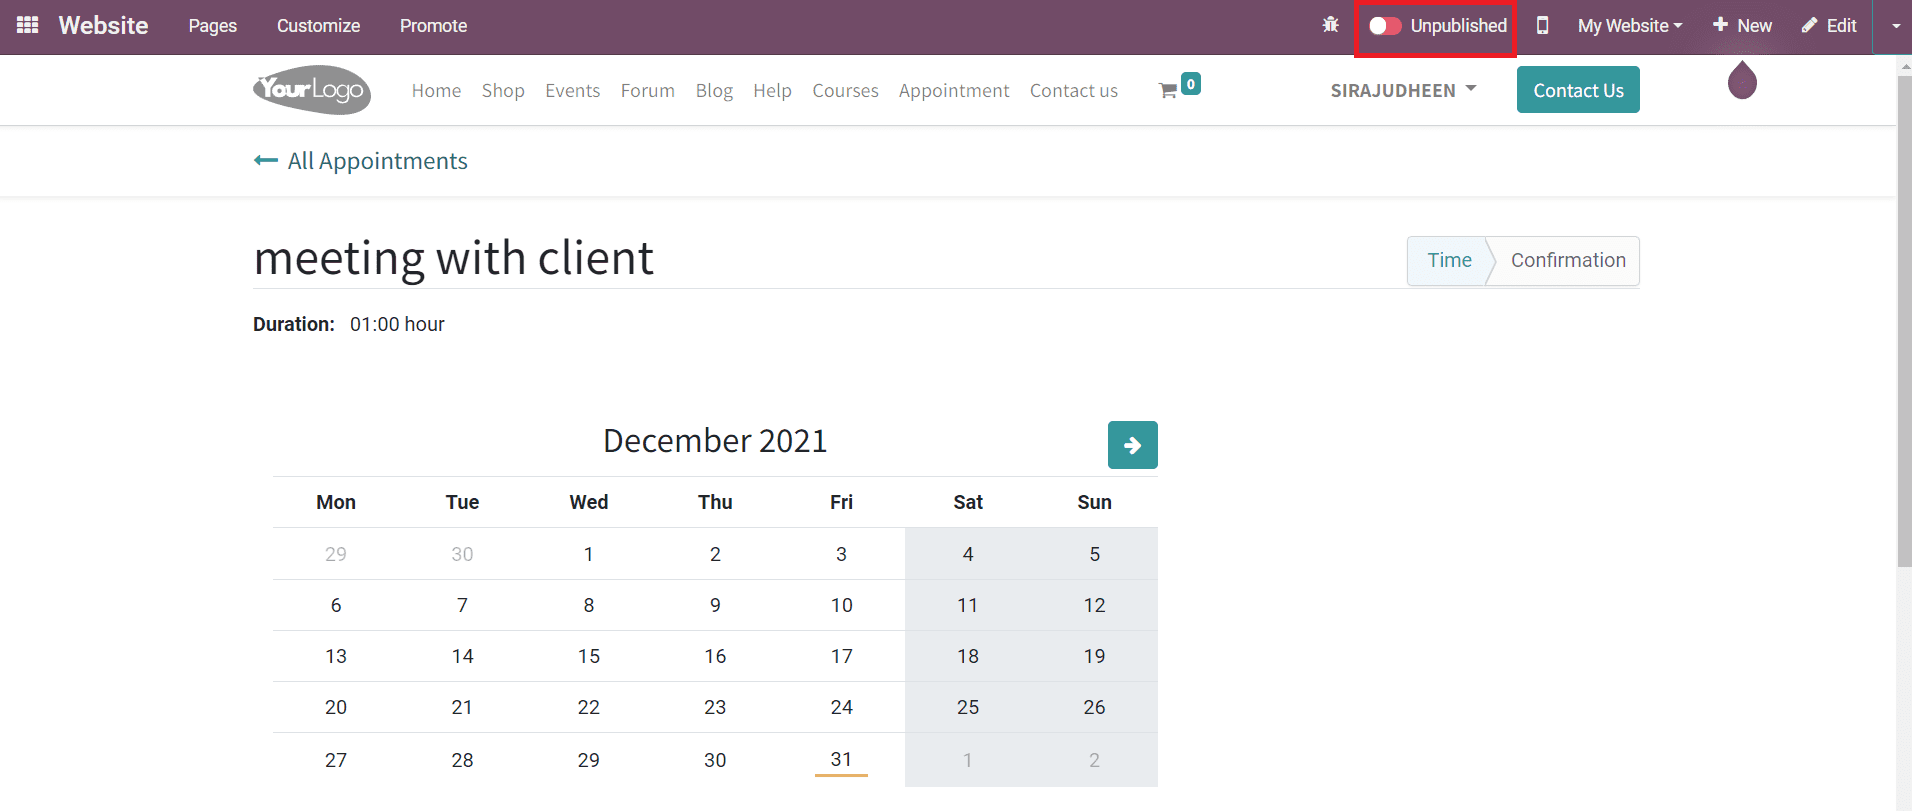
Click on the Unpublished button to change the Unpublished status to Published.

After publishing the appointment on the website, you will get a share button in the appointment window as shown in the image above.

A pop-up window will appear with a sharing link. You can copy this link and share it with others.