Ordering Lunch
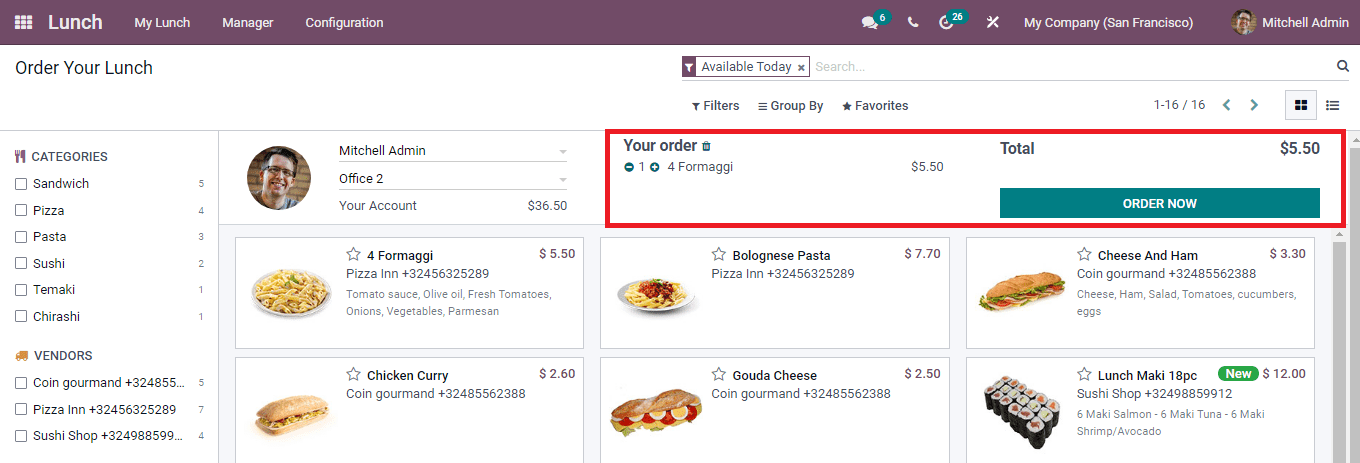
You can make your lunch order straight from the Lunch module dashboard. At the dashboard you can view your name at the employee field along with your workcenter and account balance. If the information provided by Name and Work center is wrong, you can select the right one from the drop down menu. To order your lunch, you can select the food displayed on the screen as per your preference. You can select the food from the Categories and also food from specific vendors can also be selected.By selecting the food item from the dashboard, Confirm your Order pop up window will appear. At the displayed window mention whether you need Extras or not and also any description that should be passed while making the food can be specified at the Notes. Once done specifying, you can add the food to your cart by selecting the ADD TO CART option.

After adding the food to the cart, at the dashboard you will be able to see the food being added at the Your Order menu. You can increase or decrease the count of the quantity with the ‘+’ and ‘-’ signs. The Total amount is also displayed next to it. After adding the required food in the cart you can proceed to place your order. Select the ORDER NOW button to place the food order.

After selecting the ORDER NOW you will be shown an Ordered label next to Your Order and the amount of the food ordered will be decreased from Your Account.

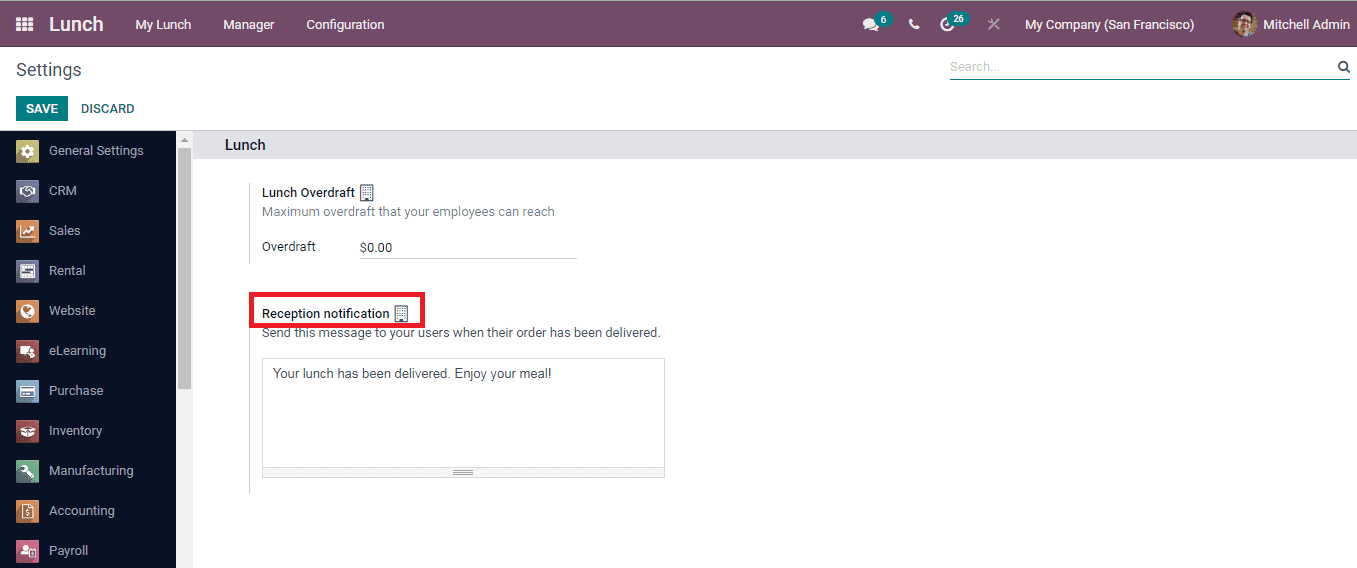
When your lunch is being delivered you will receive a message, which can be configured from the Settings. Select the Settings option from the Configuration tab. At the Settings you can add the message that should be sent to the users after delivering the order at the Reception Notification option.
