Locations
The Location aspects in Odoo can be described as it is the actual or physical locations or places within the warehouse in which the goods are stocked. Odoo allows you to manage multiple locations in a warehouse. Moreover the system allows you to configure location operations based on the warehouse operations and the descriptions given.
As it is considered as a sub location of a warehouse which actually means a shelf, floor etc. So it is only a part of the warehouse and it cannot be connected to multiple warehouses. However, you have the provision to configure multiple locations under one warehouse. Odoo manages three types of locations which are Physical Locations, Partner Locations and Virtual Locations. Physical Locations are observed as an internal location that are actually part of your warehouses. It can be the stuffing and destuffing area (shelf, department etc) of your warehouse. In the case of Partner Locations, it is the place within a customer or vendor’s warehouse. It also works like the principles of Physical locations with the difference that you are not considered as the owner of the warehouse. When we come to the Virtual Locations, these are the virtual places which do not exist. However the product can be managed even without its physical presence. It will turn out to be useful when it is needed. For example if you need to place the lost items out of stock (in the inventory loss) or in the case when you want to give consideration to products that are on their route to your warehouse(procurements).
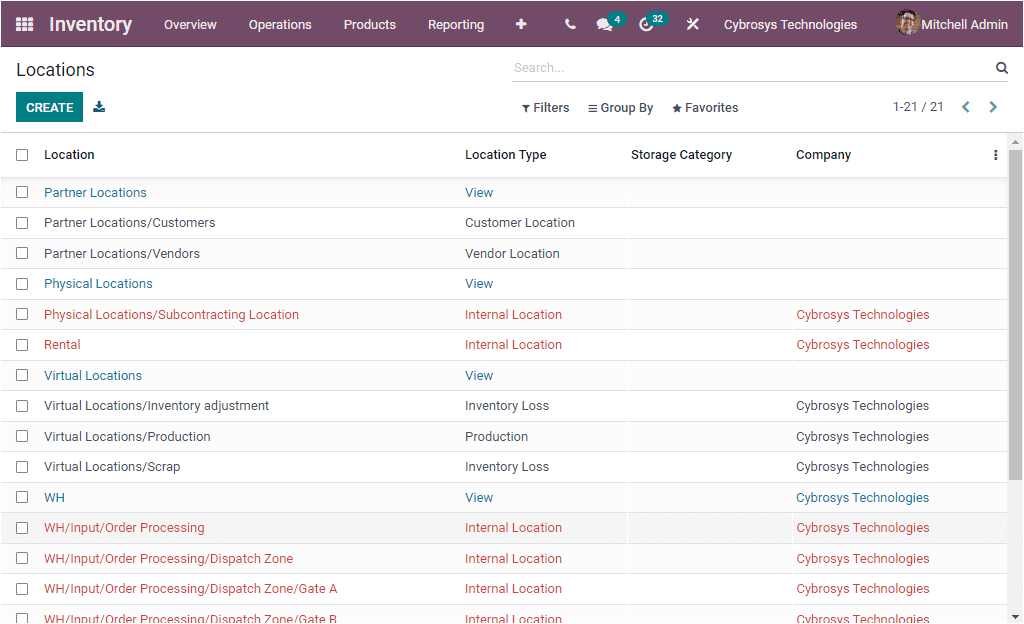
The Location menu available in the Odoo platform can be accessed under the Configuration tab of the Odoo Inventory module when you activate it from the Settings page. The screenshot of the Location window is depicted below.

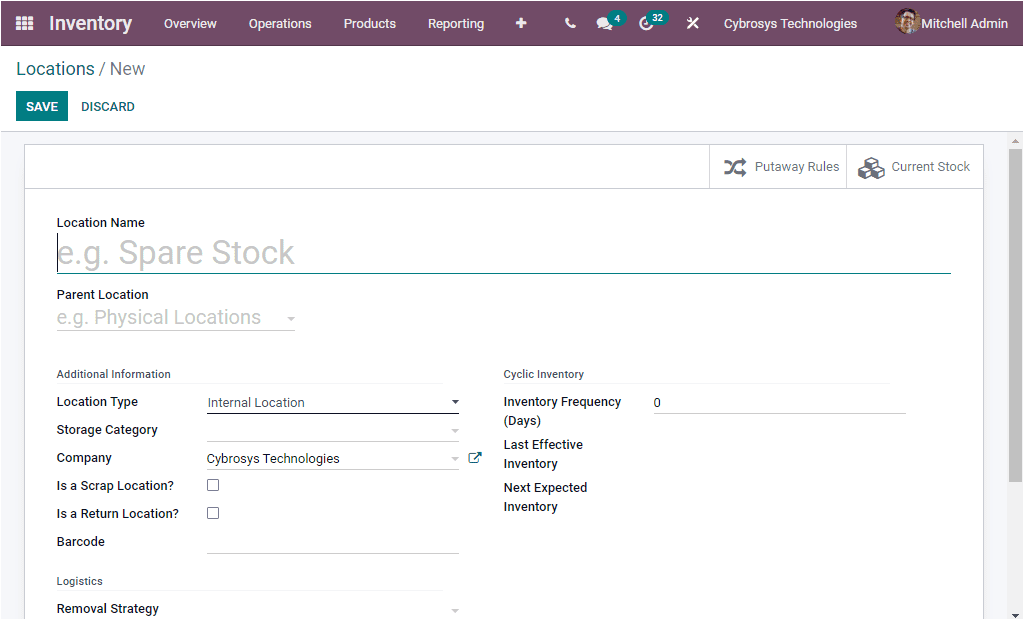
The Locations window will display every location described in the platform including the details such as Location, Location Type, Storage Category and Company. You can use the filtering option for sorting out your data easily. You can use the default as well as customizable filtering options. The default filters available in the window allows you to view the window based on the Internal Locations, Customer Locations, Production, Vendor and Archived Locations. Moreover, you can create customized groups using the Group By option available. The Favourites menu includes the advanced options such as Save current search, Import Records, Insert list in spreadsheet, Add to my dashboard, and Add to Google Spreadsheet. Moreover, you can export all records to an excel sheet by selecting the Export All icon available on the top left side. The CREATE icon can be used for configuring new Locations. The image of the Location creation form is depicted below.

In the Location creation form, you can allocate the Location Name along with the Parent Location. Then you have to define various additional information. Which are Location Type, Storage Category, Company and Barcode. The Location Type can be filled using the dropdown menu available. The dropdown menu includes some options such as
- Vendor Location: Vendor Location is the virtual location representing the source location for the products coming from your vendors.
- View: Virtual location used to create hierarchical structures for your warehouses, aggregating its child locations, which cannot directly contain products.
- Internal Locations: It is the physical locations inside your own warehouses.
- Customer Location: Virtual location representing the destination location for products sent to your customers.
- Inventory Loss: Virtual location serving as counterpart for inventory operations used to correct stock levels (physical inventories).
- Production: Virtual counterpart locations for production operations. This location consumes the components and produces finished products.
- Transit Location: Counterpart location that should be used in intercompany or inter warehouse operations.
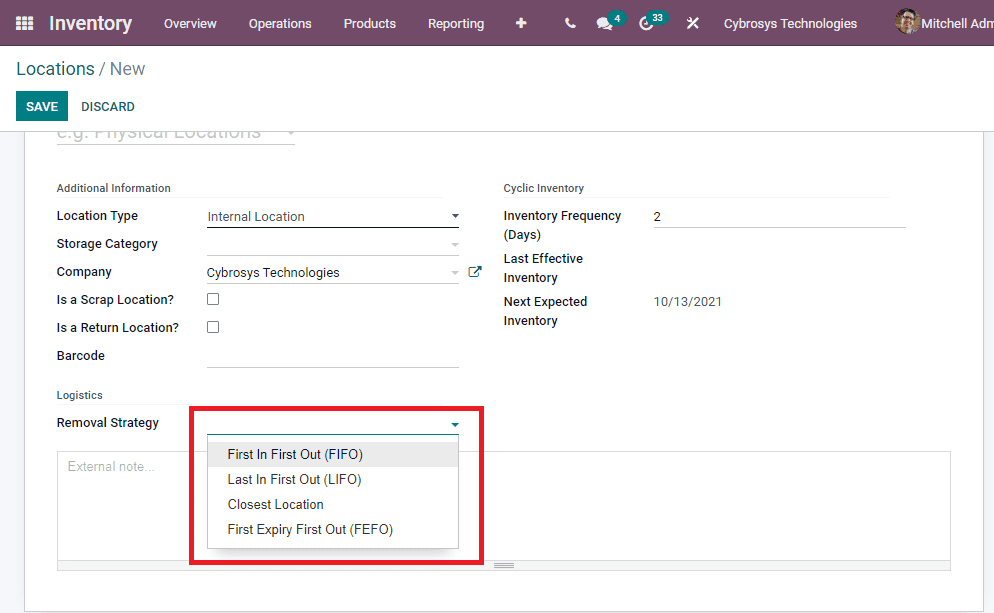
Then the location can be mentioned as scrap location or return location by enabling the boxes. Moreover you can allocate the Cyclic Inventory details such as Inventory Frequency, Last Effective Inventory, and Next Expected Inventory. Moreover, the Removal strategies of this particular location can be specified based on the default methods available. The default methods available in the dropdown menu are shown in the below image. This dropdown menu includes the First In First Out (FIFO), Last In First Out( LIFO), First Expiry First Out( FEFO), and Closest Locations. We will discuss it in detail.

Moreover the window gives you direct access to the Putaway Rules window and Current Stock window based upon the app you installed.
As yet we were talking about the Locations window of the Odoo Inventory module and now let us have a look into the Storage Categories option available.