Configuration
The Odoo ERP application is designed suitable for almost all types of business requirements that are globally accepted. For making the module a useful application, you should configure your module suitable for your business atmosphere. For configuring data, fields, workflow suitable for your company, Odoo designed the Configuration tab in each module. Under the configuration tab Odoo includes various options and you can configure it based on your company policies.This tab will help you to make it suitable for your operations. Even in the Fleet Management module, you can view the Configuration tab. Let us discuss each of the options described under the Configuration tab of the Fleet management module.
Settings
The Settings window of the Odoo Fleet management module allows you to define the end date contract alert and also enables you to set rules for new vehicle requests. The screenshot of the Settings window is given below.
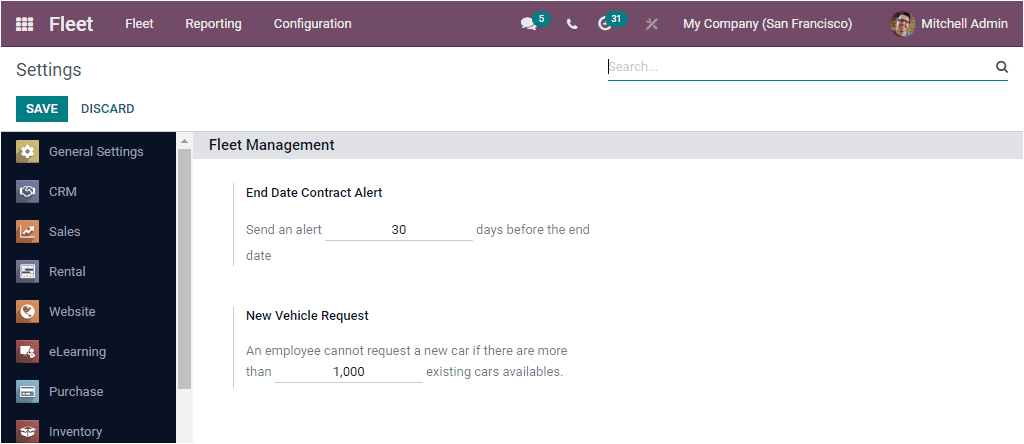
Here, you can set up a date under the End Date Contract Alert option to send an alert message before this end date. Similarly, under the New Vehicle Requestoption, you can set the number of cars. So that the employee cannot request a new car if there are more than that of cars available. These two values can provide based upon your company policies.
Let us glance at the Manufacturer's feature available under the Configuration tab of the Fleet management module.
Manufacturers
The best platform for supporting localization, Odoo realizes the need for localization in Fleet management. The system allows users to configure various vehicle brands based on their localization points. With this localization aspect of the module, you can create and manage multiple car brands based on your country and region. By default, Odoo enlisted almost all the international vehicle brands in its Manufacturer's window. For accessing this window, you can go to Fleet -> Configuration -> Manufacturers. Screenshot of the window is shown below.
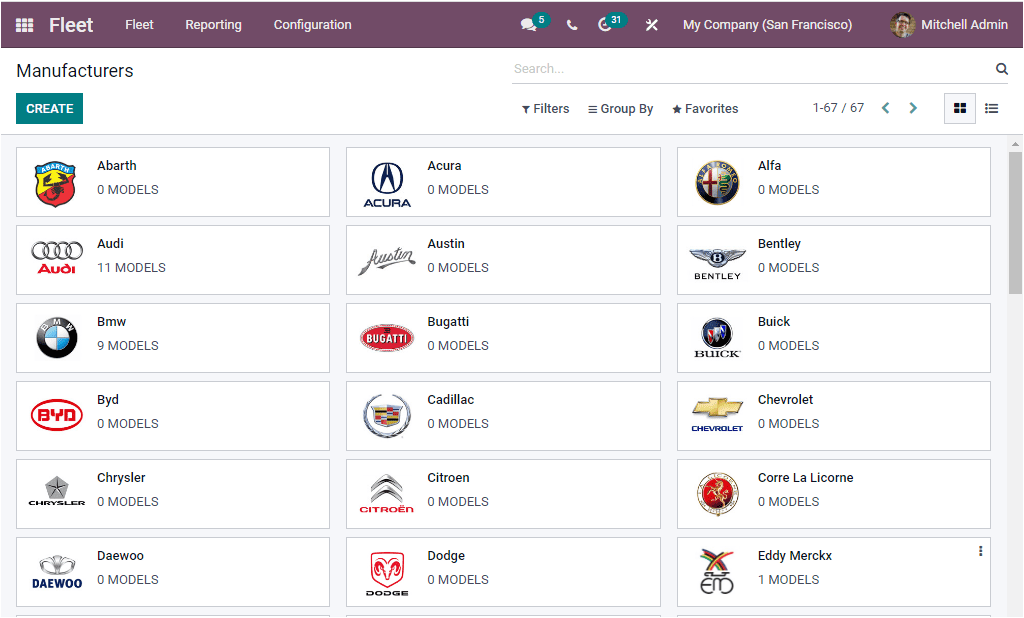
Odoo allows you to access this window in both Kanban and List format. You can filter this window using the default filter, named ‘With Models”. Applying this filter allows you to view the vehicle brands based on their models. Moreover, you can customize various filters and sorting options. You can also use the CREATE button to create new brands. The screenshot of the creation form is given below.
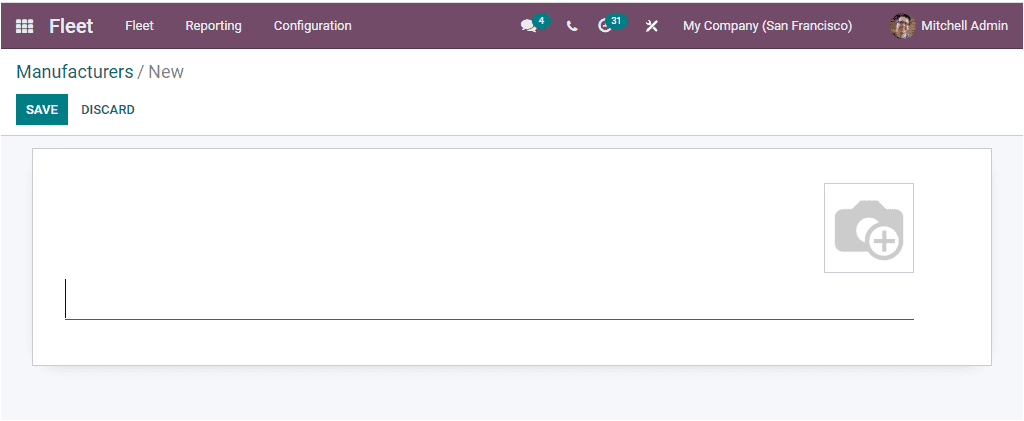
You can provide the Name and the image of the brand in this creation window. After that, you can save the details. Now the new brand is added to the Manufacturers window.
Now let us consider the Vehicle Models feature
Vehicle Models
The Vehicle Models window available in the Odoo Fleet management system is designed to demonstrate the Vehicle models in your fleet. This window allows you to quickly understand the vehicle models of your organization along with their number of vehicles.
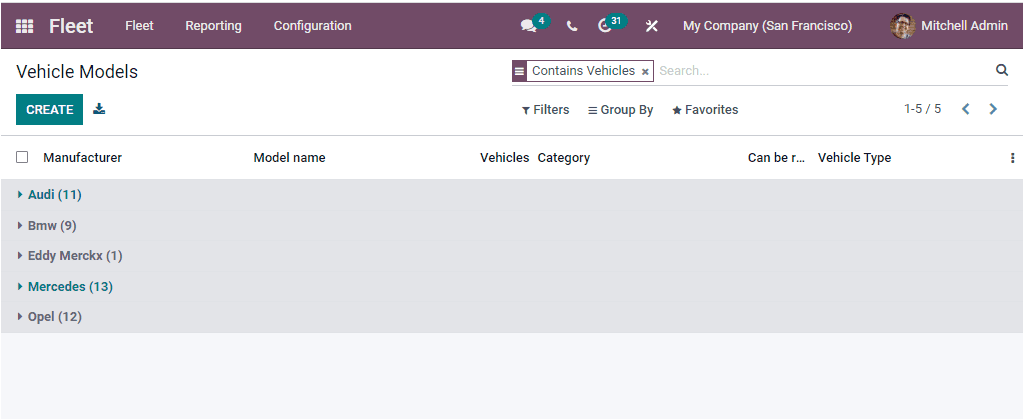
When you look at the window, you can view each of the vehicle models available in your company, and also it will display the number of vehicles in each model. If you want to view the details of each of the vehicles, you can select the respective module. Now you can view it in detail.
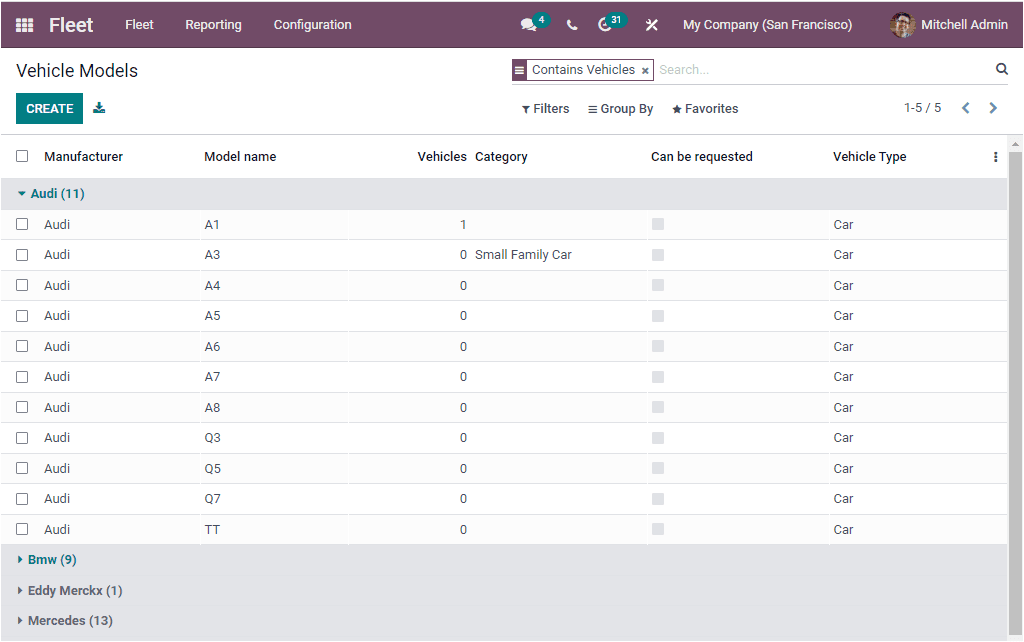
Each vehicle under the vehicle model will be enlisted along with the Model Name, Vehicle Category, Can be requested, and Vehicle Type. If you want to create new Vehicle Models, click on the CREATE button.
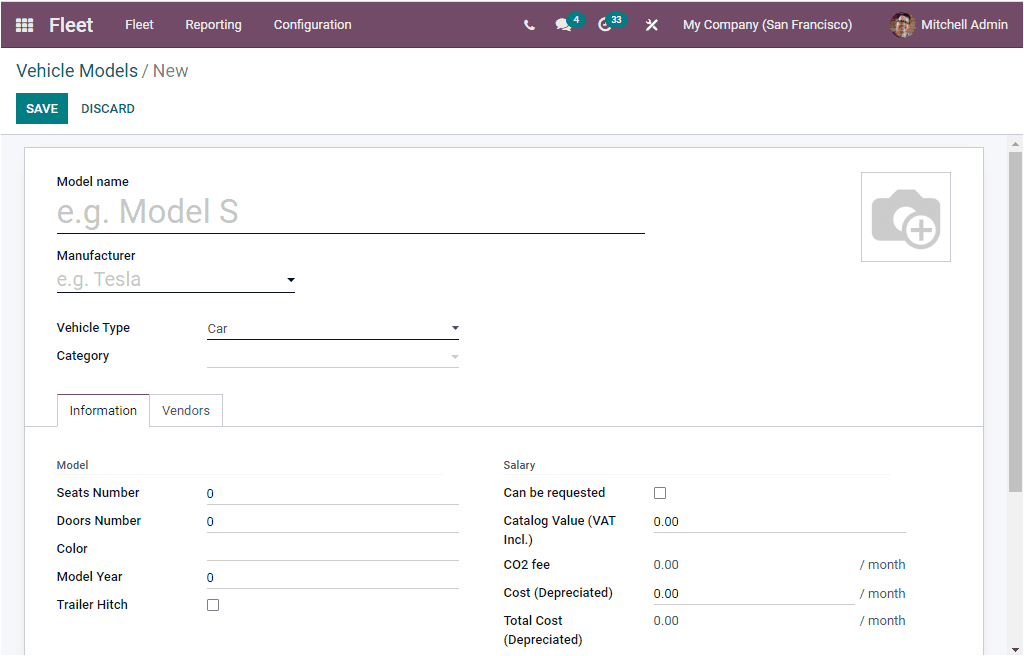

In the Vehicle Models creation window, you can allocate the Model Name along with the image. Then you can specify the Manufacturer of the vehicle using the drop-down menu available. Similarly, the Vehicle Type can be defined together with its category.
Under the Information tab, you can describe the vehicle model details. It includes the Seat Number, Doors Number, Color, Model-Year, and Tailor Hitch. In addition, you can mention the Fuel Type, Carbon Dioxide emissions, Carbon Dioxide Standard, and Transmission. You can be requested on a contract as a new vehicle in the Salary section by activating the Can be requested option. The Catalog Value, CO2 fee, Depreciated Cost, Total Cost(Depreciated) can also be described. Finally, it would help to mention the Power in kilowatt, Horsepower, Horsepower Taxation, and Tax Deduction.
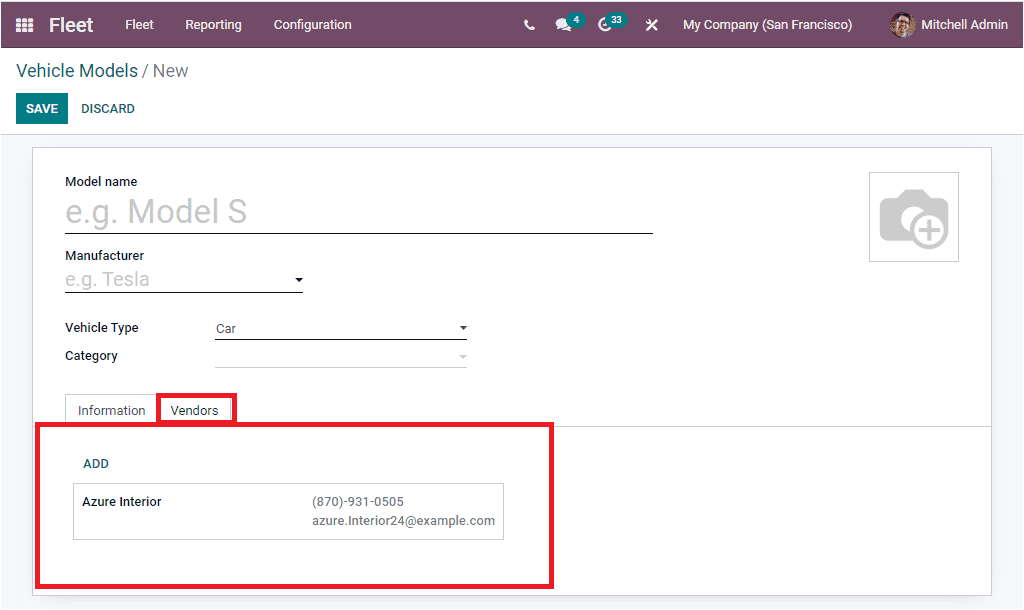
Under the Vendors tab, you can include the Vendor details. When you click on the ADD button, you will depict the Vendors list we already created on the platform. If this vendor is an already created one, you can select them. If it is a new one, you can make the new vendor form itself if you installed the Inventory module in your system.
As we understand the configuration steps of Vehicle Models, let us move into the Model Category option.
Model Category
The Model Category menu will allow you to configure various Vehicles model categories. For accessing this window, you can take the route Fleet -> Configuration -> Model Category.
The image of the window is given below. Using the same window, you can create a new Model Category.

So far, we have discussed all the options available under the Configuration tab of the module, and now let us move on to the Reporting section.