Task creation and allocation
To create a new task to the project the user can simply select the project form
the home dashboard and then the user will be depicted with the task window of the
respective product.
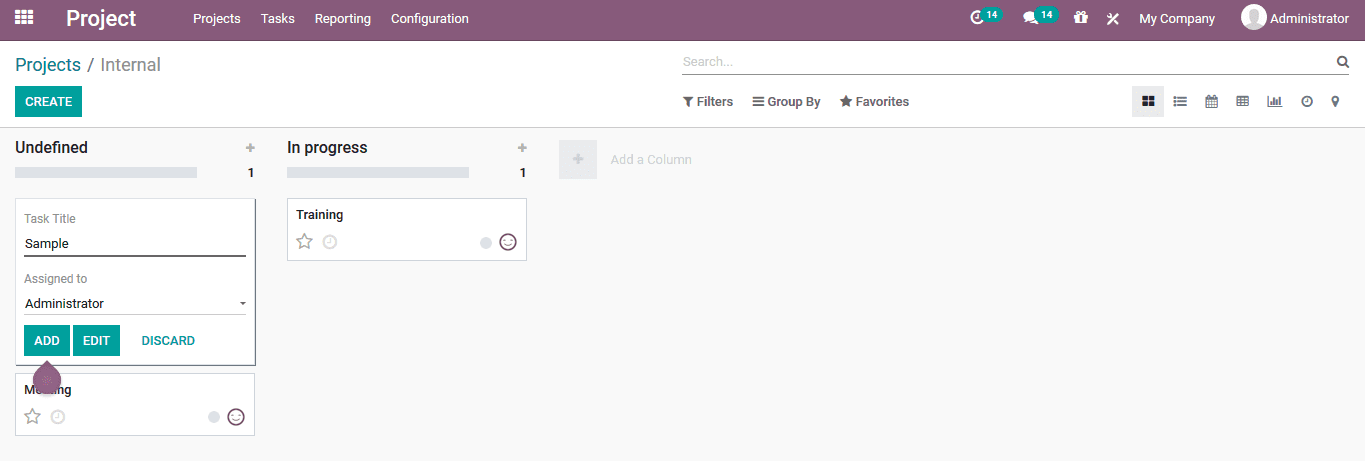
In the task creation window the user can assign a task title and allocate the respective
person for the task. The stages of each task in the respective project can be created
by using the add a column option available in the window.
Tasks of the respective projects can also be accessed from the task window accessible
from the home dashboard. Here the list of all the tasks are listed out with the
project name, allocated person, progress indicated in percentage and the status
of the operation. Task window can be viewed in different formats which would provide
the user with the accessible information.
List view
Below is the list view of the task window which would indicate the projects, assigned
person, company, hours spent, progress of the operation, next activity scheduled,
stages of operation and the tags allocated.

Kanban view
Another view in which the tasks can be viewed is in the kanban view format, which
would allow the users to change the status of operation based on the company specification.
The status of each task is indicated in colour format which would provide a visual
representation of each stage of the operation. The tasks available can be prioritized
based on the specifications by enabling the star symbol available.

Calendar view
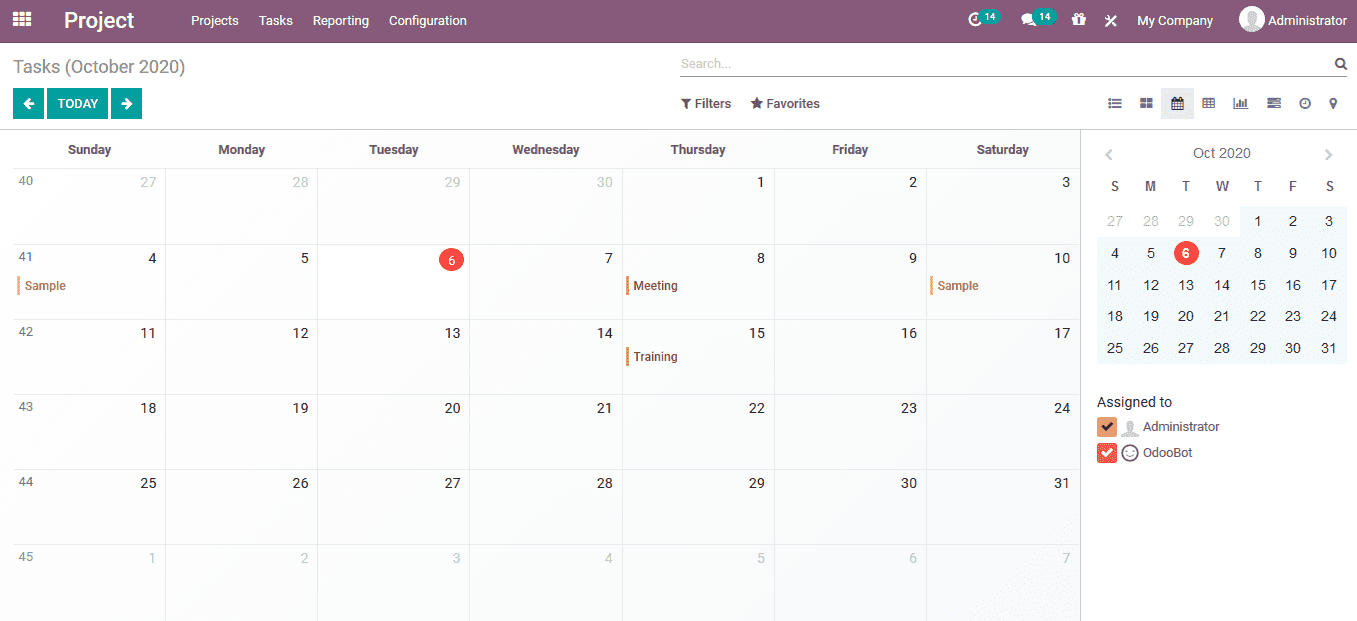
The task window can also be viewed in the calendar format where the users could
view the deadline date of the respective views in a calendar format. In addition
the assigned person is indicated on the respective dates of the task deadlines available.
Pivot view
The Odoo platform's pivot view functionality is one of the best available which
provides the user with analytical information based on the default as well as customisable
parameters which can be used as per the user's needs.

Graph view
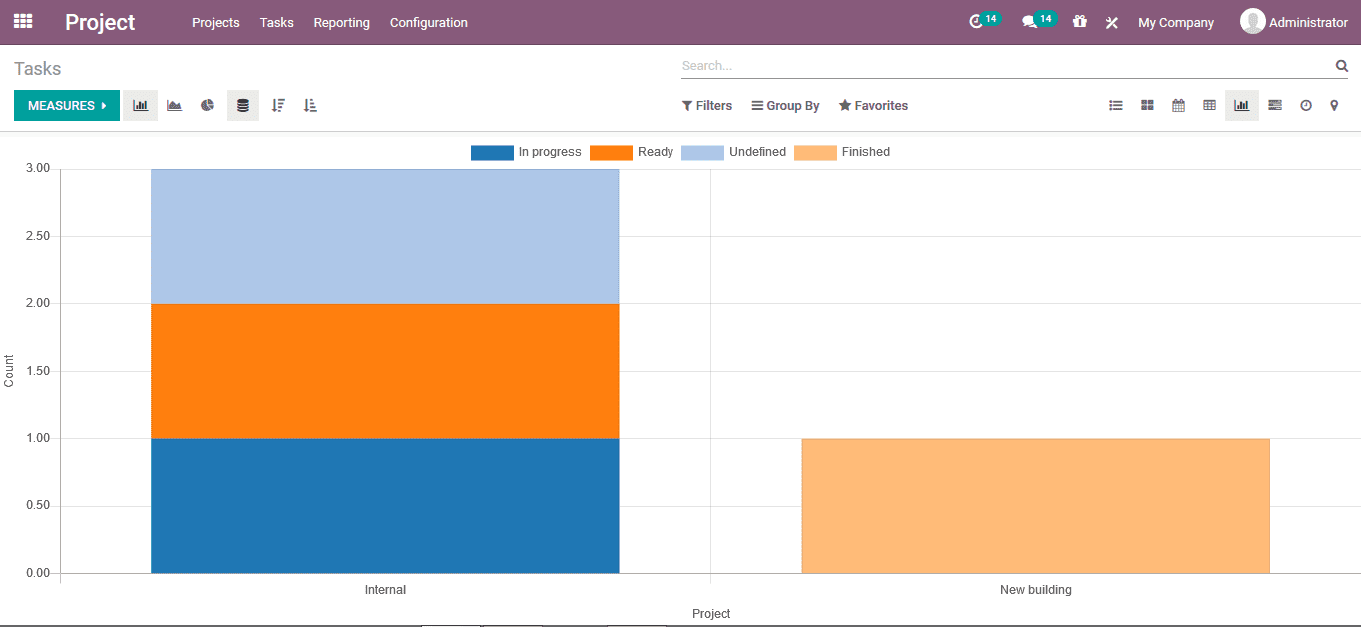
The reporting aspect of the task operations in the project planning of the company.
This view will allow the users to generate a demonstrative graphical report which
can be based on the various default as well as customisable parameters available
in the measures and the sorting menu.
New task creation
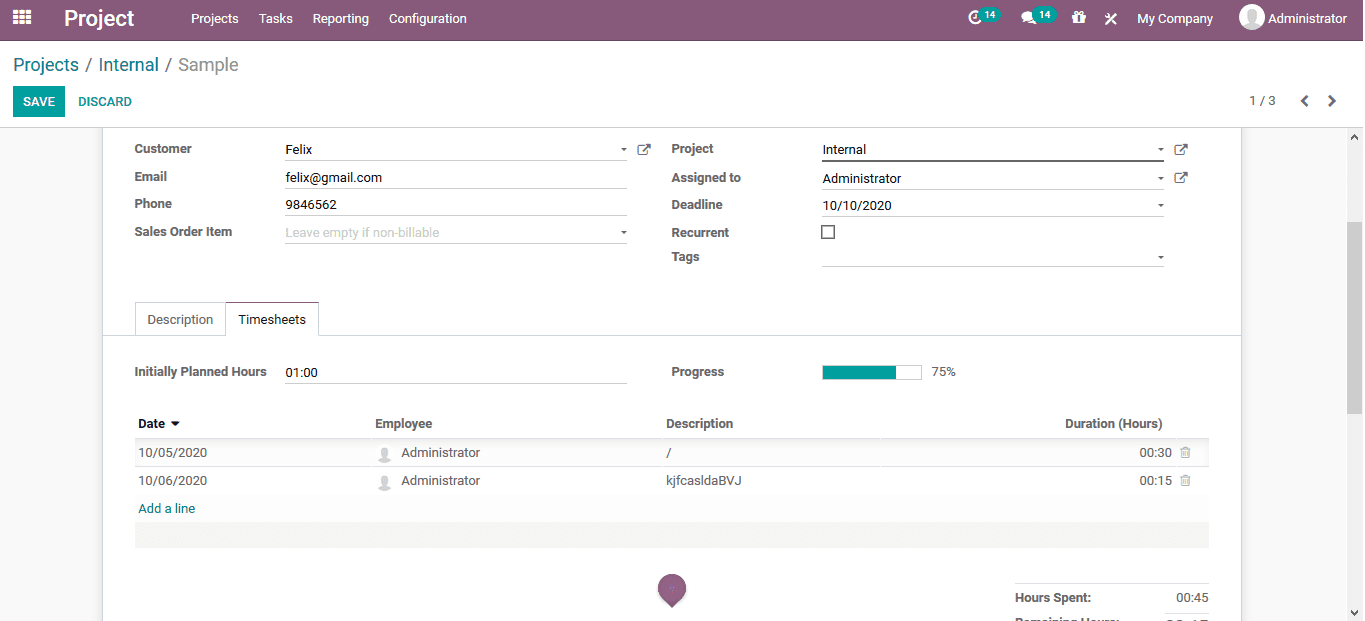
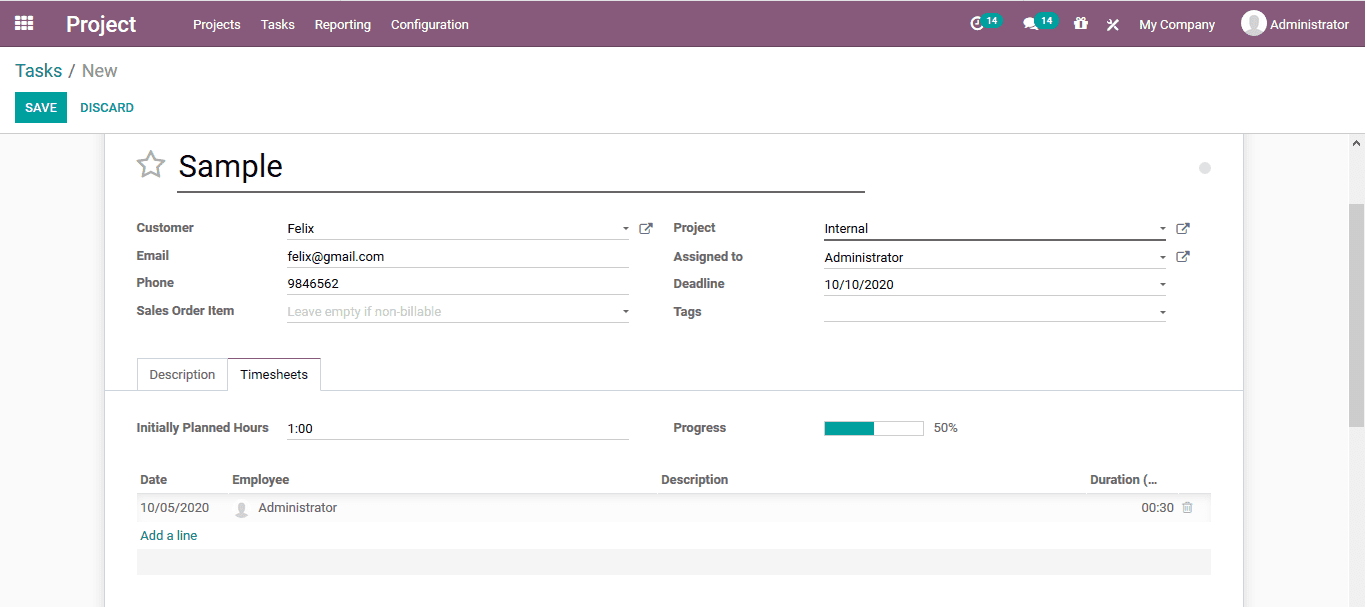
New tasks for the respective project operations can be created from this window
by selecting the creation option. In the task creation window the user can define
the name of the task, customer allocated with the task operation if any, the contact
details are auto generated as per the contract description. If the user wants to
edit the contact details he/she can also do so. The respective project allocation,
the responsible person along with the deadline for the operation is being described.
In the time sheet operation ,the user can assign the time spent on by the employee
or the users on the respective task. The initially planned hours can be indicated
and when the employee progress is depicted the progress bar will indicate the respective
percentage of completion.
Recording the time on each task
The Odoo platform with its advanced feature of the time recording done on the time
spent by the employees in the respective task. This feature will allow the user
to describe, view and manage the time operations on each task and the project by
the respective employees. The time sheet operation of the Odoo platform helps the
users in this operation. The Timesheet functionality will allow the users to record
the time spent by a beach employee on a task based on their screen time recording
options and the task time start and stop options available.
To measure the time spent by the employees on the respective task operations. The
user should initially enable the time management options available in the settings
menu of the project module. In the settings menu under the time management tab the
user should enable the planning and time sheet options available.
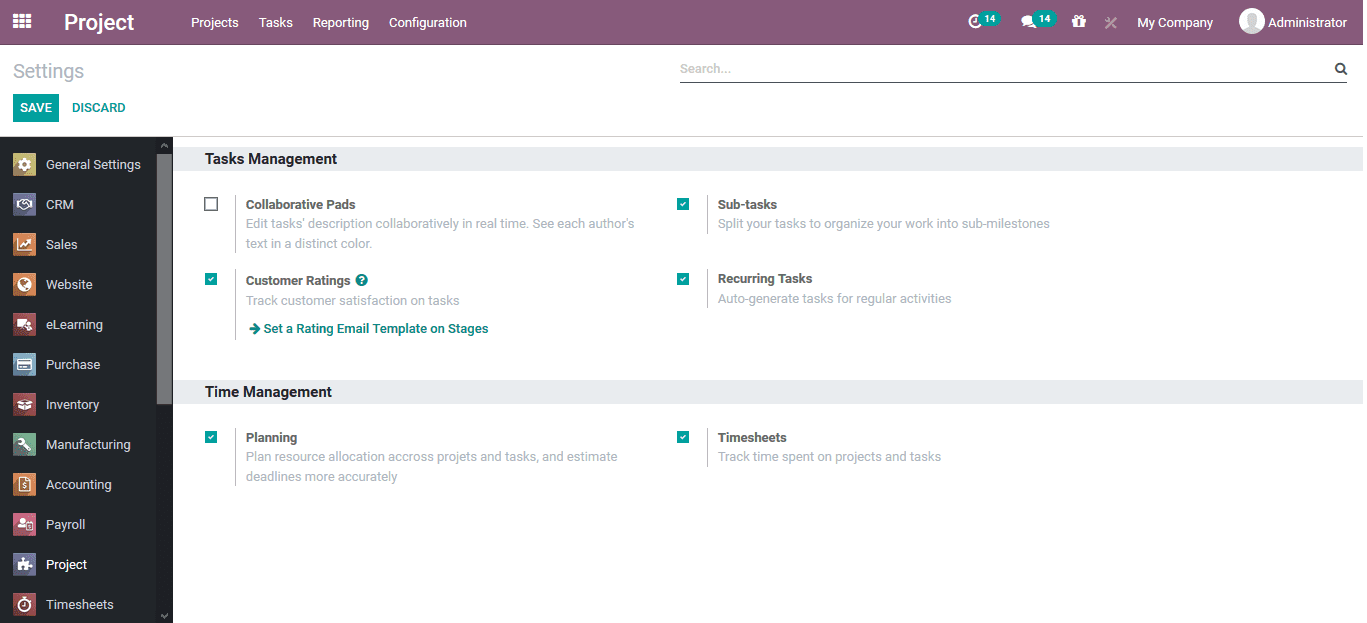
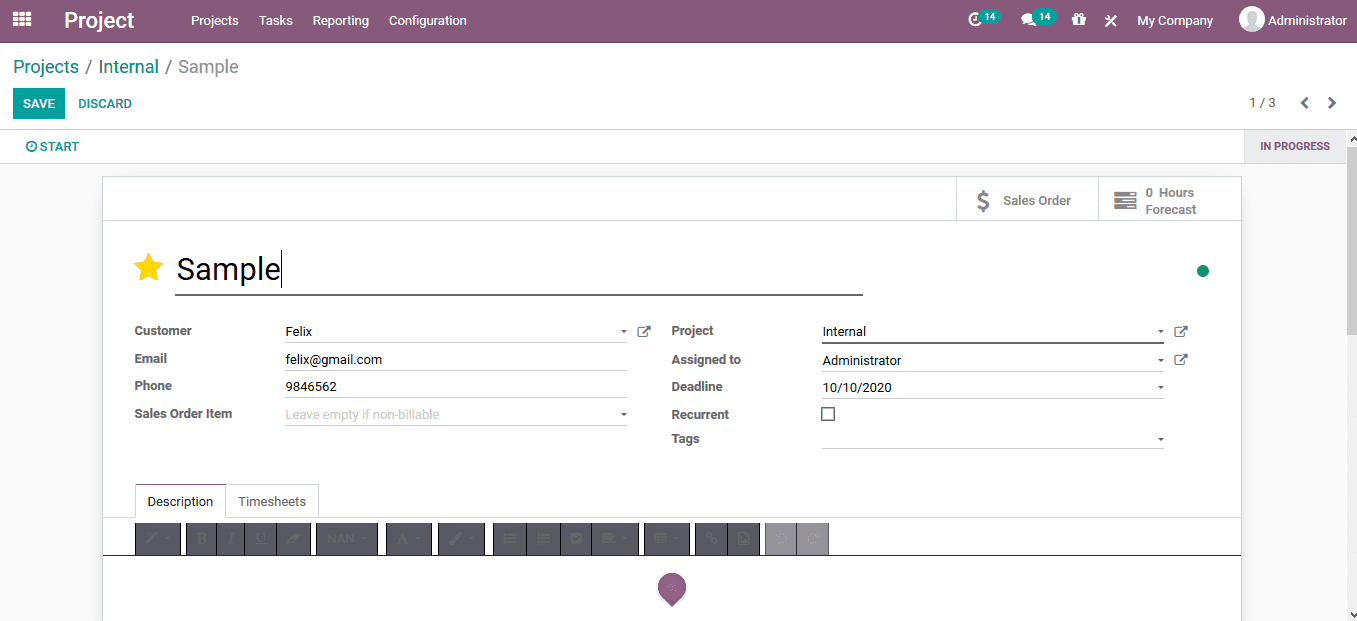
As the time sheet options are enabled the user can now record the every employee
operation being seen on a task. As the respective employee logs into the platform
and navigates to the respective task under the project he/she can now view the option
to start the timesheet operation, just by clicking it the time on the task is enabled
and will run until its been stopped.
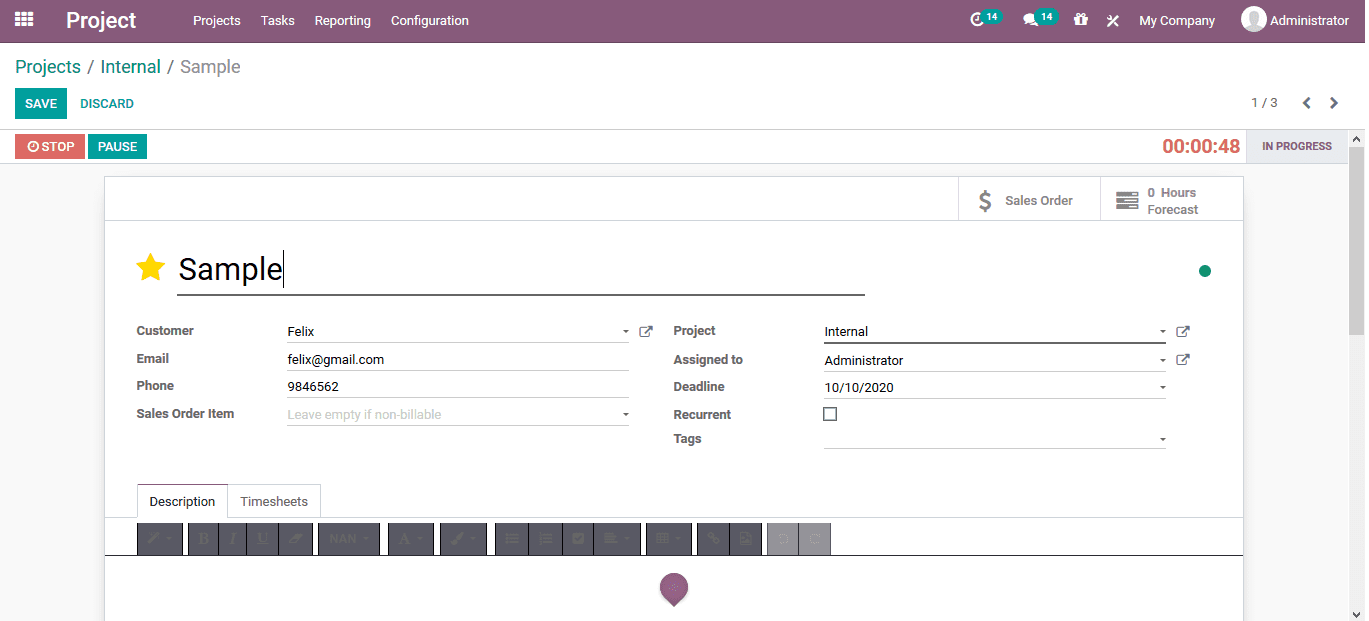
The employee will now have the provisional option to pause the time sheet or stop
it according to their needs. In addition., there is a timer clock which would indicate
the time being spent on the respective task.
Once the user stops the timesheet operation they are depicted with this window as
shown below. Here the time spent is indicated and there is space to describe custom
made descriptions in the window.

Back in the task description window the user will be depicted with the timesheet
descriptions of each employee. The user can remove these timesheet lines and add
one manually using the add a line option available.
