In the Odoo website builder, snippets are UI building blocks. The simplest method for customising the Odoo website is to use snippets. We'll look at how to make Odoo dynamic snippets. Based on database values, we may produce content-based snippets. Let's see an easy example of how to make a dynamic snippet in Odoo 17.
How to create a dynamic snippet?
When there is a change in the data source or backend, the contents of dynamic snippets are updated accordingly. In order to generate a dynamic snippet, we must first construct an XML file that defines the view. Two files—a Javascript file for the website's content presentation and a Python controller for retrieving data from the Odoo backend. Take into consideration the below actions to generate a fresh dynamic snippet displaying a list of 10 products.
● Controller
Let's first construct a controller in order to retrieve data from the backend. In this instance, let's obtain ten products.
from odoo import http

class ProductList(http.Controller):
   @http.route('/product/list', type='json', auth='public')
   def product_list(self):
      products = request.env['product.product'].search([], limit=10)
      product_data_list = []
      for product in products:
         product_data = {
            'product': product.name,
            'price': product.list_price
         }
         product_data_list.append(product_data)
      data_list = {
         'data': product_data_list
      }
      res = http.Response(template='module_name.product_list',
                          qcontext=data_list)
      return res.render()
● XML
First, we need to define the content of the snippet.
dynamic_snippet_template.xml
<?xml version="1.0" encoding="utf-8"?>
<odoo>
    <template id="product_list" name="Dynamic Snippet">
        <section class="container dynamic_snippet">
            <h3 class="text-center">Product List</h3>
            <div class="row">
                <t t-foreach="data" t-as="product">
                    <div class="p-3 col-md-3">
                        <div class="card" style="width: 18rem;">
                            <div class="card-body">
                                <h5 class="card-title text-center"
                                    t-esc="product['product']"/>
                            </div>
                            <ul class="list-group list-group-flush">
                                <li class="list-group-item text-center"
                                    t-esc="product['price']"/>
                            </ul>
                        </div>
                    </div>
                </t>
            </div>
        </section>
    </template>
</odoo>
Then we need to inherit the website.snippets and add our snippet inside the Dynamic section.
dynamic_snippet.xml
<?xml version="1.0" encoding="utf-8"?>
<odoo>
   <!-- Snippets and options -->
   <template id="dynamic_snippets" inherit_id="website.snippets"
             name="Snippet">
       <xpath expr="//div[@id='snippet_effect']//t[@t-snippet][last()]"
              position="after">
           <t t-snippet="module_name.product_list"/>
       </xpath>
   </template>
</odoo>
● Javascript
JavaScript will be used to retrieve the data from the server and display it on the webpage.
dynamic_snippet.js
/** @odoo-module **/

import publicWidget from "@web/legacy/js/public/public_widget";
import { jsonrpc } from "@web/core/network/rpc_service";

publicWidget.registry.DynamicSnippet = publicWidget.Widget.extend({
   selector: '.dynamic_snippet',
   start: function () {
       var self = this;
       var data = jsonrpc('/product/list', {}).then((data) => {
           self.$target.empty().append(data)
       });
   }
});

export default publicWidget.registry.DynamicSnippet;
Here, we are assigning the section's class to the selector and utilising JSONRPC to retrieve the value from the controller.
Now we need to add the XML file to the data section and the js file in the assets section of the manifest.py file.
'assets': {
   'web.assets_frontend': [
       '/module_name/static/src/js/dynamic_snippet.js',
   ],
},
'data': [
   'views/dynamic_snippet.xml',
   'views/dynamic_snippet_template.xml'
]
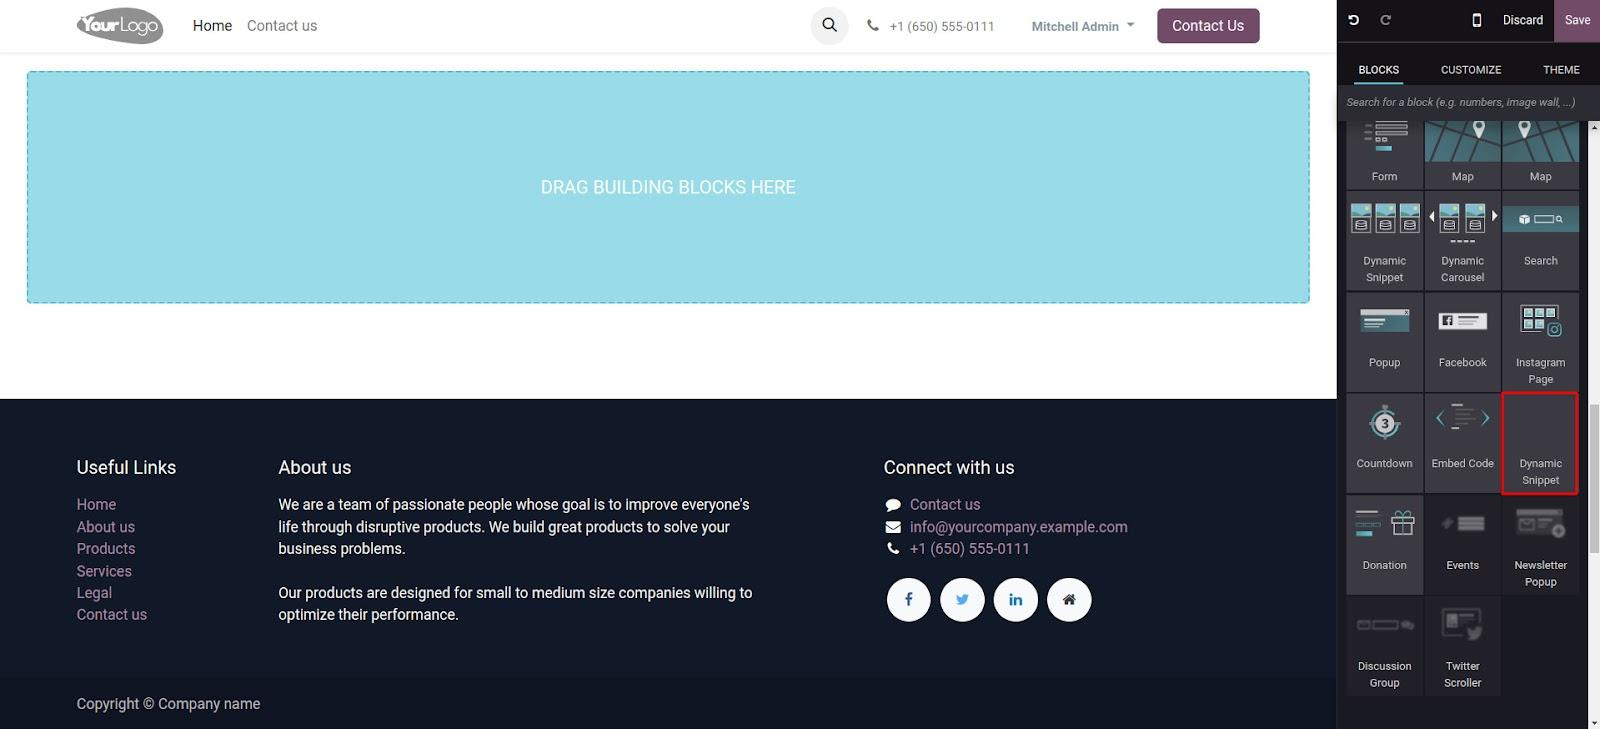
Go to the website and choose the "Edit" option after installing or upgrading the module. The snippet is now visible under Dynamic Content. Drag and drop the Dynamic Snippet to the building block section.

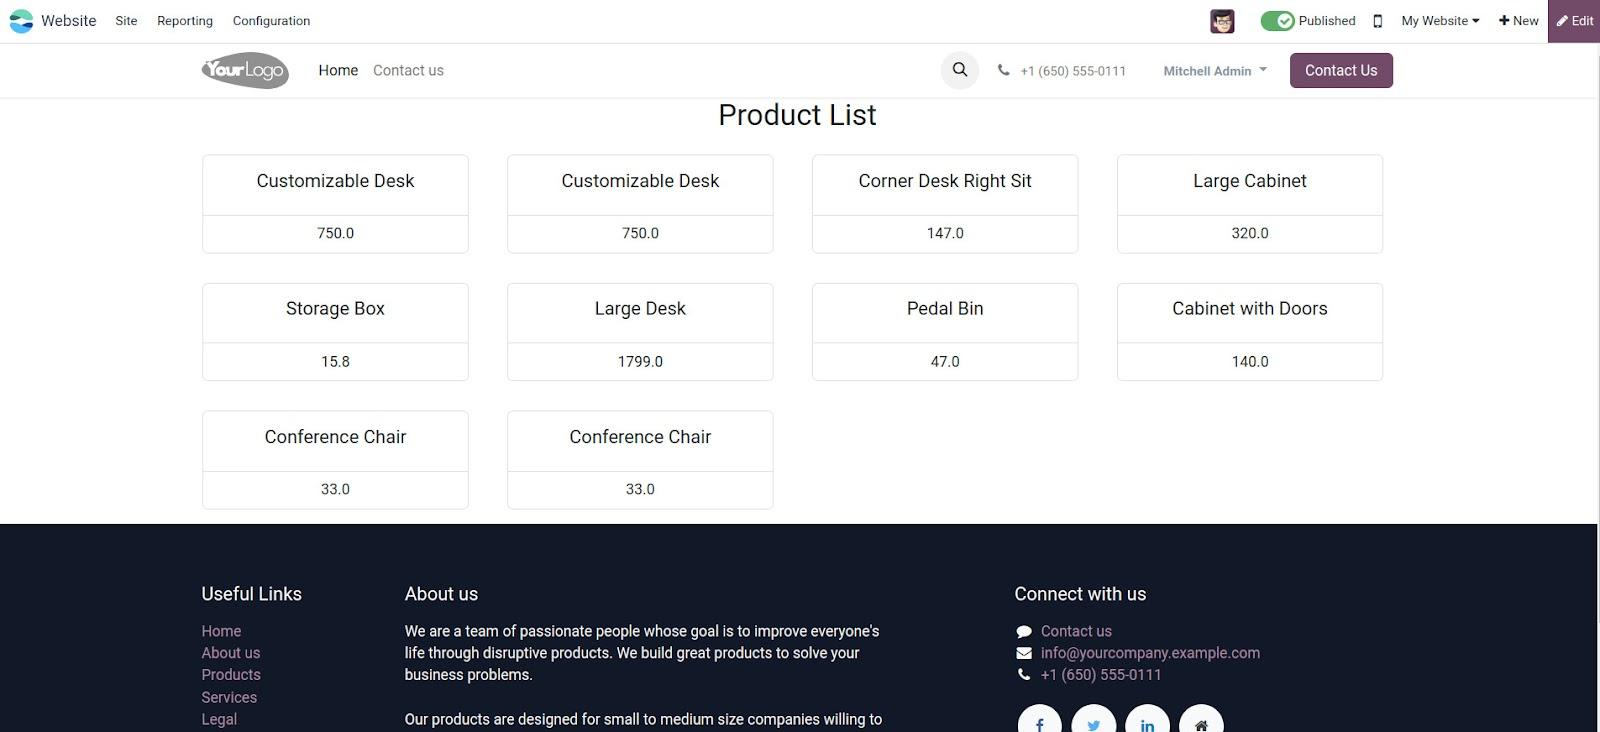
After dragging and dropping the Dynamic Snippet into the website, it looks like the below image.

This is how we create a dynamic snippet in odoo 17.