Customize Customer Receipts
The modification of POS receipts is explained in this section.

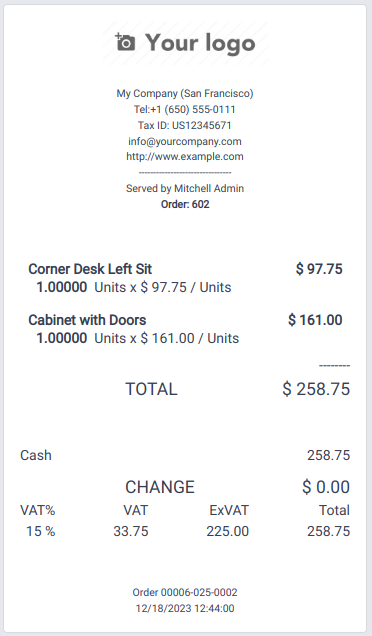
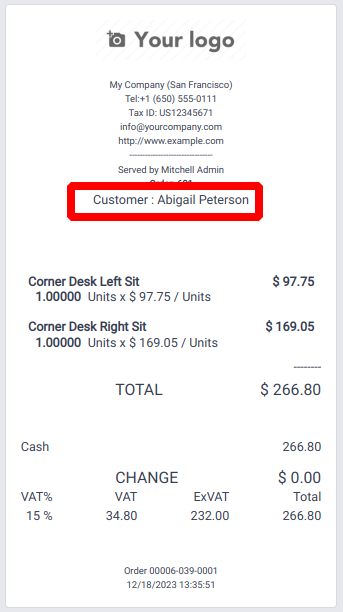
The POS uses this receipt as its default receipt. The customer's name will now appear on the receipt below the cashier's name. To do that, we need to add the customer name into the js file for that we need to patch the function getReceiptHeaderData(). And then we need to inherit the "ReceiptHeader" template and add our unique customizations.
/** @odoo-module */
import { patch } from "@web/core/utils/patch";
import { PosStore } from "@point_of_sale/app/store/pos_store";
patch(PosStore.prototype, {
   getReceiptHeaderData() {
       return {
           ...super.getReceiptHeaderData(...arguments),
           partner: this.get_order().get_partner(),
       };
   },
});
<?xml version="1.0" encoding="UTF-8" ?>
<templates id="template" xml:space="preserve">
<t t-name="custom_pos_receipt.ReceiptHeader" t-inherit="point_of_sale.ReceiptHeader" t-inherit-mode="extension">
    <xpath expr="//div[hasclass('pos-receipt-contact')]" position="after">
        <t t-if="props.data.partner">
            <div class="pos-receipt-center-align">
                <div>Customer : <t t-esc="props.data.partner.name" /></div>
                <br />
            </div>
        </t>
    </xpath>
</t>
</templates>
We modified changes to the normal Odoo ReceiptHeader template, inserting the client name below the cashier's name using XPath. A customer's name appears when they are set on the order.
The XML file needs to be included as one of the assets listed in the manifest file.

When a customer is assigned to an order, their name automatically appears on the receipt as the customer details are readily accessible within the receipt environment. However, to display additional information not currently available, overriding the export_for_printing() function becomes necessary. By doing so, more data can be sent to the receipt environment. The Qweb template of the receipt will then incorporate all the data transmitted through this function.
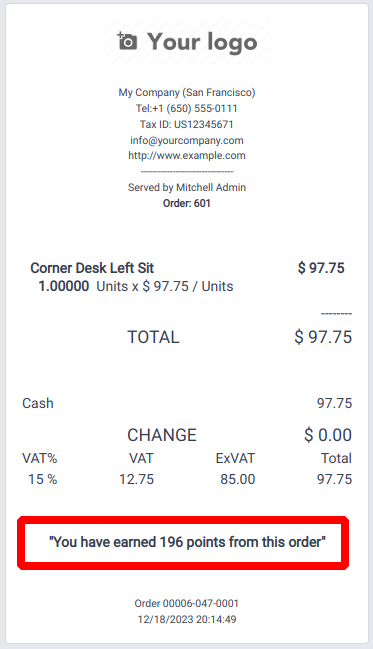
As an illustration, our customers are entitled to loyalty points based on their purchases. To reflect this, the receipt should display the points earned from this order, calculated at a rate of 2 points for every unit of currency spent.
In the js file,
/** @odoo-module */

import { Order } from "@point_of_sale/app/store/models";
import { patch } from "@web/core/utils/patch";

patch(Order.prototype, {
   export_for_printing() {
       const result = super.export_for_printing(...arguments);
       var loyalty_points = Math.floor(Math.round(result.amount_total * 2))
       result.loyalty_points = loyalty_points
       return result;
   },
});
The export_for_printing() function is overridden in this case, and the gained loyalty points are computed from the subtotal and passed to the receipt environment as earned_points.
In the XML file,
<?xml version="1.0" encoding="UTF-8" ?>
<templates id="template" xml:space="preserve">
  <t t-name="custom_pos_receipt.OrderReceipt" t-inherit="point_of_sale.OrderReceipt" t-inherit-mode="extension">
     <xpath expr="//div[hasclass('after-footer')]" position="after">
         <div style="font-weight: bold; text-align: center;">
               "You have earned <t t-esc="props.data.loyalty_points"/>
           points from this order"
       </div>
     </xpath>
   </t>
</templates>
With the value we gave from the export_for_printing() function, the key earned_points are now present in the receipt environment. We expand the OrderReceipt template and set its display position using XPath.
The receipt will now display as shown.

The Odoo POS module supports the effective administration of your business's activities. You may manage multiple shops or restaurants with Odoo POS. It is still functional even if you are not online.
Since it must be worked offline, it also employs a different architecture from the perspective of development.
Odoo offers POS solutions that we may modify to our specifications. We can alter the POS user interface and customer receipts in addition to changing the current business logic.