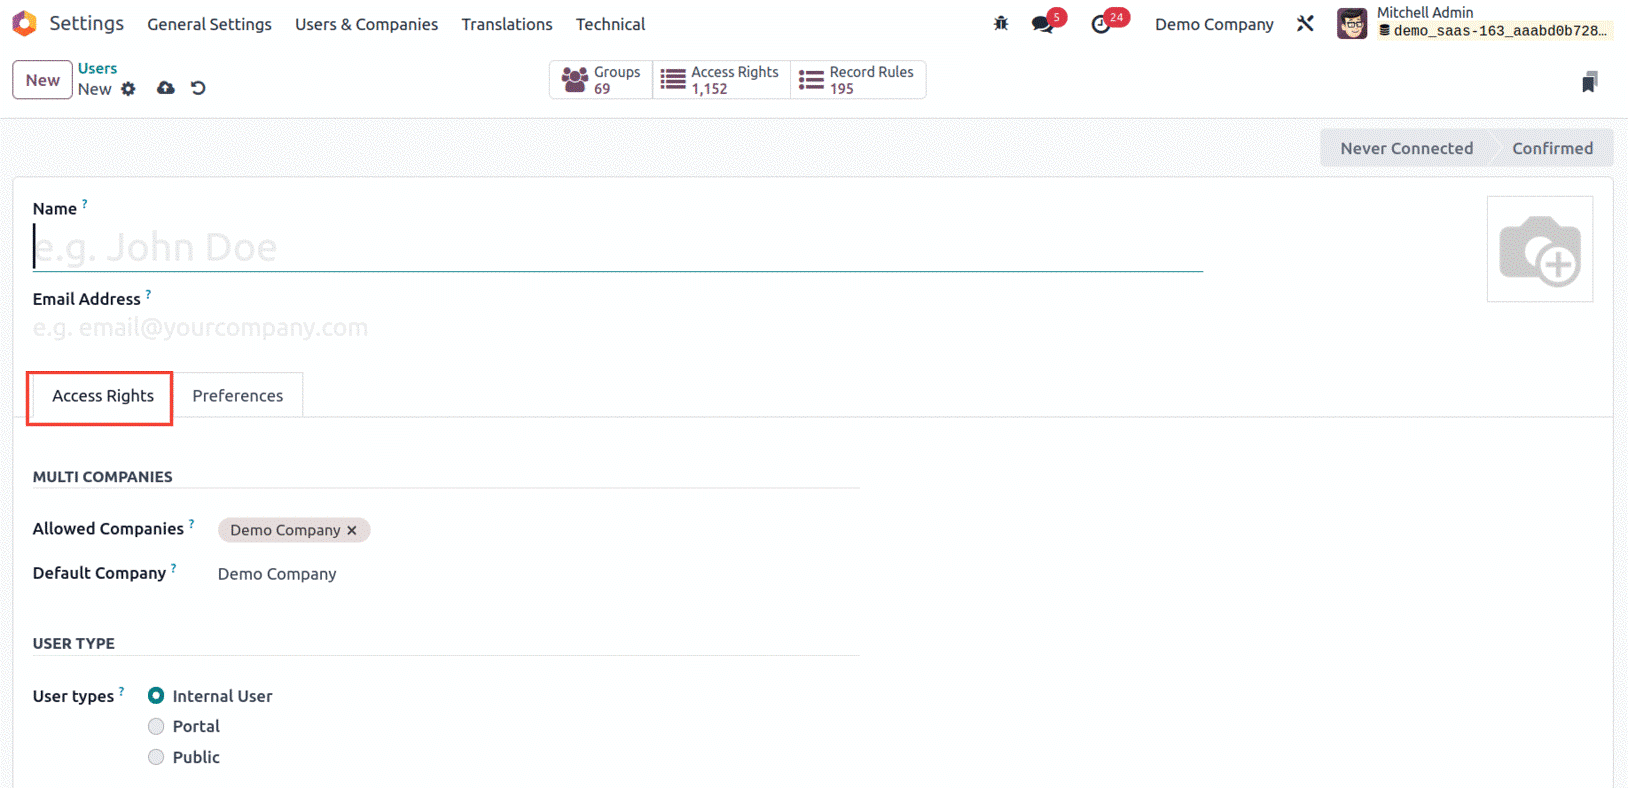
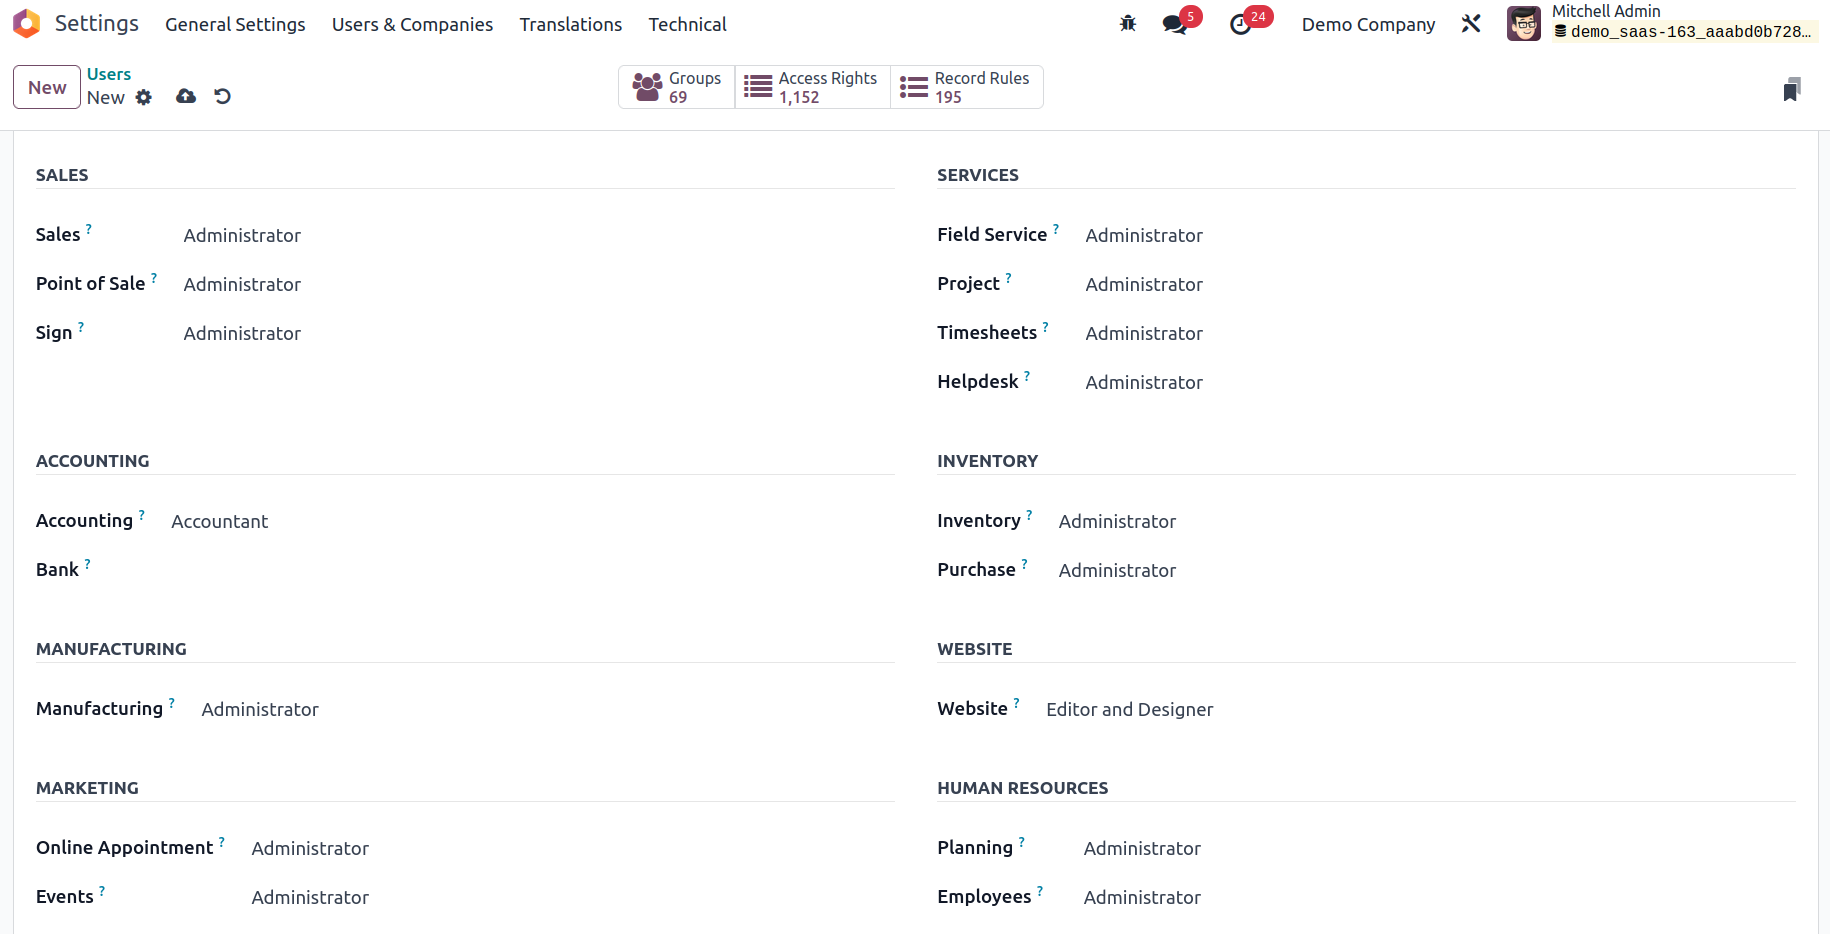
The Access Rights tab in the Users setup form allows you to define the user's access rights-related information. There are various fields on the Access Rights tab. First of all, you can describe the Multi companies' associated information, such as Allowed Companies and Default Company. In the Allowed Companies section, you may specify which companies the user has access to if the system is multi-company. The Default Company option allows the user to specify their default company. Next, under the User types area, the platform offers three options: Internal User, Portal, and Public, from which you may choose the most appropriate. Then you may talk about the user's potential for sales. In the Sales area, there is a dropdown menu with three options: User: Own Documents Only, User: All Documents, and Administrator. If you choose the first option, the user will be able to view his personal data in the Sales application. In the second scenario, the user will have access to every user's sales application record. In the case of the Administrator, the user will have access to the sales configuration as well as statistics information.

Furthermore, in the Point of Sale field, there are User and Administrator choices in the dropdown menu. Setting a good one right now on the spot enables you to get the most out of your point of sale through quick sale encoding, streamlined payment mode encoding, automatic pricing list production, and other features. Similar to this, the Sign field makes it simple for you to sign and finish your papers by allowing you to select the best option from the choice of "User Own Templates or Administrator."
Following that, you may describe the Accounting-related components, making it easier to manage accounting demands. You have a variety of options here, including Billing, Read-only, Bookkeeper, and Accountant, which we will go into more depth about later. Likewise, the user's manufacturing characteristics might be classified as either Administrator or User in the respective field.
Then, under the Services area, you may define the Field Services, Project, Timesheet, and Helpdesk. Additionally, the Inventory and Purchase sections allow you to choose either Administrator or User depending on the relevant user and are used to control inventory operations and stock activities. The Live Chat, eLearning, and Website fields are then found in the Website section. The user will have the ability to remove assistance channels if the Live Chat box is set to Administrator. The user will have the authority to remove the support channel if it is designated to be a User. Similar to this, you may designate the user as an Officer or Manager in the eLearning field. In the Website area, you can select 'Restricted Editor' or 'Editor and Designer'.

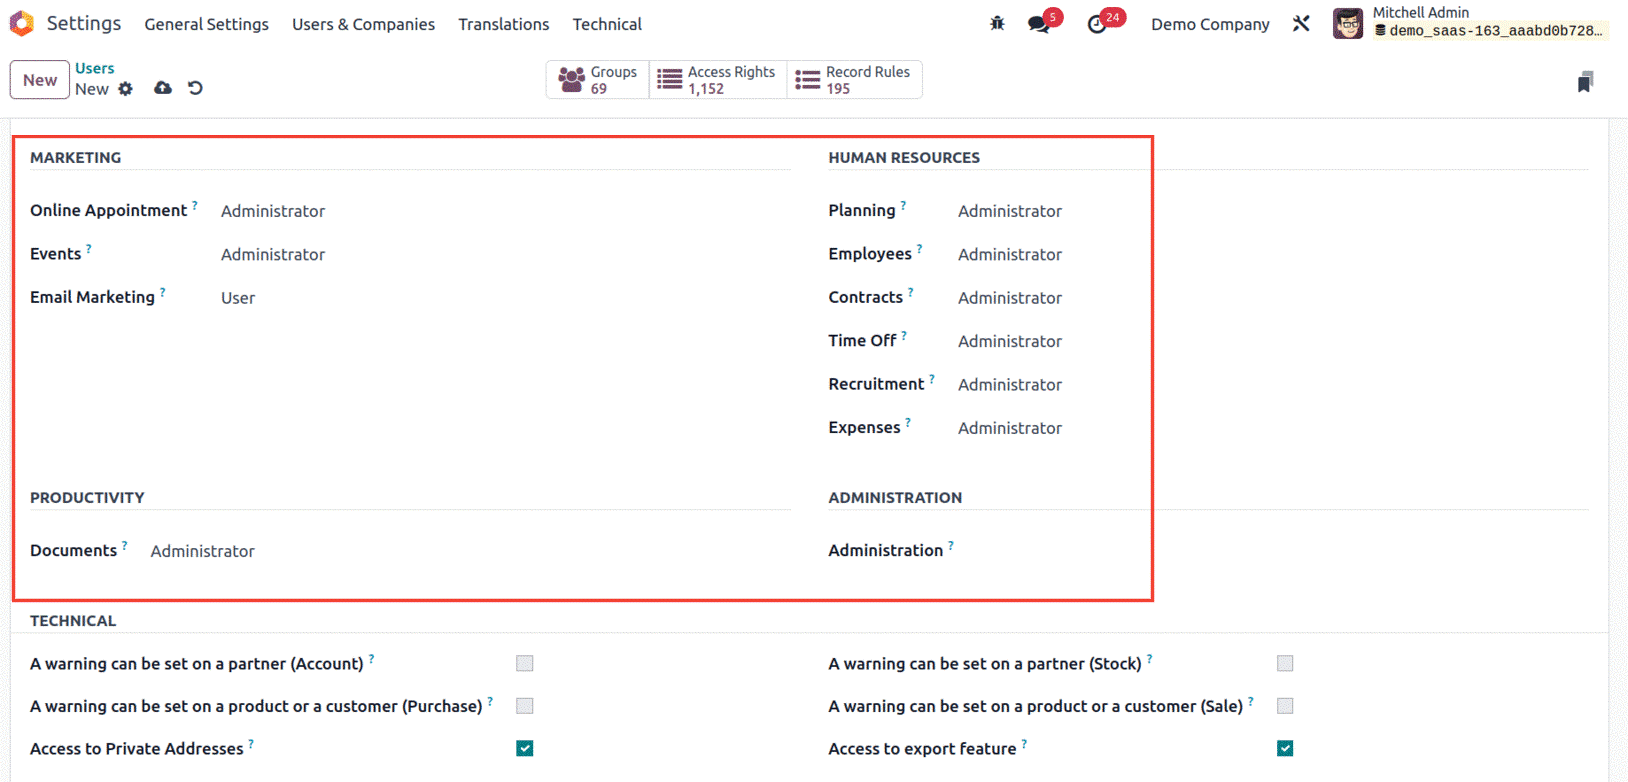
Furthermore, in the Marketing area, you may describe the essential features using the Online Appointment, Social Marketing, Marketing Automation, Events, Email Marketing, and Surveys sections.

Then, under the Human Resources area, you can see several fields like Fleet, `Lunch, Planning, Employees, Approvals, Contracts, Time Off, Recruitment, and Expenses. Furthermore, the Administration option allows you to specify whether the user has 'Access Rights' or 'Settings' access. Similar to this, an appropriate selection from the dropdown menu may be entered in the Documents box found under Productivity.
Boolean fields are now available in the Technical area, and they can be activated or disabled depending on the user. A warning can be put on a partner (Account), a product or a client (Purchase), and several other variables. Private Addresses Access, Modern pricelists, Permit fiscal years to be defined that are longer or shorter than a year, Basic Pricelists, immediate creation of a new quote from the chores, reduction on lines, delivery slips, show the serial and lot numbers. On the Sales Order and any related invoices, display the Incoterms, Lock Confirmed Sales, Control Access to Templates, Control Multiple Units of Measure, Control Multiple Stock Owners, Control Mass Mailing Campaigns, Control Packages, Control Product Variants, Control Storage Categories Print GS1 Barcodes for Serial Numbers and Lots, create leftover items, Templates for quotes, the reward for referrals, responsible user Purchase Receipt, Display Customer Reviews, Display Recurring Revenues, B2B tax display, Time Off Responsible, Default Unlocked, Operation Dependencies are useful. Use recurring tasks, use subtasks, and the reception report Utilize time billing A warning can be put on a partner (stock), a product, or a customer (sale), among other things. access to the export function Allows cash management, Analytic Accounting, Price comparison, shipping address, display of a resume on an application, and Clearly showing serial and lot numbers on invoices. Activate the signing order Editor for Mail Templates, Manage Product Packaging, Push and Pull Inventory Flows, Multiple Stock Locations, Multiple
Warehouses, Manage Lots/ Serial Numbers, Manage Work Order Operations Pro-forma invoices, several websites, Order Receipt, the interviewer for a job, ask for a signature on your delivery orders, Send an automated email reminder to verify delivery. Display Lead Menu SLA Policies, please UOM Price Display for eCommerce, Tax Display B2C Use benchmarks, Use the Project rating Use Manufacturing Orders and Reception Report, Project Stages are used, Use wave pickings and task dependencies. The other rights areas, such as Contact Creation and Multi Currencies, can likewise be activated or removed in a similar manner. The appropriate user will be helped by the setting of the Technical and Access Rights elements to manage all of these actions on your platform. Furthermore, all of these configuration elements will simply aid you with the permission part of the respective user in your Odoo platform.
So far, we have discussed the operations and maintenance of the User's Access Rights description, and now we can go on to the following part, which will cover the Preference choices configuration.