Similar to giving refunds to vendors based on business operations, receiving refunds from vendors likewise happens as part of a business' operations. The Vendor Management tabs in Odoo's Accounting module include a unique menu that supports the Refunds on Vendors sections. Here, all completed refund operations as well as those that have already been started will be defined. The Refund will be described along with the Bill Number, Vendor Name, Bill Date, Reference Information, Next Activity Scheduled for the Refund Operations, Tax Excluded Amount Along With The Total Amount, and the Status of the Operations.

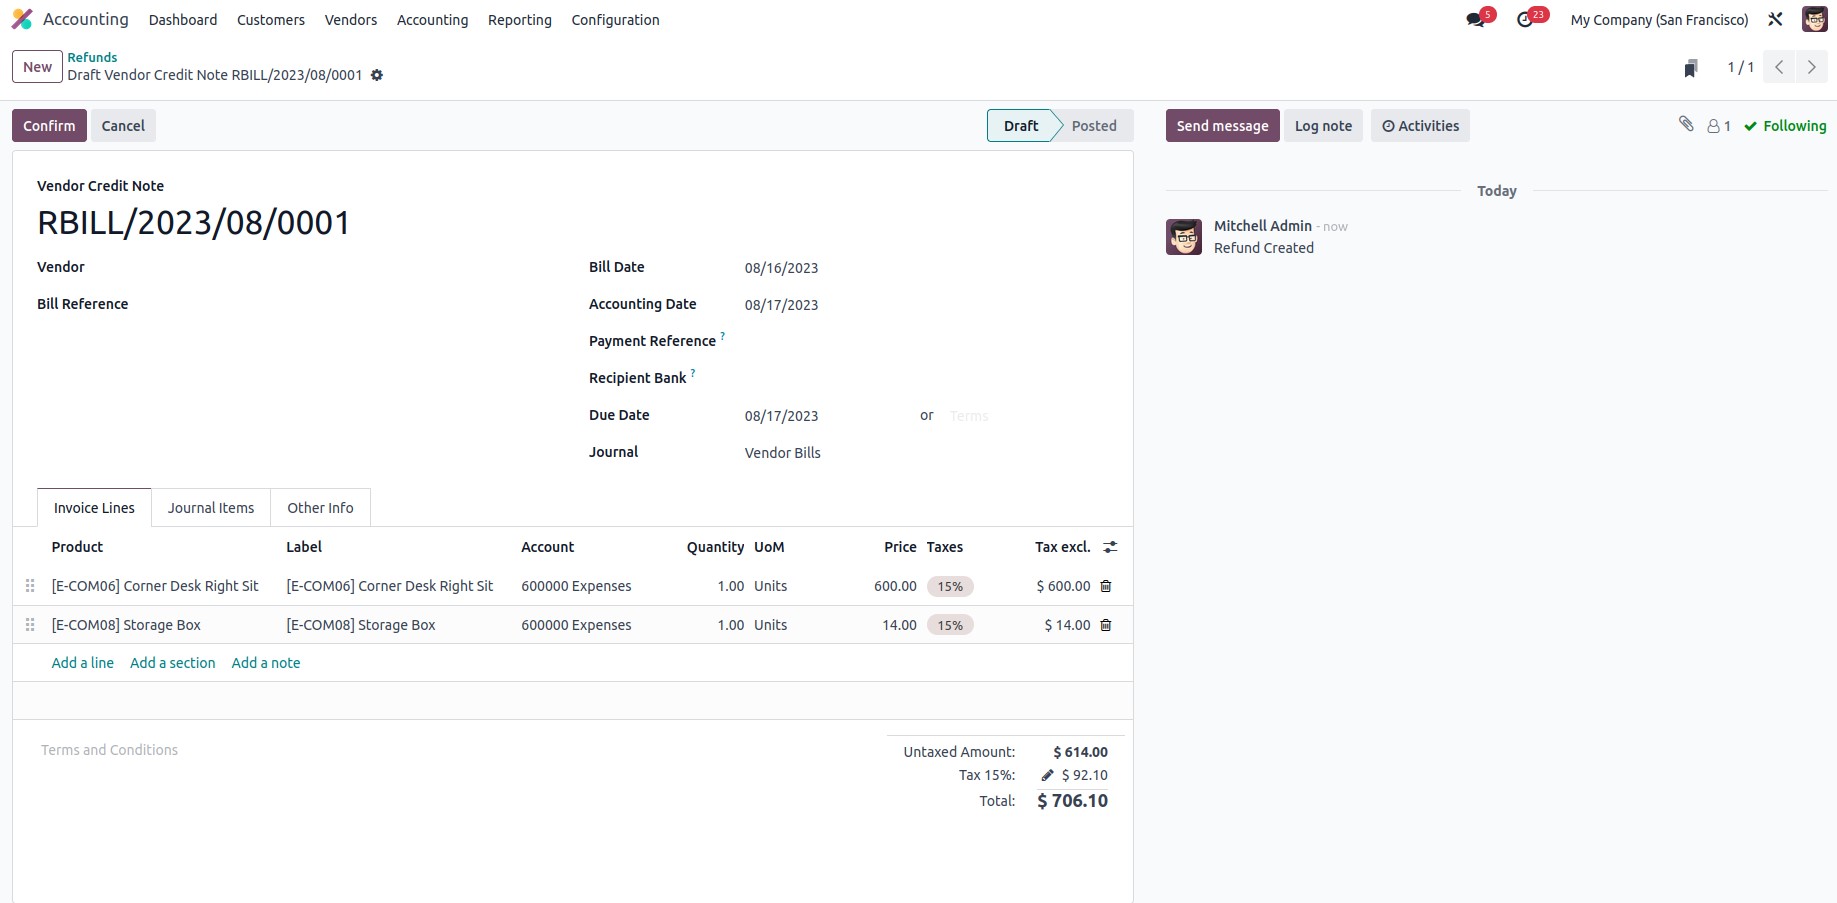
You will be able to edit the defined Refund procedures that have already been carried out by using the Edit option present in the relevant menu where each of the Refunds is being defined. You can choose the Create option from the Refund menu to open the window depicted in the following screenshot in order to create a new refund operation.
Along with the vendor's name, the bill reference, payment reference, and recipient bank can all be added in this field. Additionally, the Bill Date, Accounting Date, Due Date, Journal Details, and Currency can all be defined. The Product Details, Label, Account Details, and Analytical Accounting Details can all be defined under the Invoicing Lines. The Subtotal, Quantity, Price, and Tax information will all be defined. The Add a line option now allows you to define products, and the Add a section option allows you to expand the Product Lines with new sections. A determined custom note may also be included in the Refund description. The Total of the refund bill both taxed and Untaxed Amounts along with the Tax details will be defined.

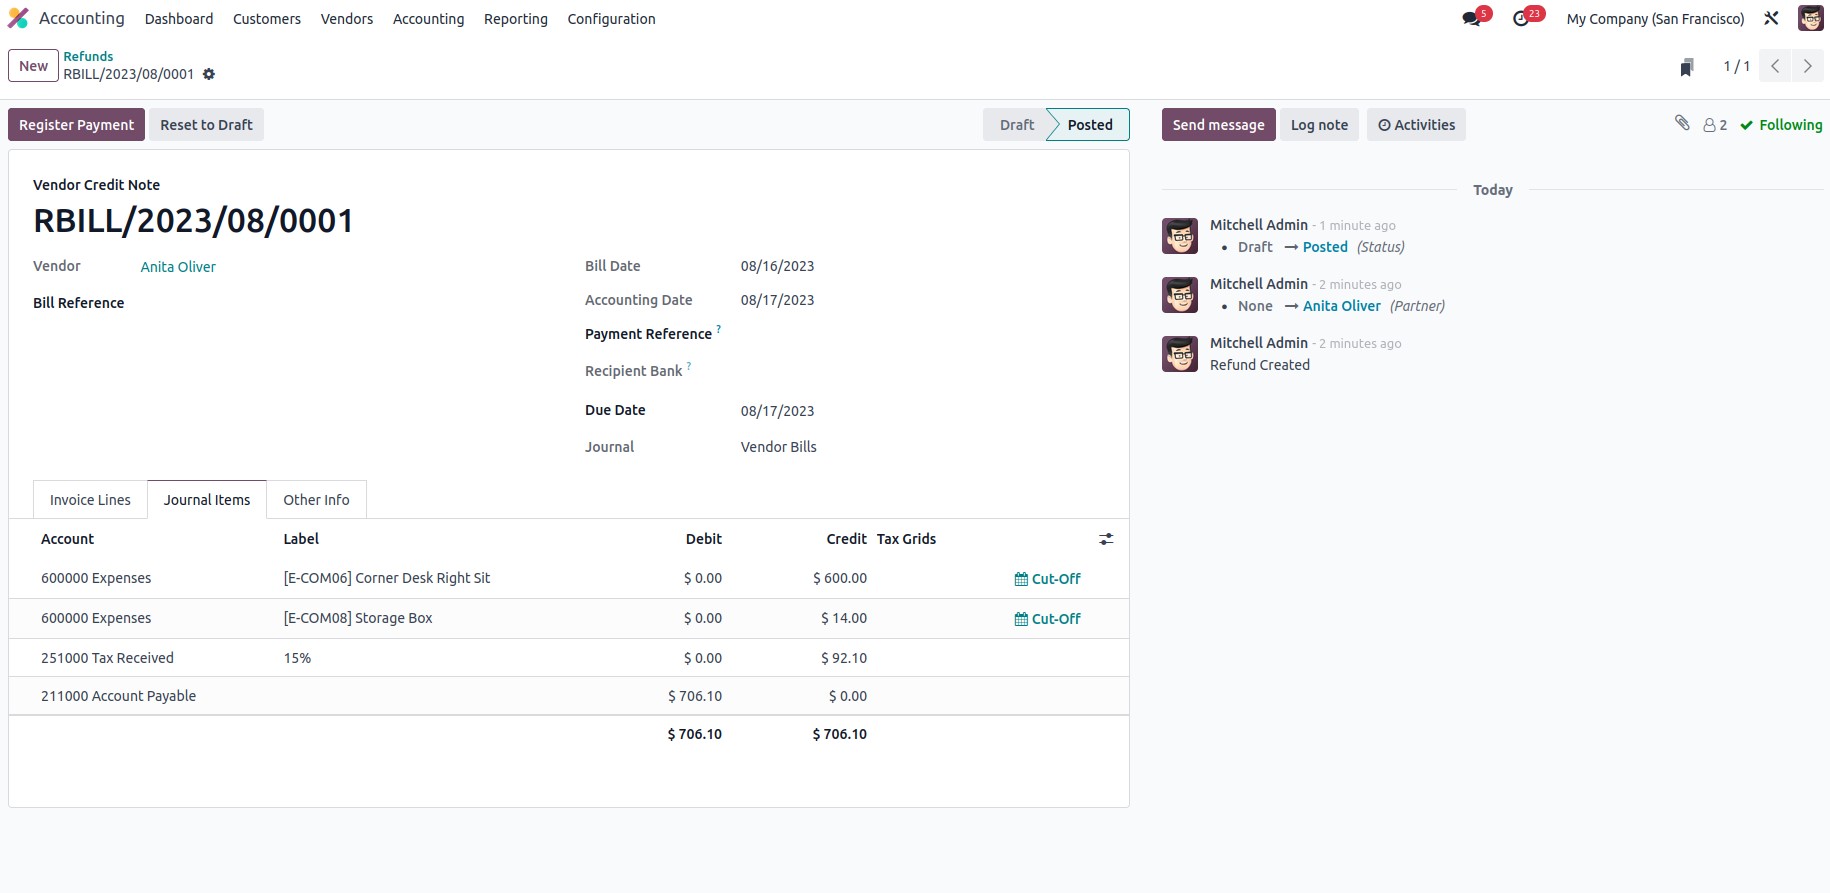
The details of the Journal Account, Label, Analytical Tags, Debits, and Credits, as well as the Tax Grid, will be defined under the Journal Items of the relevant Refund. Additionally, the Account Payable will be Credited and the Expense Account will be Debited throughout the Reverse Billing procedure. By choosing the accessible Add a Line option, you can add new Journal details.

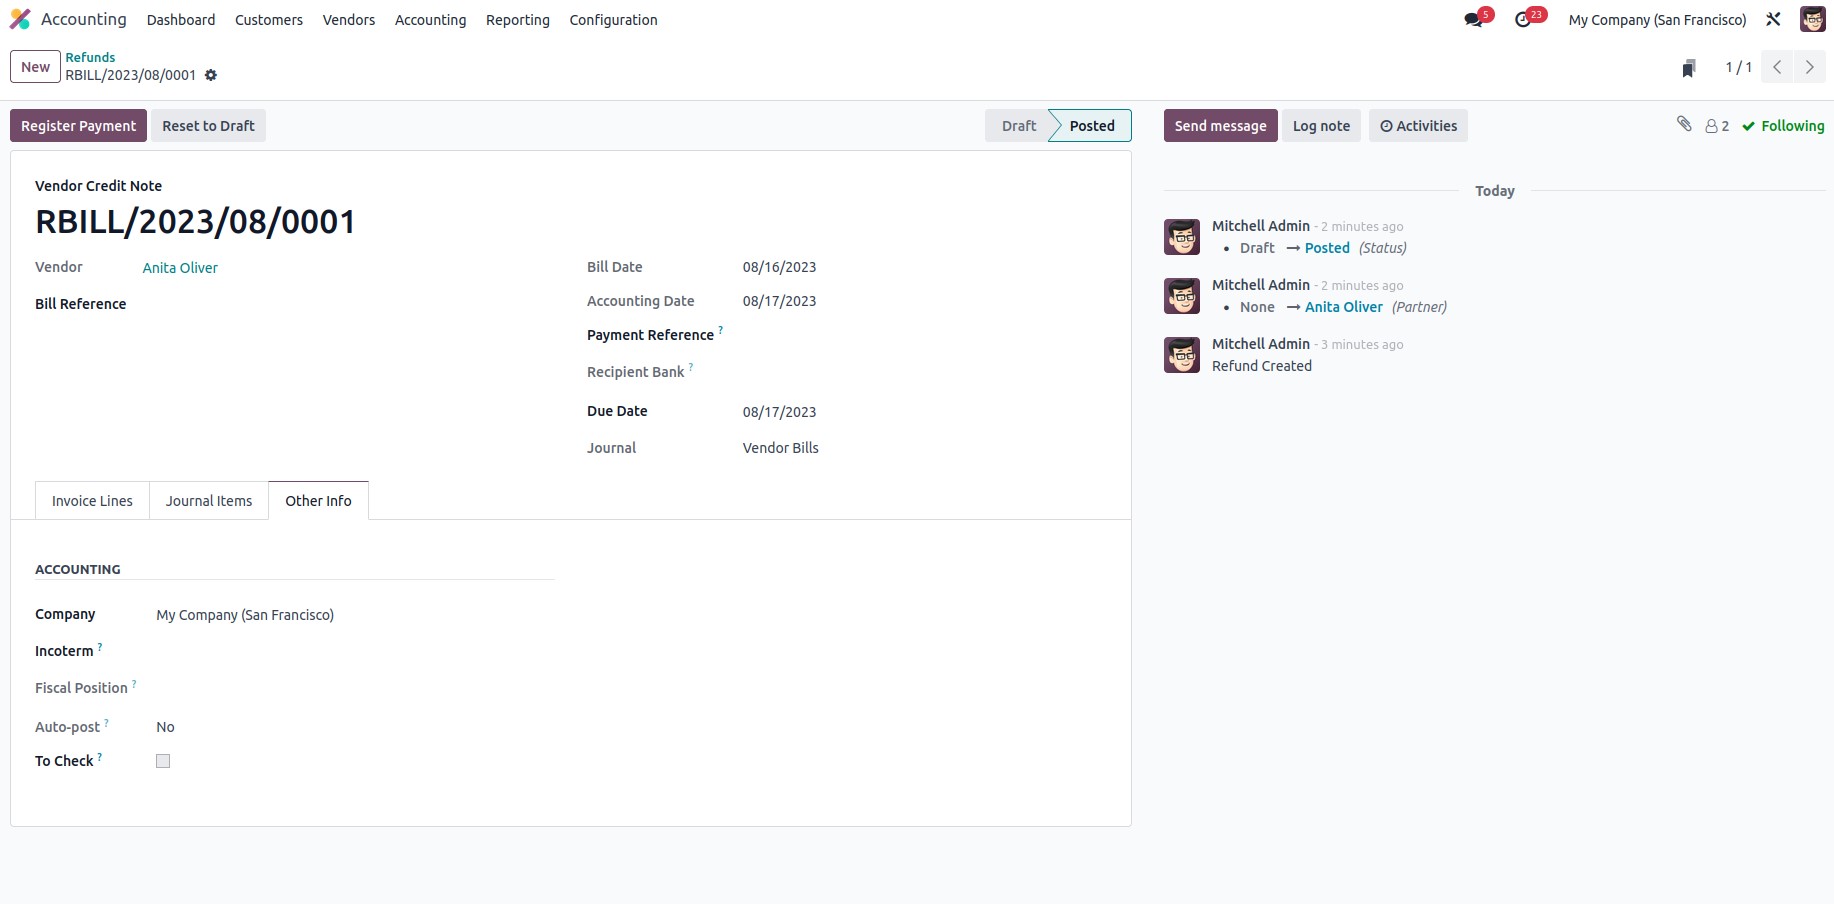
Additionally, you can adjust the Accounting specifics, such as the Incoterms, Fiscal Position, Intrastat Country, Intrastat Transport method, and the Cash Routing Method, in the Other Info tab of the relevant Refunds menu. Additionally, the options to specify and put into action in the specific Refund procedure include Post Automatically and To check.

The Register Payment option will bring you to the Register Payment box, as shown in the accompanying screenshot, once all the Configurations components of the Refund have been established. You may then choose to save the description. The Journal and the Payment Method can both be set to Manual, SEPA Direct Debit, or Batch Deposit in this case. Along with the Payment Date and the Memo on each return, it is also possible to define the Amount, Currency, and other details of the refund. You can choose the Create Payment option once the configuration details for the Register Payment have been finished.