A corporation should handle invoicing and invoice administration with the utmost attention and accuracy
using respectable tools and solutions. Both the Accounting and the Financial departments of every
organization are in charge of creating and managing invoices. With the aid of a supporting Invoicing
module that is integrated with the Accounting module of the Odoo17 platform, the operations of invoicing
and invoicing administration are supported by the Odoo17 Accounting module. When the Accounting module
is installed, the Invoicing module also does so automatically.
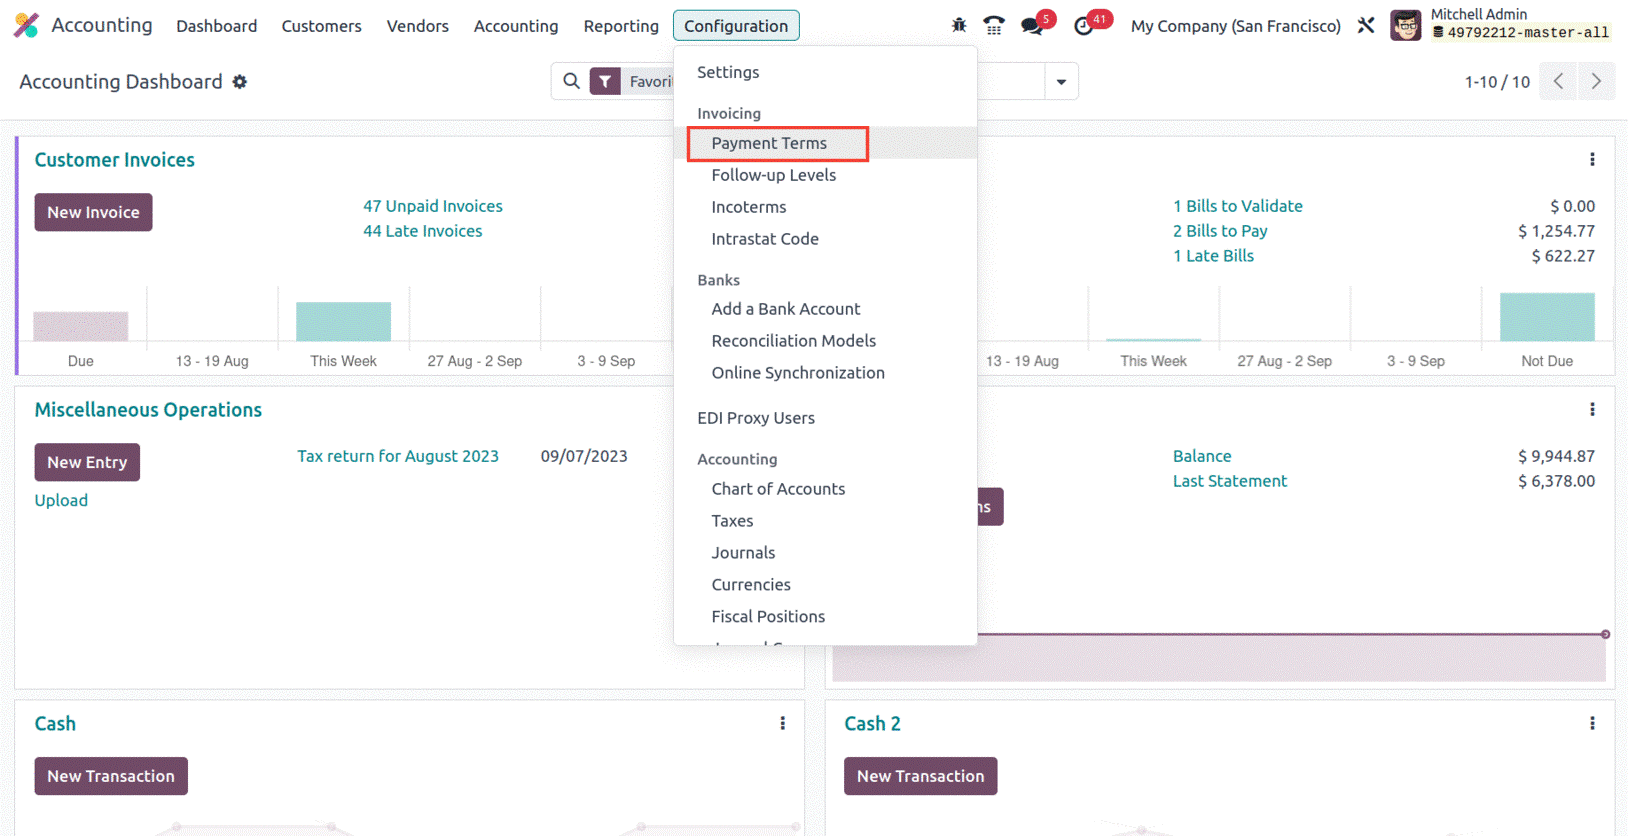
Along with the Invoicing module, Odoo17's Accounting module offers a number of configurations to
support operations. These configurations are accessible via the Accounting module's Configuration tab.
Numerous menu options that support the components of invoicing are available in the Configuration tab.
Let's continue by learning about each component of the invoicing configuration individually.
Payment Terms and Early Payment Discounts
You may manage your payment terms and conditions using the Odoo 17 Accounting module's Payment Terms
feature. Businesses that need to monitor and manage their payment terms and conditions will find this
tool helpful. With the help of this tool, you may view a list of all payment terms, add a new payment
term, update an existing payment term, delete a payment term, and search for a particular payment term.
Businesses will benefit greatly from defining the conditions under which they will collect payments from
their clients. By detailing when they will receive payments and providing a transparent record of what
payments have been made, this feature can help firms manage their cash flow more effectively.
The Accounting module's Configuration page has an Invoicing section where you can locate the Payment
Terms menu.
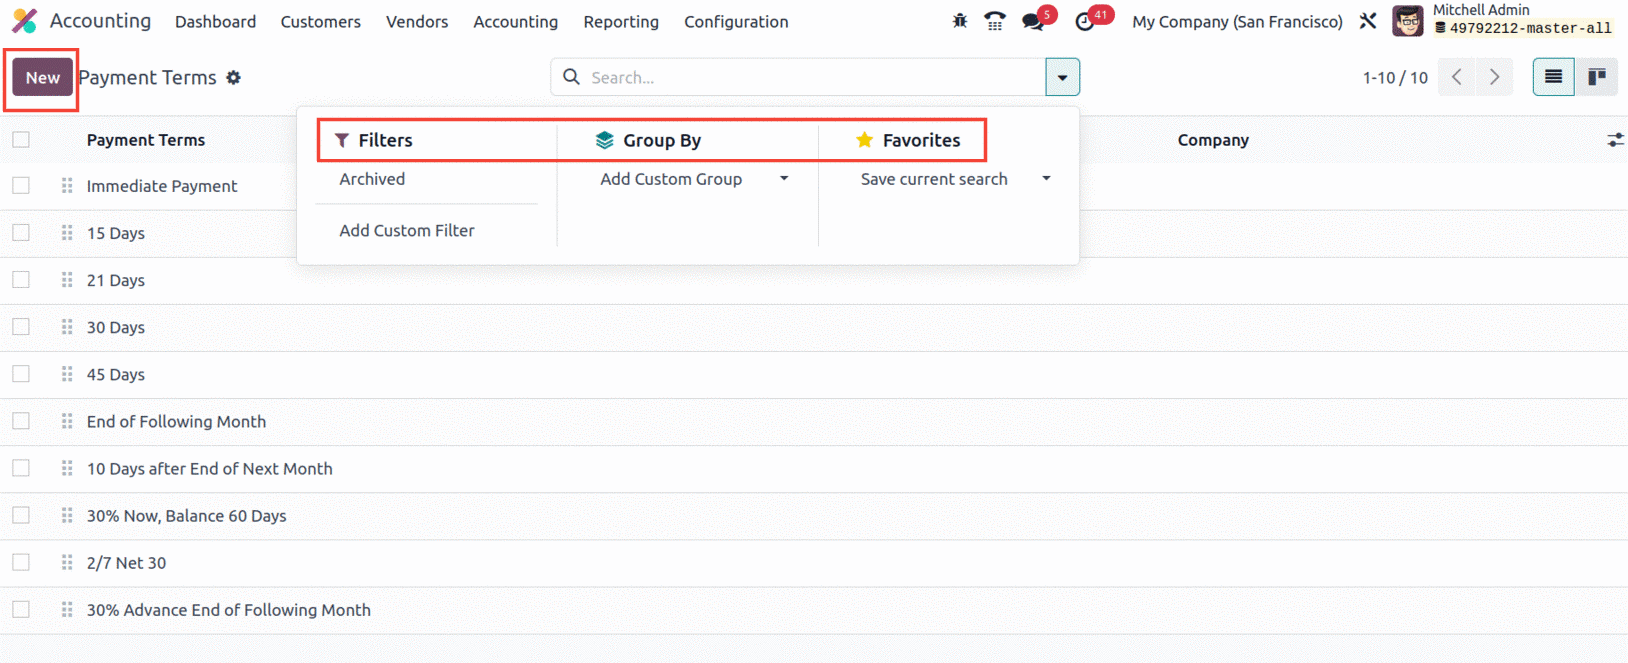
You may access the Payment Terms window using the menu, as seen in the screenshot below. Along with the
pre-set and user-configurable choices, the Payment Terms window will contain all of the
configuration-specific information.
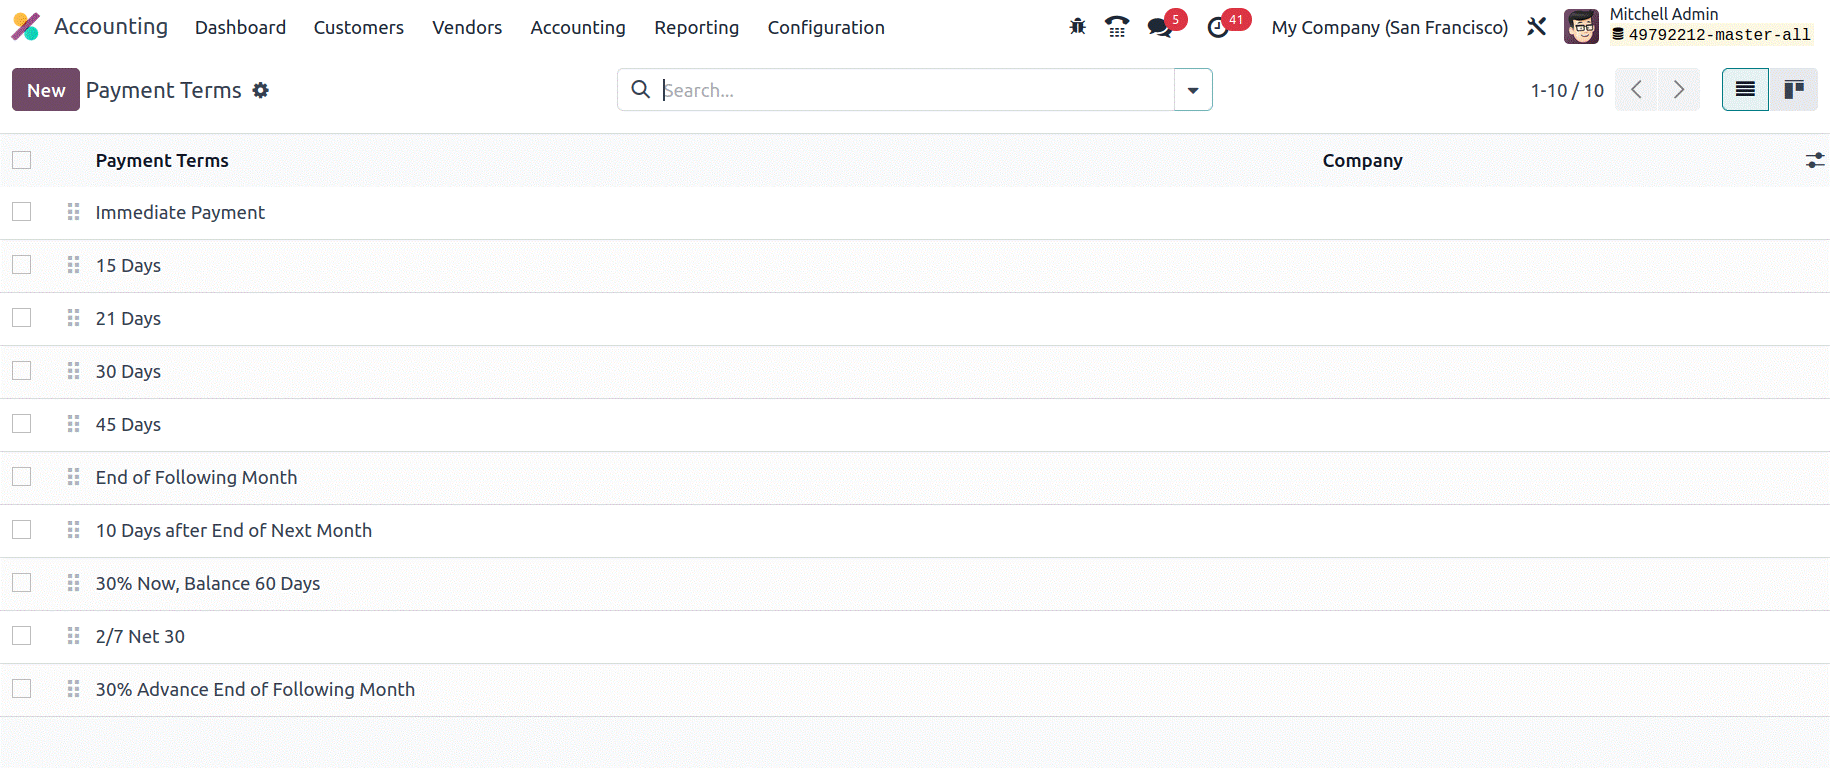
The necessary tools will be listed for each payment period. You can choose and learn more information
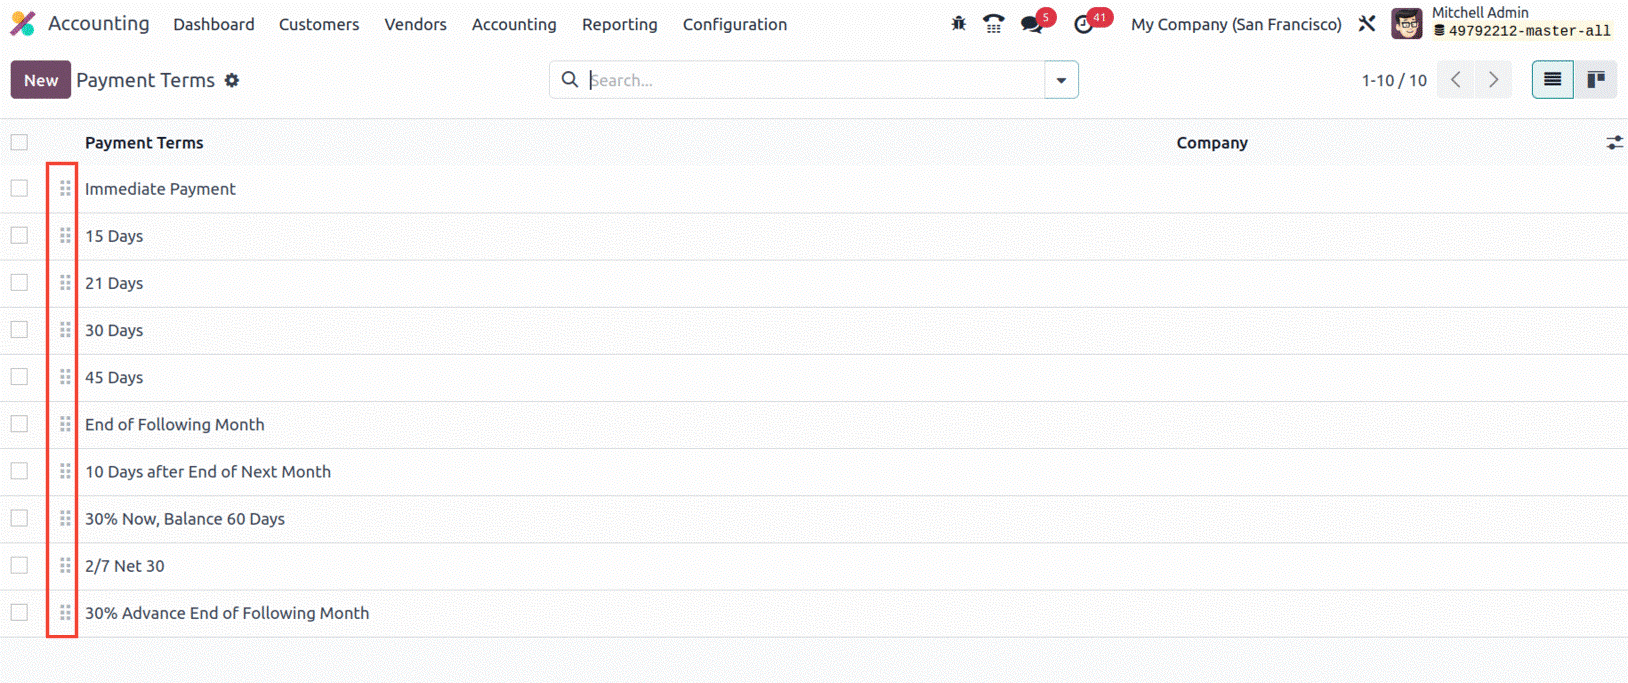
about any of these listed payment terms. It is also possible to change it if you want to. You can drag
and drop the payment terms in the window's sequencing feature to arrange them in the order you like.
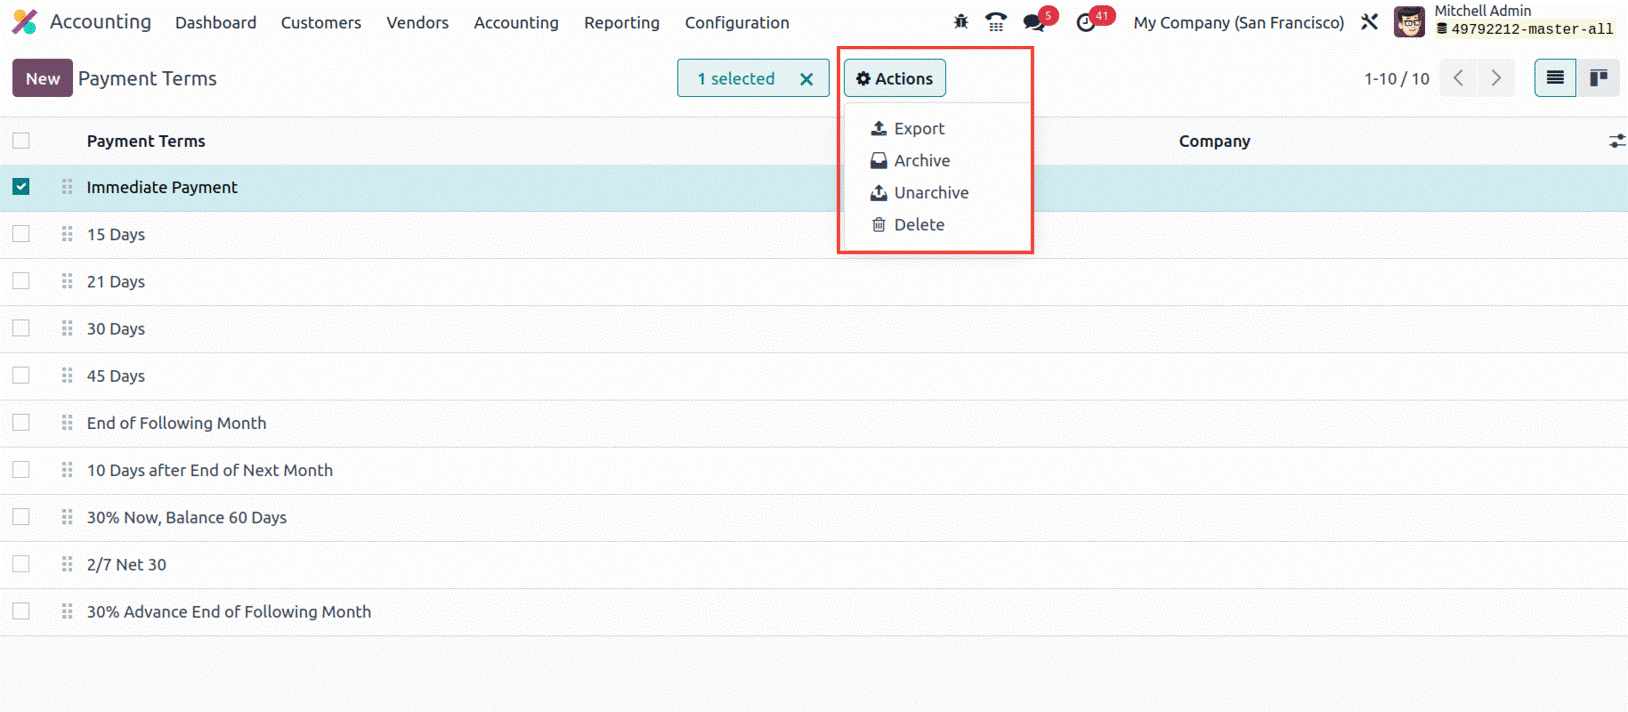
Additionally, additional actions can be taken by checking the checkbox located on the extreme left of
each payment terms record. When the box is
checked, the Action button, which has menus like Export, Archive, Unarchive, and Delete, will be
displayed, as shown in the screenshot.
Additionally, the criteria option simplifies the search process and allows for better search results
through the use of a variety of preset and customizable criteria. To simplify data processing, you can
create a variety of groups of payment terms that are fully customized using the Group By option.
Numerous additional options are included under the Favourites tab,
including Save Current Search, Import Records, Link Menu in Spreadsheet, and Insert List in Spreadsheet.
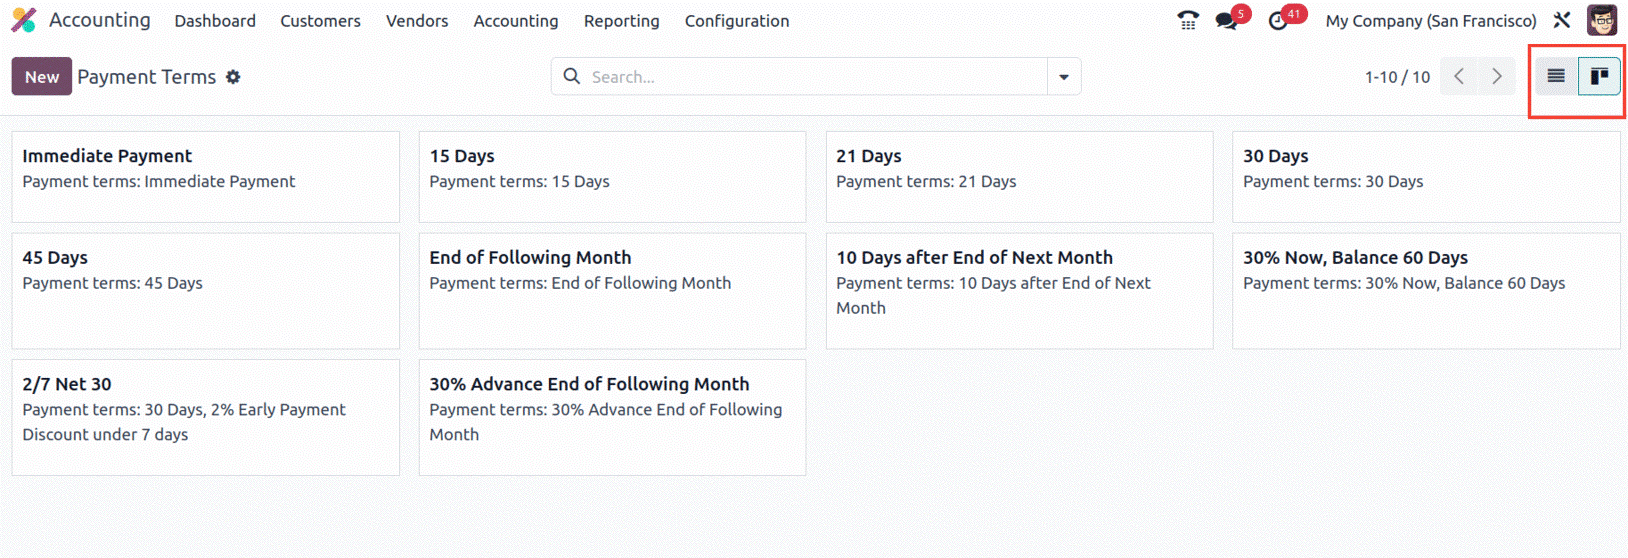
Additionally, using the Kanban menu icon in the top right corner, as seen in the screenshot below, you
can access the window in Kanban format.
The payment terms can be thought of as the time frame that the business gives its clients to pay for
the associated goods or services. The related payment will be marked as due if the customer doesn't make
it in time for the payment deadline. Additionally, based on the sales payment term or the buy payment
term according to the due date, the relevant payment will be shown in the aged reports, which means in
the aged payable or aged receivable.
You can select the NEW button to open the creation form when you want to create new Payment Terms, as
shown in the following screenshot.
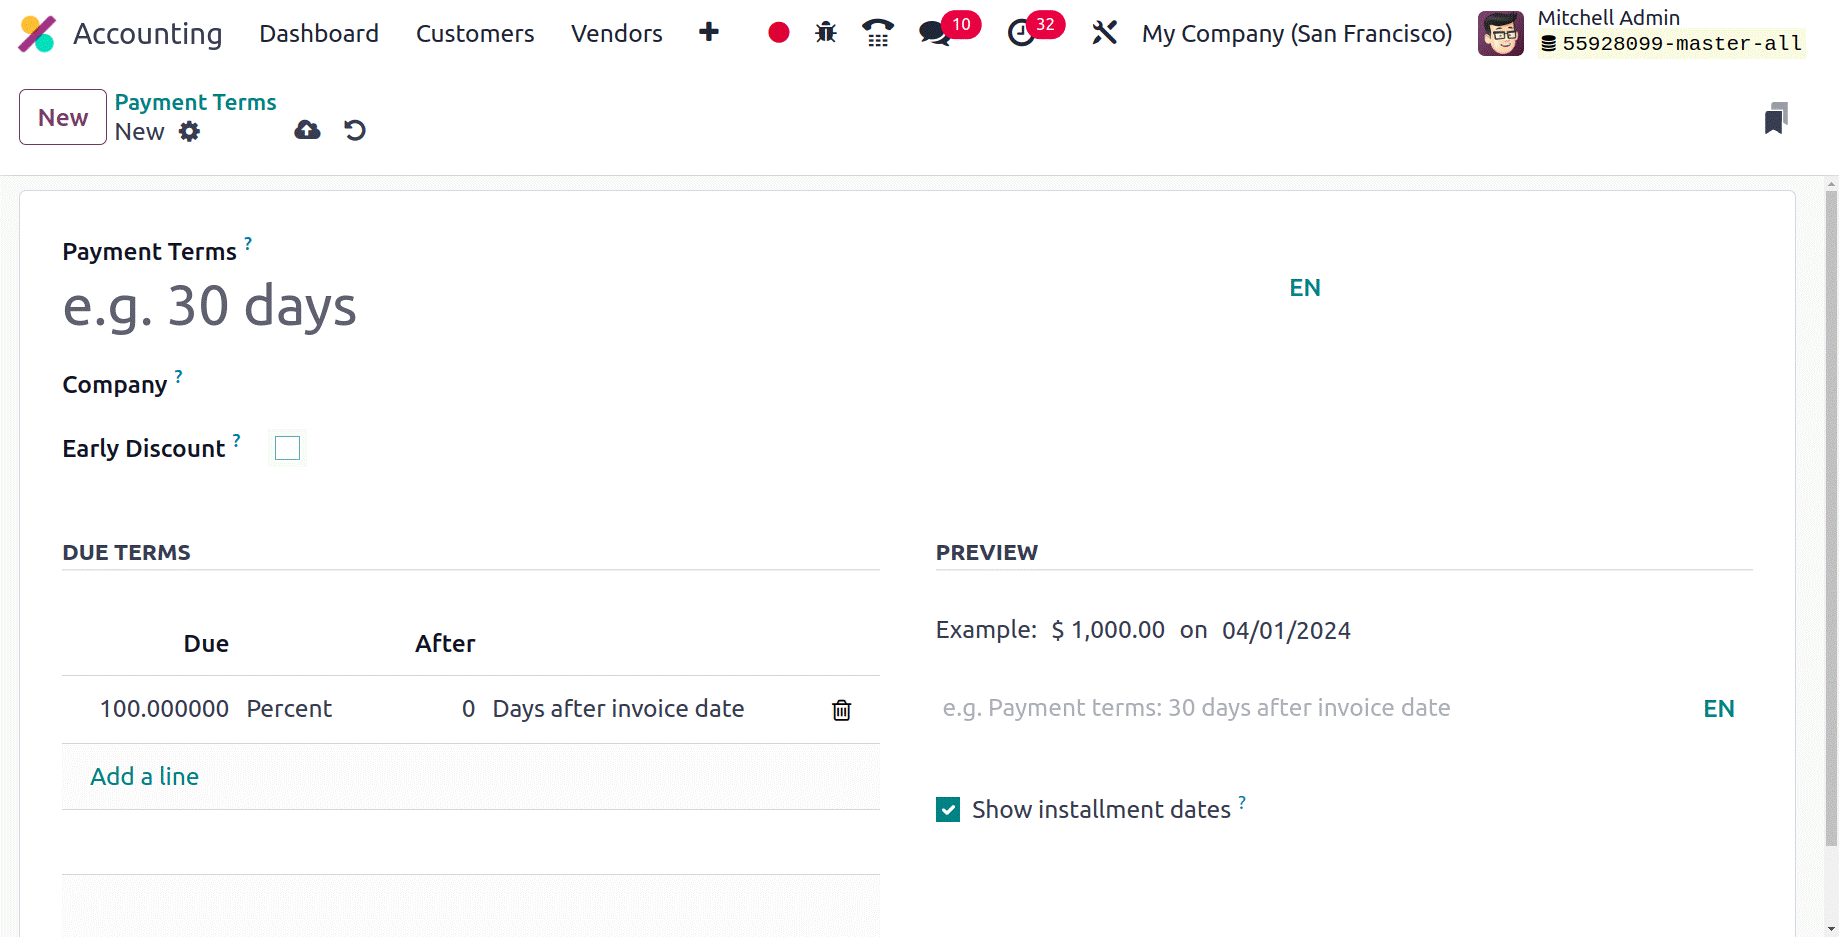
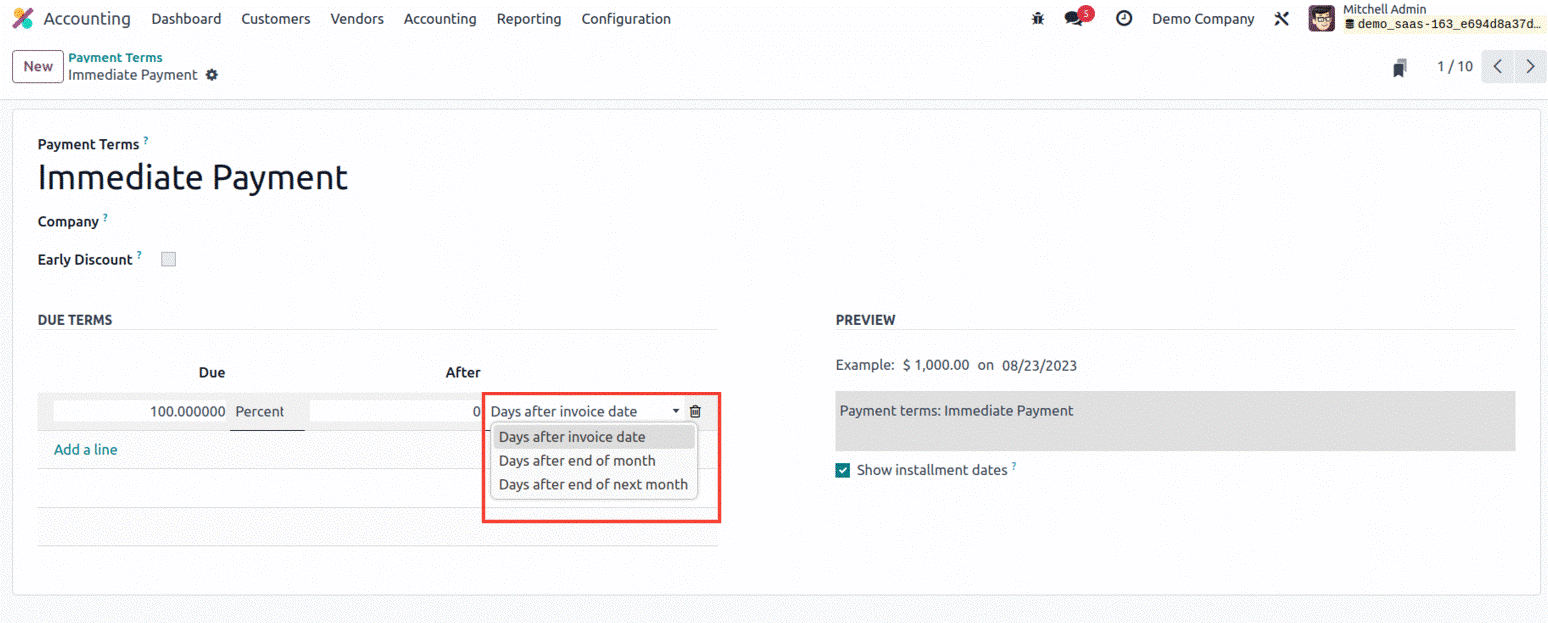
In the Payment Terms area of the form view, you can first enter the name of the payment terms. Also,
the user has the option to mention the Company name and early Discount and then we have a Due term
section that includes the filed Due and the type such as Percentage, and Fixed Amount. Additionally, it
is possible to define the Due Date Computation Details of the Terms by supplying the relevant fields on
a date and the computation details.
With the addition of the feature of offering early discounts, Odoo 17 provided new field discounts and
discount days in the due lines. You can include the discount and the number of days it is effective on
field discount days.
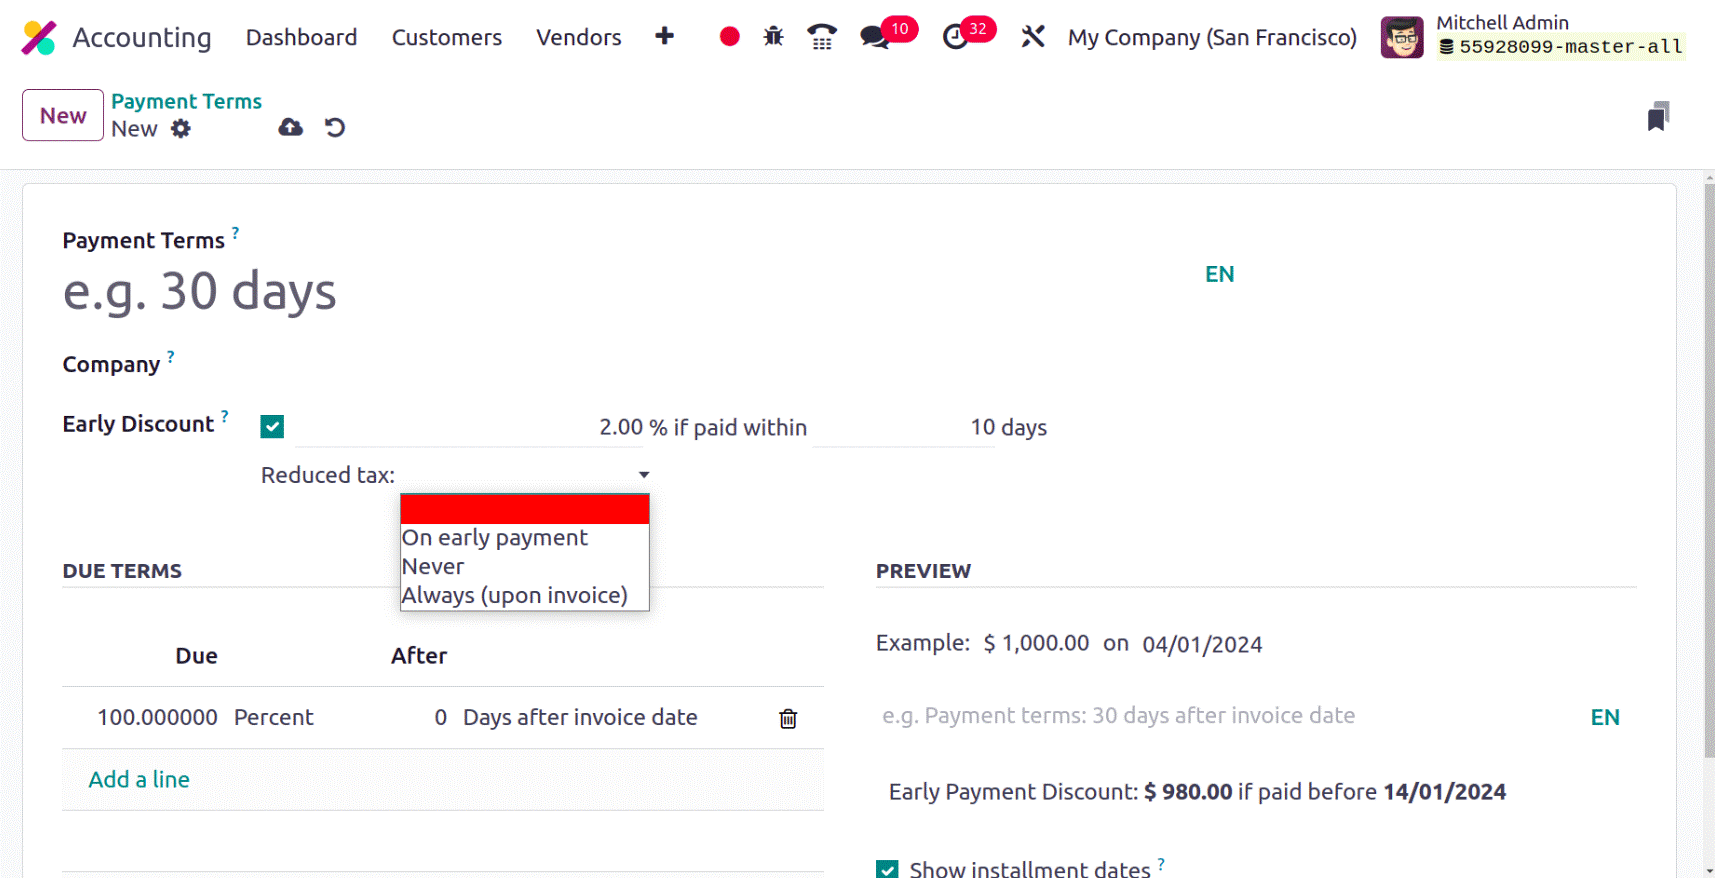
After being defined, these payment expressions can be used in bills and invoices.
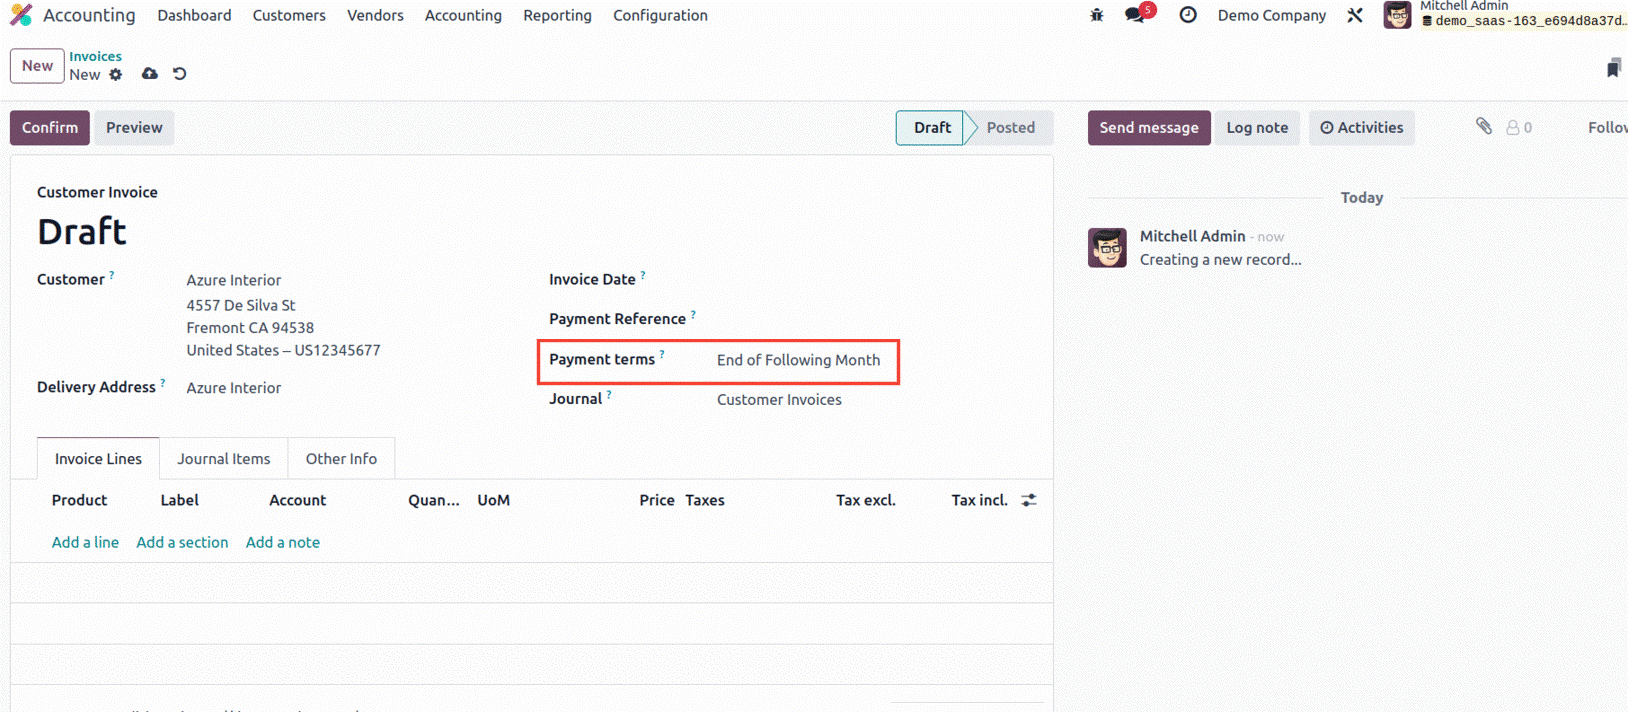
The Odoo17 platform gives you the option to select and update the necessary Payment Terms that you have
set up.
Now that the payment terms configuration in Odoo17 has been clarified, the next part will address the
Follow-Up Levels management function that is available under the Invoicing management area of the
Configuration tab.
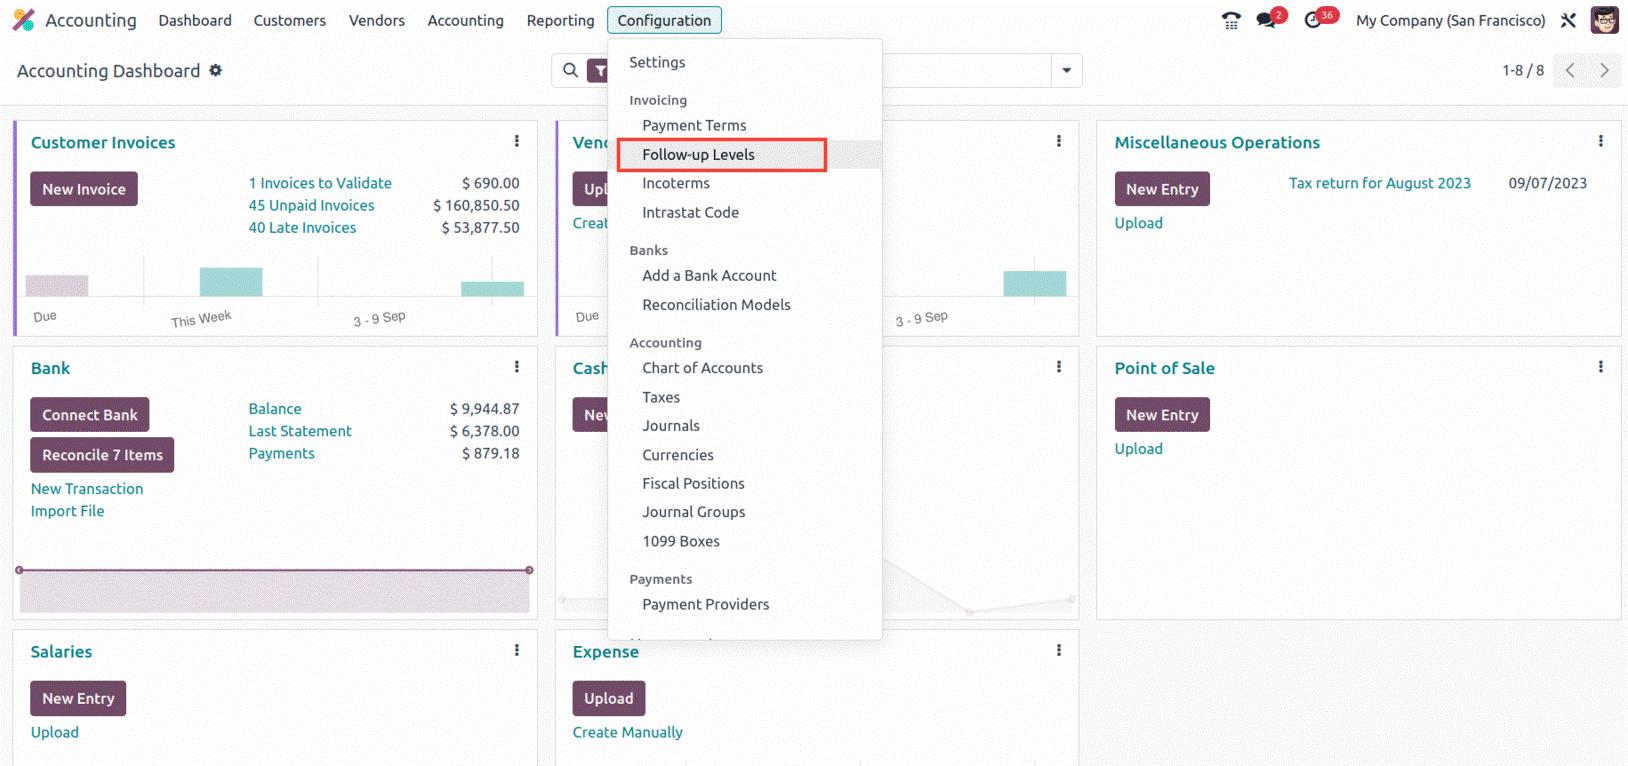
Follow-Up Levels
You may configure and manage the follow-up levels for client invoices using the Follow-Up Levels
functionality in the Odoo17 Accounting module. The menu can be found in the Accounting module's
Invoicing section's Configuration tab.
It is a great system for classifying and monitoring client invoicing. Customers who wish to see a
breakdown of their invoices by follow-up levels and organizations who want to keep track of which
invoices are past due may find this beneficial. Additionally, you can use this option to select the
level for each customer and to view which customers are on which level. You may also set up automated
follow-up emails and texts with its assistance.
The Accounting module's Configuration tab provides access to the Follow-up Levels menu, which lets you
manage and set up the follow-up levels for your business. We can select the appropriate option to define
the Accounting operation's Payment Follow-up. The Payment Follow-up window, as seen below, is what you
will draw in the following situation.
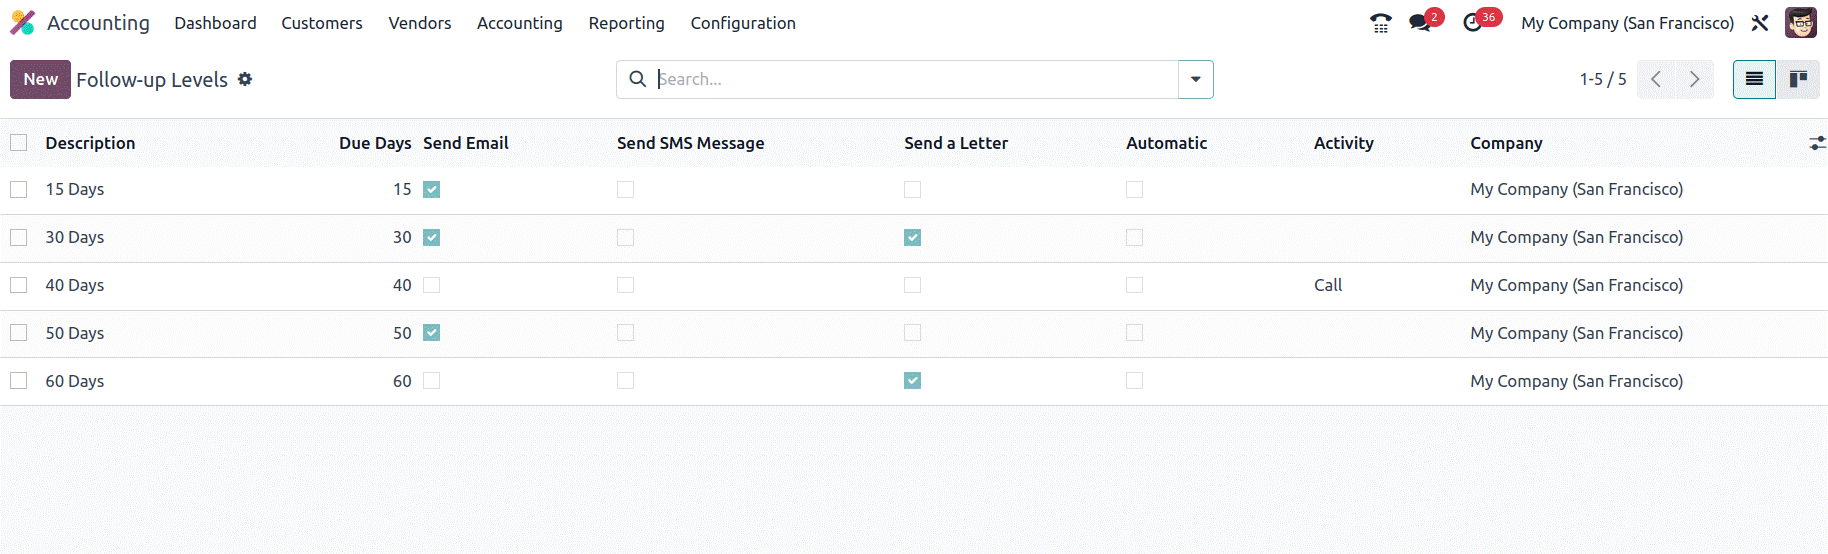
With the use of this function, you can make sure that you have the right resources to monitor any
unpaid invoices for clients. The Follow-up Levels window will present a polished preview of each
Follow-up Level that has already been established together with important details like Description, Due
Days, Send Emails, Send SMS Messages, Send Letter, Automatic, Activity, and Company. Depending on the
user's preferences, the follow-up actions on the Send Emails, Send SMS Message, Send a Letter, and
Automatic can be activated or deleted. Here, you can also access the other standard Odoo window options
like the Filters, Group By, Favorite, Search, Kanban view icon, and Export All icons.
The NEW button can be gently clicked to open the creation form for configuring new Follow up Levels.
Below is a screenshot of the creation window.
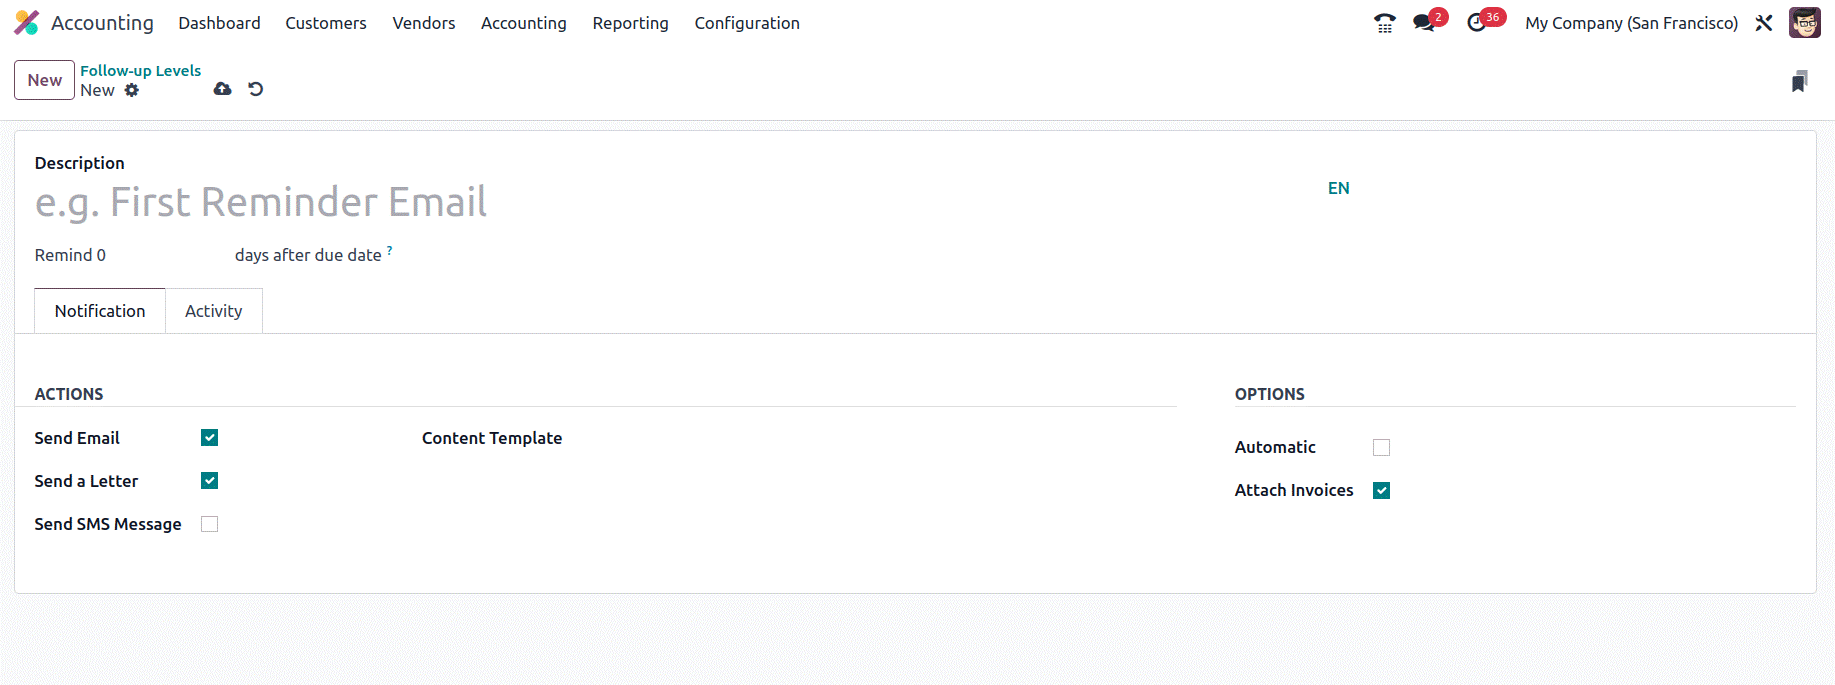
Initially, you can set the name of the follow-up action in the Description field and the follow-up's
due date in the available space. It is the number of days after the invoice's due date that must pass
before a reminder is sent. If you want to send the reminder prior to the invoice due date, you can
change this value to negative. You can enable the actions for each follow-up, such as sending an email,
an SMS message, a letter, etc. You can check "schedule activity" and add the sign activity to the
designated individual under the "Activity" page, where manual action options are provided.
Additionally, based on the situation, the Options for Payment Follow-ups, including Automatic and
Attach Invoices, can be enabled as well as disabled.
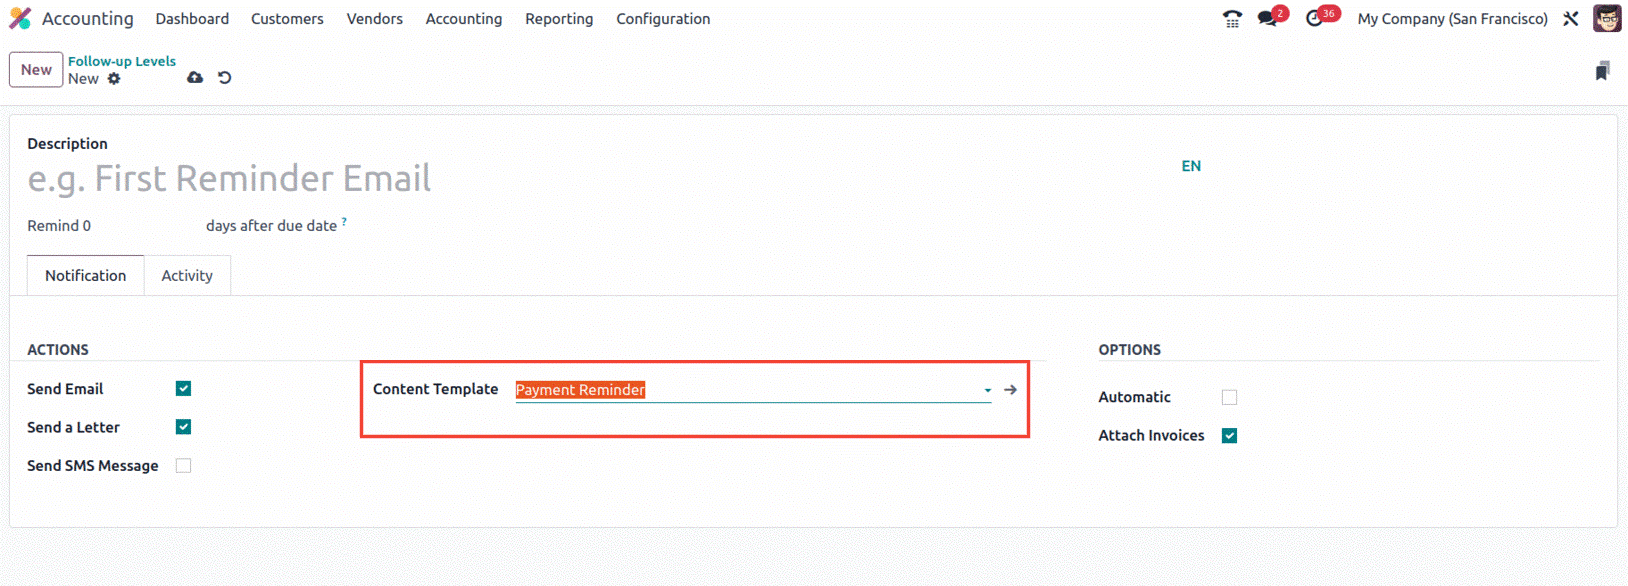
Additionally, the content template 'Payment Reminder' will display the message in response to the
Payment Follow-ups being conducted. As invoices become due, a follow-up report is generated based on the
following levels that have been defined.
Since it is obvious that the Follow-up Levels function is sufficient for managing and customizing the
follow-up levels for customer bills, you can track customer invoices with the help of this effective
tool and make sure that they are paid on time.
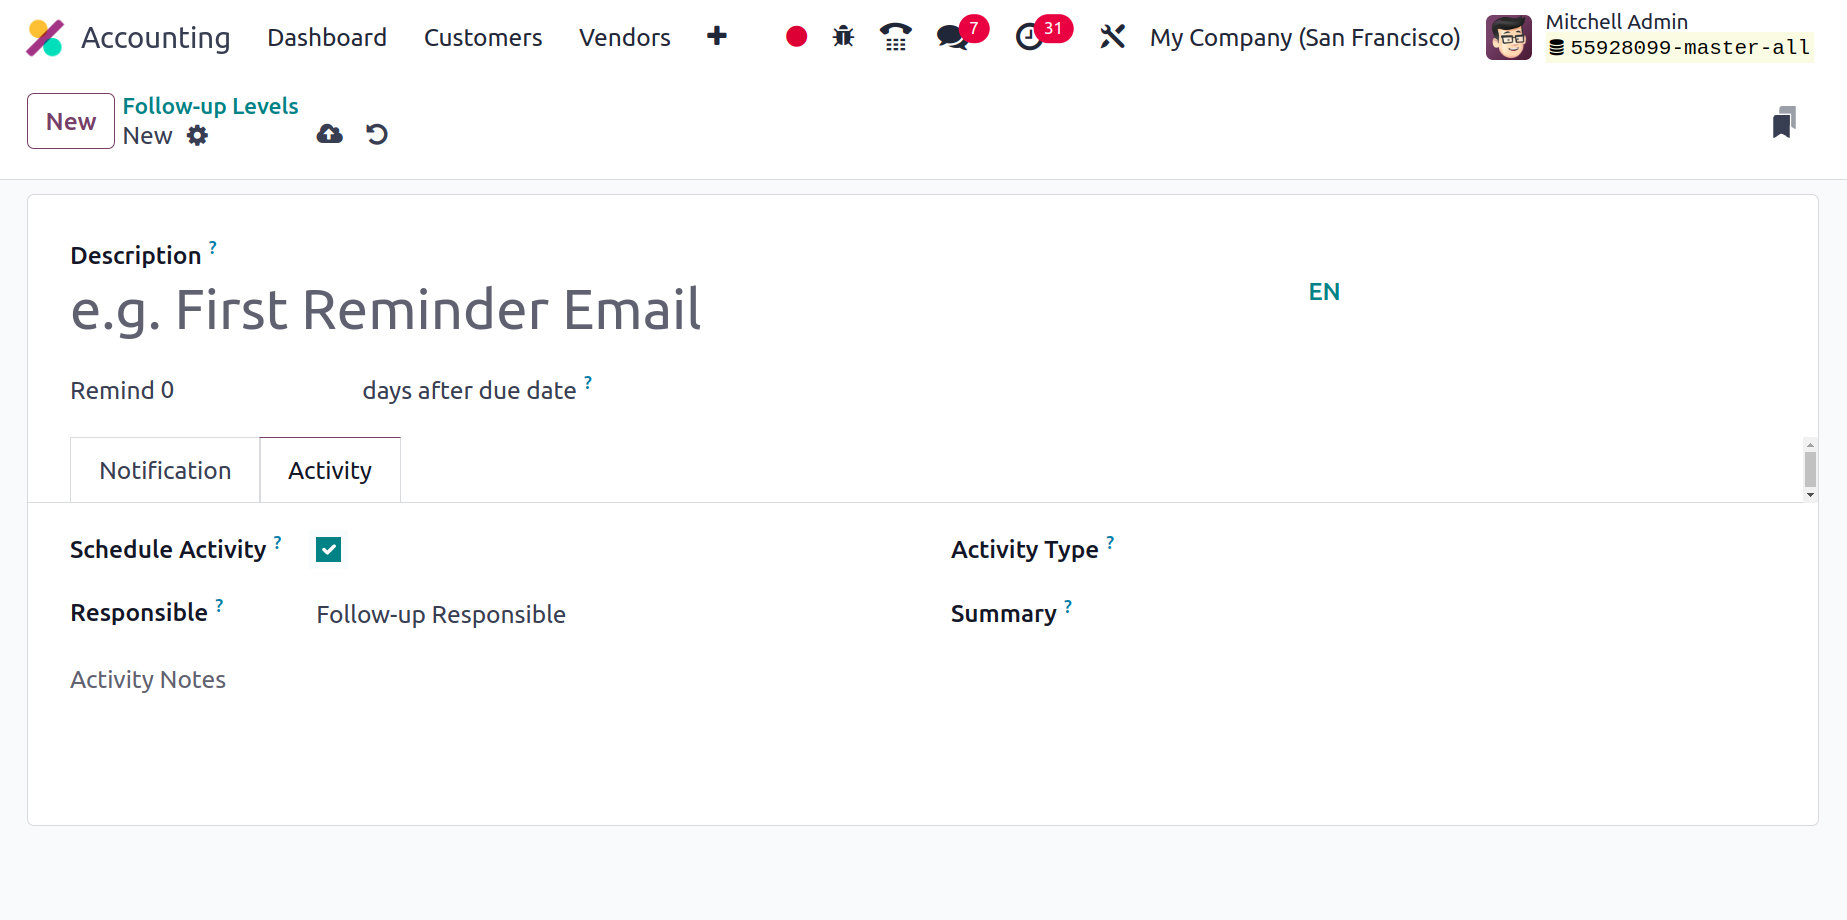
The Schedule Activity boolean can be used to schedule activities inside of follow-up levels. Indicate
who is in charge of the task in the Responsible field. Next, select the Activity Type and make reference
to the Summary.
Now let's move on to the section that describes the Incoterms settings menu.
Incoterms
The international commercial terms known as Incoterms outline the obligations of buyers and sellers
with regard to the delivery of products. They are used to identify when the title to the goods goes from
the seller to the buyer as well as who is liable for paying the freight and other transportation costs.
Incoterms are used in Odoo 17 Accounting to automatically fill in shipping-related fields on the Sales
Order and Purchase Order forms, such as the Incoterms and the shipping address. When products are sent,
they are also used to create the proper accounting entries.
The most crucial thing to keep in mind about Incoterms is that they should only be utilized for
shipments that are being sent internationally. Incoterms should not be utilized for domestic shipments
because the terms and conditions are frequently different.
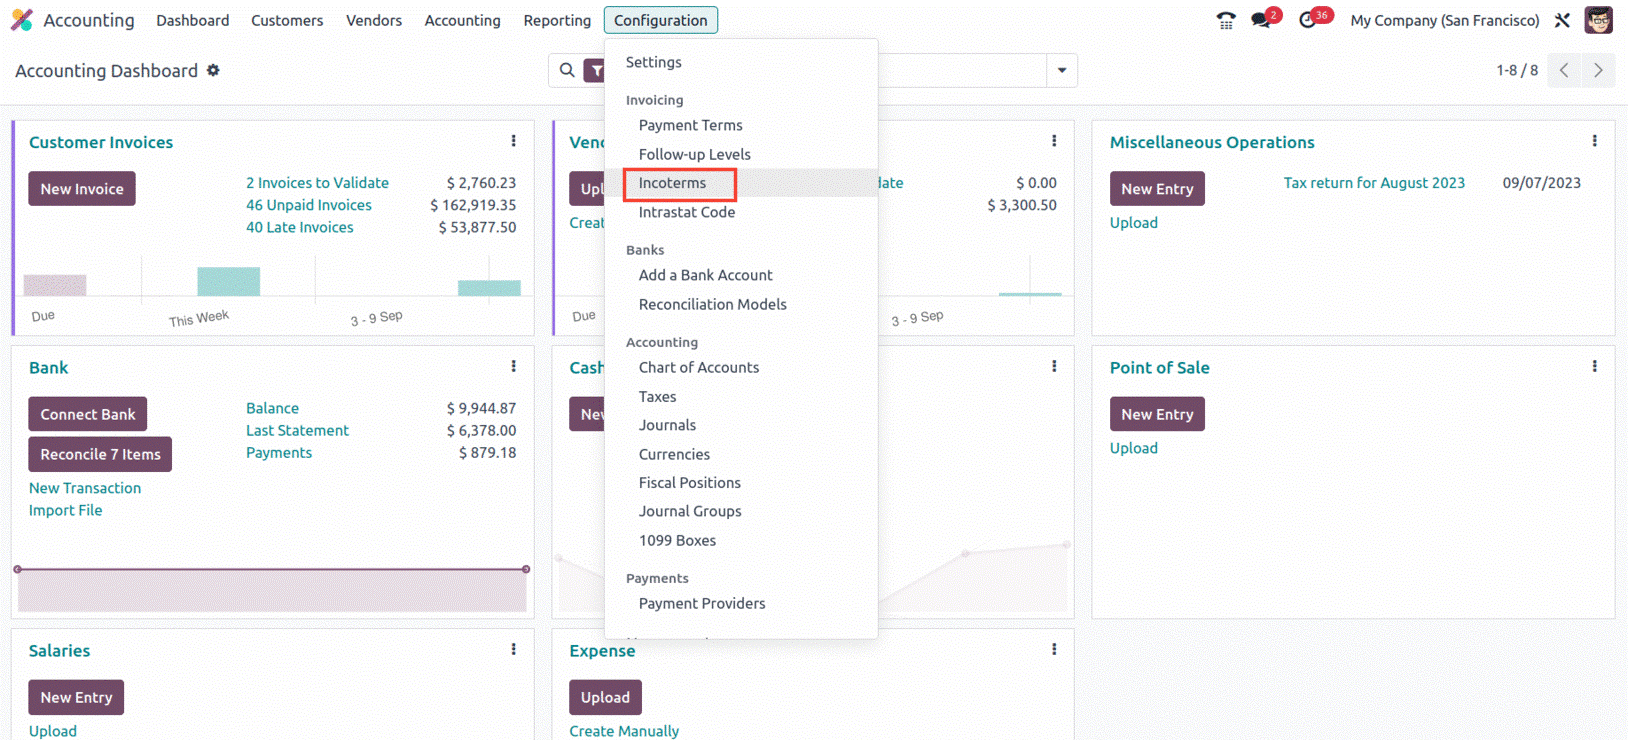
You can navigate the Incoterms window as shown below by lightly pressing the Incoterms menu, which is
located in the Configuration tab's Invoicing section.
All the aspects of Incoterms activities that were previously demonstrated in the platform will be shown
in this window. The platform anticipates the requirement for sorting capabilities and includes all
standard and resizable sorting as well as other functional menus like Filters, Group By, Favourites,
Search, and Export All, as seen in the screenshot.
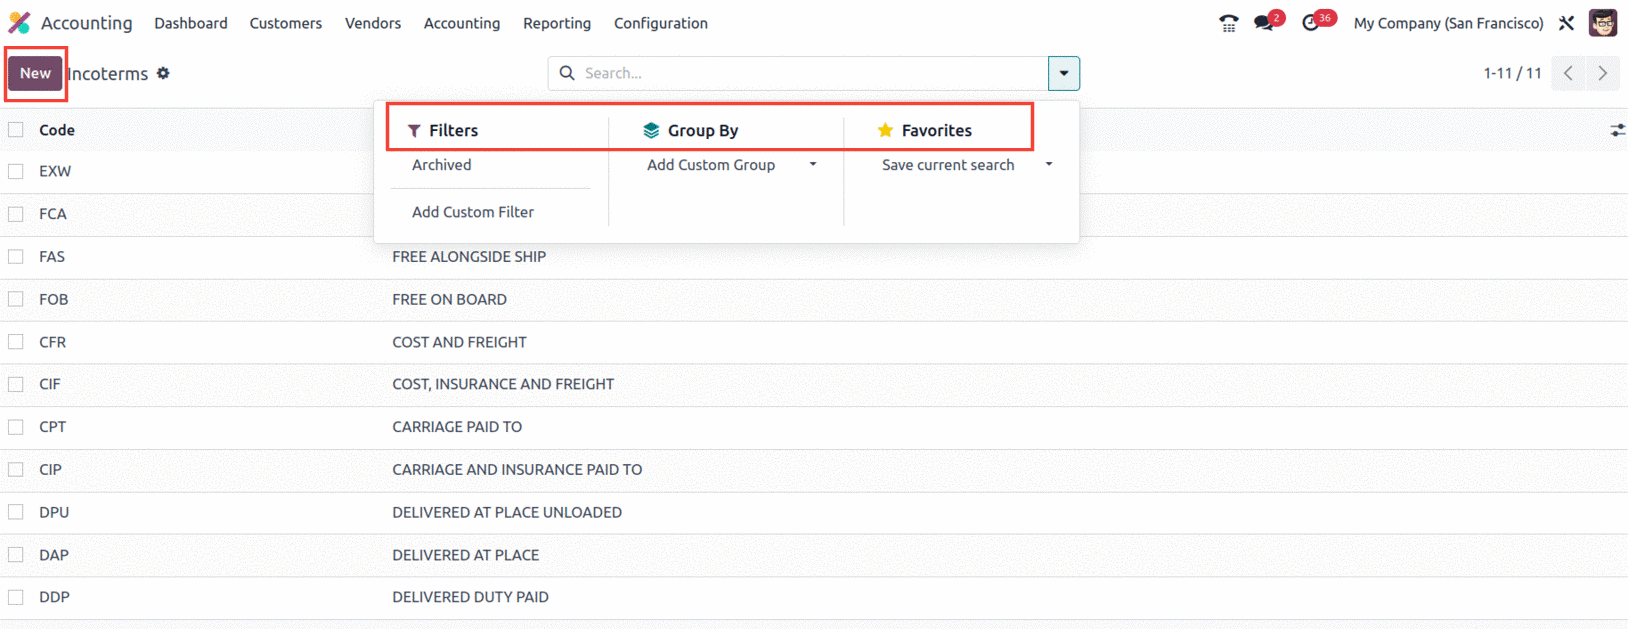
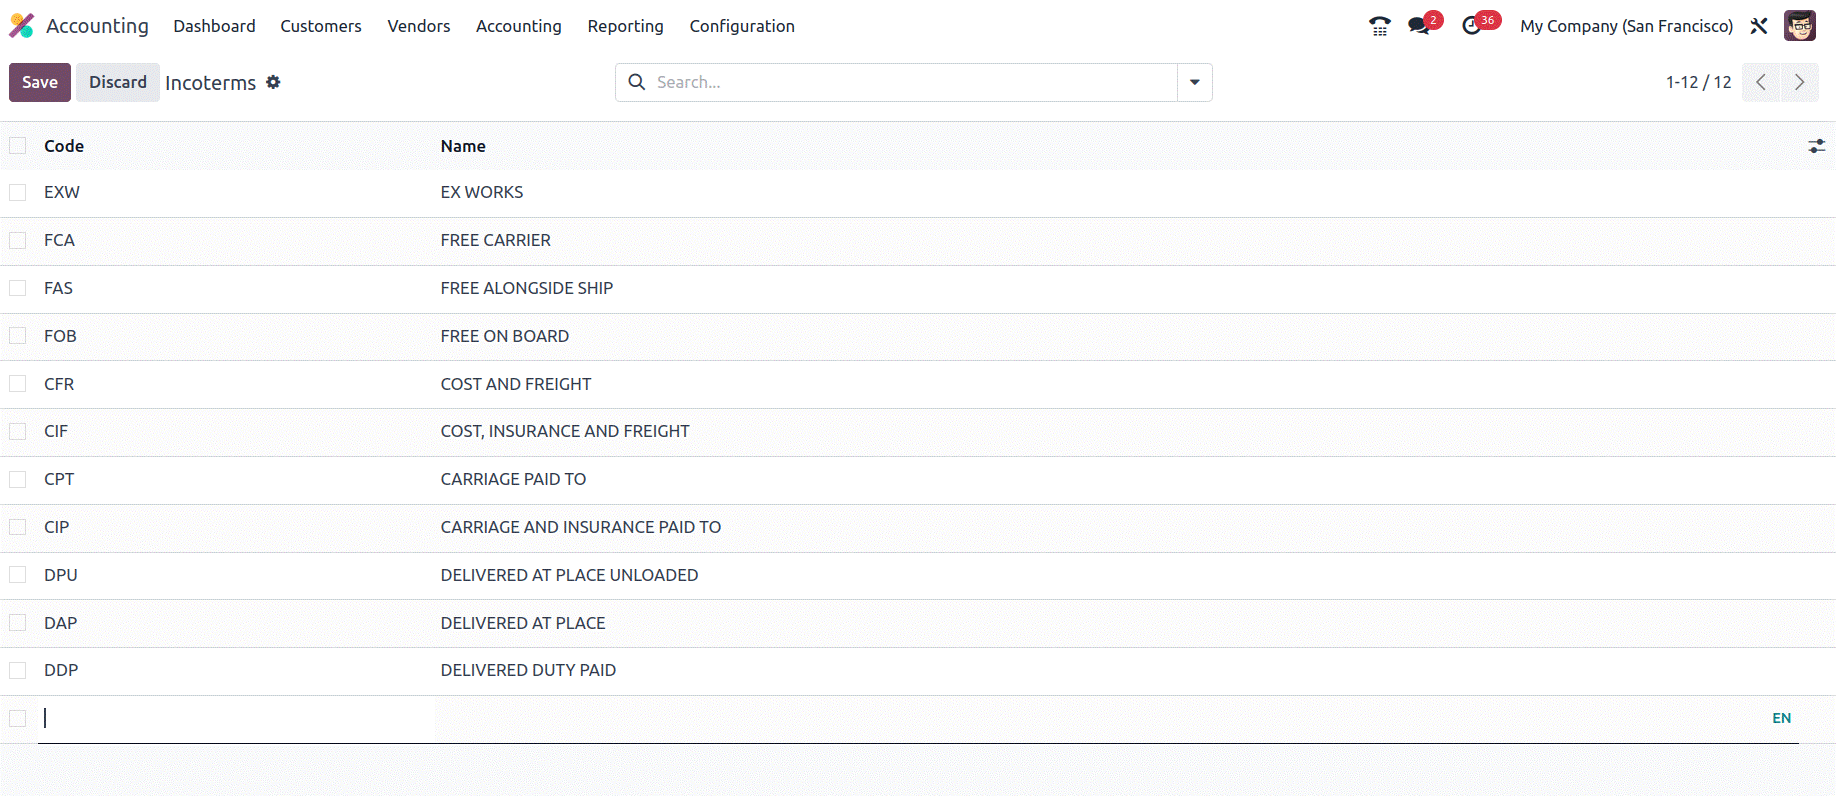
With the help of the NEW button, it is simple to construct new Incoterms. When you click the NEW
button, a new creation line is shown in the same window where the new Incoterm can be set.
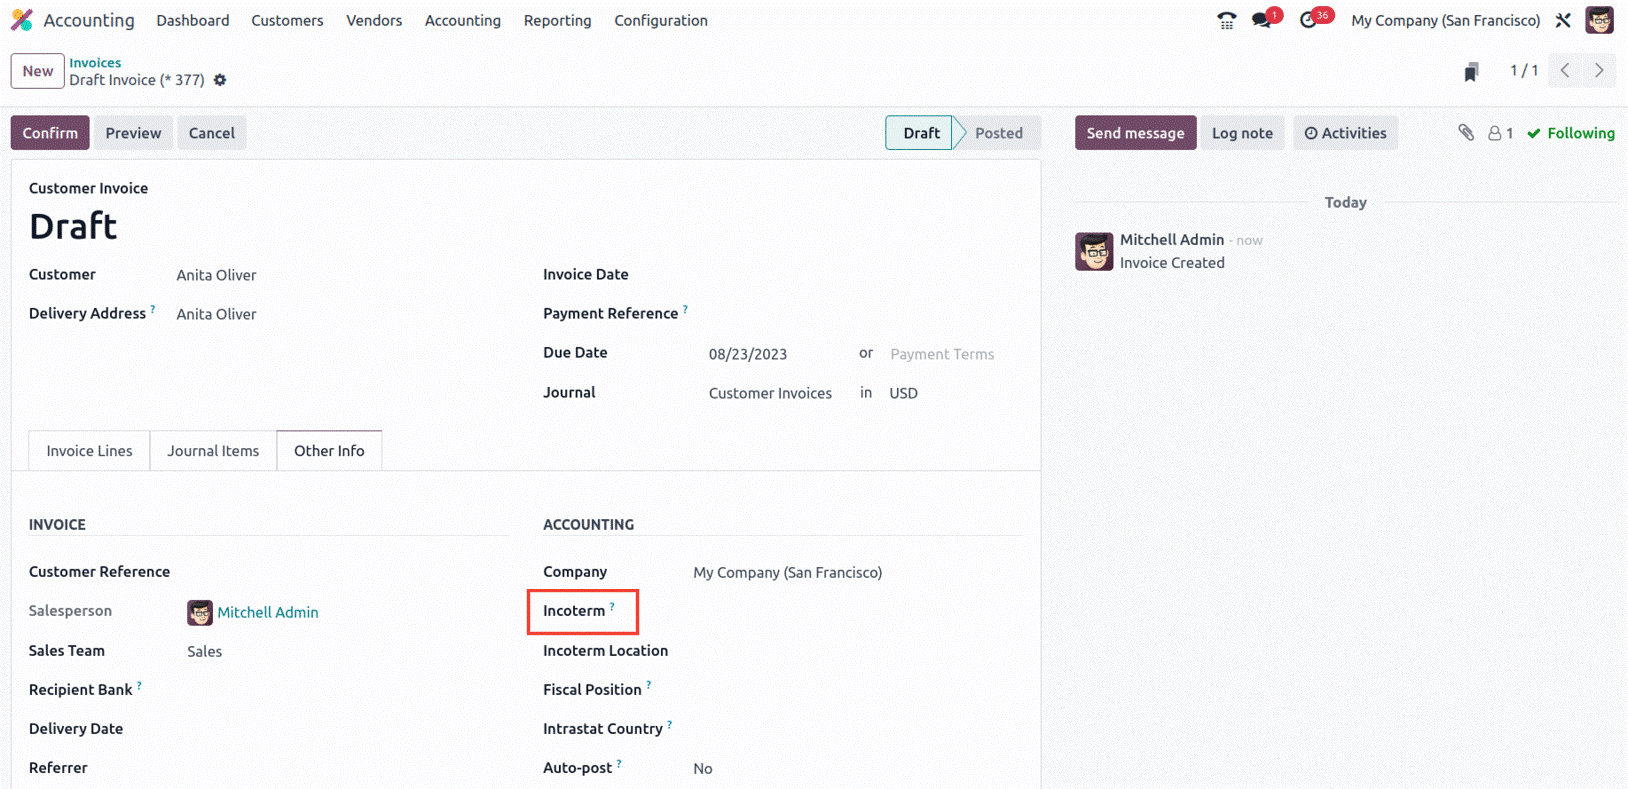
It is possible to apply incoterms to invoices and even establish default incoterms in the accounting
configuration settings section devoted to customer invoices.
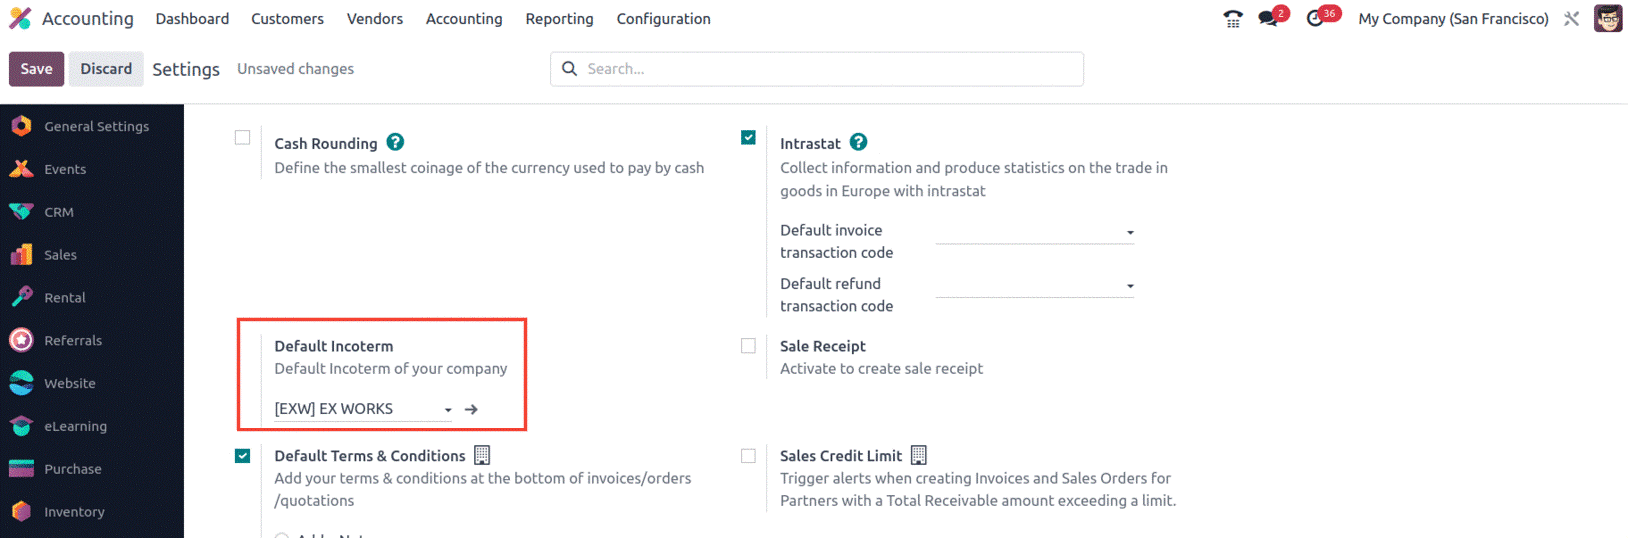
The invoice will also include the applicable Incoterm.
Let's move on to the platform's Intrastat Code setting now that we have covered the management of
Incoterms in the Odoo17 Accounting module. To safeguard the buyer and seller, each incoterm calls for a
defined location at the origin or destination. These requirements should be as explicit as feasible.
Intrastat Code
To identify items transferred between nations in the European Union, a code called the Intrastat Code
is employed. This code is used to trace the flow of goods and figure out the appropriate tariffs and
taxes that must be paid on them. The value of international trade in goods is also determined using the
Intrastat code. It serves as the identification code for monitoring the flow of products between several
nations. Customs officials use this code to keep track of the value of imported and exported items.
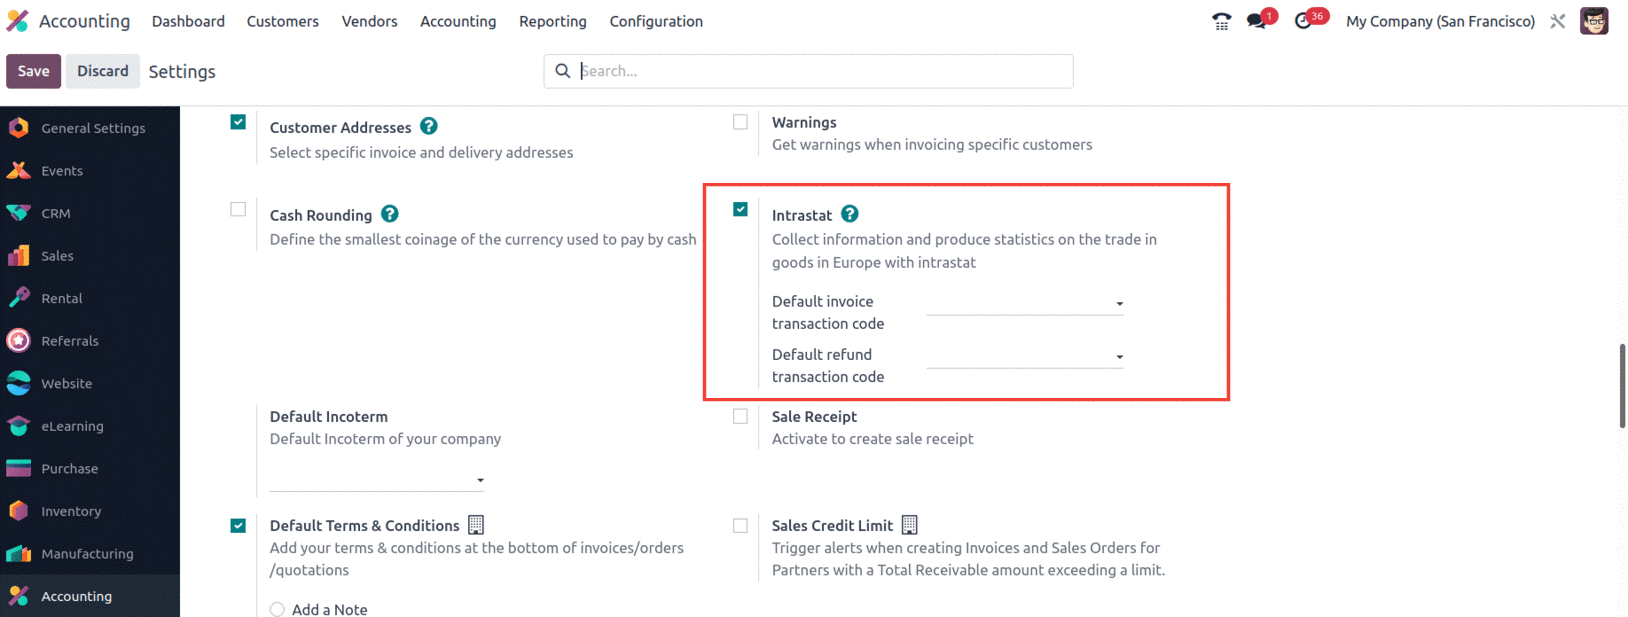
In Odoo17 the Intrastat Code must be enabled from the Configuration Settings. Default invoice
transaction code and Default refund transaction code can be added from there also.
The European Commission assigns a product an eight-digit code called the Intrastat Code. For
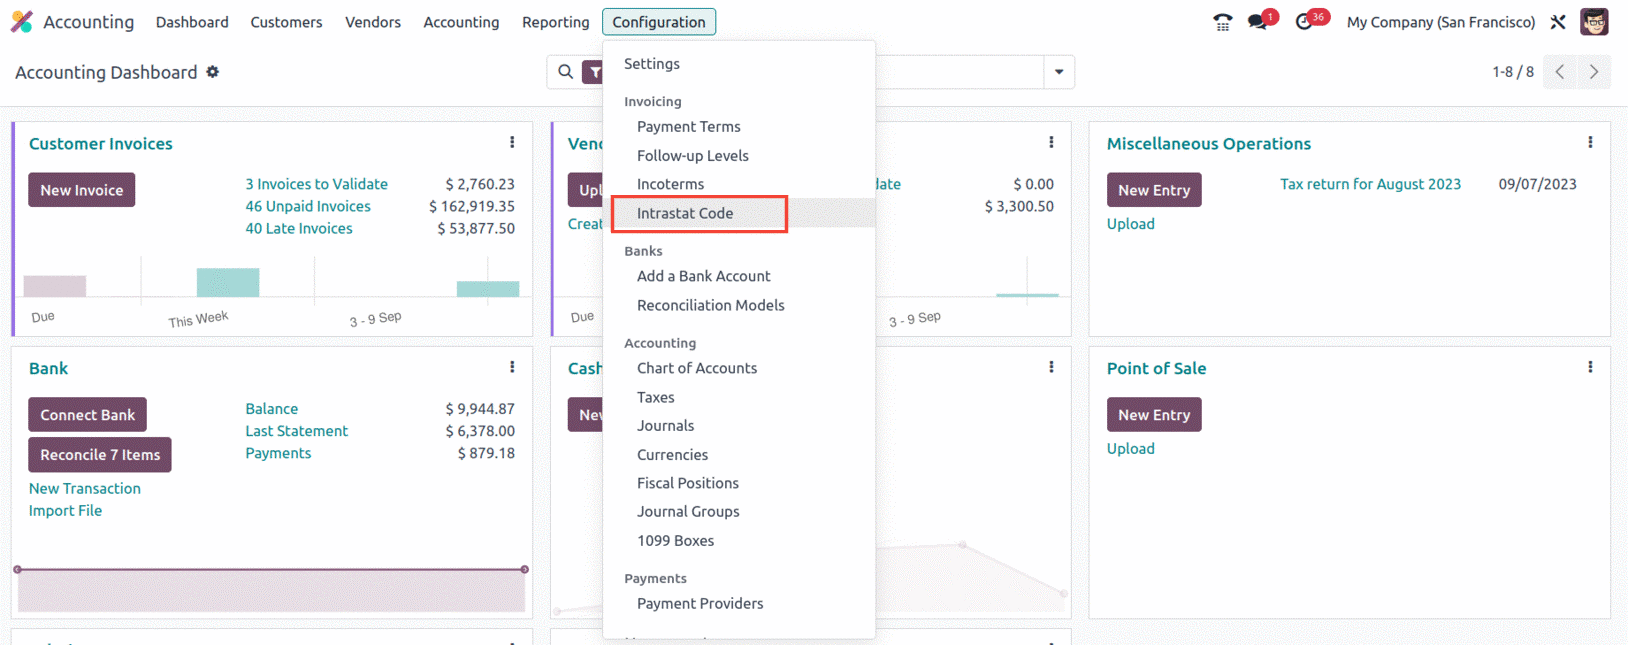
statistical purposes, the product is identified by the code. The Configuration tab's Invoicing section
is where you'll find the Intrastat Code menu. The Intrastat Code window, which has the appearance seen
in the screenshot below, will appear as soon as you click on this menu.
The Intrastat Code menu will show all of the platform-defined characteristics of the Intrastat Code.
You can read a general description of each code defined in the preview itself.
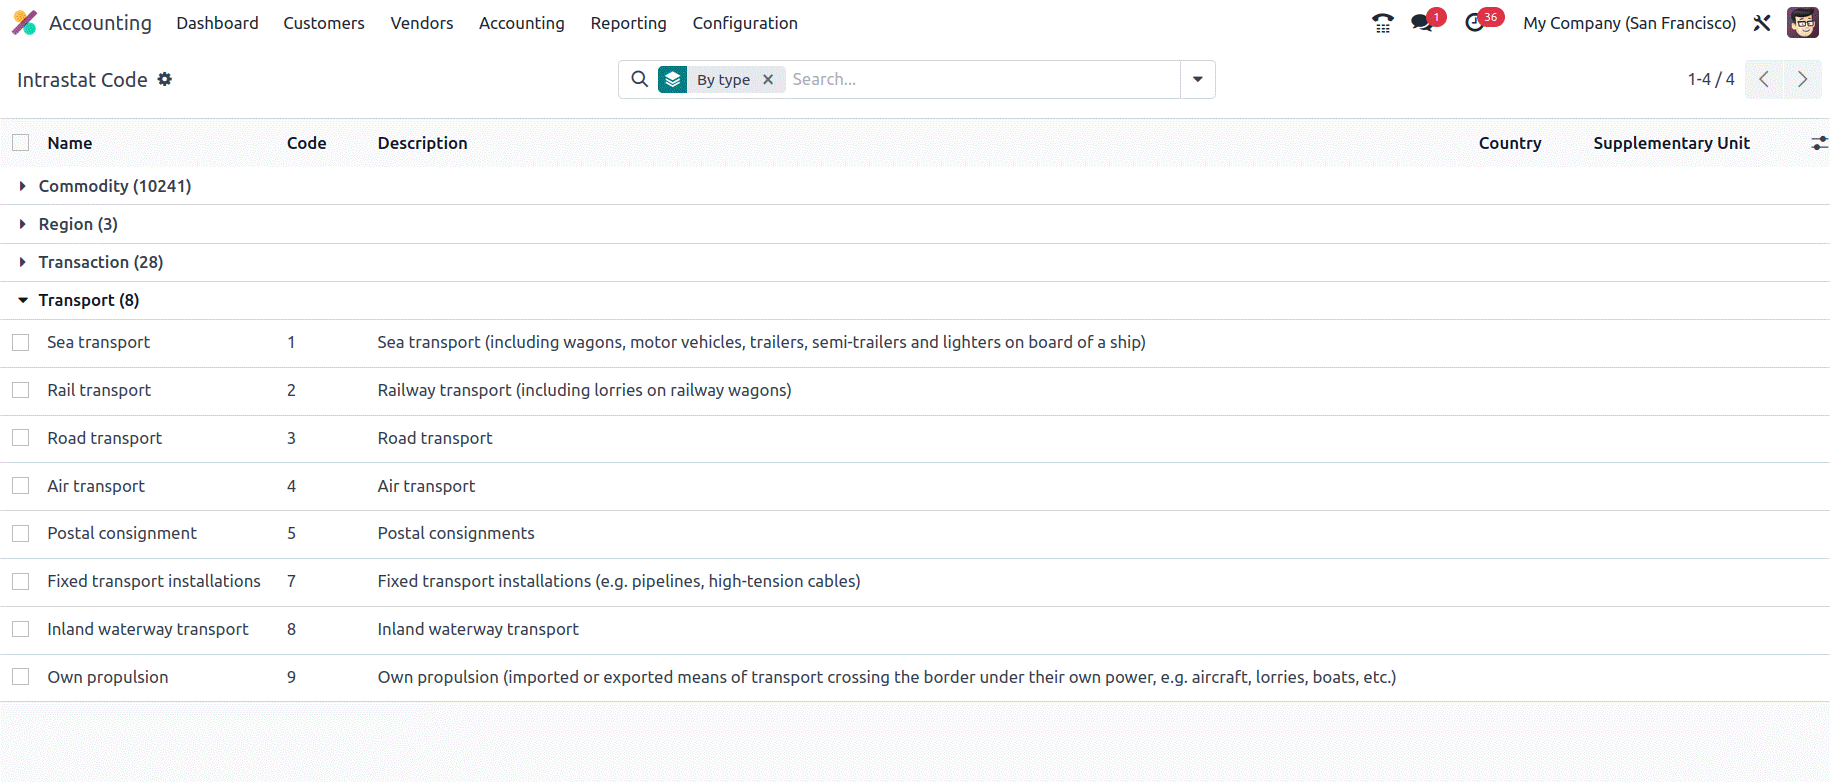
As seen in the screenshot above, you may view the Name, Code, Description, Count, and Supplementary
Unit. Under the Filters menu, you may select from a variety of preset and personalized filters. You can
use it to rapidly get the Intrastat code you need. Active, Commodity, Transport, Transaction, and Region
are the accessible default filters here. The ‘By Type’, and ‘By country’, are included in the Group By
tab by default. The Save current search, Link menu in spreadsheet,
and Insert list in spreadsheet options are additionally available on the gear wheel icon.
Select one of these defined Intrastat Codes to explore it in more detail.
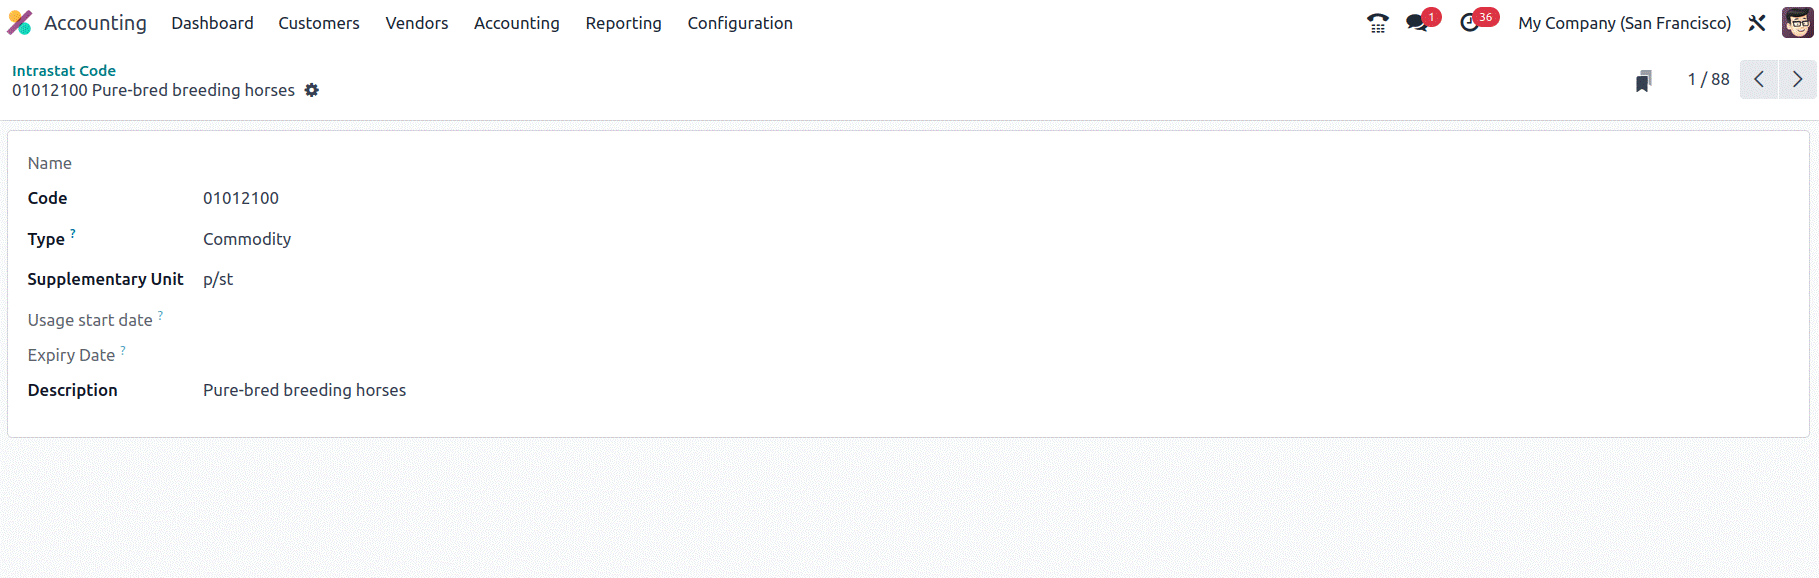
The Name, Code, Type, Supplementary Unit, Usage start date, Expiry Date, and Description may be seen
here in the extension form, as shown in the screenshot above.
We have been looking at the setting options available in the Odoo17 Accounting module's Invoicing
section up to this point. Let's move on to the Configuration of Bank Payments, the platform's final
management tool for Odoo17 Accounting.