Outgoing Email Configuration
Odoo's outgoing mail setting is simple. It allows effective and efficient communication for a company to succeed in its industry. Outgoing mail servers are a useful feature with the intention to contend with the transfer of outgoing emails. Outgoing electronic mail servers end up essential for e-mail advertising and marketing and other easy wishes.
To set up the outgoing email configuration,
Setting > Technical > Custom Email Servers > Outgoing Mail Servers.
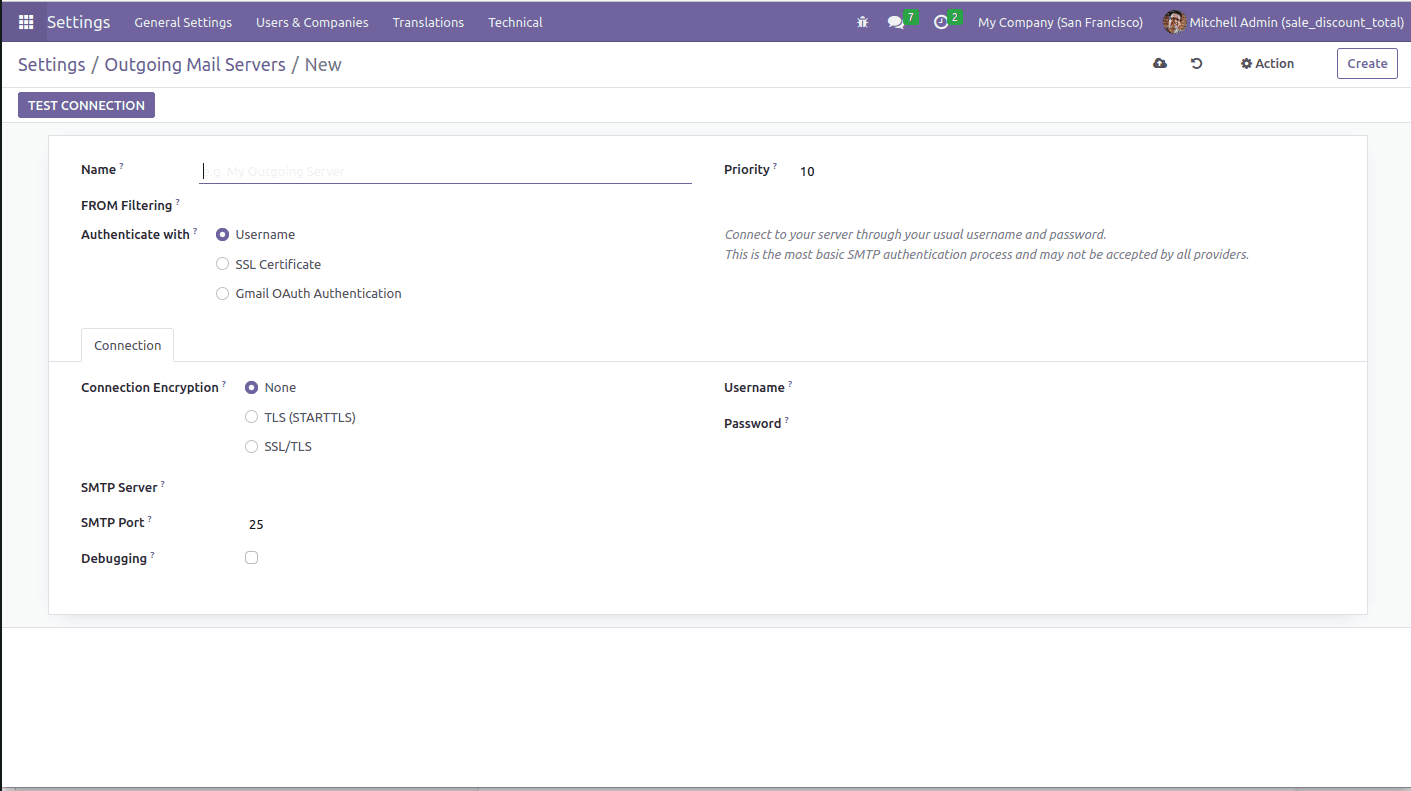
Then click the button ‘Create.’ You will get a window like this;

Now, let’s check the fields;
Name: Allows you to enter the name for the outgoing mail server.
From Filtering: Define for which email address or domain this server can be used.
Priority: If not a specific mail server is requested for mail, then the highest priority one is used. The default priority is 10.
Authenticate with: Here, we can pick the alternatives which might be used as authentication. If it is the username, then the optionally available email for the SMTP authentication and its password. Suppose it’s the SSL certificates, then the SSL certificates and SSL private key.
SMTP Server: It denotes the SMTP of the server.
SMTP Port: This is the port of the SMTP server. For SSL it’s 465, and for others, it will be 587 or 25.

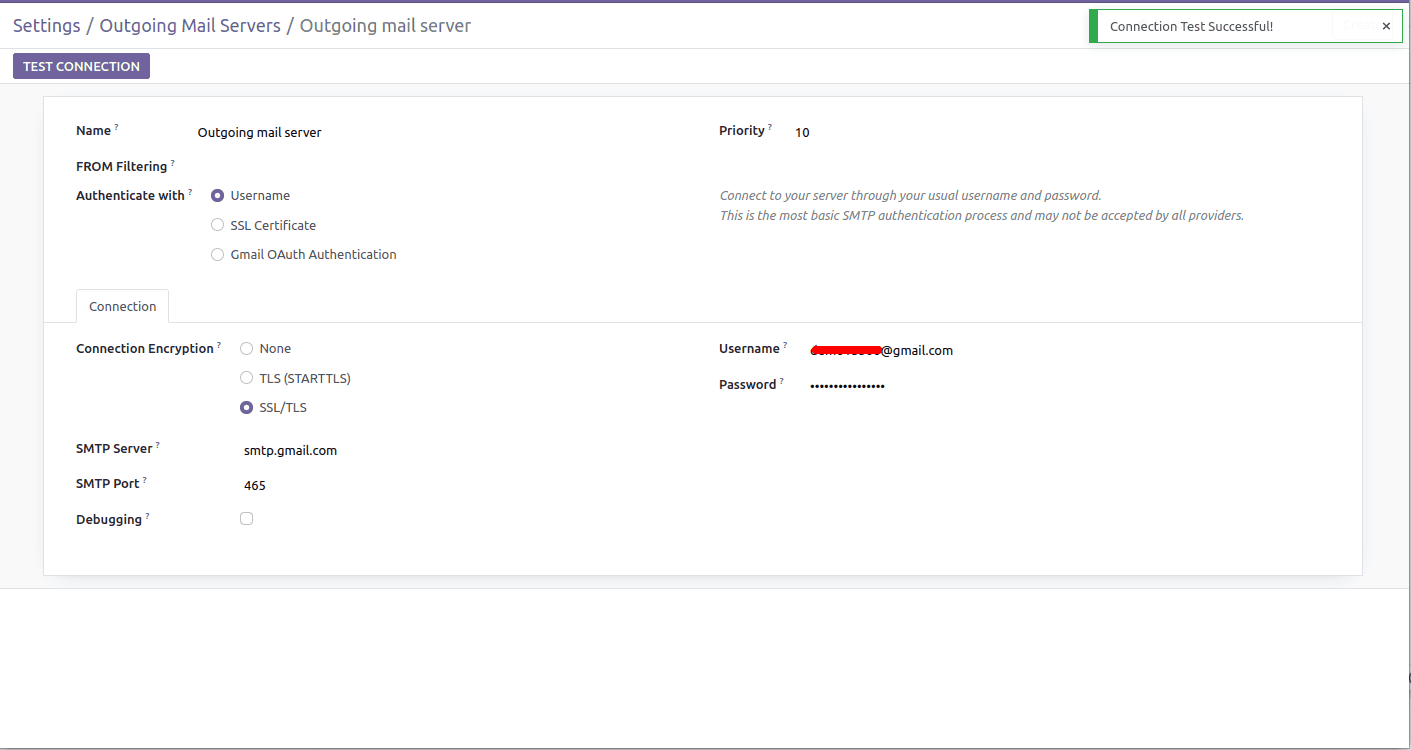
There is a button called ‘Test Connection’ that is used to test the connection after providing all required data. Then we can see the message ‘Connection Test Successfull’, which means now the outgoing mail server is ready. The configuration is given below.

When the authentication fails, there will be certain exceptions. Suppose you get a warning like Invalid Credentials (failure) [AUTHENTICATION FAILED] while testing your Gmail account, in that case, the less secure app gets the right of entry to an alternative to have to be activated.
Email setup in Odoo is one of the important features of Odoo, it allows users to send emails immediately from Odoo to customers. It can be simply configured by the user.