Email Alias
In Odoo, email aliasing is a built-in tool that allows users to extract data from incoming emails and save it to ERP records. This function is an example of automation. We may configure Emails to automatically fetch content, eliminating human work and streamlining the business process. Any email sent to your domain that does not have a designated mailbox will be sent to your catchall email address. The applications retrieve the emails and forward them to the appropriate virtual mail account, and this is how an email alias works.
A Mail Alias is a relationship between an email address and an Odoo Document object.
Odoo's mail gateway uses it to process incoming emails delivered to the system. If the message's recipient address (To) matches a Mail Alias, the message will be processed according to the rules of that alias. If the message is a response, it will be added to the associated record; otherwise, a new model record will be generated.
This is intended to be used in conjunction with a catch-all email setup on the company's mail server so that when a new mail.alias is generated, it is utilized, and Odoo processes mail for it.
Let’s check how the email alias is configured in Odoo.
If we need to use the email, for example, example@mydomain.in here, ‘example’ is the alias name, and mydomain.in is the alias domain.
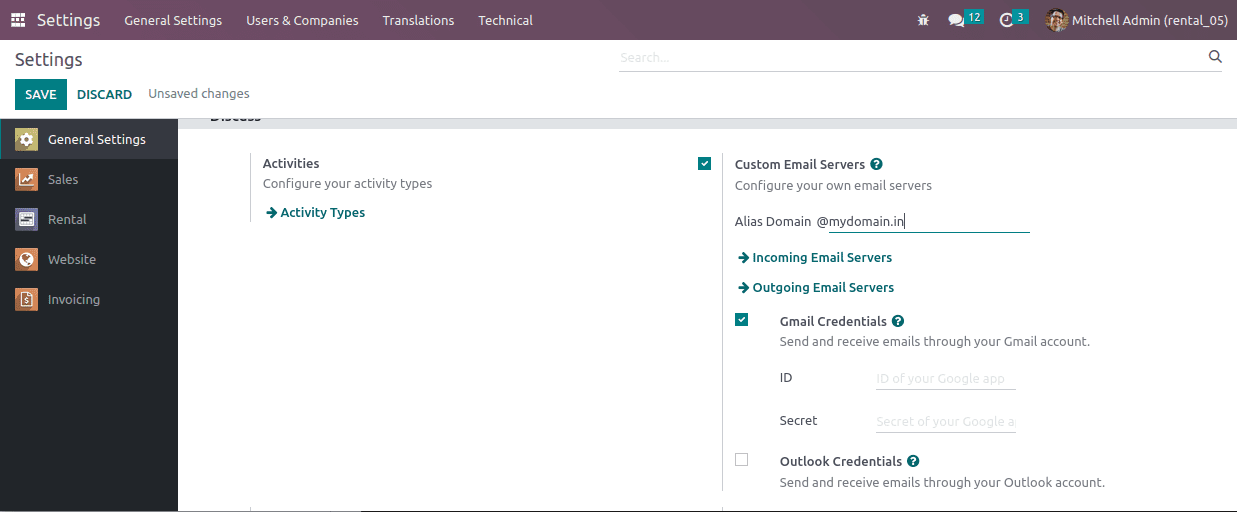
First, we need to set up the alias domain. For that, you will need to go to the settings > general settings > Alias domain

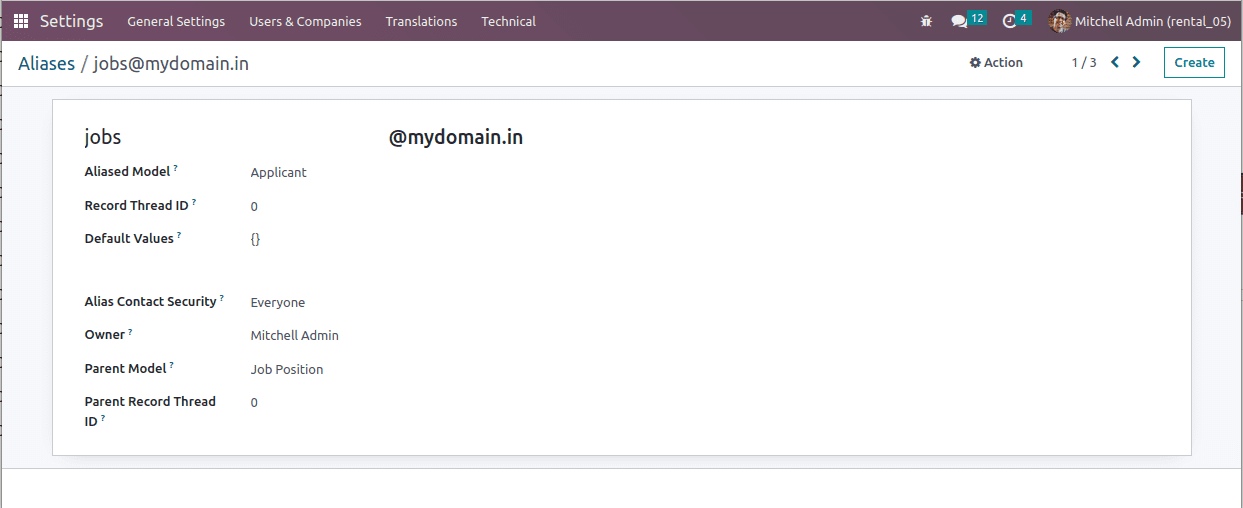
We may enable the field 'Custom Email Servers' here, which will bring up another option below where we can enter the custom domain. After creating the custom domain or alias domain, the next is to create a record in the model ‘mail.alias’ from Settings > Technical > Email > Aliases.
This can be done using the XML code given below.
<record id="mail_alias_jobs" model="mail.alias">
    <field name="alias_name">jobs</field>
    <field name="alias_model_id"ref="model_hr_applicant"/>
    <field name="alias_user_id" ref="base.user_admin"/>
    <field name="alias_parent_model_id"ref="model_hr_job"/>
</record>
id: id of the record
model: model in which this record is being correspondent
alias_name: alias name needs to be provided
alias_model_id: id of the model in which the alias is defining
alias_user_id: XML id of the user
alias_parent_model_id: parent model holding the alias
After creating this record, it will be visible on the menu Aliases;

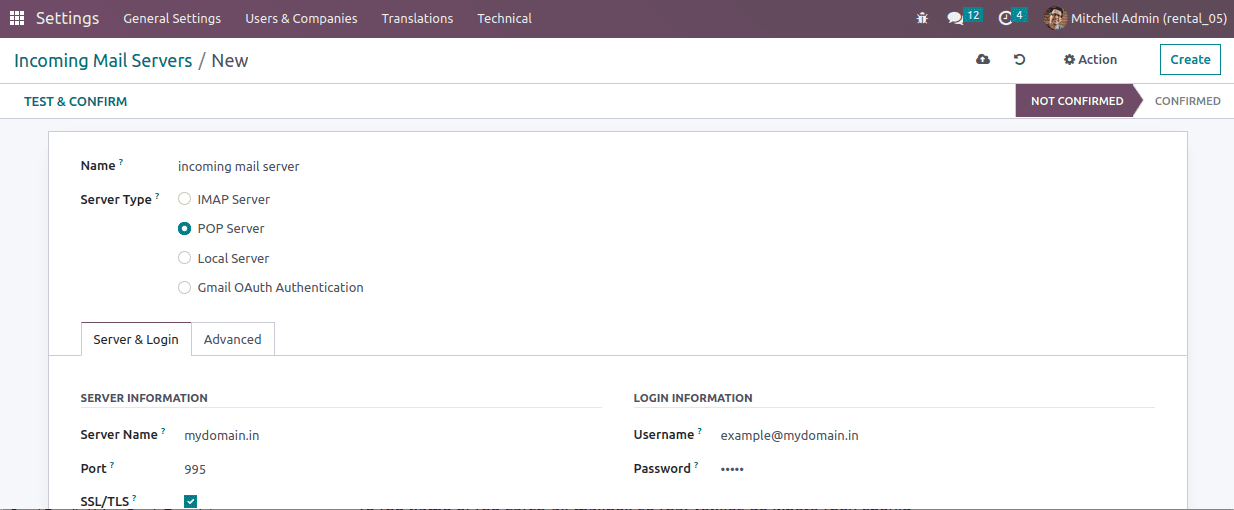
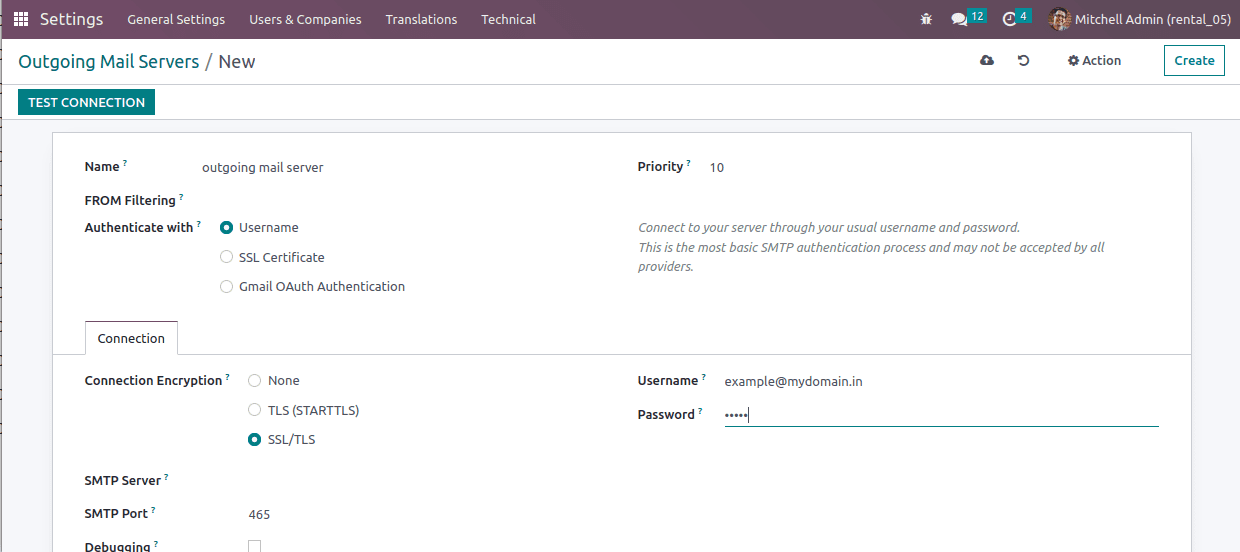
After this, the outgoing and incoming email servers can be configured.


Odoo will connect via a scheduler and will check emails every 5 minutes by default.
It is recommended that in developer mode, go to Settings >> Technical >> System parameters, then search for "mail.catchall.alias" and set its value to the name of the catch-all mailbox so that replies go where they should.