Incoming Email Configuration
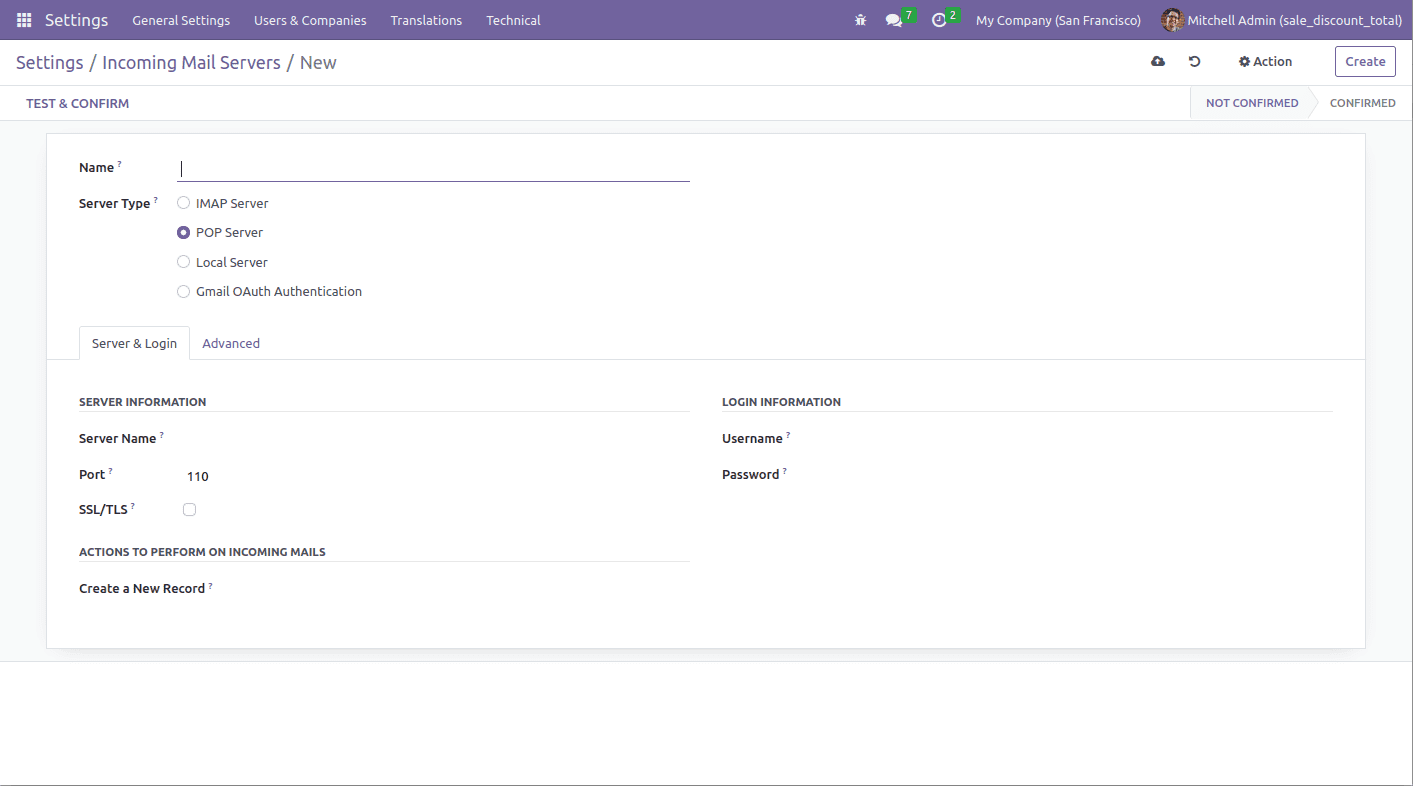
We can configure incoming emails to connect the email with Odoo efficiently. The incoming emails will be received in Odoo after configuring the incoming email. Let’s see how we can configure the incoming mail. To set up this, go to Settings > Technical > Custom Email Servers> Incoming Email Servers. Then click on the create button, Then you will depict a window as shown below.

Let’s take a look at a few fields that need to fill once you create the incoming email server.
Name: Enter the name of the email server. Let you know which server this is.
Server Type: This is the server that contains your email. From here the email reaches the client. There are three types of servers: POP server, IMAP server, local server and Gmail AUth authentication. POP servers are the most commonly used.
It’s the server in which the emails are contained. From here, the emails may be attending to a client. There are three sorts of servers like IMAP Server, POP Server, and Local Server. POP Server is the most usually used one.
Server Name: It indicates the IP or Hostname of the mail server.
Port: It’s the port number.
SSL/TLS: The connections will be encrypted using the dedicated portSSL/TLS after enabling this option. The port will be 995 and 993 for POP3S, and IMAPS, respectively.
Username: It carries the email address from which the system wishes to fetch the mail.
Password: It will be the password for the given email address.
After filling in the required info in the document, the button ‘test&Confirmed desires to be clicked. This may authorize the credentials. If the authentication is successful, the state will be changed to ‘Confirmed’; otherwise, arise a popup that indicates user error.
For Gmail, the configuration will appear to be this.