It is pretty easy to find and manage the company's menu on the Odoo 16 platform. You can locate the menu by taking the route to the Settings module and where you can find a well-defined Companies tab under which you can access the Manage Companies option as well as the other company-associated functionalities, as pointed out in the screenshot below.
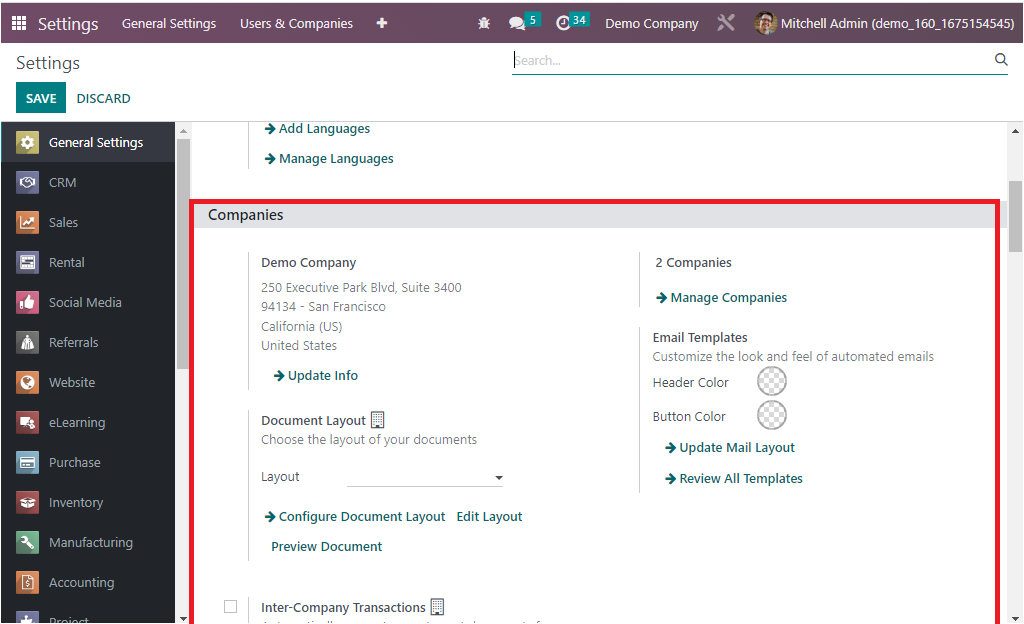
The Companies tab available in the General Settings window of Odoo 16 is showcased in the above image, and it allows you to manage the companies and their associated settings. It provides an overview of all companies in an Odoo instance and permits you to edit, delete and add new companies. The tab also provides access to the company’s settings, including its name, currency, timezone, and logo as well as its address, contact information, and other relevant information. It also provides access to the company’s security settings, such as user access levels, passwords, and roles.
When you click on the Manage Companies arrow under the Companies, you will be directed to the Companies window, as shown in the screenshot below.
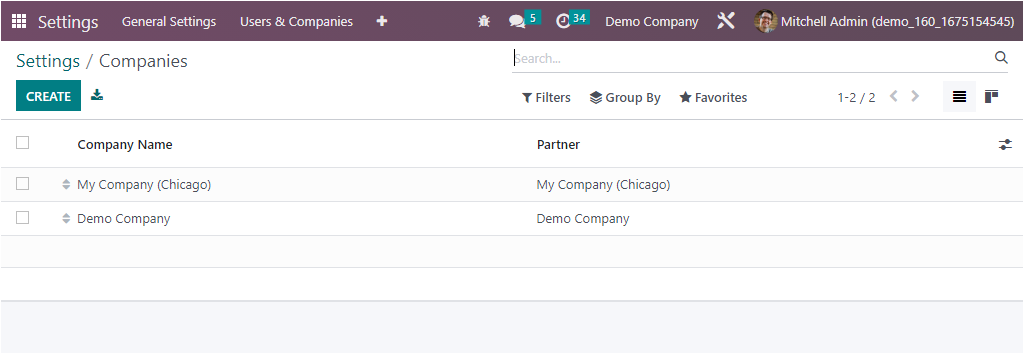
Here you can see that two companies are already configured in this platform, and the details are showcased here. Likewise, all the configured companies' details will be listed here in the window, and it can be accessed and viewed in both list format and kanban format by switching the respective menu icon displayed in the top right corner. The window will depict the Company Name and the associated Partner information. The Filters, Group By, and Search options will be very useful for efficiently identifying and grouping companies while managing so many companies together in this single platform. You can customize the sorting functionalities based on your preferences. The Favourites tab contains useful menus to perform various functions, which is essential for the smooth management of your company and business. The menus include Save current search, Import records, Link menu in spreadsheet, and Insert List in Spreadsheet. The Export All button existing near the CREATE button helps you to quickly export details into an excel sheet. It is also possible to select each company record. For this, you can check the box near the respective company. Now the system will offer an Action button where you have the Export, Archive, Unarchive, and Delete options, as shown below. You can also view the Print option left in the Action menu.
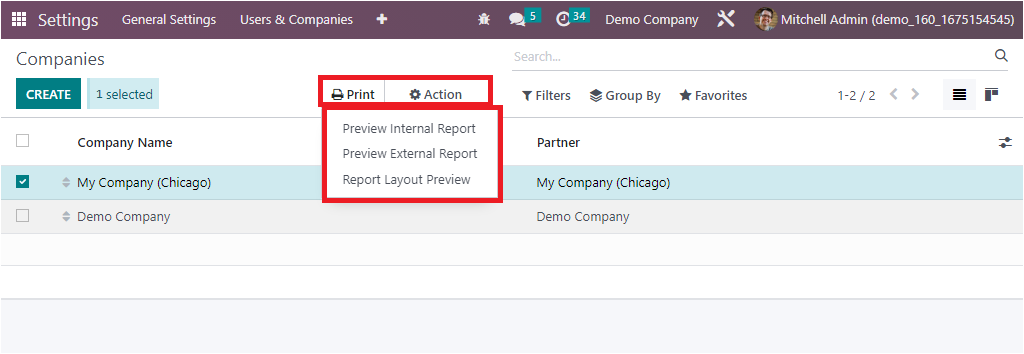
The Print menu contains the sub-menus such as Preview Internal Report, Preview External Report, and Report Layout Preview, as highlighted in the screenshot above. The Kanban view of the Companies window will look like in the image shown below.

The Kanban view will depict the Company name, Email address, and Phone number along with other keys and menus.
You can easily define a new company record in your Odoo platform with the help of the CREATE button. The CREATE button guides you to the Company configuration form, as shown in the image below.
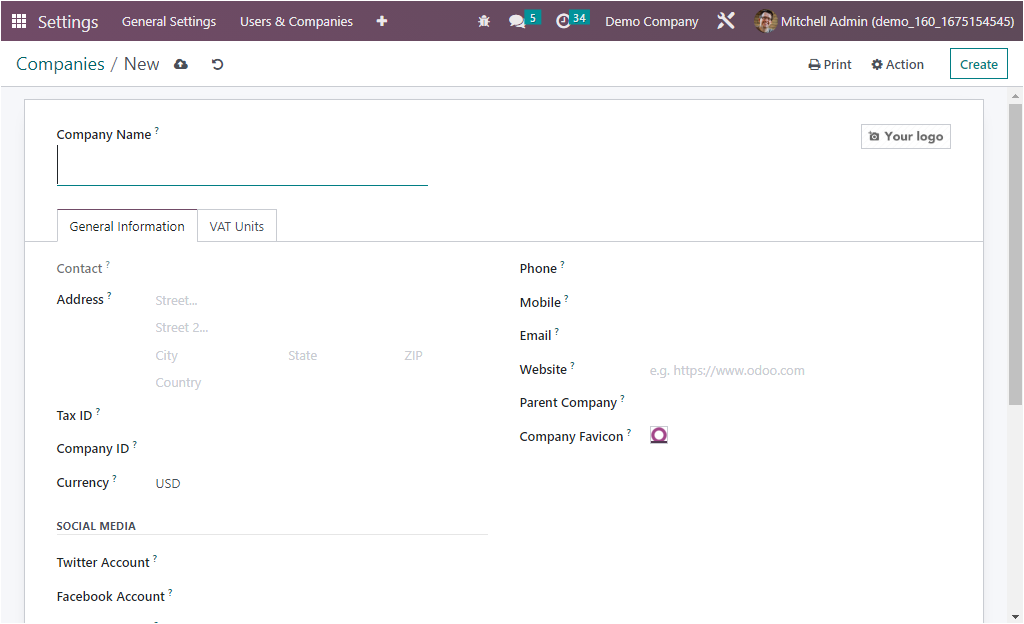
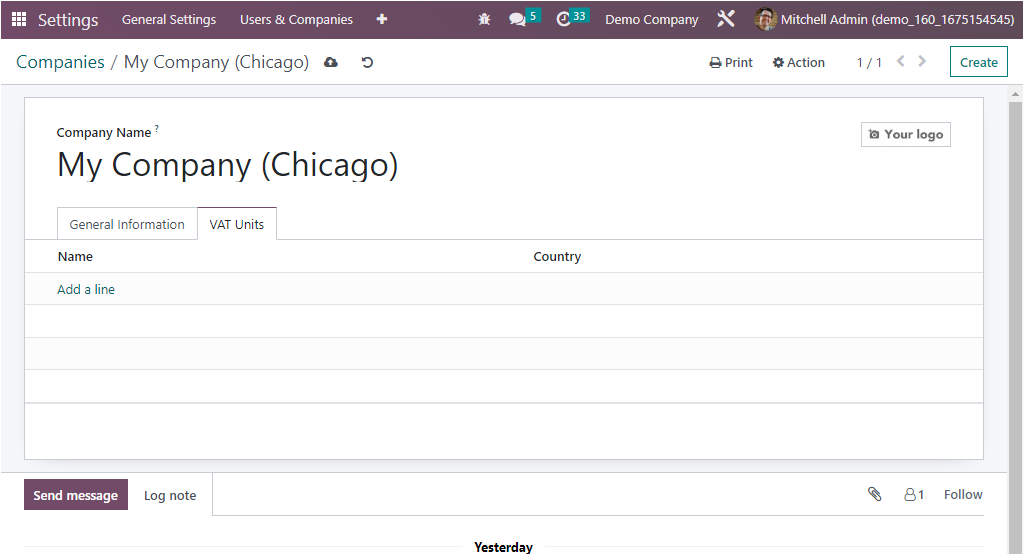
First of all, the creation form demands you to provide the company name in the Company Name field. Next, you can attach a logo of the company in the provided space, and this will be very needful for easily identifying the company from the other companies. To attach the logo, you can select the Your logo option, where you can upload your logo from the system. After defining these two pieces of information, you can configure the general information and the VAT Units data under the respective tabs.
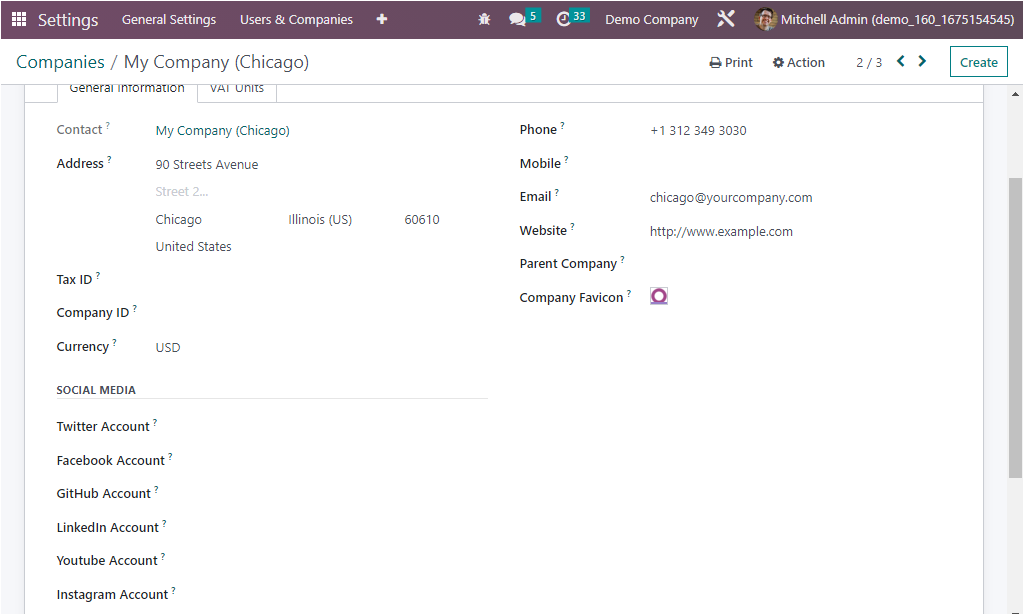
Here, under the General Information tab, you can describe the company's address in the Address field. Here you have to mention the information such as Streat, City, State, Zip Code, and the Country of operation. Then you have the field called Tax ID, where you can manage the company's tax identification number, which will be used to identify the company in tax processes and legal statements. This field must be filled when the company is subjected to government taxes. Then you can allocate the registry number of the company in the Company ID field. It is the internal Odoo identifier for the company. Next, you can define the corresponding currency in the Currency field.
In addition, the Phone number, Mobile number, Email Address as well as Website information, and Parent Company can be described in the provided space. Also, you have to mention the Company Favicon, which is used to set up the favicon or logo that is displayed next to the company’s name in the title bar of the web browser when the company’s web page is open. It is very useful for quickly identifying the company and its associated website.
Next, Social media information such as Twitter Account, Facebook Account, GitHub Account, LinkedIn Account, Youtube Account, and Instagram Account can be defined in specified fields.
The VAT Units tab allows you to configure the VAT configuration for the company. You can add tax units using the Add a line option.
All the details you provide in the system will be automatically saved into the system, and it can be edited in the future if required.
The moment we are creating a database in the Odoo platform with a fixed country, and at the time of installing the Accounting module, the system will automatically install the accounting localization packages for that specific country. This will accomplish the company currency and taxation aspects in accordance with the rules and regulations of the respective country.
Furthermore, if it is required to set up a new company on a multi-company basis, whose country is different from the previously mentioned one, the localization aspects required for operating the new company will be different. Therefore, in these cases, we have to use the required localization facilities in the Configuration Settings of the Accounting module before adopting any accounting entries.
The Odoo platform makes it possible to configure numerous companies of operation using the Company menu. Now it is evident to create a new company in Odoo, and let us take a look at the management of Multi-company operations in Odoo in the coming section.