Running an automatic transfer operation in the company's accounting might be beneficial for regular business operations. The main goal of utilizing Odoo is to streamline everyday tasks, and Odoo Accounting helps with this by streamlining daily tasks. You can define the Transfer operations that will automate the function of transferring cash from one account to another during a specific set of intervals by using the Automatic Transfer feature menu, which is accessible in the Accounting menu of the module. The Automatic Transfers feature can be used, for instance, if you need to move money from one account to another in a specific time frame and repeat the operation after each time frame. If, for example, we utilize a given percentage of an amount for any type of business project and the required amounts should be transferred within a specific interval of time such as monthly, quarterly, or yearly continually until there is a manual stoppage of the process, then we can use this methodology.
All newly created automatic transfers, along with their names, start dates, stops dates, and frequency of operations, are defined in the menu. You can sort the requested Transfer information using the available Filter and Group by options.

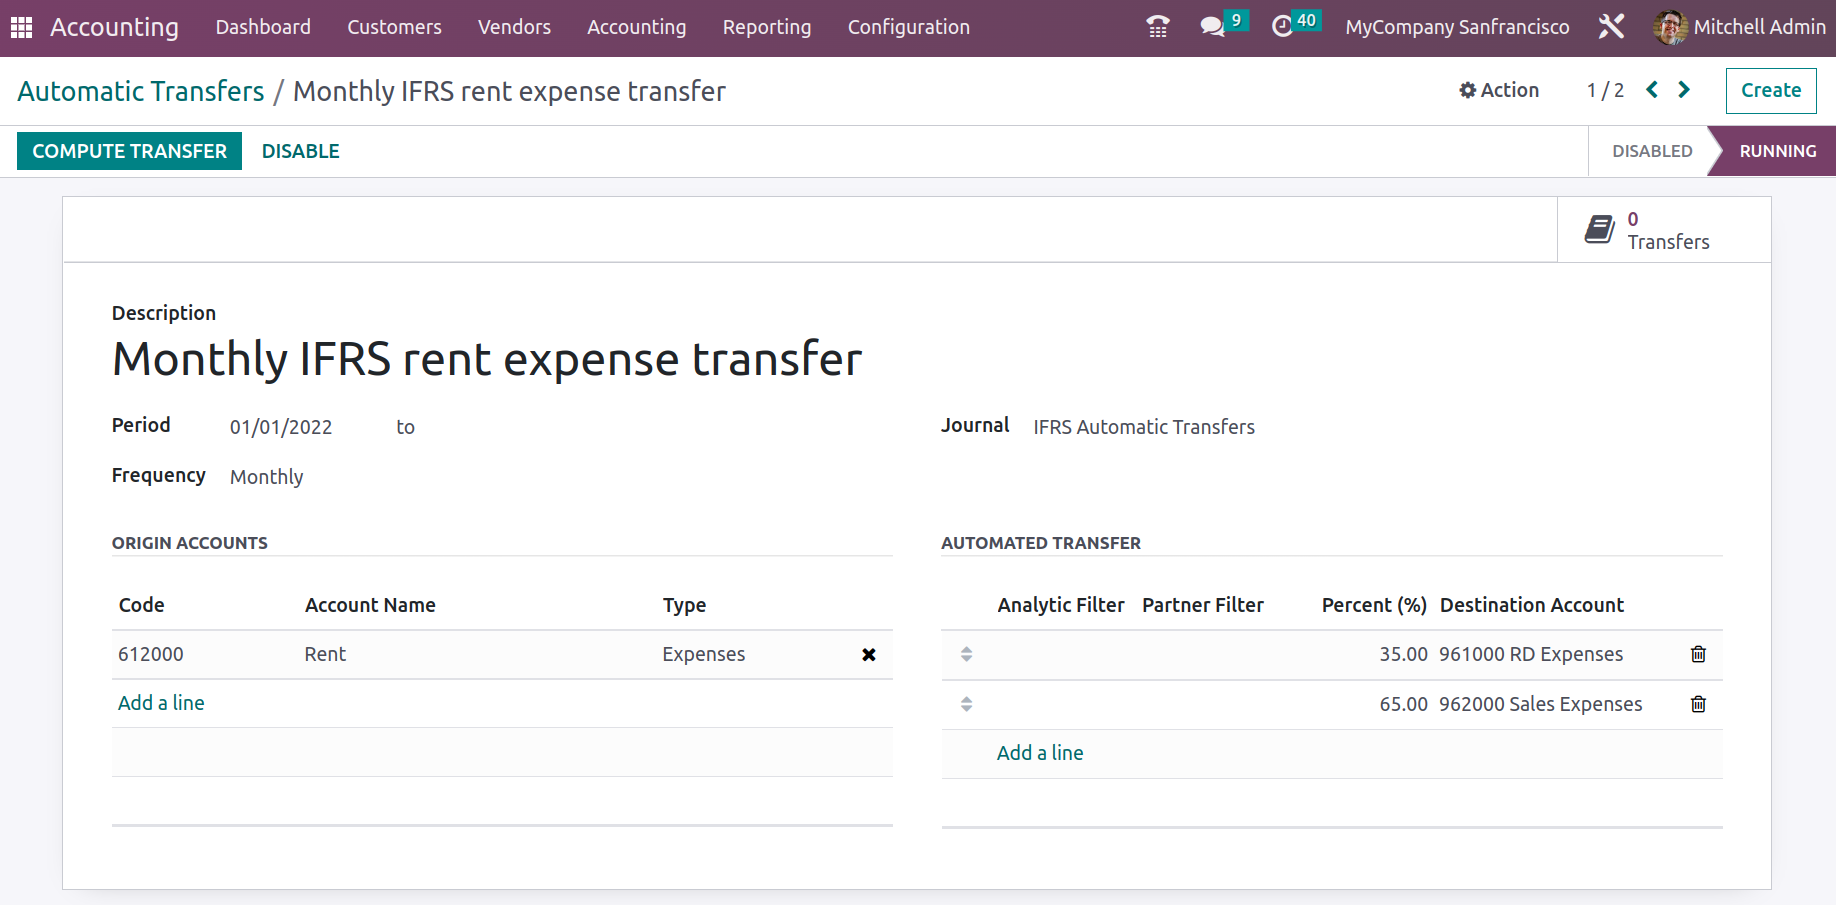
You can create new automatic transfer operations by choosing the Create option, which will take you to the Transfer creations window as seen in the screenshot below. Here, you must first enter the Name of the Automatic Transfer before defining the Operation Period from the Start Date to the Operation End Date. Additionally, the definition of the Journal of Operations allows for either the creation of a new Journal or the selection of the appropriate Journal with regard to the Automatic Transfer from a drop-down menu.

Additionally, the Partner Filter, Percentage of the Account, Analytical Filter, and Destination Account can all be defined along with the Automatic Transfer details by choosing the Add a line option that is offered. A Transfer operation that you are about to design and carry out in operations can have several Automatic Transfer added to it.
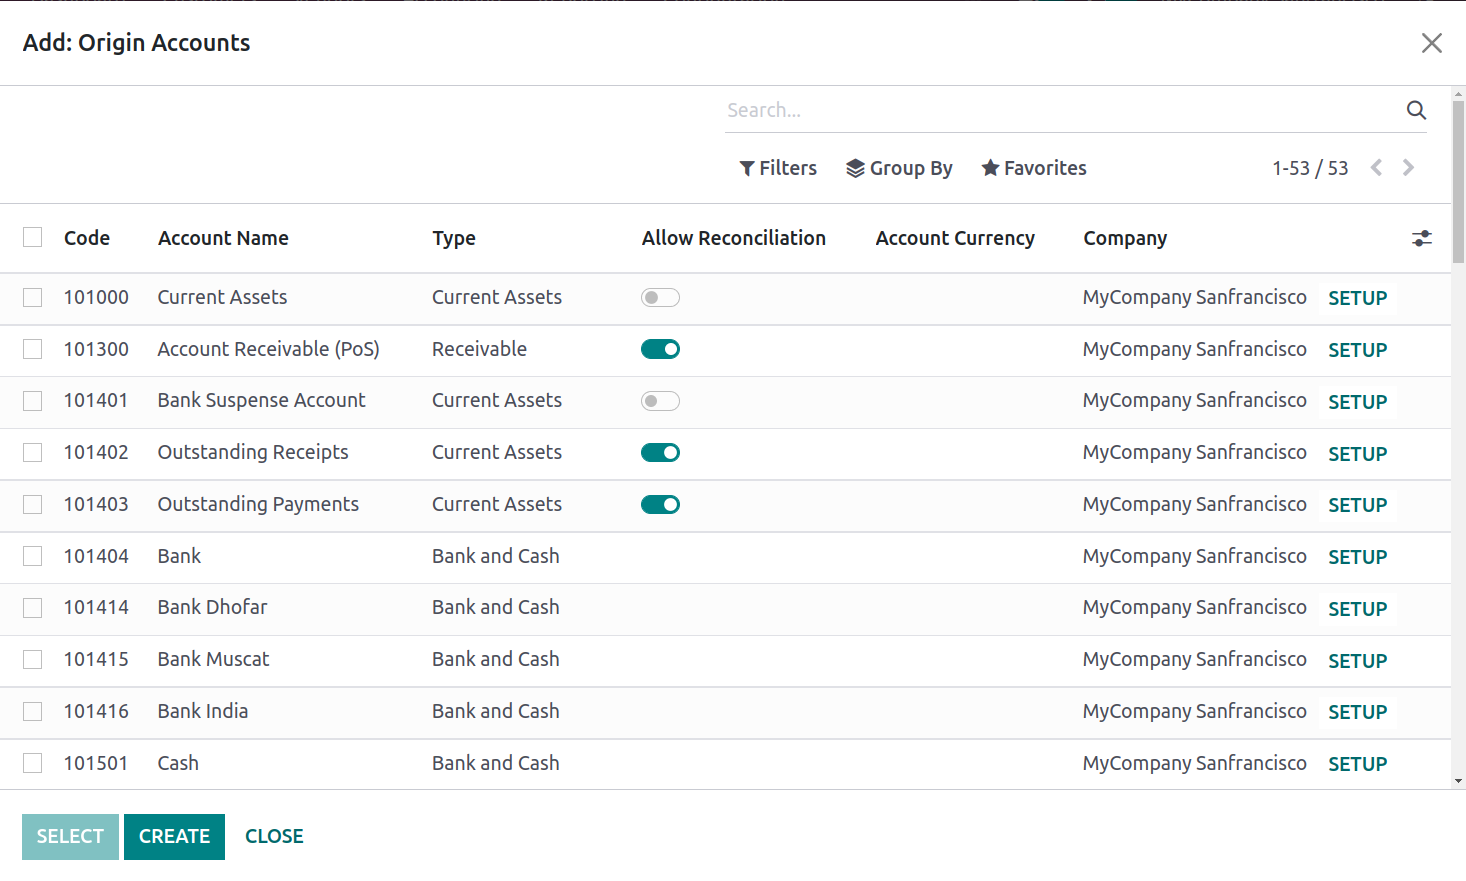
Additionally, by choosing the Add an available line option on the relevant tab, the Origin Accounts for the relevant Automatic Transfer can be defined as well. When you choose to add an Origin Account, a pop-up window similar to the one in the following screenshot will appear. All of the company's accounting activities' account of operations will be defined here. The accounts will have the following defined: Code, Account Name, Type, Account Currency, and an option for setup. Additionally, you can select the Allow Reconciliation options, which will automatically reconcile the account, using a slider option.

You must save the relevant Automatic Transfer window once the configuration of the Automatic Transfer has been finished by defining the Origin Accounts and the other configuration factors. You must list the Destination Account under the Automated Transfer after adding the Origin Account. You can also designate the proportion of the total transfer to the destination account. The corresponding percentage of the amount from the Origin Account will therefore be automatically transferred to the Destination Account at each interval—whether monthly or yearly—that is determined. The Automatic Transfer simply needs to be activated and confirmed at that point. Next, you will see Activate options that can be chosen to make the corresponding Automatic Transfer active and operating.
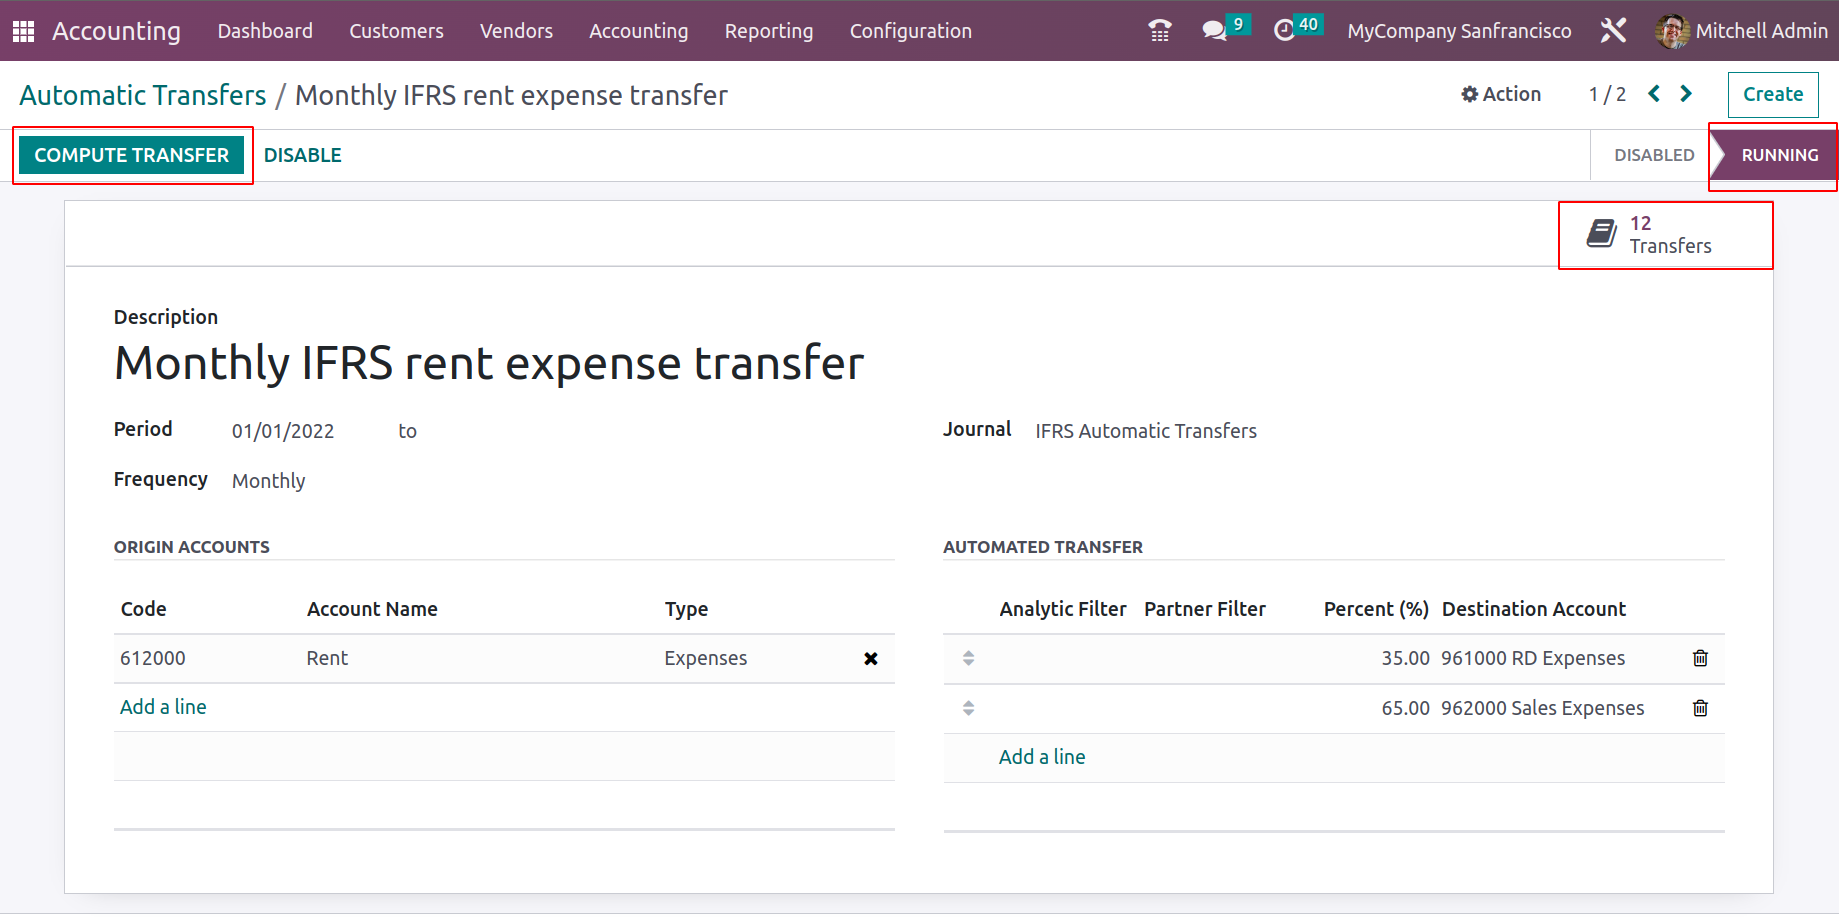
The Compute Transfer operations option will provide you all the specifics about the Transfer that has been activated to be in operation as soon as the relevant Automatic Transfer is enabled and running and you need to compute the Transfer details in the long run. The smart tab Transfers in Draft Entry, which can be uploaded manually or automatically, has a list of all the created transfers. The relevant journal entries will be automatically posted on the accounting date if the Post Automatically option is activated. Up until the specified duration of operations, the Transfer activities will continue from the indicated accounts before being automatically halted. Additionally, there is a Disable option that can be selected in order to stop the relevant Automatic Transfer operations that are being conducted.

The Odoo Accounting module includes an additional options menu called the Automatic Transfer management tool, which enables the transfer operations that should be scheduled on a regular basis to be carried out automatically for a specified amount of time. Now let's move on to the section that describes the Odoo Accounting module's Budget management menu.