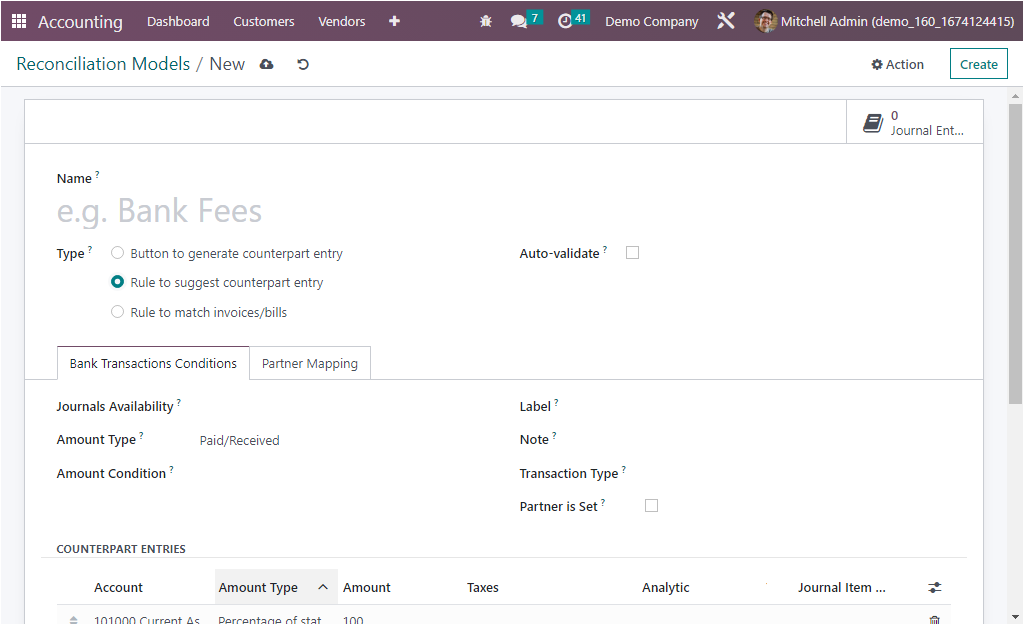
If you are applying the ‘Rule to suggest counterpart entry’ as Reconciliation model type, you will depict extra fields and tabs as shown in the screenshot below.

As depicted in the screenshot above, this type includes more configurations. First of all, you can define whether to Auto Validate the statement line or not. Then you can configure the Bank Transaction Conditions under the respective tab. To make the reconciliation model will be available in some specific journal, you can define it under the Journals Availability field. Then you can allocate the Amount Type in the specified field. It can be either Received, Paid, or Paid/Received, which can be chosen from the dropdown menu. So that the reconciliation model will only be applied to the selected transaction type. When you choose ‘‘Received’, it only be applied when receiving an amount. The Paid option allows you to apply only when paying an amount. The third one ’Paid/Received’ will be applied in both cases. Next, you can go over the Amount Condition, which will also depict a dropdown menu with different options such as Is Lower Than, Is Greater Than, and Is Between.
Now on the right side of the tab, you can fill in the fields Label, Note, Transaction Type, and Partner Is Set fields. The Label field contains the dropdown menu, which includes the options such as
- Contains: when you set this option, the reconciliation model will only be applied when the preposition label must contain this string.
- Not Contains: Negation of ‘Contains.’
- Match Regex: Define your own regular expression.
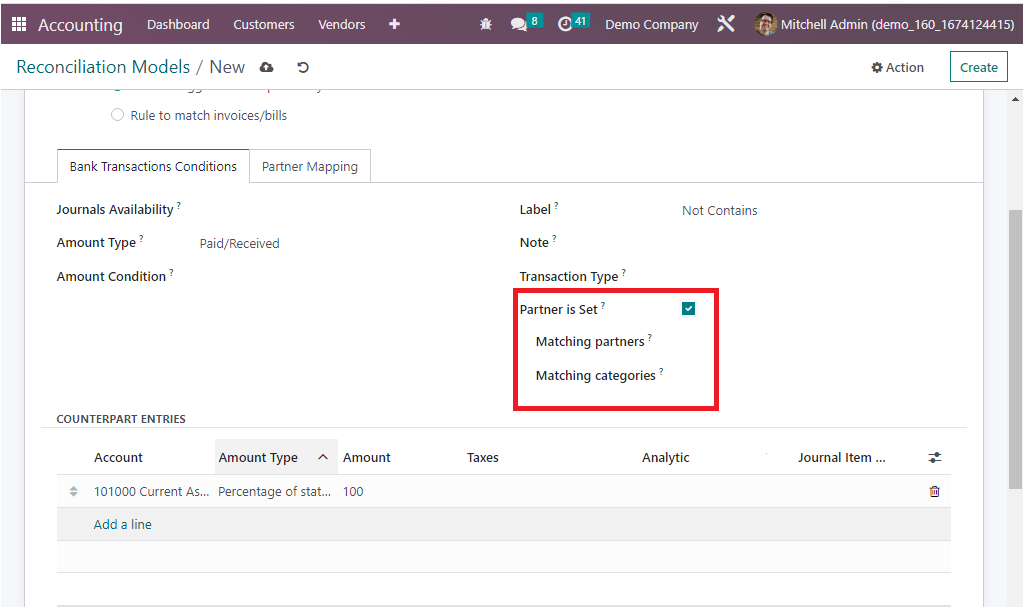
Similarly, you can allocate the Note, then the reconciliation model will only be applied when the note satisfies the condition. You can also set the Partners by clicking on the Player Should be set option, which will give you additional options, as shown below, to select the partners. Likewise, you can also select the Transaction Type. In addition, you can activate or deactivate the Partner is Set field. If you activate the field, the specified reconciliation model will only be applied when a customer or vendor is set. The activation of this field will give additional fields such as ‘Matchin partners’, and ‘Matching categories’. As shown in the screenshot below.

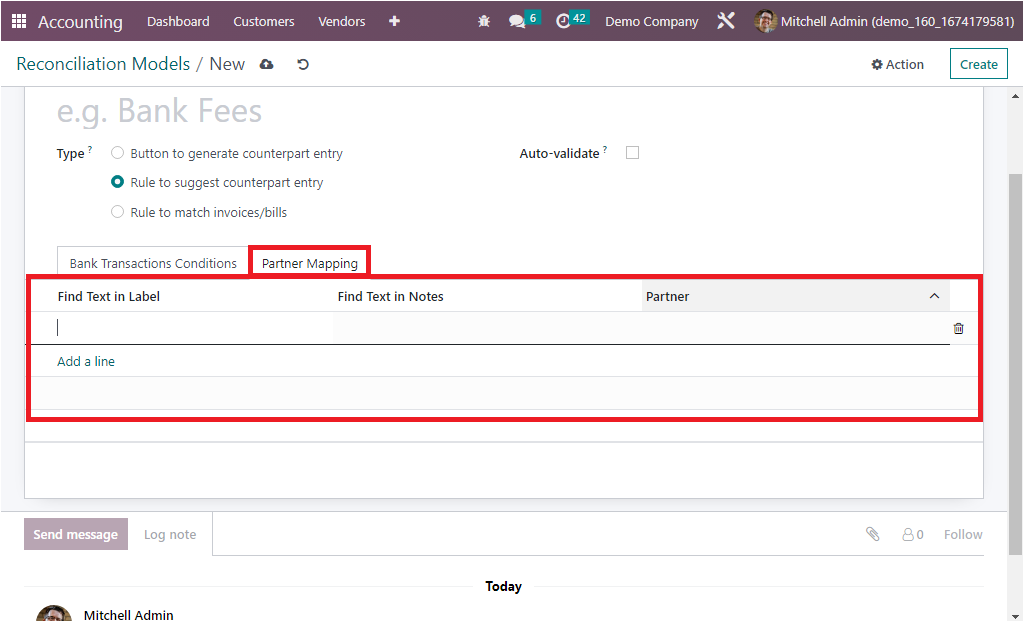
By activating this feature, you will be able to choose the matching partners and matching categories using the dropdown menu, where you will get the list of predefined partners and categories. The COUNTERPART ENTRIES field allows you to add the entries. Next, the subsequent tab is named ‘Partner Mapping’, and under this tab, the configuration can be initiated by allocating the Find Text in Label, Find Text in Note, and also can pick the matching partner using the dropdown menu accessible under Partner.

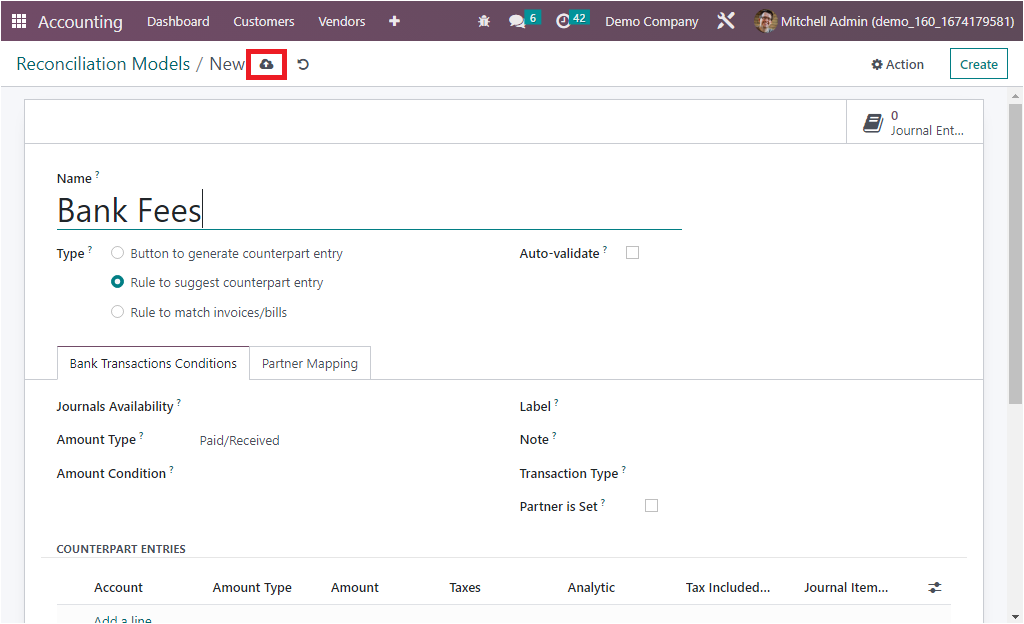
After providing all the information, the newly created Reconciliation model will be saved automatically into the system. Otherwise, you have the icon to save the record manually, which is available on the top, as shown in the screenshot below.
