In Odoo 16 Accounting module, Analytical Accounting is a feature that allows users to track financial data at a more detailed level. This is achieved by creating additional dimensions, such as departments or projects, that can be used to categorize and analyze financial data. With Analytical Accounting, users can track the financial performance of specific projects or departments and make more informed business decisions based on this information. It also enables users to generate detailed financial reports that can be used for budgeting, forecasting, and other financial analysis. It provides a more detailed view of expenses and income, allowing you to see where your money is going and where it is coming from. This module can be used to create financial reports, budget for future expenses, and track spending patterns over time.
The Analytical Accounting feature is designed to work with other financial aspects such as Accounts Receivable, Account Payable, and General Ledger. It can also be used with the Sales and Purchase modules to manage customer invoices and vendor bills. In addition, by using Analytical Accounting, businesses can keep track of their inventory levels and make sure that they have enough stock on hand to meet their customer’s needs.
This advanced accounting methodology is suitable for handling the financial operations of any industry. Also, the feature has the power to analyze or filter particular accounts without posting a journal entry. This means if there has any requirement to understand the expense details of any specific product or service out of the expense of the total products and services, it is possible to define a new Analytic Account for this specific product or service. The well-defined tools and features in the Analytical accounting aspect will make the complex accounting operations a piece of cake.
To view and set up the analytic accounts in Odoo 16, you should activate the ‘Analytic Accounting’ feature from the Configuration Settings of the Accounting module. Where you can access the menu under the Analytics section, as shown below.
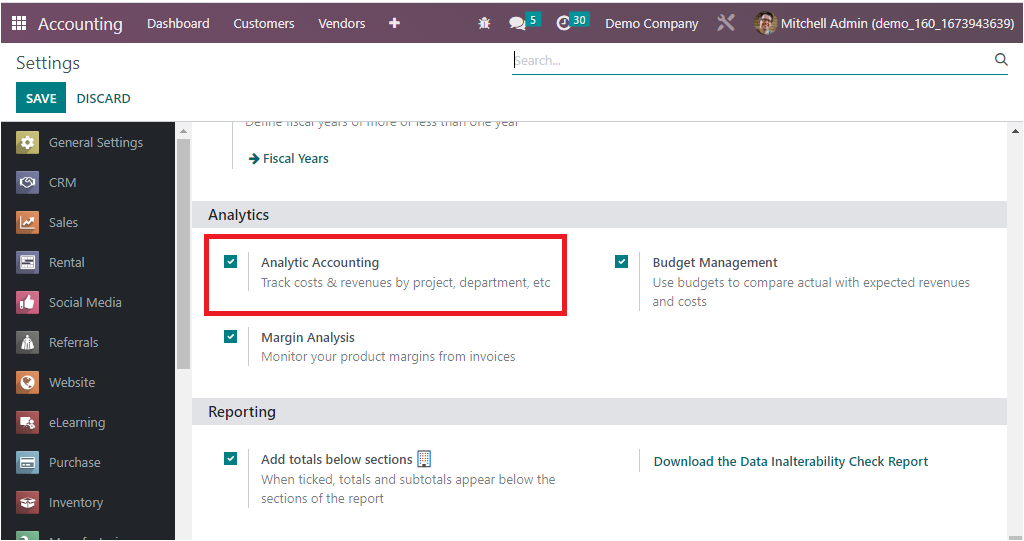
In addition, the Odoo Accounting module encompasses a distinct segment and unique and advanced tools that strengthen Analytical Accounting operations. We can have a close analysis of the various management tools and features included in the Odoo Accounting module in the coming section.
Analytic Plans
The Odoo 16 Accounting module is perhaps the best and most demanded module in the Odoo world. This module has been one of the most popular modules since its inception. It allows the user to manage accounts and finances in a better way. The feature, Analytic Plans, assists you in managing financial data in the most convenient manner. With the help of this feature, you can create and manage your financial plans. This will help you to keep track of your financial situation and make better financial decisions.
Under the Configuration tab of the Odoo 16 Accounting module, you can view the Analytic Plans menu in the Analytic Accounting section, as shown in the image below.
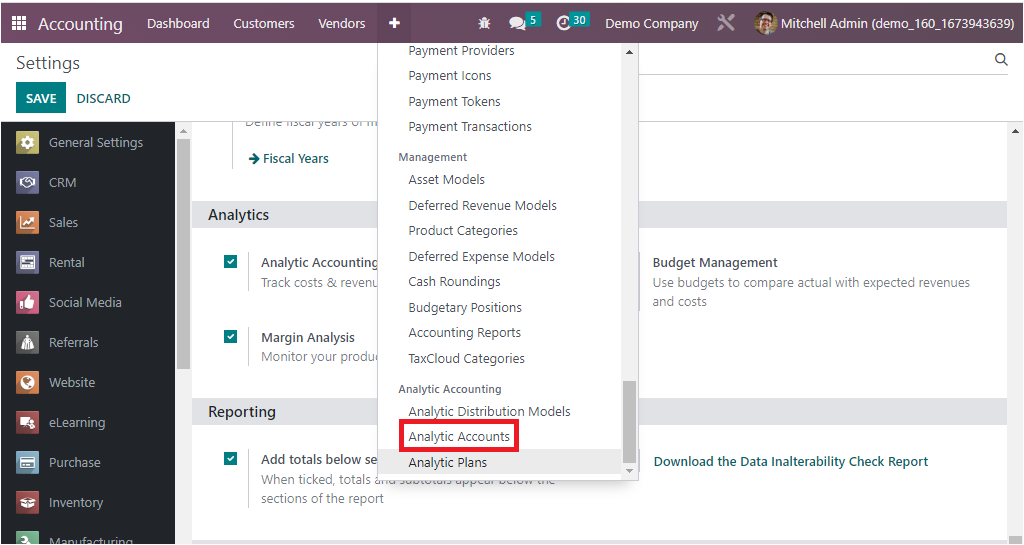
The Analytic Accounts menu will assist you in listing all the required analytic account plans.

The Analytic Plans window will systematically save and manage all the configured Analytic Plans and will display the essential information regarding each plan, such as Name, Default Applicability, Color, and Company. Each of these records can be selected and viewed in detail. Using this feature, you can manage a great number of analytic plans. The different default and customizable Filters and Group By options will help you to pick the required Analytic Plans information quickly from the whole list.
To configure a new financial plan, you need to click on the ‘ CREATE’ button. The CREATE button will direct you to the creation window of the Analytic Plans, as shown in the screenshot below.
In the Creation window, you can provide the Name, Parent, and default applicability of the plan as optional, Mandatory, or Unavailable.
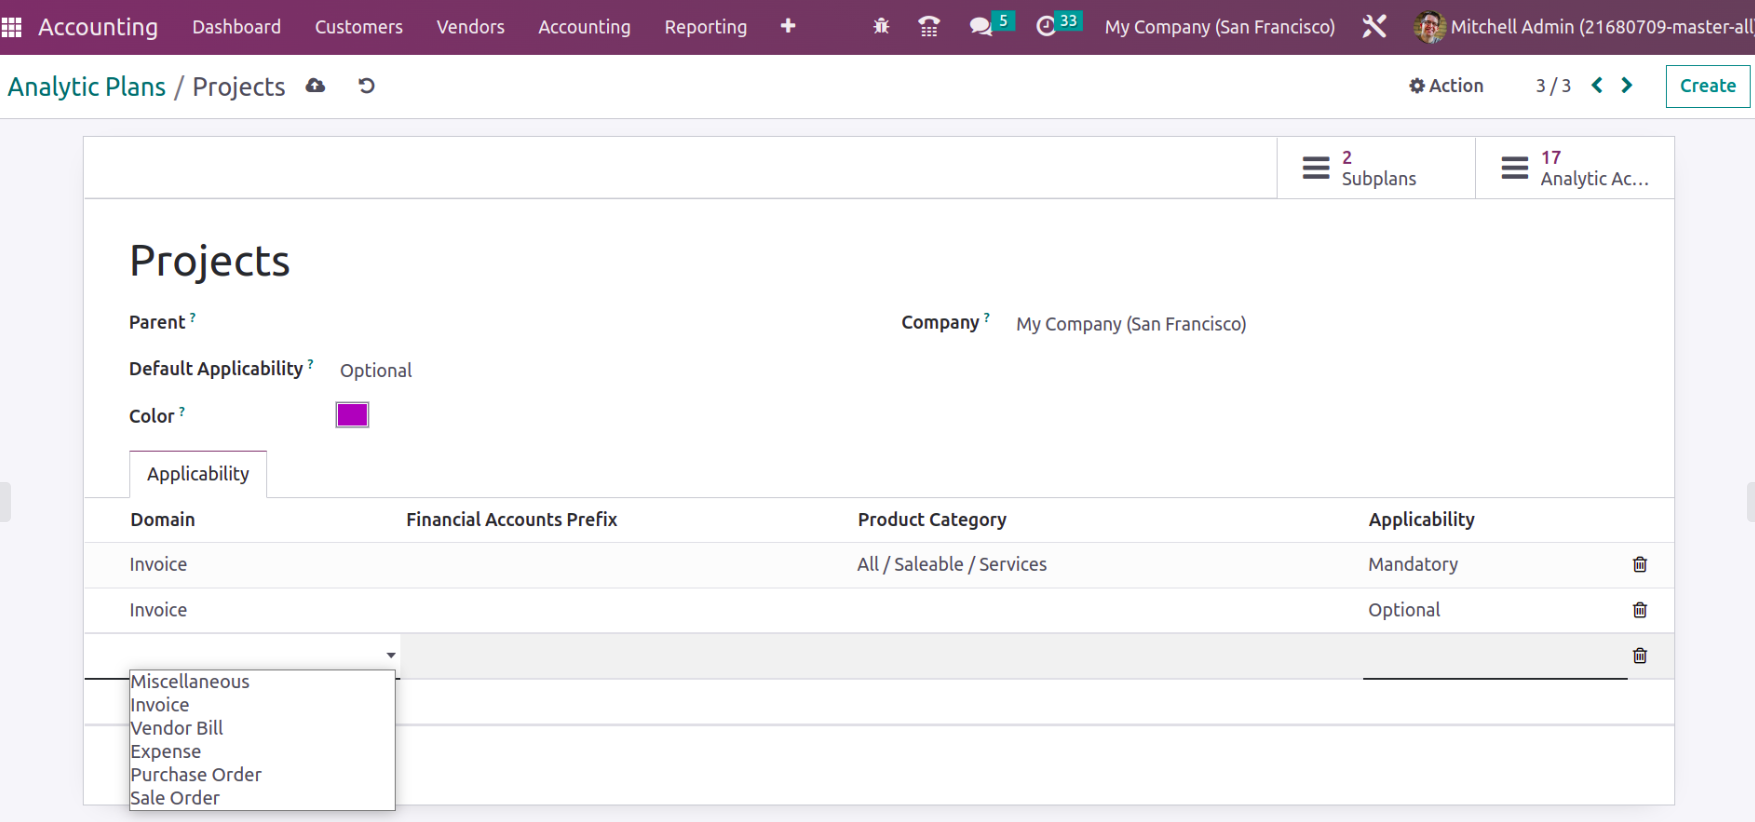
Odoo 16 brings some changes in analytic plans when compared to previous versions. It is possible to add the applicability of these plans on various domains, which is defined under the applicability tab. Plans can be applied to Invoices, Vendor bills, expenses, Purchase orders, Sale orders, and Miscellaneous. Along with this, we will be able to define whether these plans are applied to a certain product category or financial accounts with certain prefixes and whether the plan is Mandatory, Optional, or Unavailable for the defined analytic plan.
Also, sub-plans can be configured for an analytic plan that we will be able to see in the smart tab shown in analytic plans.

Once analytic sub plans are opened, where you see the parent will be automatically updated. In the above example for analytic plans ‘Project,’ two sub plans are there: ‘Project Planning’ and ‘Project R&D’.

Later, when analytic accounts are assigned with these plans, which define if an entry says any expense from the project is generated that will be recorded in the analytic account under the plan project.
As we are clear on the Analytic Plan tool in the Odoo Accounting module, let's now move on to understanding the next management option, the Analytics Tags, in the next section of the book.
Analytic Accounts
The Analytic Accounts feature is basically used to maintain and monitor your business financial data, Also, it can be used to analyze your business financial data and it provides you with the option to view your business financial data in a graphical format. The commencing phase concerning the Analytical Accounting management in Odoo will be the denotation of the Analytical Accounts. This feature submits you the option to create, edit, and delete your own analytic accounts. Also, the feature allows you to view your analytic accounts in graphical, tabular, and pivot formats.
You can fastly acquire the Analytic Accounts menu under the Configuration tab in the Analytic Accounting section.
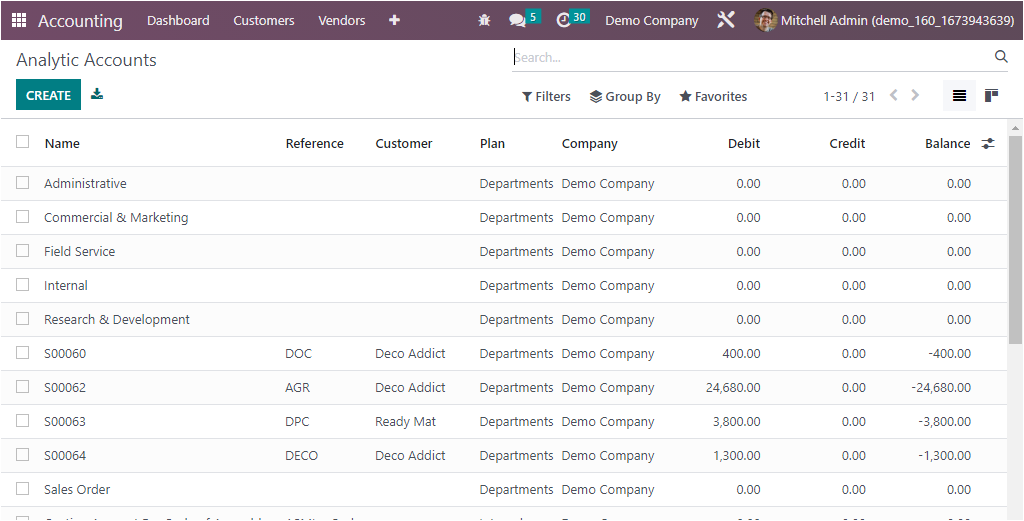
In this Analytic Accounts window, all the accounts will be managed, which is configured for the operations of the Analytic Accounting in the organization. This window is also equipped with Filters, Group By, Favourites, and Search options
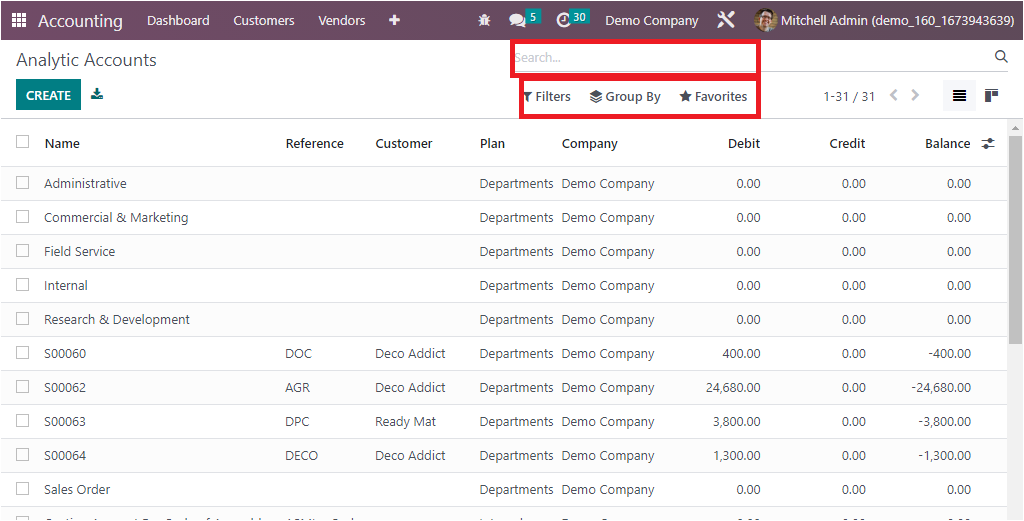
In addition, you can access the Kanban view menu icon for viewing the window in Kanban format. Here each analytic account is listed along with the details such as Name, Reference, Customer, Plan, Company, Debit, Credit, and Balance amount. All these account details are clickable and have the option to edit. To mention a new one, choose the CREATE button, which will take you to the creation form as picturized in the image below.
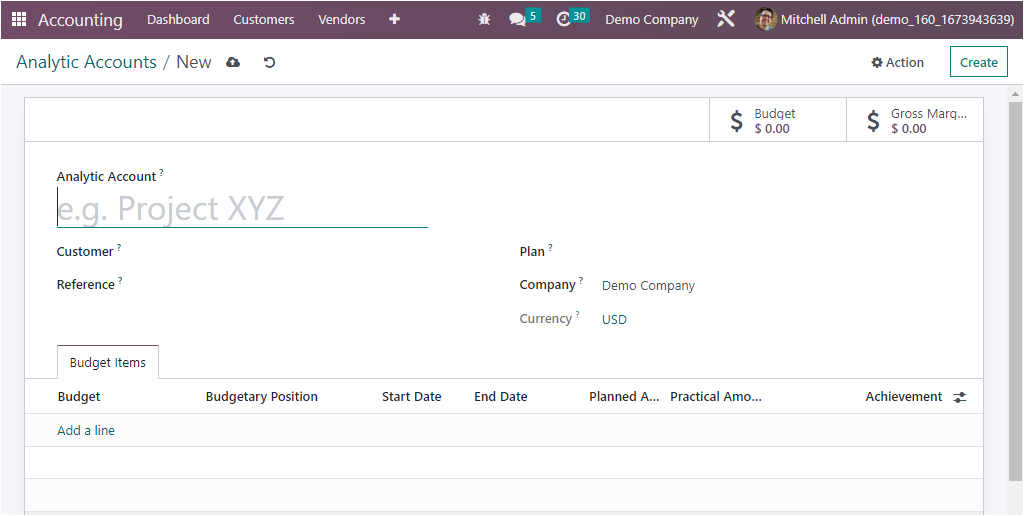
The form view of the Analytic Accounts creation window demands you to provide a name for the analytic account in the Analytic Account field. Then you can mention the Customer, Reference code, and Plan in the specified fields. The Company and the Currency field will be auto-allocated on their operational basis. The Add a line option available under the Budget Items tab allows you to add your required budget items. Here you can add the Budget, Budgetary Position, Start Date, End Date, Planned Amount, Practical Amount, and Achievement can be specified. With this option, you can add multiple budget items to the analytic account. In addition, the Action button displayed on the top of the window will display the Archive and Duplicate options to perform respective actions.
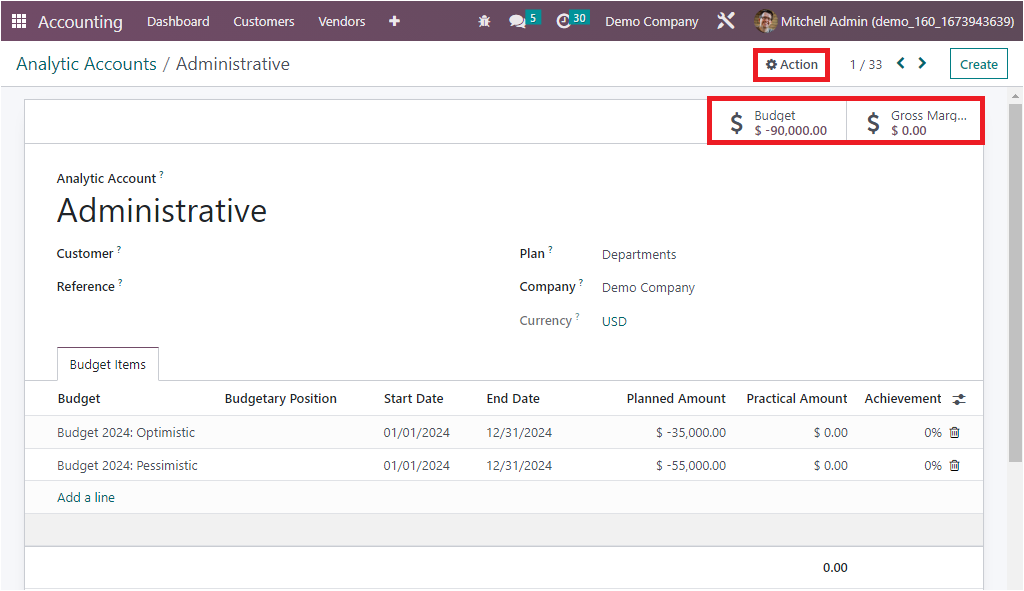
In addition, the Gross Margin and the total Budget of the respective Analytic Accounts will also be viewed in the respective smart buttons available, which are highlighted in the screenshot above.
Analytic Distribution Models
The Analytics Distribution Models in Odoo allow us to automate the accounting entries by using rules. For example, in a sales invoice, there are multiple line items. We can create a rule that will distribute the total amount of the invoice to the line items based on a percentage or a fixed amount. This way, we don't have to manually create the journal entries for each line item.
The Analytic Distribution feature is very flexible and can be used in many different scenarios. For example, we can use it to distribute the cost of goods sold to different expense accounts, or we can use it to distribute the revenue from a sales invoice to different income accounts.
To create an Analytic Distribution Model, we first need to create a model. We can do this by going to Accounting -> Configuration -> Analytic Distribution Models. On the create form, we need to enter some conditions and also analytic distribution for the model using the creation form depicted below.
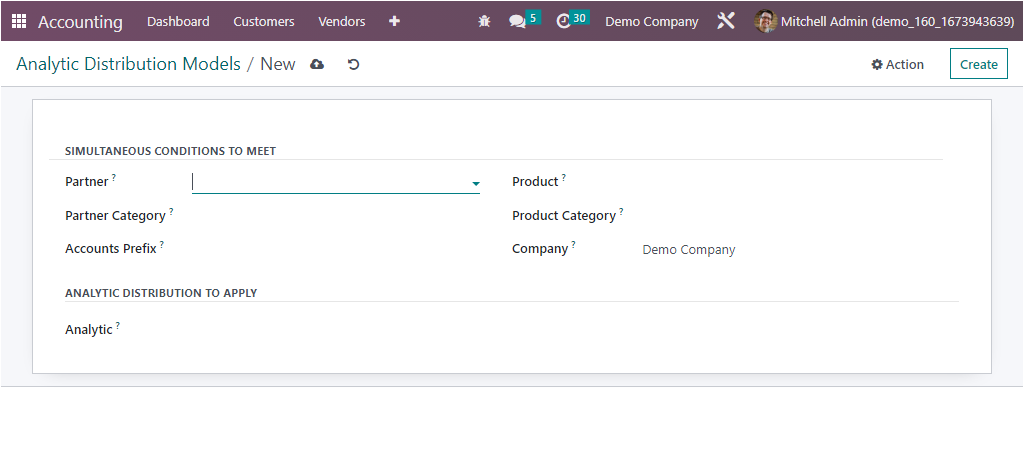
The analytic distribution defined in the analytic distribution model will automatically apply to those transactions which meet the condition defined in the analytic distribution models. Conditions can be set based on the partner, partner category, product, product category, and accounts prefix.
As per the above screenshot of the analytic distribution model, when an invoice is created for the product category ‘All / Saleable / Services’, the analytic distribution will apply automatically.
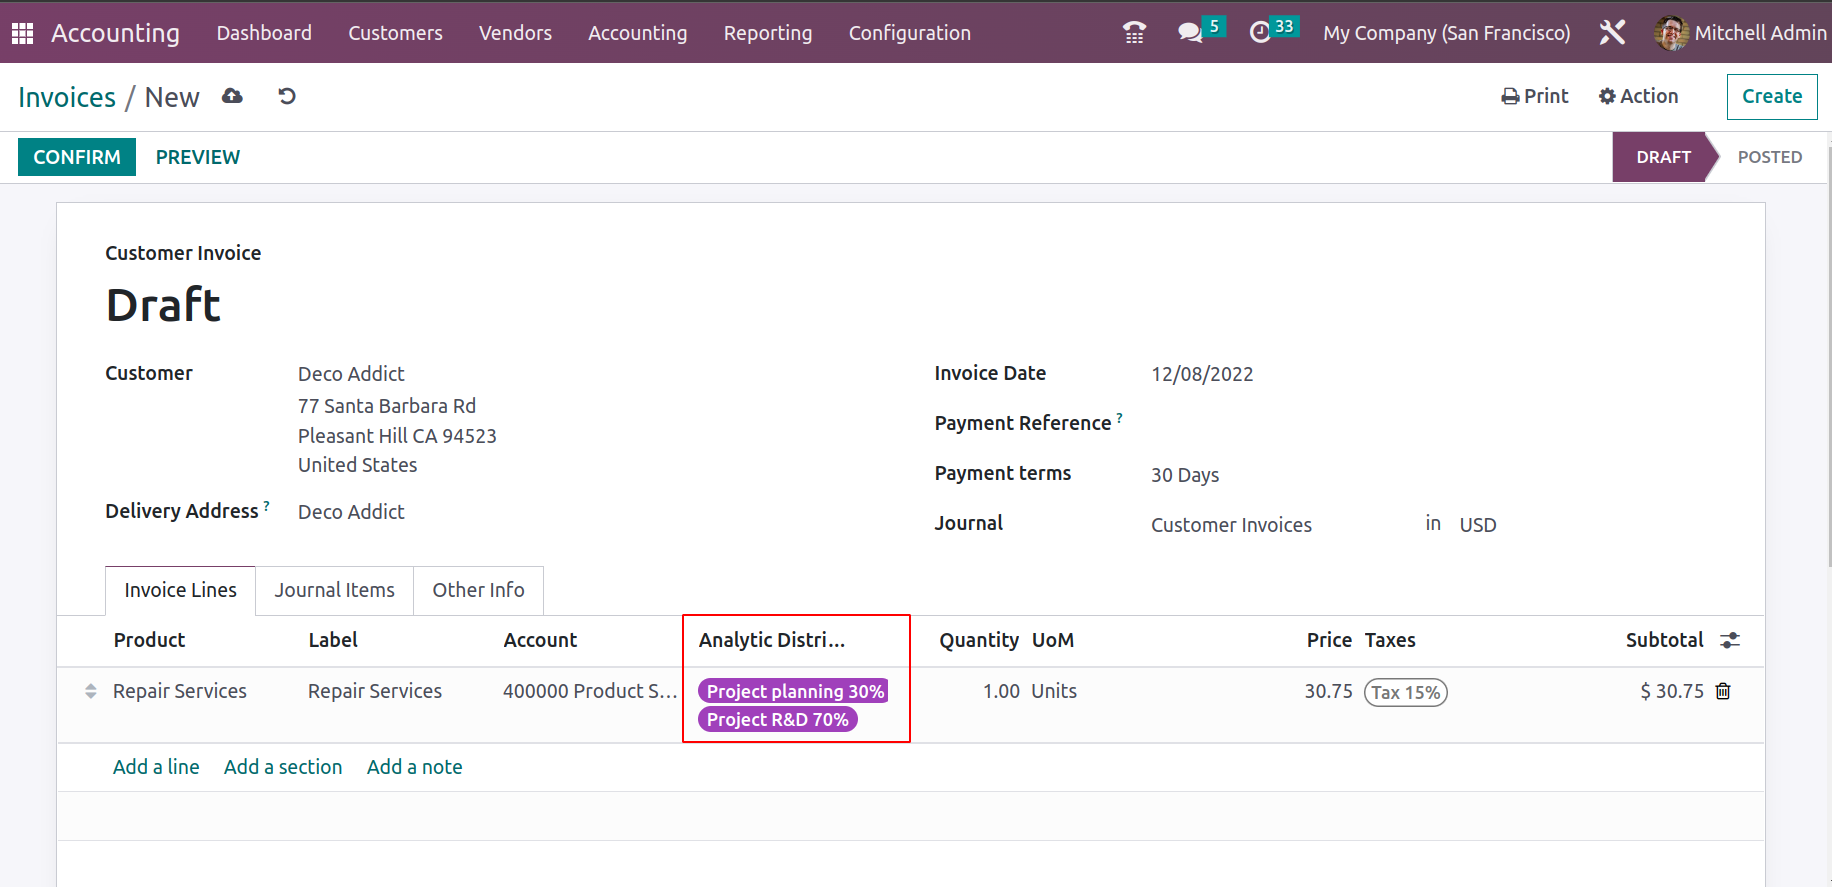
Thus the distribution will be recorded in the respective analytic accounts.
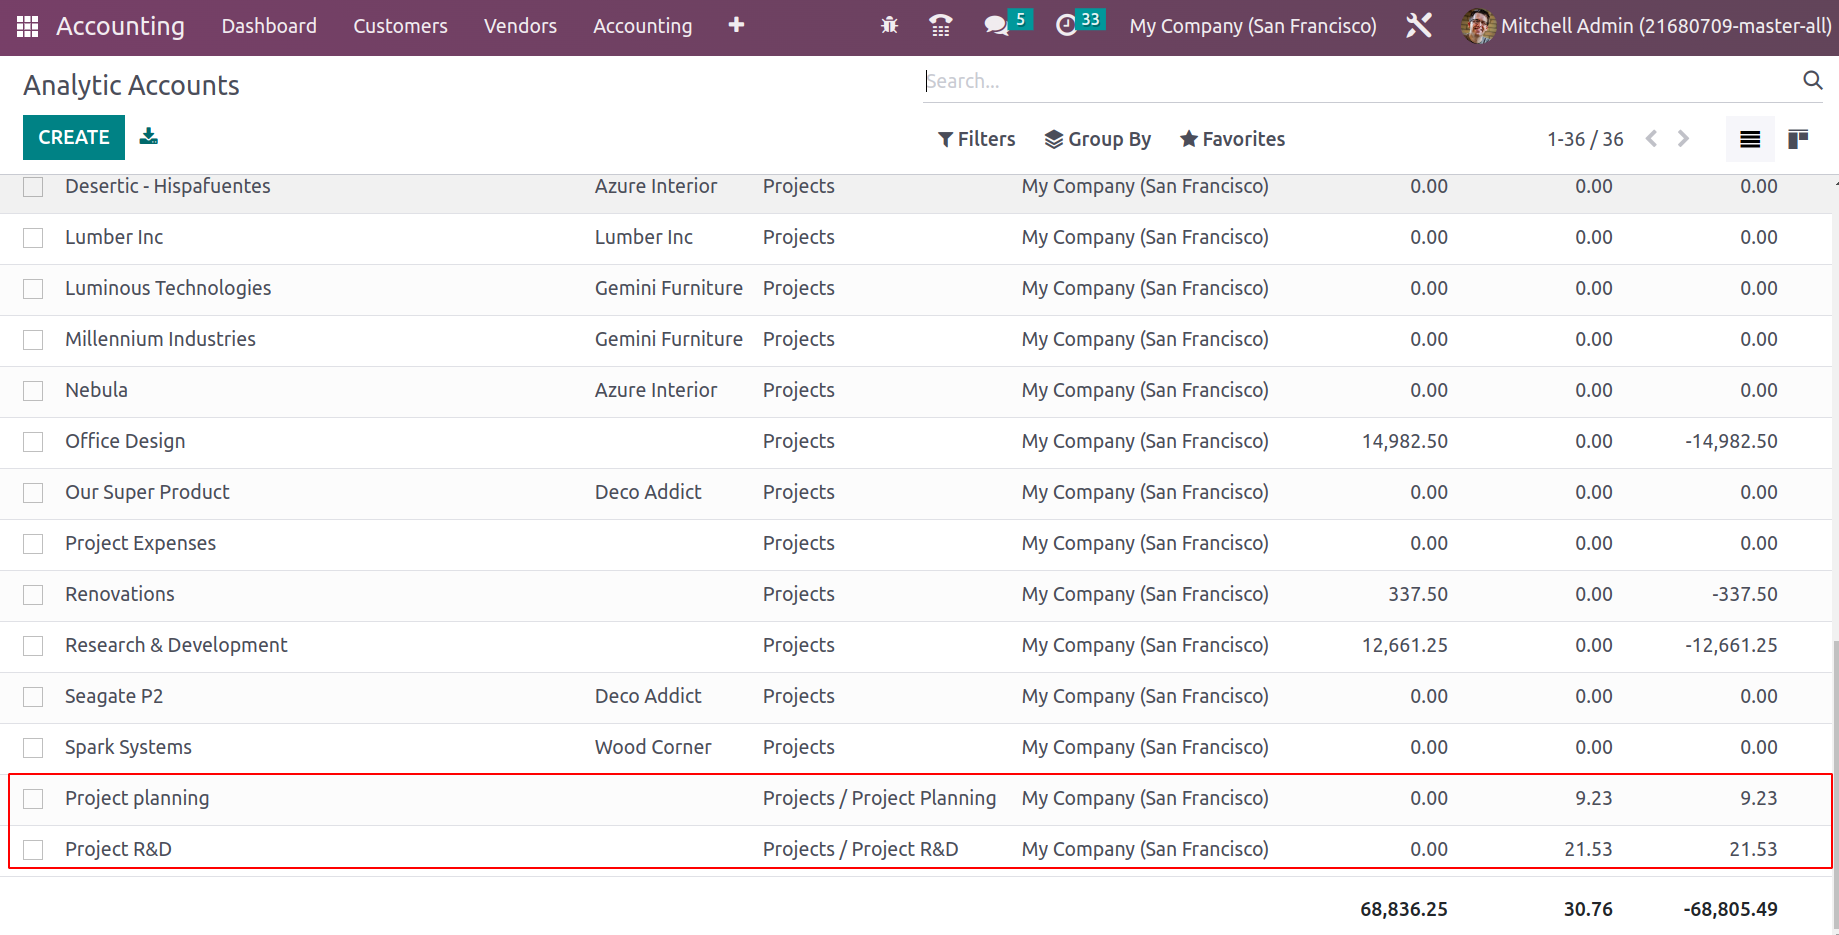
Up until now, we have been discussing the management tools available under the Configuration tab related to the Analytical Accounting aspects of the Odoo Accounting module. As we are clear on it, let's now move on to understanding the configuration of the Invoicing aspects for the accounting operations of the company management in the next section of the book.