We can create a new report from the create option depicted below in the image.
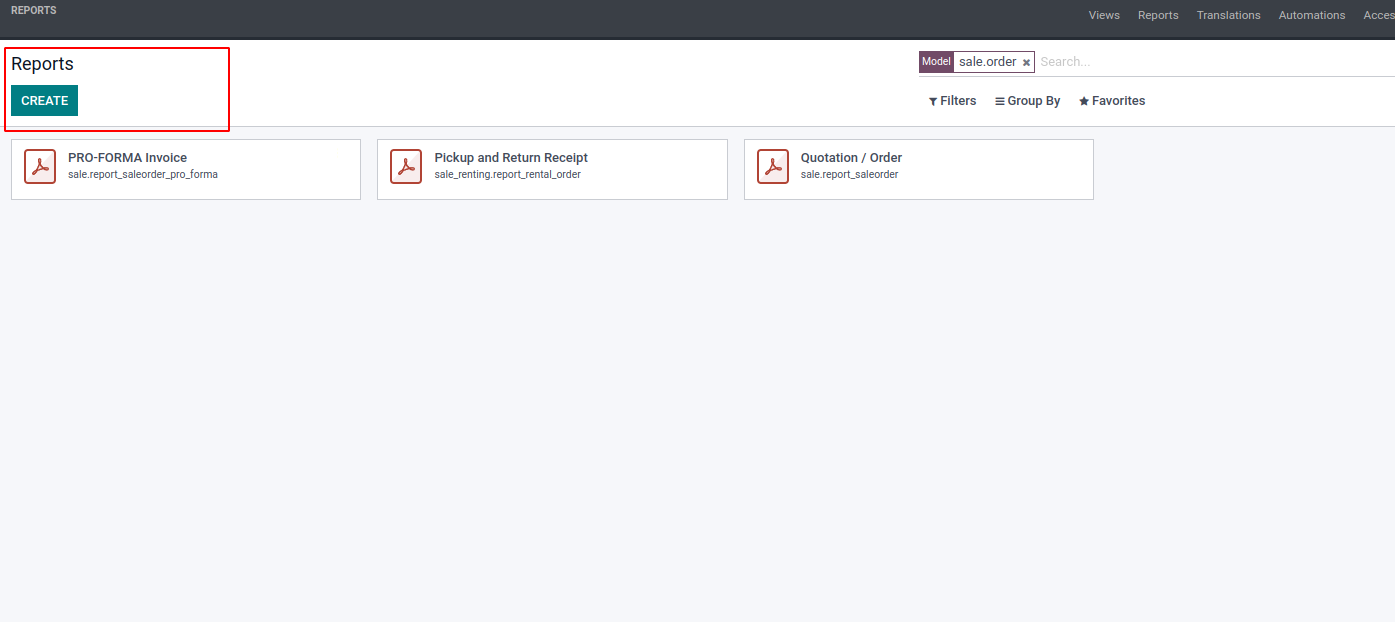
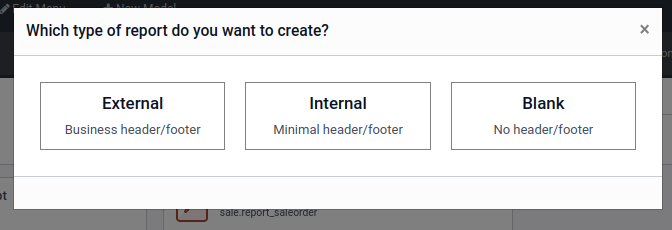
By clicking on the create option you will be presented with a pop-up box asking
you to select the type of report you need to embed the appropriate functions or
module. Here you have to select the report type from the three default options
available;
External with Business header/footer or, Internal with Minimal header/footer or,
Blank with No header/footer.
After selecting a report type you will be presented with a sample report form and
available data about the selected type. If no data is available you will be prompted
for a modified message indicating a lack of data, in which case, you need to configure
certain data and go to the Customization section of the report. Once a sample report
is displayed you will be able to submit some custom options. The add menu as shown
in the following picture contains a variety of elements that you can prepare in
the report. Here are the block options available under various categories such as
Block, Inline, Table, and column that help you provide the required field in the
report.
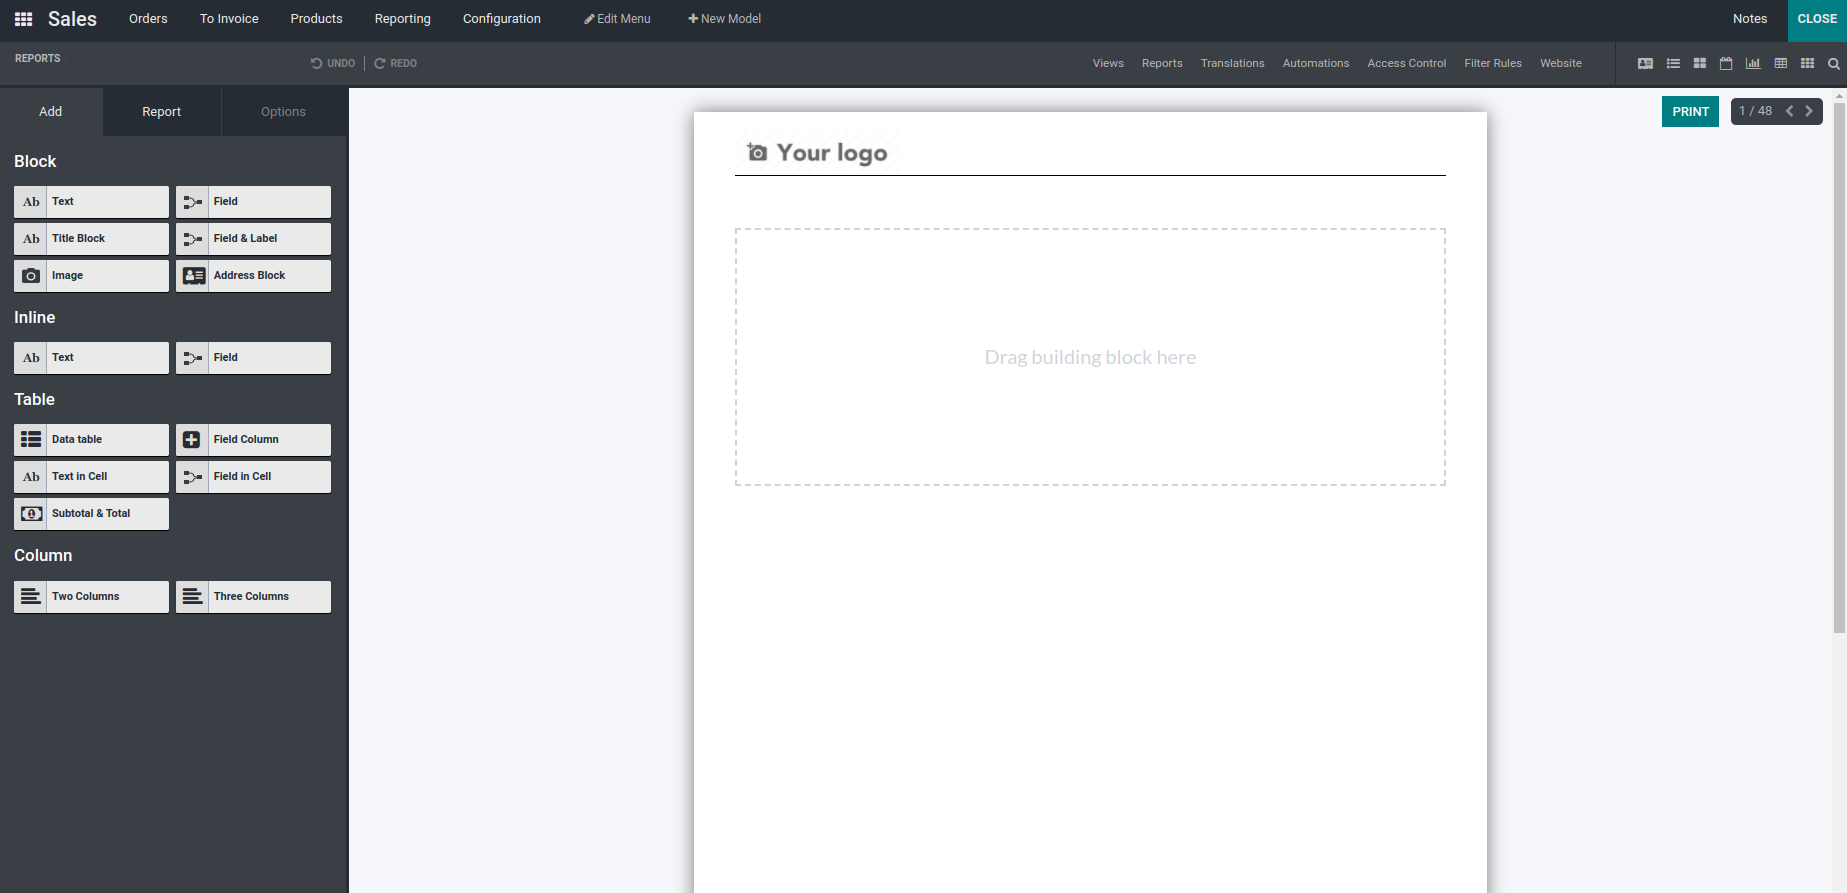
From this we can find the fields that need to be dragged and dropped into view.
Here Fields, Data Tables, Subtotal & Total, and Address Book are dynamic items which
means they need one2many or many2many related objects. Text, Title Block, Image,
and Text in Cells are static objects.
Let’s take an example from the sales module.
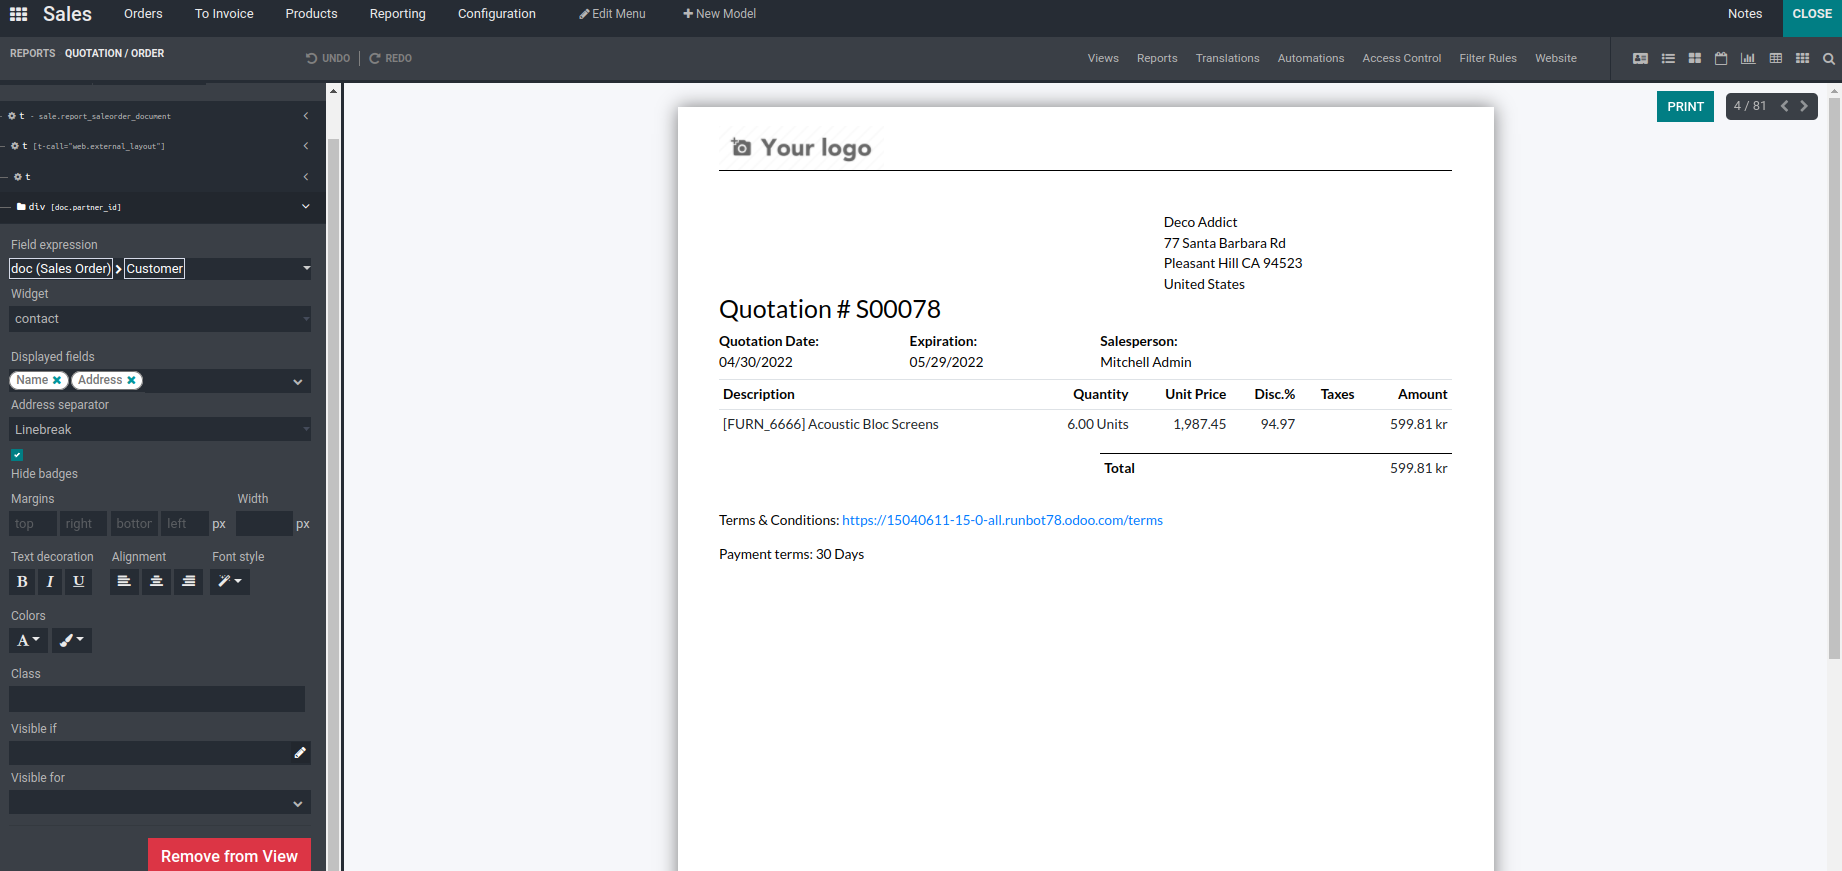
From the above image we can see how a quotation/order is created using the studio
module. There are so many fields and text boxes are depicted in a manner.
Now we are going to check how to create a report like this.
First select the type of the report that appears when clicking on the create button.
Here we are going with the external layout.
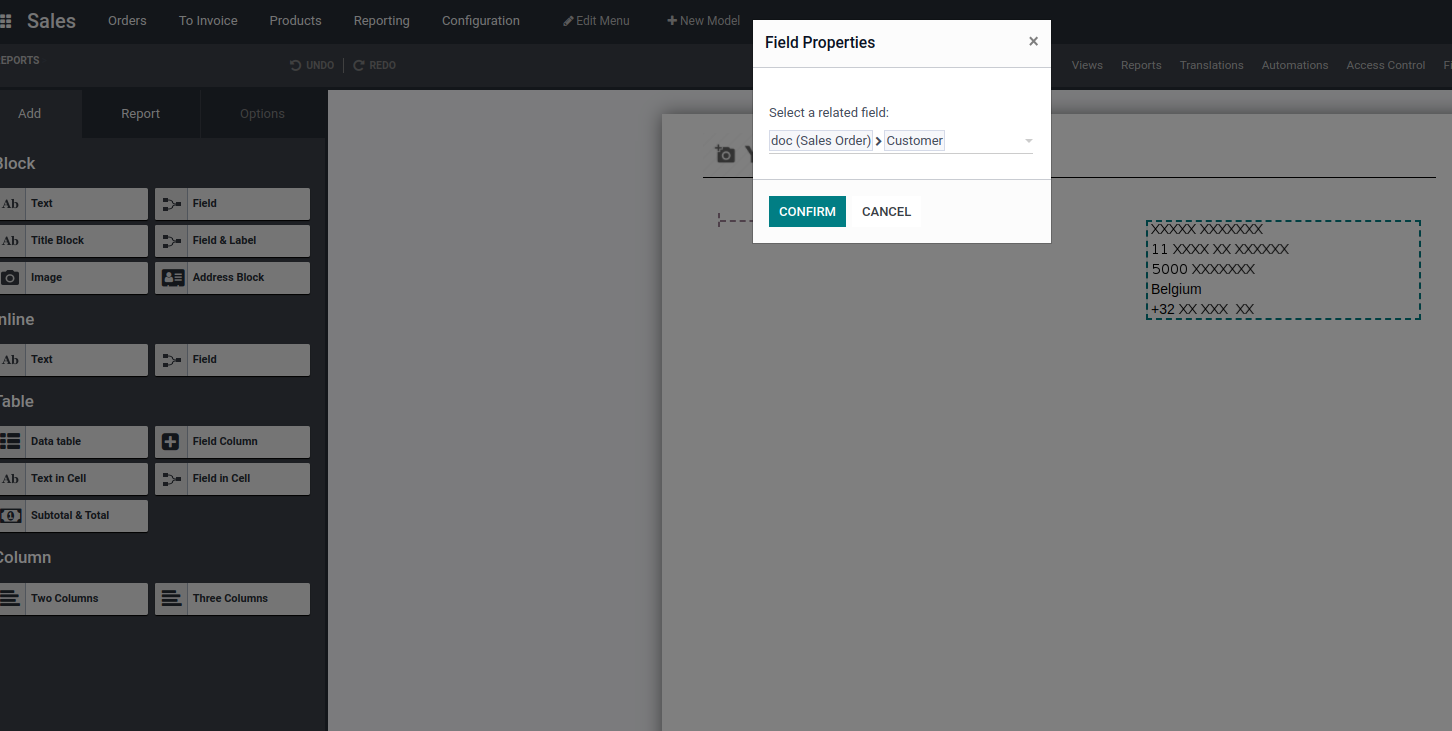
Now try to add the address of the customer in the report view .For that we have
an option address block in the add menu.
We just drag and drop the address on the page and select the field properties like
in the image shown below.
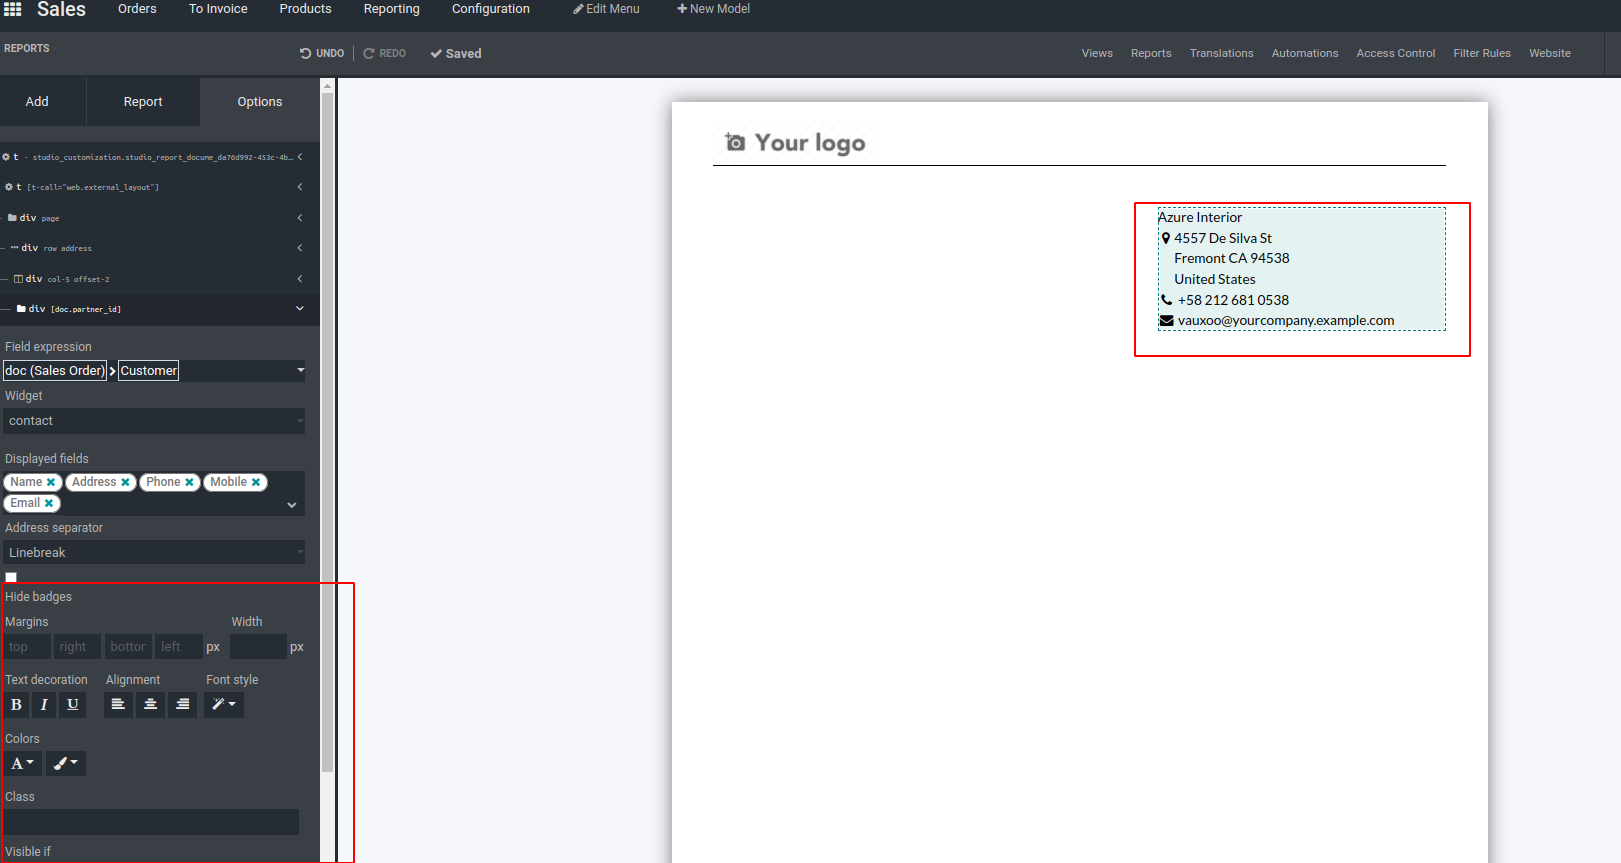
After confirming the field properties we get the address of the customer in the
page view of the report.
There is an option to align and decorate the text and change the offset properties
of the field.
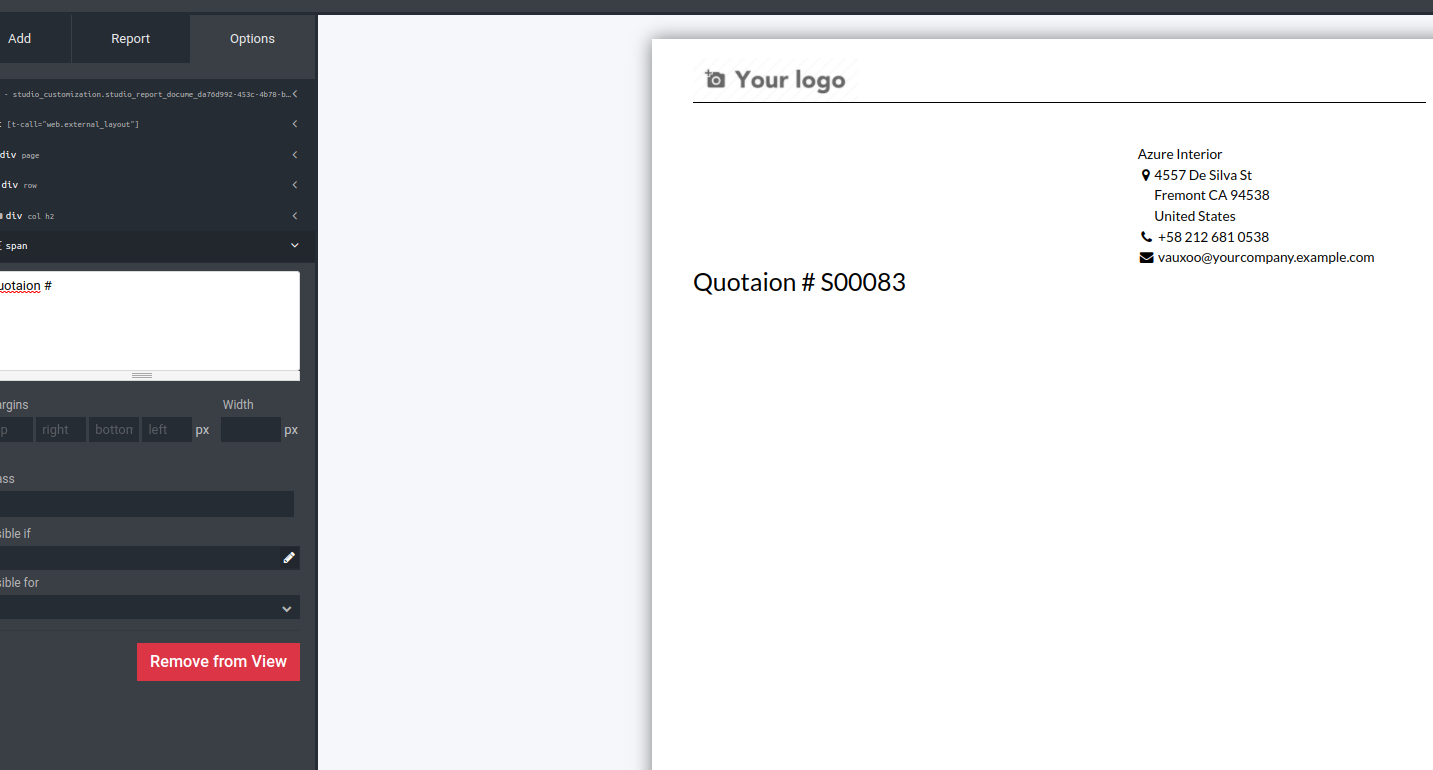
We have an option of inline field added along with the text field. From above image
Quotation is a text field and sale order number as the inline field along with it.
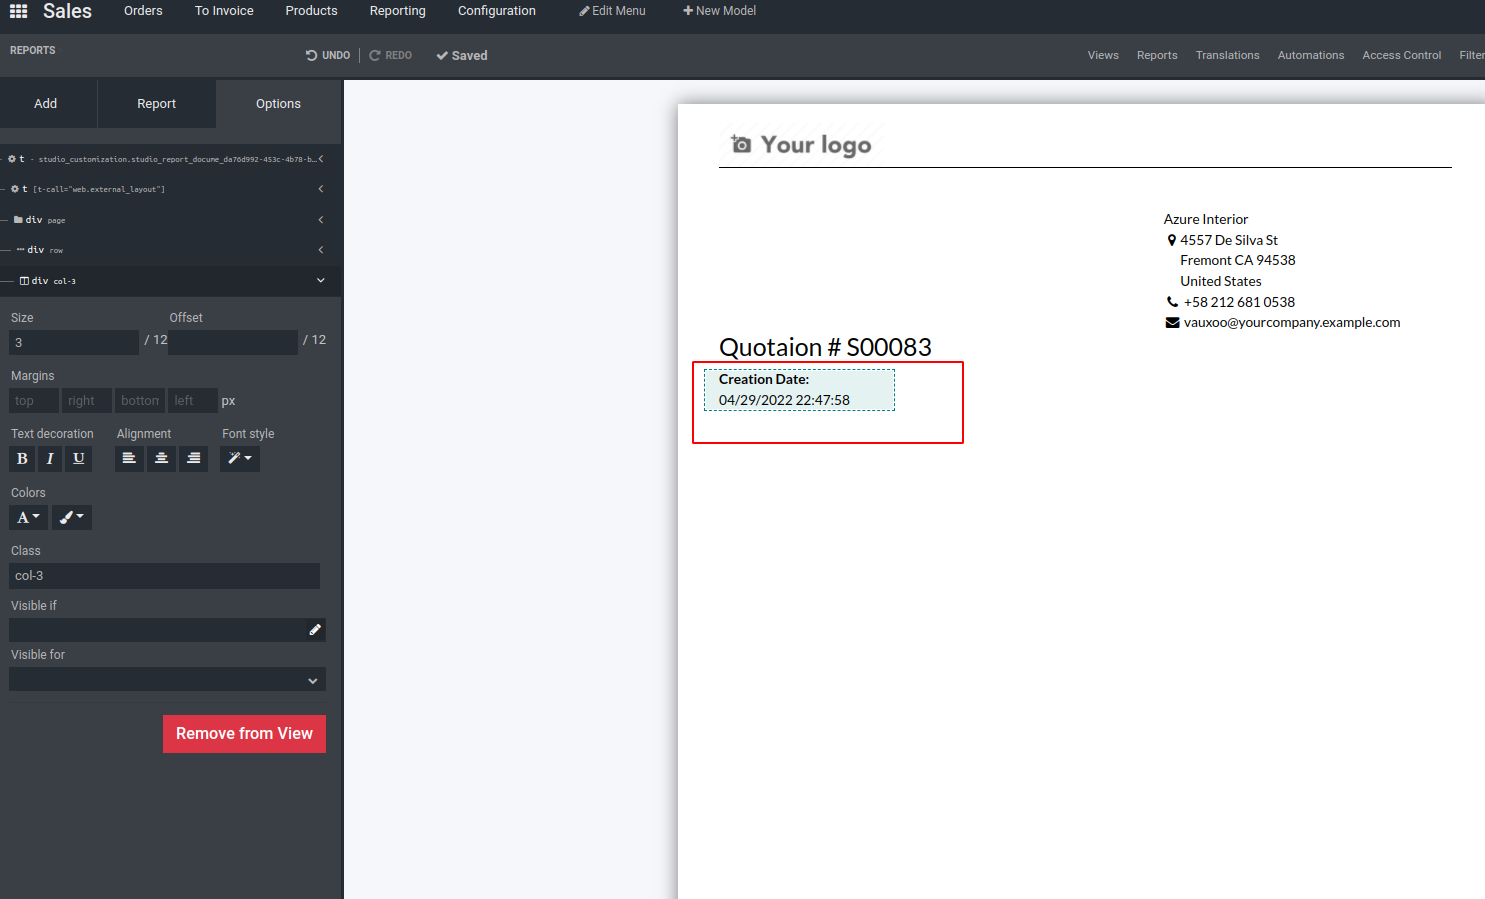
Next we are going to check how to add the field and label simultaneously. Here we
have an option field and label in the add menu. By drag and drop the field and label
box in the report page and select the field properties then we will get in the report
like the image below.
Under the table section we have seen many boxes such as data table, field column,
text in cell, field in cell, subtotal & total etc.
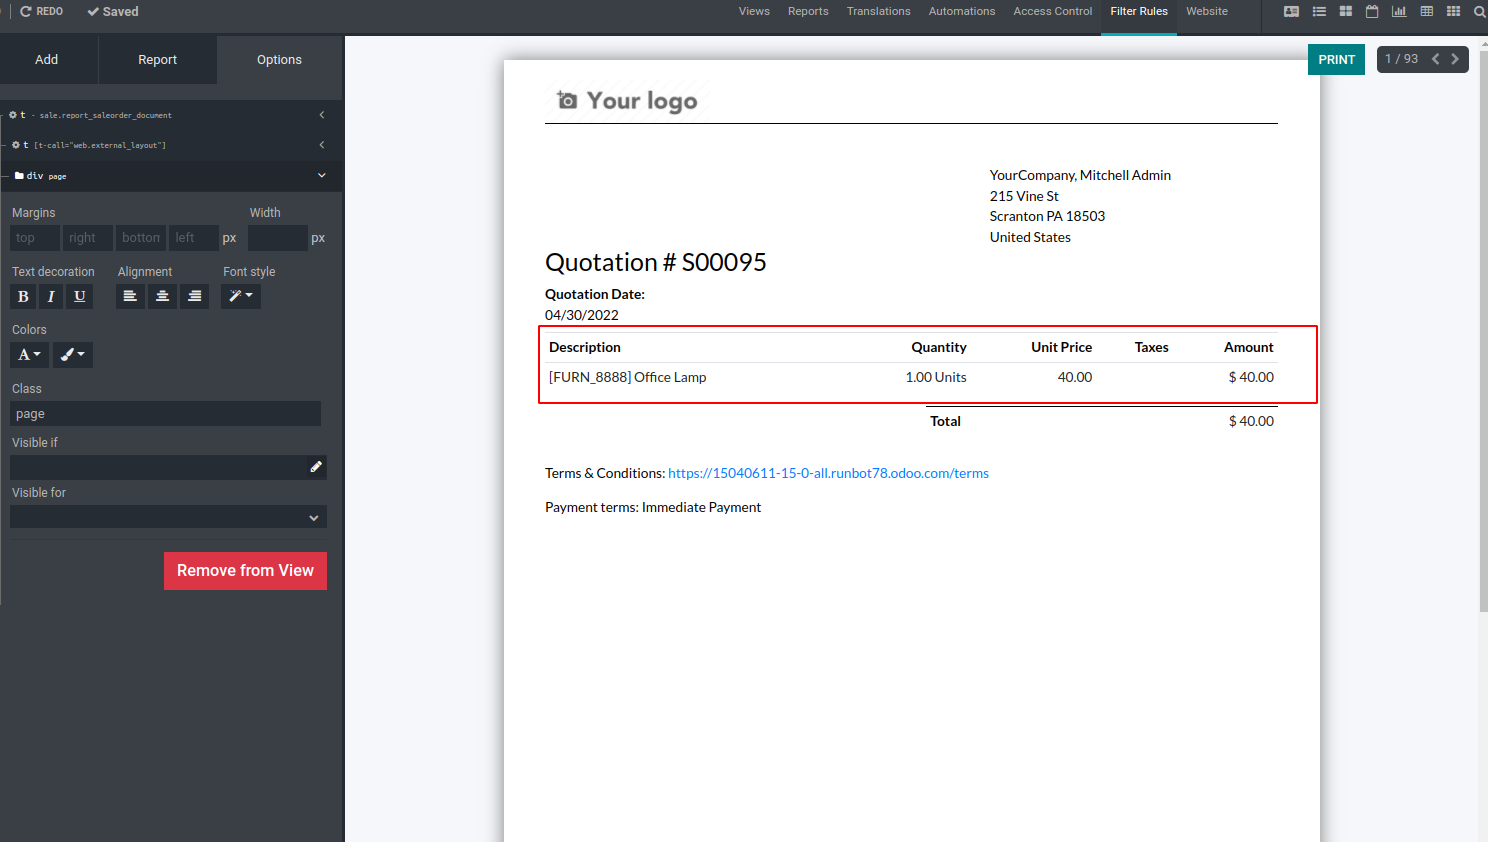
Data tables are used to create tables in the report view and additional columns
are added using the field column. For example, that is given in the image.
Once the blocks and these adjustable features are added to the reports you will
also be able to edit and bring custom features to it with the help of the available
options menu.
Additionally, there is an HTML editor window available for developers with prior
editing experience that helps you bring some features. Field expressions and widgets
can be customized for the report to work. You can enable or disable the Hide badge
option and the Address separator can be provided. In addition, Display Fields, Margin
Length, and Width can be defined. In addition, it has Text Decoration, Alignment,
Font Style, and Colors.
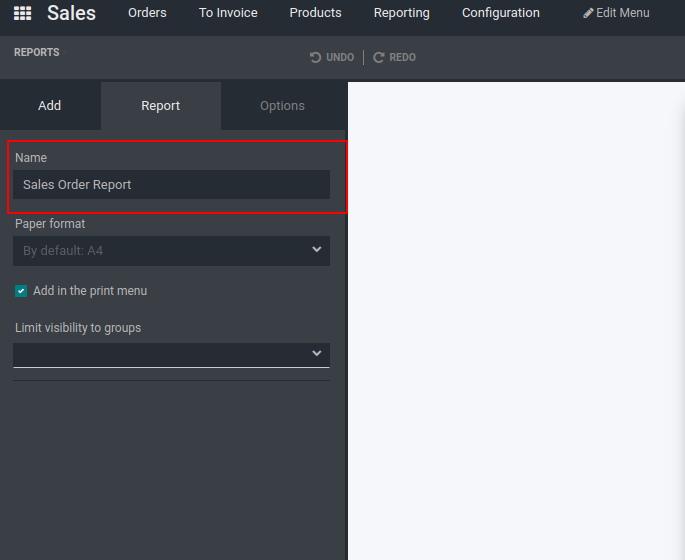
Finally, the Report name can be set under the Report menu as shown in the following
image. In that case you need to take the text of the report and you need to be ready
for the type of paper to choose from which you can define the appropriate Report
Paper Format. Additionally, you can limit the visibility of groups by providing
the right option.
