POS Configuration
As prerequisites, make sure the IoT Box and the computer running the Odoo instance are
connected to the same WiFi network. And install the point of sale application if not
already.
Once everything is set, let’s configure the IoT Box with POS.
1. In the Point of Sale application, open the settings of the PoS session.
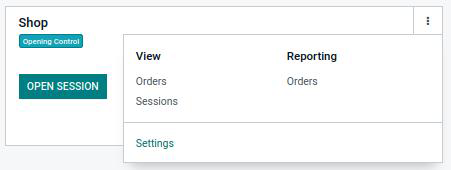
2. There will be an IoT Box checkbox under the Connected devices section on the
settings page. Enable the checkbox, and more options will be visible.
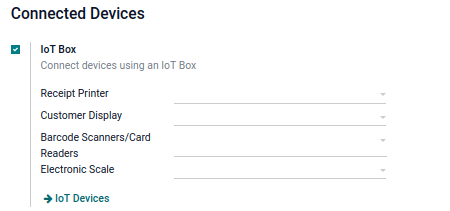
3. Here, select the corresponding devices in each field, such as the printer, barcode
scanner, etc.
4. Finally, click on the Save button.
After these steps, you will be able to use the IoT Box in the PoS session.
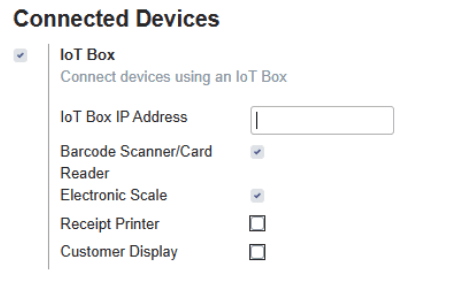
In the case of the Odoo community edition, if we want to integrate any hardware, we will
also need to enter the IP address of the IoT Box in the configuration.
Print Reports
CUPS is a printing system that allows a computer to act as a printing server. As the IoT
Box runs the CUPS internally, we can connect network printers with the IoT Box.
1. First of all, we have to open the IoT box homepage via IP address.
2. Click on the Printer Server button at the bottom of the page.
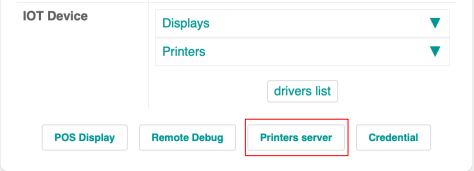
3. Then, it will open the CUPS configuration homepage. We can configure our printer
here.
4. The printer will appear in the IoT device list once the configuration is done. Now
navigate to Settings < Technical < Reports after enabling the Developer mode
in Odoo.
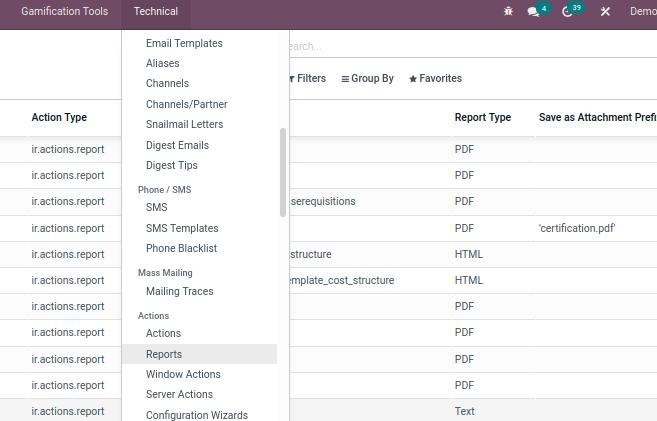
5. Find the report you want to print from the list. Open the form view and select the
printer we just added in the IoT Device field.

6. Once these configurations are done, the report will be directly sent to the
printer.