Manage the Vendor Bill Payments
The Vendor bills and their Payments can be effectively managed with the help of
the dedicated management menu in the Odoo Accounting module. The management of the
Vendor Bill Payments falls a priority in the operations with regards to the product
procurement aspects of the company therefore, the need for a dedicated system of
operations is inevitable. With the Odoo Accounting module, you will be able to define
the aspects of the Vendor Bill Payments management in a synchronized as well as
systematic way aspect of the company operations.
The following screenshots depict the Vendor Bill Payments management menu of the
Odoo Accounting module. Here all the Payments on the Vendor Bills will be depicted.
You can view the details such as the Date and the Bill number of the respective
payment. In addition, the details of the Journals, Payment Method, Vendor details,
Batch Payment information, Amount embedded along with the Currency of Payment, Status
of the payment, and the SDD scheme will be described. You will have default Filter
as well as Group by options allowing you to sort out the required Payment information.
Additionally, you can use custom filtering as well as Group by options as per the
need of filtration and can be configured as Favourites for future uses.

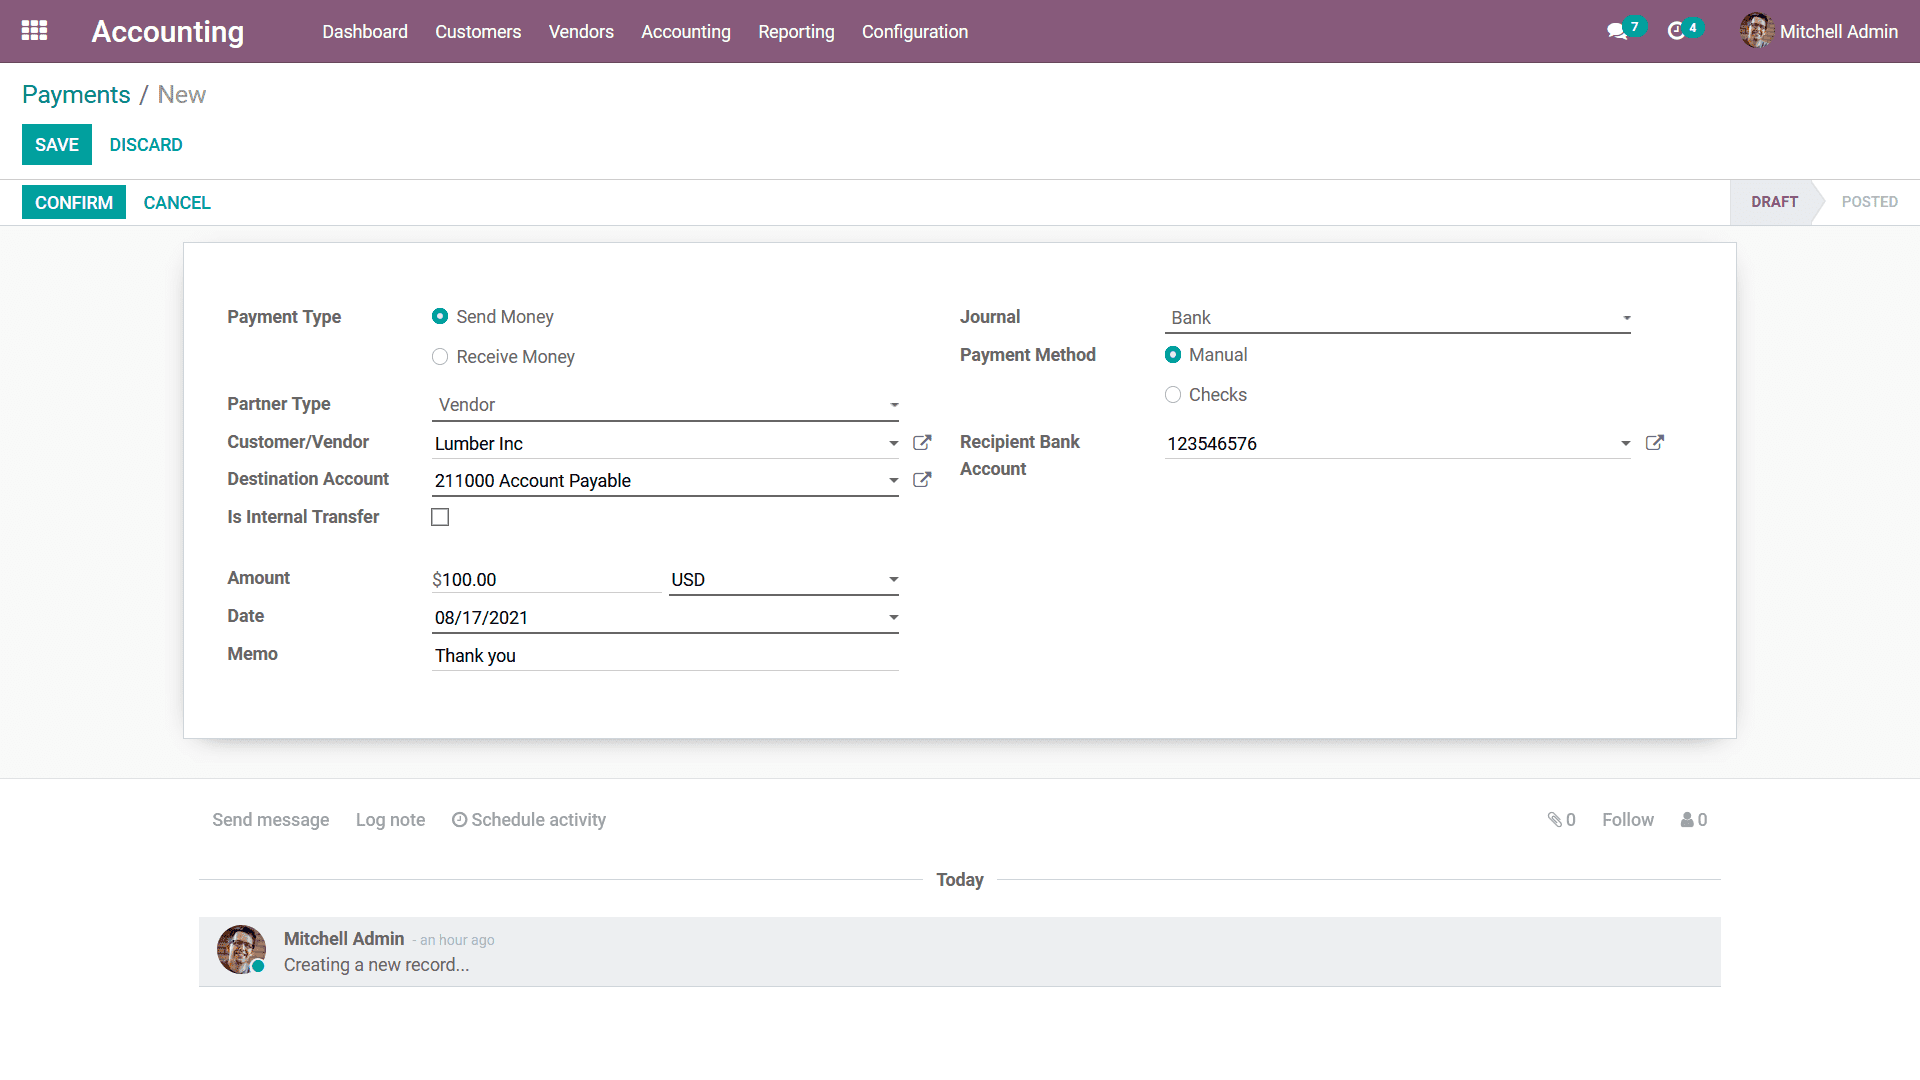
You can create new Payments by selecting the Create option available which will
depict you with the following creation menu where the Payments can be created. Here,
you have to initially describe the Payment Type as Sent Money or Receive Money.
Next, you have to define the Partner Type, Customer/Vendor details, Destination
Account details, Amount allocated along with the Currency details, Date of the Payment,
and the Memo can be defined. In addition, you can enable the Is Internal Transfer
option which will define the Payment as Internal Transfer. The Journal can be selected
for the drop-down menu along with the Payment Method which can be defined as Manual
or Checks. The Recipient Bank Account Number can also be defined based on the need.

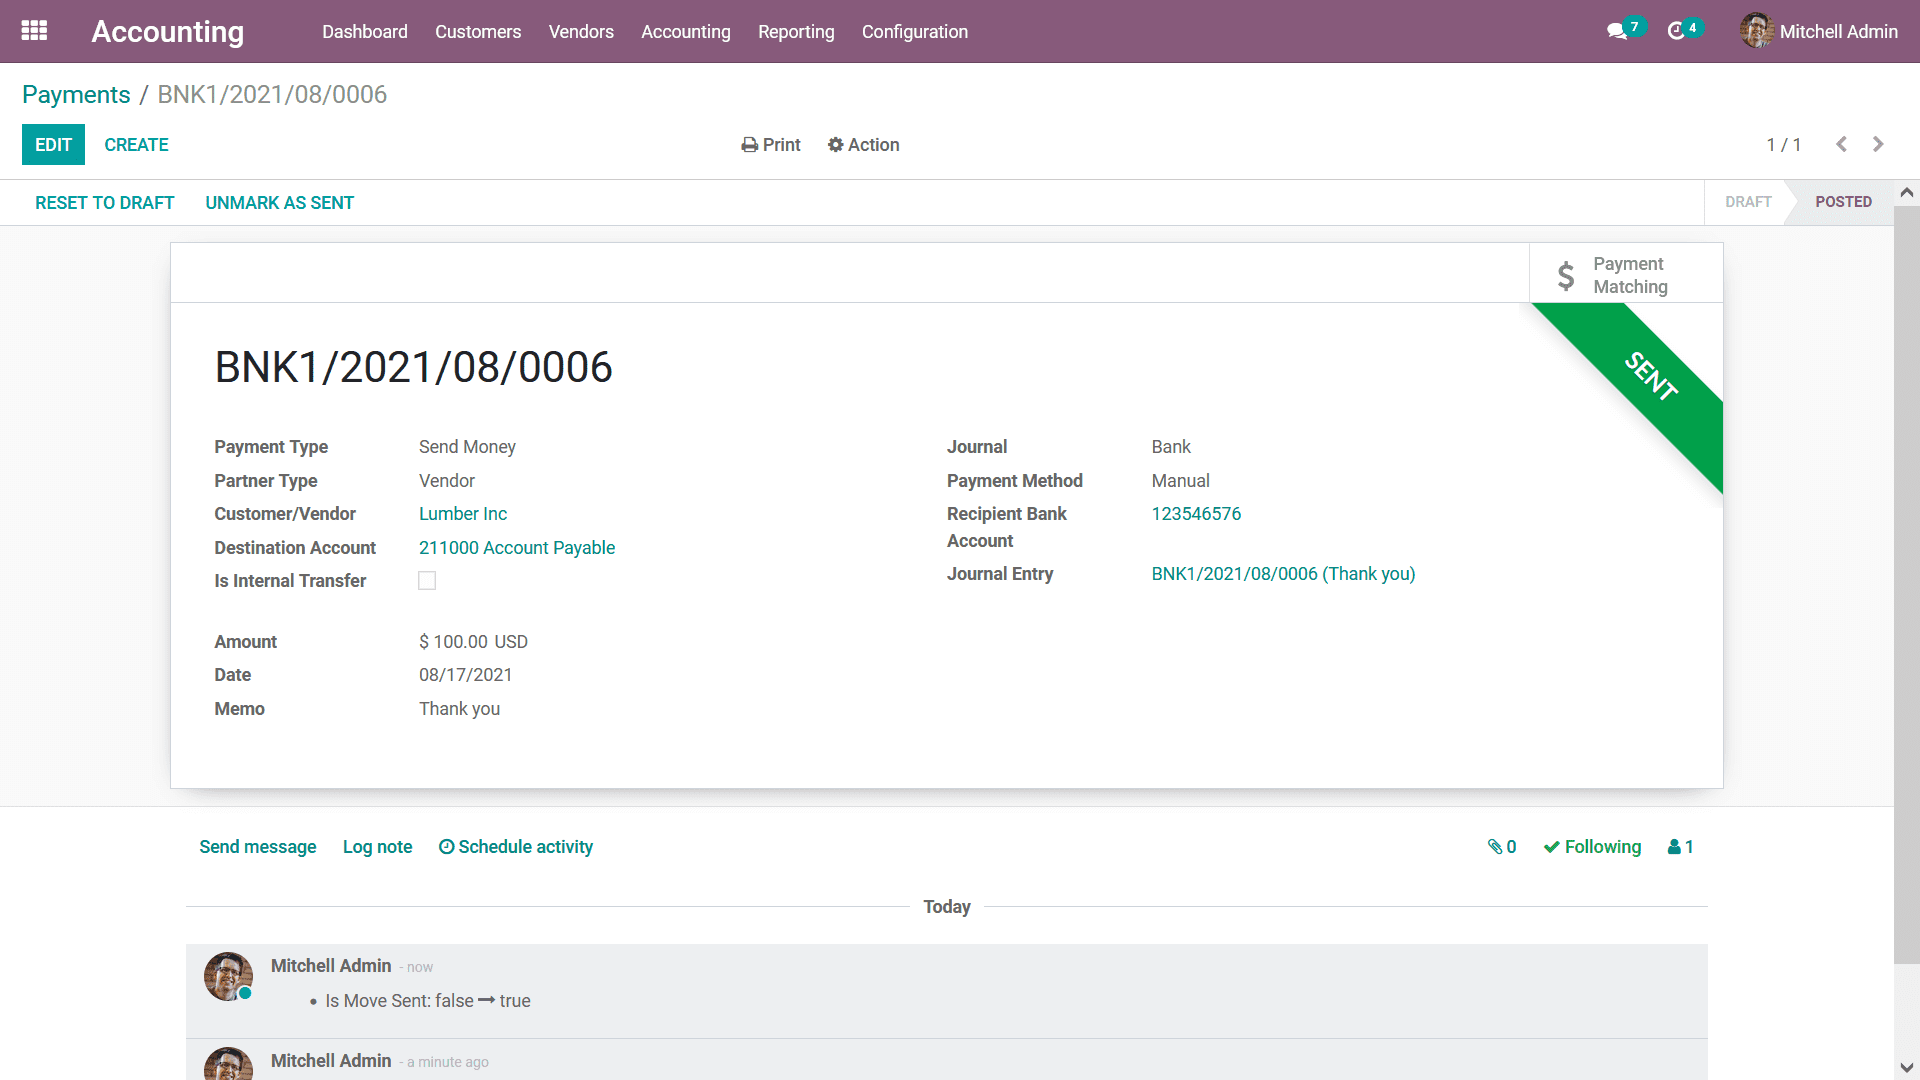
As the configuration of the payment is completed the next step is to Confirm the
Payments which has been defined which can be done by selecting the Confirm option
that is available further these Vendor Payments can be added to the Vendor Bills
of the vendor. Upon confirming the Payments, it will depict a label as Send as depicted
in the following screenshot.

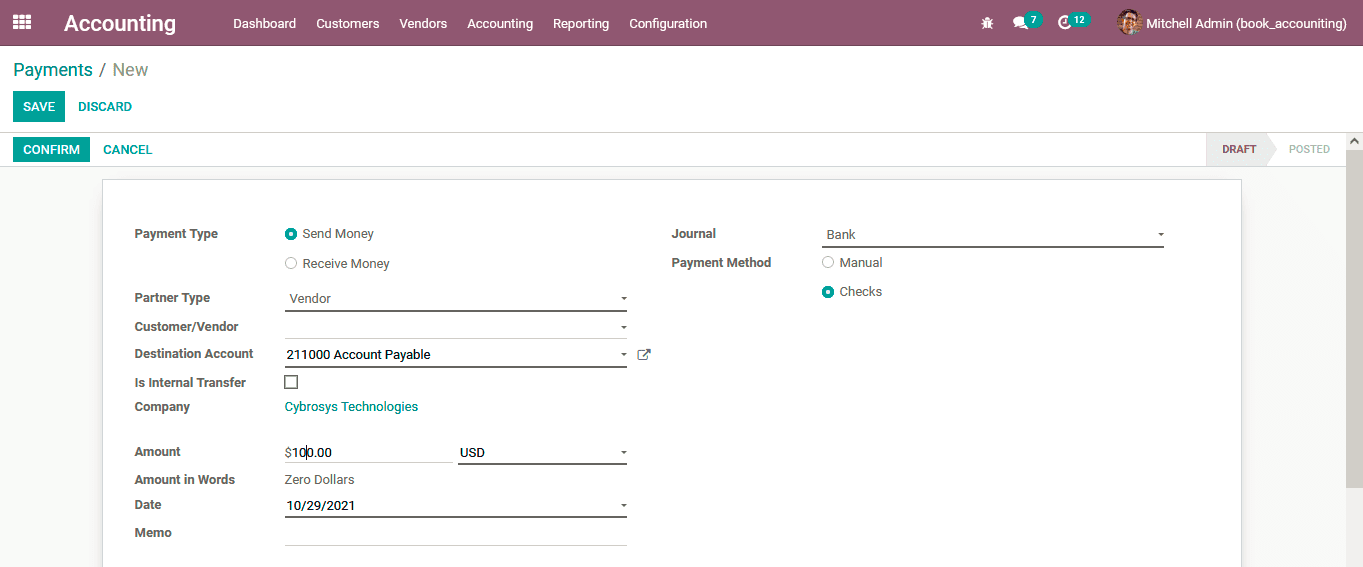
Now when the Payment is done through Checks you need to select the Payment Method
as Checks as depicted in the following screenshot.

Once the Payment aspects are configured as Checks you can select the Confirm option
that is available which will depict you with the Print Pre-Numbered Checks and the
Next Check Number can be defined. Once the Print Pre-Numbered Checks are defined
then the Print option can be selected.

If you have not defined the Check Layout you will be depicted with the following
warning message as depicted with the following image. You can select the Go To The
Configuration Panel.

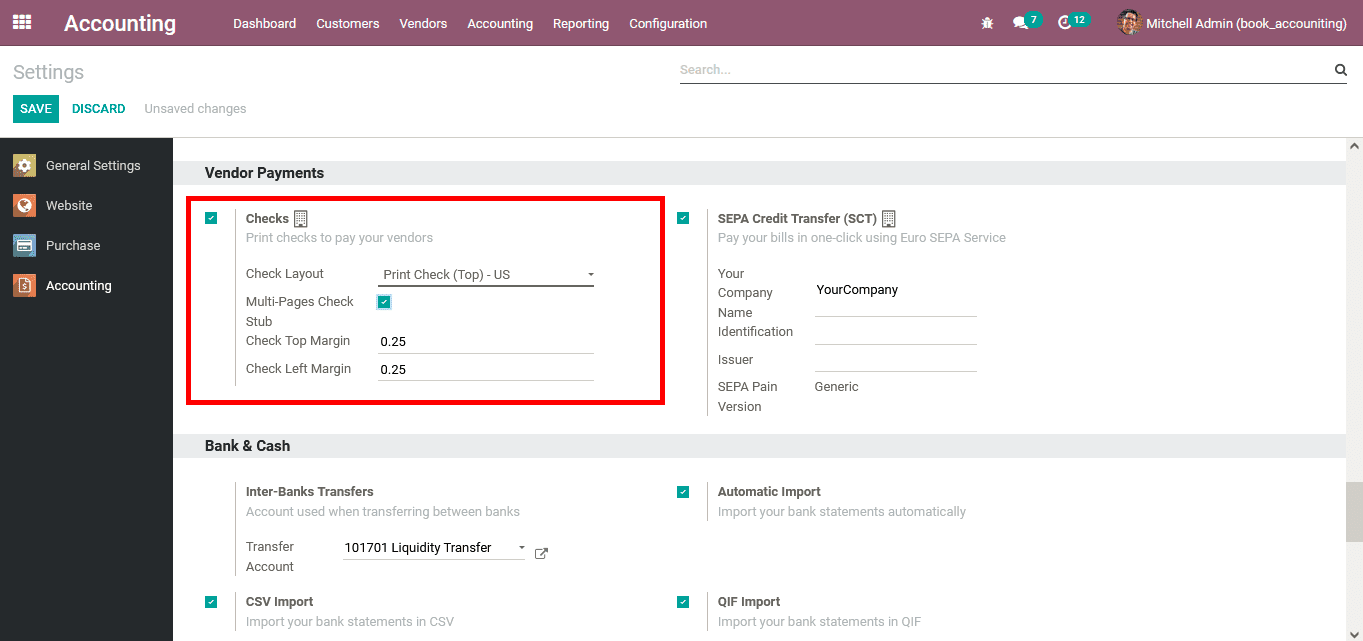
This will take you to the Settings menu of the Accounting module were under the
Vendor Payments menu where the Checks aspects can be configured. Here, the Check
Layout can be enabled which can be selected as Print Check(TOP)- US, Print Check(MIDDLE)-
US, or Print Check(BOTTOM)- US.

In this manner, you can create new Payments which can be towards the vendors or
the ones generated from them towards the company. The Odoo Payments management serves
as the best tool in the aspects of management of the Accounting operations related
to that of the financial aspect of these Payments. Let's now move on to the next
section where the aspects of the Batch payments on vendor bills are defined.