Follow Up Reports
In the real-time operations of the companies, there will be instances where the
customer will be generating the payment towards the company for the sales conducted
to them due to various reasons. Therefore, the burden falls under the business owners
to follow up the sales operations as well as its payment. The problem arises when
the manageability of this aspect becomes uncontrollable. Considering the aspects
in mind the Odoo developers have implemented a Follow-Up option where the business
owner can follow up with the customers for the payment using various activities
which can be scheduled within the company or with the customer.
The Follow Up Reports option can be accessed from the Customers menu of the Odoo
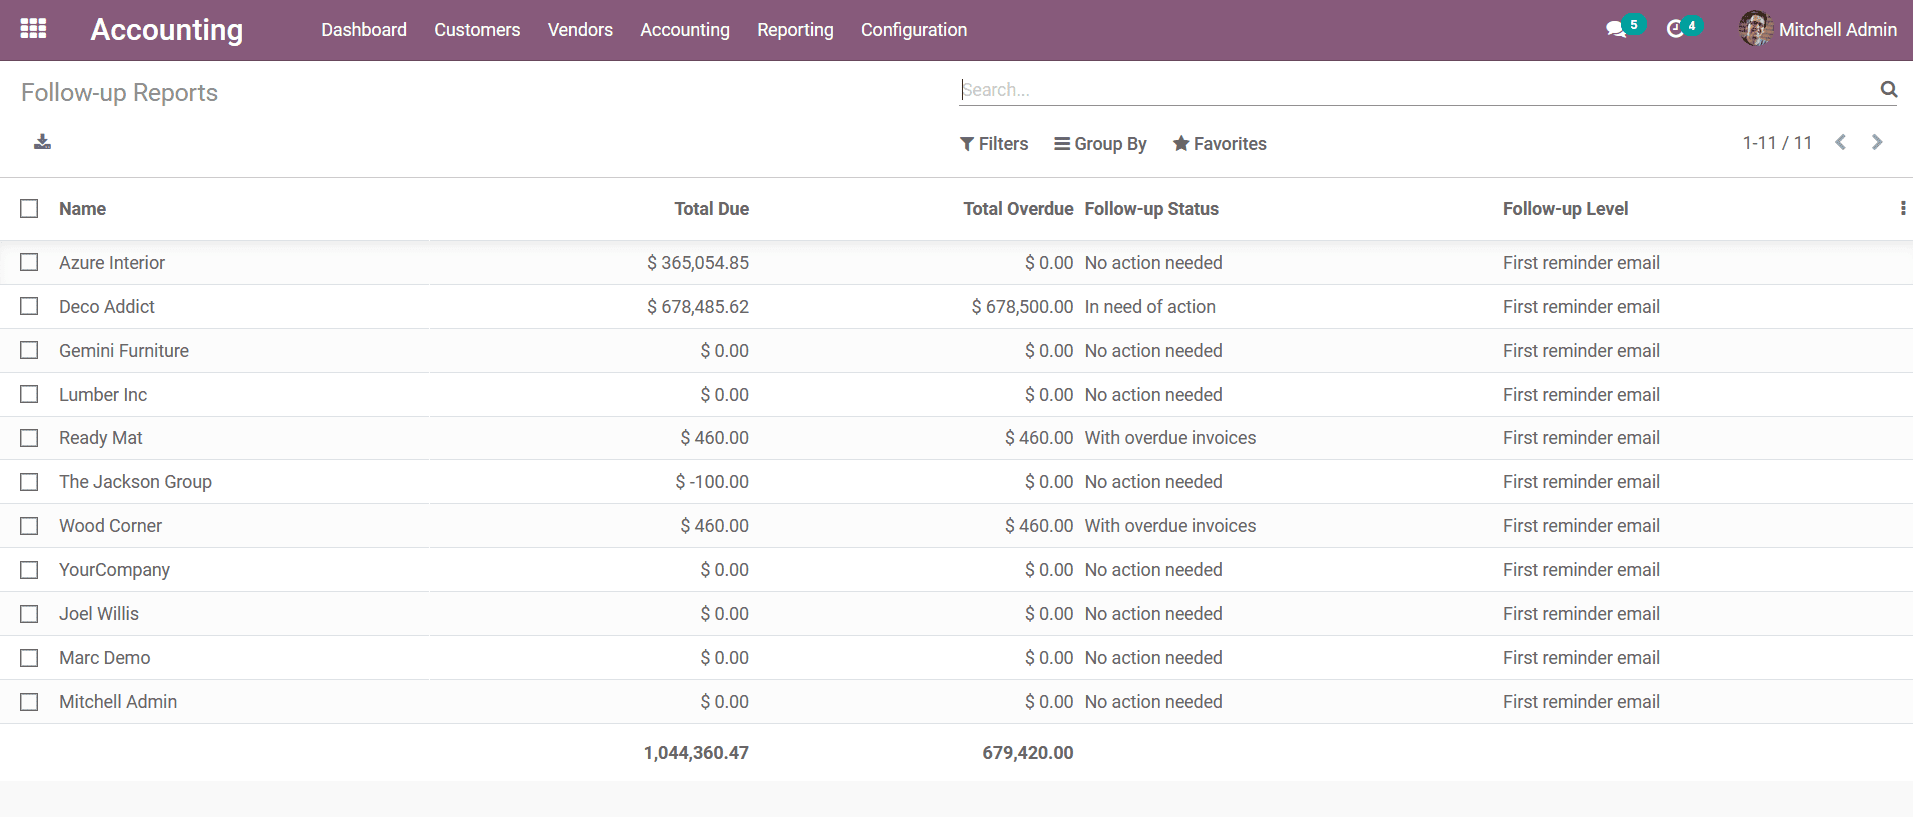
Accounting module. In the Follow Up Reports menu, all the details of the Follow
Up Reports will be depicted such as the Name, Total Due, Total Overdue, Follow-up
Status, and the Follow-Up Level. There are Filter as well as Group By options that
are available in the menu helping you to obtain the respective Follow Up Report
from the menu. Additionally, these Follow Up Reports are generated based on the
Follow Up Levels that have been configured in the platform. Furthermore, the Follow
Up Levels can be defined in the Accounting module of the Odoo platform under the
Configuration tab > Follow Up Levels (described in section 3.5.2). In addition,
the action to be performed for the respective Follow-Up activity such as email or
print letter or SMS or Manual Action or any other for each Follow-Up report is also
described in the Follow Up Level configured.
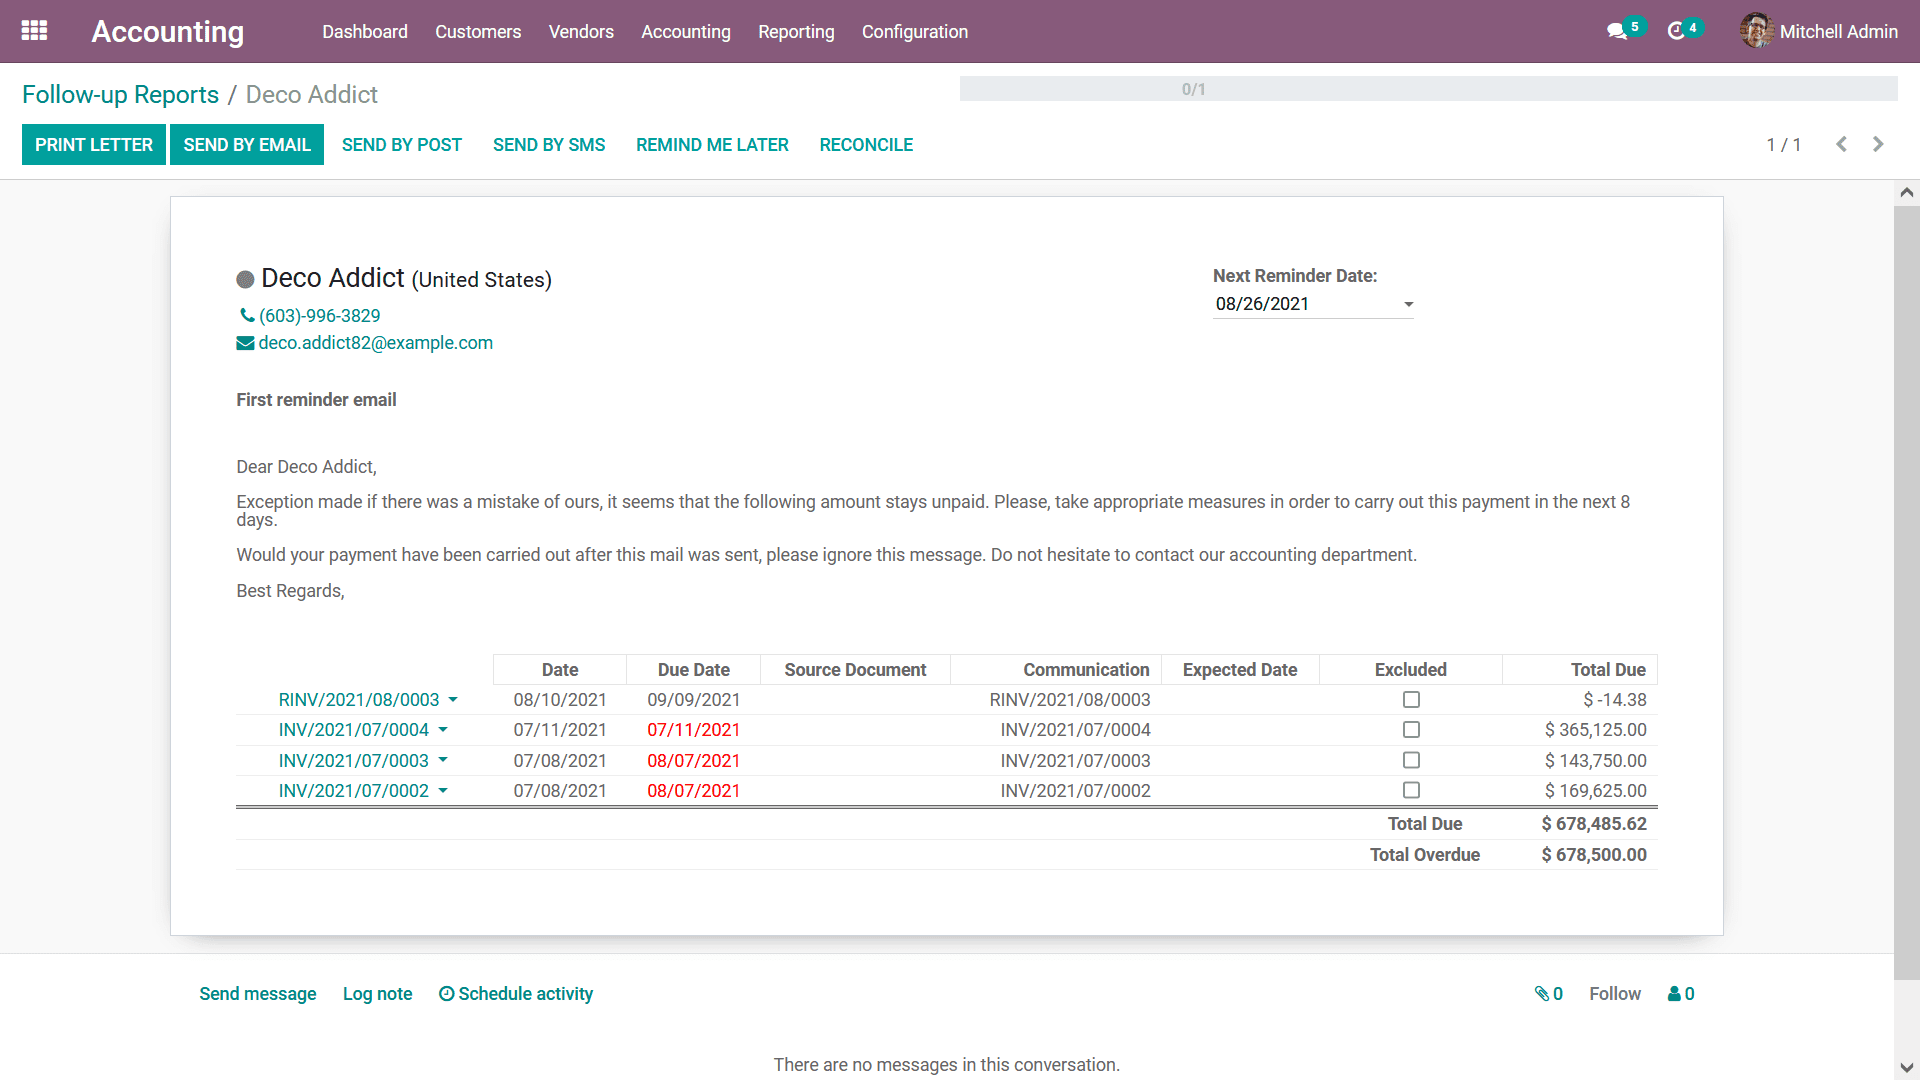
To know further detail on a Follow Up Report you can select it and will be depicted
with a similar window as shown in the following screenshot. Here, The Customer details
along with the contest information will be depicted. The Next Reminder Date will
also be depicted which can be modified. If the First reminder is an Email the First
reminder email will be described along with the contents in it.
Furthermore, all the information regarding the invoices which have been defined
in the respective Follow Up Report will be depicted in the table as shown in the
following screenshot. Here the Invoice number, Date of invoice, Due Date of payment,
Source Document, Communication, Expected Date, and the Total Due Amount will be
depicted. If you need to Exclude a respective invoice from the Follow Up Report
you can enable the Exclude option which is available concerning each invoice line.
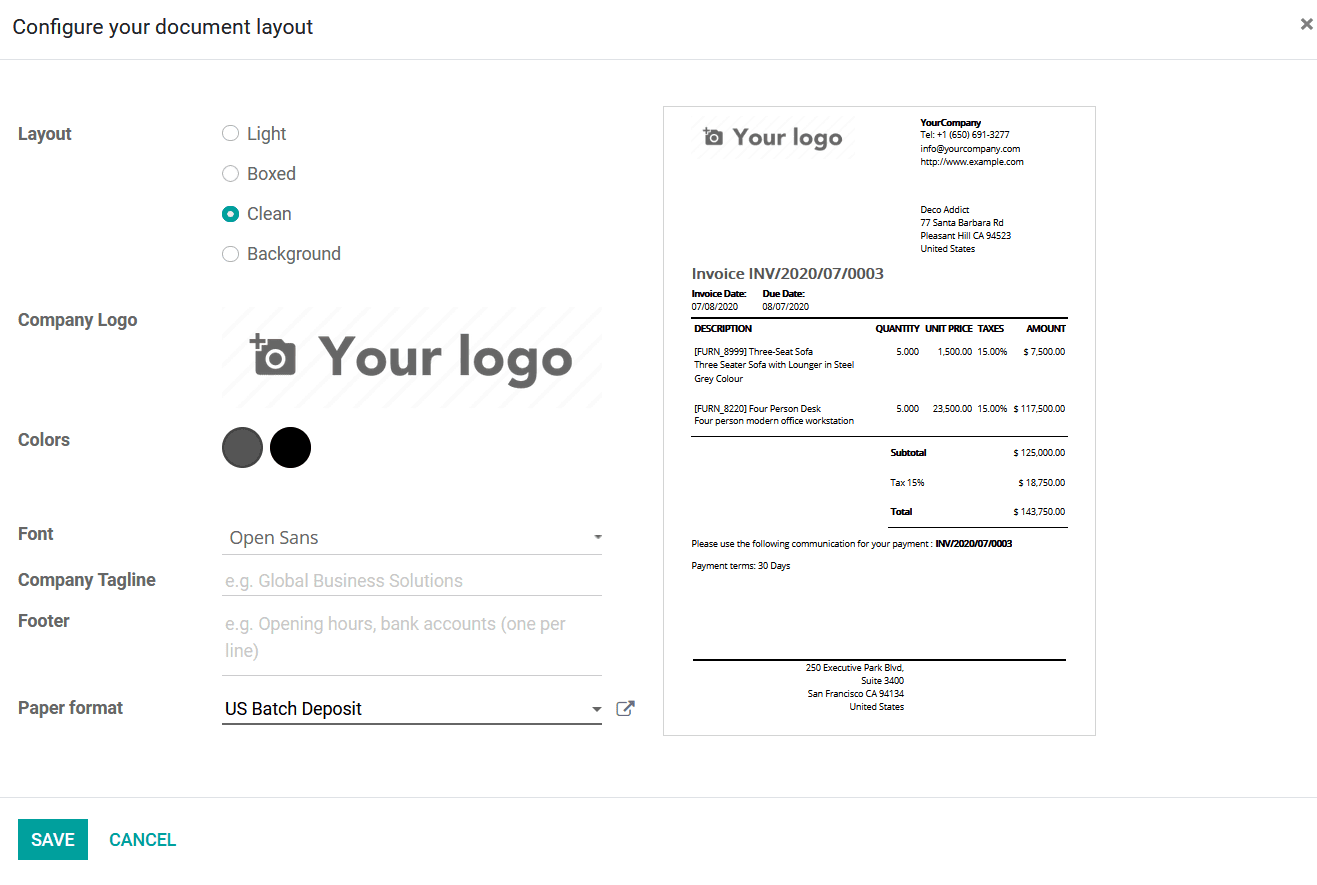
You can get a printout of the report by selecting the Print Letter option that is
available in the Follow Up Report menu and you will be depicted with a preview of
the Letter along with the various available configuration options. The Layout can
be defined either as Light, Boxed, Clean, or Background. Furthermore, the Company
logo can be defined and configured with Colors, Font to be used, Company Tagline,
Footer description, and Paper Format can be described. The Preview of the Letter
can be seen on the right side of the window and the configuration changes based
on the option you choose in operations. Finally, you can select the Save button
that is available to save the configuration of the Letter and Print the Letter.
You can send the Follow up by post to the customer by selecting the Send By post
option that is available which will direct you to the window as depicted in the
following screenshot. Here a warning message will be depicted to you about the Stamp(s)
cost to send the letter. The Stamps can be purchased from the Odoo website for the
integrated Postal services with Odoo. You can select the Send By post option if
you are acceptable with the Stamps being used and you have enough balance of Stamps
to proceed with the operation.

To indicate how the operations, work here we have integrated the Snailmail postal
service for the letter, invoices, reports and other aspects of the company operation
to be sent to the customers. You can select the Confirm option for the Follow Up
Report or the Follow-up letter to be sent via post to the customer and do ensure
that the customer address, as well as the Zip Code, has been mentioned.

You also have the option to send the Follow Up Report by email by selecting the
Send By Email option that is available in the respective Follow Up Report and you
will be depicted with the default email with the template being used. You also have
the provision to edit the details described in the email or choose a different mailing
template that has been defined. The new description can also be saved as a template
to be used for future operations.
Follow-Up Reports by text messages, to send Text messages based on the Follow-Up
Reports you can select the Send By SMS option available in the respective Follow-Up
Reports that have been described. Upon selecting to send a Text message you will
be depicted with the following window where the message can be configured. The Recipient
will be auto-defined along with the Mobile number of the in-charge person of the
company and a default Message template will be defined which can be modified based
on your need. However, you should ensure that the Text message character should
be below 65 characters and if it’s above 65 Characters the message is sent as two
SMS and you can finally select the Send SMS option available.

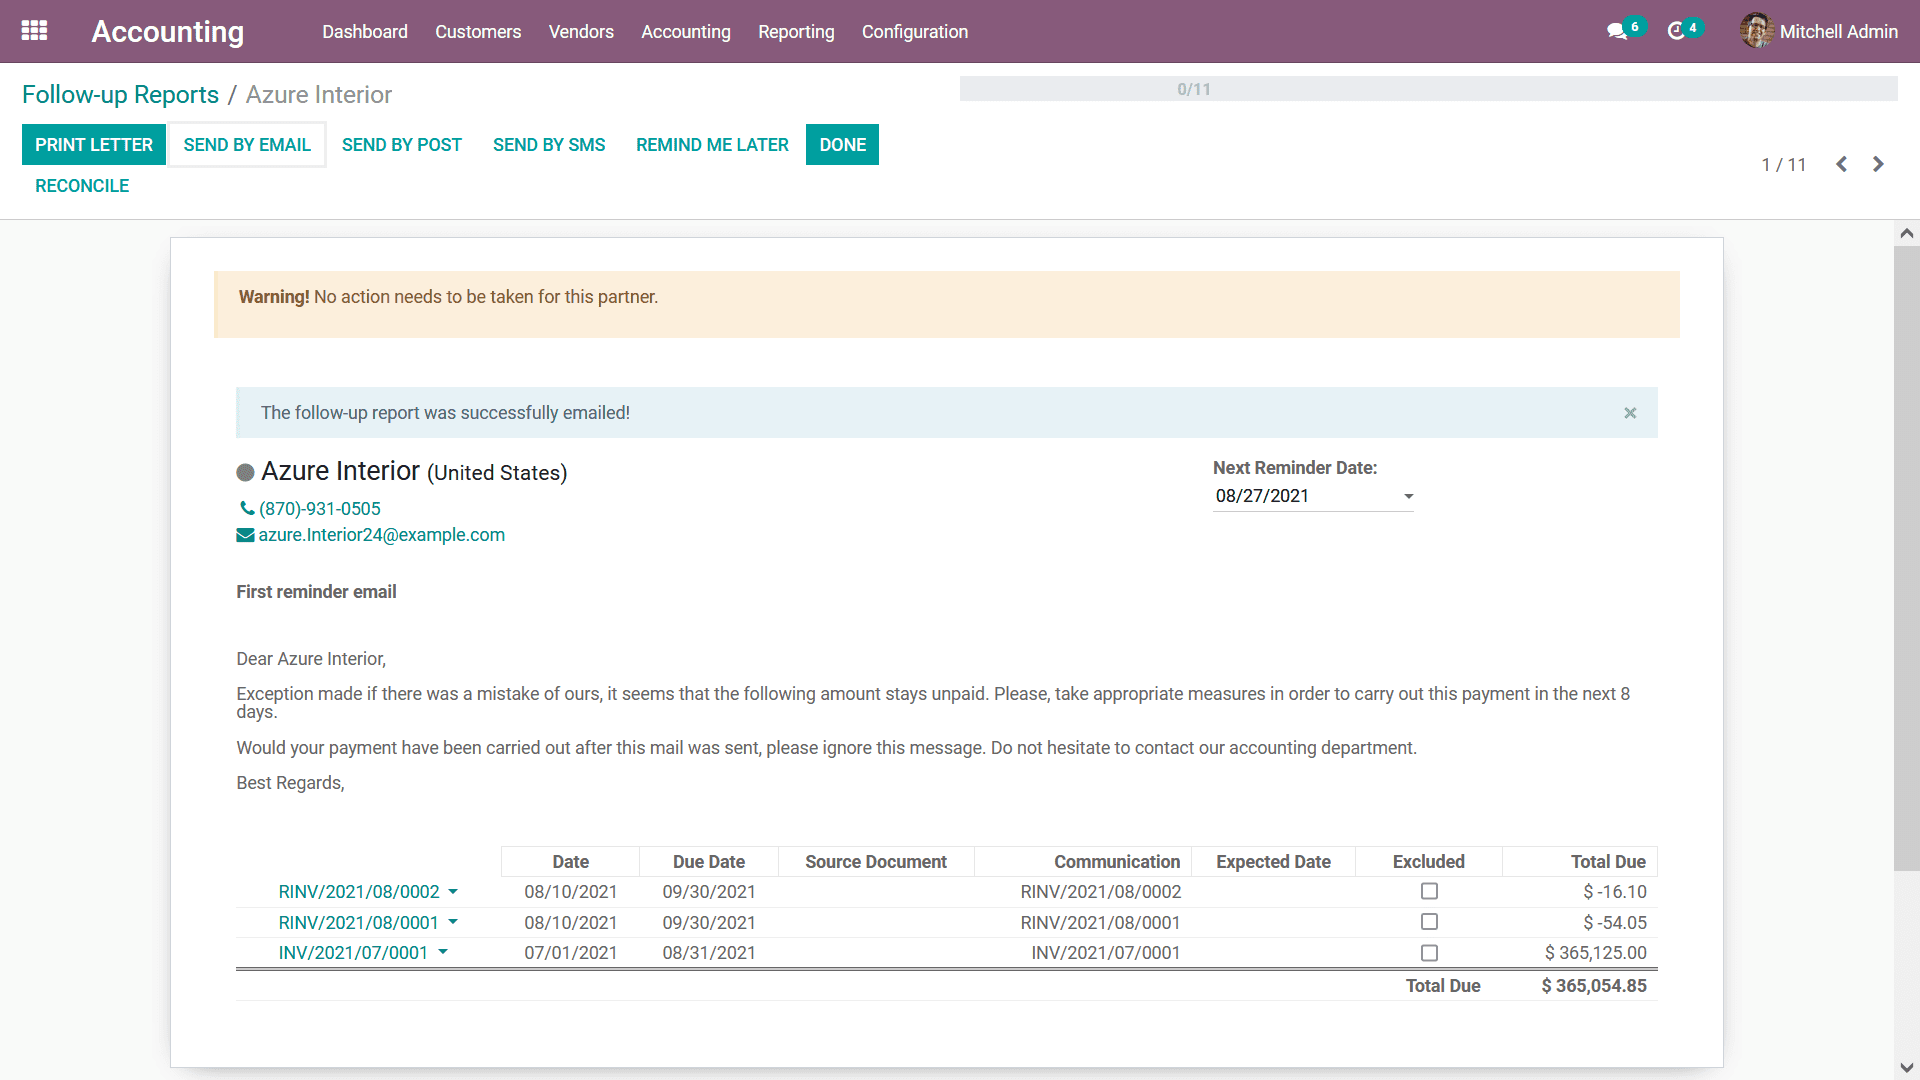
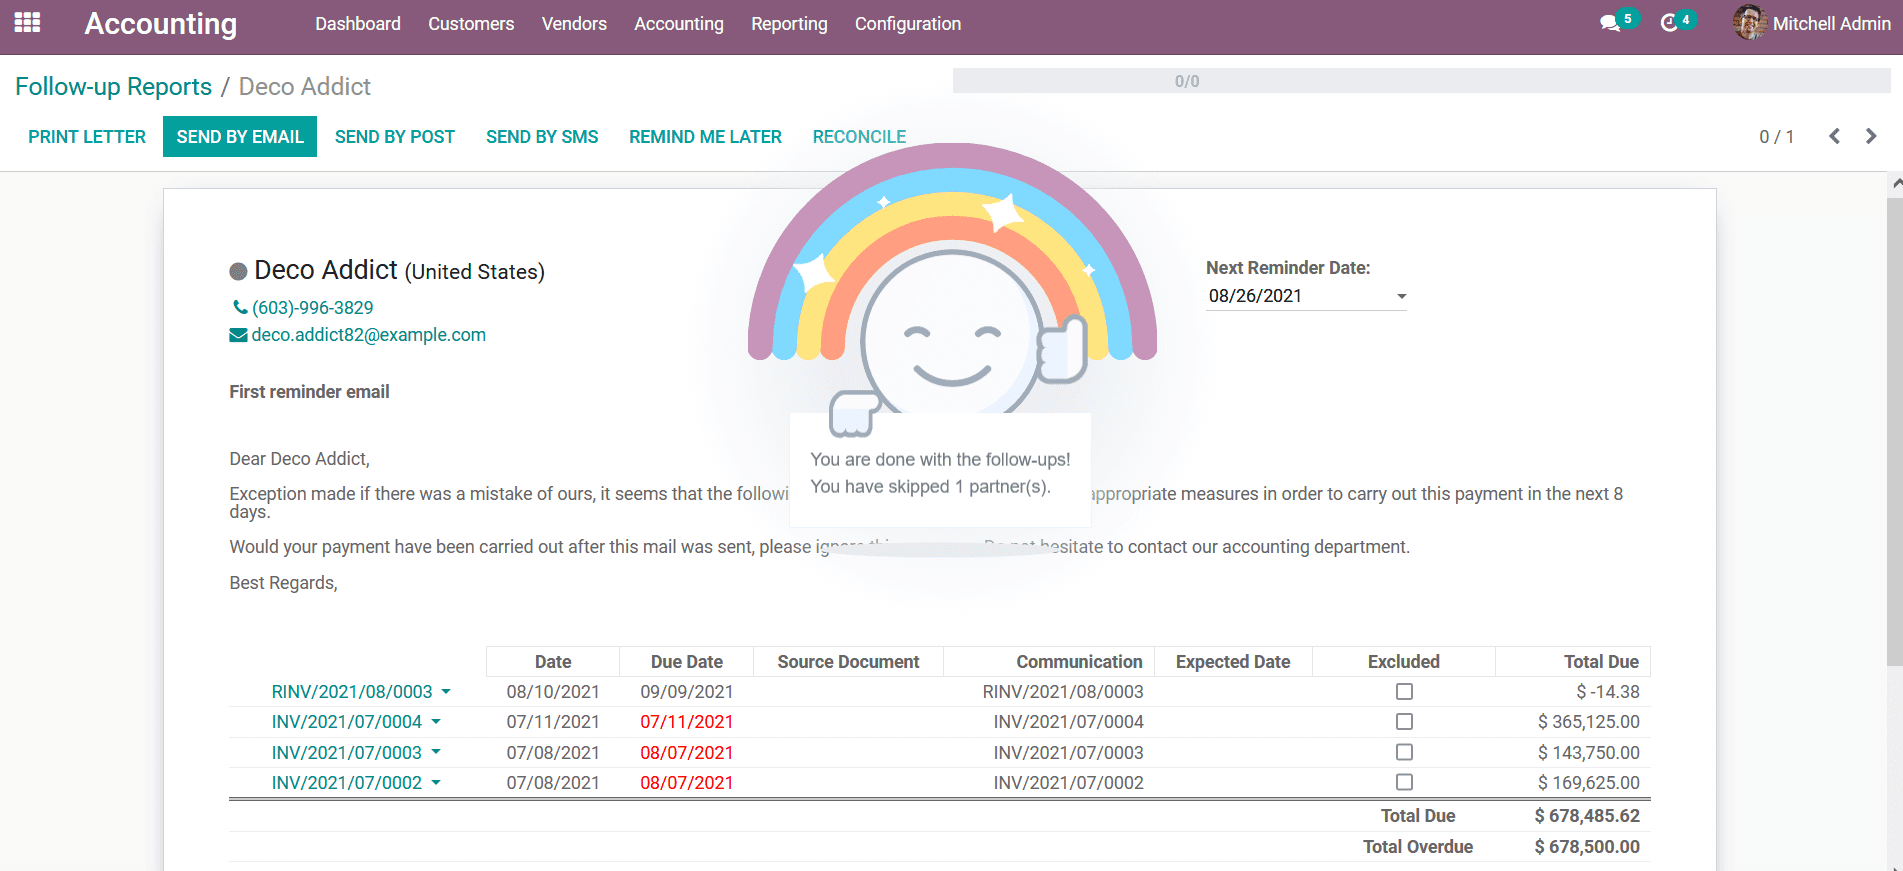
Once all the configurations as well as sending operations concerning the follow-up
reports are being done the next step is to select the Done options and then select
to reconcile it for the invoices to be matched with the bank payments which have
been described. Once up select the Done options the screen of your Follow Up Report
will depict an animation as shown in the following screenshot with an overview of
the operations.
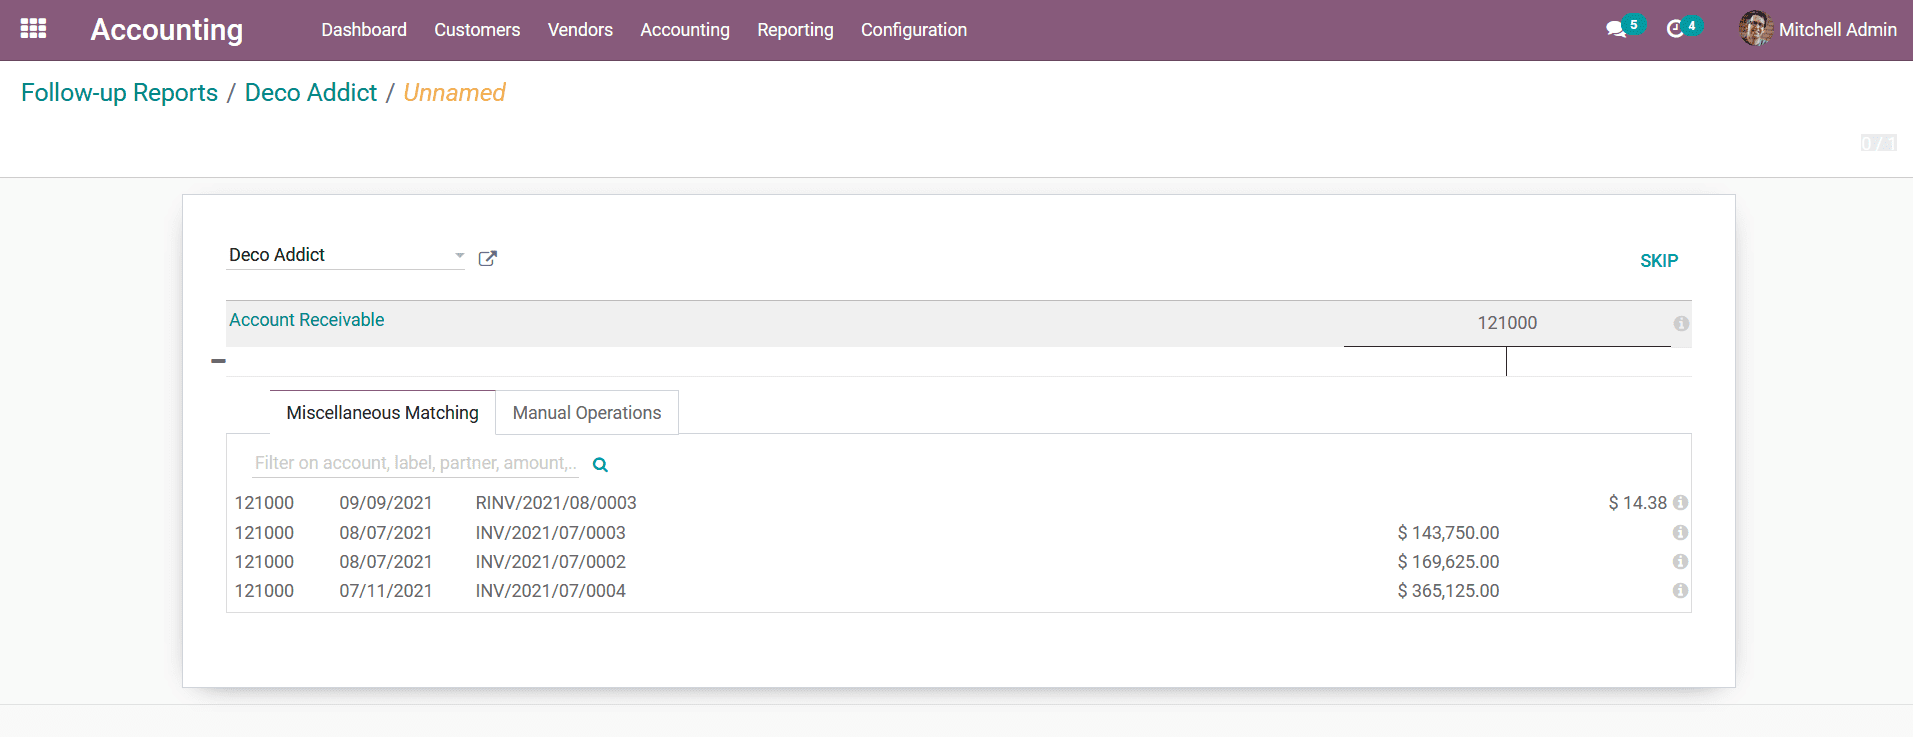
As the Follow Up Report configuration aspect has been done the next step as mentioned
earlier is to Reconcile, there is a distinctive Reconcile option that is available
under the Follow Up Report menu and upon selecting it you will be depicted with
the Reconciling menu as shown in the following screenshot. Here the name of the
customer and the amount as well as the Account details such as whether it's a Receivable
or a Payable account will be described. Furthermore, the Miscellaneous Matching
details of the respective Reconciliation will also be described.
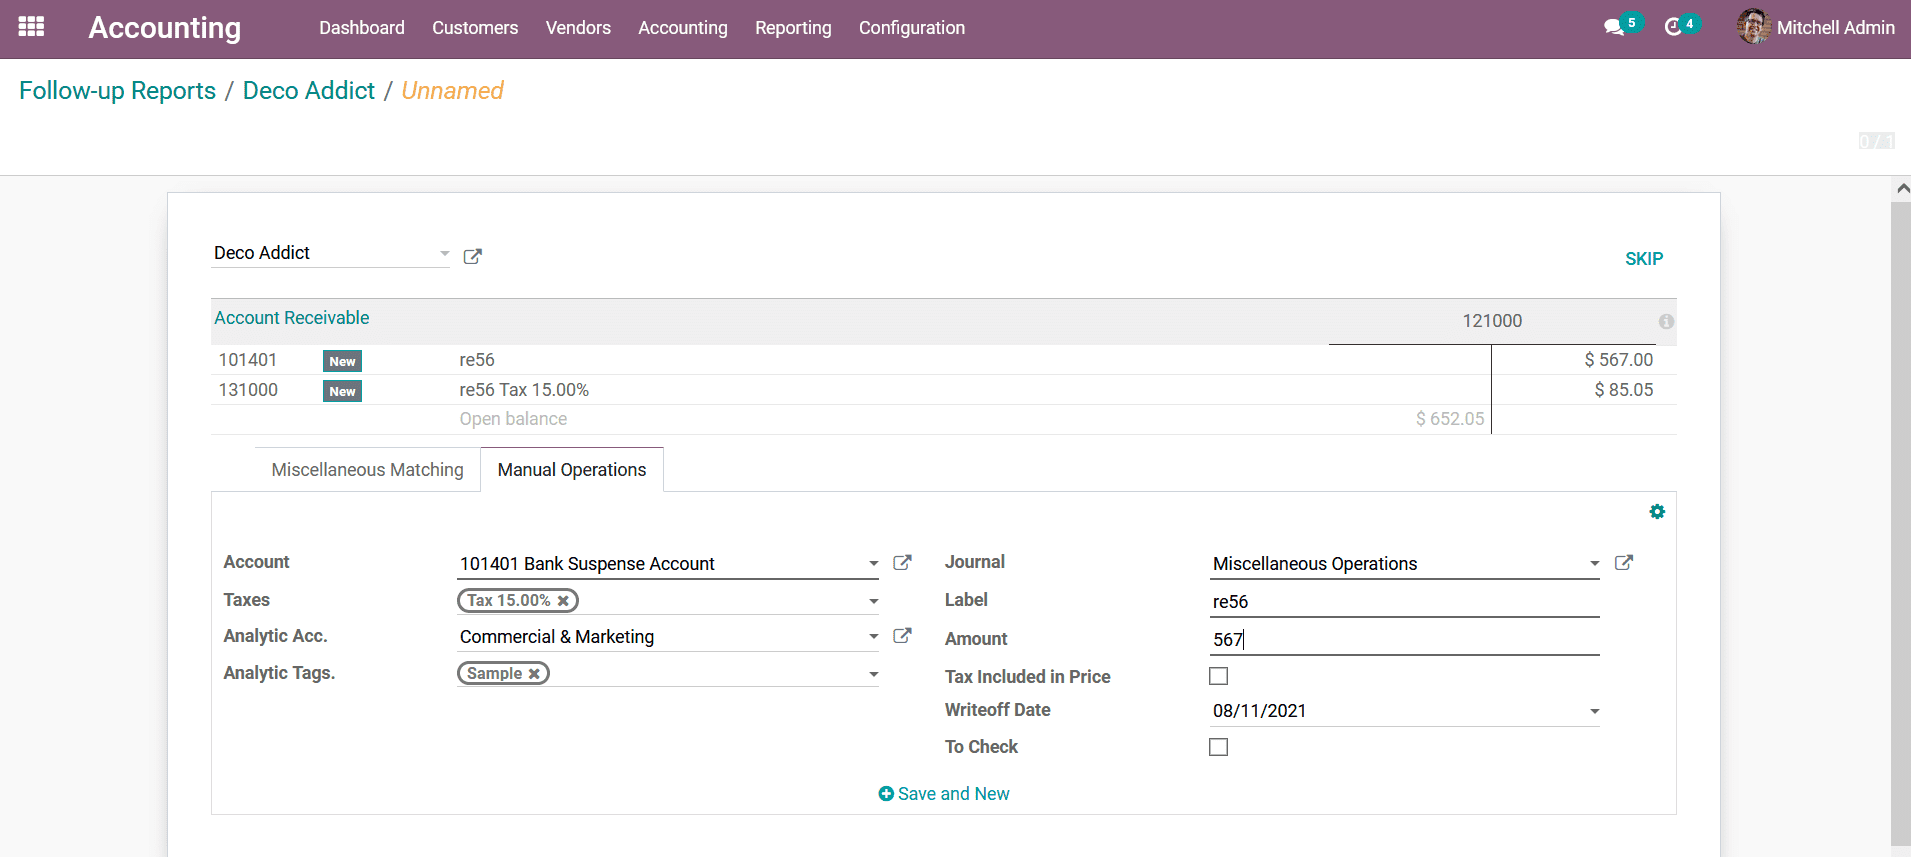
Additionally, the Manual Operations regarding each of the aspects of the Reconciliation
operations can be configured with distinctive operational capabilities. The details
such as Account, Taxes, Analytical Accounting, and Analytical Tags should be defined
for the operations to be moving ahead for the accounting management. Moreover, the
Label Journal details, Amount incorporated, Tax Included Price, and the Write off
Date can be defined. You can enable them to check option for the Reconciliation
operations to be further checked before processing.
The Follow Up Reports management with the Odoo platform will be a useful tool in
follow-up management of the payment operations and will be one of the most useful
tools to support you during real-time functioning. Let's now move on to the next
section where the Direct Debit Mandates of the customer management in the Odoo Accounting
will be discussed.