Dedicated Vendor Management Menu
The aspect of Management of the Vendors is as important as that of the Customer
management in a business because you will be functioning with multiple vendors of
operations in real-time. Moreover, there are multiple vendors of operations for
a single product or service which you keep tabs with and will be chosen based on
the internal factor of the company operations. In Odoo there is a dedicated as
well-crafted
Vendor management menu available under the Vendor's tabs of the Accounting module.
Here just as in the Customer menu, all the Vendor information will be defined along
with the partners of the company who also act as a vendor in the operations.
In the menu, all the Vendors of operations that are being defined will be depicted
along with brief information on them. The menu can be viewed in the List view also
where all the Vendors will be listed out. You will have Filtering as well as Group
by options that are available by default and the custom ones can be defined helping
you to sort and filter out the required Vendor from the long list.

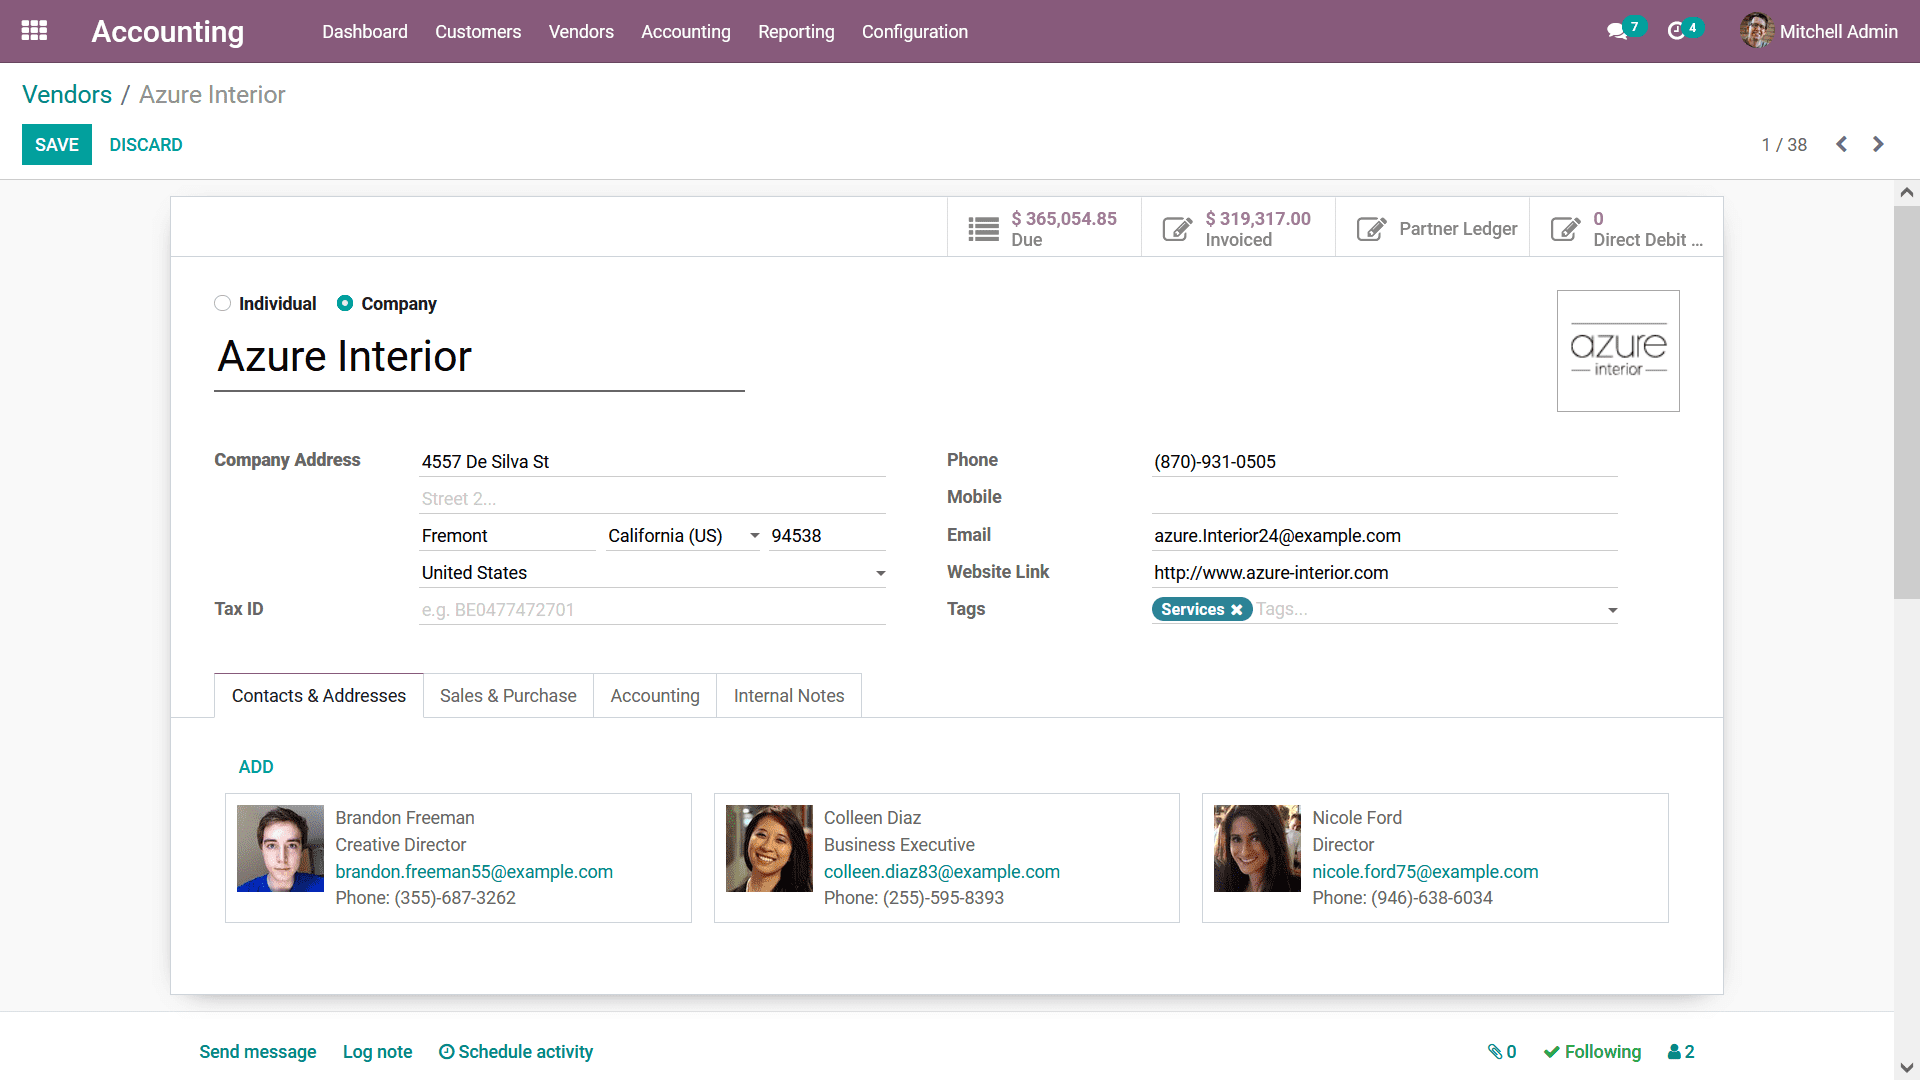
To create a new Vendor, you can select the Create option that is available which
will depict you with the Vendor creation menu as shown in the following screenshot.
Here, the Vendor should be defined as an Individual or a Company and then define
the Name of the Vendor along with the Company Address the Country of operations,
and the ZIP Code. In addition, the Tax ID and the contact information such as Phones,
Mobile numbers along with the Email address, Website link of the company website
should be defined. You can also define the tags on the respective Vendor for internal
purposes.

Under the Contacts & Addresses tab, you can define all the people and their address
of operations associated with the Vendor and the people whom your company contacts
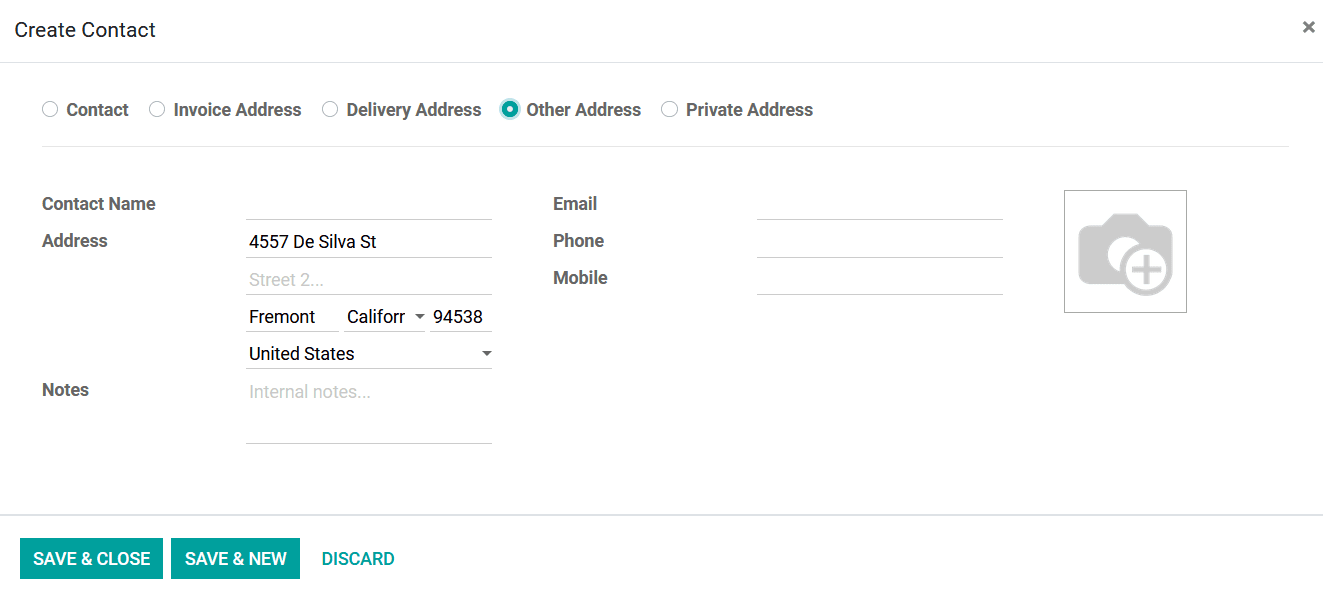
in regards to the purchase operations. You can select the Add option available with
the following pop-up window to define the Contact and their Address. Here, initially,
you have to assign which type of address is to be defined. The Contact type can
be just a piece of regular Contact information, Invoice Address, Delivery Address,
Other Addresses, or a Private Address. Once the Address type is being defined you
now need to further define the Contact Information. The Contact Name, Address along
with the country name, and the Zipcode should be defined. If any Notes regarding
the respective address can also be defined along with the Email address, Phone,
and Mobile number. You can add multiple Contact information for a Vendor being defined
for that you can choose the Save & New option or else you can choose the Save &
Close option that is available.

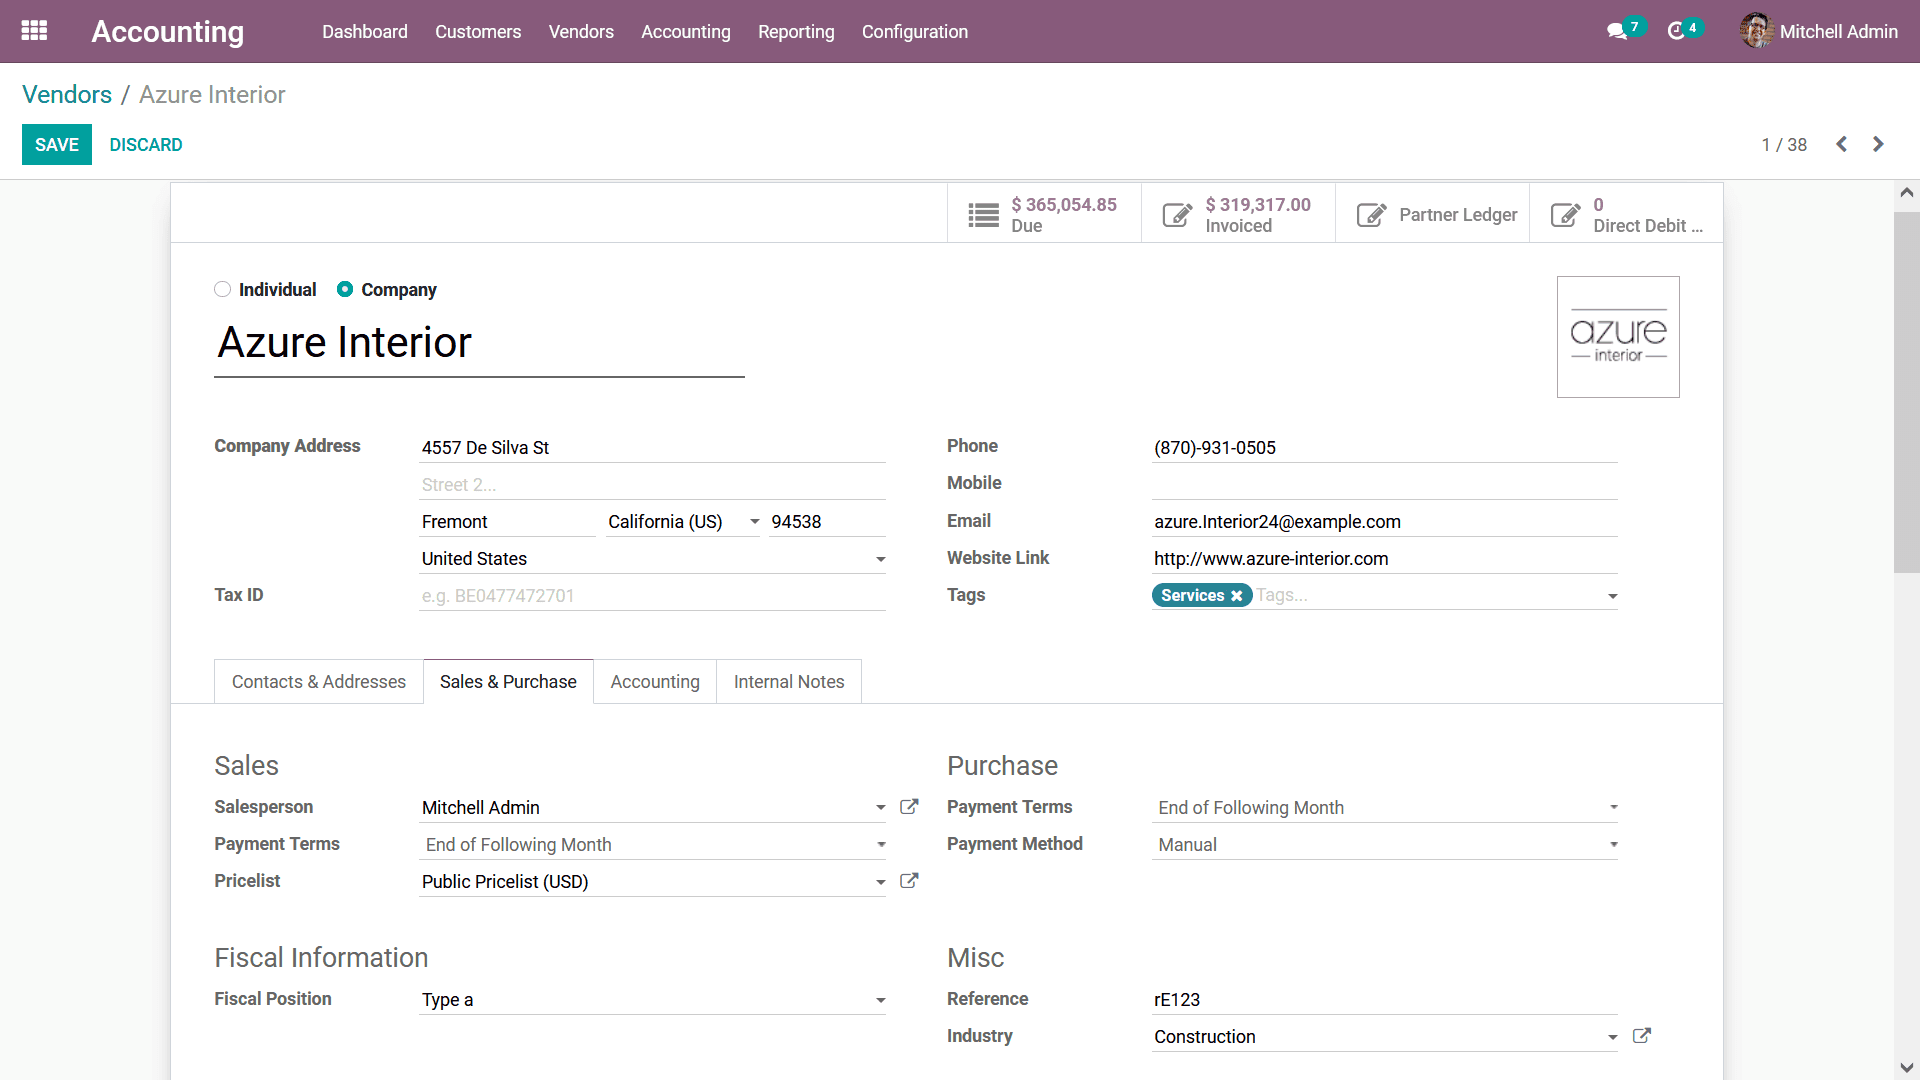
Next, we have to define the Sales & Purchases tab where you can configure all the
aspects with regards to the Purchase operations with the vendor. In case if the
respective Vendor is also a partner of the company and the sales are being conducted
you also have to configure the aspects of the sales operations. Under the Sales
tab the Salesperson, Payment Terms, and the Pricelist details should be defined.
Further, you can define the Payment Terms and the Payment Method under the Purchase
tab. The Fiscal Position can be defined under the Fiscal Information Tab. Additionally,
the Miscellaneous aspects such as the Reference through with the Vendor was obtained
as well the Industry or sector in which they function can also be defined.

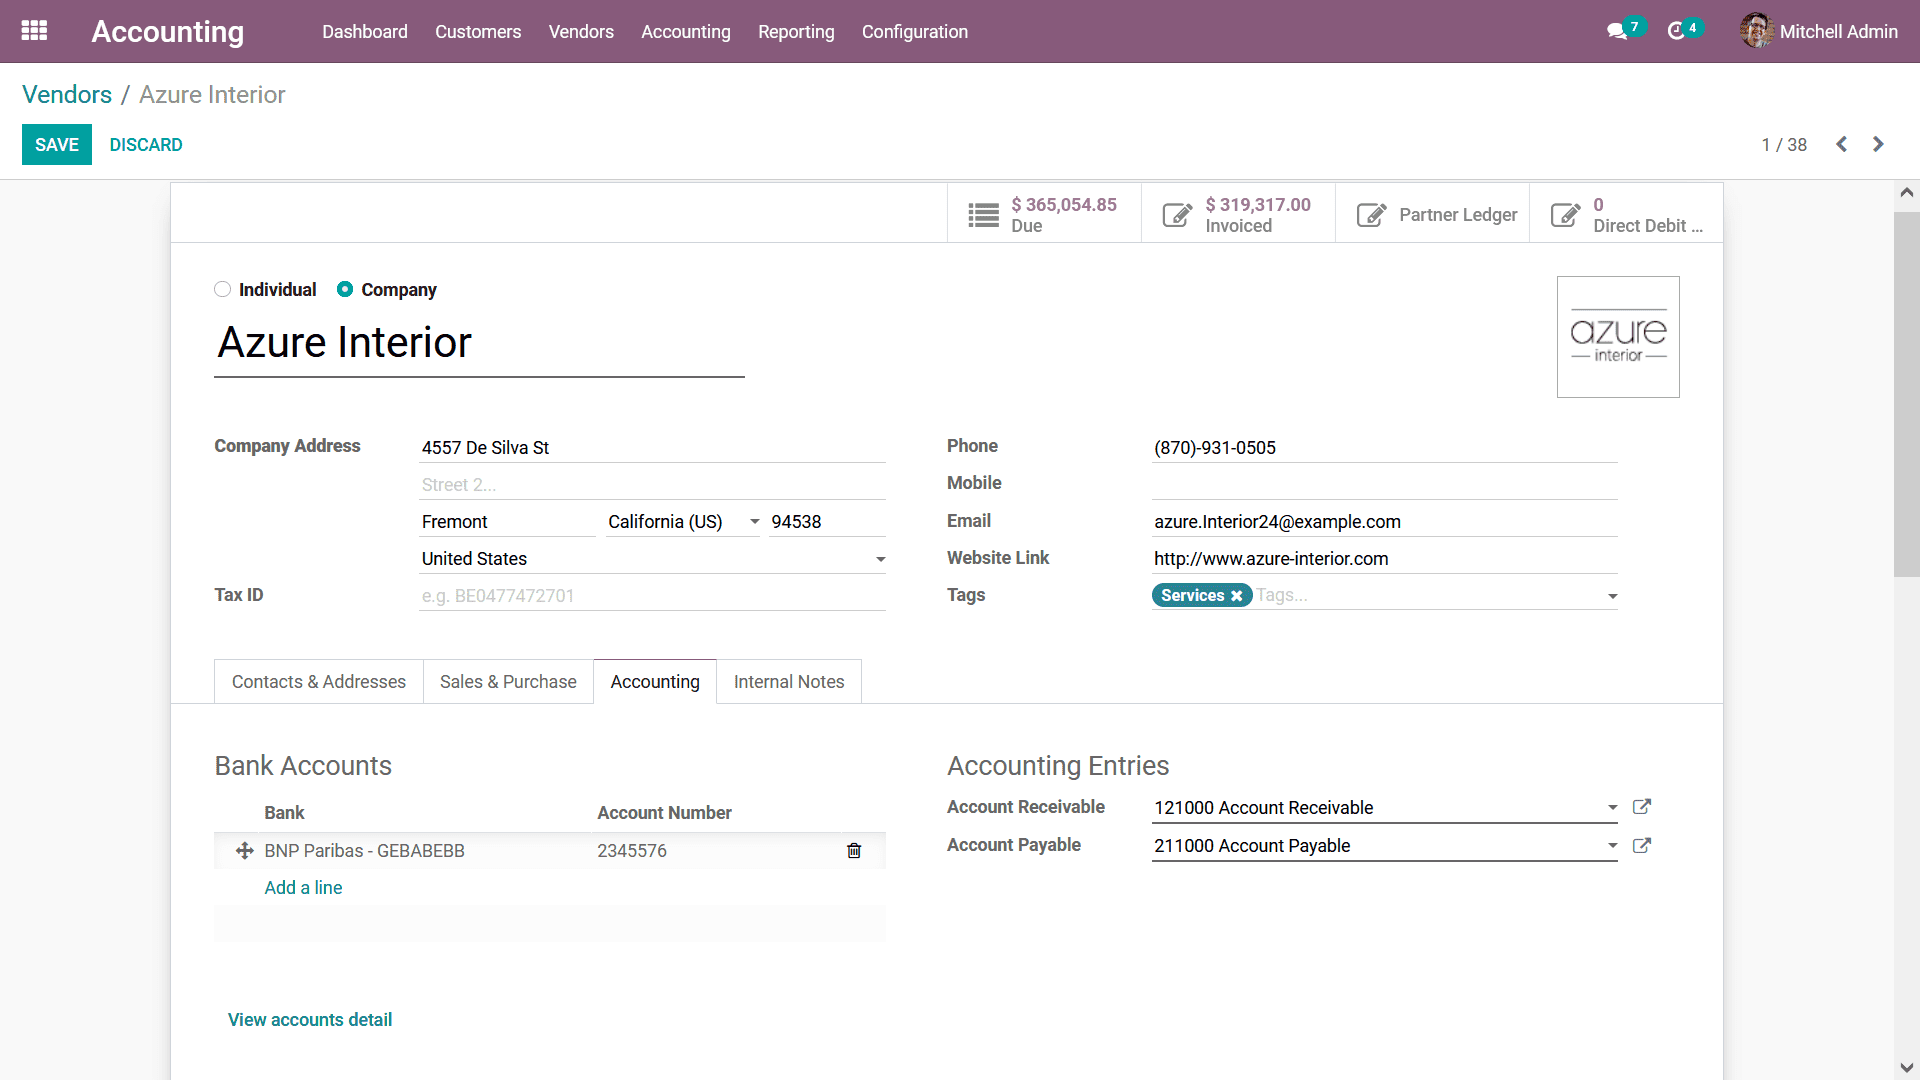
Under the Accounting tab concerning the Vendor, you can define the Bank Account
details for the business operations by selecting the Add a line option that is
available.
Moreover, if you have multiple accounts to be defined it can also be done. You can
select the View Accounts details option that is available which will describe the
details of the Accounts. Upon selecting the Add a line option you will be depicted
with the menu where the Account Number, Type of the Account, Bank details, ABA/Routing,
Currency details, and the Account Holder Name can be described. The Accounting Entities
such as the Accounts Receivable and the Accounts Payable can be selected for the
defined Accounts of operations in the company.

Finally, under the Internal Notes tab the Primary Vendor details can be described
along with a Warning on the Invoice which can be a message based on the need. The
Warning and the Messages can be custom-defined and you can always opt for no warning
and messages concerning the Vendor.

All the Vendor management tools that have been defined will aid for the effectiveness
in the Vendor operations in the company which can be controlled and managed by these
distinctive tools and functions.
In Conclusion, this chapter entirely focused on describing the Financial management
aspects of vendors and customers with the dedicated Odoo Accounting module. All
the functional tools regarding the Customer as well as the Vendor management as
described in detail covering all the tools and functions menus available under it.
In the next chapter, we will be focusing on the Accounting management tools in the
Odoo Accounting module and the various aspects of it will be described in detail.