Customer Management
The management of customers will be the prime objective of the operation of various
businesses however, what most of them lack will be the aspects of dedicated management
which will do the operations of tasks to be run with ease. The Odoo ERP is a well-defined
solution that offers effective business management of the entire aspect of the company.
Moreover, with dedicated aspects of business management covering all aspects of
the company operations such as customer management.
Regarding the Accounting aspect of the company operations with Odoo, there is a
dedicated customer management section menu available which will avail for all the
operations regarding the customer management operations with regards to the Accounting
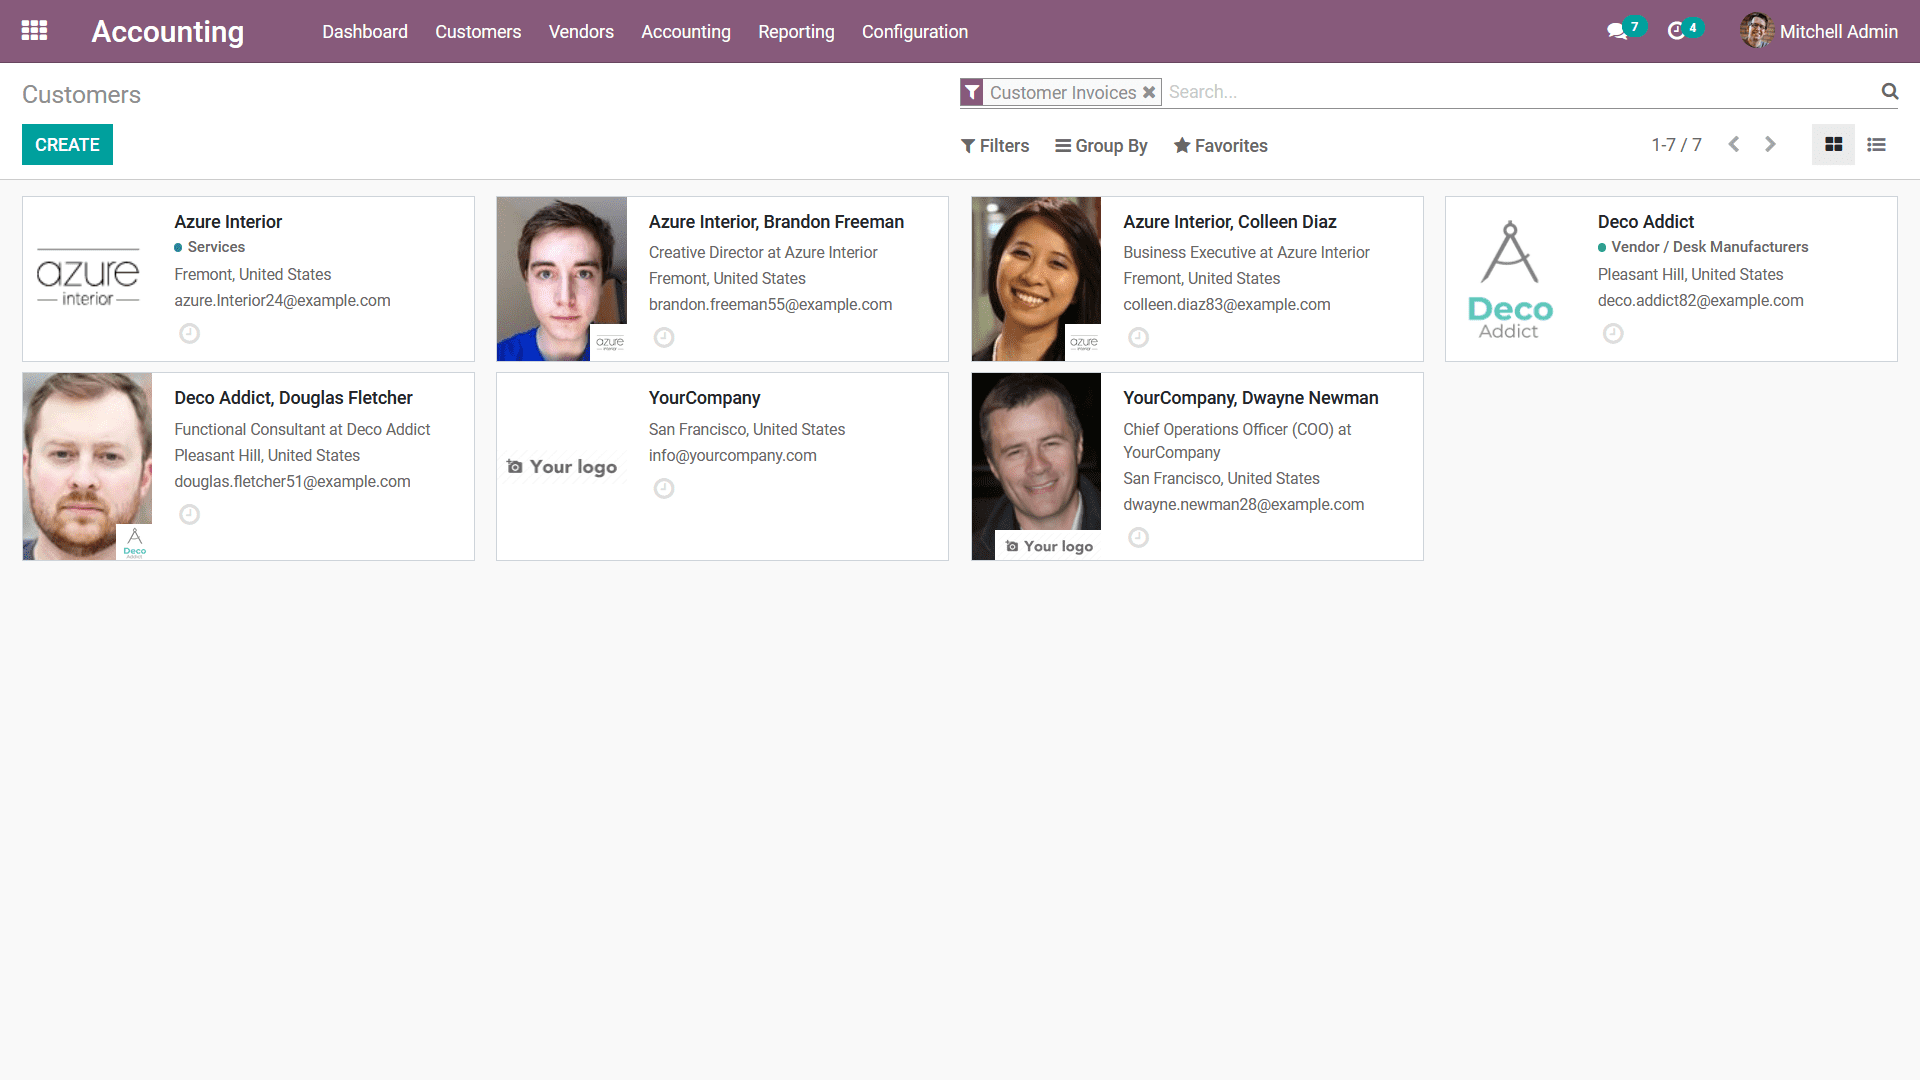
aspects. The Customer's menu can be selected for the Customers tab of the Accounting
module dashboard and you will be depicted with the following screenshot where the
entire customer of your company, both organizations as well as individuals will
be described. Viewable in Kanban as well as List view the Customers menu will depict
the entire information in a well descriptive way for the users as shown in the following
screenshot. In addition, with the Filter as well as Group by options available you
will be able to filter out the required customer information using the default as
well as custom filtering options.
You can select to edit the Customer details any time by selecting it from the list
and to create a new Customer you can select the Create option that is available.
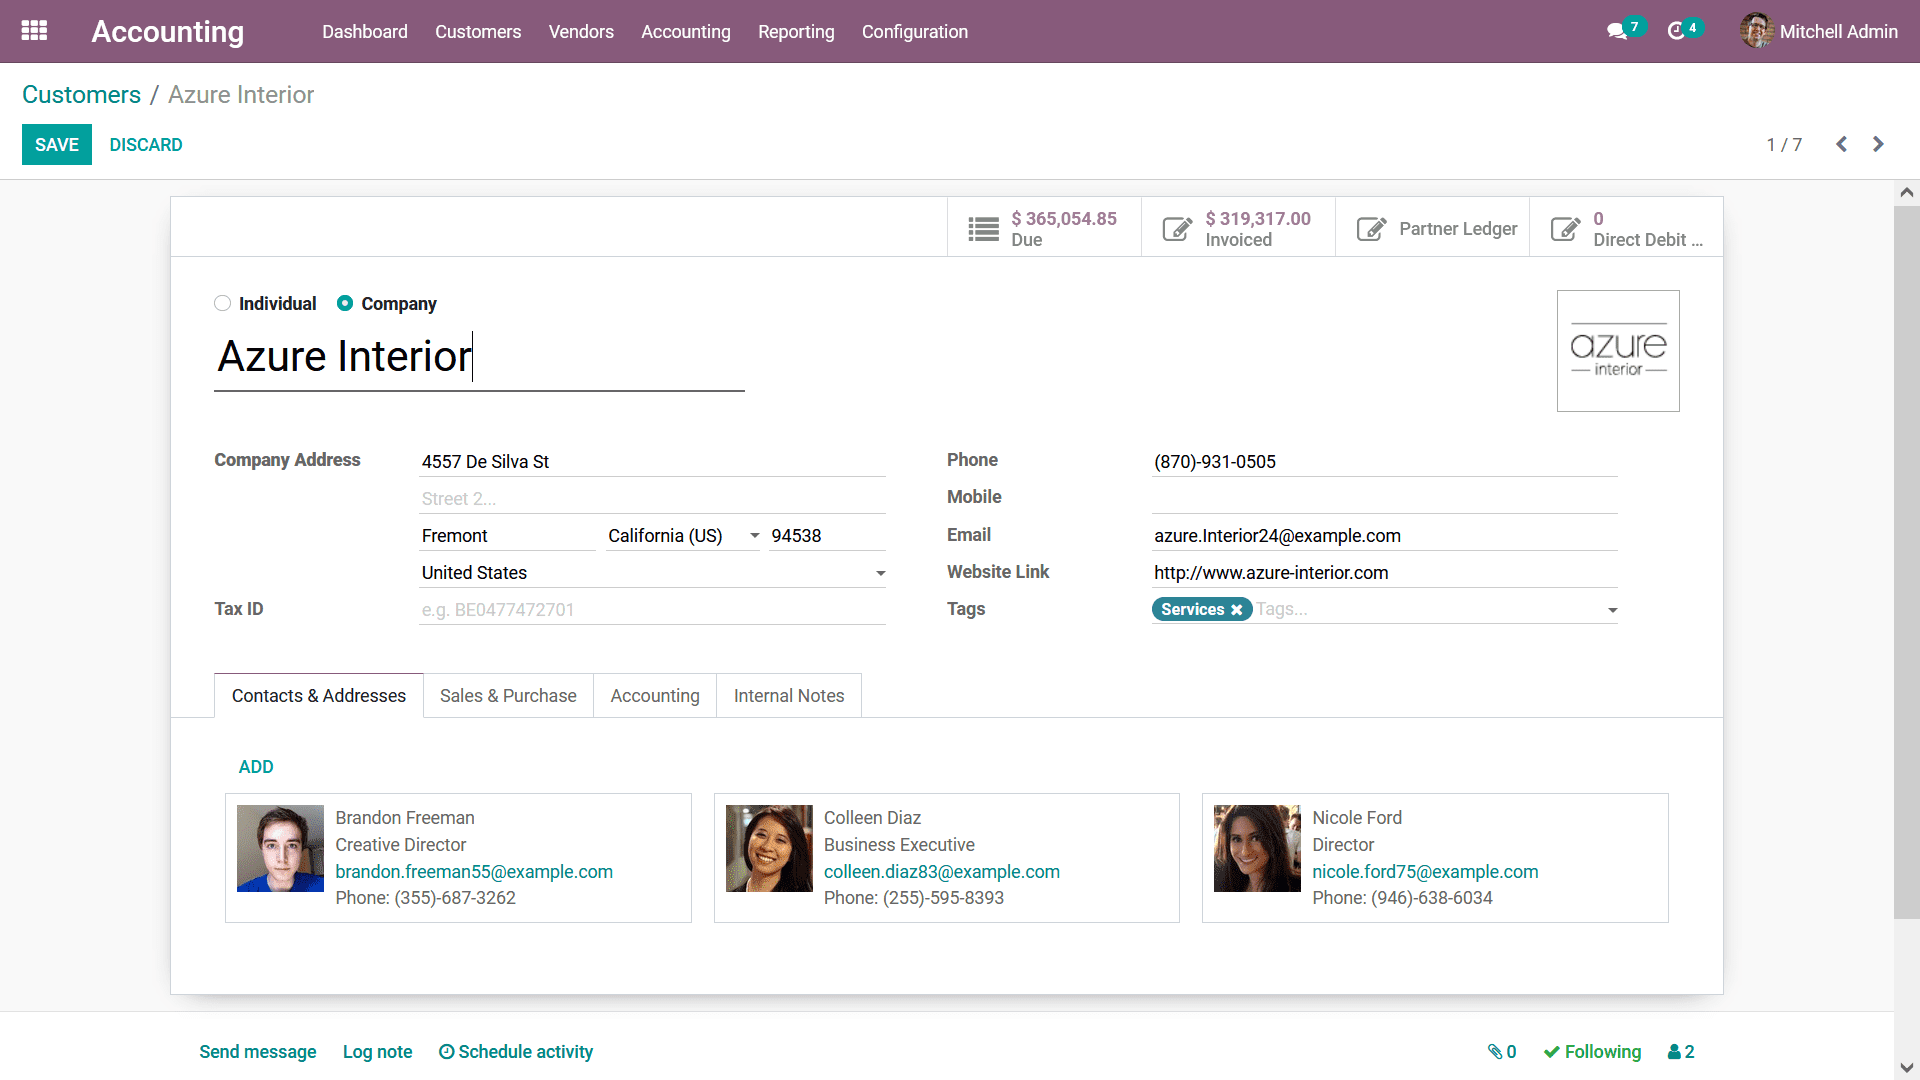
In the Customer creation window, you have to first select whether the Customer is
an Individual or a Company, then provide the Name. Further, you have to define the
Company Address along with the location and the Zip Code of operation. The Tax ID
should be also defined for the financial aspects of operations.
Additionally, the contact details such as the Phone and Mobile number along with
the Email address and the Website link should be defined. Furthermore, the Customer
Tags which have been defined in the platform can be allocated which will be defined
in the Customer management aspect of the Odoo platform. You will also have the provision
to create new Tags straight from this menu.
Next, we have to define the Contacts & Addresses of the respective Customer in the
distinctive menu by selecting the ADD options available. You can define multiple
Addresses of operations of a respective company or the individual.
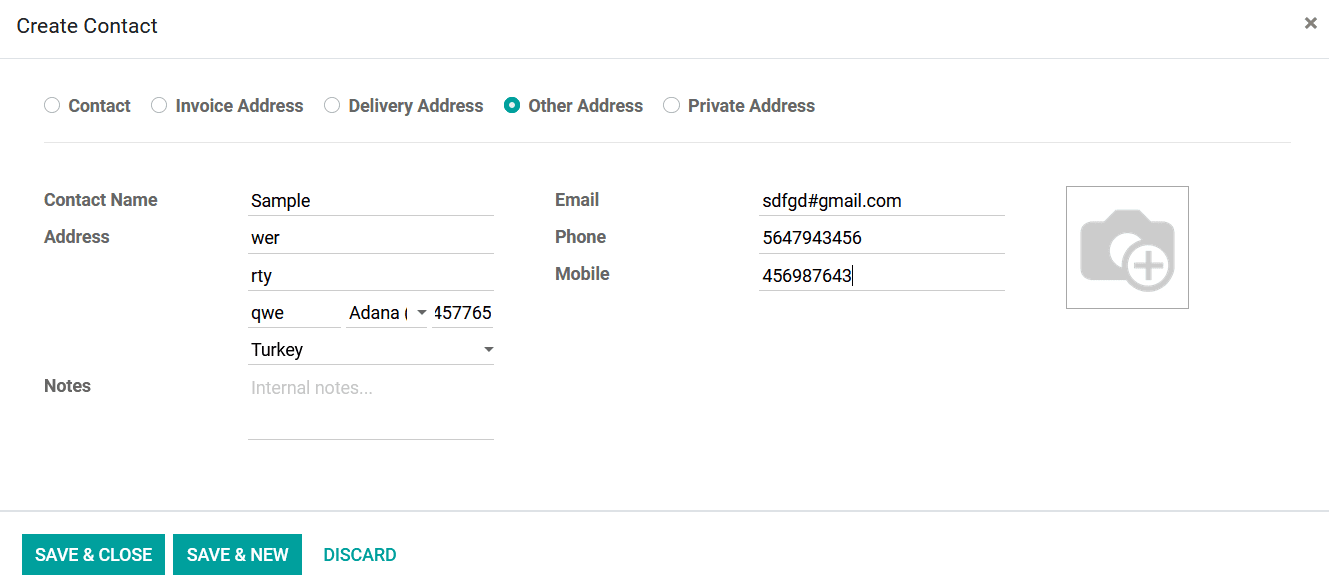
Upon selecting to Add Contacts & Addresses you will be depicted with the following
pop-up window to define the Contact. Here, initially, you have to assign which type
of address is to be defined. The Contact type can be just a piece of regular Contact
information, Invoice Address, Delivery Address, Other Addresses, or a Private Address.
Once the Address type is being defined you now need to further define the Contact
Information. The Contact Name, Address along with the country name, and the Zipcode
should be defined. If any Notes regarding the respective address can also be defined
along with the Email address, Phone, and Mobile number. You can add multiple Contact
information for a Customer being defined for that you can choose the Save & New
option or else you can choose the Save & Close option that is available.
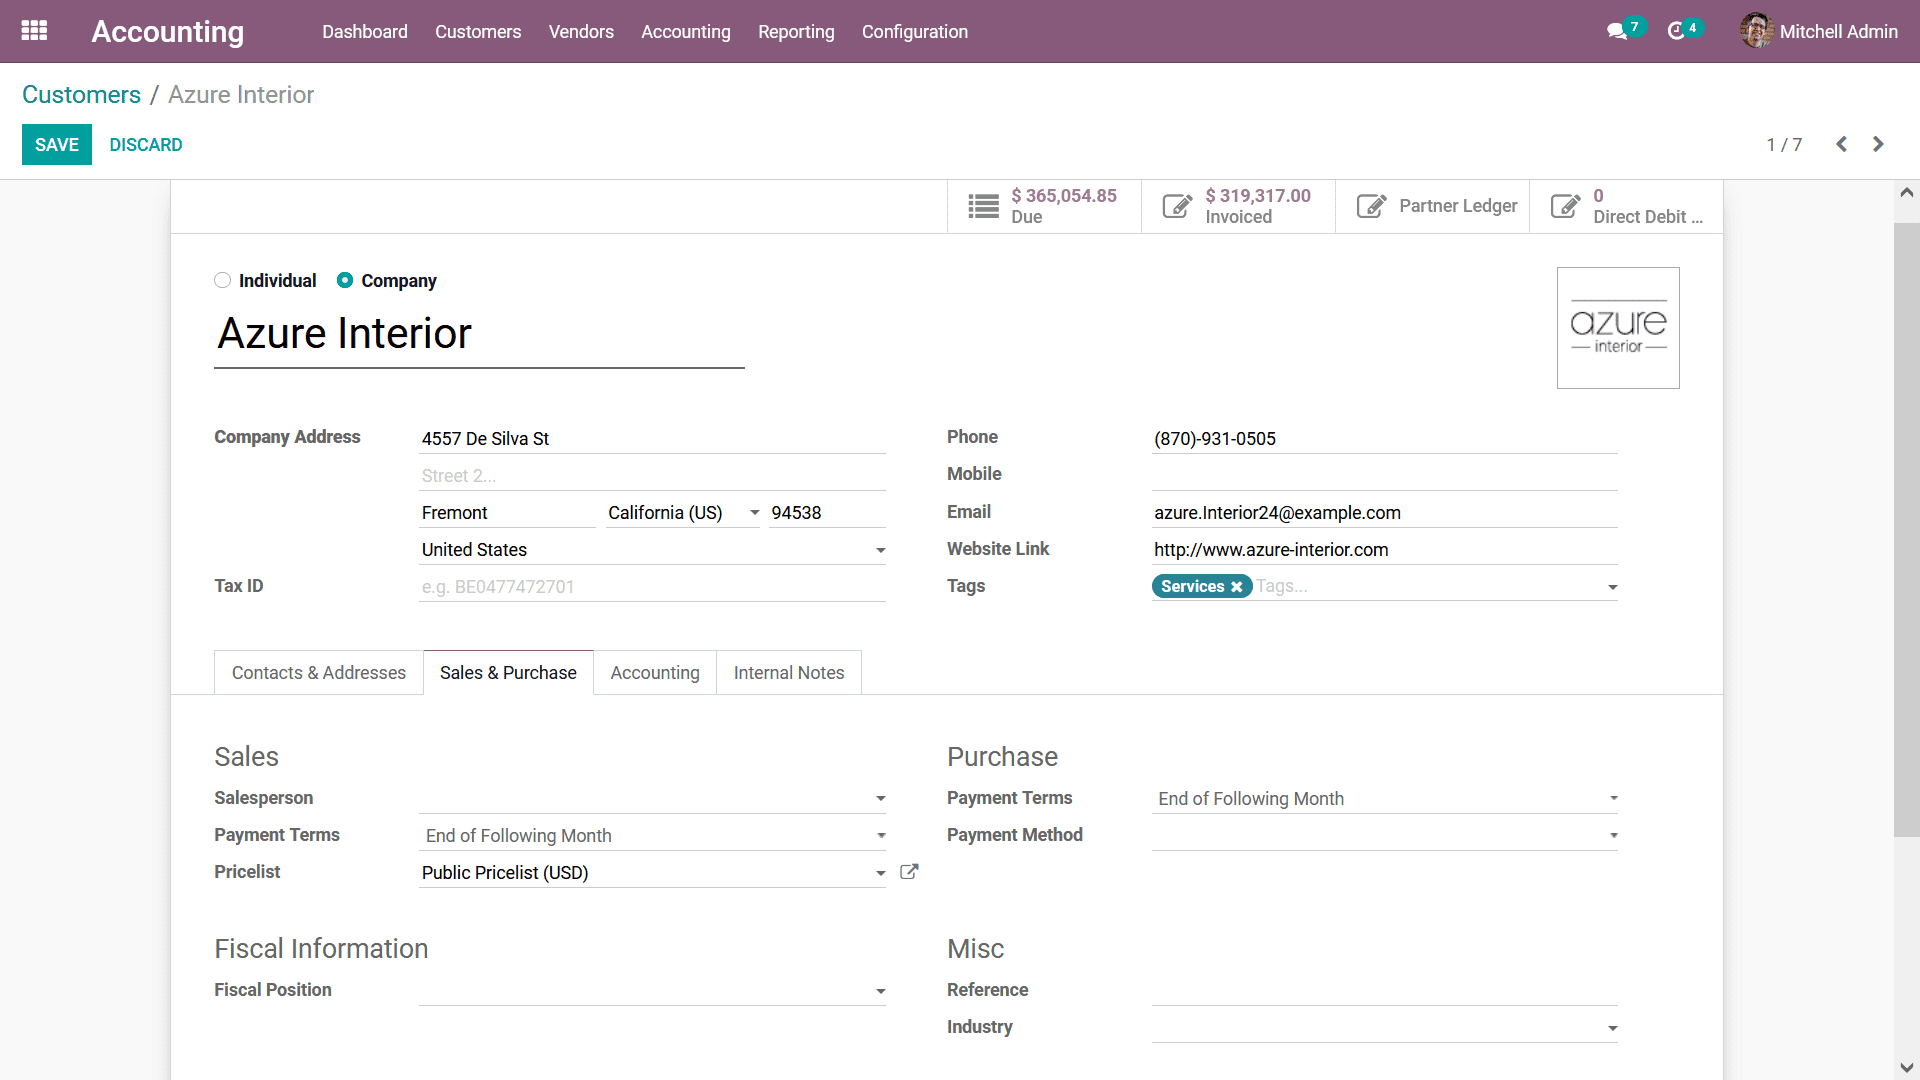
All the Addresses which have been defined for the Customer will be depicted under
the Contacts & Addresses tab of the Customer which has been defined. Next, we have
to configure the Sales & Purchase configuration aspects of the Customer. Under the
Sales tab the Salesperson, Payment Terms, and the Pricelist details should be defined.
Further, you can define the Payment Terms and the Payment Method under the Purchase
tab. The Fiscal Position can be defined under the Fiscal Information Tab. Additionally,
the Miscellaneous aspects such as the Reference through with the Customer was obtained
as well the Industry or sector in which they function can also be defined.
Furthermore, the Accounting aspect regarding the Customer can be defined under the
distinctive Accounting tab which is available. The Accounting entry aspects such
as the Account Receivable as well as the Account Payable should be defined from
the drop-down menu items available.
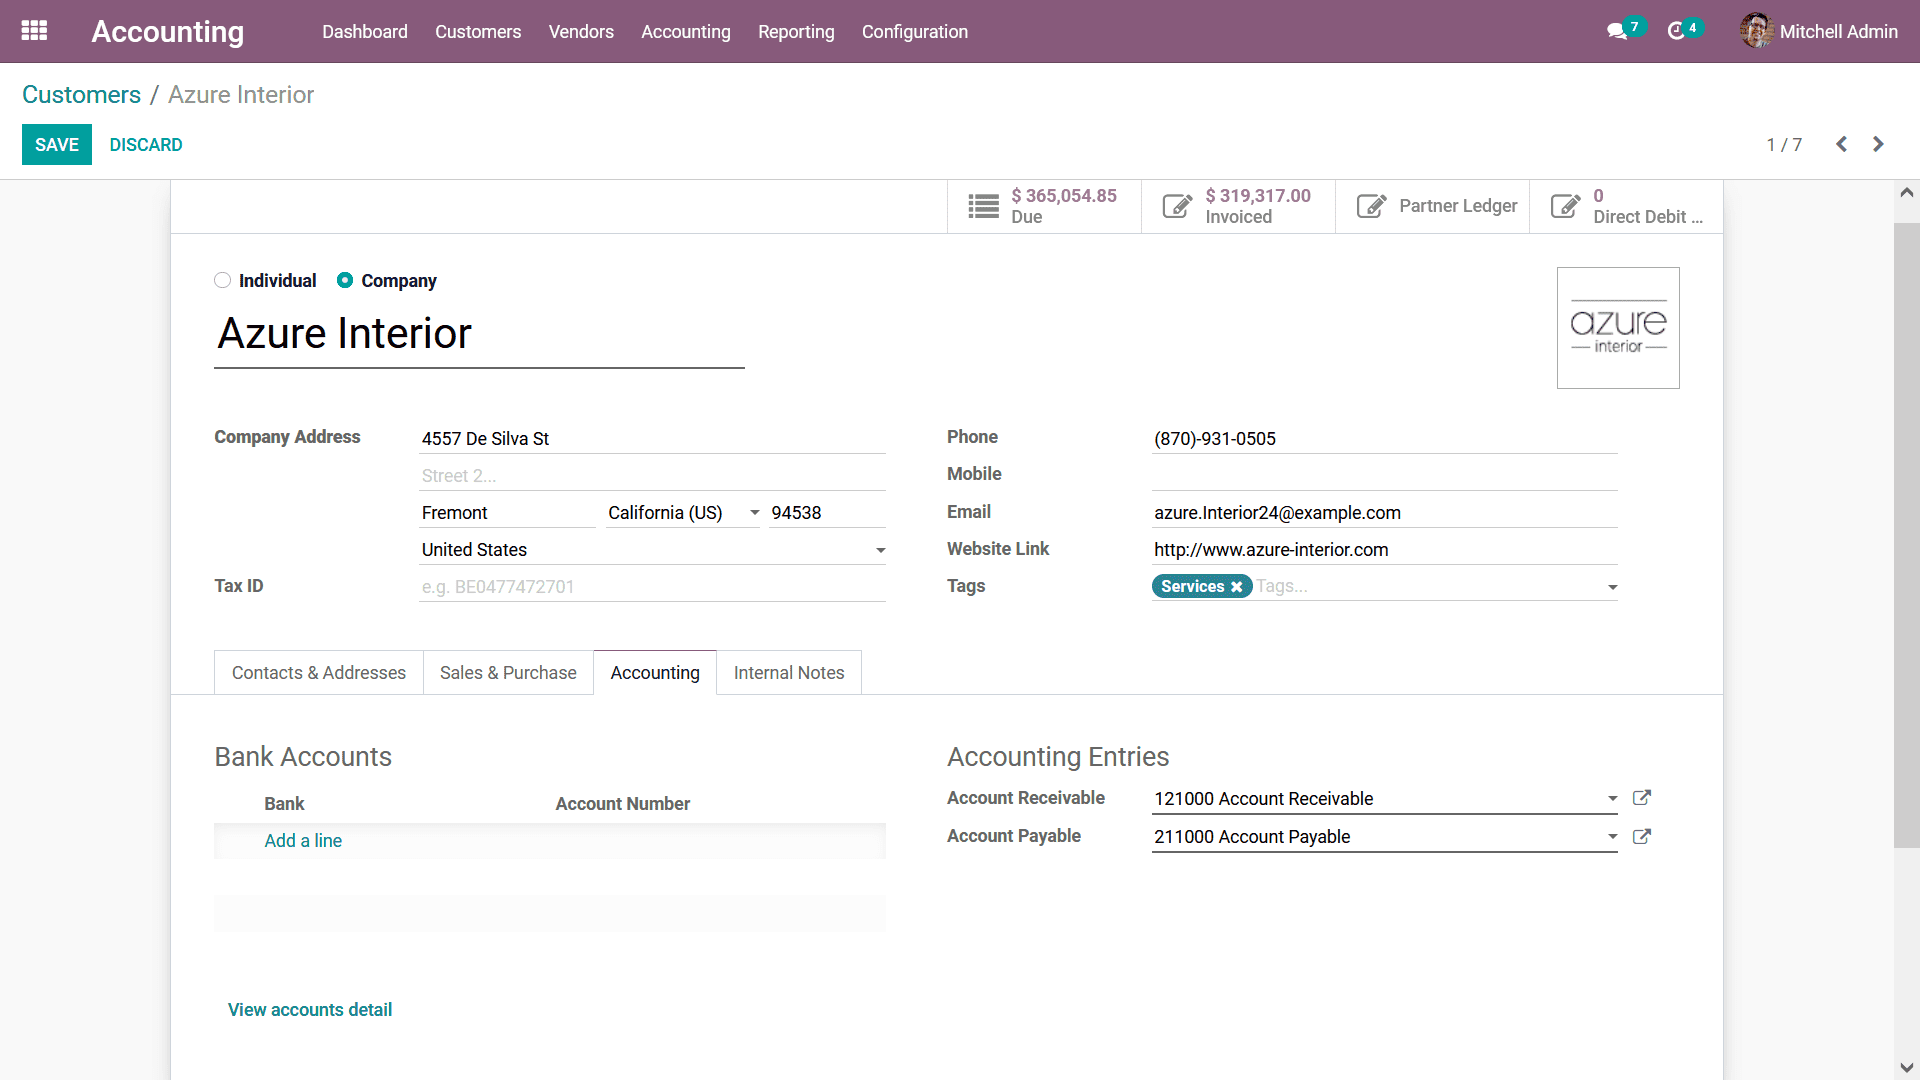
The Bank Account details can be added for the business operations by selecting the
Add a line option that is available if you have multiple accounts to be defined
it can also be done. You can select the View Accounts details option that is available
which will describe the details of the Accounts. Upon selecting the Add a line option
you will be depicted with the menu as shown in the following screenshot. Here, the
Account Number, Type of the Account, Bank details, ABA/Routing, Currency details,
and the Account Holder Name can be described.

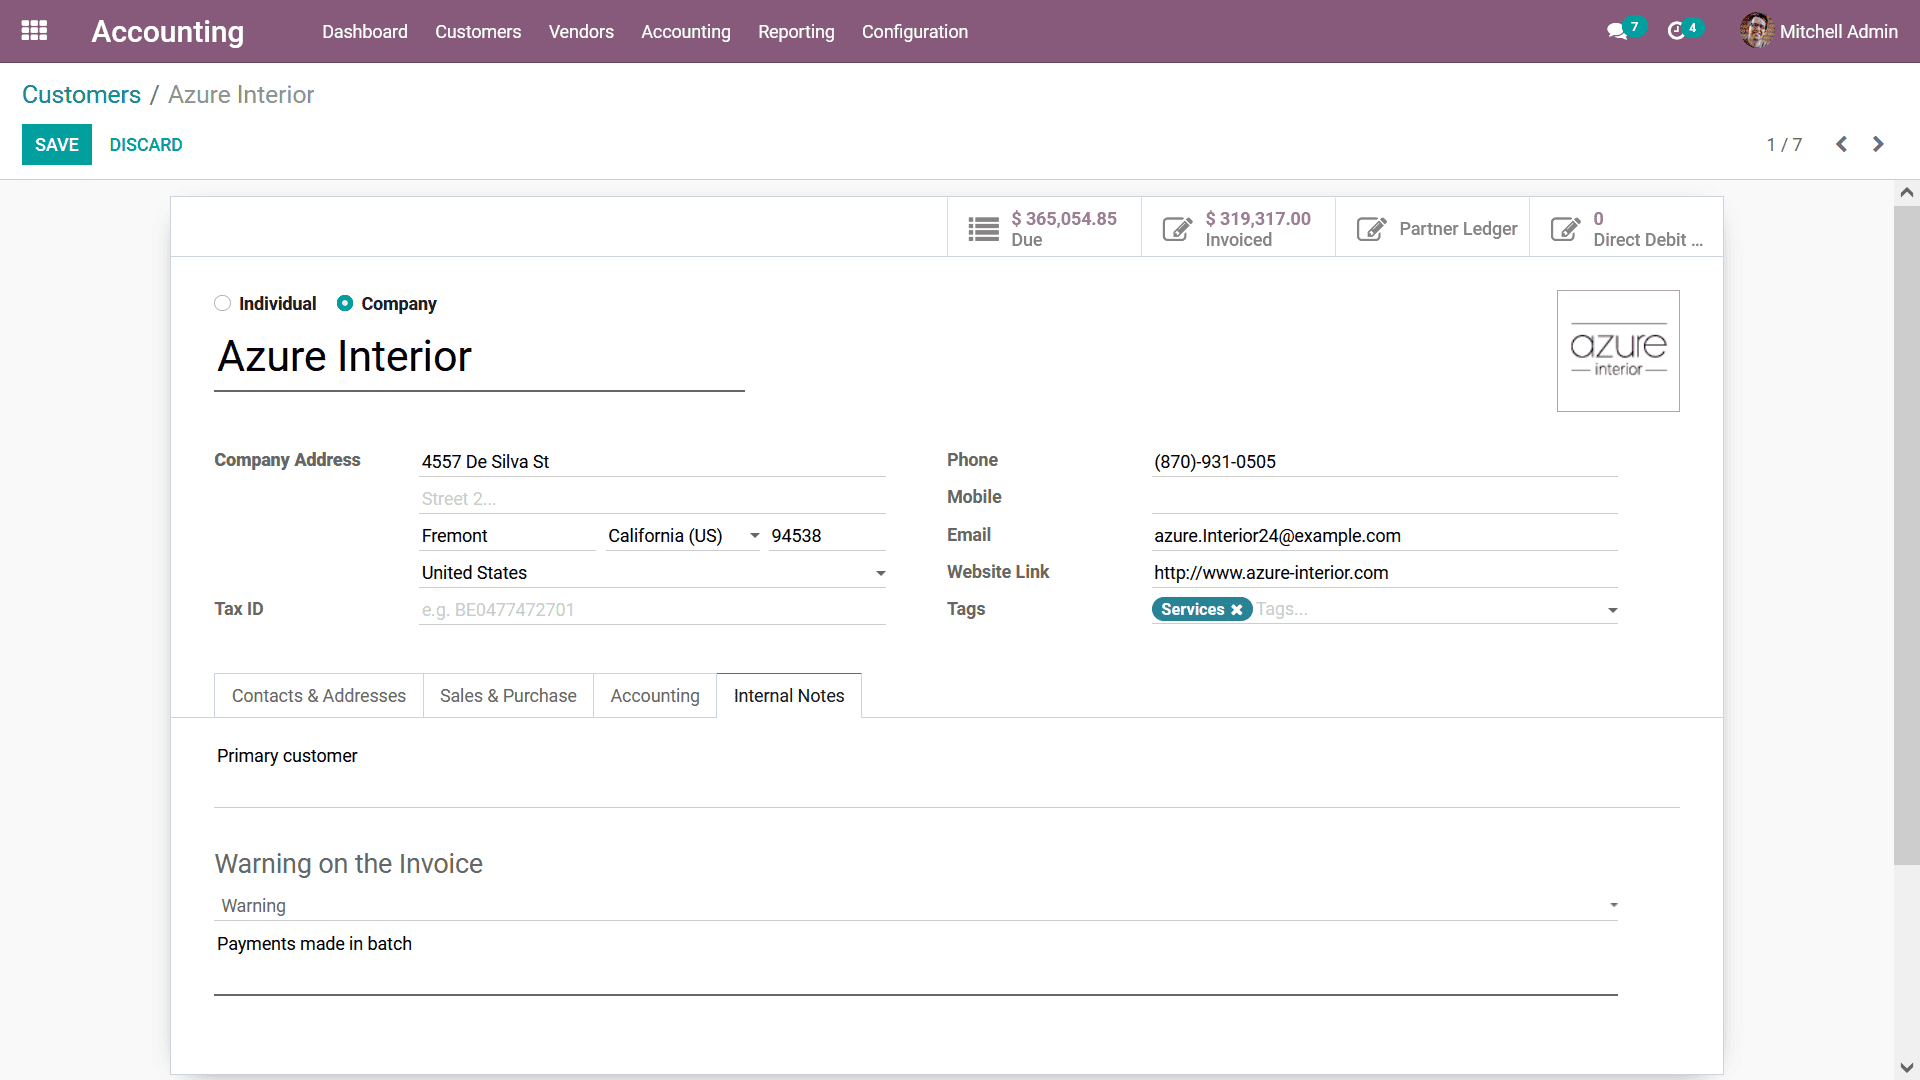
Under the Internal Notes tab, all the internal aspects of operation can be described.
Here, the Primary Customer details can be described along with a Warning on the
Invoice which can be a message based on the need. The Warning and the Messages can
be custom-defined based on the aspects of the operation.
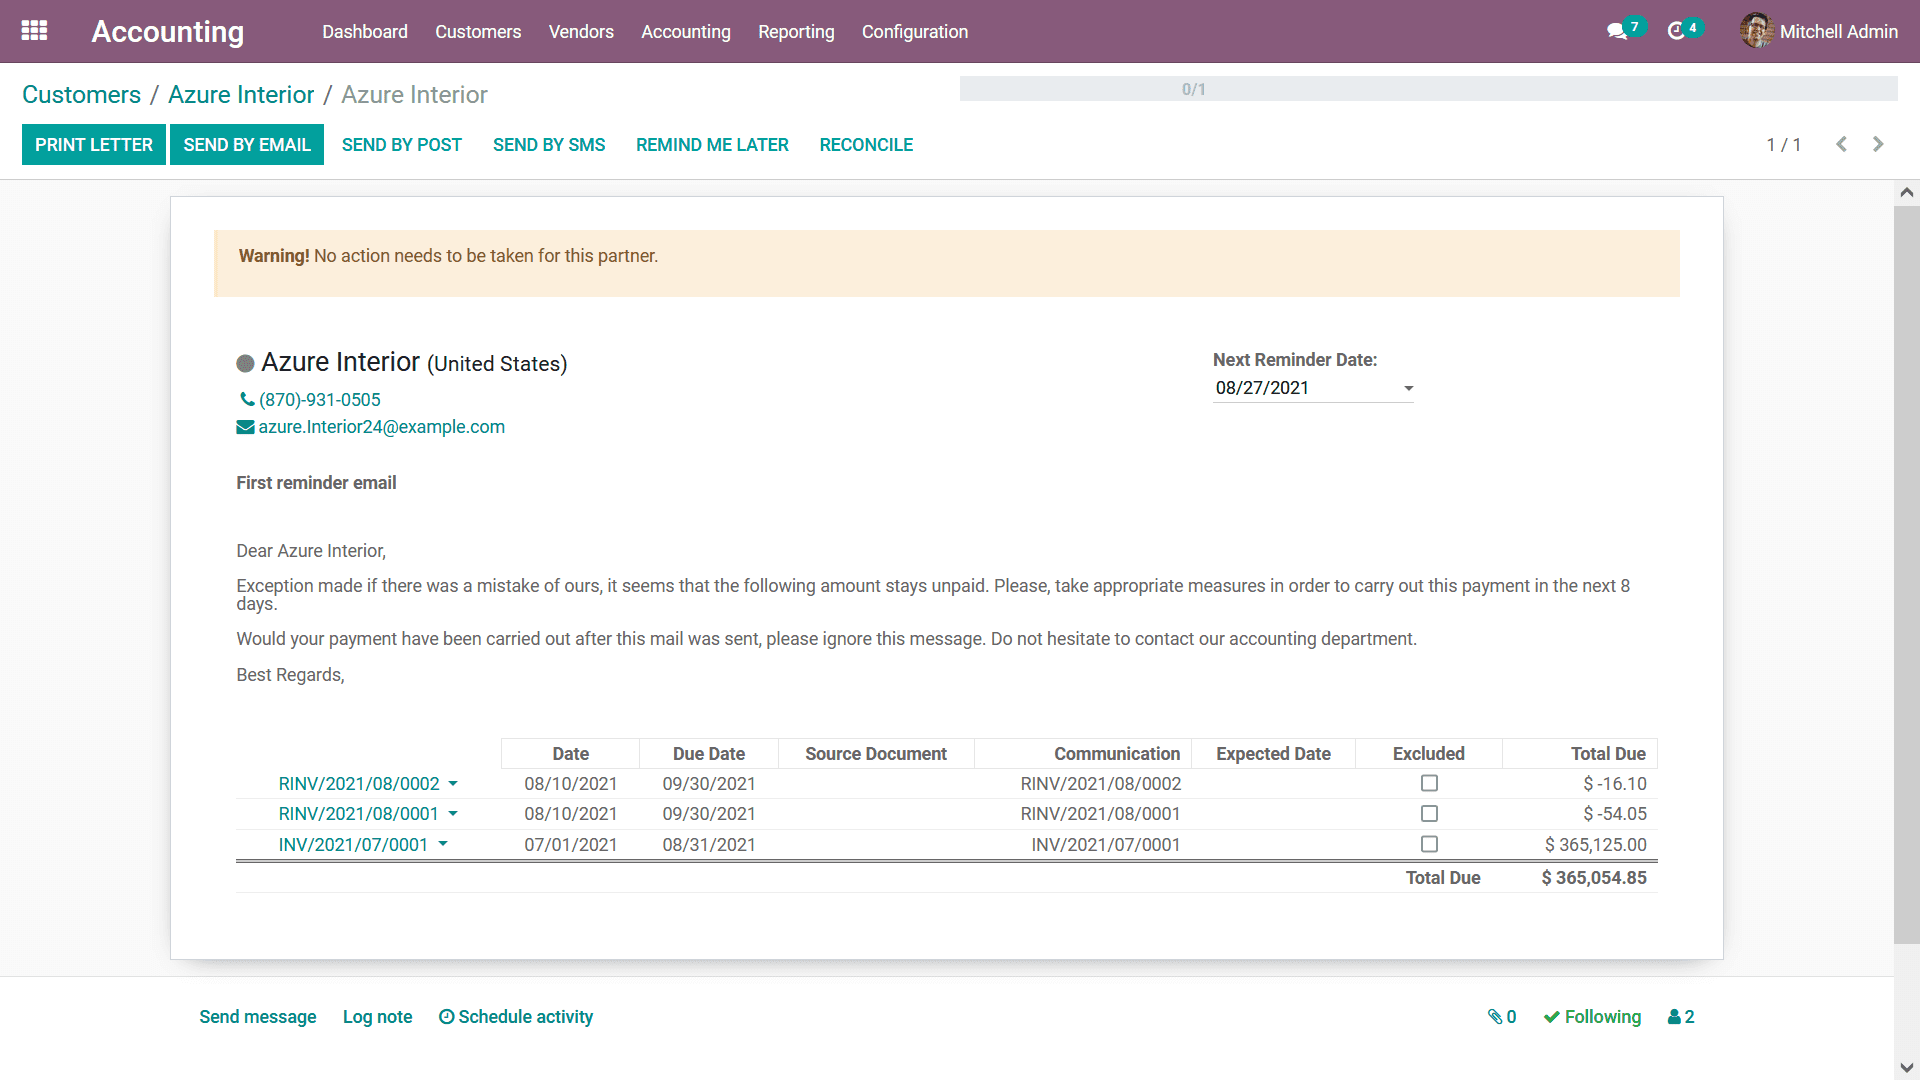
You can also select the Due amount details that have been defined by selecting the
Due option that is available which will direct you to the Follow-up report menu
as shown in the following screenshot. Here, the Invoice details along with the Transmission
amount details will be defined. You can refer to the Follow-up section that has
been defined previously in this book to have a clear understanding of the operations.
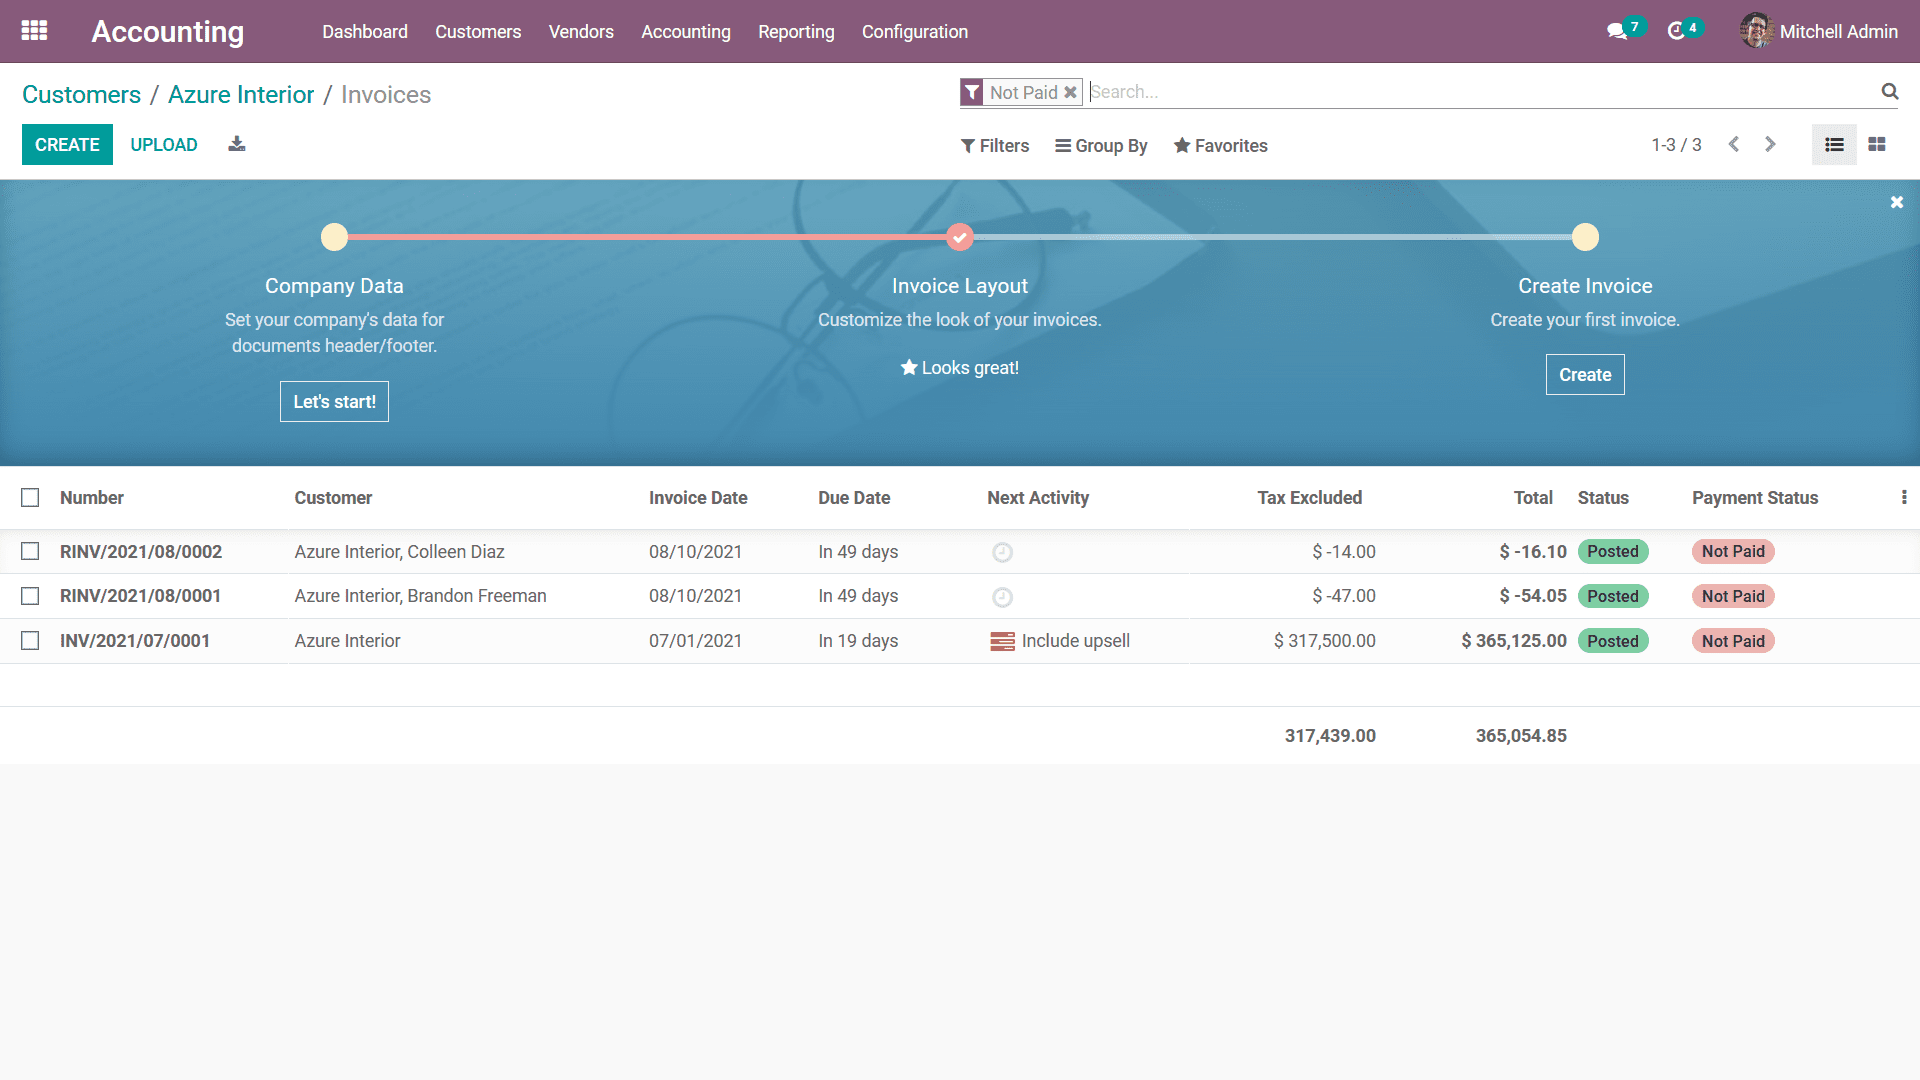
Furthermore, you can select the Invoiced tab to view all the Invoices of the respective
customer which provides a complete information aspect as shown in the following
image. The Invoice Number, Customer details, Invoice Date, Due Date, Next Activity
details, Tax Excluded amount, Total, Status, Payment Status.
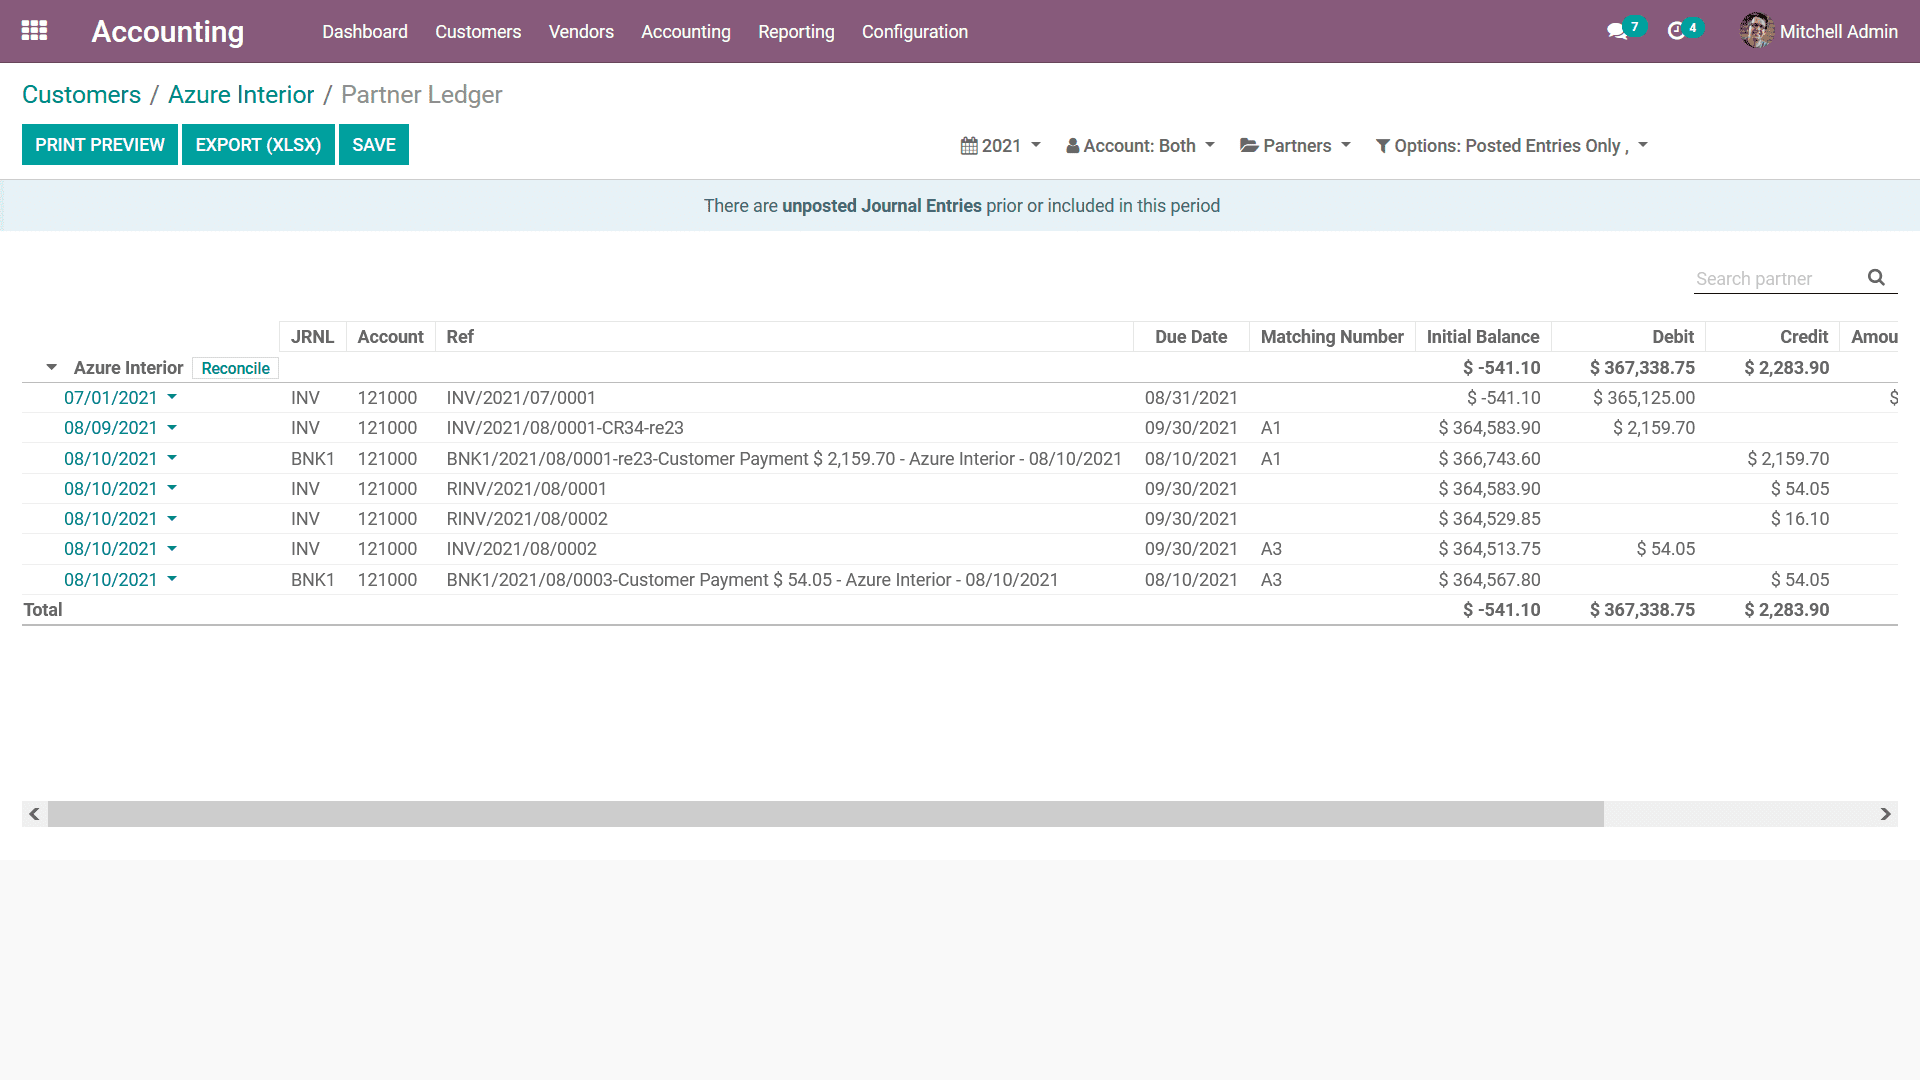
In addition, if the customer is also a partner of the company a Partner Ledger will
be defined which can be viewed by selecting the Partner Ledger options in the Customer
creation menu. In the Partner Ledger details such as the Invoice numbers, Journal
details, Account information, References, Due Date, Matching Number, Initial Balance,
Debit amount and Credit amount details will be described concerning each of the
Invoices of the Ledger.
Once the entire aspect of the Customer has been defined the respective Customer
can be saved for further operations. You will also have the provision to edit the
Customer details any time you want by selecting the Customer from the list and choosing
the Edit option that is available.
As we are clear on the various Customer management tools that are available in the
Odoo Accounting module let's now move on to the next section of the chapter where
the Vendor management aspects and the various options available in Odoo are being
discussed.