The Accounting module of the Odoo platform supports the effective management of
the payment as well other financial operations regarding the customer as well as
vendor operations towards the company. With a dedicated menu and tools that are
available in the Odoo Accounting module, both the customer as well as vendor payments
can be managed effectively.
In the last chapter, we were focusing on the configuration aspects of the Accounting
module. All the configuration menus, as well as options available, were defined
in detail. In this chapter, we will be focusing on the financial management aspects
of your company with regard to customer and vendor operations. The following aspects
will be covered in this chapter:
- Accounting module Dashboard
- Customer Finance management with Odoo Accounting module
- Vendor management
All the sub aspects regarding the defined tops will also be defined in this chapter
in detail with proper description and illustrations.
Accounting module Dashboard
Odoo due to the modular aspect of operation has a distinctive Accounting module
where all the financial management operations of the company can be conducted with
dignified menus and options. As the Configuration aspects were described in the
previous chapter let's now move on to understand the face of the Odoo Accounting
module the Dashboard where the users are directed to while entering the Accounting
module. The well-defined Dashboard of the Odoo Accounting module will provide you
with clear-cut information on the various operational aspects.
A descriptive overview of Accounting Module Dashboard
The Dashboard of the Accounting module will provide you with an overview of the
financial operations that are being conducted in the company with the Odoo accounting.
Moreover, with distinctive tabs, you will be provided with an insight into how the
operations are being conducted and what is going on with regard to the financial
aspects of each tab. Initially, when you reach the Dashboard you will be depicted
with Filtered information which is based on the configurations which are set up
during the development of the platform. Moreover, the filtering can be removed based
on your need. In addition, you can create a custom filter option to define your
Dashboard and there are ones that are available by default.
In addition, with the help of the Group by field available in the Dashboard the
information depicted in the menu can be configured based on your operational need.
Furthermore, you will be depicted with an illustrative table on how the configurations
of the Accounting module as well as the further financial management operations
of the company should be conducted. This will provide you information on which all
operations concerning the functioning with the finance management should be configured.
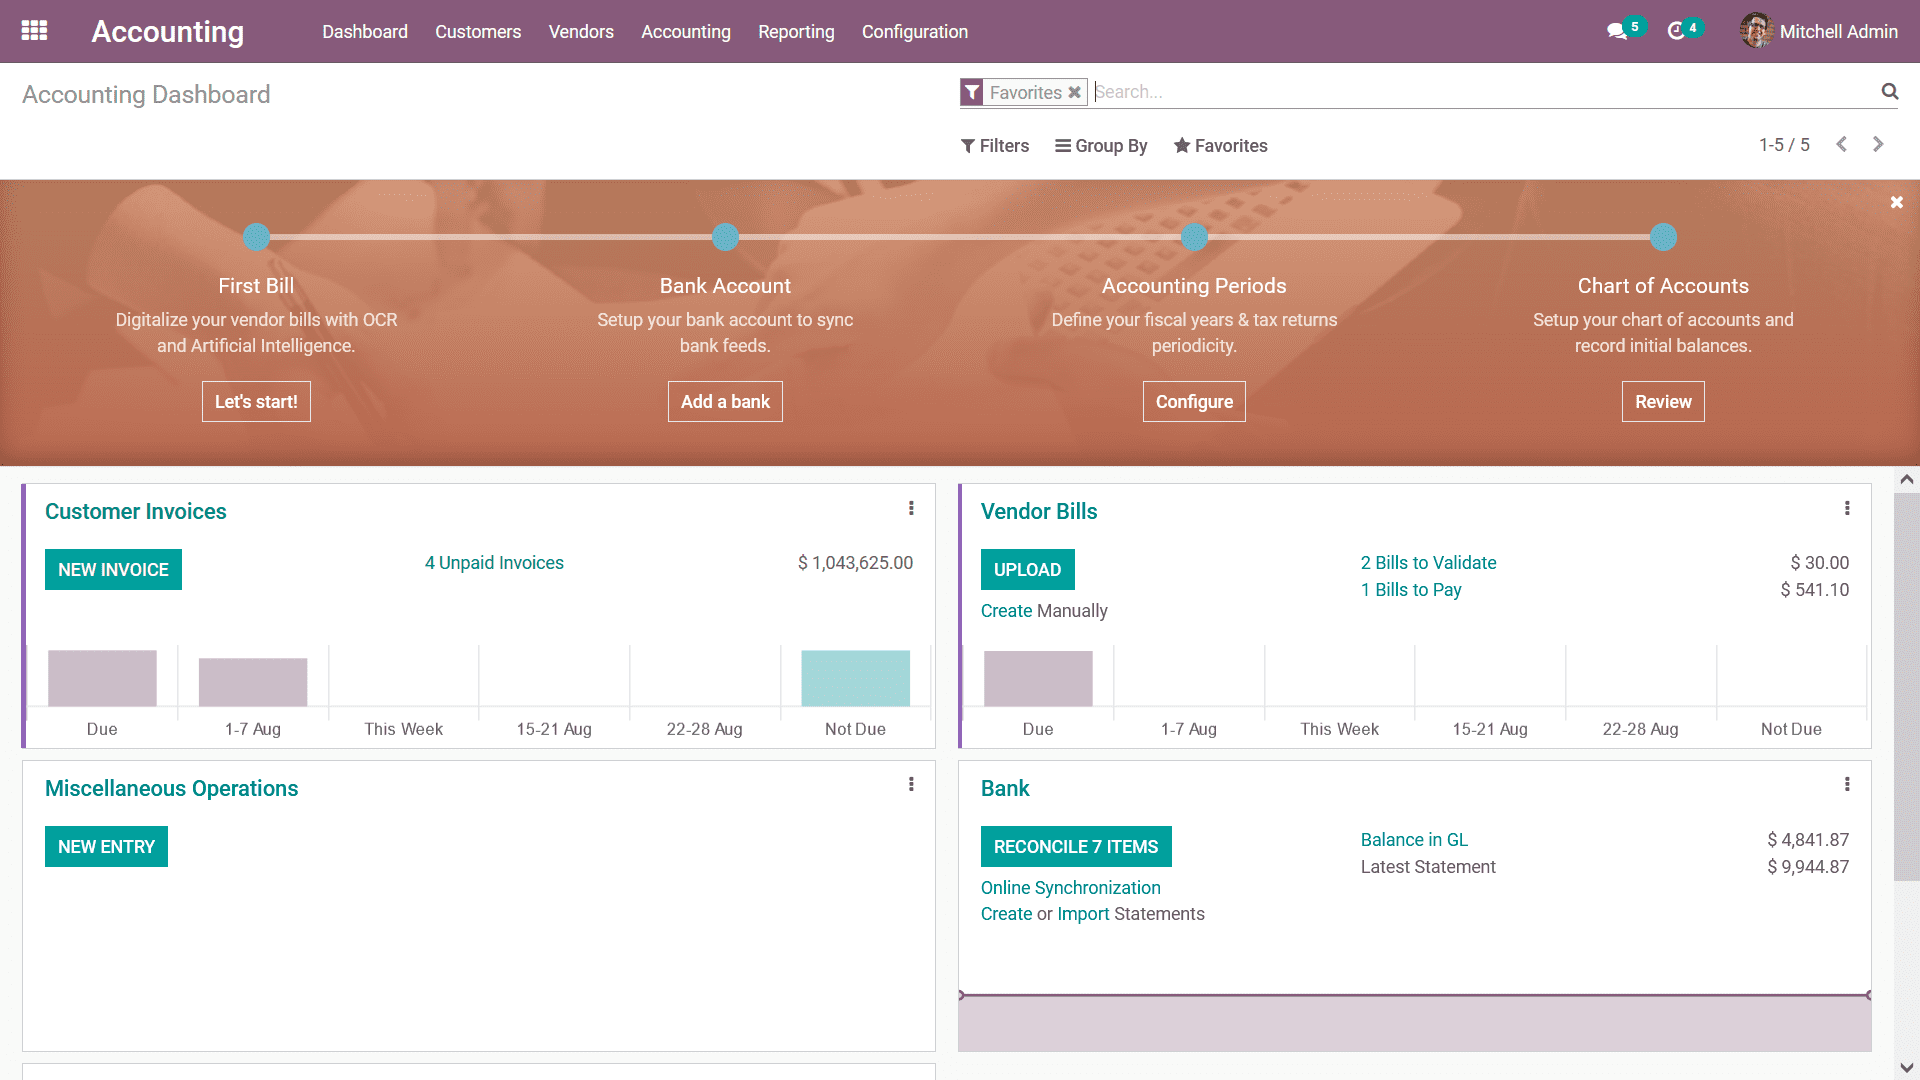
The following image depicts the Dashboard of the Accounting module with the configuration
description window.
From the overview itself, you can define the First bill for vendors can be drafted
by clicking on it. Let’s Start option that will direct you to a Vendor Bill Creation
window and you can right away create the Vendor Bills based on the functional needs.
Furthermore, you can configure a Bank Account for the operation of the company by
clicking on Add a Bank which will lead to the same interface of creating a bank
account for the company. Further, then you can set the Accounting Period and Tax
Return Periodicity for different periods like quarterly, annually, and based on
the need by clicking on the configure button under Accounting Periods.
Additionally, all the Charts of Accounts of the currently installed localization
can be seen from the Review button. Moreover, if required more Chart of Accounts
can be created/imported as per requirement. Furthermore, the Review button under
the Chart of Accounts will provide the users with the capability to add the opening
balance. In addition, the Credit/Debit Amount on each account can be added and the
changes can be Saved for the operation of the platform. The corresponding Journal
Entry will be generated for Opening Balance in Journal Entries. If there is any
difference in Debit and Credit amounts, Odoo will automatically add that difference
amount to ‘999999 Undistributed Profits/Losses' for automatic balancing.
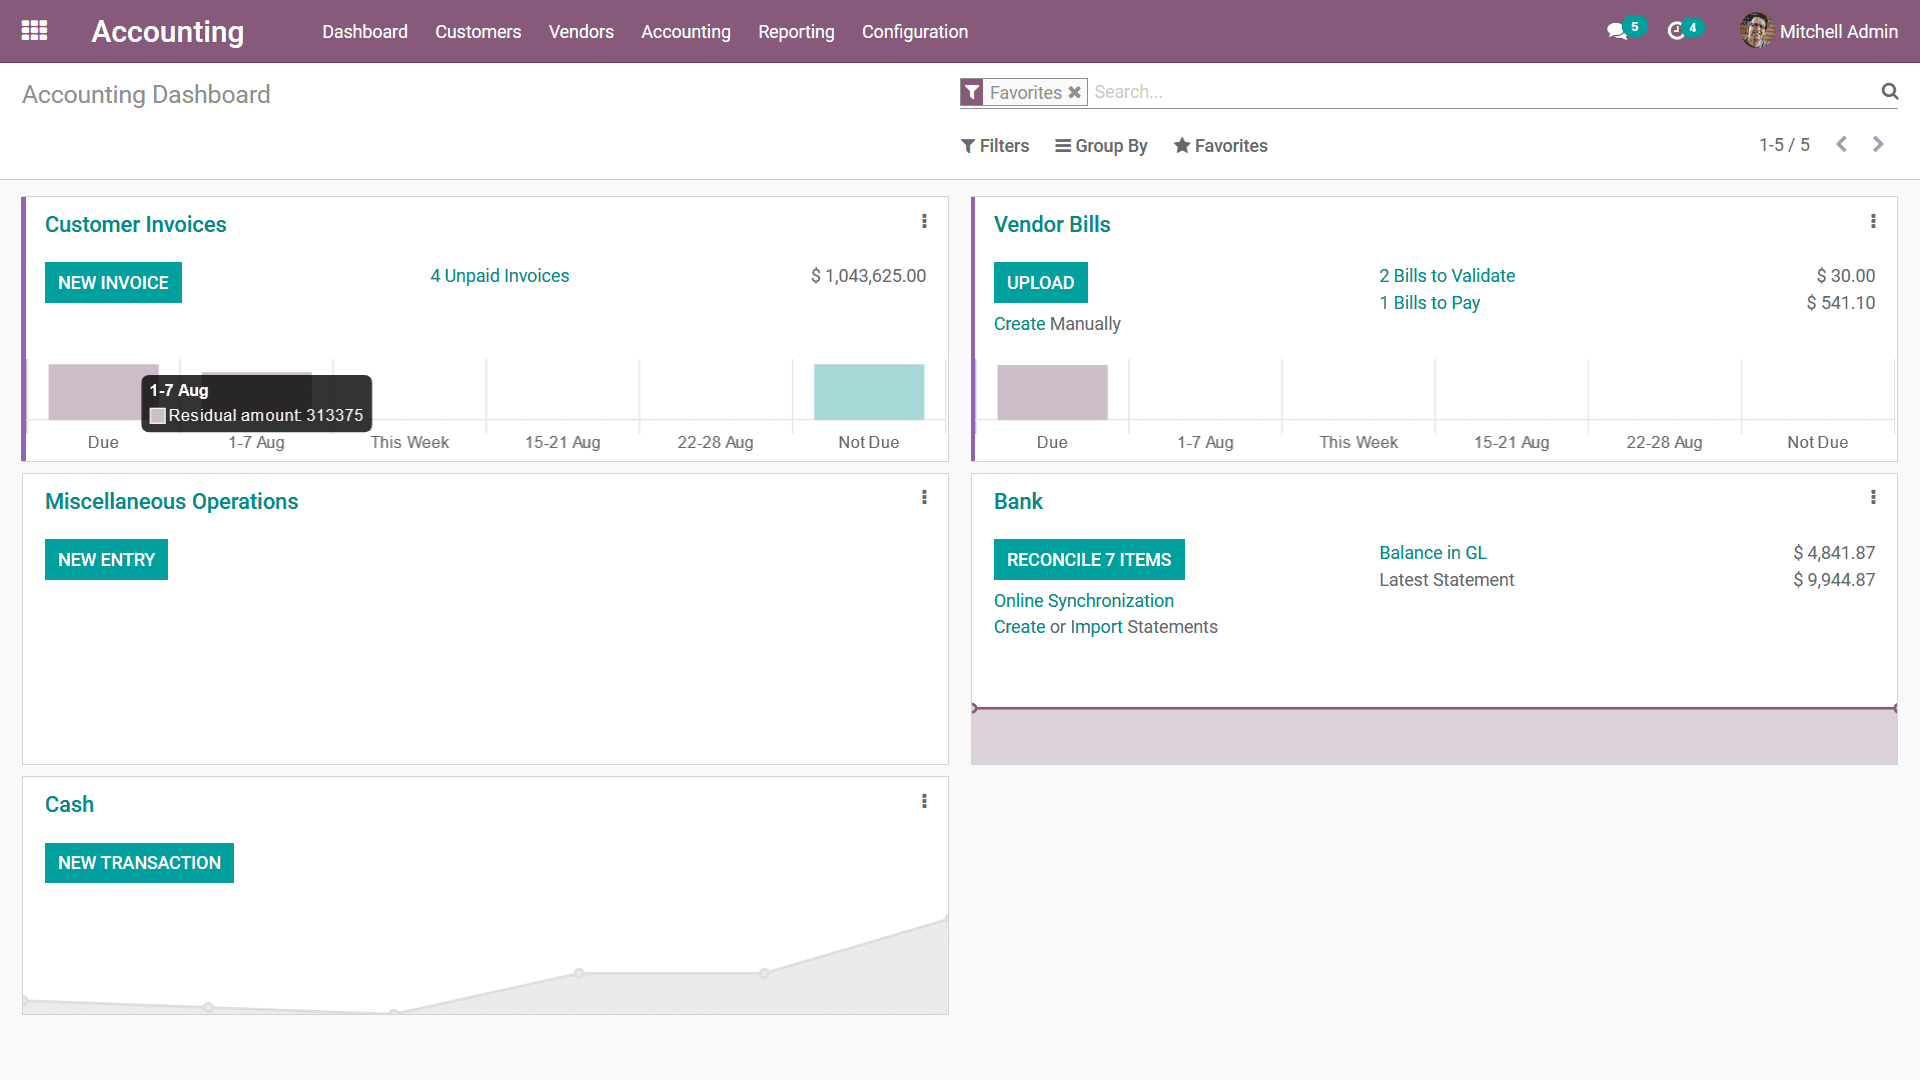
The depicted window can be closed as the need and you will be depicted with the
Dashboard as shown in the following image. The various tabs such as Customer Invoices,
Vendor Bills, Miscellaneous Operations, Bank details, the Cash information, and
many more will be depicted based on the Favorites of the Dashboard being defined
in operation. Moreover, all the Journals which are created and operations will be
available in the Dashboard. Furthermore, you can add the ones which are used frequently
based on your requirement to the Favorites. This will be helpful for filtering the
Journals based on the need. An informative chart on the operations concerning the
functioning on each tab will be depicted as shown in the following screenshot. Upon
hovering your mouse pointer on the charts you will be depicted with the distinctive
information on each based on the definition on the chart.
There are also options to directly move to the respective menus of each of the tabs
that have been defined. In addition, there are distinctive configuration options
available under each of the tabs that have been defined based on the operational
aspect of each. The color configurations options help you to define the various
color coordination for each tab helping you to classify them distinctively if numerous
tabs are present.
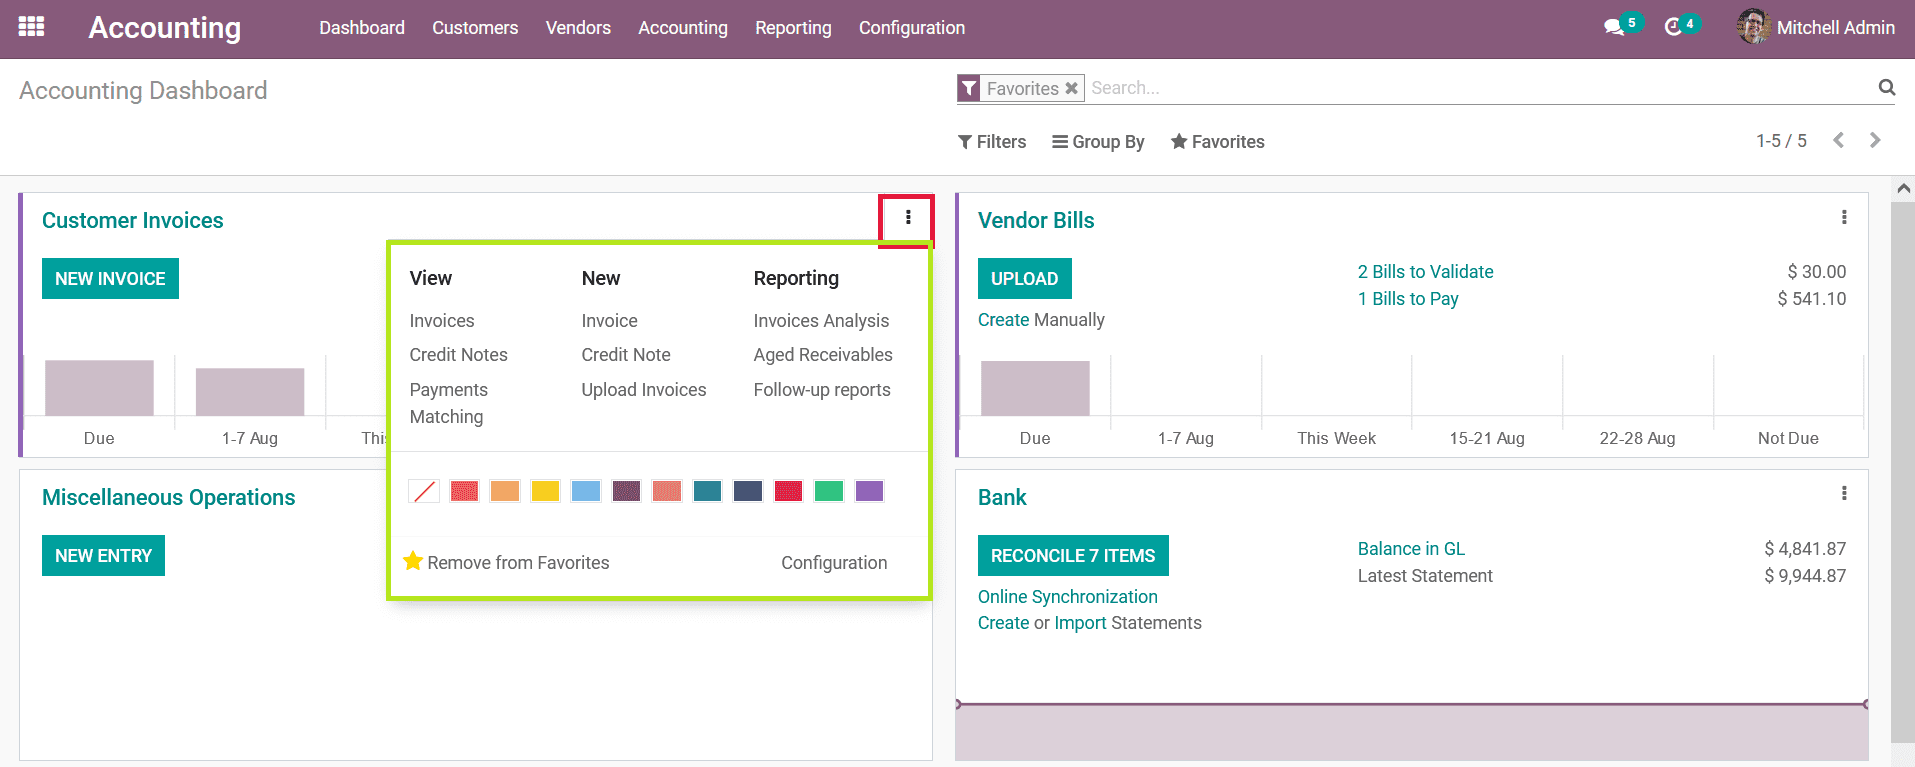
There are also options available to Remove from Favourites helping the respective
tab to be removed from the Dashboard of the Accounting module. In addition, for
each Journal, the respective documents such as Invoices/Bills, Credit/Debit notes
can be viewed, created a new doc, and reports on the docs of each Journal can be
taken from the Overview. Furthermore, there is a Configuration option which upon
selecting will take you to the configuration menu of the respective tab. Each of
the tabs will have a different configuration setting and in general, you will have
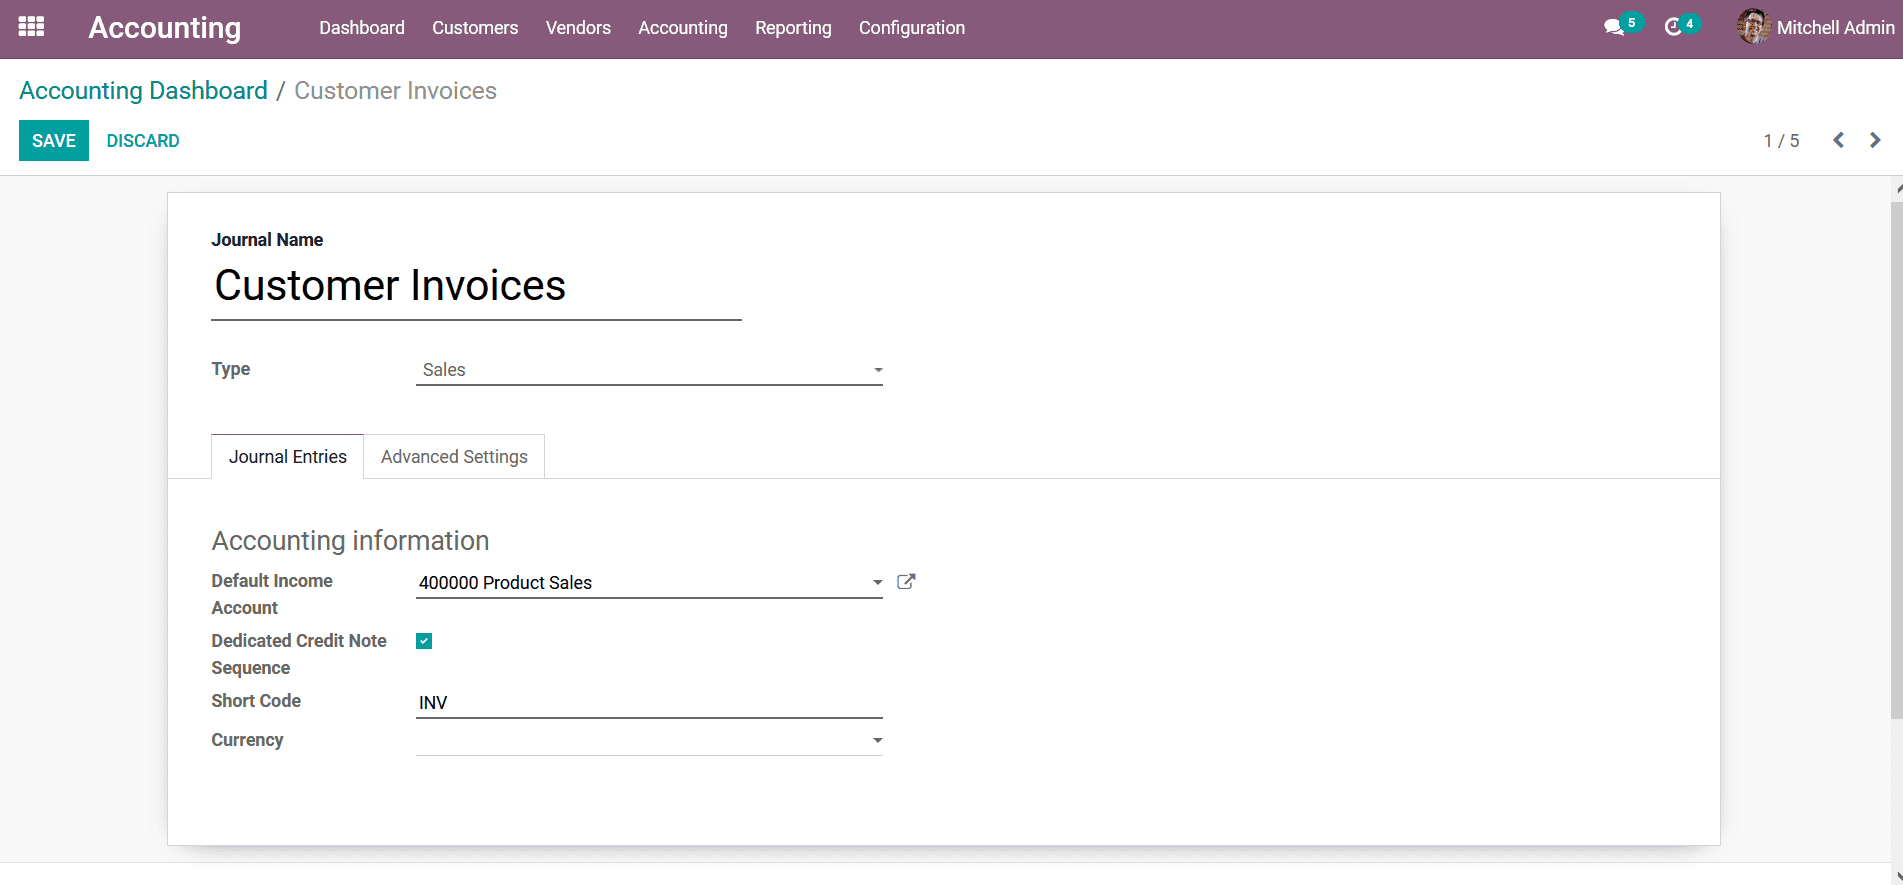
to define the Journal Entries of the respective tab being defined. For example,
here the Customer Invoices tab is selected and the following screenshot depicts
the Configuration menu of it. Here you will get information on the respective Journal
such as the Type of the Journal. Further, the Journal Entries configuration details
such as the Default Income Account, Dedicated Credit Note Sequence, Short Code,
and the Currency details. You will have the provision to modify all the prescribed
details of the Journal by selecting the Edit option that is available in the Configuration
window.
Additionally, the Advanced Settings concerning the defined Journal can also be configured
where the menu options such as Control Access details such as Allowed Account Types,
Allowed Accounts can be modified and you can enable or disable the Lock Posted Entries
with Hash. Moreover, the Configure Email Servers option will help you to modify
the Email Servers from which the Accounting emails will be received. The Electronic
Data Interchange option the Electronic Invoicing by Factor-X(FR) can be enabled
or disabled for the respective Journal.
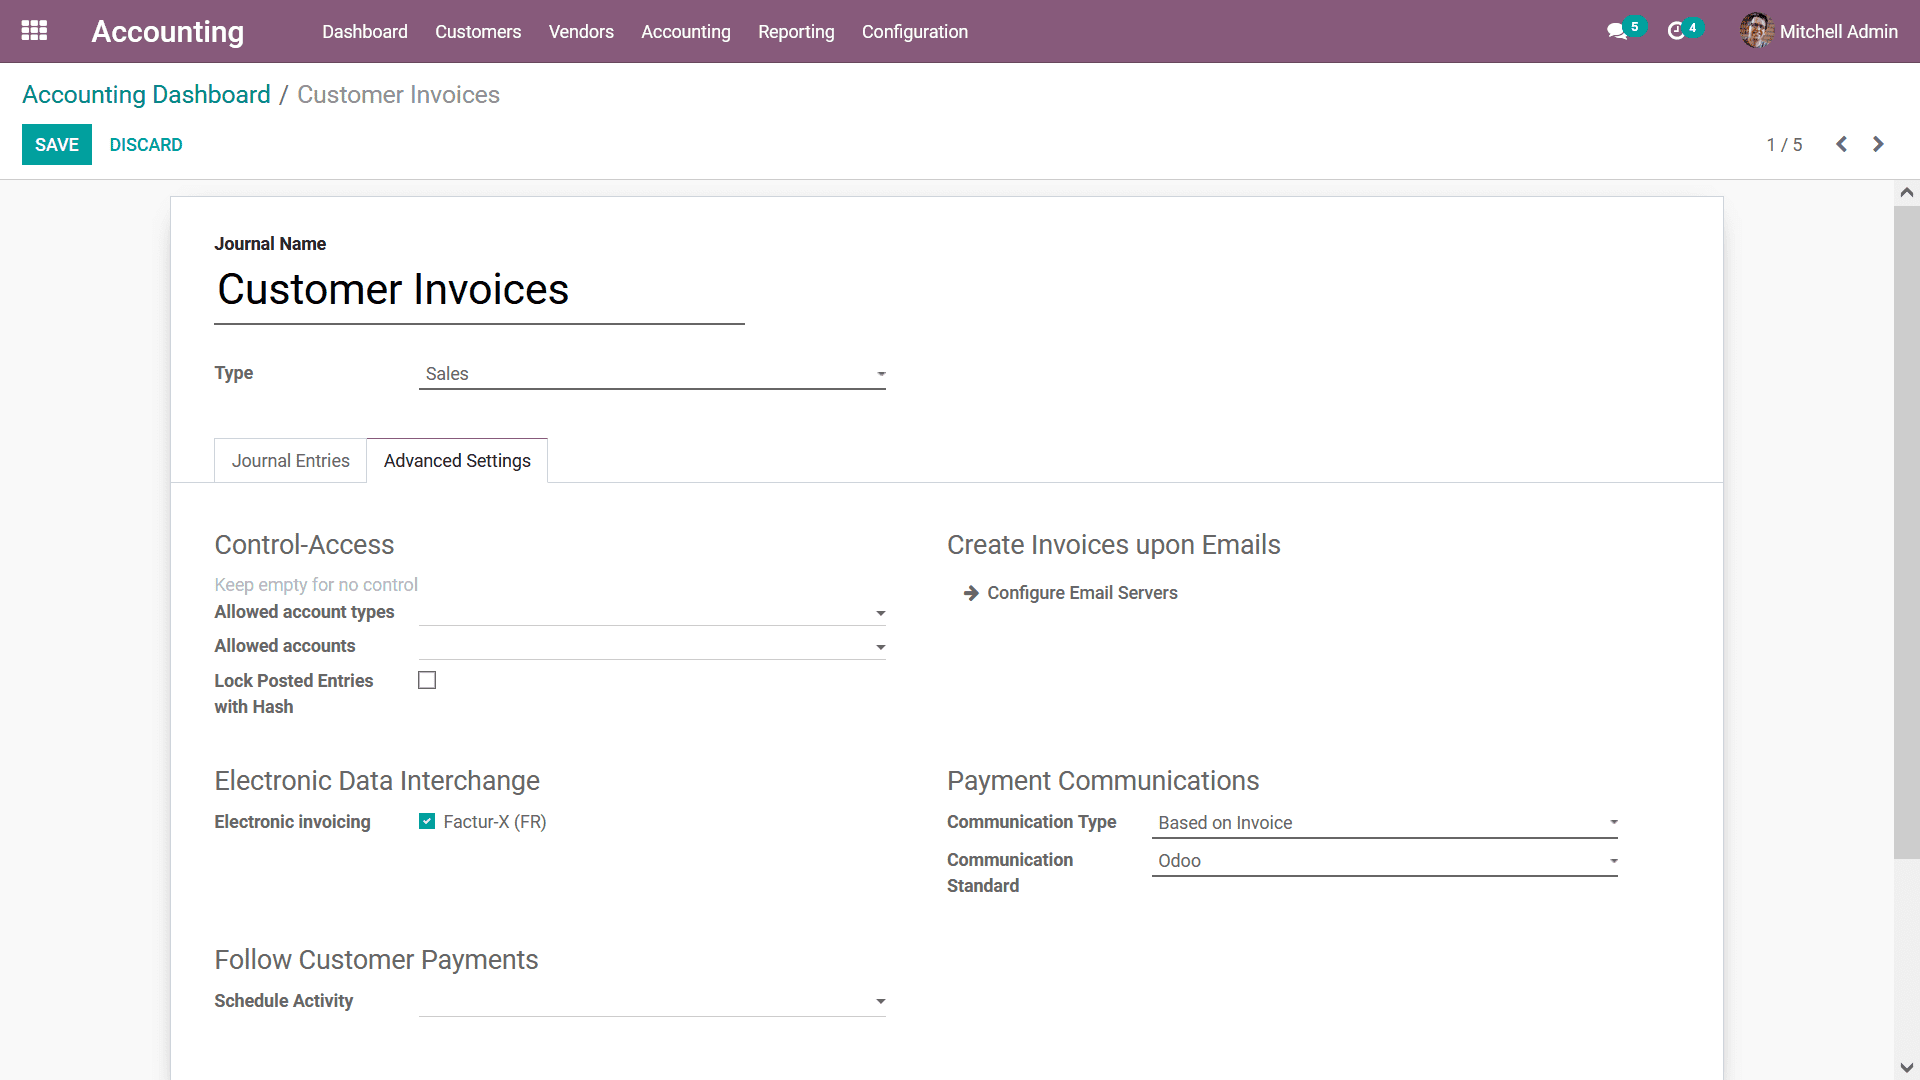
Furthermore, the Payment Communications options can be modified such as the Communication
Type, as well as the Communication Standard options. In order to Follow Customer
Payment, the Scheduled activity can be defined based on the follow-up activity and
can be modified based on the need.
How Opening Balance is added?
The Opening Balance for the company operations should be added to illustrate the
funds that are available in the respective accounts of operations. The aspects of
Opening Balance will provide an insight into the funds that are available in the
company operating at the initial stages of functioning of the company. Let's now
move on to understand the steps by which the Opening Balance for the company can
be defined in Odoo:
Step 1: Opening balance can be added by mentioning the debit or
credit amount in respective ledgers.
Step 2: While saving a draft, Journal Entry is created in the Accounting
menu > Journal Entries with reference as 'Opening Journal Entry'.
Step 3: If any account is missed, they can be added by editing
a draft Journal Entry.
Step 4: The difference between Credit & Debit value is automatically
taken to '999999 Undistributed Profits/Losses Account which is provided by Odoo
for automatic balancing.
Step 5: Further, Edit the accounting date on which the Opening
Balance to be affected in Account Ledgers are defined.
Step 6: Once it is posted the Balance Sheet is updated with those
values.
Step 7: f we want to add a certain Credit/Debit amount to some
Account Ledgers that have been missed while entering the Opening Journal. They can
be added further by manual Journal Entry.
The thing that has to be noted is that while posting, add the correct Accounting
Date, it should be the same on which the entry is recorded in the balance sheet.
The Odoo Accounting module Dashboard is advanced and provides you a clear picture
of the operations that were ongoing in regards to the accounting management of the
company. As you have a complete understanding of it lets now move on to the next
section where the customer finance management aspect is being described concerning
the Odoo Accounting module.