Disallowed Expenses Categories
The Disallowed Expenses are there in operations in the Odoo Accounting where the
respective Expenses are not deducted from the fiscal results but the user has the
provision to deduct it from the bookkeeping result. To define the Disallowed Expenses
Categories for your accounting operations in Odoo initially you need to install
the Disallowed Expenses modules from the Application module. You can clear out the
Apps filter and search in the search bar for the Disallowed Expenses and you will
be depicted with the module which can be installed.
Once the Disallowed Expenses Categories module is installed you can access the Disallowed
Expenses Categories menu from the Accounting module from the Configuration Tab.
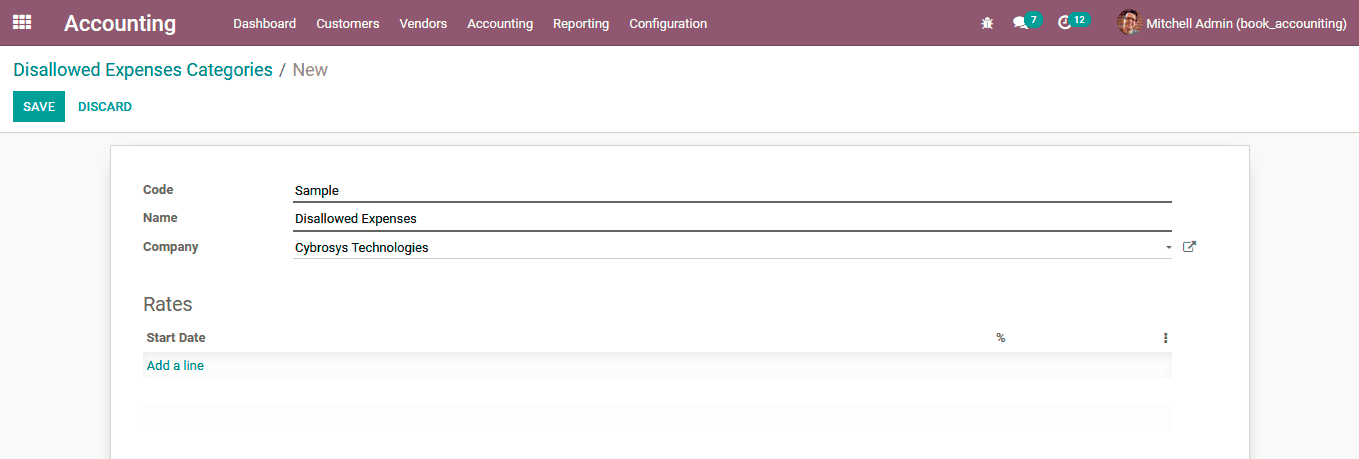
Use the Create button that is available. In the Disallowed Expenses Categories creations
window as depicted in the following screenshot, you have to initially provide the
Code, Name, and the Company in which it is in operation. Further, the Rates can
be added by selecting the Add a line option that is available.

Upon selecting the Add a line option you will be depicted with the Create Rate window
as depicted in the following image. Here, you need to define the Start Date and
the Percentage of the Disallowed Expenses and the Company can be assigned which
will be helpful in the multi-company operation.

Furthermore, all the defined Disallowed Expenses Categories will be depicted in
the Disallowed Expenses Categories menu as shown in the following screenshot. Here,
you will have both Filtering as well as Group by options that are available with
default as well as customizable ones helping you with the sorting out aspects of
the required Disallowed Expenses Categories.

The capability to define the Disallowed Expenses Categories is one of the best features
and tools available in the Odoo Accounting module. As we have an understanding of
it lets now move on to the next section where the Analytical Items are being described.