Multi-Languages
The Point of Sale module is an integral part of the Odoo ERP system, which will be useful for managing and registering daily sales transactions. It keeps records of all transactions and related operations efficiently and adequately. This module has a simple and user-friendly interface that can be completely integrated with the Inventory and Accounting module in Odoo. Using this module, a company can integrate its retail operations with Odoo. The advanced tools available in the Odoo Point of Sale module will help you to manage and organize the sales operations of a restaurant or a shop. You can run this module offline also.

You can choose suitable languages for your website based on your business programs. Odoo
Will give you the advanced option to set the language that is more appropriate for the visitors of your website. This feature will help the visitor to read the content of your website in their regional language.
To configure multiple languages for your website, you have to go to the Settings menu under the Configuration menu of the Website module.
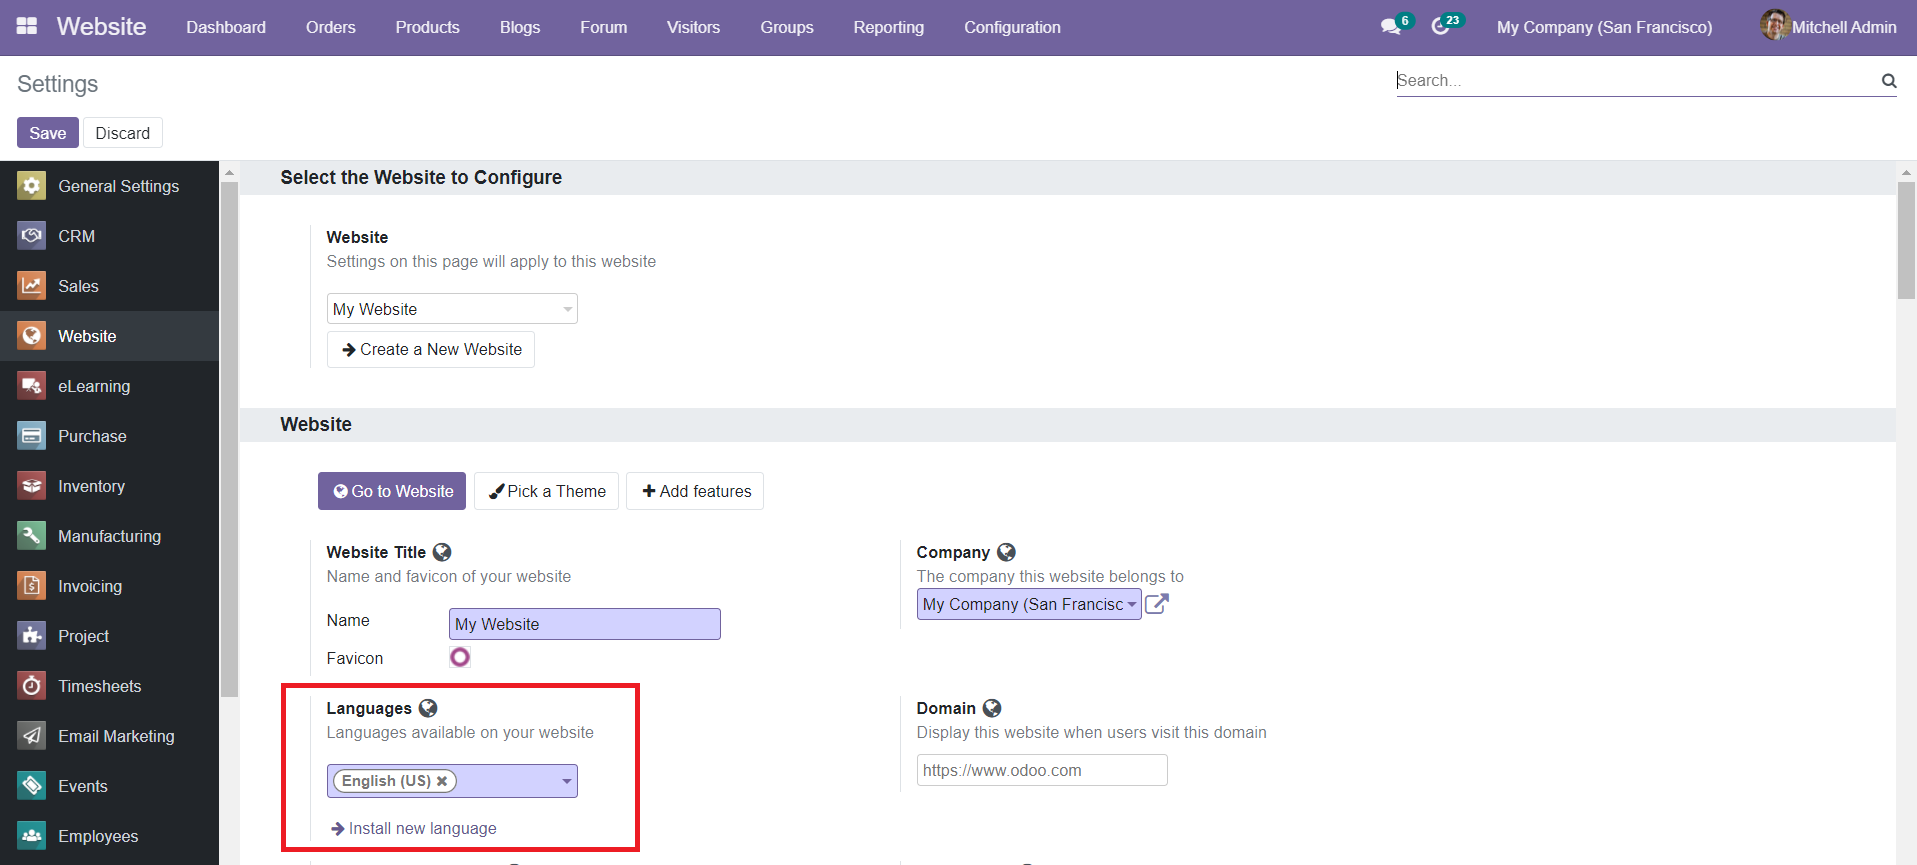
Under the Website tab, you can see the Languages option as shown in the screenshot above. You will get the list of available languages on your website from the dropdown menu. To add more languages, you can use the option ‘Install New Languages’.
A pop-up window will appear to select language suitable for your website from the given list.

You can also choose the website from the given options which you want to translate into the selected language. After selecting the specified options you can click on the ‘Add’ button to add the language to your system. The languages in the dropdown menu are configured from the Settings module. You will be able to find the Manage Languages option under the Language tab in the Settings module. Using this option you can manage and create new languages for your system.
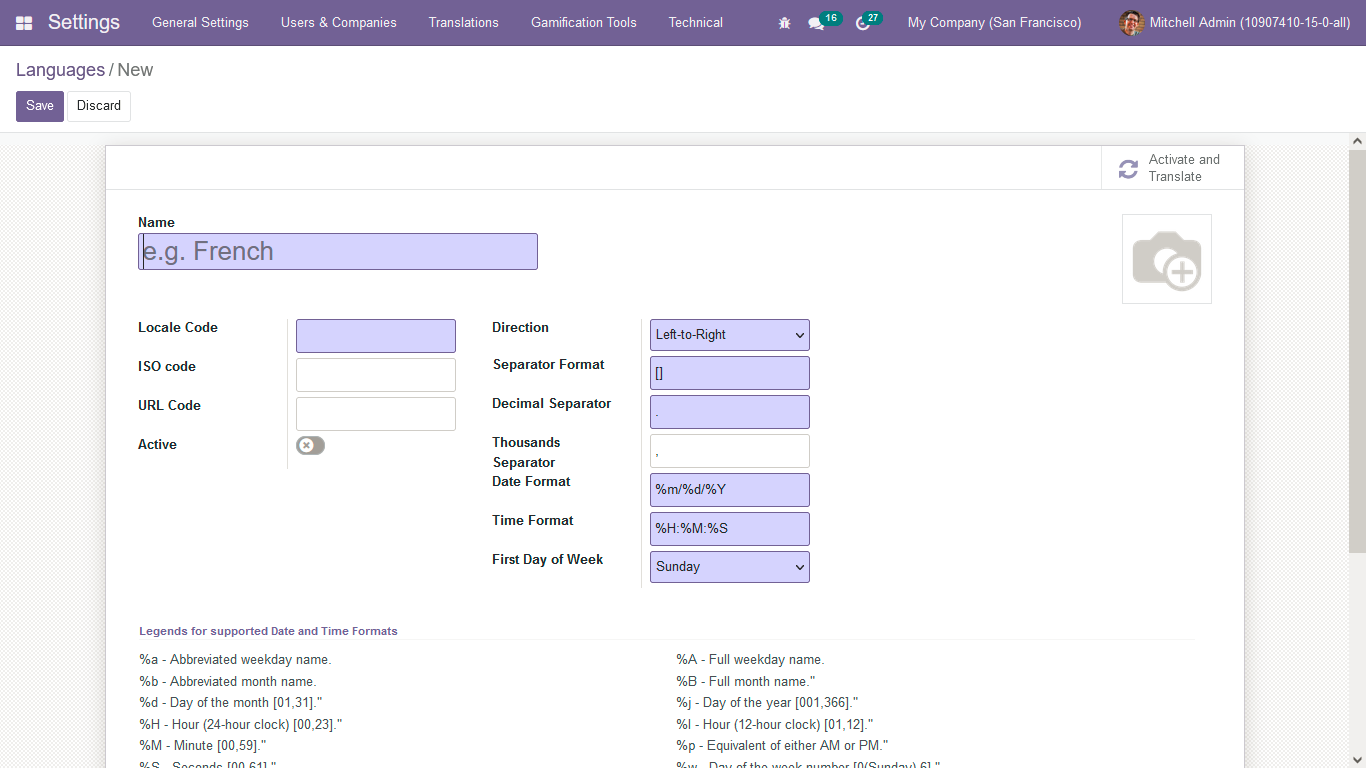
Here, you can define the characters of the new language and configure it to your Odoo ERP system.
The homepage of your website will show the option to change the website language as shown in the image below.
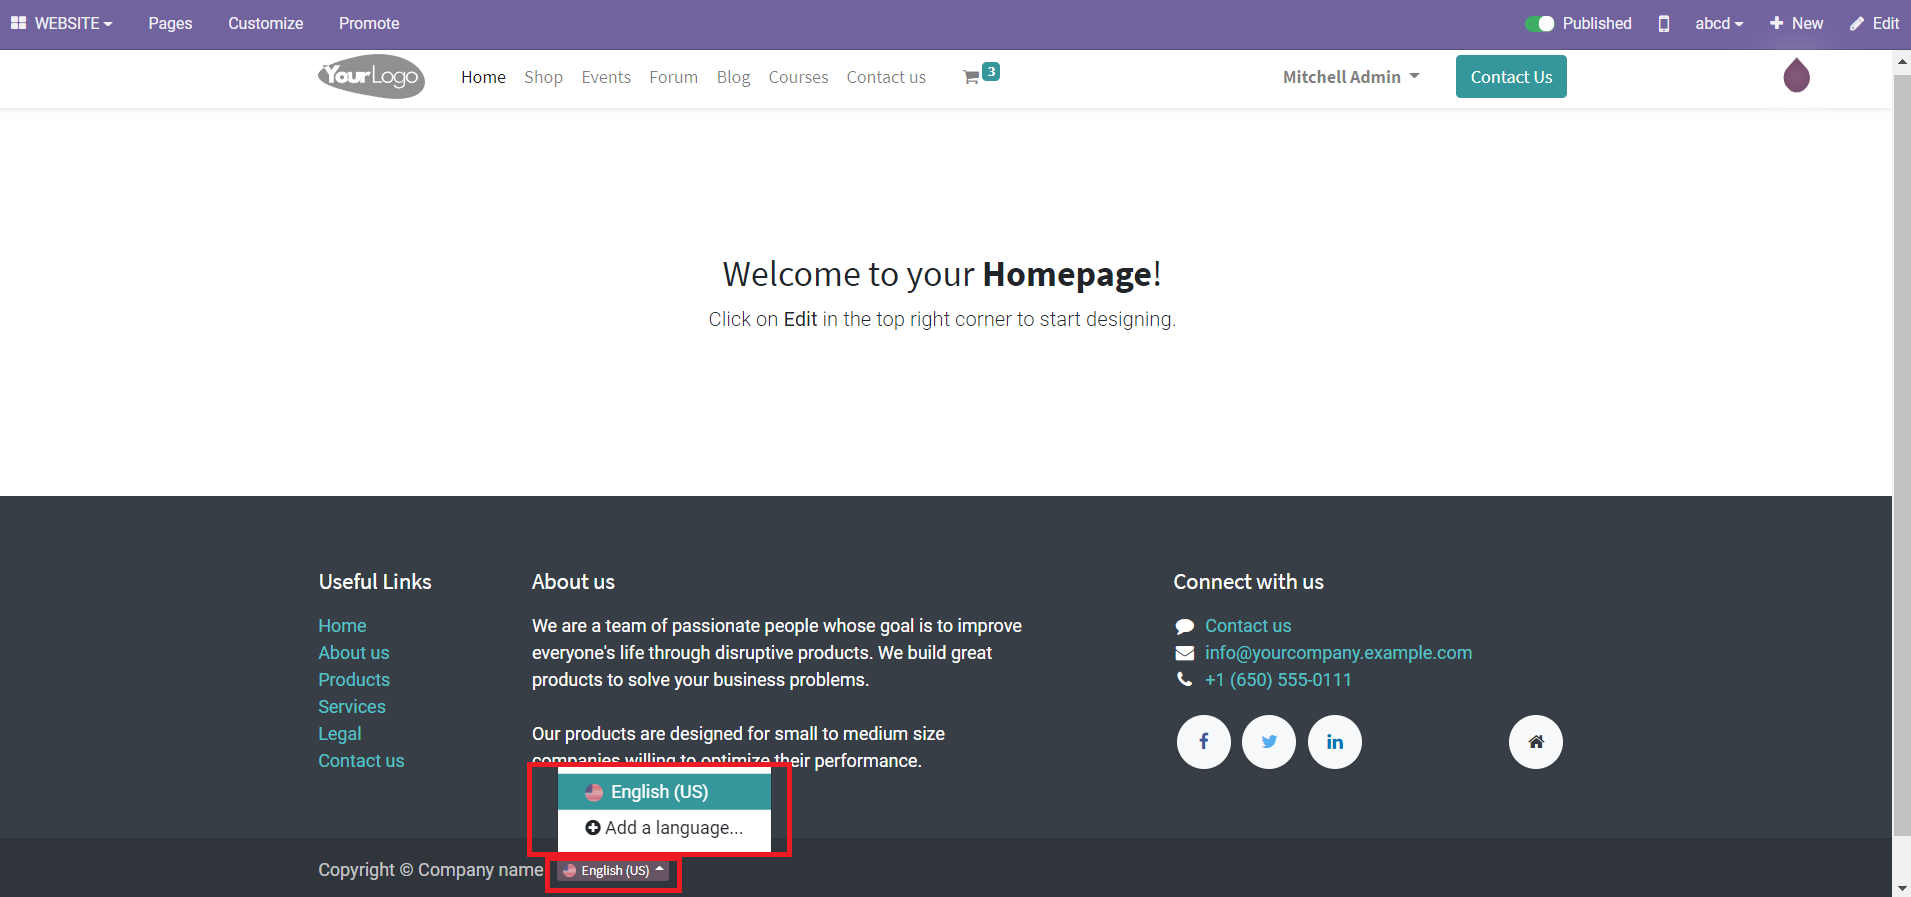
You can select the required language by clicking on the ‘Add a Language’ option. After selecting the required language for your website, you will get the ‘Translate’ option on the top right side of the window as shown below.
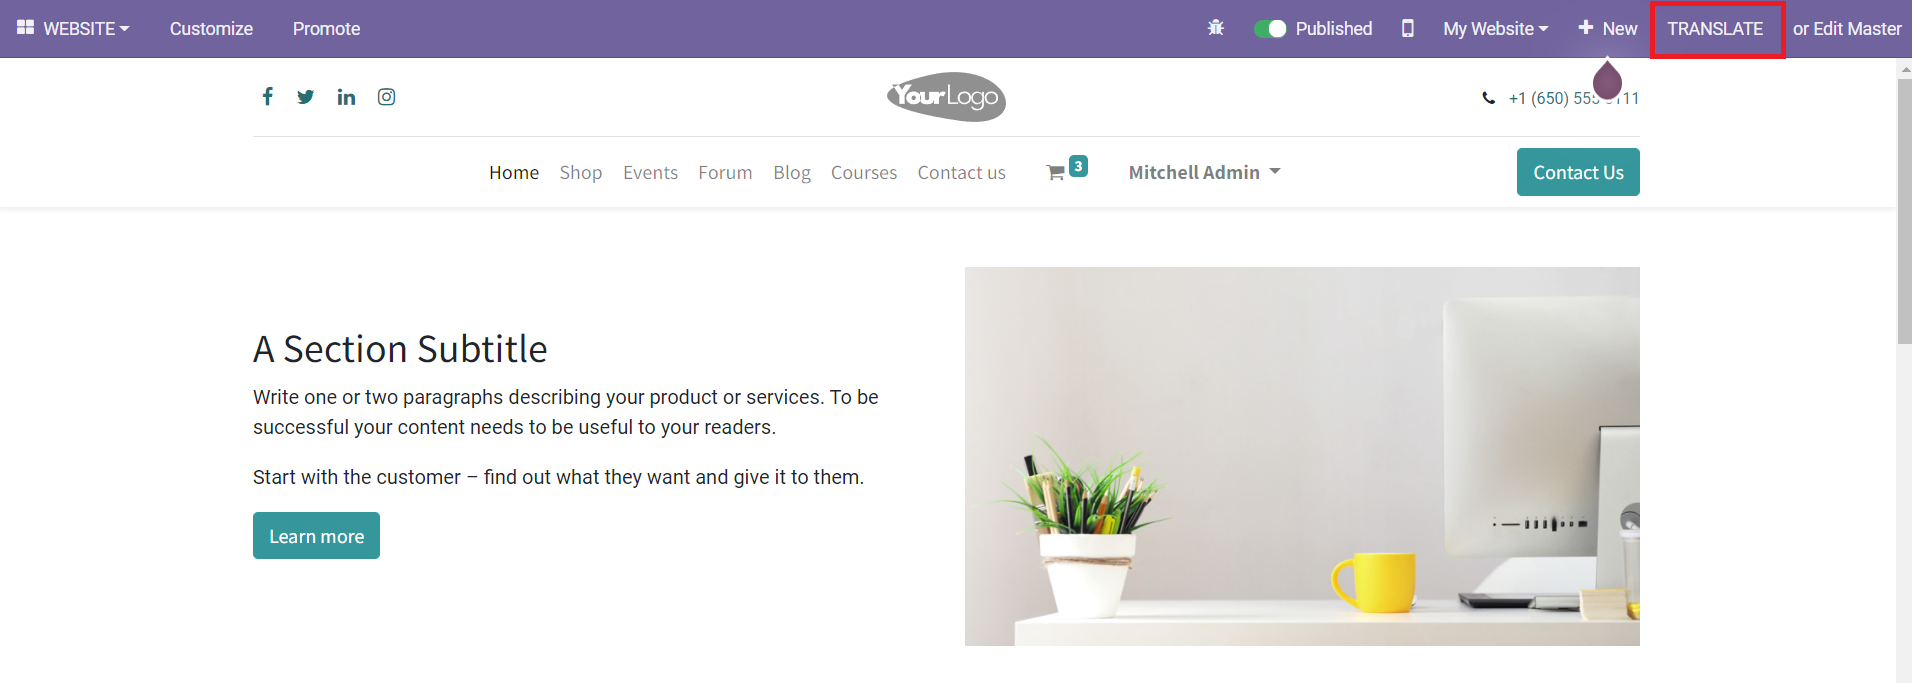
Some words may not be translated to the language you selected. In such cases, you can manually translate the content by using the Translate option. A pop-up window will appear by clicking on the ‘Translate’ button.
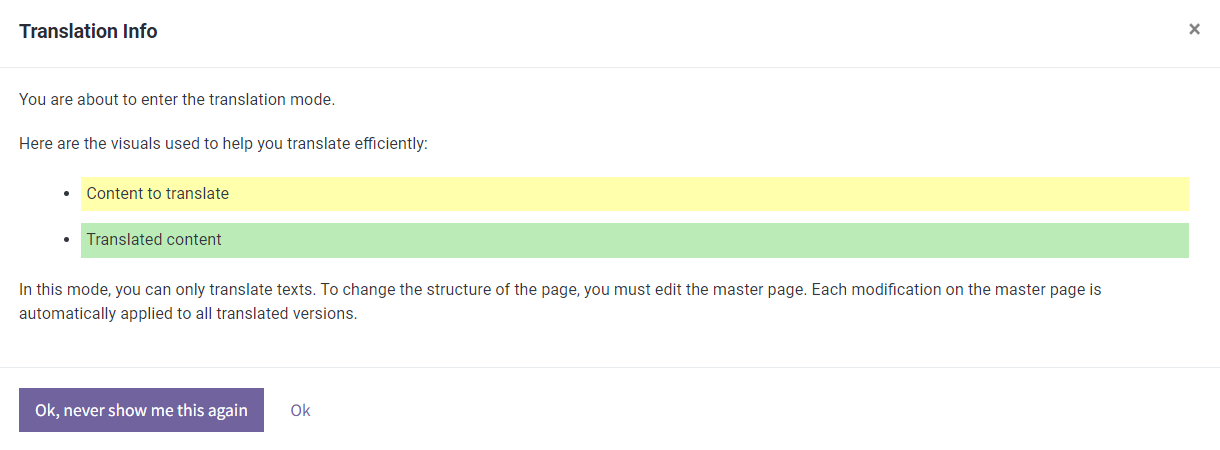
The pop-up window will give instructions for editing texts. In the translation mode, you can edit the texts shown in yellow color. The green color texts are already translated to the selected language. Click the ‘Ok’ button and start translating the texts in yellow color.

After manually translating the content, you can click the ‘Save’ button to save all changes.
Now, let’s discuss how to publish various content on your website.