Customers
You can keep a record of all your customer’s details in the Sales module in a separate field. The Customer field in the Sales module can be used for keeping details and contact information regarding each customer.
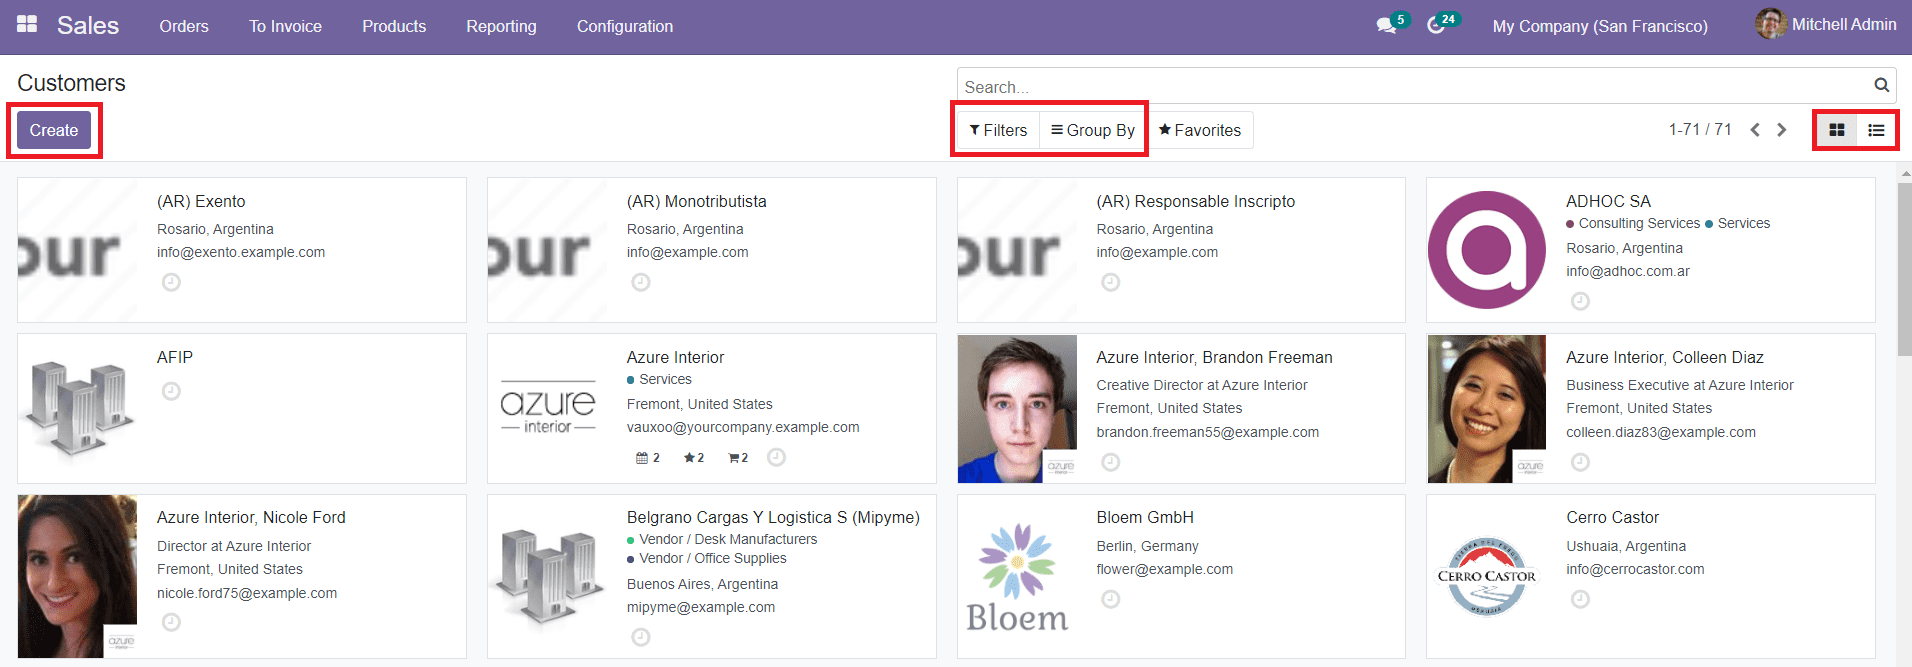
As we can see in the above screenshot, the customer’s data can be seen in both Kanban view and List view. You can locate any of the saved customer details using the sorting option like Filters and Group By options available on this platform. Both default and customizable filters and grouping options can be used to ease the searching process. In order to add new customer details to the platform, you can click on the ‘Create’ button.
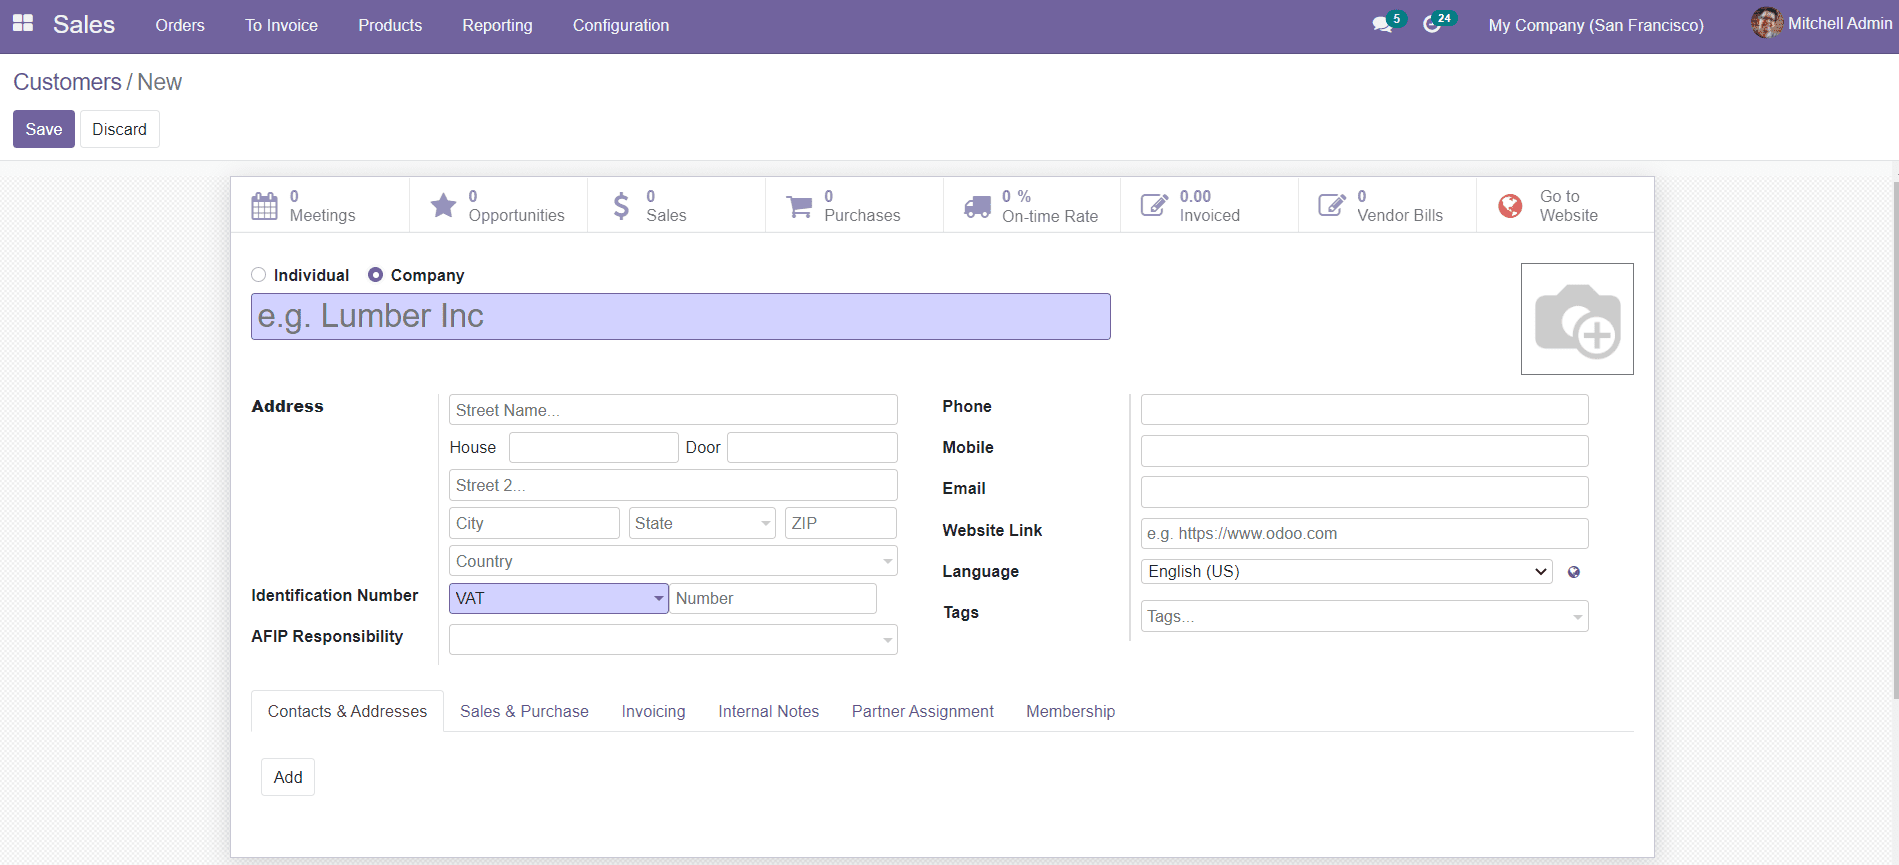
Clicking on the Create button will direct you to a new field where you can add details about the customer. You can create the contact on an individual’s name or a company’s name. Specify the customer’s name and add an image of the customer in the given field. Later, Odoo will ask you to mention details regarding the contact address of the customer, Phone Number, Mobile Number, Email, Website Link, and Language to the field. There are also additional fields to add the Identification Number of the customer, AFIP Responsibility, and Tags suitable for this contact.
The customer description in this platform contains various fields such as Contact & Addresses, Sales & Purchases, Invoicing, Internal Notes, Partner Assignment, and Membership. Under the Contact & Address tab, you can add the customer’s contact address details by clicking the ‘Add’ button.
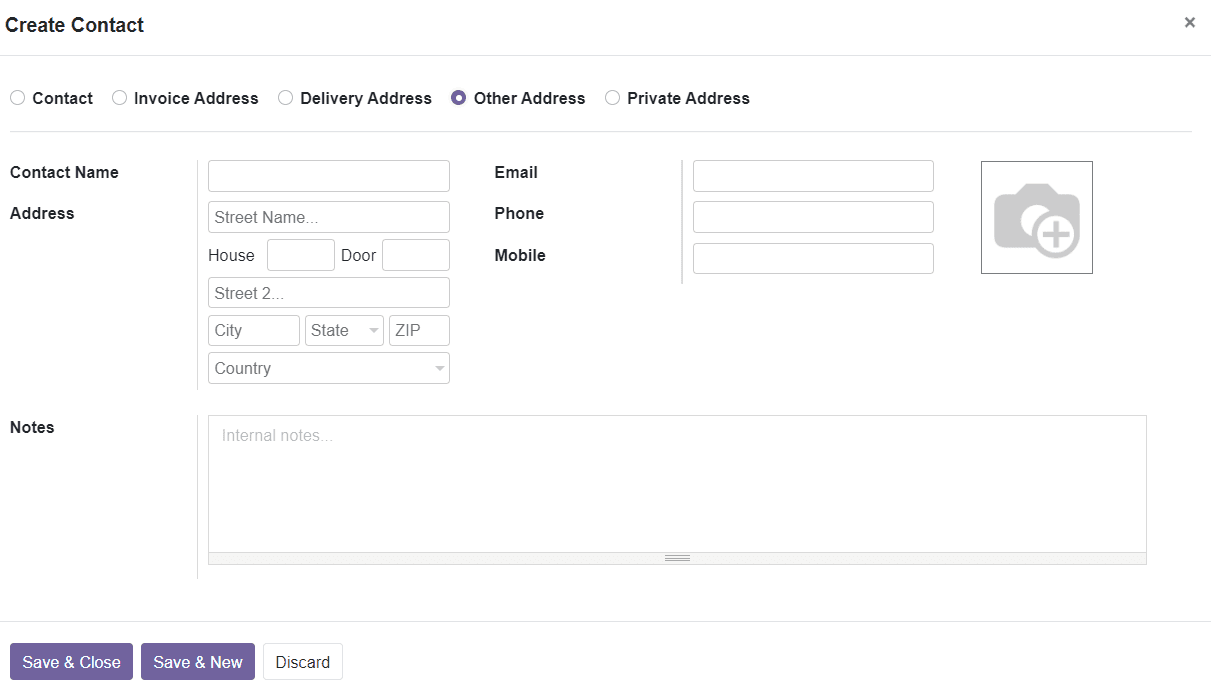
The address type can be defined as Contact, Invoice Address, Delivery Address, Private Address, or any Other Address as per the purpose of creating the contact. If the customer has more than one address you can mention it in this field. Add Contact Name, Address, Email, Phone, Mobile Number, and Notes regarding the contact in the specified fields. After completing the form, you can click on the ‘Save & Close’ button.
The data regarding sales and purchase aspects of the customer can be added under the Sales & Purchase section. You can assign a person who is responsible for sales activities as the Salesperson and specify the Payment Terms and Pricelist from the given list. You can also add a Delivery Method for the customer from the drop-down menu.
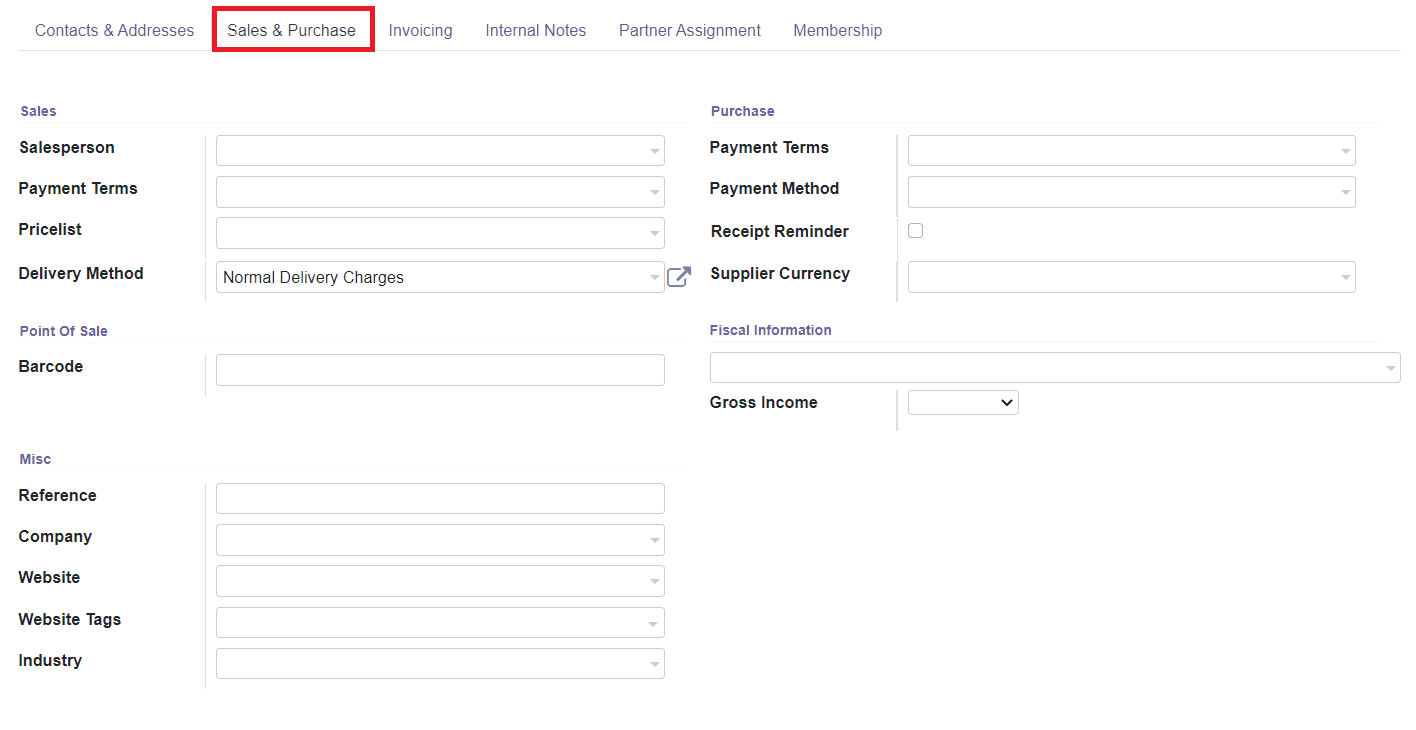
In the Purchase field, you are allowed to define the Payment Terms and Payment Method for purchase. There is an option available to enable Reminders, which will automatically send a confirmation mail to the vendor a specific day before the expected receipt date to confirm the exact date of the receipt. Mention the currency selected for purchase in the Supplier Currency field.
You can add Barcode to appear on the Point Of Sale. There are also fields to add Fiscal Information and Gross Income on this platform. Additionally, you can add Miscellaneous information such as Reference, Company, Website, Website Tags, and Industry in this field.
You will be able to add the bank account details of the customer under the Invoicing tab. By clicking on the ‘Add a Line’ button, you can add the Bank name and Account Number to the field. Moreover, you will be able to add other purchase documents under the Accounting Documents option.

If you want to get a detailed view of the account details of the customer, Odoo has enabled the option ‘View account details’ under the Invoicing tab.
The Internal Notes tab can be used to add additional notes about the customer.

If you have enabled the Sales Warning option from the Settings menu of the module, you will be able to see an additional field under the Internal Notes to set Warning on the Sales Order.
Under the Partner Assignment tab, you can add details about Geolocation, and Partner Activation details such as Partner Level, Activation, and Level Weight.
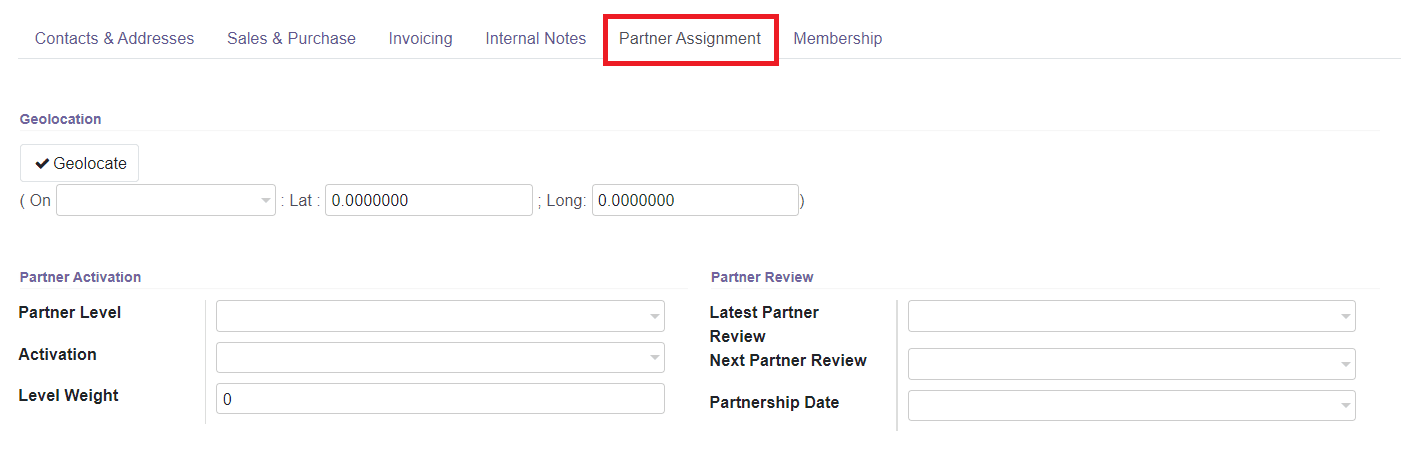
The Partner Review field includes the options to add Latest Partner Review, Next Partner Review, and Partnership Date.
At last, the Membership tab for the membership-related information can be seen in the customer description as shown below.

You will be able to mention the customer as a free member or not in this field. Then, add information about the membership such as the Associate Member, Current Membership Status, Join Date, Membership Fee, and Invoice.
After adding all these details in the customer description, you can click on the ‘Save’ button and the data will appear on your customer list in the system.
Let’s discuss the management of the sales team in the following session.