Vendor Management
When an organization is engaged in various types of purchases, they will definitely have to deal with multiple vendors according to the product they are purchasing. We can configure different vendors on a single product in Odoo that will help the company to choose suitable suppliers for their purchase. Odoo has an efficient system to manage all vendors that are saved in the Purchase module. The management of the vendor directory and the organization of vendor details have become easier than the earlier times. Effective coordination of vendor data with a particular product on creating new purchase orders can be easily done with Odoo.
The Vendor’s menu can be accessed by clicking the Orders button from the main menu bar of the Purchase module. When you enter into the vendor’s menu, you will get a view of the list of all vendors configured in the Purchase module.

The preview of the vendor list includes the details about the name of the vendor, communicative address, and contact information. Odoo allows you to shift the view between Kanban and List views at your own convenience. The sorting options such as Filters and Group By can be used to locate the required vendor from the list. In order to edit the existing vendor contact, you can click on the respective vendor and use the ‘Edit’ button. To add the details about a new vendor to this list click the ‘Create’ button from the home dashboard of the Vendor menu.

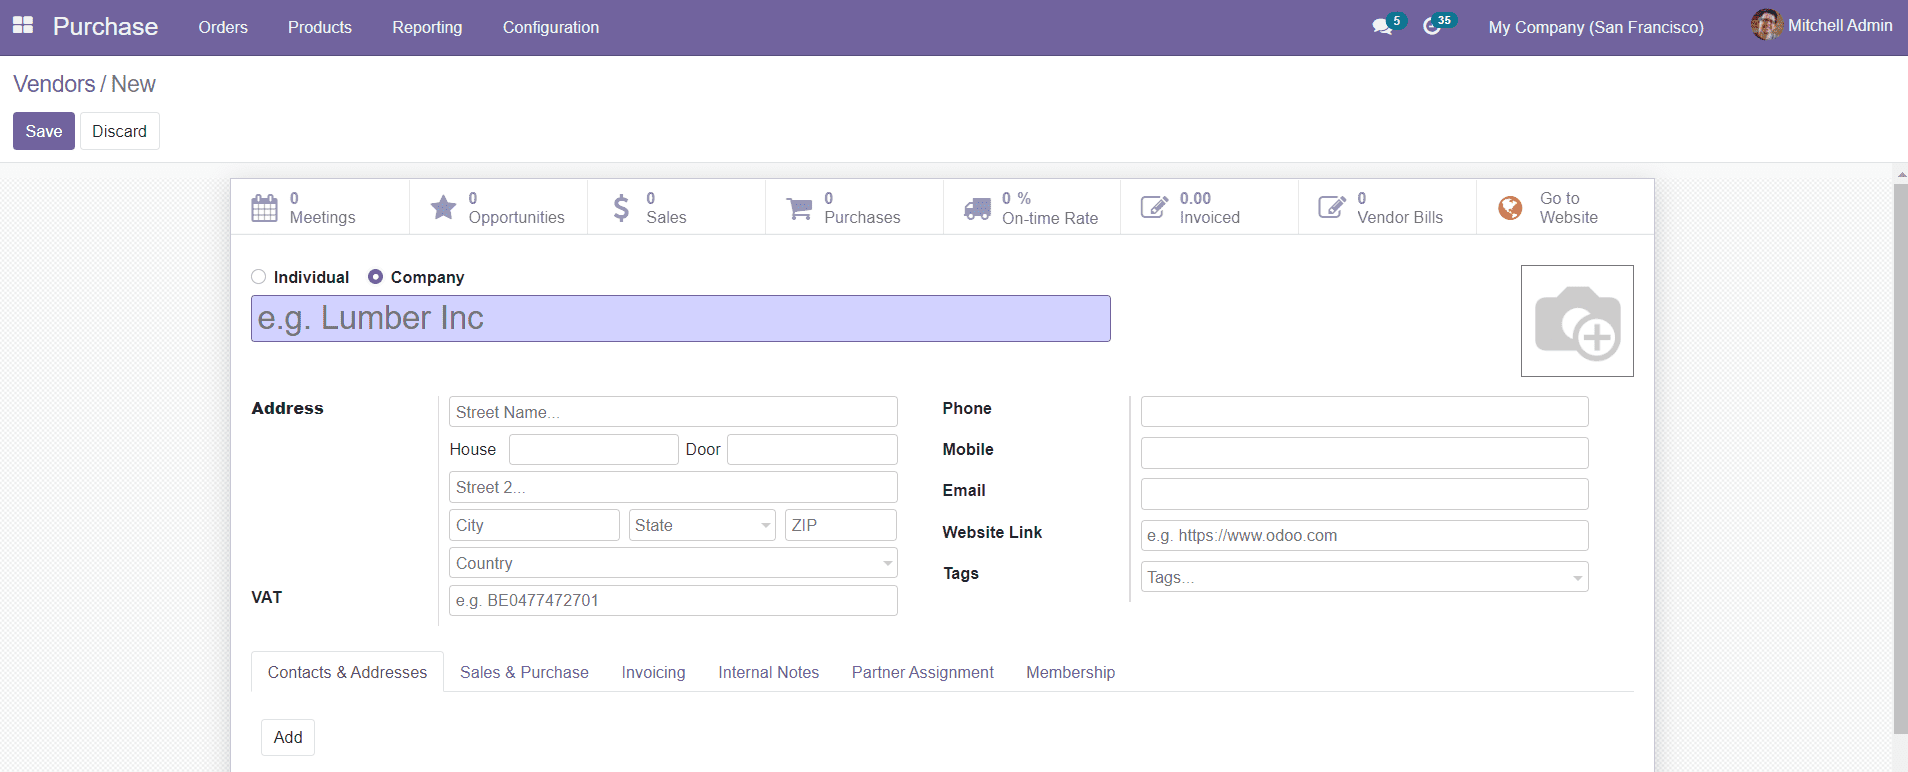
Add the Vendor’s name in the given field. You can save the contact either as an individual contact or in the name of the company. Specify the contact information such as Address, Phone, Mobile Number, and Email address. The form also contains fields to add Website Link and Tags. The VAT number can be added to the form in the specified section.
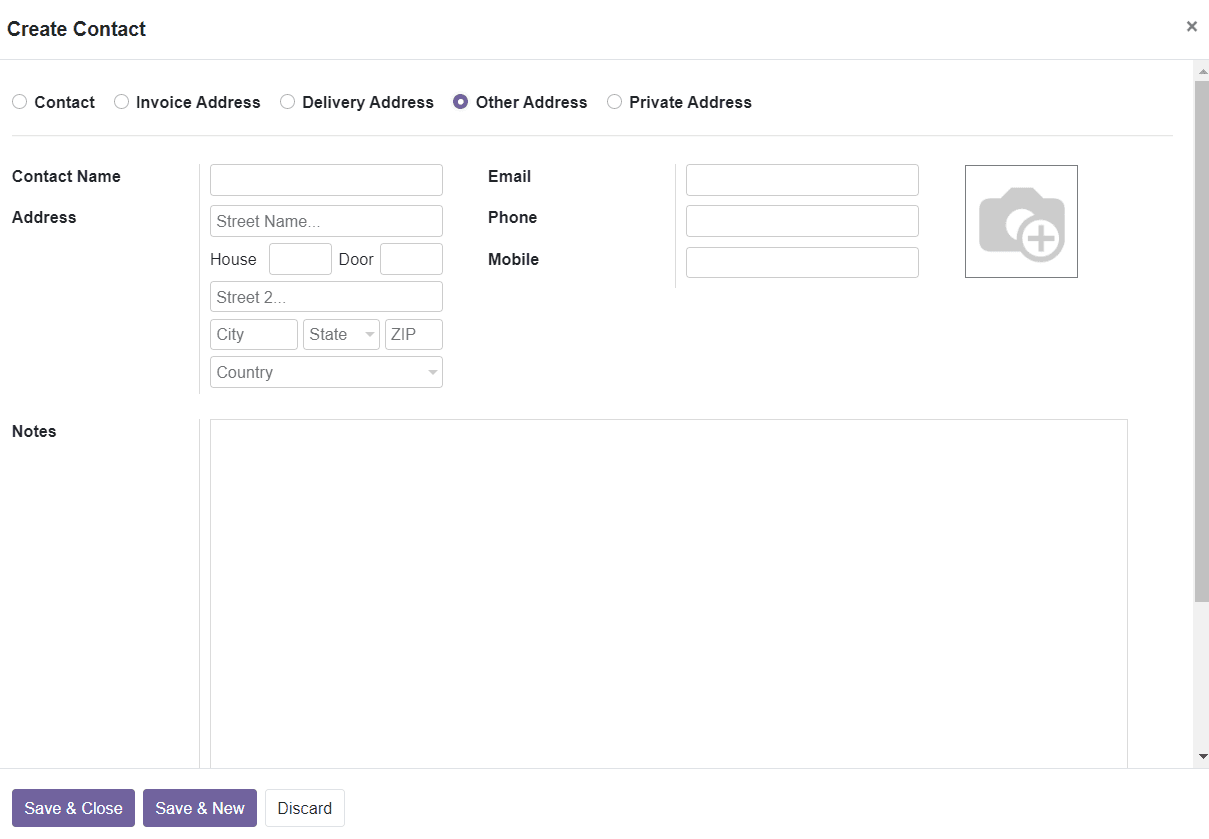
The vendor description tabs include fields such as Contact & Addresses, Sales & Purchase, Invoice, Internal Notes, Partner Assignment, and Membership details about the vendor. In the Contact & Addresses tab, you will be able to add address and contact information about the vendor using the ‘Add’ button. A pop-up window will appear as shown below and you can save the data after completing the fields.

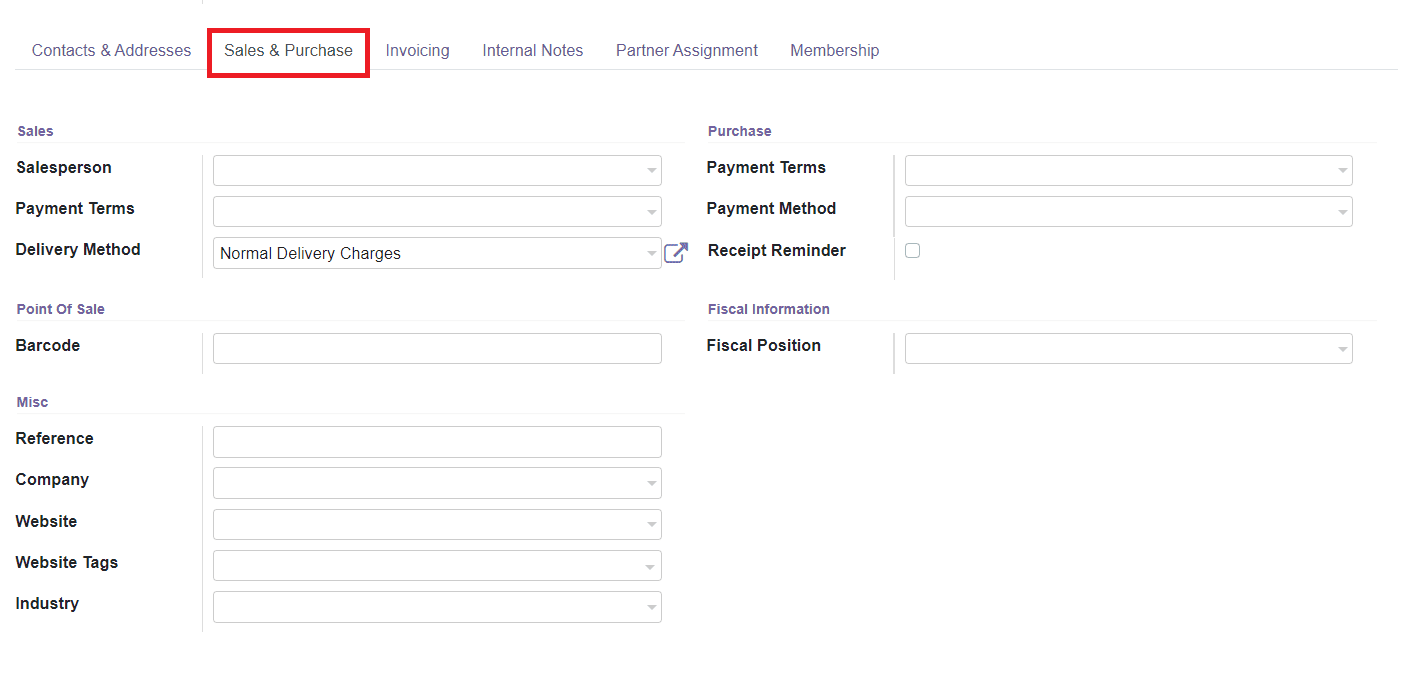
The sales and purchase details can be included in the Sales & Purchase tab. Assign a Salesperson along with the Payment Terms and Delivery Methods in the given fields.

The Payment Terms, Payment Method, and Receipt Reminder for purchase can be specified under the purchase field. Specify the Barcode to identify the vendor on Point of Sale. The Fiscal Information includes the Fiscal Position regarding the Vendor. Additionally, you can add Miscellaneous information such as the Reference details, Company, Website, Website Tags, and Industry.
The invoicing details about the vendor can be specified in the Invoicing tab.

The Bank account details of the Vendor can be added along with the Account Number by clicking on the ‘Add a Line’ button. The additional details about the vendor can be mentioned under the Internal Notes section.
The Partner Assignment tab includes details such as Geolocation, Partner Activation, and Partner Review.

The Partner Level, Activation, and LevEl Weight will be displayed under the Partner Activation Menu and the Partner Review will include information about Latest Partner Review, Next Partner Review, and Partnership Date.
The Membership tab can be used to define the membership aspects of the particular vendor as shown in the screenshot below.

Specify the current membership status with join date, membership, membership fee, and invoice details. You can also mention the name of the associate member in the specified field.
Click the ‘Save’ button to add the new vendor contact to the vendor’s directory in the Purchase module.
Vendor Pricelists
In Odoo, you can configure multiple vendors on the same product. The product price will change in accordance with the vendor configured to the product. You can easily set a pricelist for different products supplied by different vendors in the Vendors Pricelists field under the Configuration menu. The pricelist will help you to compare the prices between different vendors and select the appropriate vendor for purchase.

You can find the list of Pricelists with the respective Vendor, Product, Company, Quantity, Unit of Measure, and Price details. You can expand the view by enabling the options to display Product Variant, Agreement, Vendor Product Name, Vendor Product Code, Start Date, End Date, and Delivery Lead Time.
To create a new pricelist, click the ‘Create’ button.

You need to mention the Vendor name, Vendor Product Name, Vendor Product Code, and Delivery Lead Time in the given fields. Then, select the Product and its Variant along with the Quantity and Unit Price under the Pricelist field. You can also add the Validity of the Pricelist and Company name to this form. By finishing the necessary fields, you can save the details by selecting the ‘Save’ button.
Now, let’s take a look at the configuration of Unit of Measures in the Purchase module.